
Olive oil cornmeal cake with blood orange and honey

A bit more olive oil can also be drizzled over the top - definitely won't hurt!
We recently returned from our honeymoon in Peru, where we picked up some palta (avocado) honey at the peak of summer to the other side of the equator where it is currently a different kind of seasonal peak - the height of the winter doldrums. Fortunately, grey winter days are not without their culinary delights, one of them being amazing citrus. Given our recent honey purchase, the cold weather begging me to "get my baking on", and beautiful blood oranges that fold so lovely into an olive oil cake, this combination was calling my name. The palta honey has very unique dark, earthy quality to it, but any honey that you enjoy will do for drizzling.
The recipe is adapted from a Smitten Kitchen recipe in a few ways including to incorporate cornmeal and deconstruct the compote - blood orange slices are so gorgeous it's a shame to chop them up for this application and we wanted the honey to shine on it's own. Makes one 9x5-inch loaf pan or four, 5x2.5-inch loaf pans. I happen to have four of these small loaf pans and am always looking for excuses to use them because they are pretty darn cute and more surface area = more crispy bits = delicious.

Butter for greasing pan
5 blood oranges
1 cup (200 grams or 7 ounces) sugar
About 1/2 cup (118 ml) plain yogurt
3 large eggs
2/3 cup (156 ml) extra virgin olive oil
1 cup plus 2 tablespoons all-purpose flour
6 tablespoons cup medium grind cornmeal
1-1/2 teaspoons (8 grams) baking powder
1/4 teaspoon baking soda
1/2 teaspoon salt
Honey, for drizzling
Crème fraîche for serving (optional, but perfect - just do it)
Preheat oven to 350 degrees. Butter a 9x5-inch loaf pan or four 5x2.5-inch loaf pans. Grate zest from 2 oranges and place in a bowl with sugar. Using your fingers, rub ingredients together until orange zest is evenly distributed in sugar.
Supreme an orange - aka "segment citrus like a boss" (I created that instructional post and just found out through this recipe that this technique is called "supreming"!). Break up segments with your fingers into about 1/4-inch sized chunks.
Halve 2 oranges and squeeze juice into a measuring cup; you’ll will have about 1/4 cup. Add buttermilk or yogurt to juice until you have 2/3 cup liquid altogether. Pour mixture into bowl with sugar and whisk well. Whisk in eggs and olive oil.
In another bowl, whisk together flour, cornmeal, baking powder, baking soda and salt. Gently stir dry ingredients into wet ones. Fold in pieces of orange segments. Pour batter into prepared pan.
Bake cake for 50 to 55 minutes (9x5-inch loaf pan) or 25-30 minutes (5x2.5-inch loaf pans), or until it is golden and a knife inserted into center comes out clean. Cool in loaf pan(s). While cake is cooling, supreme 2 more oranges and keep refrigerated until served.
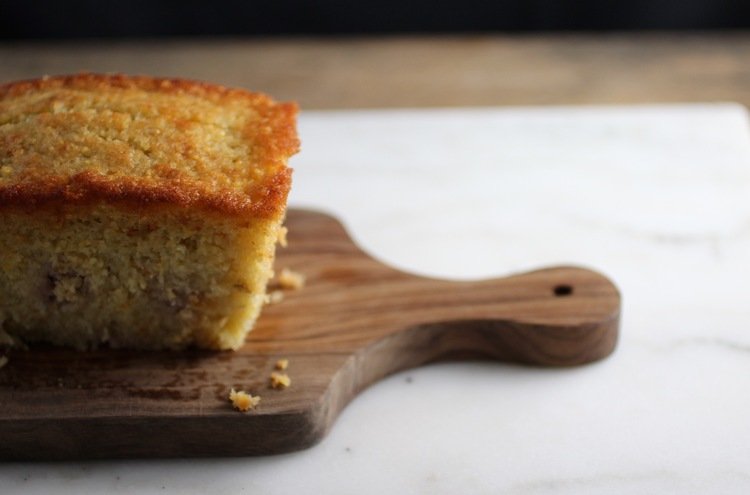
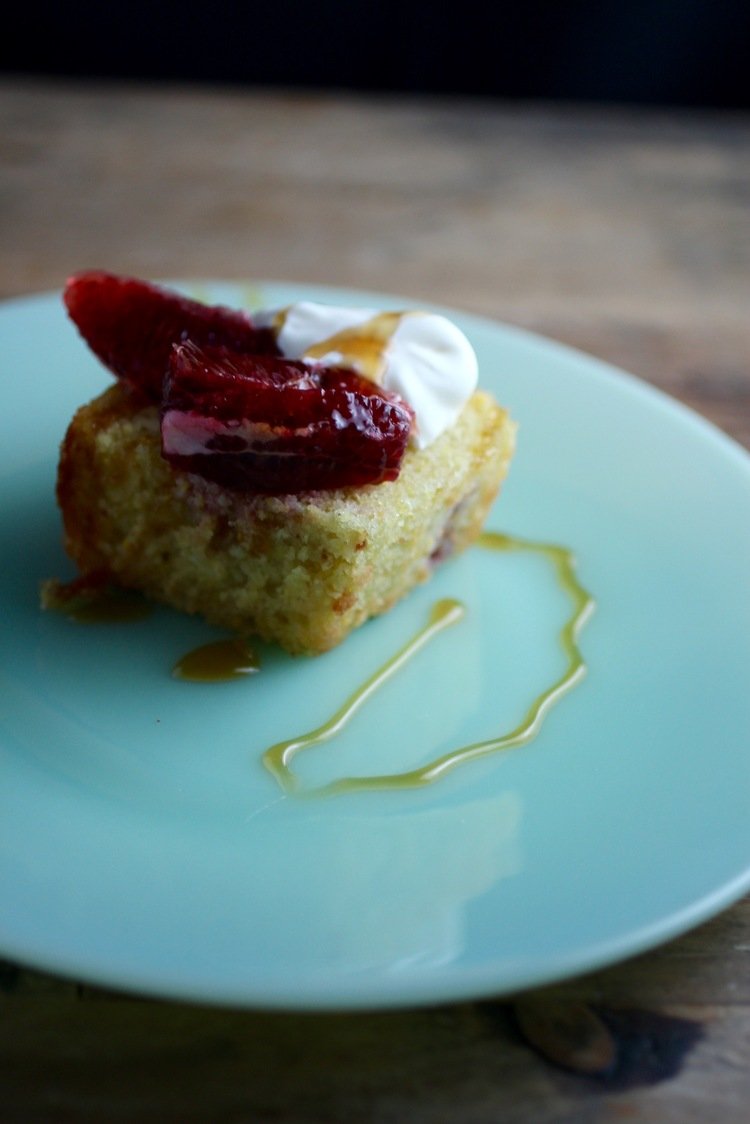
Slice cake and serve with crème fraîche, blood orange slices, and a drizzle of honey. You can also drizzle some more olive oil over the top if you're feeling wild. Keeps for 3-4 days.

Bay Nut Ricotta Cake
A lovely use of foraged and roasted bay nuts

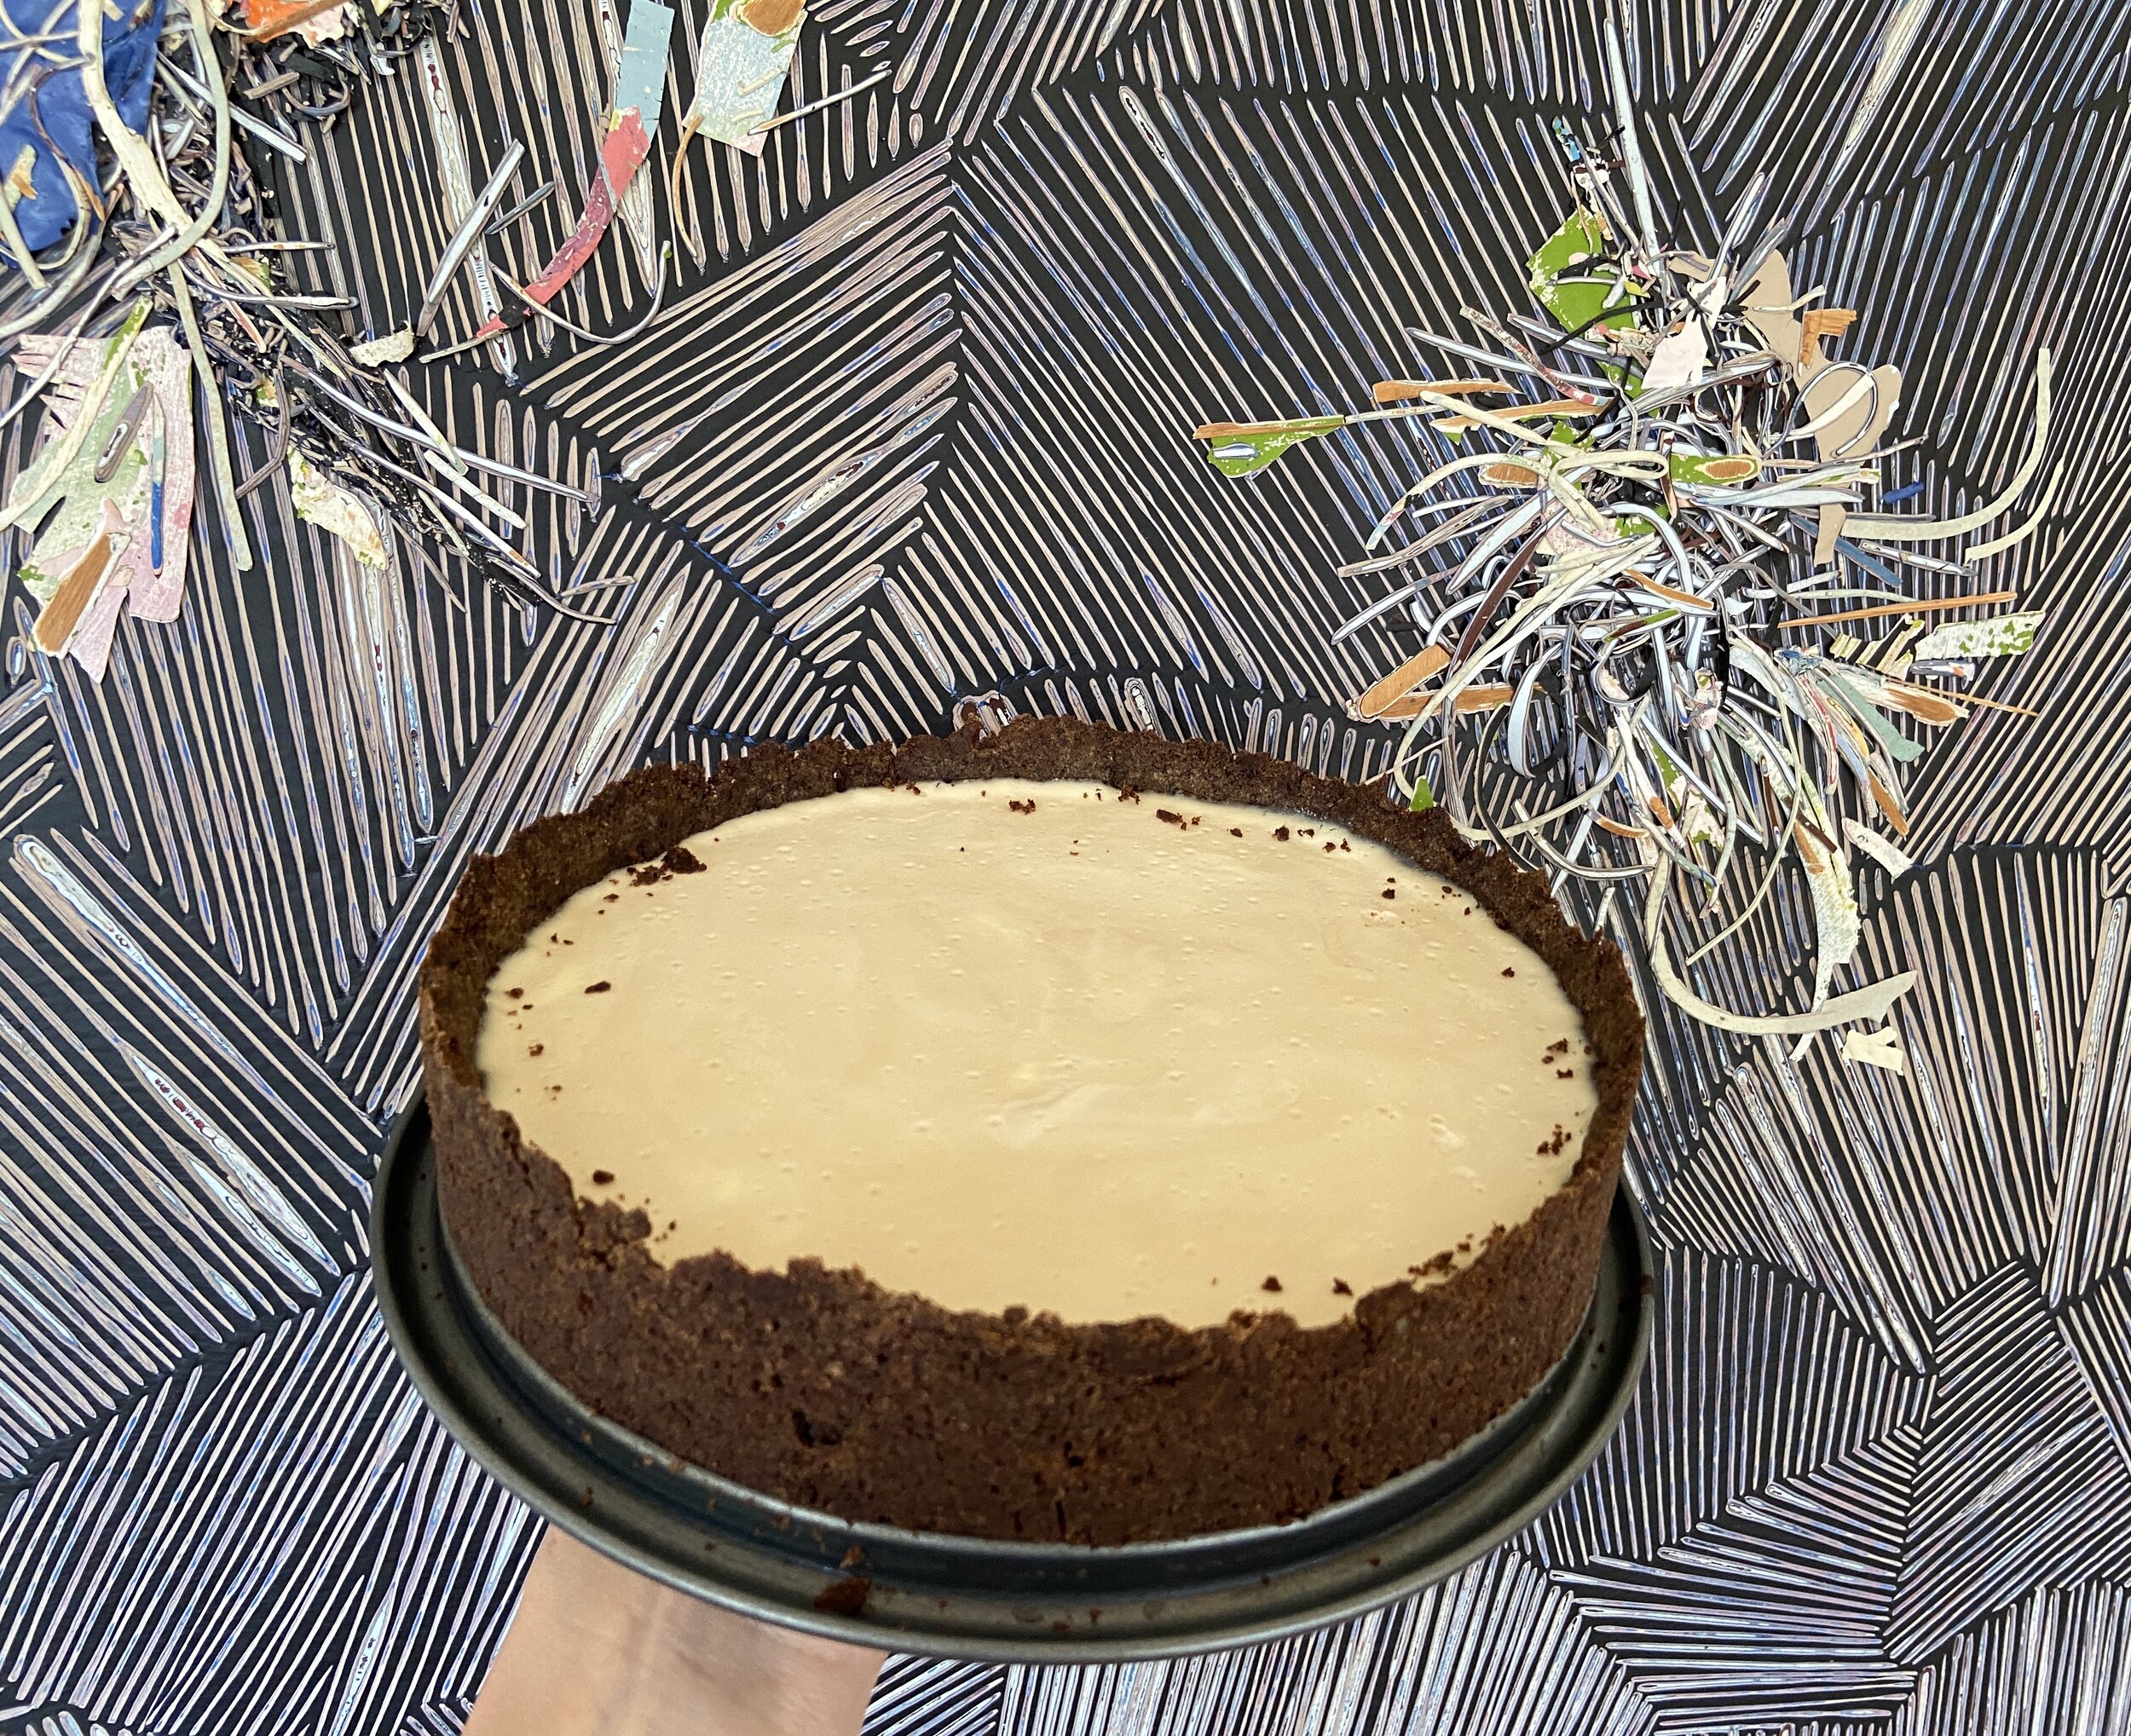
Cake in foreground, my brother’s art in background.
Here’s the deal: everyone likes coffee and chocolate. Okay, so that may not be entirely true, but who are we kidding? I probably don’t want to associate with those individuals anyway.
For those of us with *good* taste, the knowledge that there is a wild edible commonly found on the West Coast (the bay nut - more including foraging info here) that, when roasted, produces a flavor that can be likened to a combination of coffee and (bitter) chocolate is mind blowing. Now think about taking that amazing ingredient and adding it to a ricotta cheesecake - not bad. This brings us to the bay nut ricotta cake.
“A graham cracker crust also works, but doesn’t have the same rustic qualities as buckwheat flour. Buckwheat is also gluten free - make the dessert gluten free by replacing the all purpose flour with a gluten free substitute. An entirely buckwheat crust can work, but is a little too crumbly. ”
Crust Ingredients
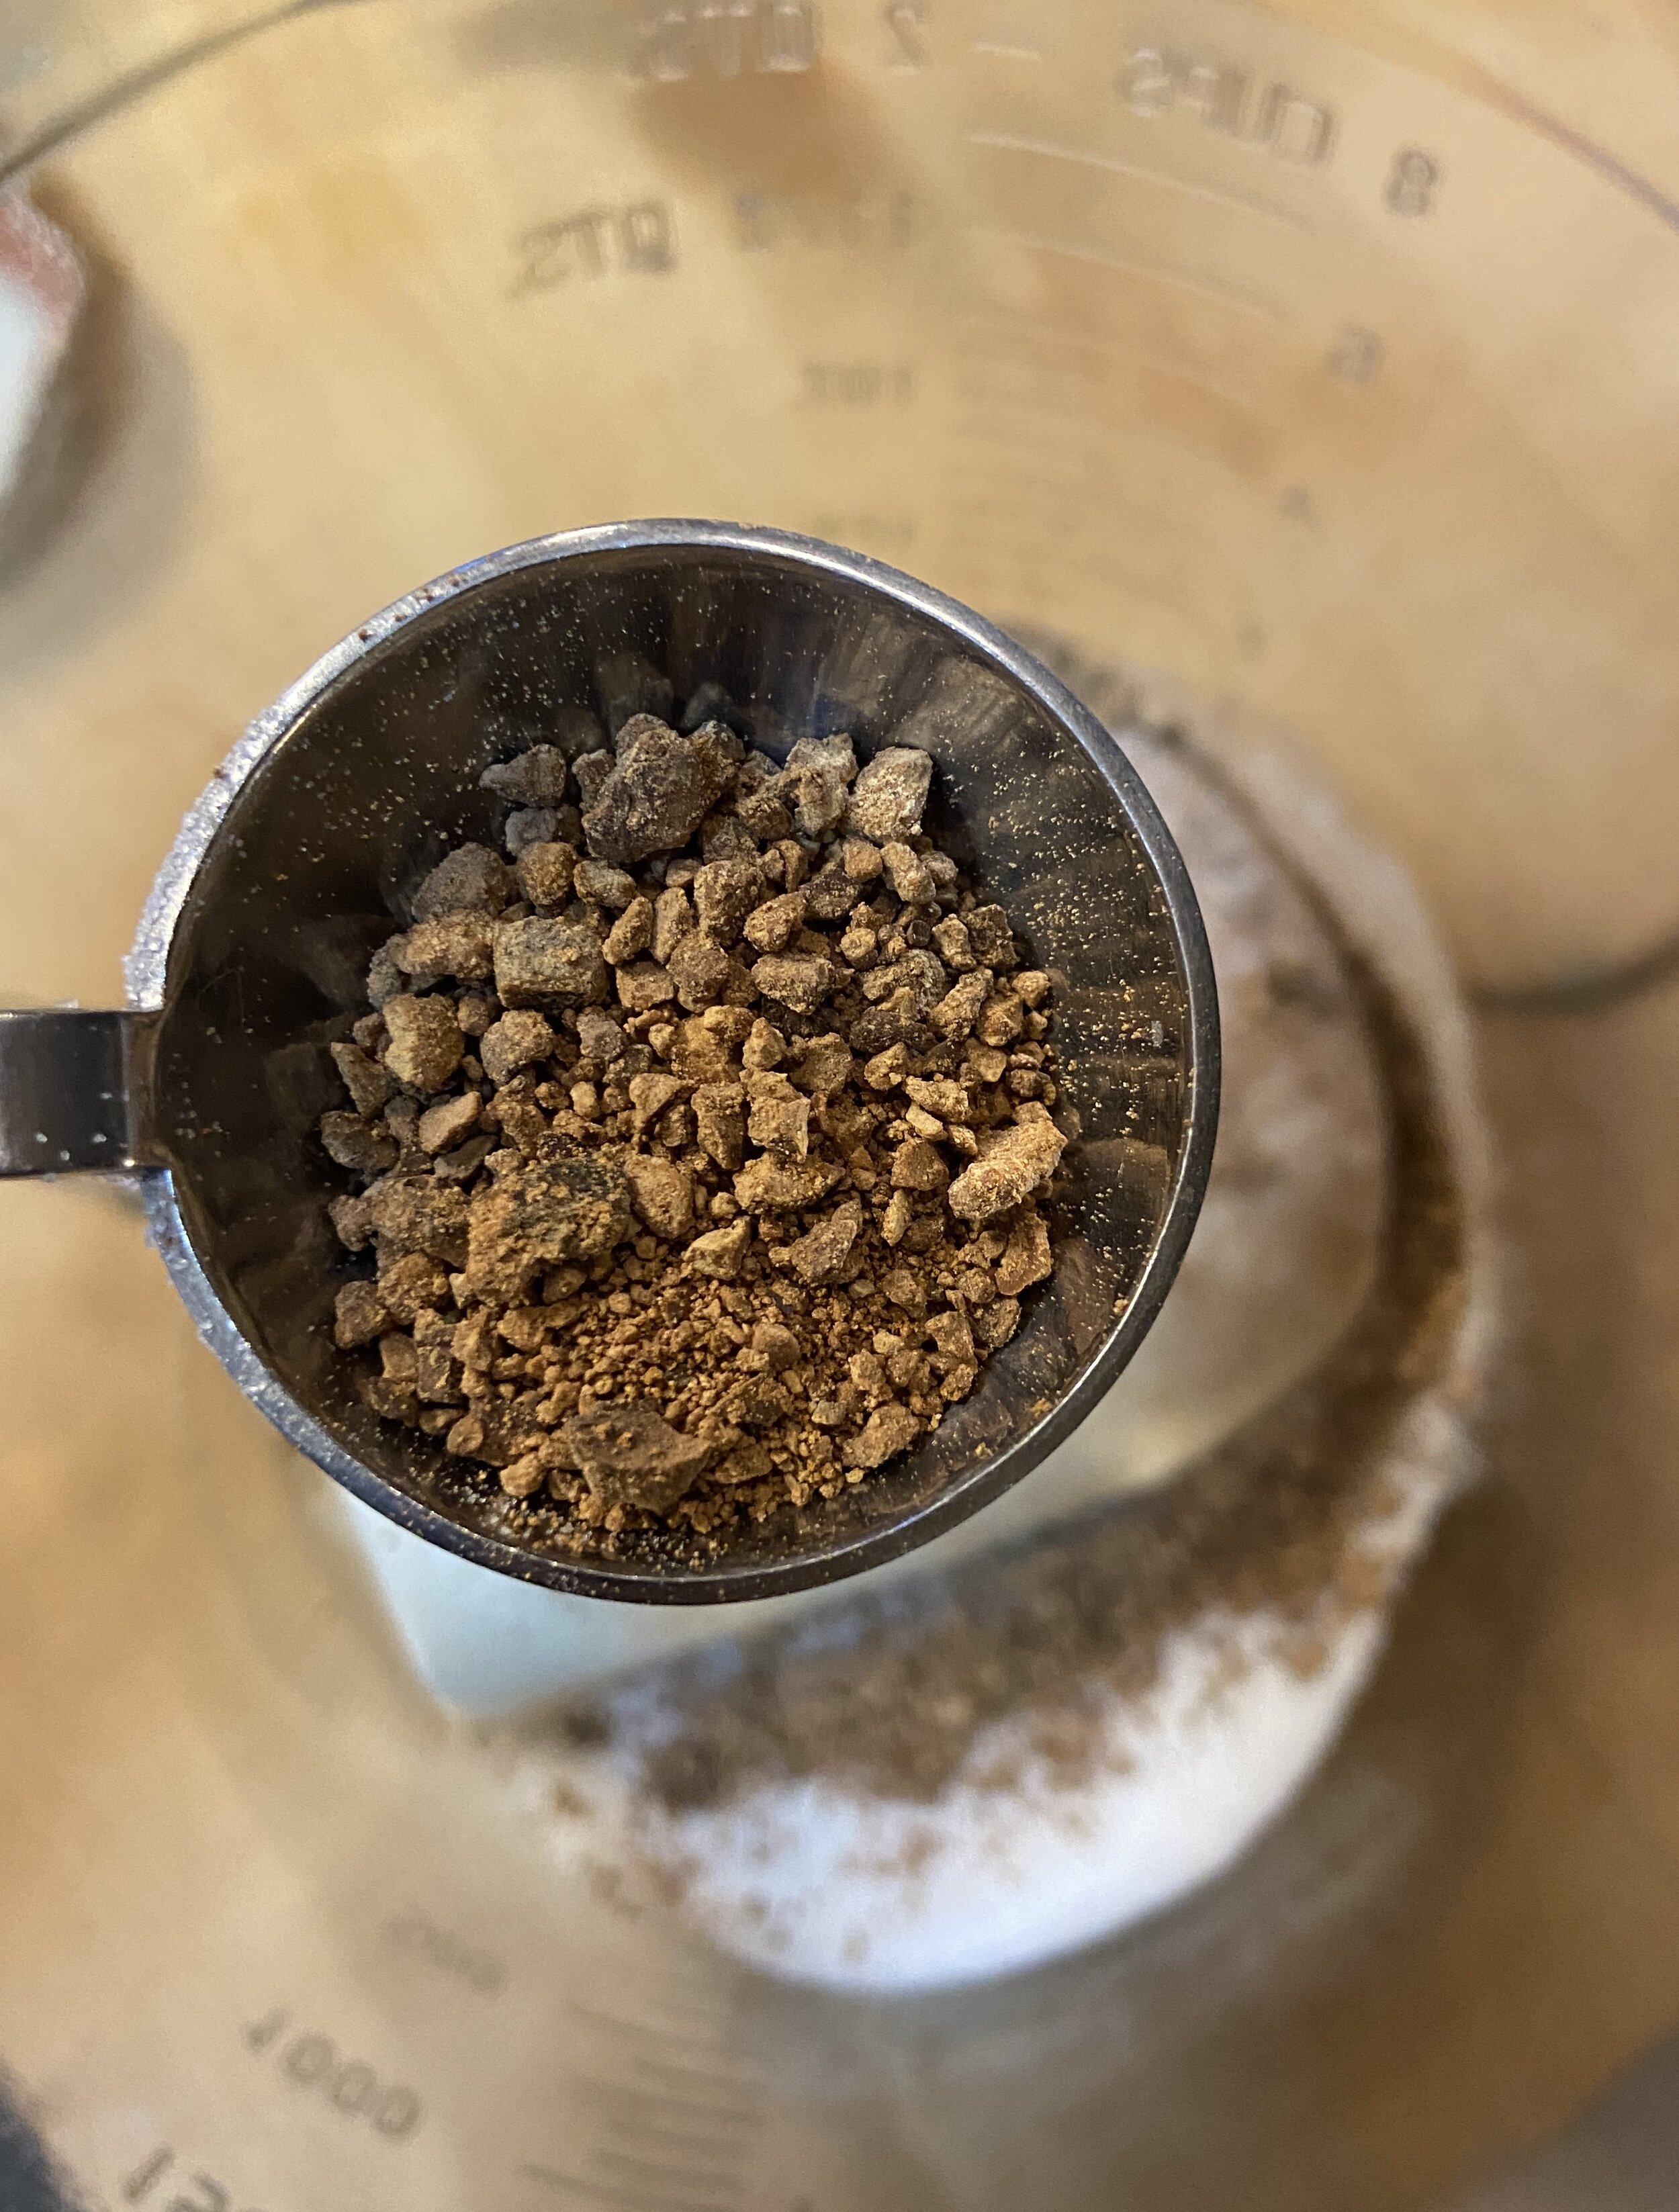
1/4 cup coarsely ground bay nuts - I used a coffee grinder for several pulses. You could also chop with a knife.
1 cup buckwheat or other flour of choice
2 tablespoons all purpose flour
1-2 tablespoons roasted bay nuts, finely ground
1/3 cup granulated sugar
1/4 teaspoon salt
1 tablespoon orange zest
7 tablespoons unsalted butter
1-2 tablespoons cold milk or water
I forgot to add citrus zest to the crust, so I threw it into the ricotta mix, as seen here:)
Filling Ingredients
16 ounces ricotta cheese
1/4 cup granulated sugar
1/4 cup roasted bay nuts, coarsely ground
1 egg, lightly beaten
2 teaspoons juice from an orange (optional)
Topping Ingredients
8 oz. sour cream
2 tablespoons sugar
1 teaspoon vanilla extract
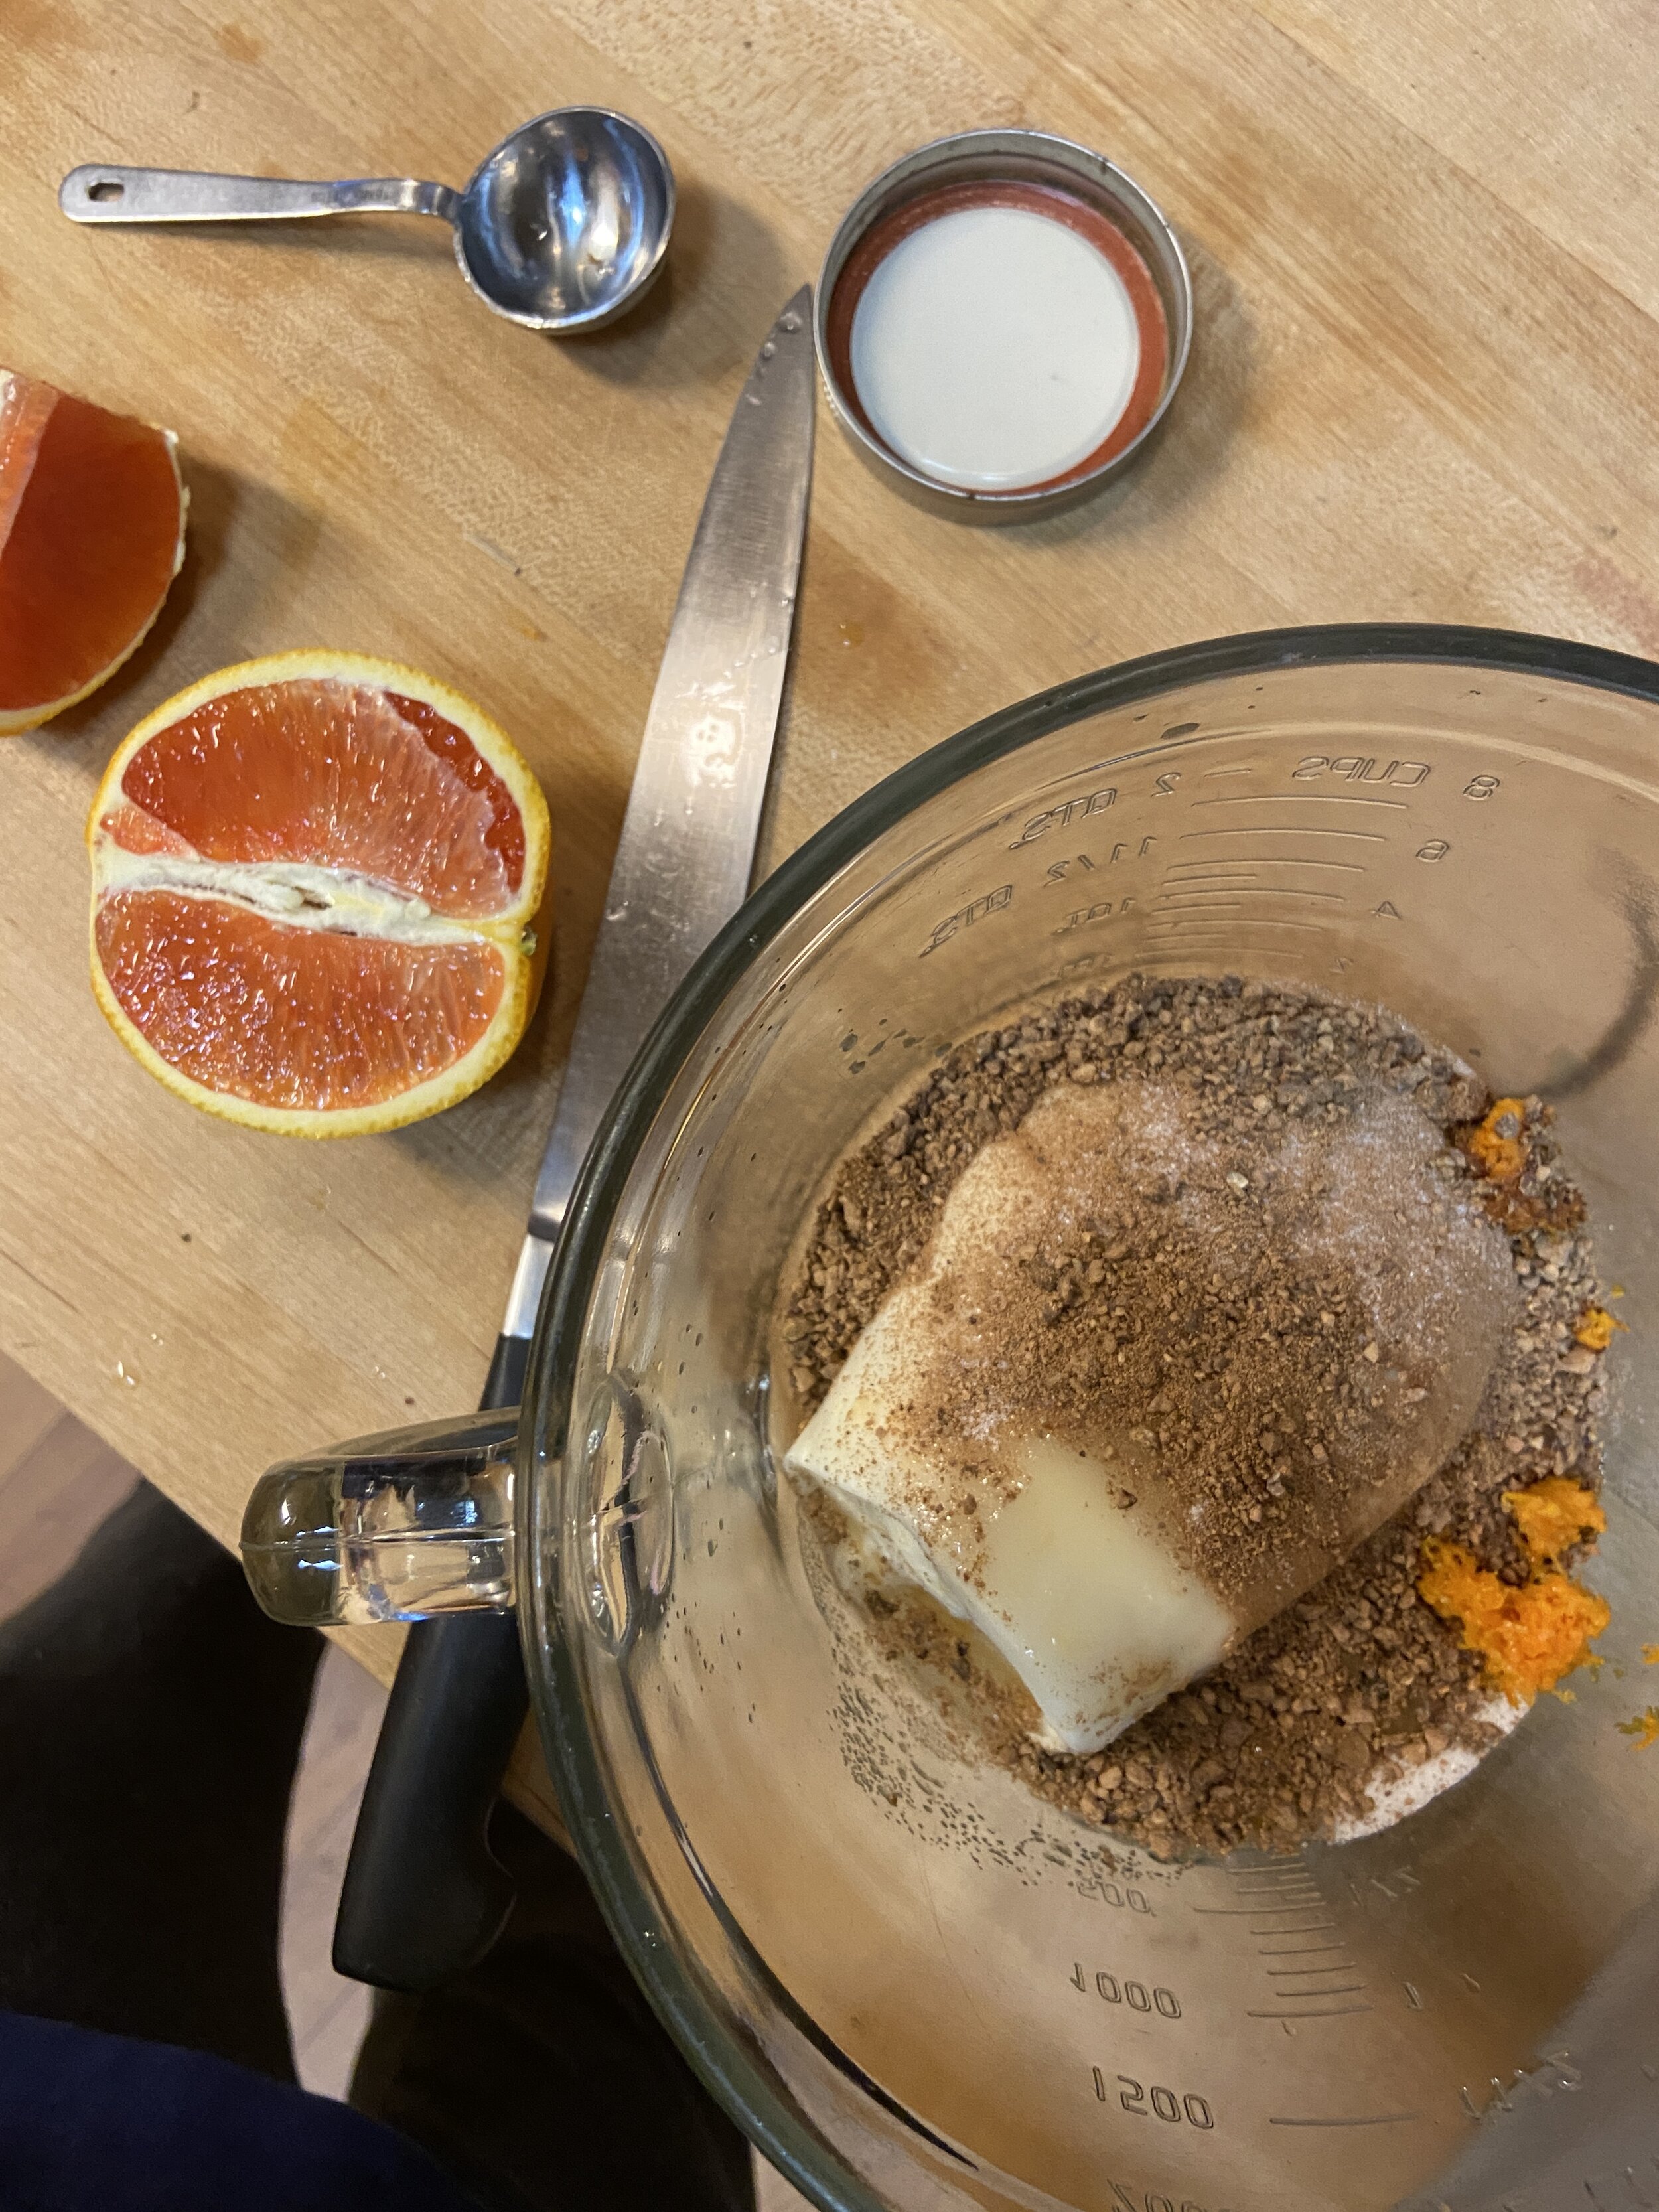
Preheat oven to 350. Mix flours, 1/3 cup sugar, salt, 1-2 tablespoons bay nuts, and zest. Cut in butter, mix until pea-sized crumbs. Add water or milk until dough comes together when pressed, but is not too wet. Press into greased 9” springform pan and bake for 10-15 minutes until browned. Remove from oven and cool.
Blend filling ingredients until thoroughly mixed. Pour onto cooled shell, bake in oven for about 40-50 minutes, until cake is set and jiggles only slightly. You make need to cover with foil if top gets too brown.
Remove from oven and let stand for 15-20 minutes while you mix together the topping ingredients. Spread out topping mixture and put back in the oven for another 10 minutes. Remove and cool until served.
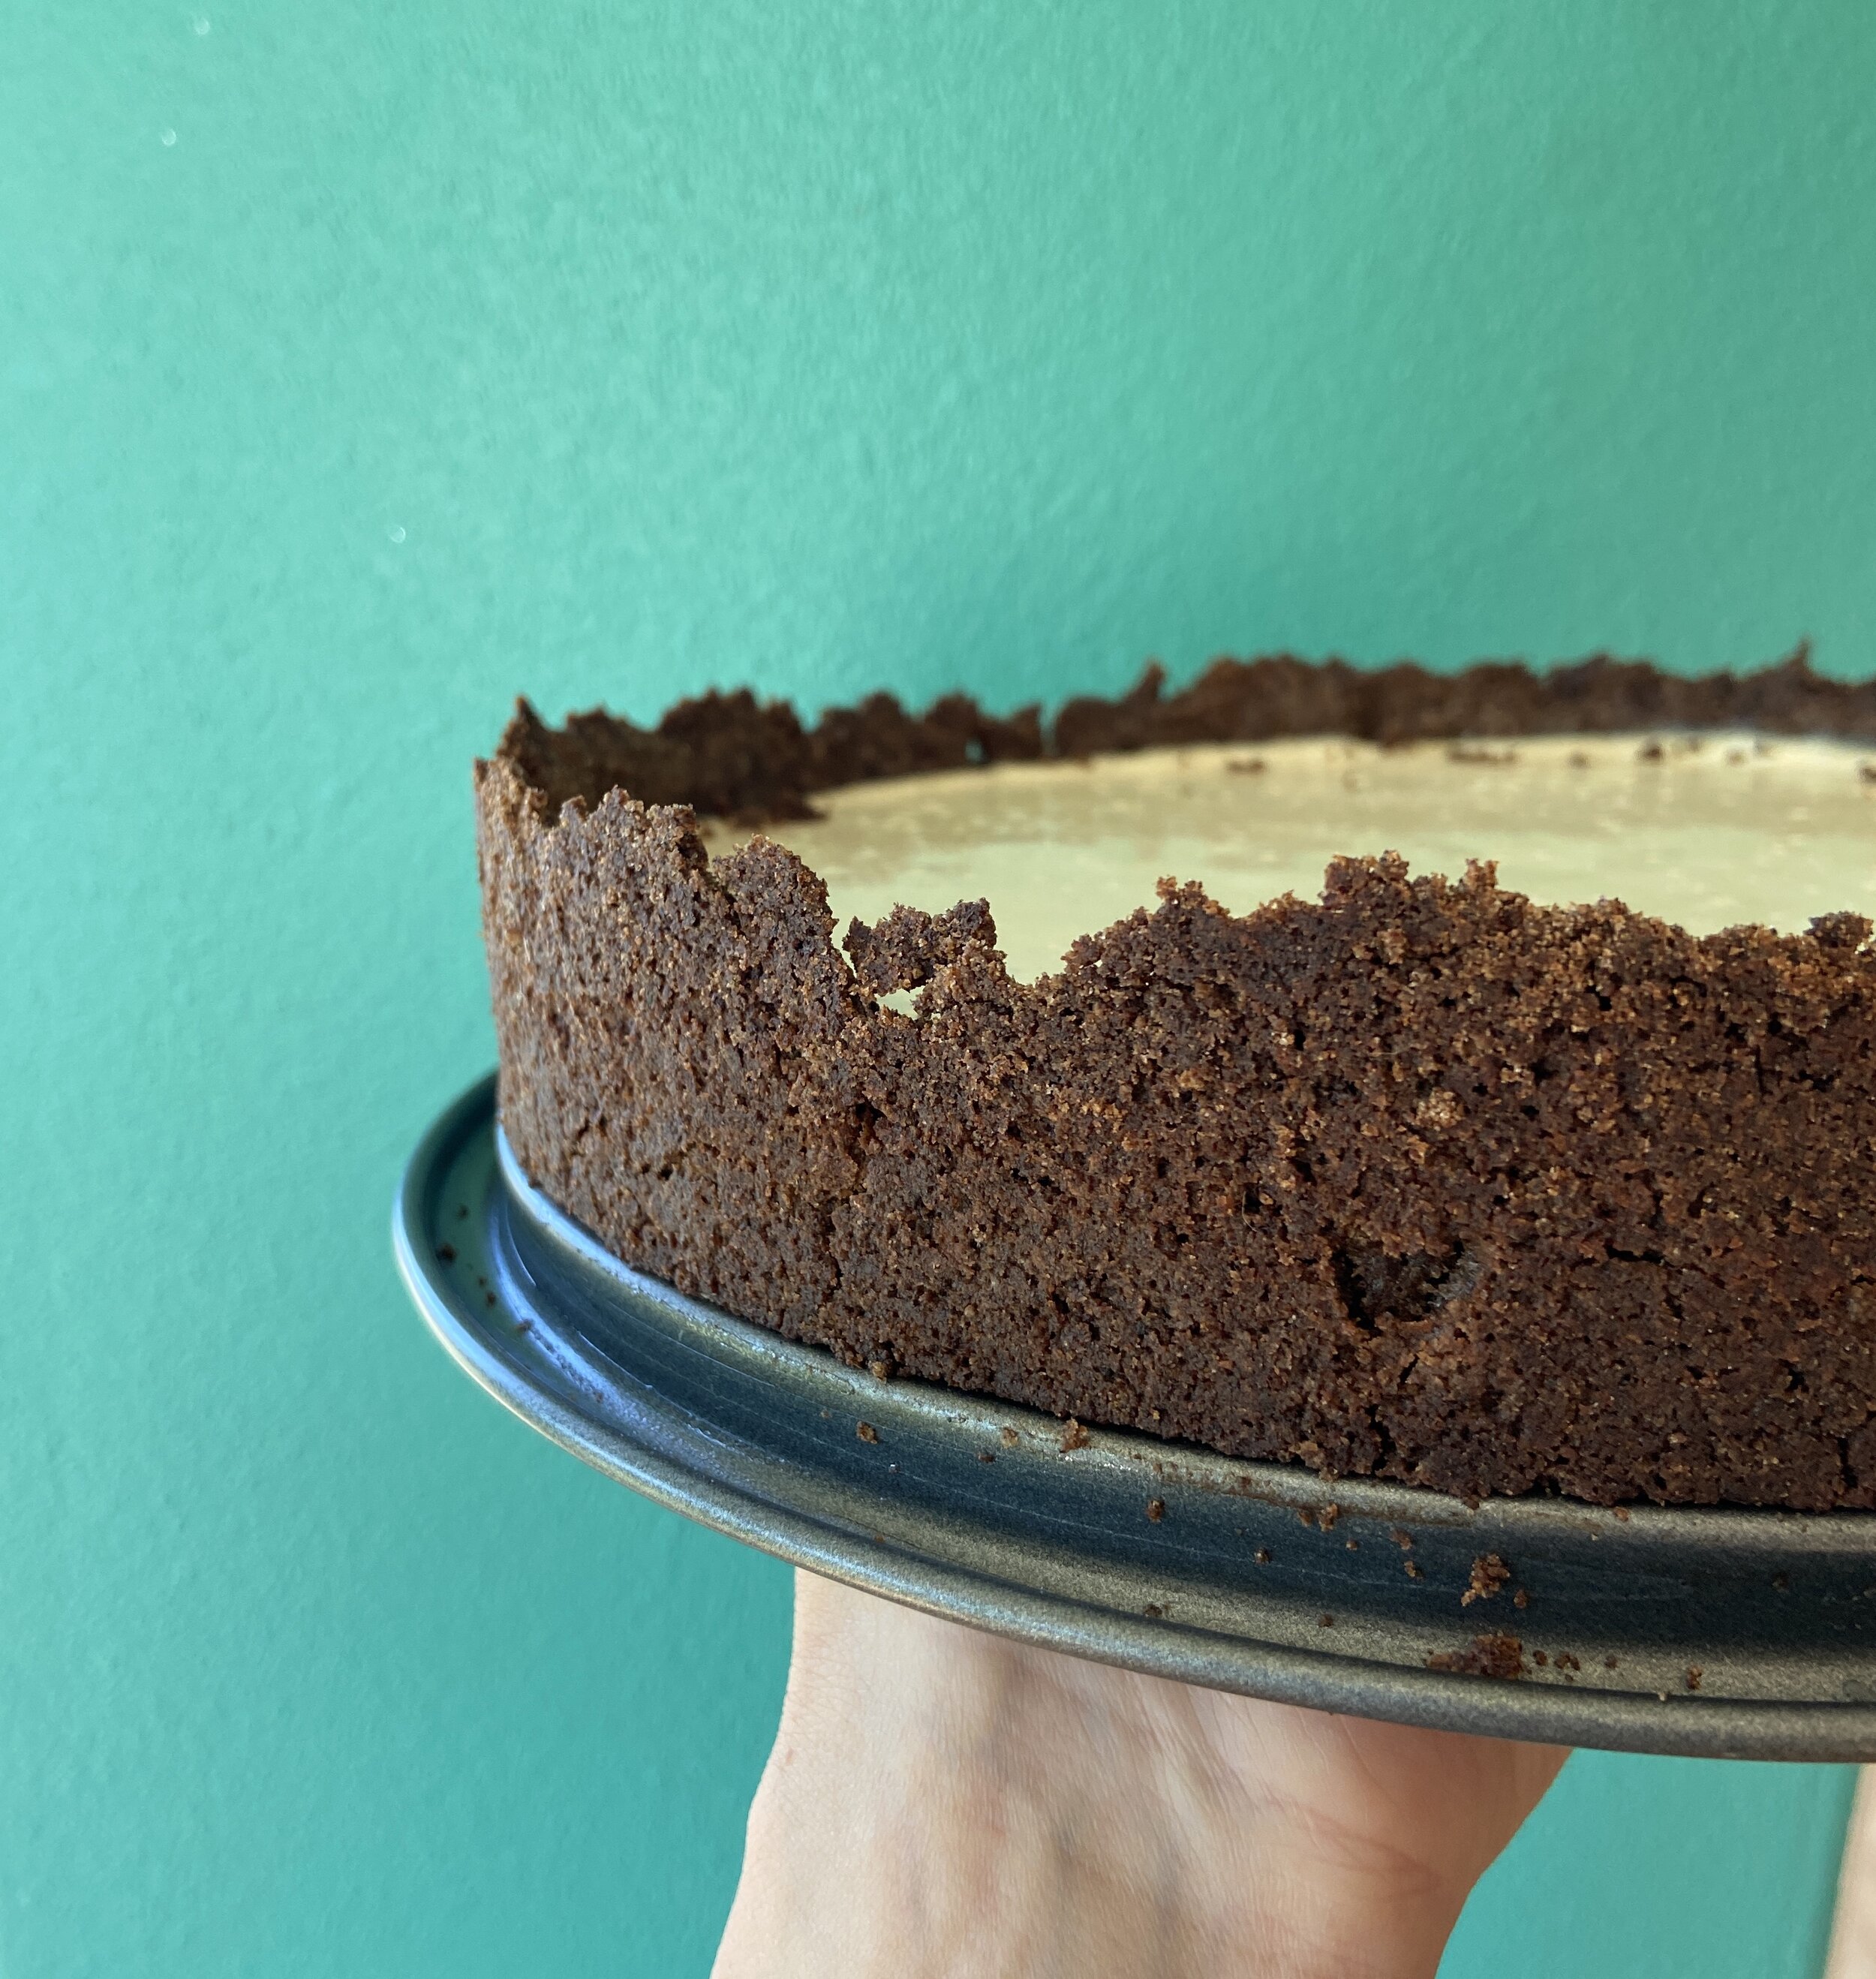
Crust me! I like to smash the crust up higher than the filling will be for a more dramatic rustic look.
Kransekage: Danish almond (wedding) ring cake
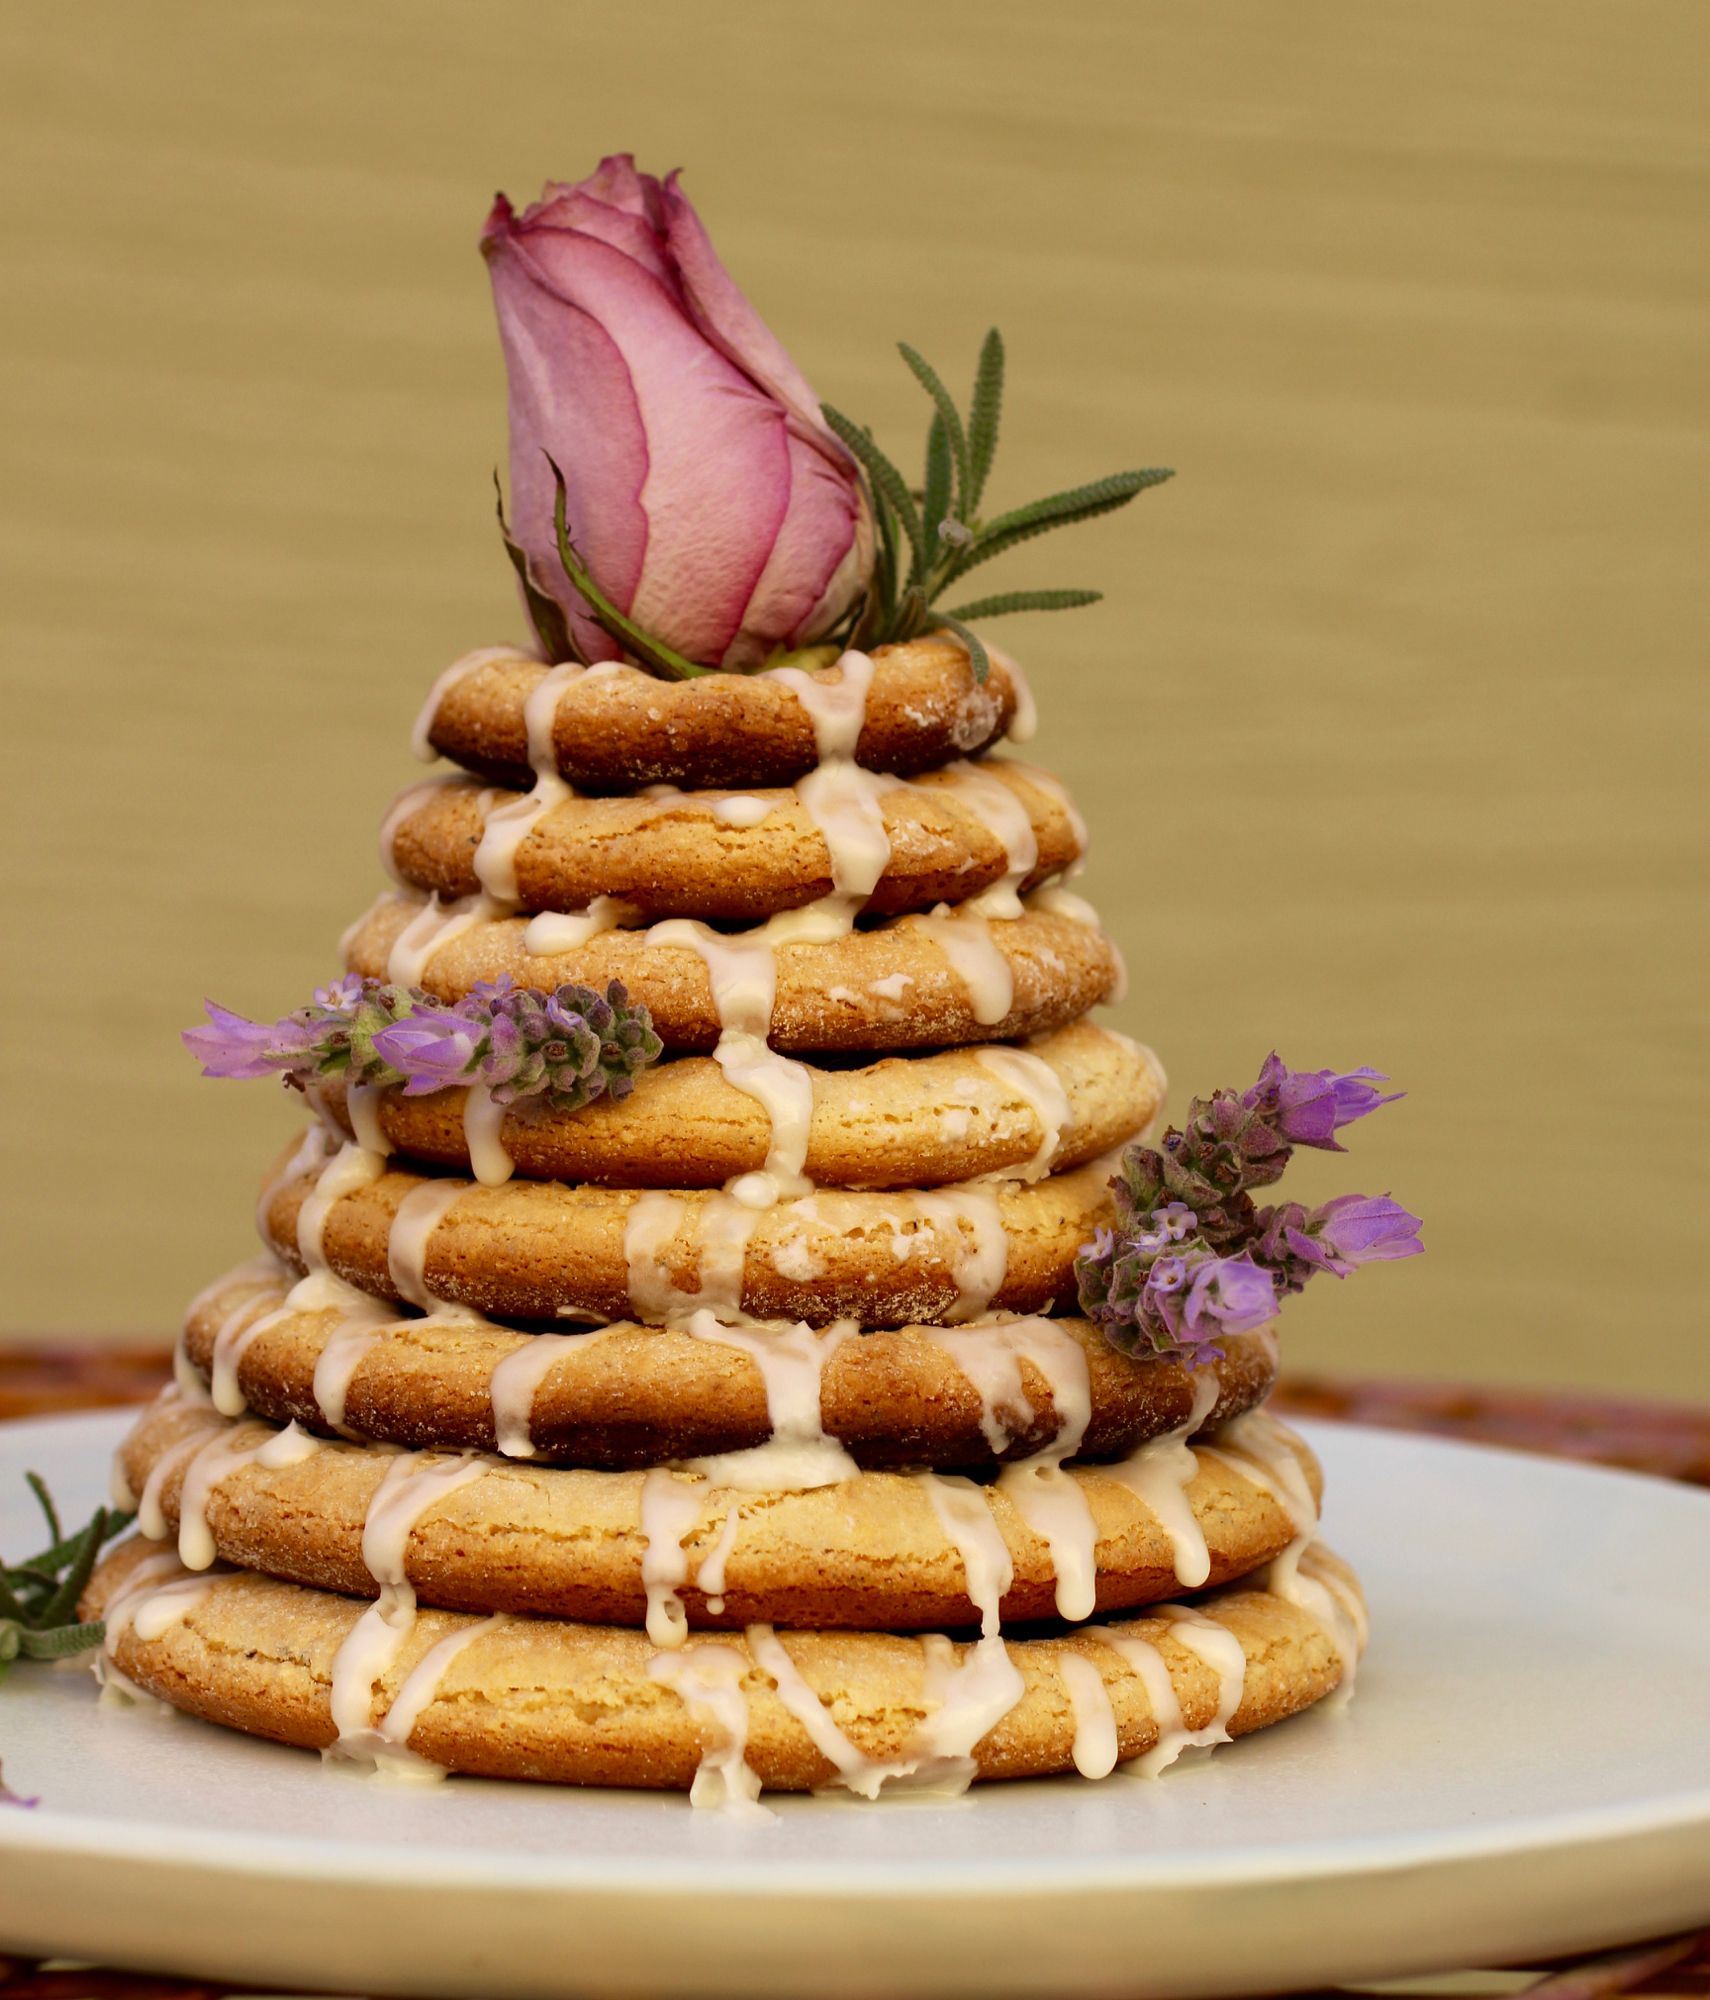
Cardamom-flavored chewy rings traditional at weddings and New Year's Eve parties.

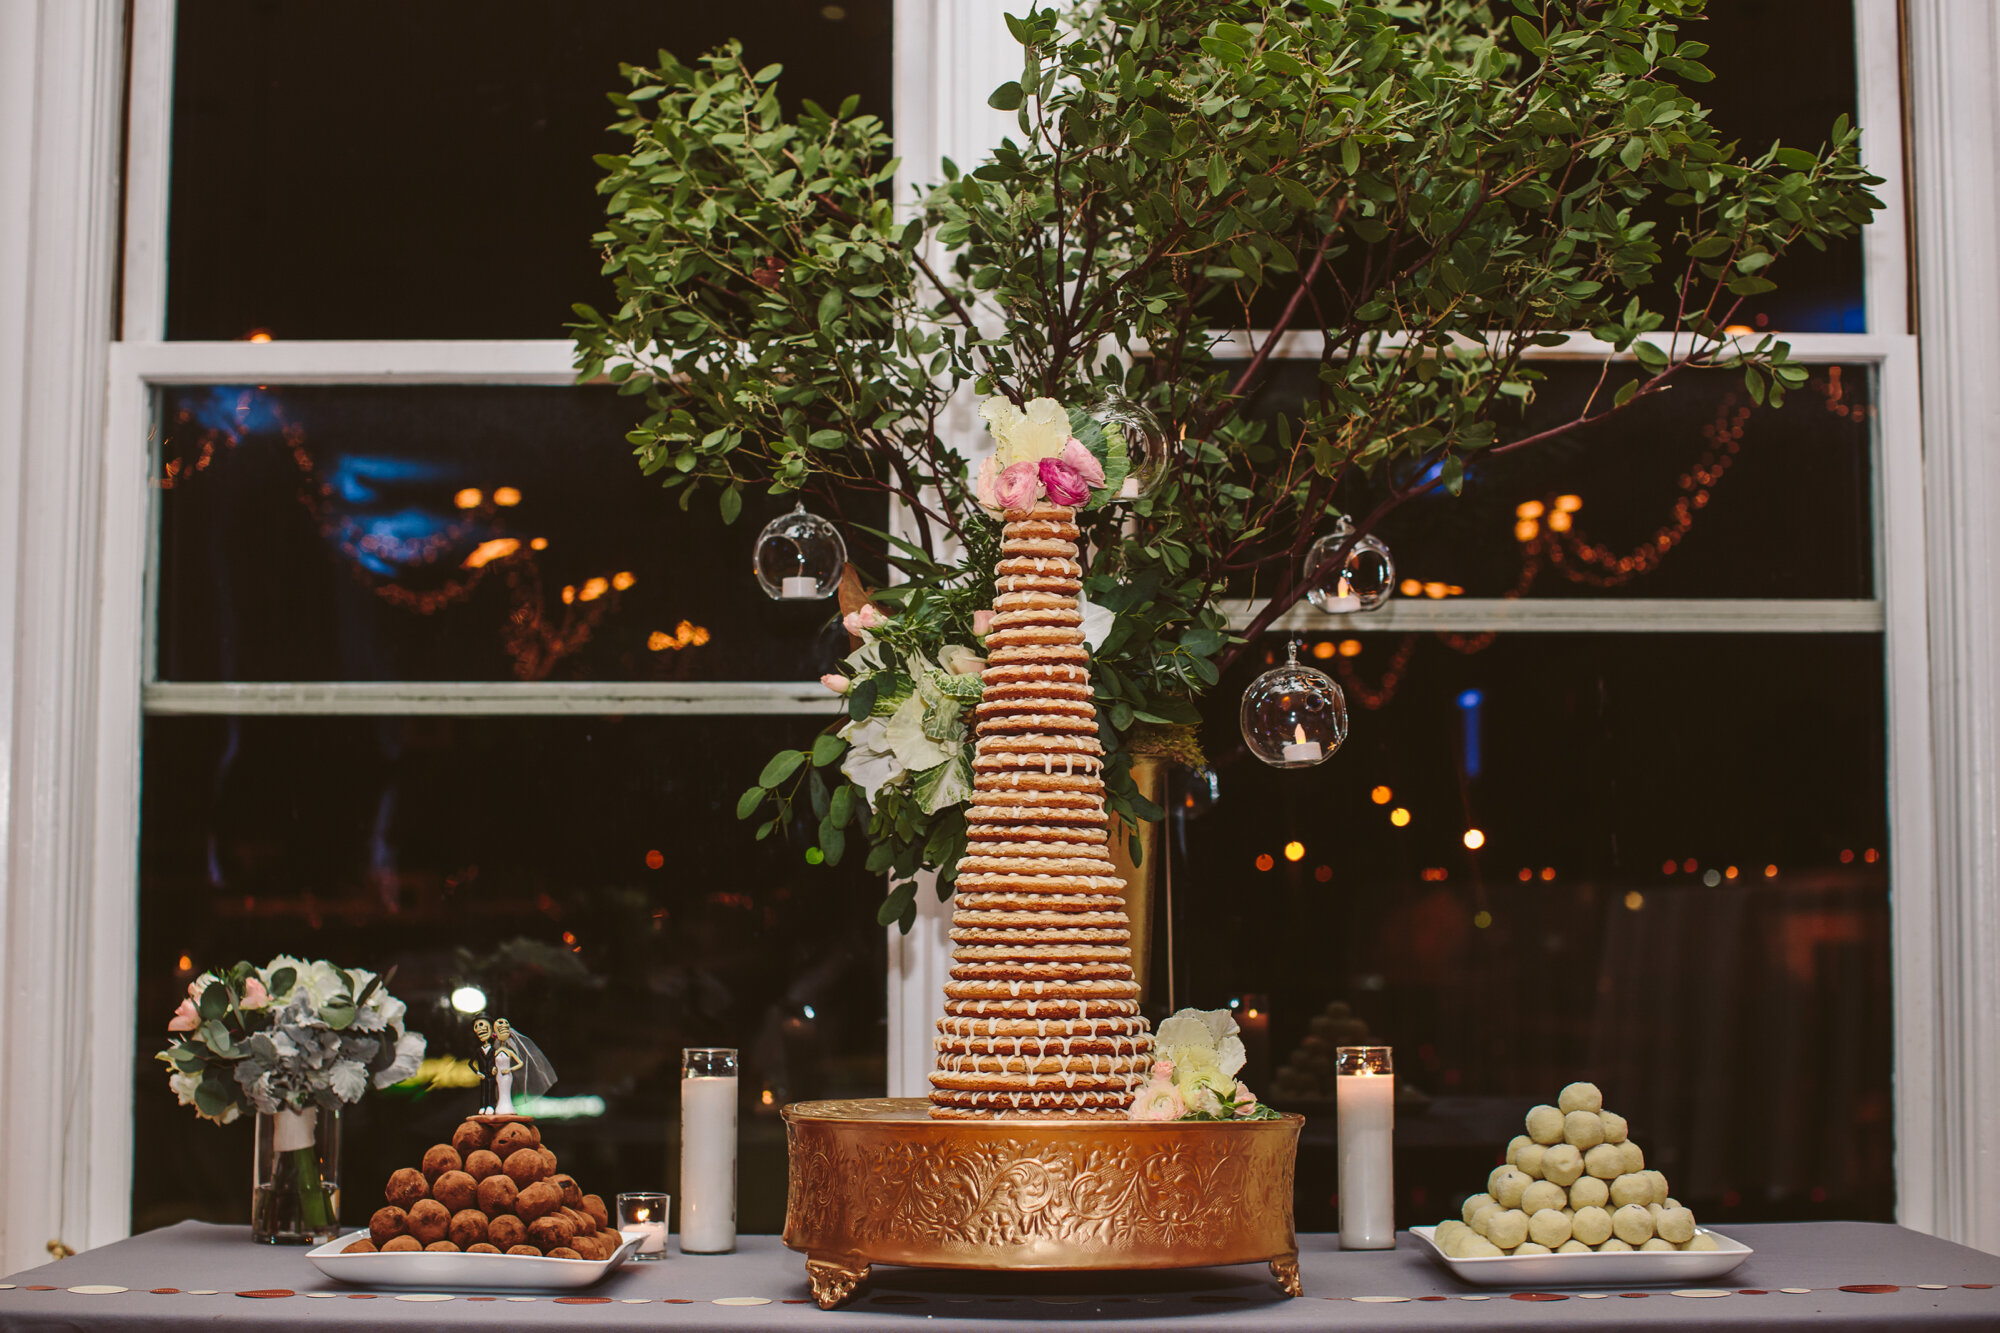
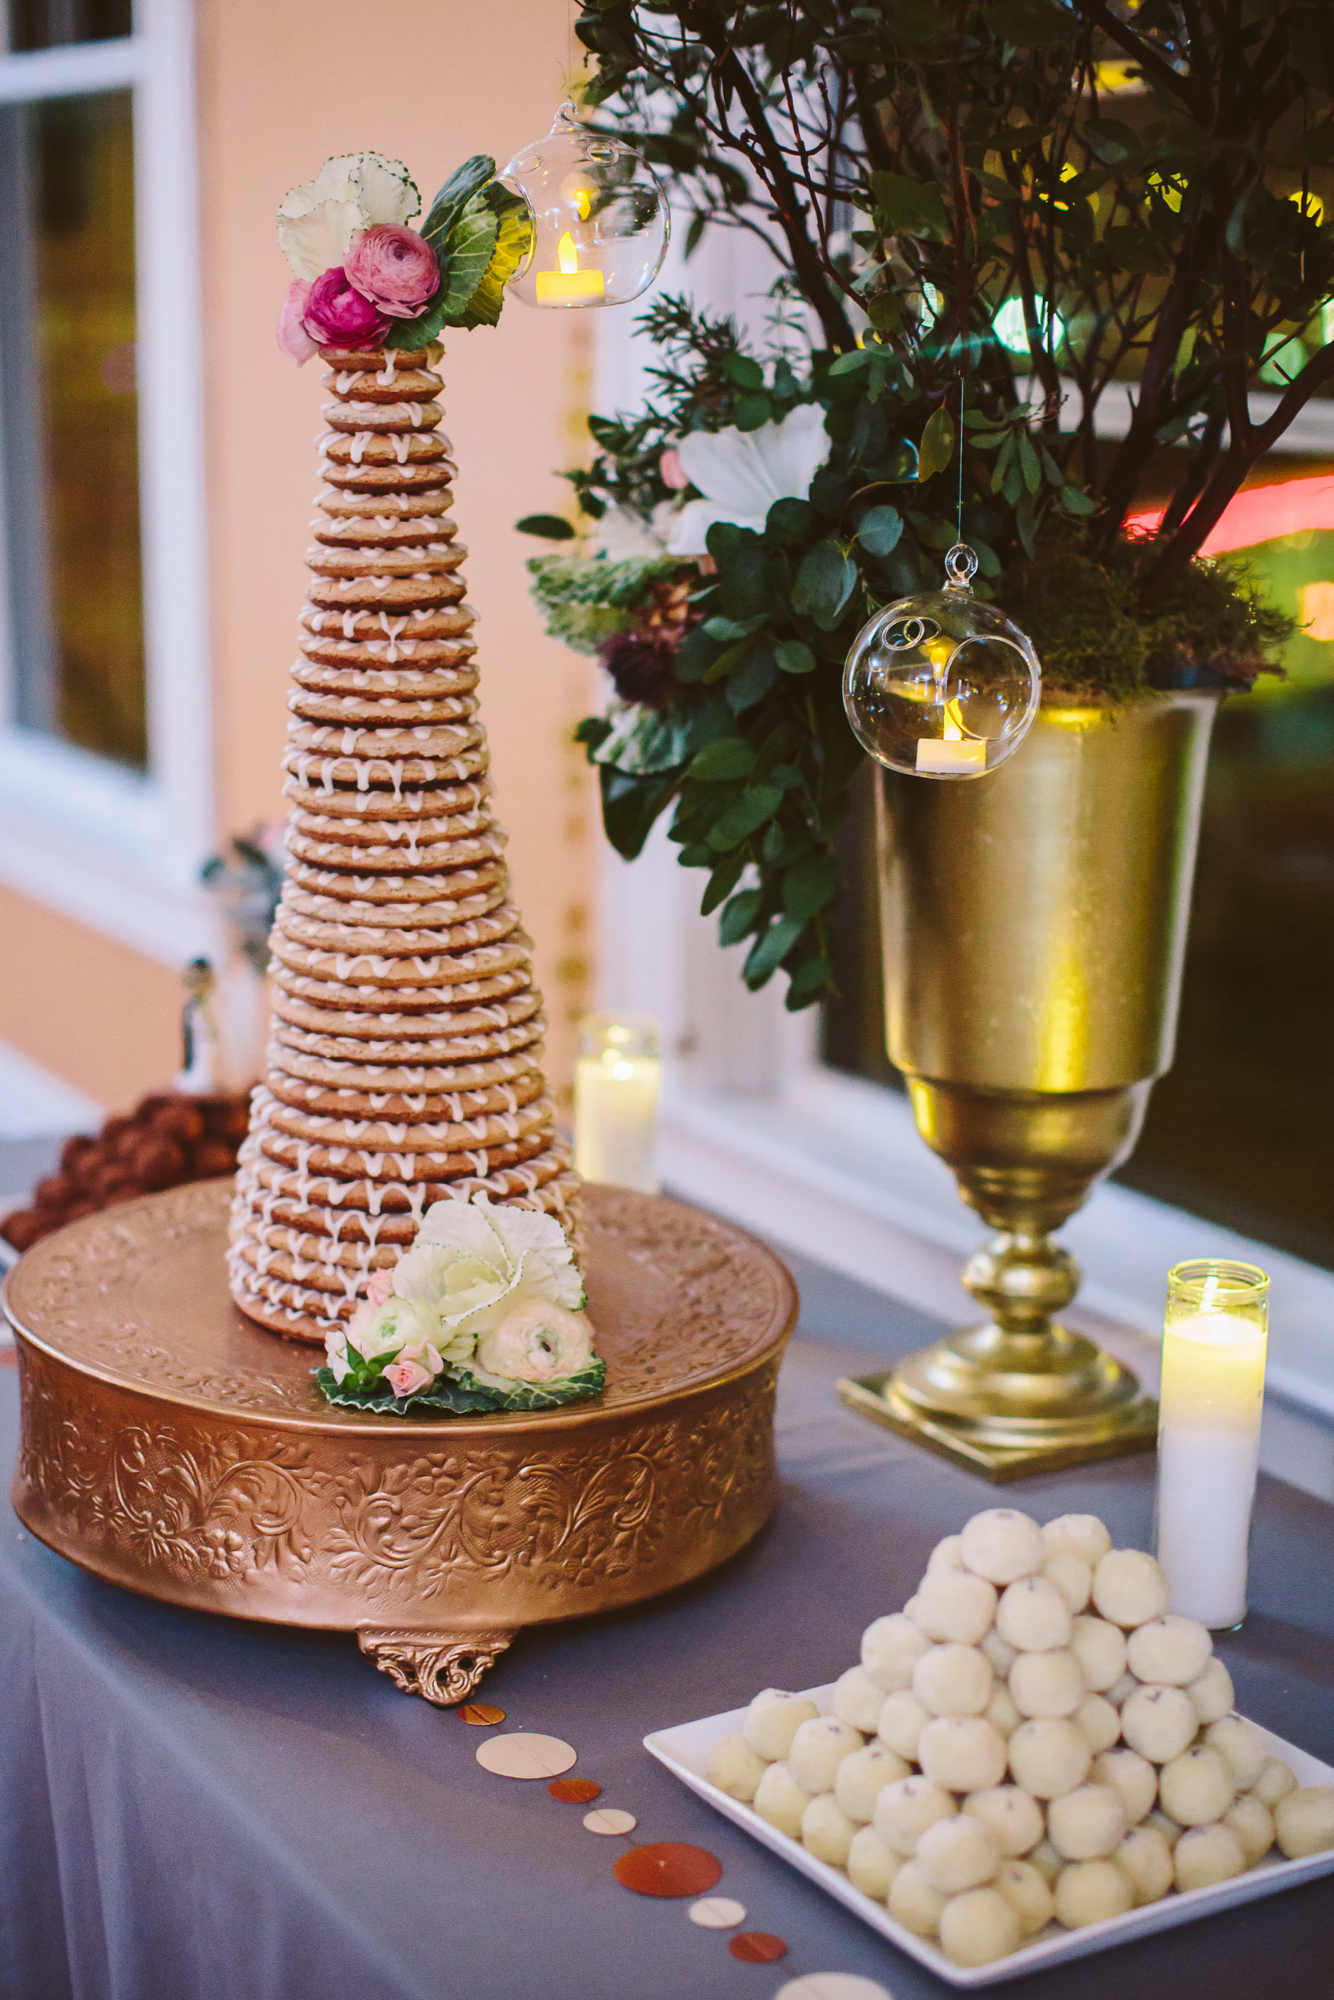
Beautifully stacked kransekage tower.
Like many Americans, I can trace my ancestry back to many, many different countries. However, whether because my last name is Rasmussen, a classic Danish last name, (and my great-grandfather was Rasmus Rasmussen) or because I just love the culture so much, I feel the biggest connection to my Scandinavian-Danish heritage. So when I was betrothed and started diving into the (very wide) world of weddings, I immediately began looking up Scandinavian and Danish wedding traditions. There were a few traditions that jumped out at me, including one that involves cutting the groom's tie to symbolize his imminent wife's good sewing skills, which we decided to forego, but just one that stuck. Naturally, the one that stuck was the traditional wedding cake, called Kransekage.
More cookie than cake, kransekage is typically served at weddings and New Year's Eve parties and our wedding just happened to be on December 31st. The cake rings symbolize wedding rings and I suppose for NYE they are symbolic of the year going 'round and 'round, but I'm just hypothesizing. Apart from the serendipity, I was also drawn to kransekage because it's flavored with cardamom, probably my favorite dessert flavoring, and made with almond meal, egg white, and sugar, which is a recipe for success in my book. Lemon zest is the final ingredient that provides a welcome brightness. That's right, just a total of five ingredients and if you're into the world of gluten free (I eat everything, but just sayin'), then this dessert is for you. On a romantic note, serving this cake at our wedding made sense because my now husband visited me in Denmark (I was on a research stint there for a summer) way back when we first started dating. I've told him numerous times that if he hadn't visited it probably wouldn't have worked out because, I mean, come on - live a little! Luckily, he did.
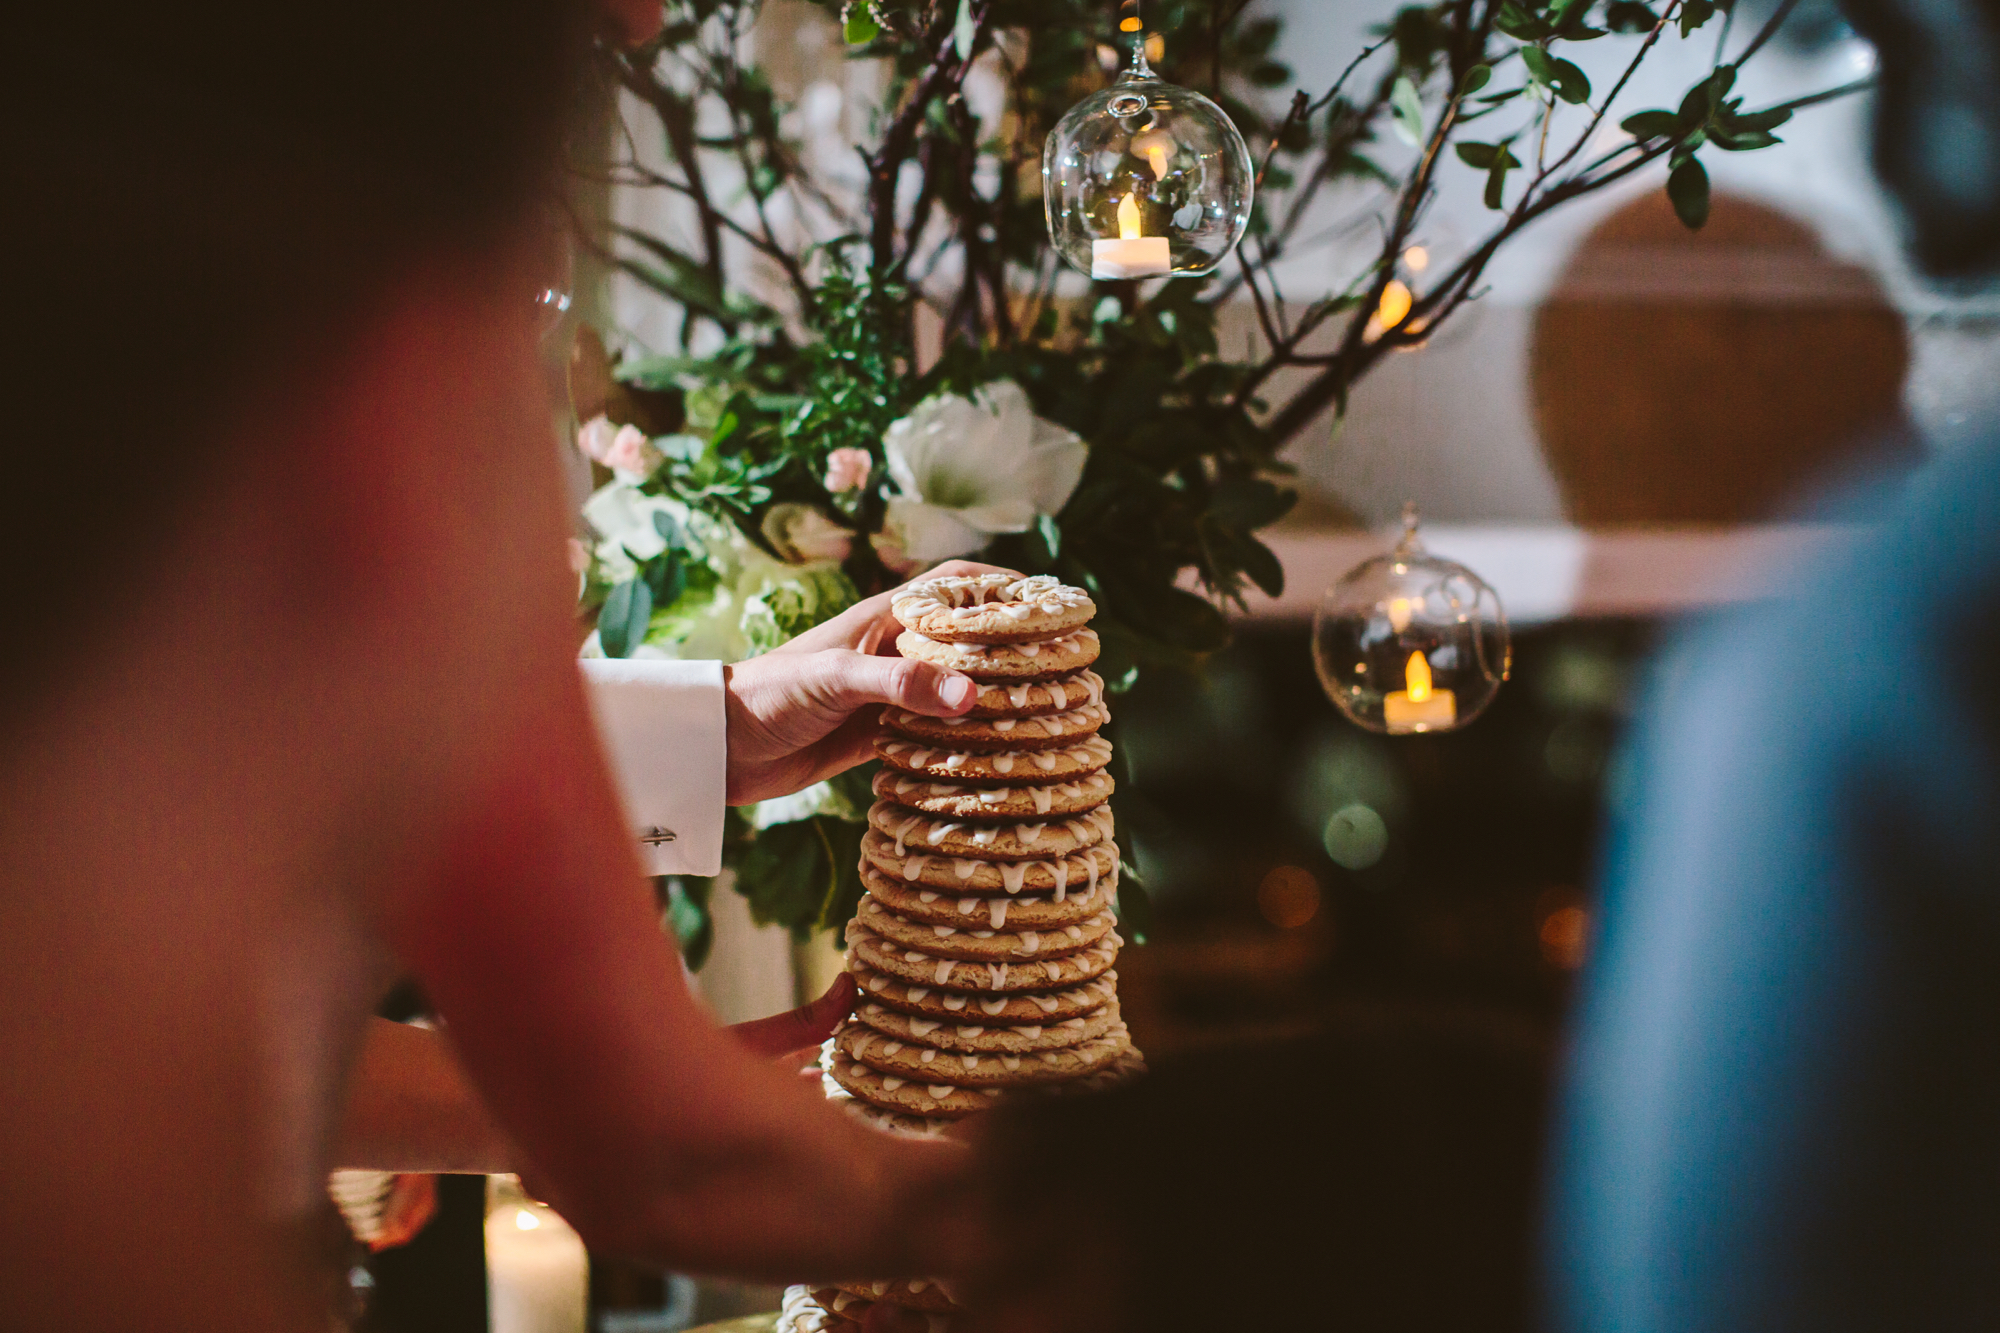
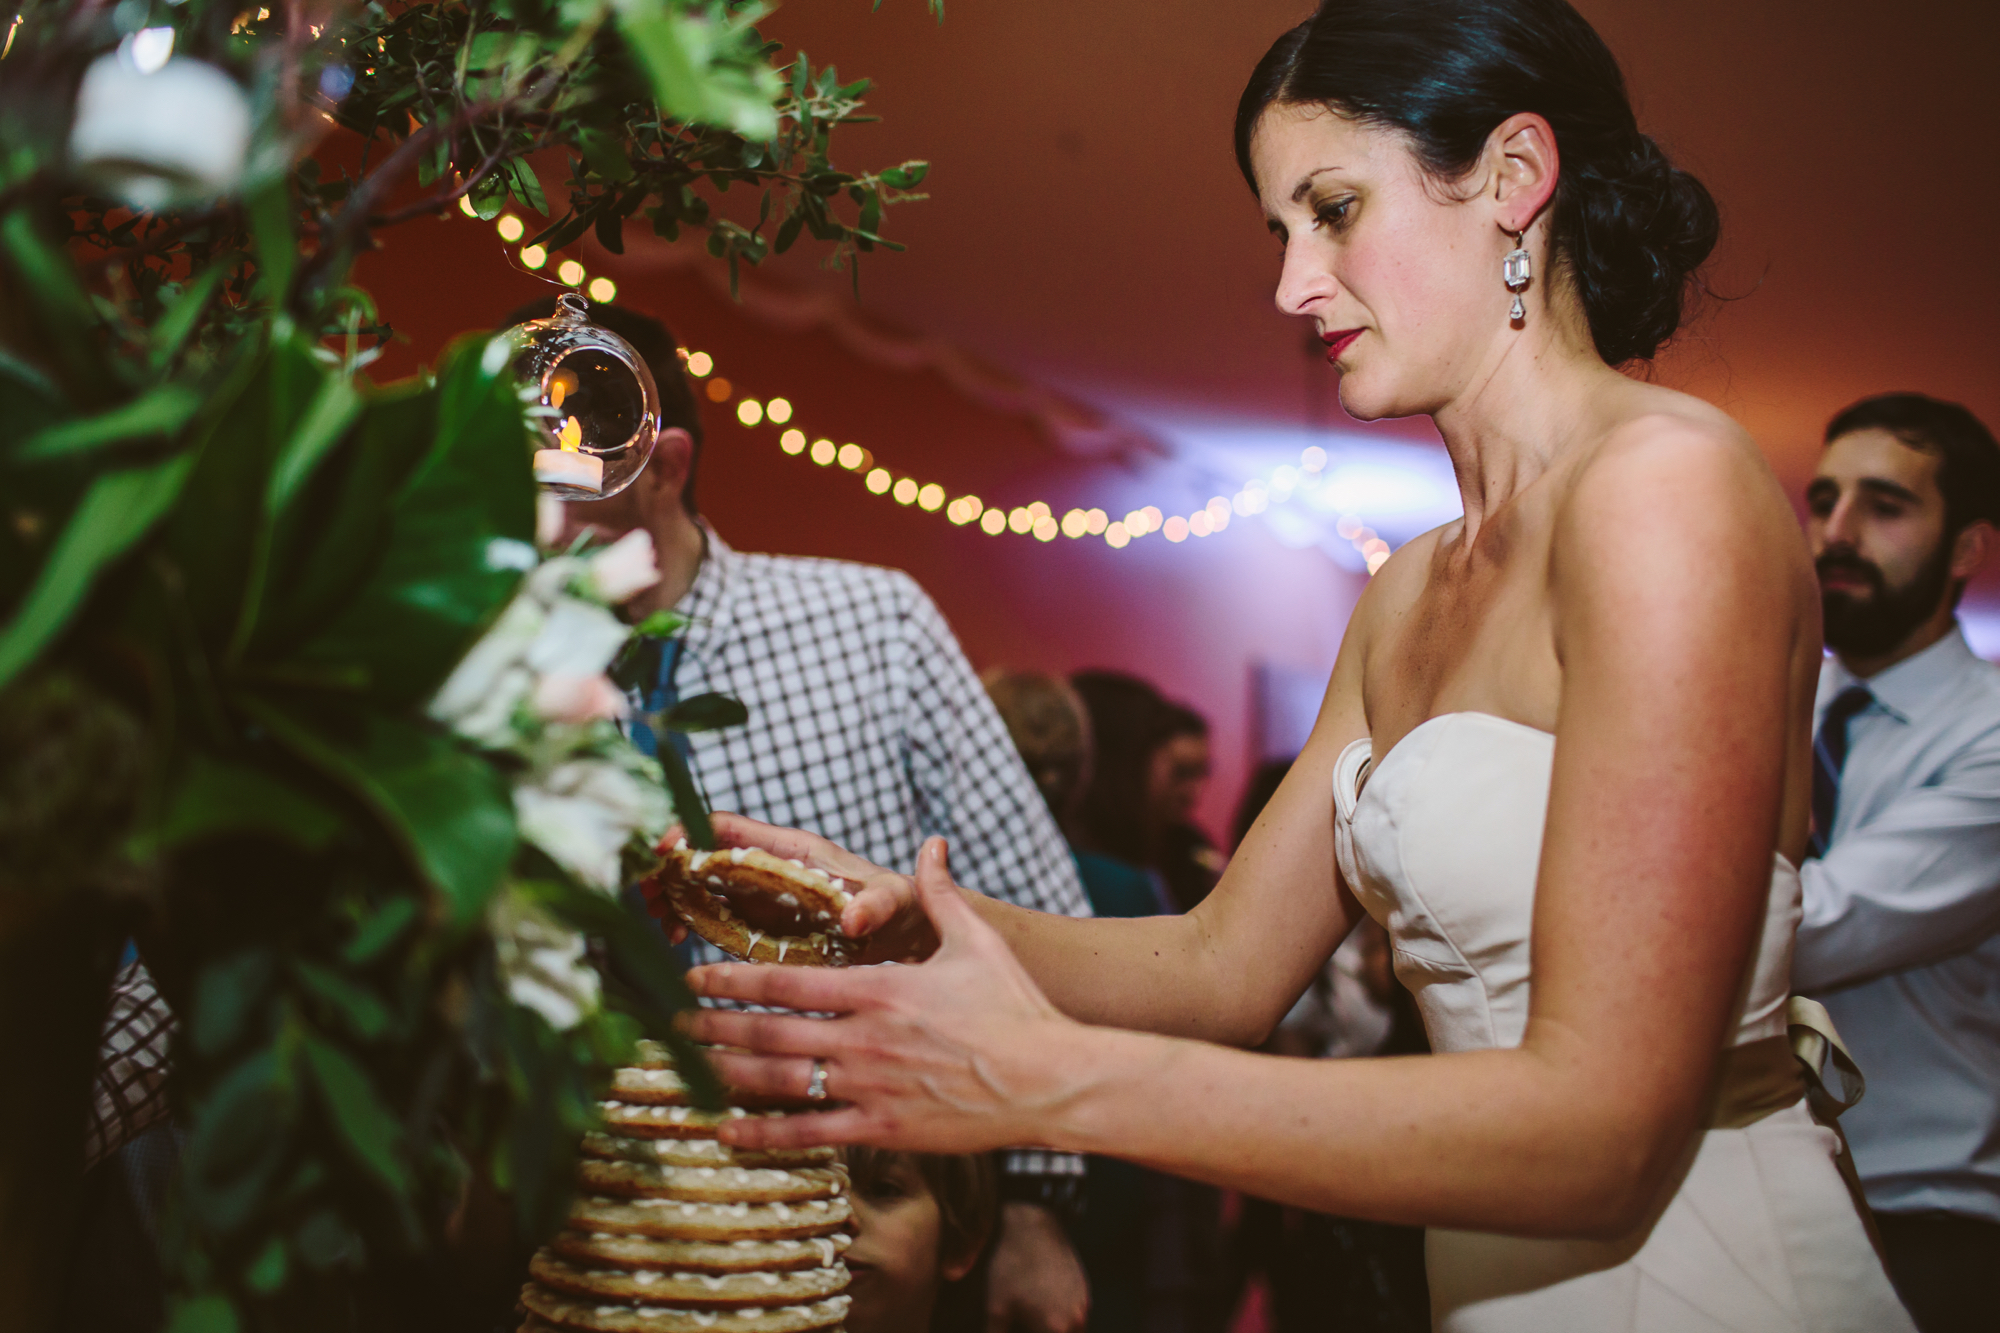

I originally intended to purchase a kransekage cake from a baker for the wedding, but being the crazy person that I am, I ended up making it. I'm not saying this to brag (okay, maybe I am just a little), but really - the cake is that easy that a bride can make it for her own wedding! I made my other friend's more classic American wedding cake and I would never put that pressure on myself as a bride. Also, I did have some delicious back-up truffles made by a local baker just in case. The great thing about this cake is that, in addition to being super simple and forgiving, you are supposed to make it a few days in advance to let the rings reach their optimal chewiness. Truly! Don't let the fact that you need special pans turn you away, as you can buy them on Amazon for twenty bucks. That being sad, I am absolutely willing to sell this cake to anyone who's interested in my making it for their wedding!
My wedding cake test-run.
Almond-cardamom cake rings fresh from the oven.
I've been meaning to post this recipe for some time, but now that it's been nearly a year since our wedding(!) and I plan on making it again for our anniversary/NYE, I thought it was the appropriate time. Below I have the recipe to make about one (set of) pan's worth as well as 3x that, which is what I used for the wedding that served about 80 adults (though it went fast!) The preparation method is same for both. The measurements are in metric weight and U.S. volume, which I know is strange, but that's what worked the best for me!
Krasnsekage A Ingredients*: Makes enough dough for one set of these pans (~25 servings)
410 grams almond flour or finely ground almond meal (125g/cup), Bob's Red Mill's normal bag is 450g almond flour
410 grams powdered sugar
Up to 40 grams gluten-free, rice, or all-purpose flour (about 9g/Tbs, I ended up adding 3 Tbs at first, then 4 more Tbs)
3 tsp freshly grated lemon zest
3 tsp ground cardamom
1/2 tsp salt
3 large egg whites (= 90g)
Extra flour and grapeseed oil or cooking oil spray for greasing the molds
1 set of kransekage ring molds (18 rings)
Krasnsekage B Ingredients*: Makes enough dough for 3x one set of these pans (~80 servings)
1,100 grams (1¼ lbs) almond flour, or finely ground almond meal (125g/cup), Bob’s Red Mill normal bag is 450g almond flour
1,100 grams (1¼lbs) powdered sugar
Up to 100 grams (about 3/4 cup) gluten-free, rice, or all-purpose flour (about 9g/Tbs, I ended up adding 1/4 cup at first, then 6 more tablespoons)
2 tablespoons plus 2 teaspoons freshly grated lemon zest
2 tablespoons plus 2 teaspoons ground cardamom
1-1/2 teaspoons salt
8 large egg whites
Extra flour and grapeseed oil or cooking oil spray for greasing the molds
1 set of kransekage ring molds (18 rings)
Preparation: Same for both versions, but you'll prepare and bake 3 batches for Kransekage B.
Preheat the oven to 400°F. Spray the ring molds with cooking oil spray or lightly brush them with grapeseed oil. Lightly dust them with flour. Set them onto cookie sheets.
In a large bowl or bowl of electric mixer, combine the ground almonds, icing sugar, one-half of the flour, lemon zest, cardamom, and salt. Mix on low speed using hand mixer or Cuisinart to combine. Add egg whites one at time and beating well after each addition.
The dough should be starting to come together and come away from the sides of the bowl. You can tell if the dough is moist and pliable enough by pinching some of it between your fingers. It should stick nicely together. If it is too moist, add more flour by tablespoon. You are aiming for the texture of soft ‘playdough’.
Scrape the dough onto your work surface and pat it into a large ball. Cut the ball into quarters and roll each chunk into a smaller ball. Work with one ball at a time and keep the rest covered with plastic wrap to prevent them from drying out.
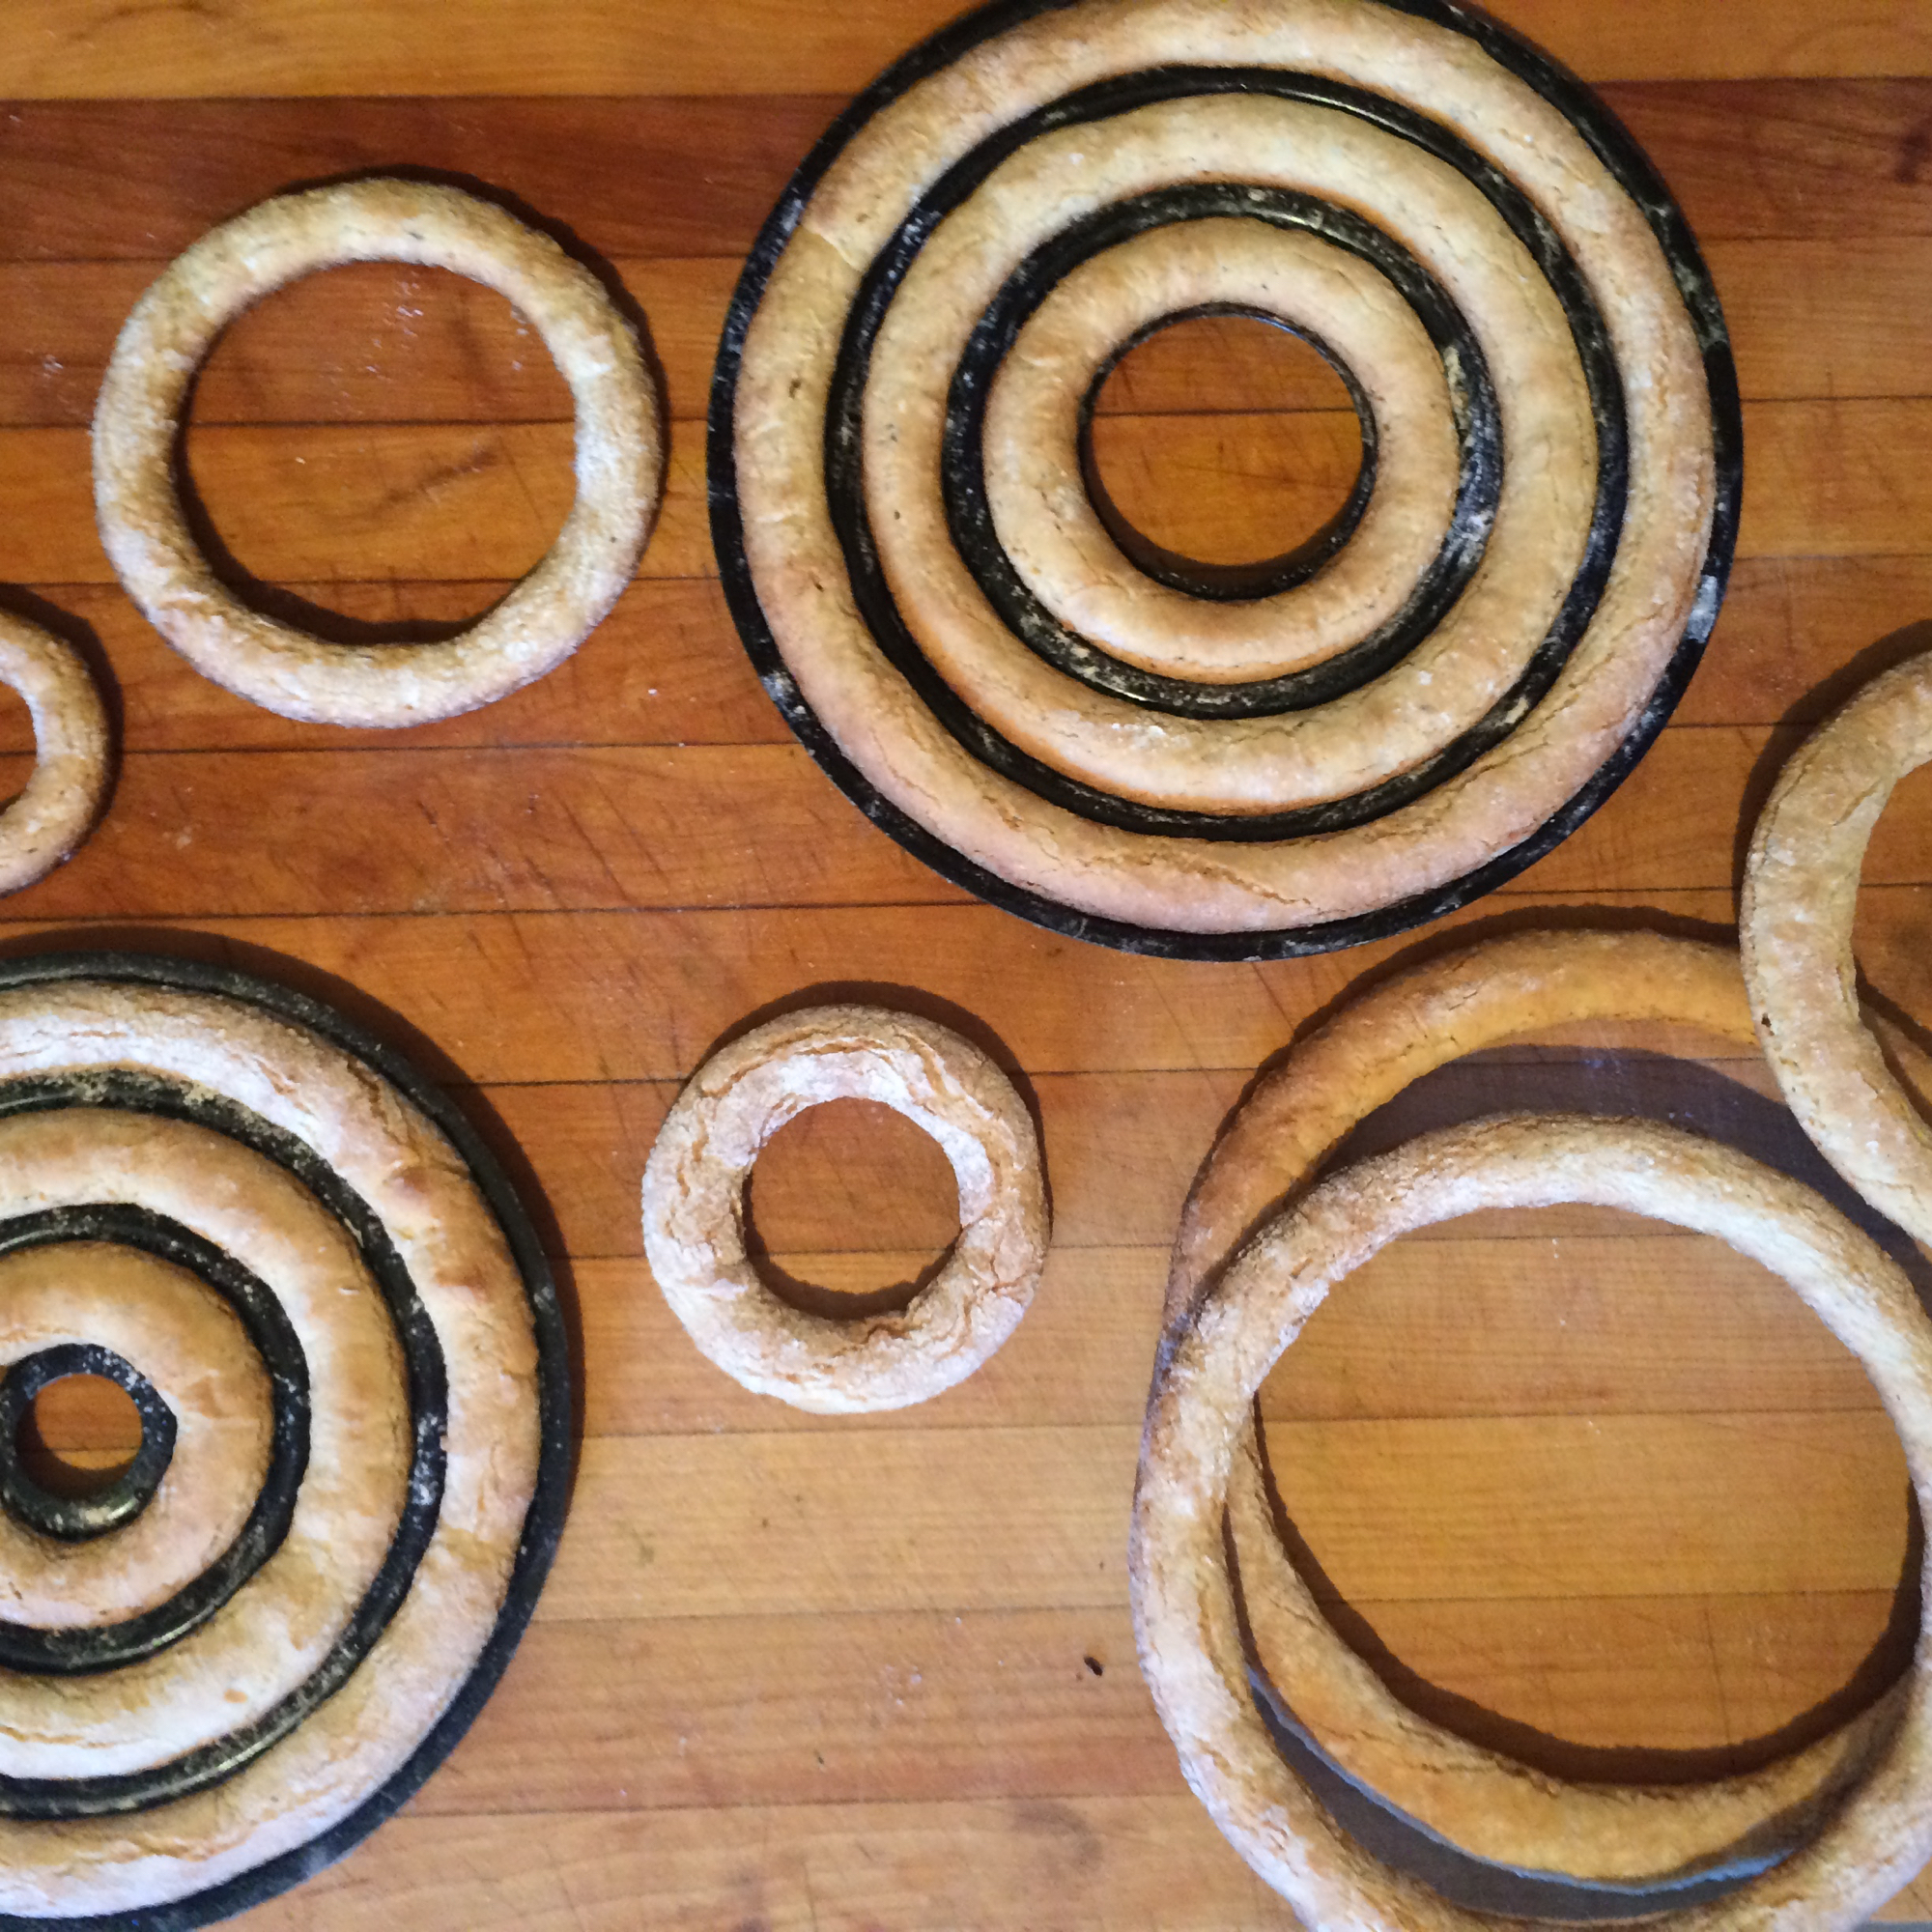
Roll each ball into a long, even rope. I found it handy to use a ruler to keep the ropes uniform. For my 18-ring set of molds, 1/2 inch thick. Lay a piece of rope into one ring at a time, pinching off the excess length and smoothing the ends together to seamlessly join them. The dough is very forgiving, and it`s easy to re-roll a few rings if you don`t have enough dough to make the last ones.
Bake in the preheated oven, in batches, for 8-12 minutes, until the rings are a golden caramel color. The smaller ring pans tend to cook faster, so check on them at 8 minutes.
Leave the cakes to cool in the pans, then carefully remove them. You may have to insert a knife tip underneath the rings to help them pop out of the pans. For Kransekage B, cool the cakes before removing, then wash, dry, and re-grease the pans for the next batch. Store cakse at room temperature for a 1-3 days, preferably 48 hours to give the perfect amount of chewiness. I found that it was better to leave to open air than putting in plastic bags.
Icing Recipe: Make below x1 for Kransekage A and x3 for Kransekage B
1 small egg white
1.5 cups (225 gms or ¼lb) icing sugar
1 teaspoons fresh lemon juice
Icing Preparation: Whisk together the egg white(s) and icing sugar. Add enough lemon juice to make it a good drizzling consistency. Spoon the icing into a piping bag with a small round tip, a squeezable plastic piping bottle made for icing, or a heavy duty plastic bag and snip off a tiny bit of one corner to make a round hole.
To assemble the cake, lay out your rings in order of size. Start with the largest ring and attach it to your base or plate with a ring of icing. Pipe zig-zags of icing loosely over the top of the ring. I added an extra squeeze of icing all the way around the ring, as added insurance since this wedding cake was so tall. If you are making a regular height cake, you won`t need the extra ring of icing -the zig-zags will be enough to hold the rings together. Place the next smallest ring on top and repeat. Continue until you reach the smallest ring at the top.
<img src="https://images.squarespace-cdn.com/content/v1/53df581ae4b0461efc5879aa/1481141410783-4NQ94ALIT65IOCK998HM/image-asset.jpeg" alt="The cake worked!" />

The cake worked!
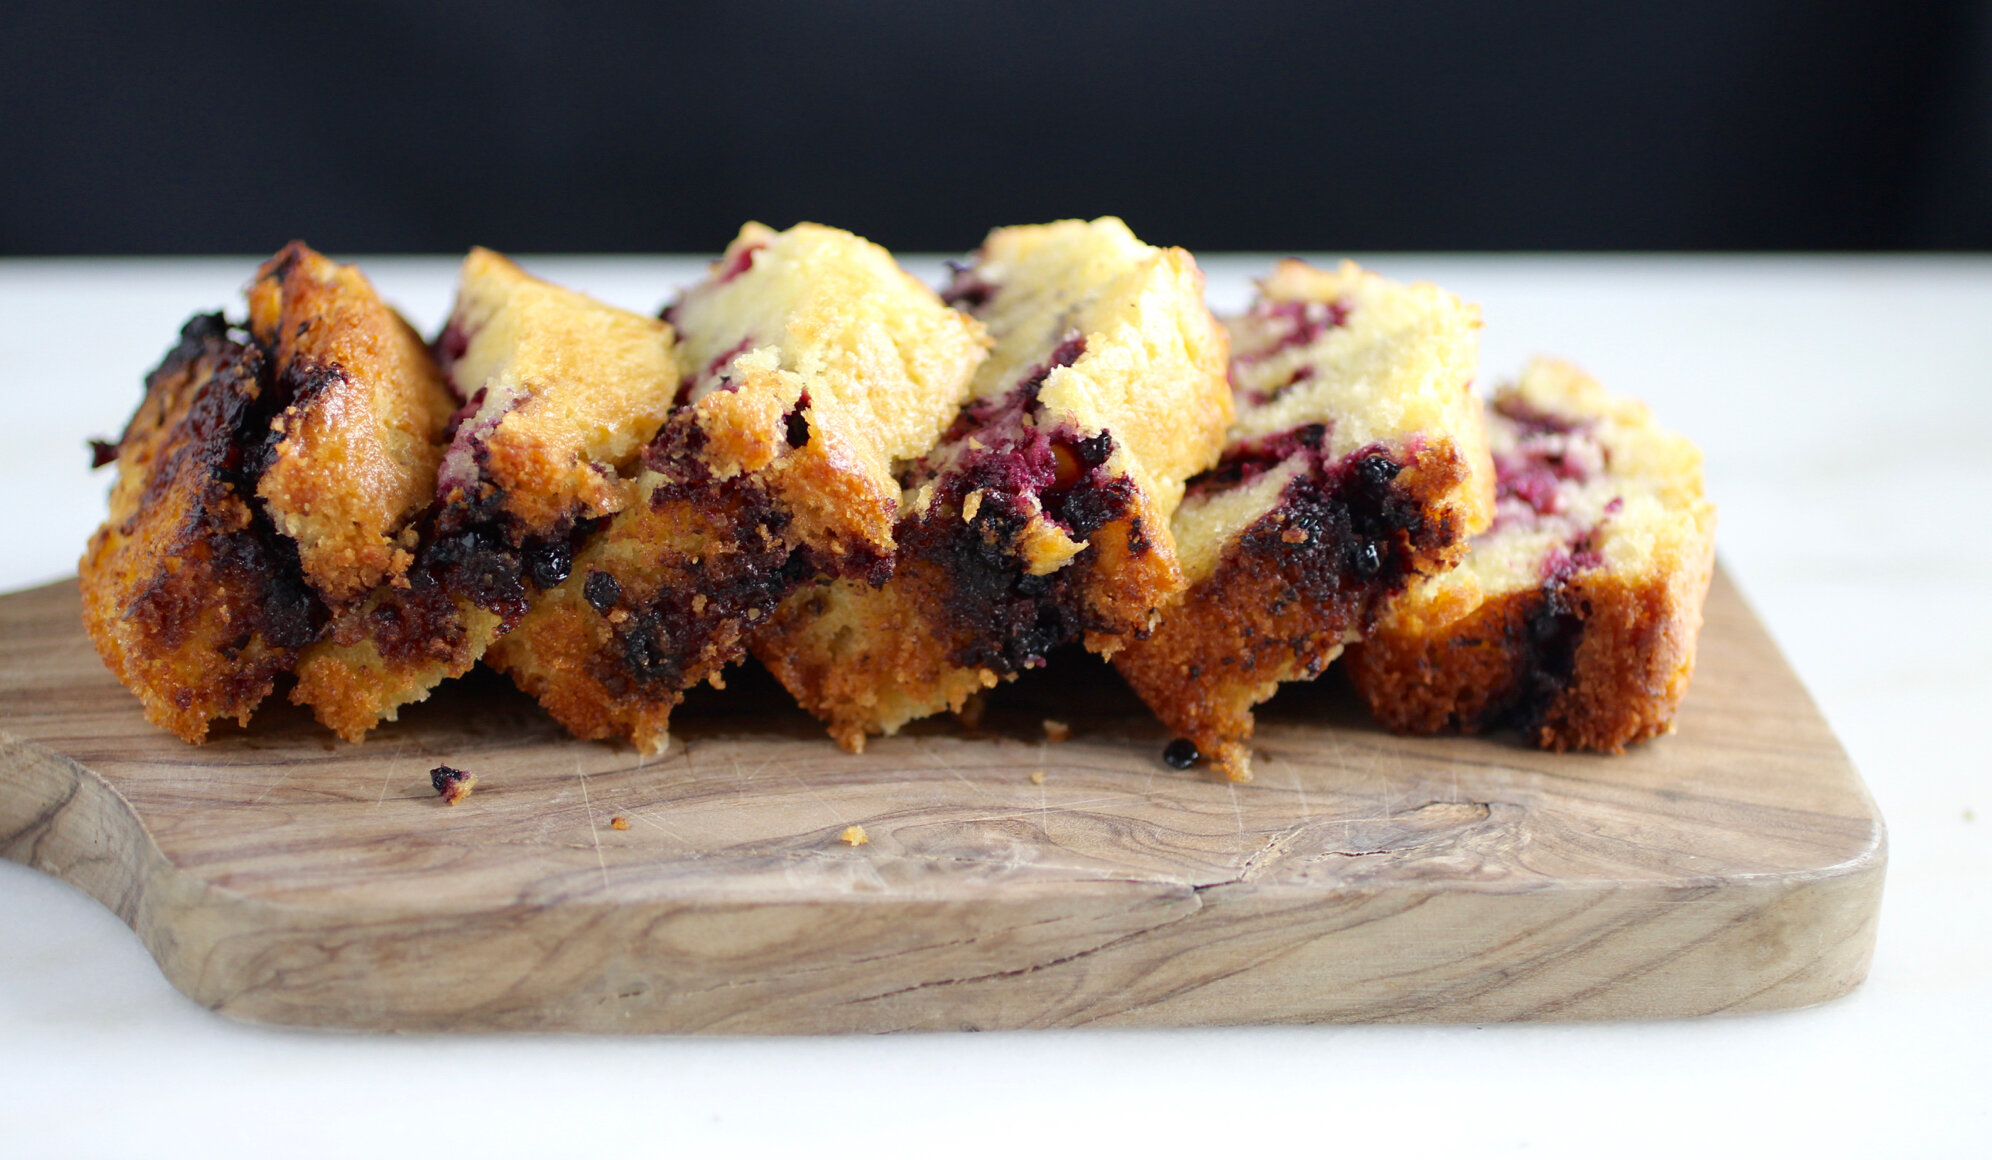
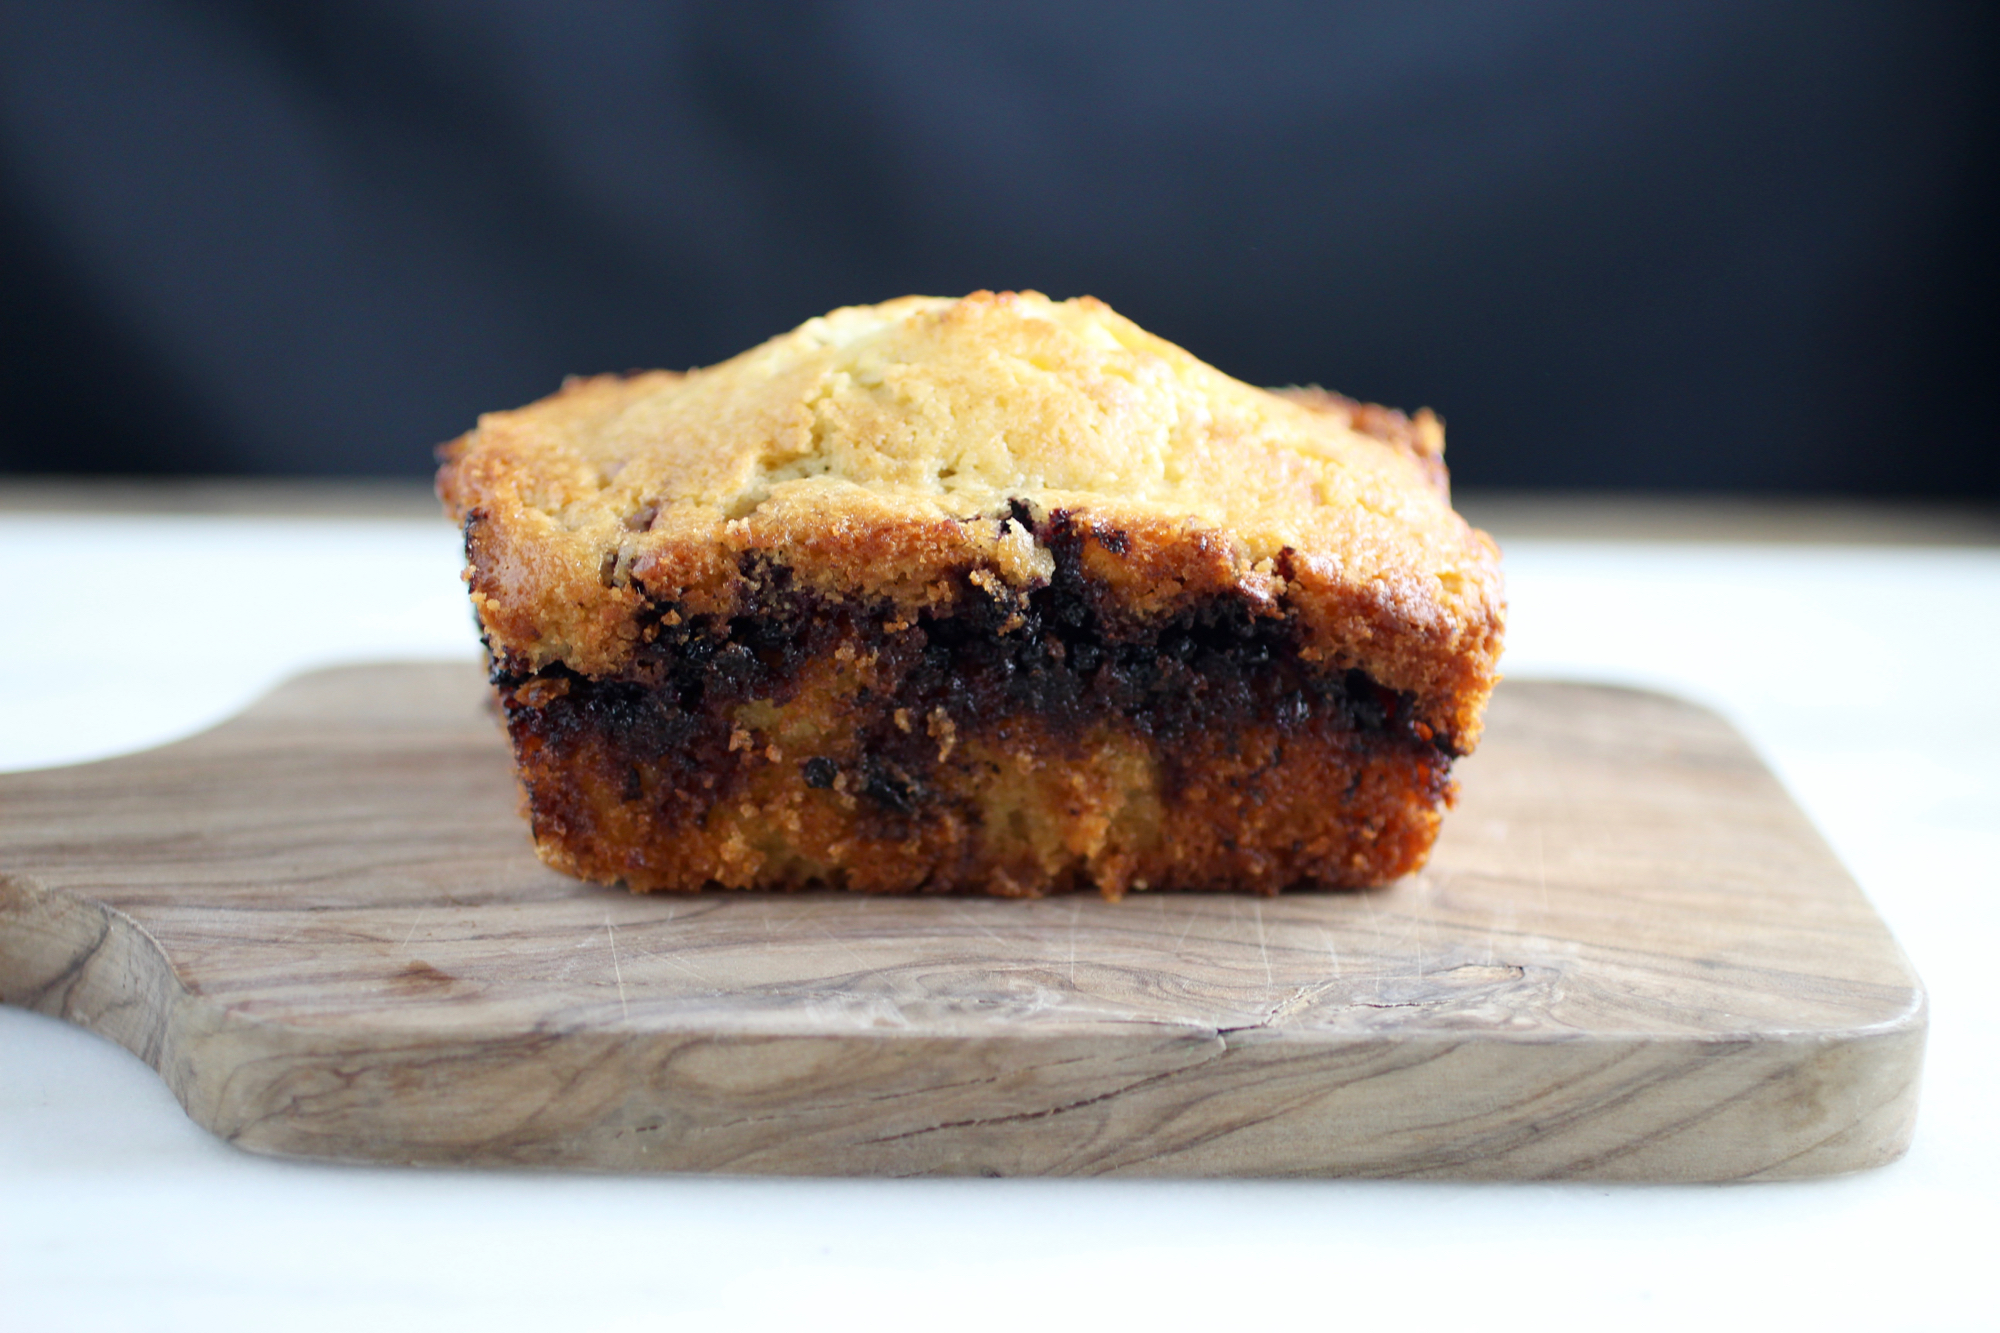
Elder Almond Pound Cake
Elderflower and elderberries unite for a perfect taste of summer, in all its glory.

This nutty loaf cake uses both elderflower cordial and elderberries for the complete elder experience. Cordial can be substituted for any sweet syrup and elderberries for other berries, if you only happen to have one of the gifts from the elder tree on hand. The time for harvesting elderflower in the Bay Area is May through June/July and elderberry season is July through September. See related the Regal Elderlflower article for information on the elder tree and harvesting elderflower - more information on harvesting elderberries will be available soon as July approaches! Serves 8.
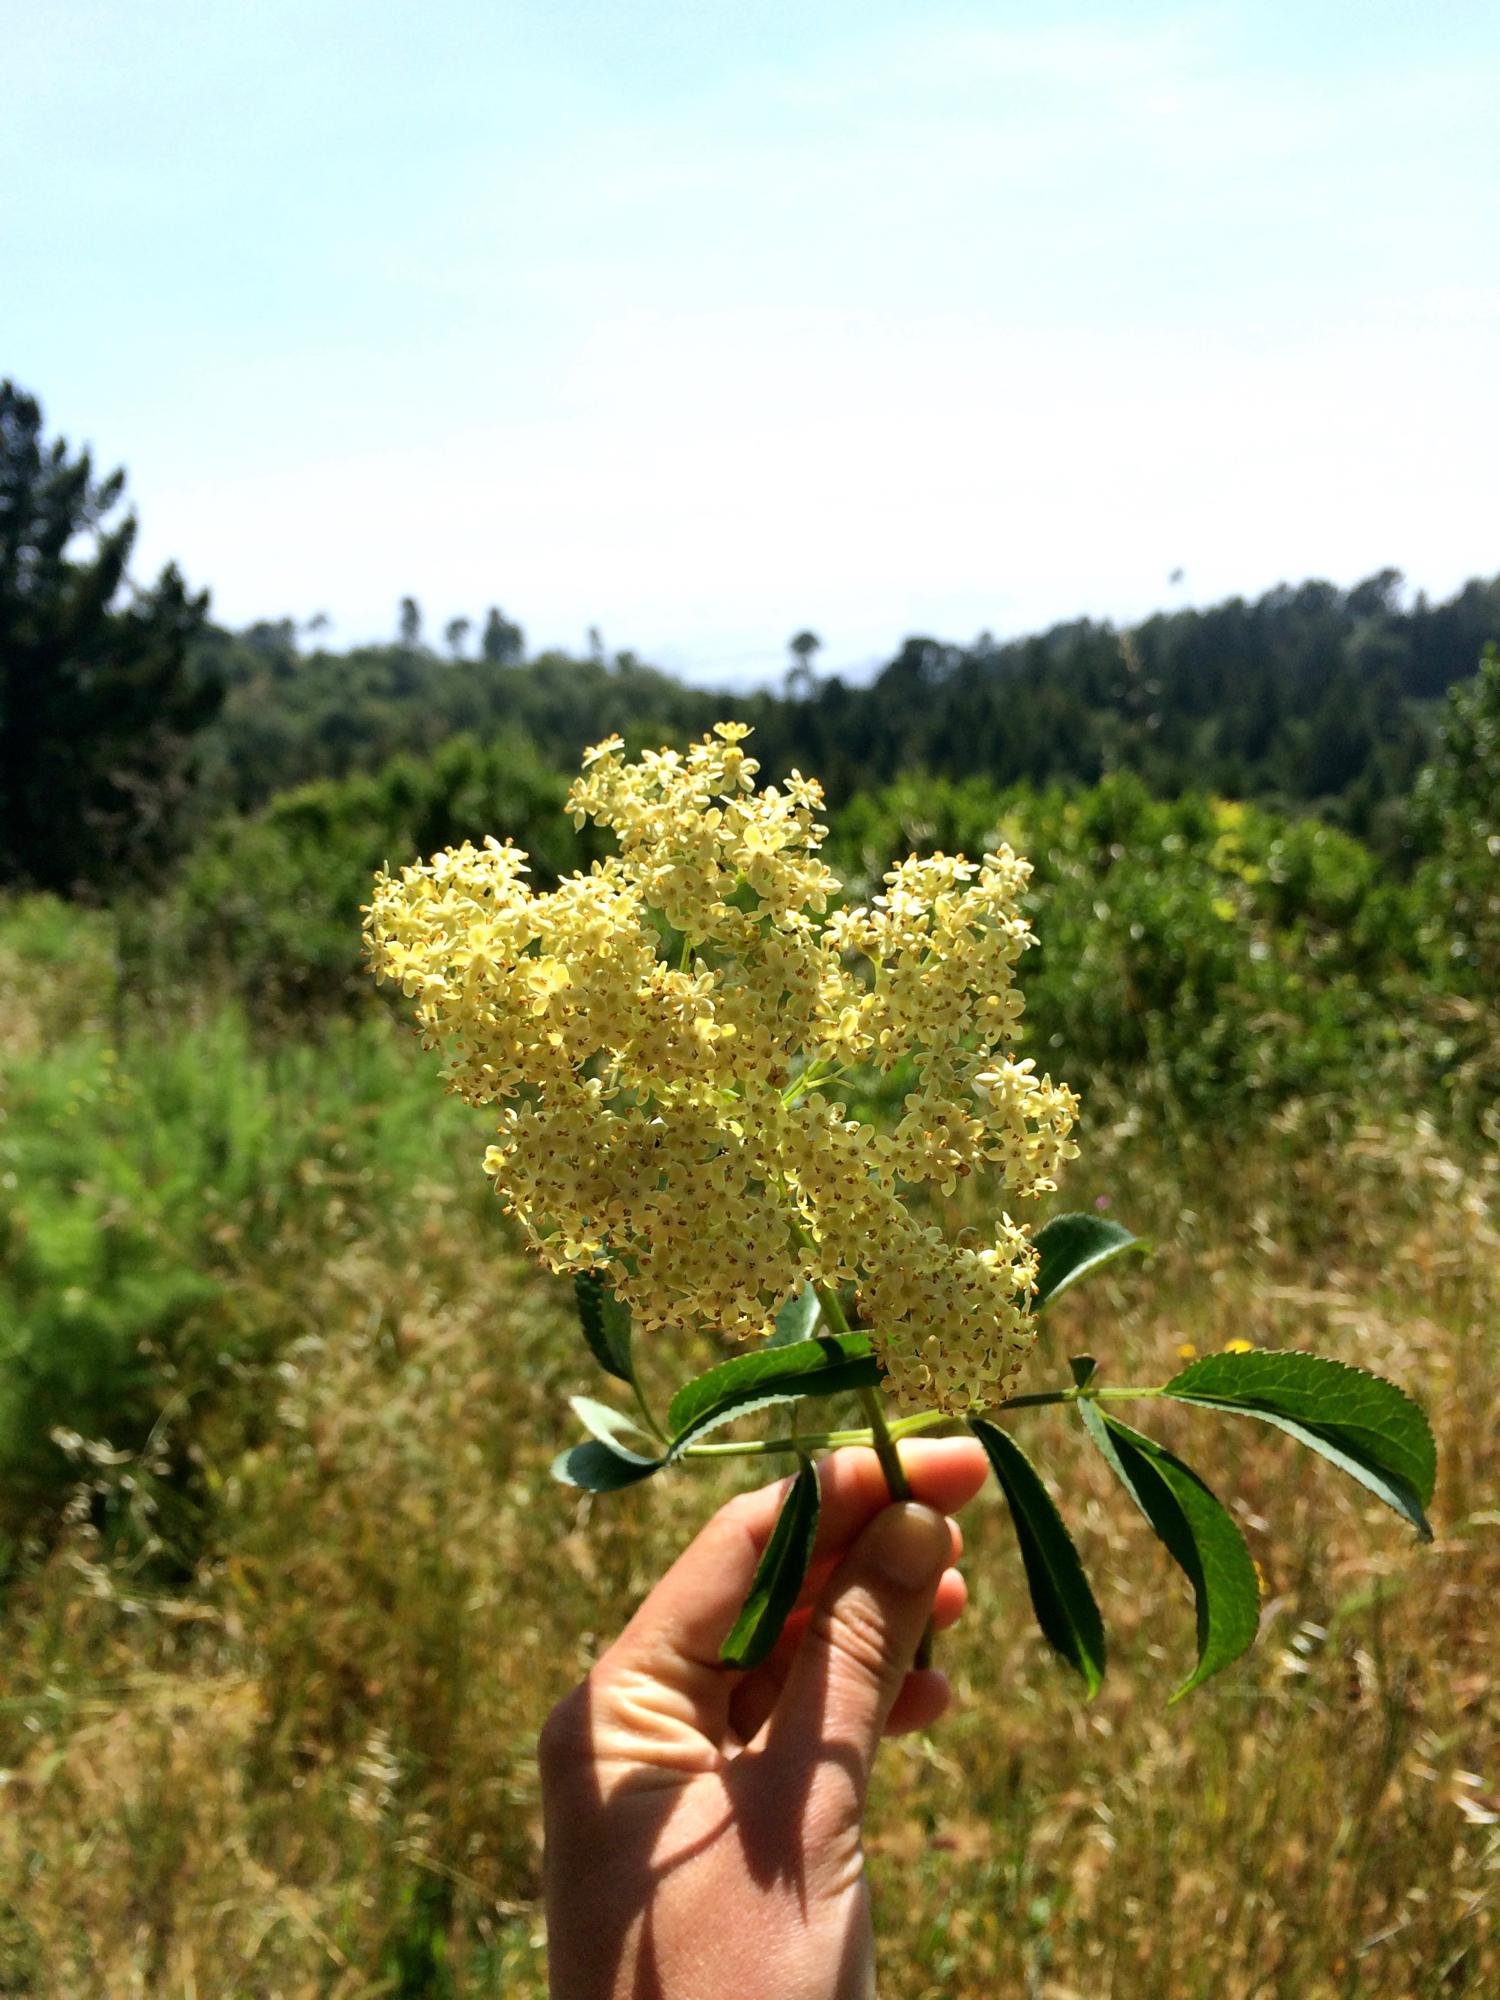
Elderflower
Harvest May - July.

Elderberry
Harvest July - September.
3/4 cup unsalted butter, room temperature
3/4 cup granulated sugar
4 eggs
2 tablespoons plain yogurt
6 tablespoons elderflower cordial (see Edible East Bay Summer 2016 issue for recipe or use St.Germaine or any other sweet syrup), divided
1 cup all-purpose flour
3/4 cup almond meal
2 teaspoons baking powder
3/4 teaspoons salt
2 cups fresh elderberries, washed and dried (may be previously frozen, can use other berries if needed)
1 cup whipped cream or crème fraîche (optional)
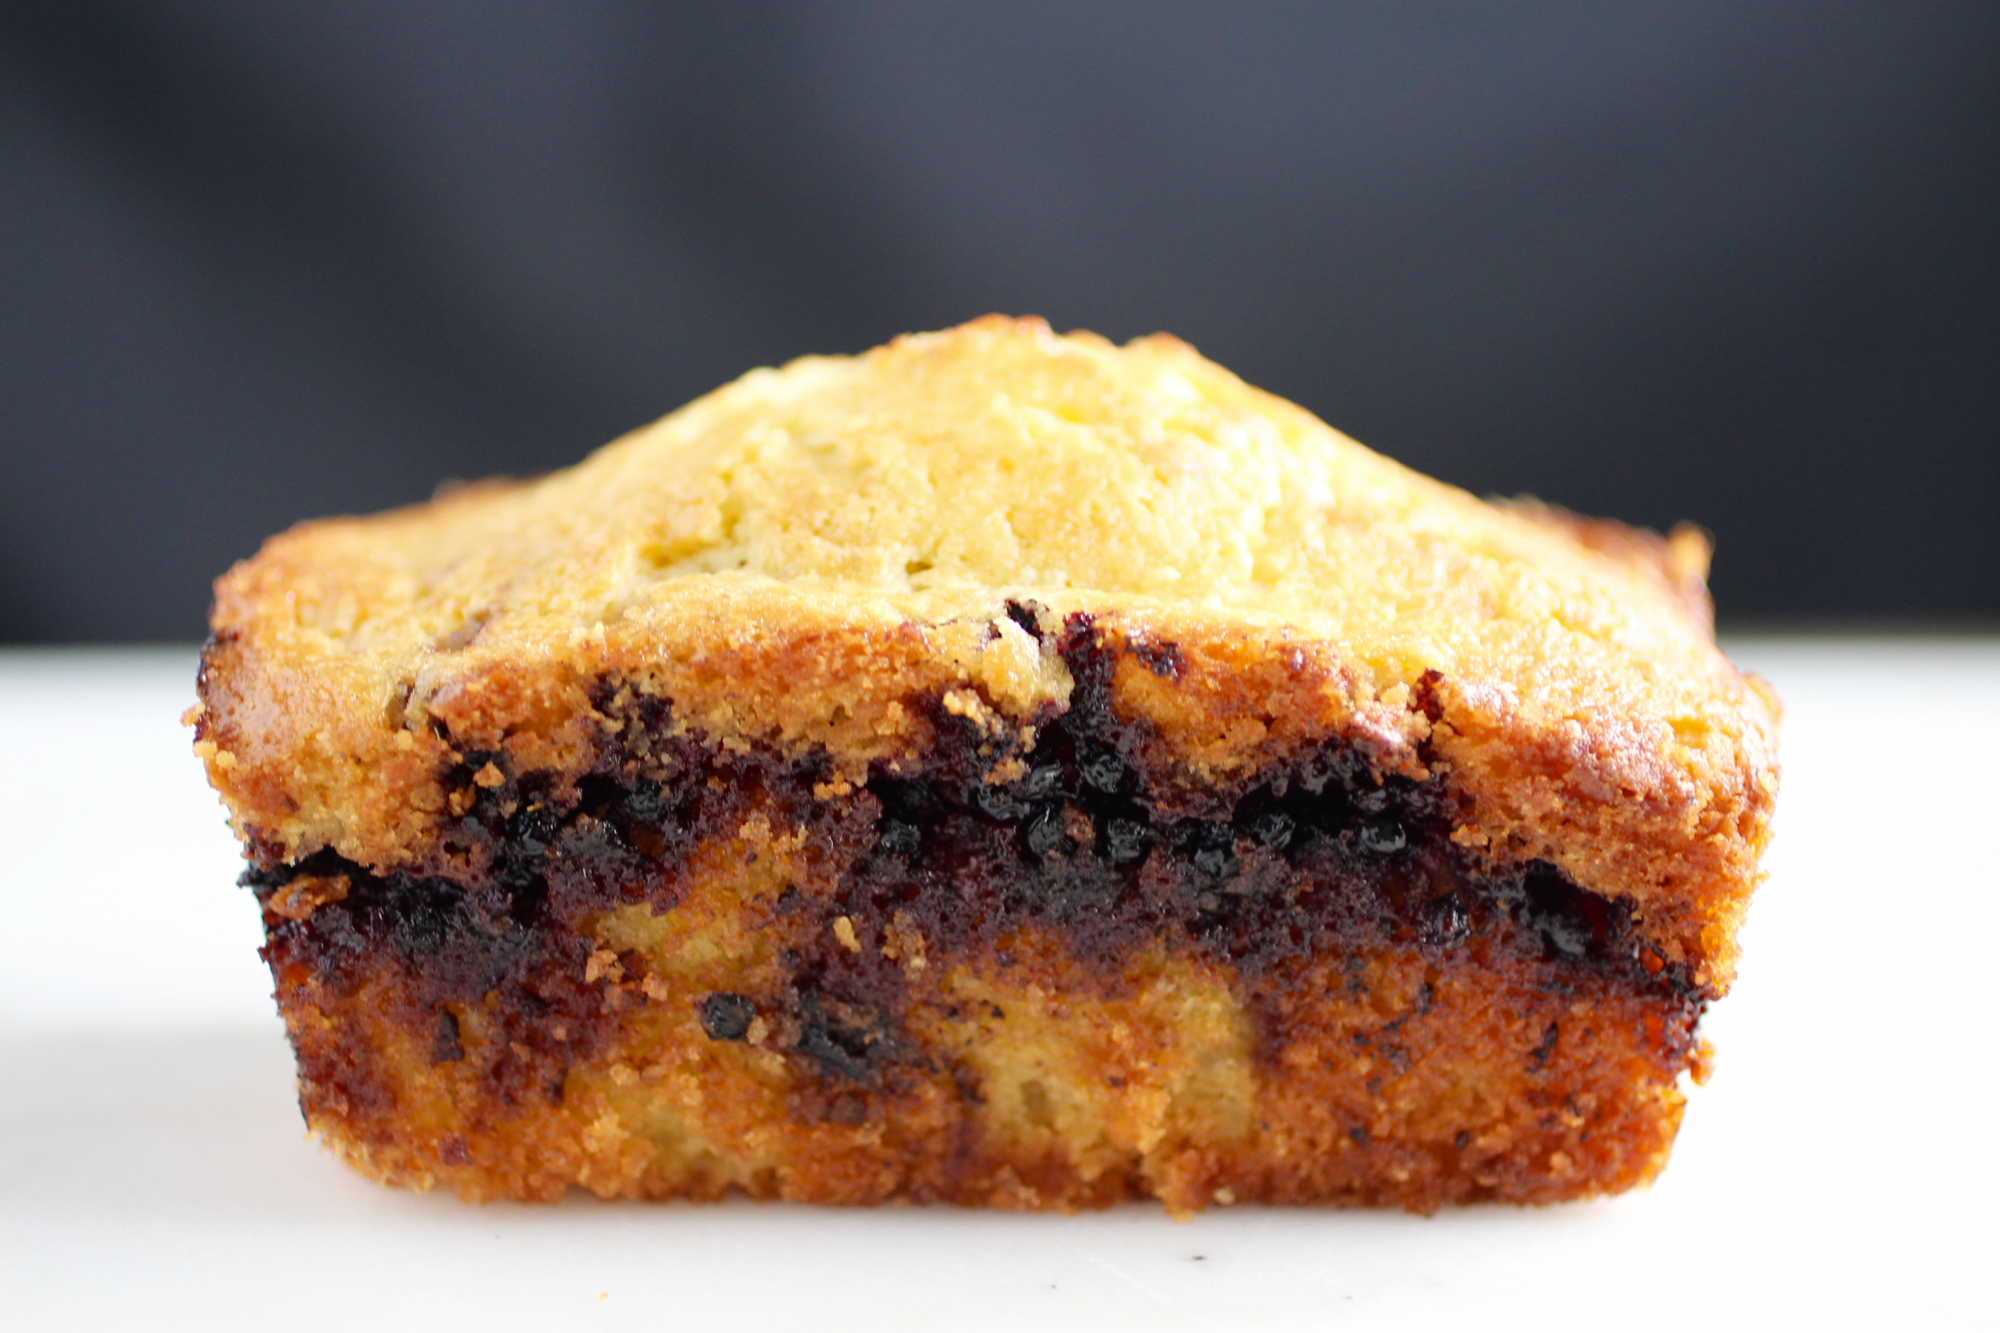
The line of elderberries in this pound cake is delicious as it is visually appealing.
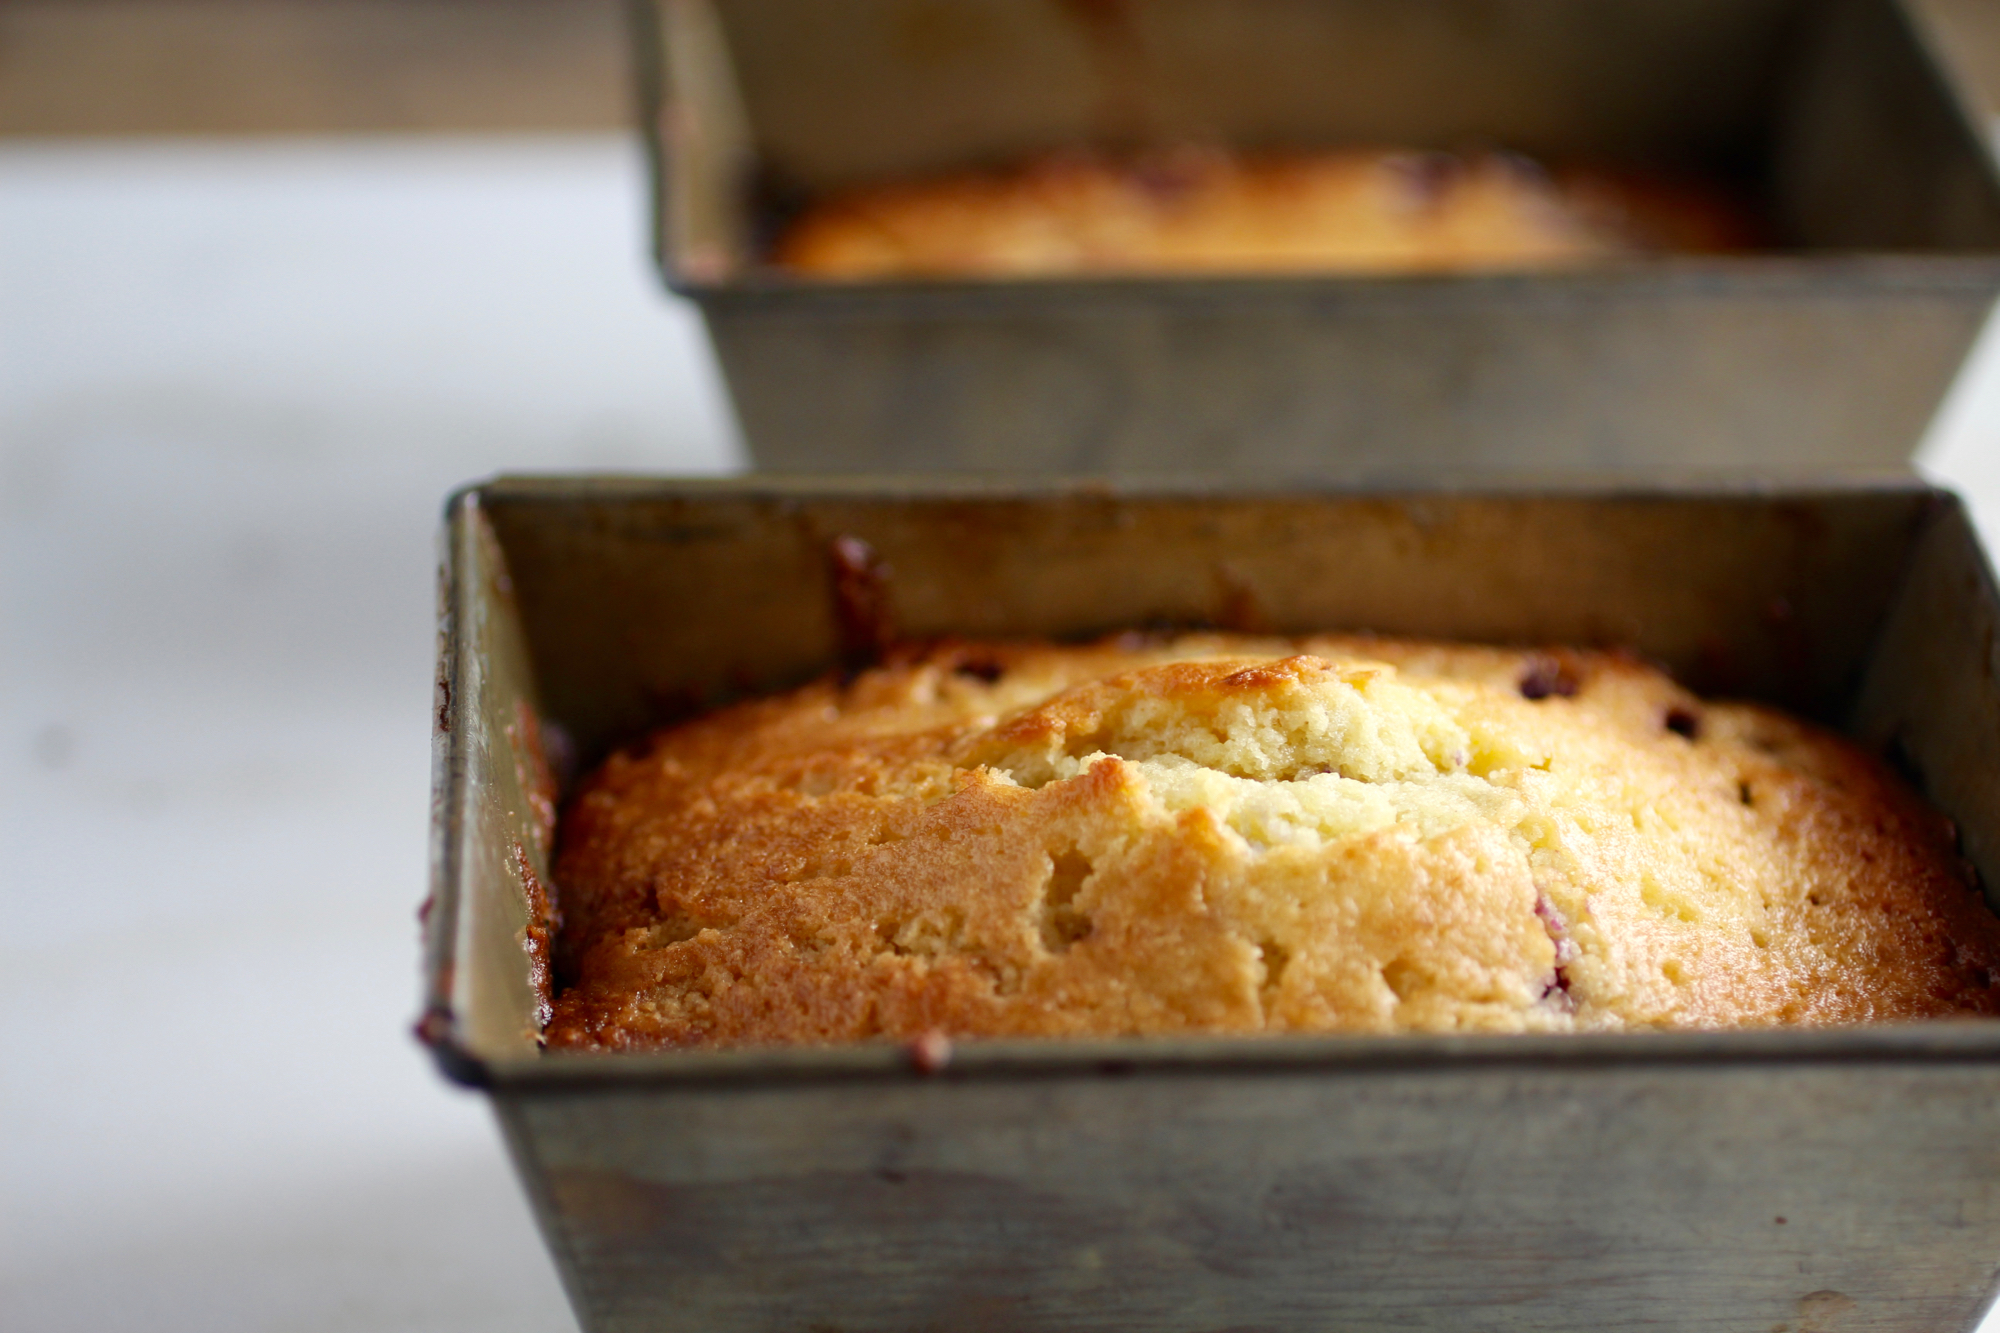
Grease one 9 by 5-inch loaf pan (or 4 mini loaf pans) and preheat the oven to 350 degrees F.
Cream the butter and granulated sugar until they are light and fluffy. Beat in the eggs one at a time then incorporate the yogurt and 3 tablespoons of the elderflower cordial.
Wait for a golden crust and clean toothpick.
In a separate bowl, mix together the flour, almond meal, baking powder, and salt and slowly whisk this into the wet mixture until incorporated. Pour half of the batter into the greased loaf pan(s). Toss elderberries with remaining 3 tablespoons elderflower cordial and spread evenly over the batter in the loaf pan(s), followed by the remaining batter. Bake for 1 hour or 30 minutes if using the mini loaf pans. Cake is done when top reaches a golden brown and a toothpick comes out clean. Remove from oven and allow to cool.
Remove cake(s) from loaf pan(s), slice into pieces to reveal berry layer, and serve with optional whipped cream or crème fraîche.
Mini loaf pans or a standard 9x5-inch loaf pan can be used. Serve with whipped cream or crème fraîche (optional).
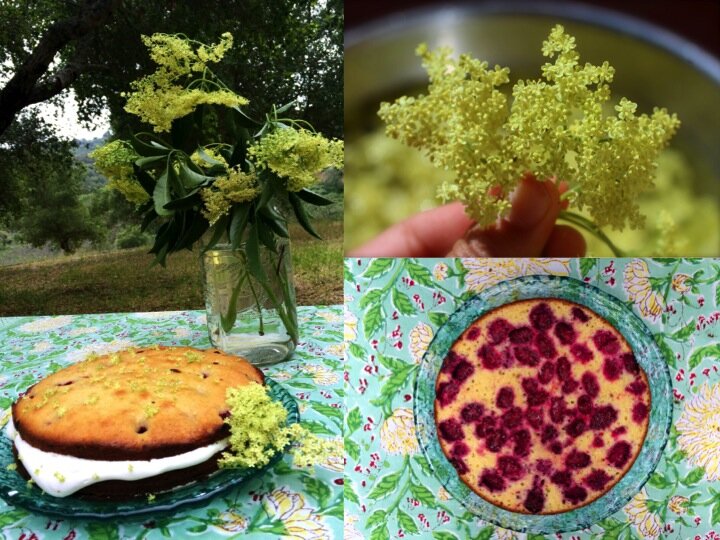
Classic Elderflower Cordial & Elderflower berry birthday cake
Bring the spring to any beverage or dessert.

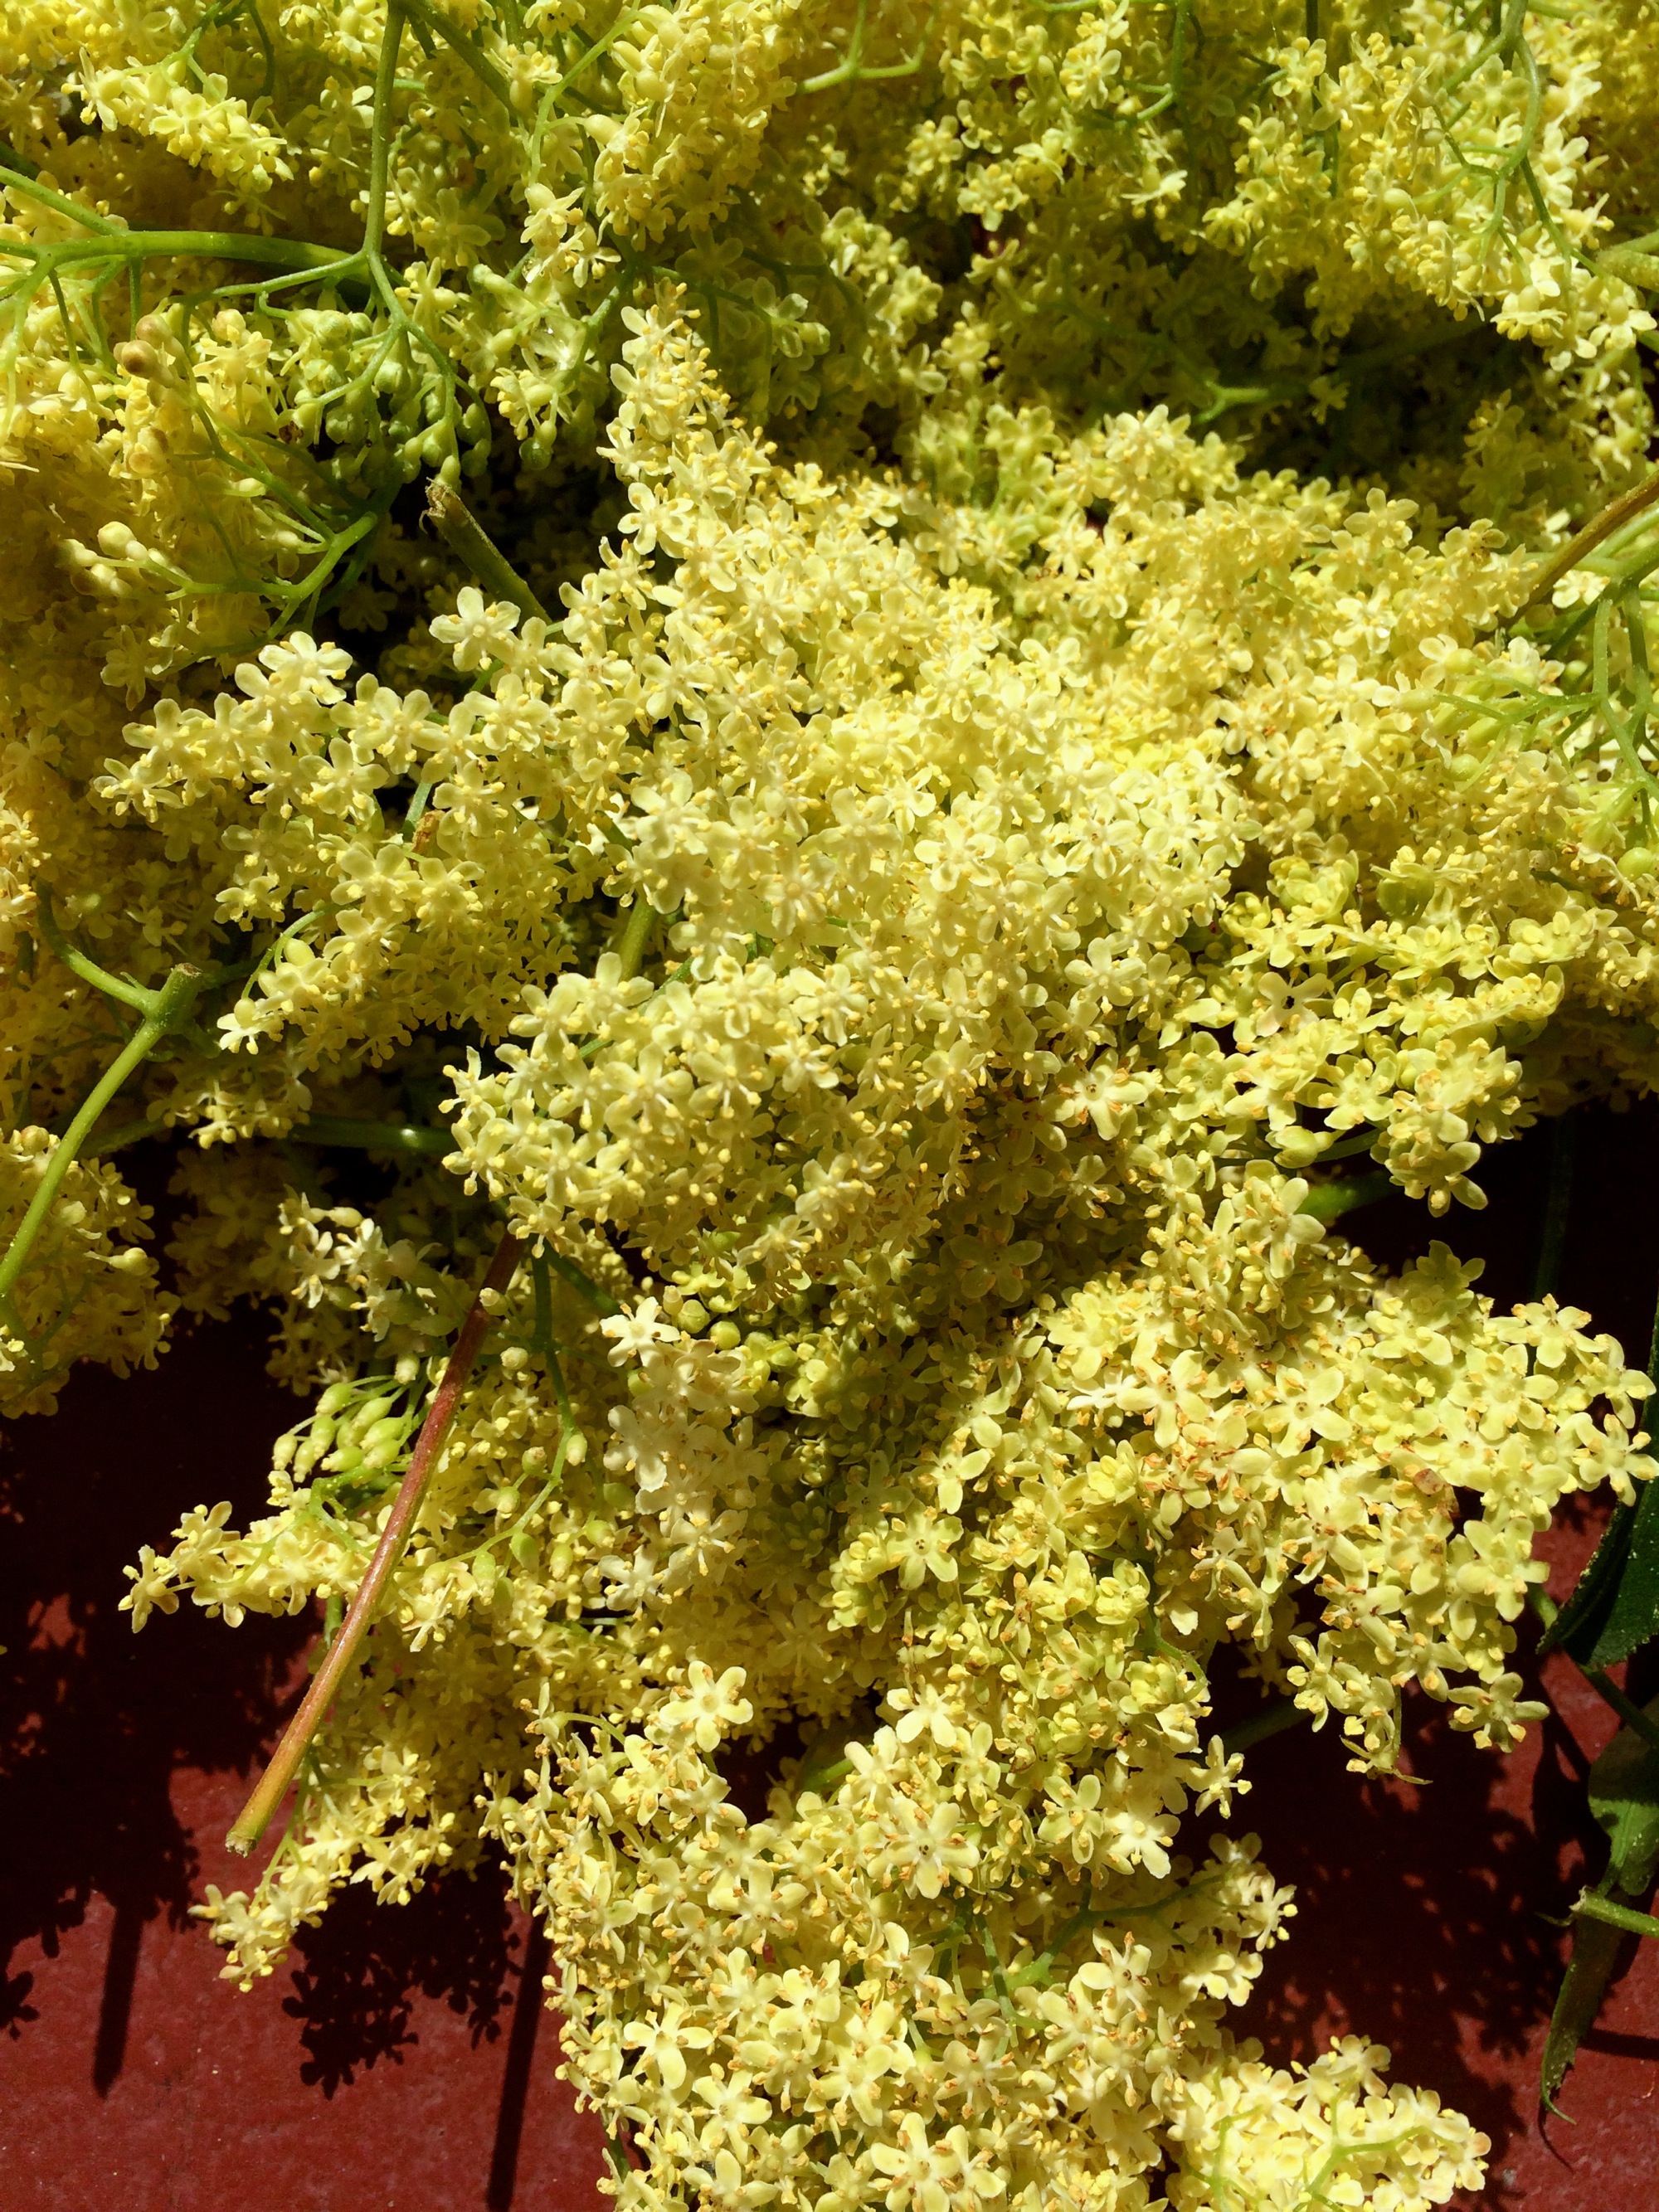
Any search for the culinary uses of elderflower will pull up elderflower cordial. By cooking the flower head in what is essentially a diluted simple syrup, you can pretty easily preserve its fragrance for future use. Which is great, because elderflower is an amazing, special plant that deserves to be savored. The most common way to enjoy elderflower cordial is by using it in cocktails (gin, elderflower, and lemon, is a tasty simple classic) or adding a bit to sparkling wine or even sparkling water for a nice kid-friendly afternoon refreshment. I also love drizzling elderflower cordial over any dessert for a quick and easy way to make that dessert oh-so-special (such as for my huckleberry-elderflower birthday cake below).
Elderflower cordial: Makes about 1 liter.
20 medium elderflower heads (about 2-3'' across)
Grated zest of 2 lemons
Juice of 2 lemons
4 cups water
3.5 cups sugar
Note: Some recipes call for citric acid (about 1 teaspoon for this batch), which helps the cordial keep for longer.
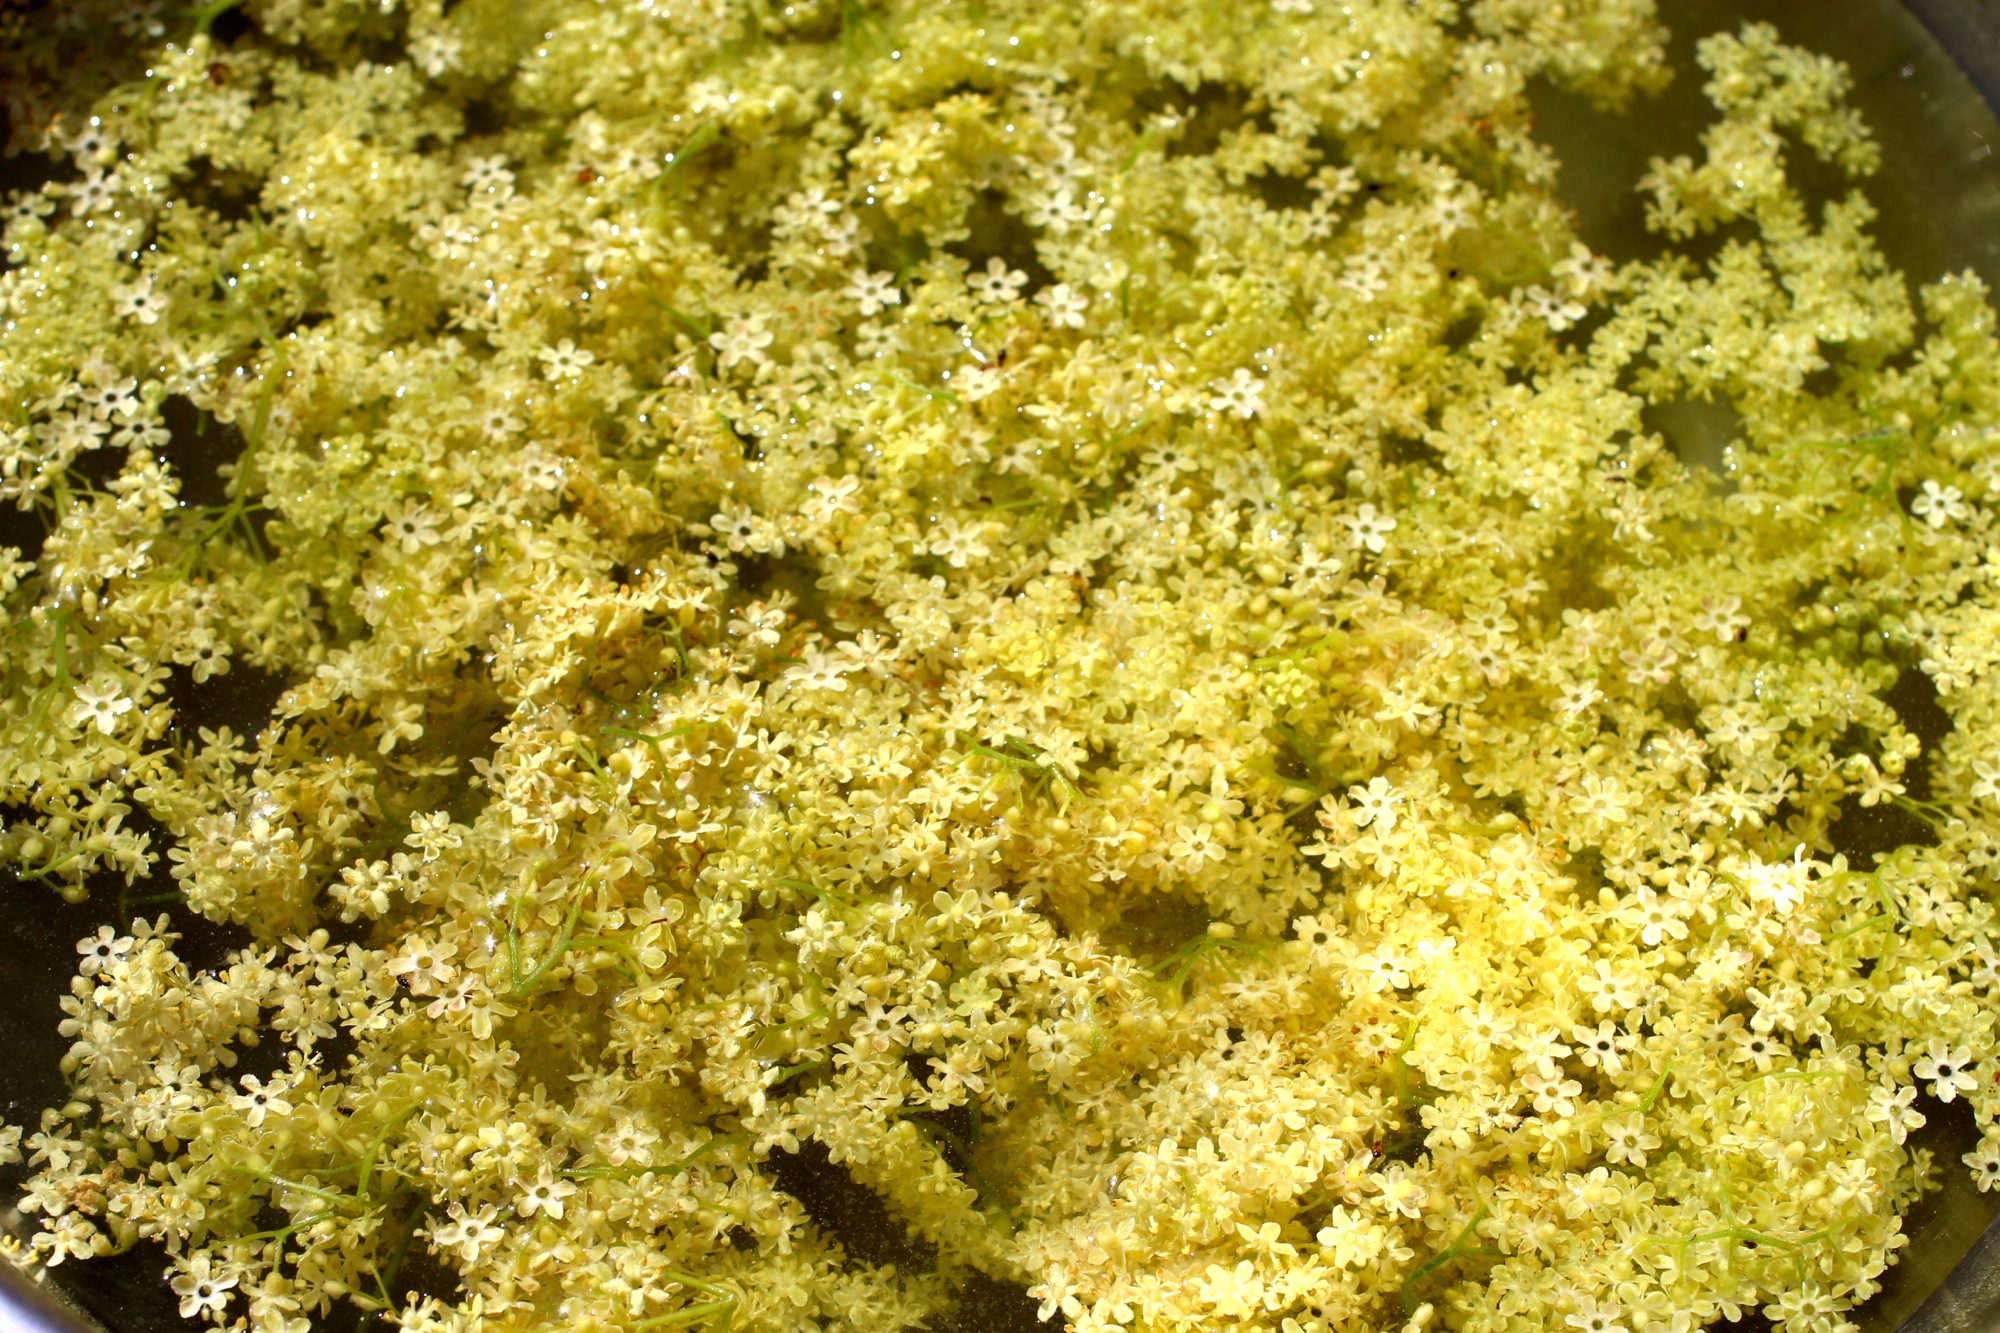
Infusing water with elderflower essence.
Inspect the elderflower heads carefully and remove any insects. Remove flowers from most of stems (especially the large ones), wash by quickly submerging in cold water, and drain. Place the flower heads in a large bowl together with the lemon zest.
Bring water to the boil and pour over the elderflowers and citrus zest. Cover and leave overnight to infuse.
Strain the liquid through cheesecloth and pour into a saucepan. Add the sugar and the lemon juice. Heat gently to dissolve the sugar, then bring to a simmer and cook for 2-3 minutes.
Use a funnel to pour the hot syrup into sterilized bottles and seal with a sterilized cap or cork. Bottles can be sterilized by washing with soapy water then plunging into boiling water for 5 minutes and allowing to air dry.
Allow to cool then store in the refrigerator or freezer. Cordial will keep in the fridge for 2 weeks and in the freezer for 1 year. I like to freeze the cordial in smaller batches so I can use it as needed.
Elderflower-Mulberry Birthday Cake: Serves 12.
Bottom half of the cake has been drizzled with cordial and is about to be spread with tart whipped cream.
For my birthday last weekend, I had an inkling to make a cake infused with elderflower cordial, but had a hard time deciding exactly what else to include - apricots and almonds? loquats and honey? lemon and poppyseed? Spring is a fun time to daydream about desserts! While walking through my surprisingly abundant neighborhood however, I was lucky enough to stumble upon some mulberries, which helped to complete my vision. My birthday party was a campout and the cake held up nicely for several hours, even though I was impatient and made the tart whipped cream earlier than necessary:) My photos do not show the final spread of whipped cream on the top, as it was too dark for photos when I added this piece.
1/2 cup plus 5 tablespoons unsalted butter, room temperature
3/4 cup plus 2 tablespoons granulated sugar
4 eggs
2 tablespoons yogurt
3 tablespoons plus up to 3/4 cup elderflower cordial
1 cup all-purpose flour
1/2 cup almond meal
2 teaspoons baking powder
3/4 teaspoons salt
2 cups fresh mulberries, washed and dried
3/4 cup whipping cream
1/2 cup crème fraîche
1/2 teaspoon vanilla extract
Grease a 9-inch springform pan and preheat the oven to 350 degrees F.
Cream the butter and 3/4 cup sugar in a mixer until they’re light and fluffy. Beat in the eggs one at a time then incorporate the yogurt and 3 tablespoons of the elderflower cordial.
In a separate bowl, mix together the flour, almond meal, baking powder, and salt and slowly whisk this into the wet mixture in 3 batches. Once its fully incorporated, pour half of the batter into the greased springform pan, then spread mulberries evenly over the top, followed by remaining batter and bake for 1 hour. Cake is done when a toothpick comes out clean. Remove from oven and allow to cool.
While cake is baking, beat whipping cream until almost stiff, continue beating as you add in 2 tablespoons sugar and vanilla and then lightly whisk in crème fraîche.
The gorgeous mulberry layer is revealed!
Once cake has cooled, cut in half to make two layers using a large serrated knife. You should be cutting right through the berry layer and at this point, you will be able to see all of the beautiful mulberries hiding inside.
Drizzle up to 1/4 cup of elderflower over the bottom layer and top with half of the tart whipped cream, followed by the other half of the cake. Drizzle up to another 1/4 cup of elderflower (for both of these, it depends on how sweet/moist/elderflowery you want the cake) and spread the other half of the whipped cream over the top. Top with a sprinkling of fresh elderflowers if you have them and drizzle each piece of cake with a little more elderflower cordial before eating.

This version is before the addition of the final tart whipped cream layer.

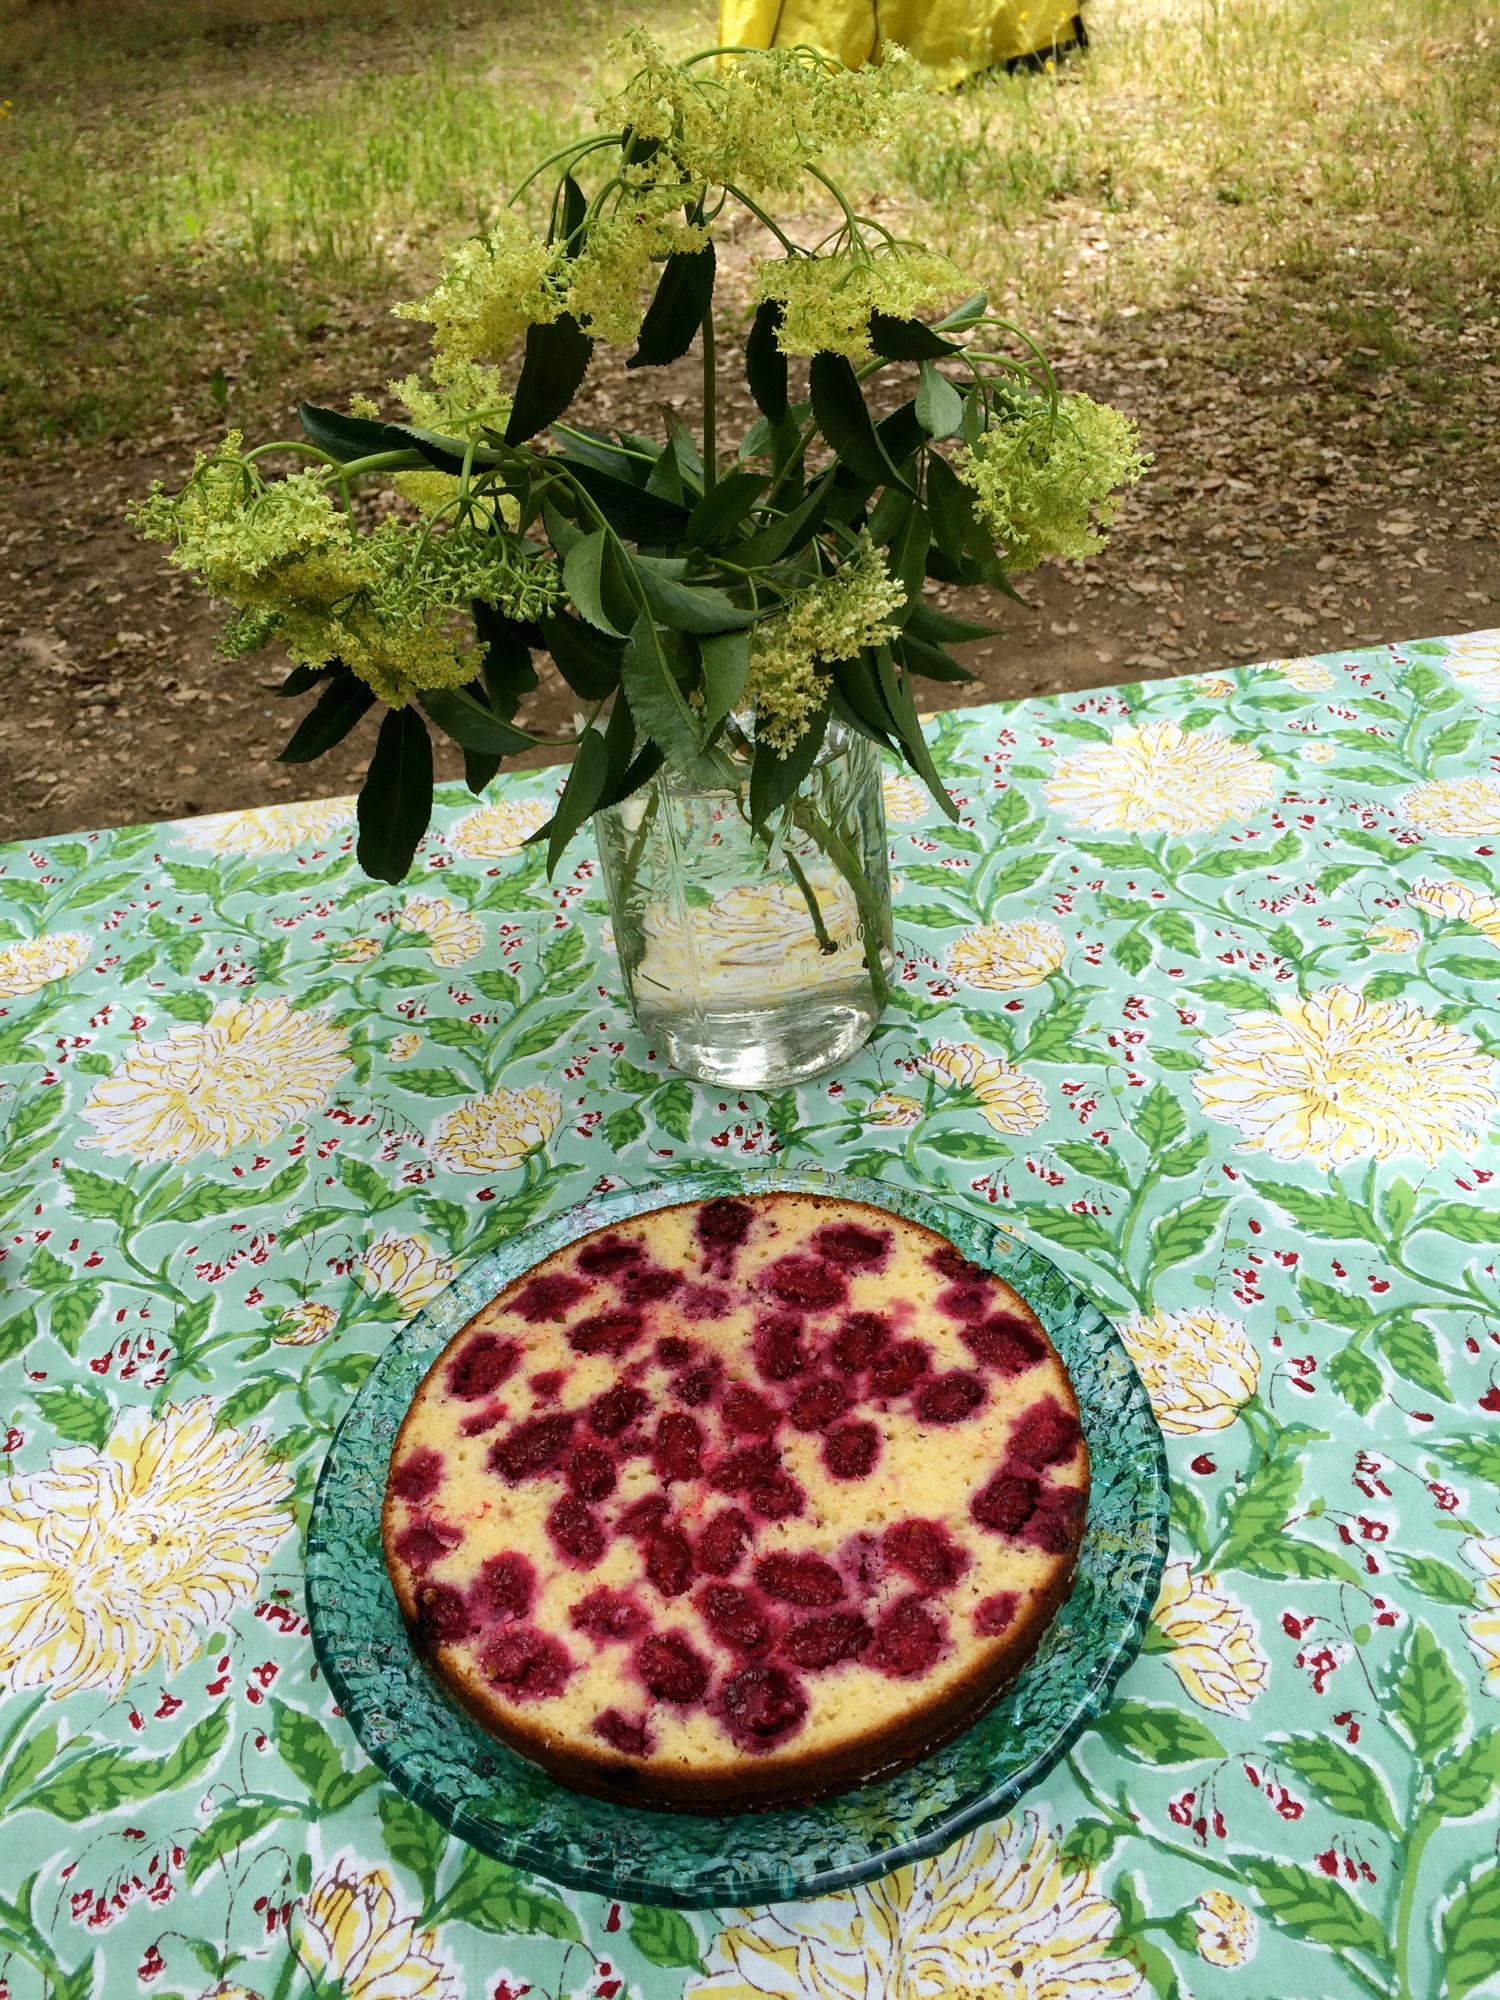
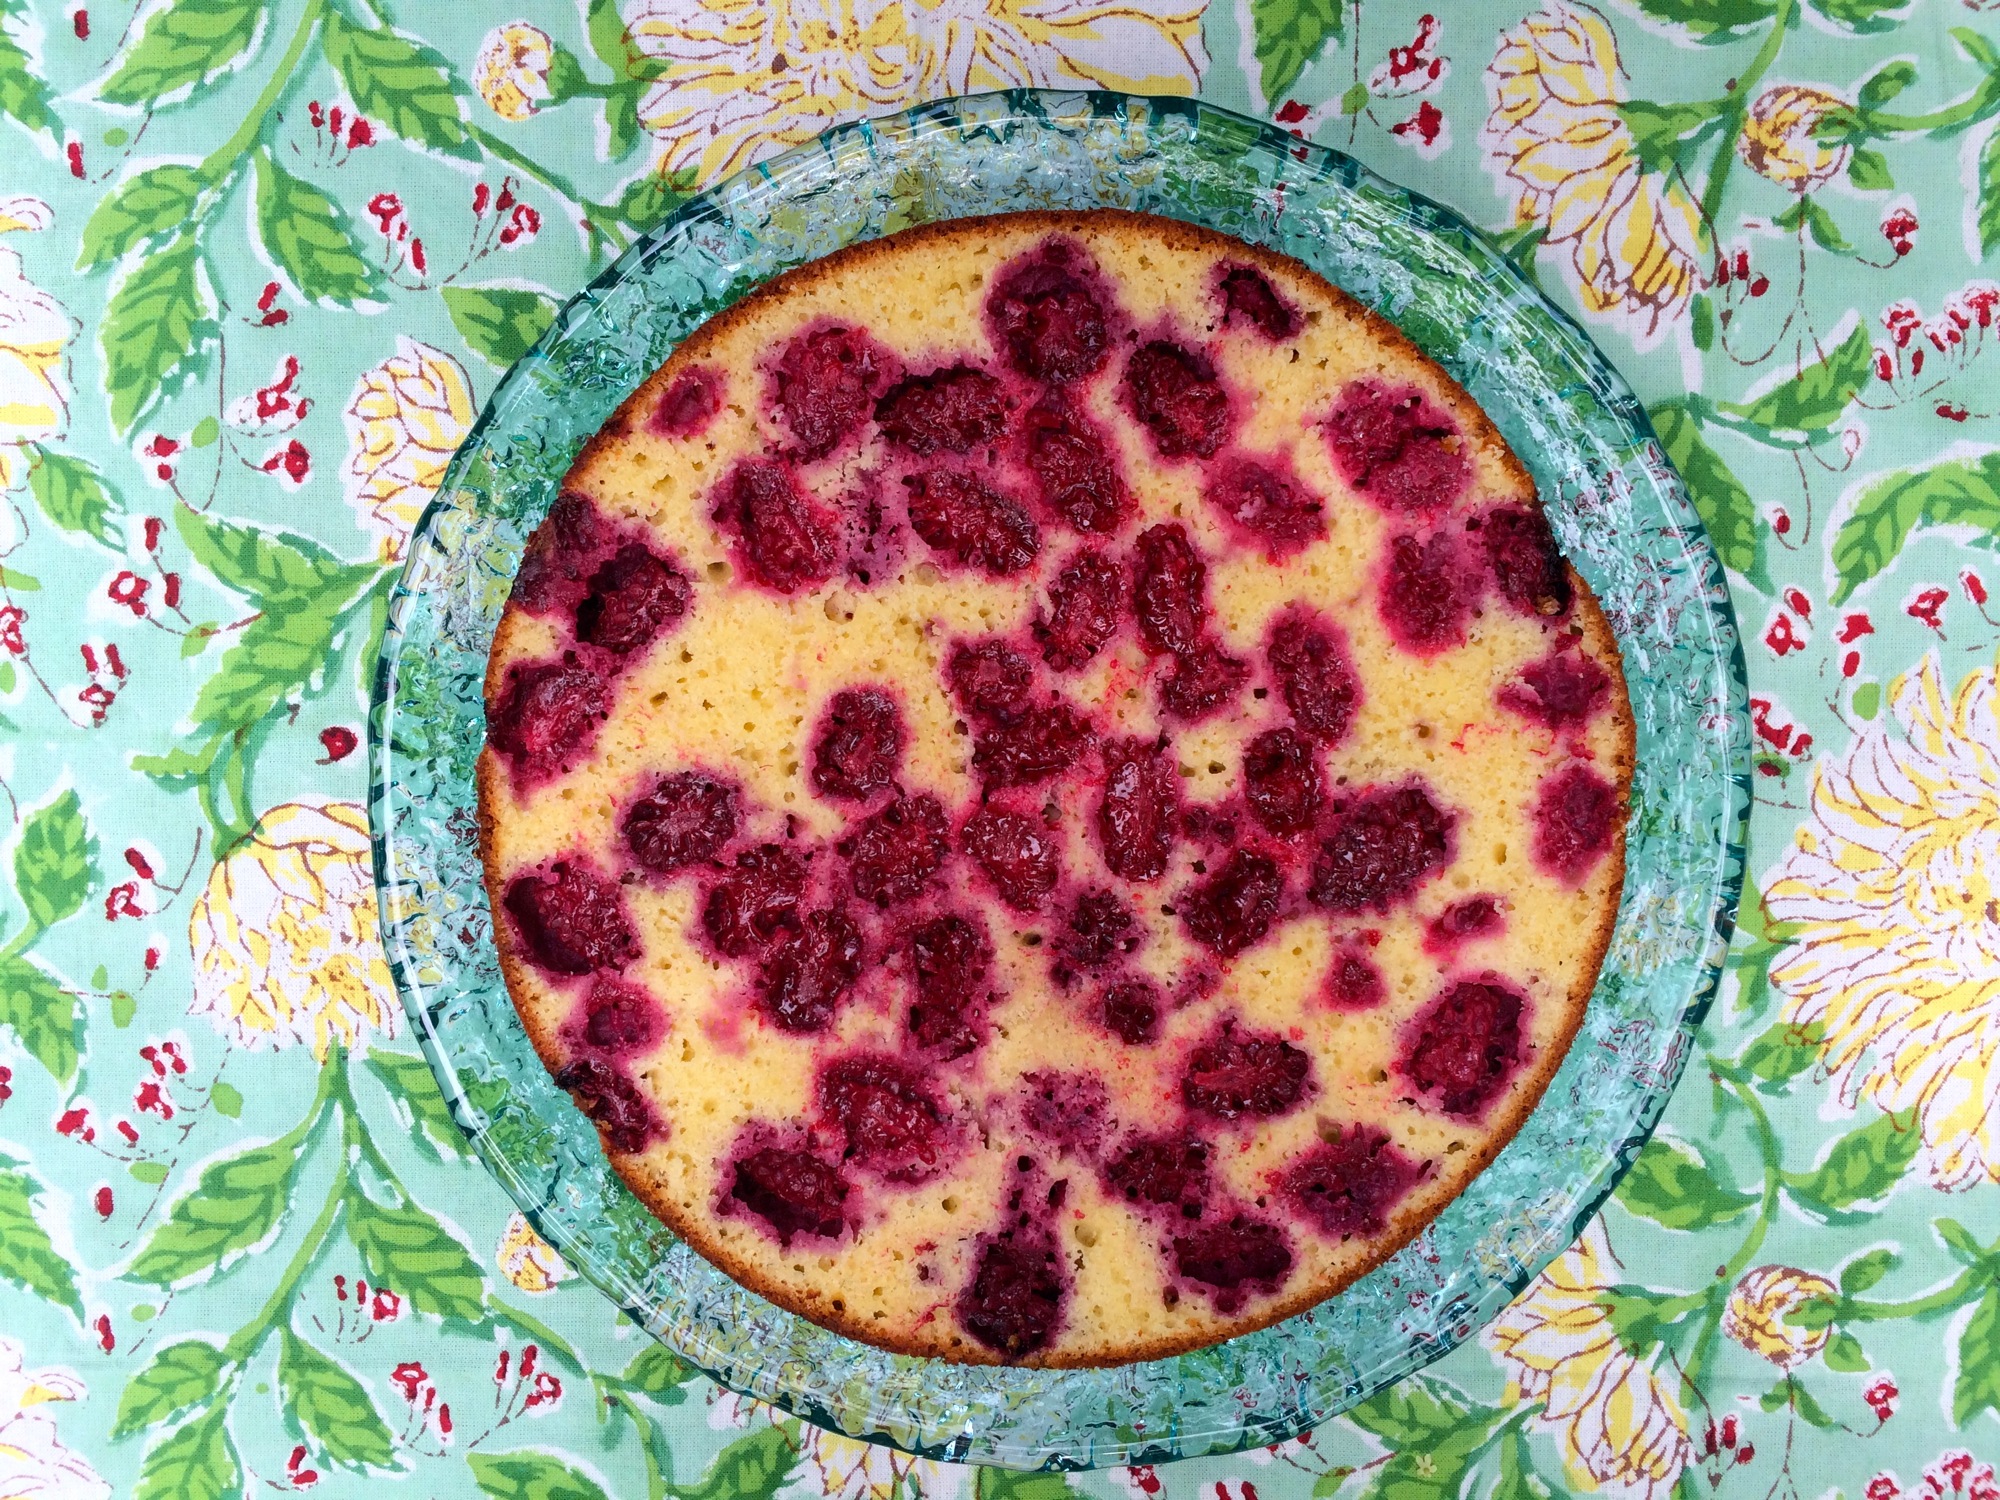
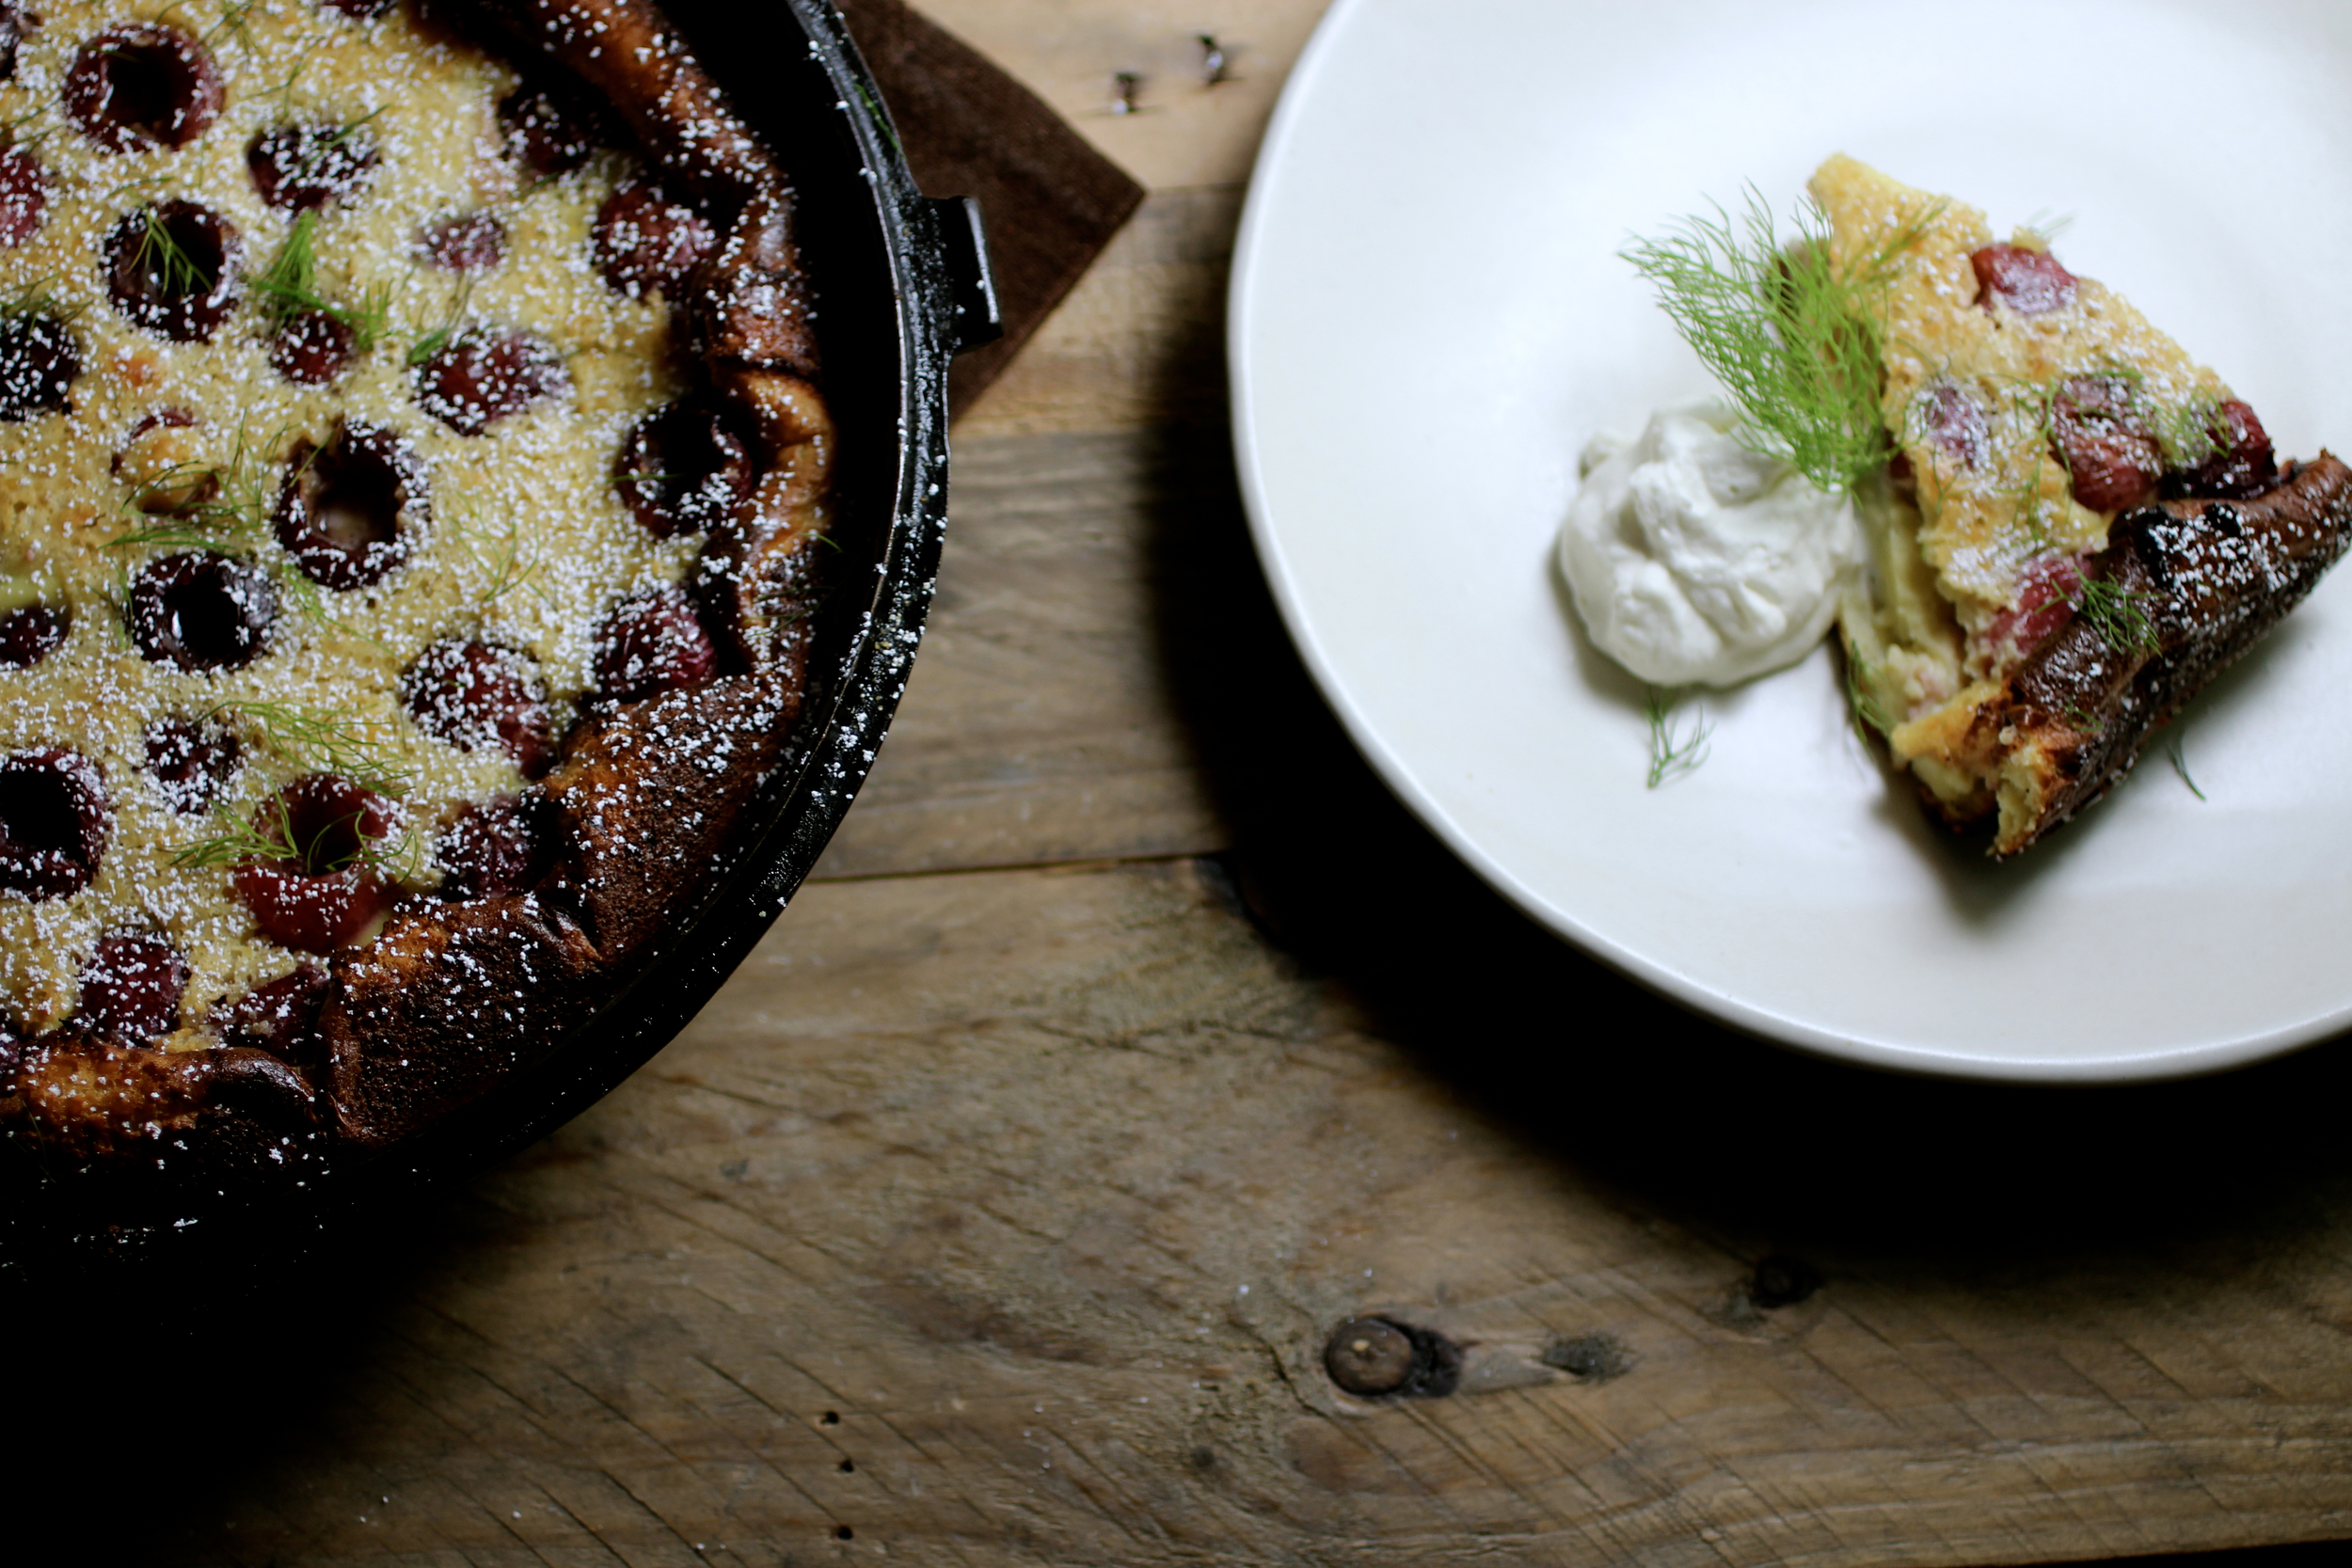
Cherry and Wild Fennel Clafoutis
The easy dessert that doubles as breakfast!

Sometimes, a word for a dish or a food preparation method I have never used will come to me and I will not rest until I have experienced it. That is what happened with "clafoutis" - I have no idea where I was introduced to the word, but after we picked up some cherries on our way back from a wedding in beautiful Los Olivos, all I could think about was making a cherry clafoutis, while at the same time asking myself, "cherry clafoutis is a thing, right?" This is where the internet came in, helpfully proving that cherry clafoutis is, indeed, a thing and although I don't necessary need a reason to make special desserts, my mother was serendipitously visiting for Mother's Day. Using a recipe from Saveur as a base, I decided to decrease the egg because some comments complained of eggy-ness and I tend to shy away from really eggy desserts and include wild fennel (more on wild fennel including foraging here), as cherry and fennel go together in a delightful way.
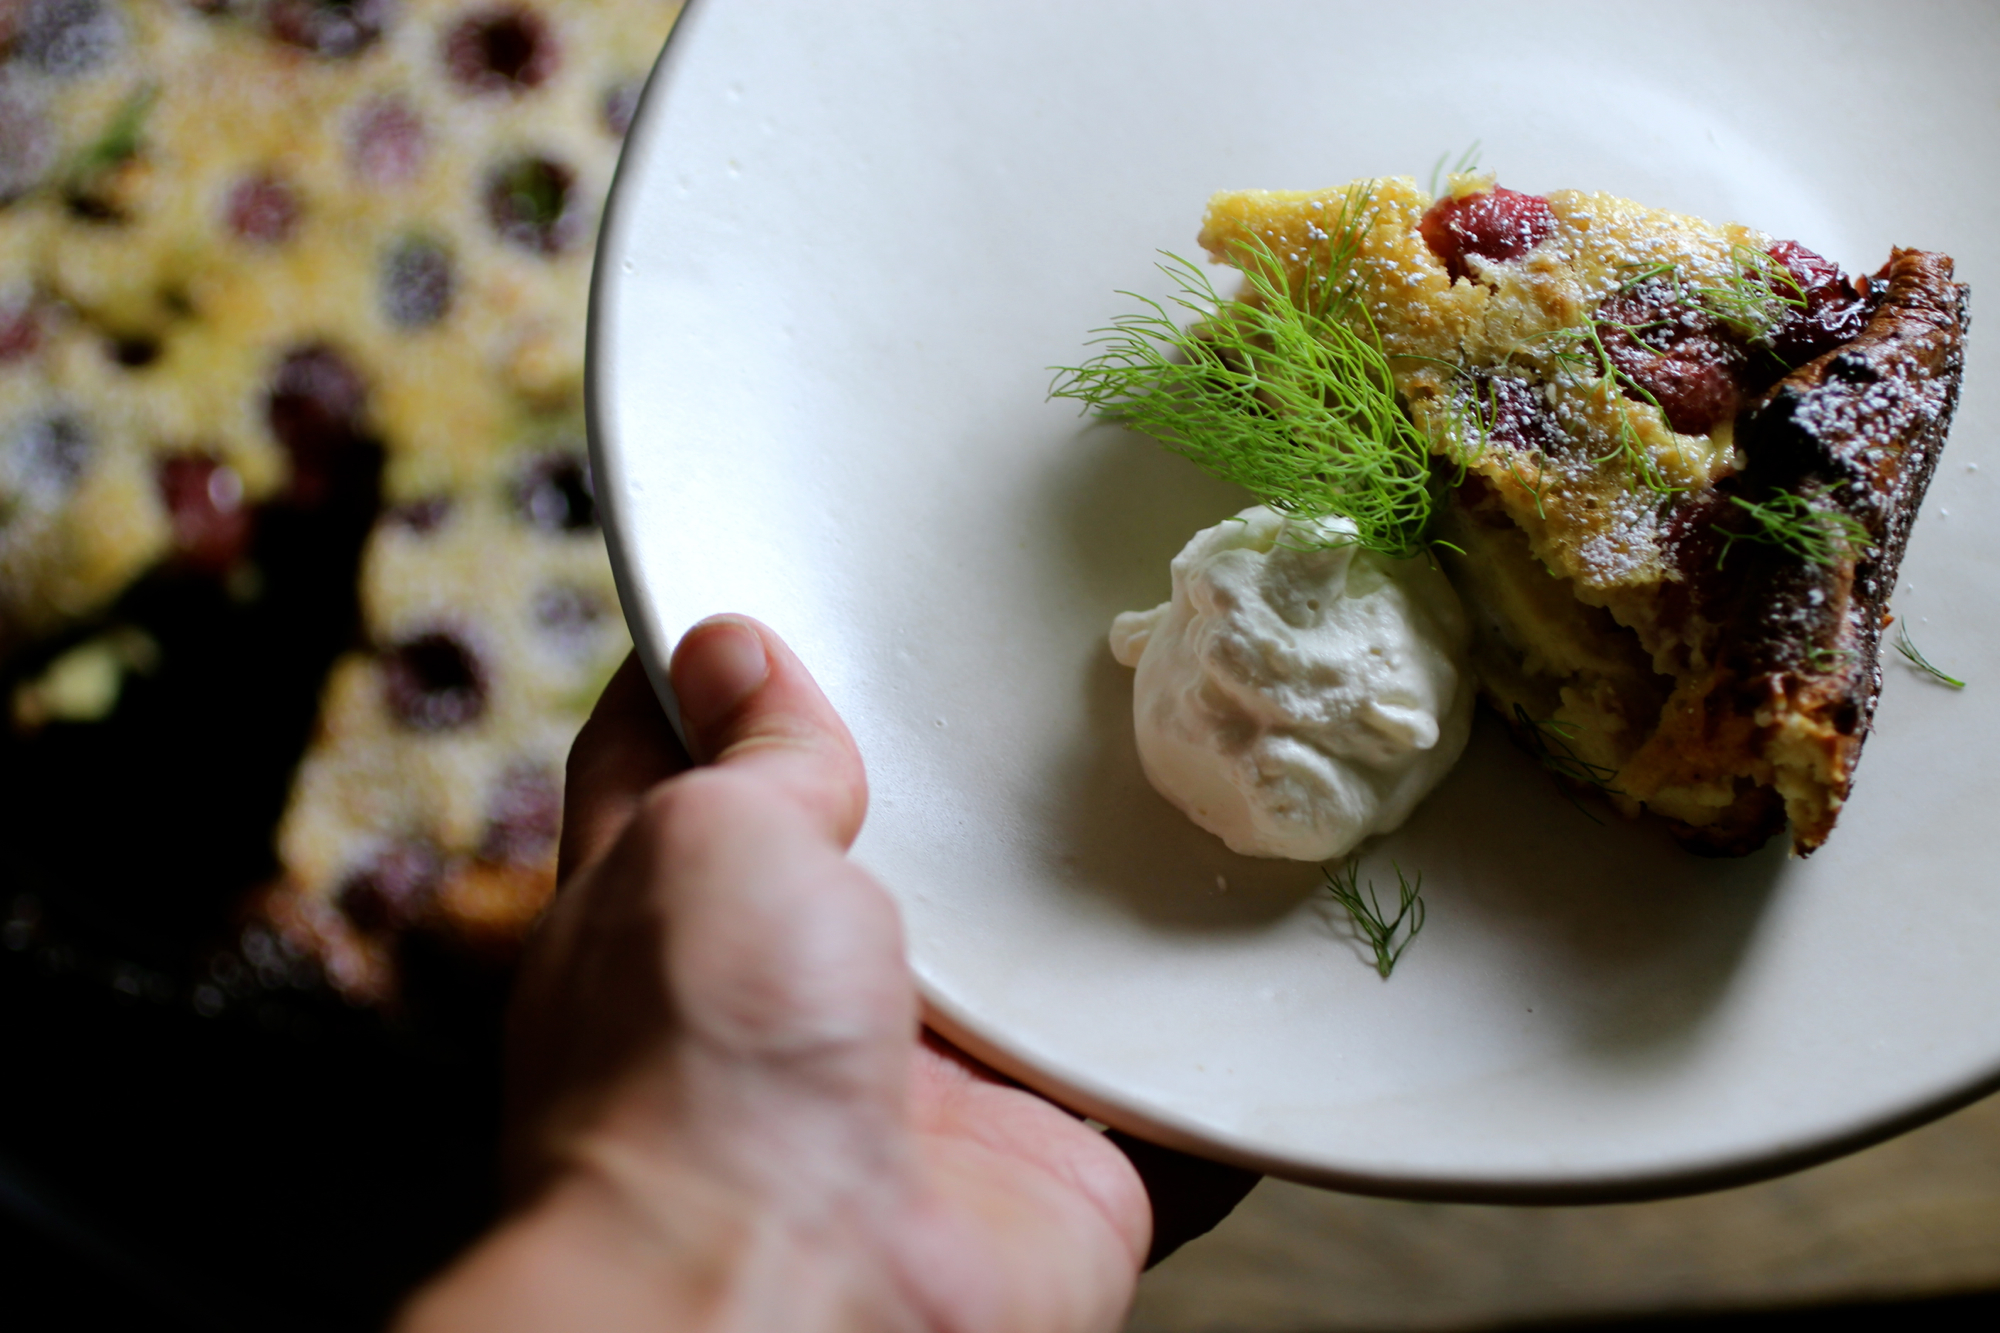
There are a few great things about this dessert. The first is that it's easy - really easy. It's also visually impressive in the cast-iron pan and versatile in ingredient options (apricot + almond? pear + bergamot?) and, because it's not super sweet, it's also versatile in potential eating occasion. We enjoyed it with fennel whipped cream as dessert and again the next day with coffee for brunch and I'm pretty sure no one would turn their nose up to a clafoutis at tea time. So, now you have no excuse - get out there, forage some fennel (which is all over the bay area), buy some cherries, and make this deliciously easy puffed crepe-like cake! Recipe below serves 8.
“Cherries can also be unpitted, which provides a more rustic flavor and texture, but I did not this time, as I knew my mom wouldn’t like it!”
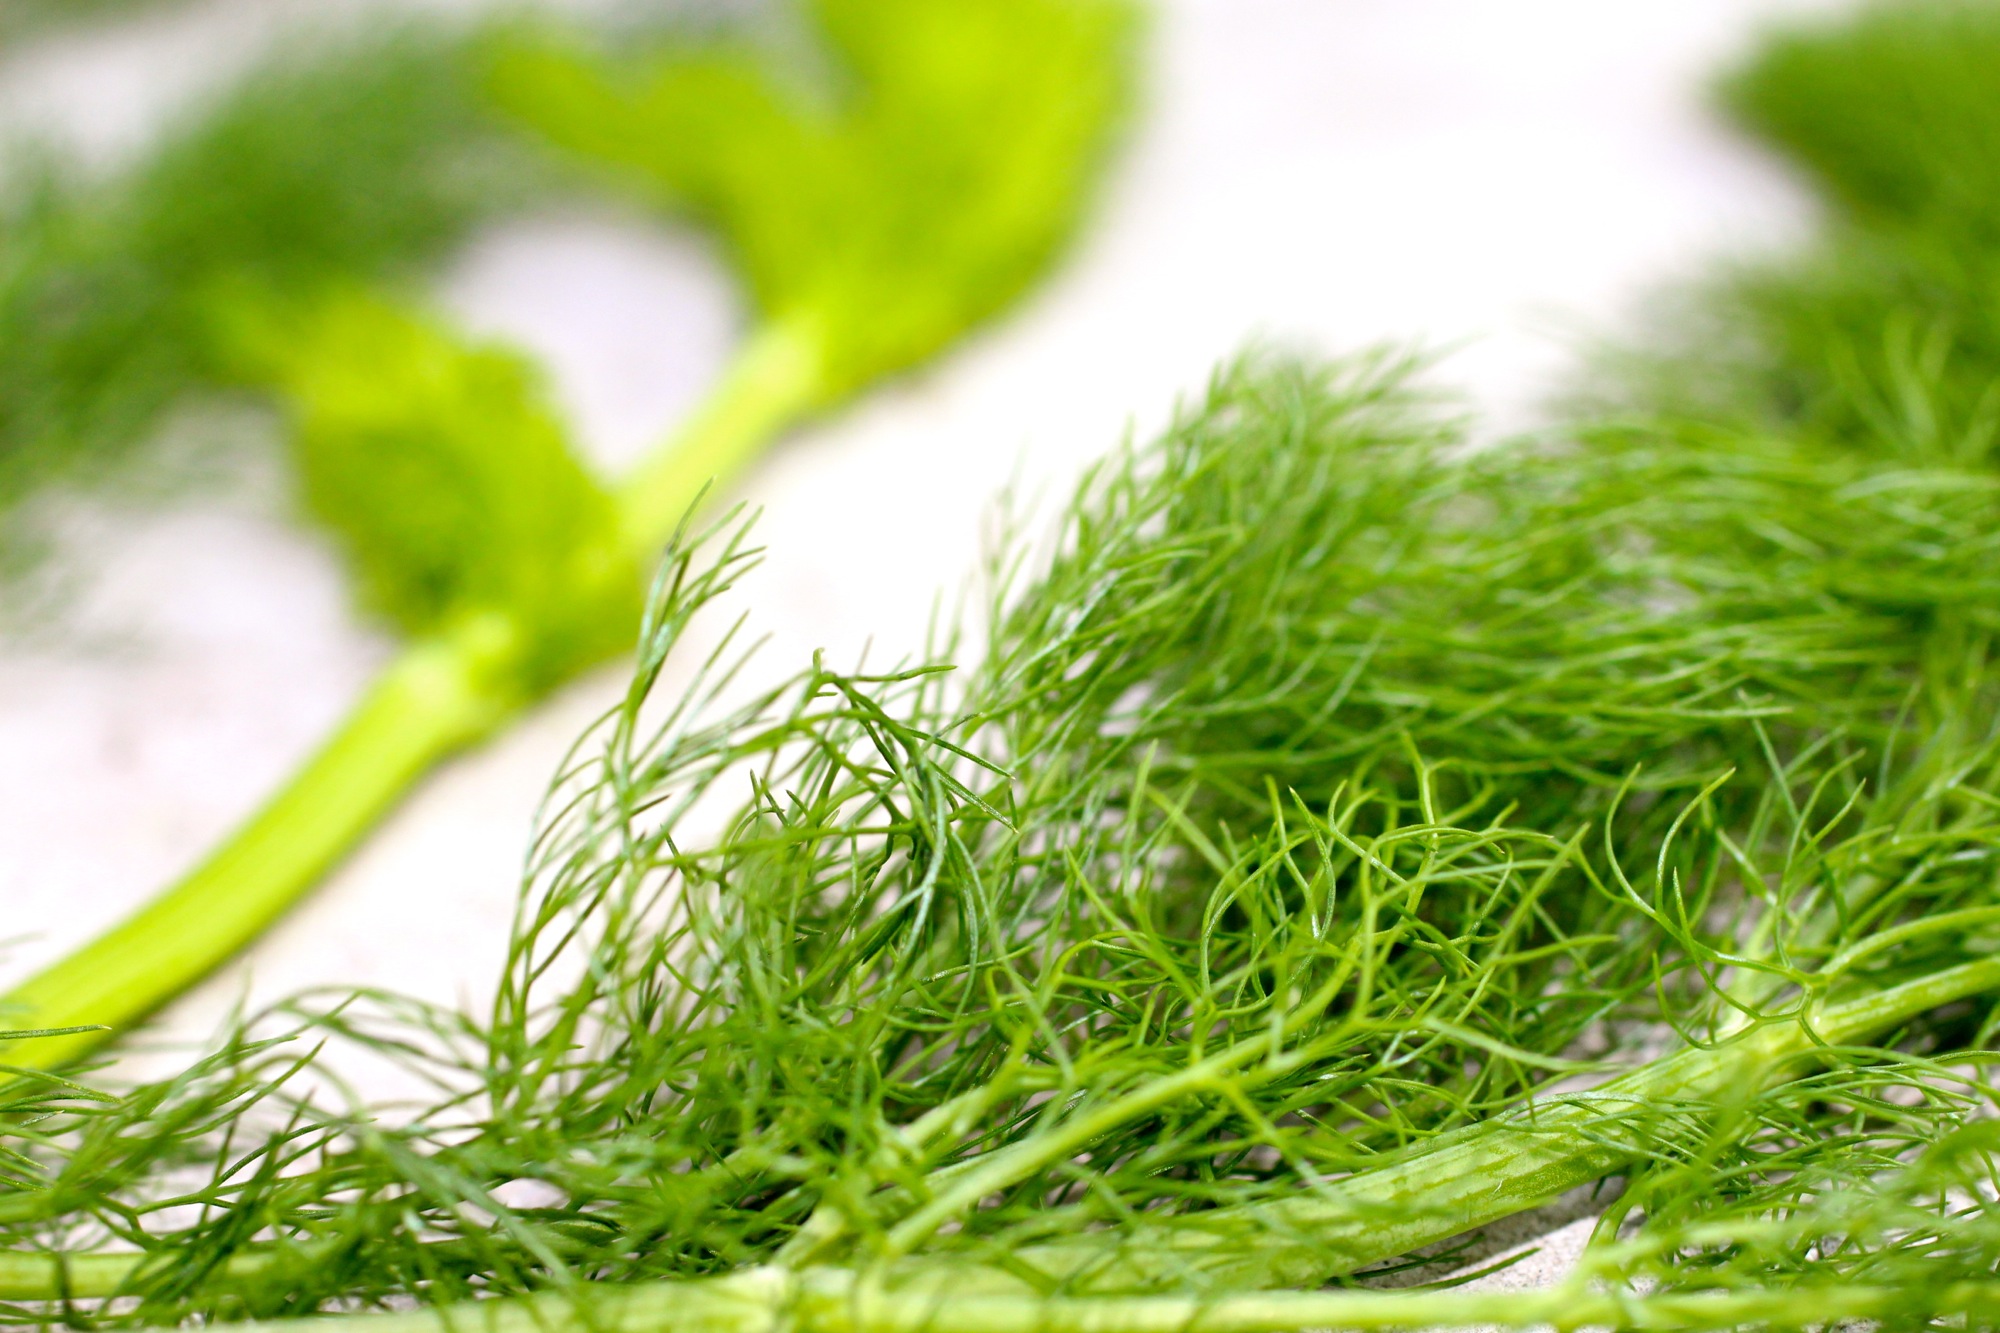
1 cup chopped wild fennel fronds, plus a few fronds for garnish
1/2-1 cup whipping cream, depending on how much your group likes whipped cream (optional)
7-8 tablespoons sugar, divided
1 tablespoon plus 1/2 teaspoon vanilla extract, divided
1/2 tablespoon butter
1-1/4 cups whole milk (can be substituted for a combination of 3 parts reduced fat and 1 part whipping cream, if you happen to have these around like I did)
2 tablespoons kirsch or Luxardo (I had Luxardo, but think it would be better with kirsch)
5 eggs
1/2 teaspoon medium coarse Kosher salt, divided
3/4 cup all-purpose flour
3 cups black or sour cherries, pitted (see post on how to pit cherries like a boss)
Confectioner's sugar, for dusting
Infuse whipped cream with wild fennel by allowing whipping cream to impart fennel flavor overnight.
To make fennel whipped cream: Place 1/2 cup chopped fennel in a mason jar, pour whipped cream over top, cover, and refrigerate overnight. Remove fennel then beat cream until whipped, adding 1-2 tablespoons of sugar and 1/2 teaspoon of vanilla toward the end of beating. Refrigerate until used.
Heat oven to 425 degrees F. Grease a 9'' cast-iron skillet and set aside. Whisk milk, sugar, kirsch or Luxardo, vanilla, eggs, and 1/4 teaspoon salt until combined. Add flour and whisk until smooth, about 30 seconds.
Pour batter into buttered skillet, then distribute cherries evenly over top. Bake until a skewer inserted into batter comes out clean and a golden brown crust has formed on top and bottom of clafoutis, about 25 minutes. Dust with confectioners' sugar and serve with a dollop of fennel whipped cream, if desired.
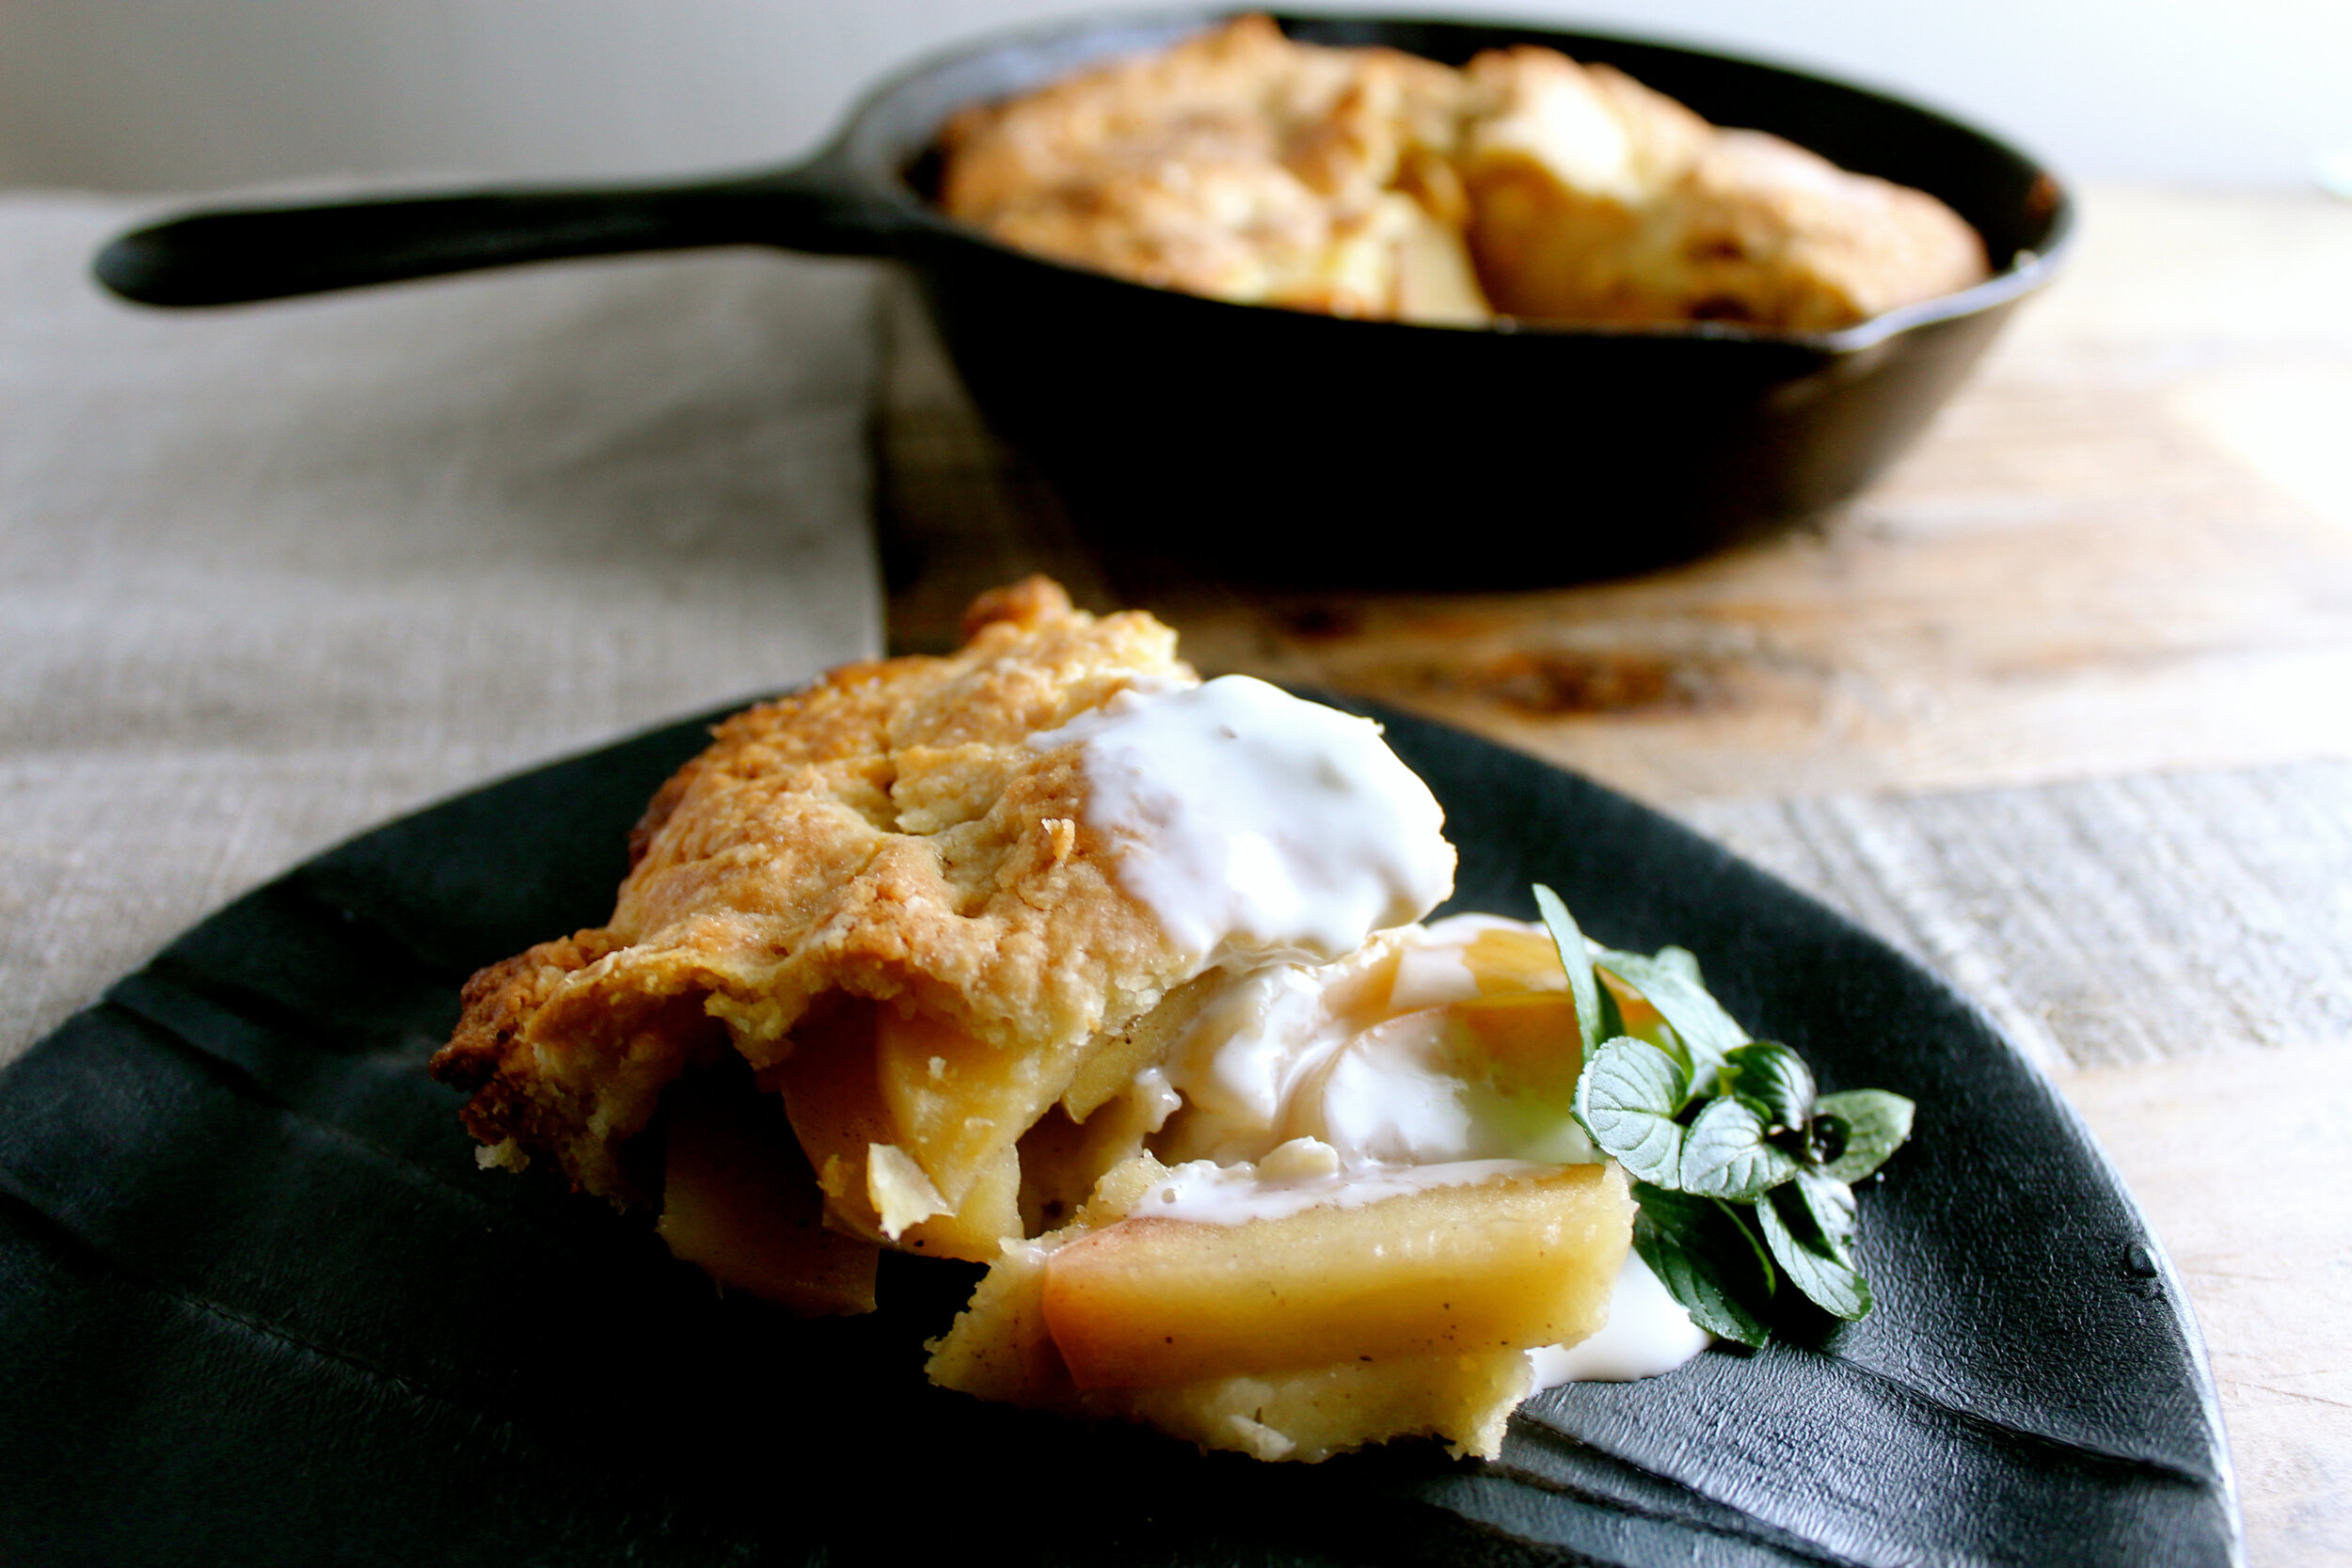
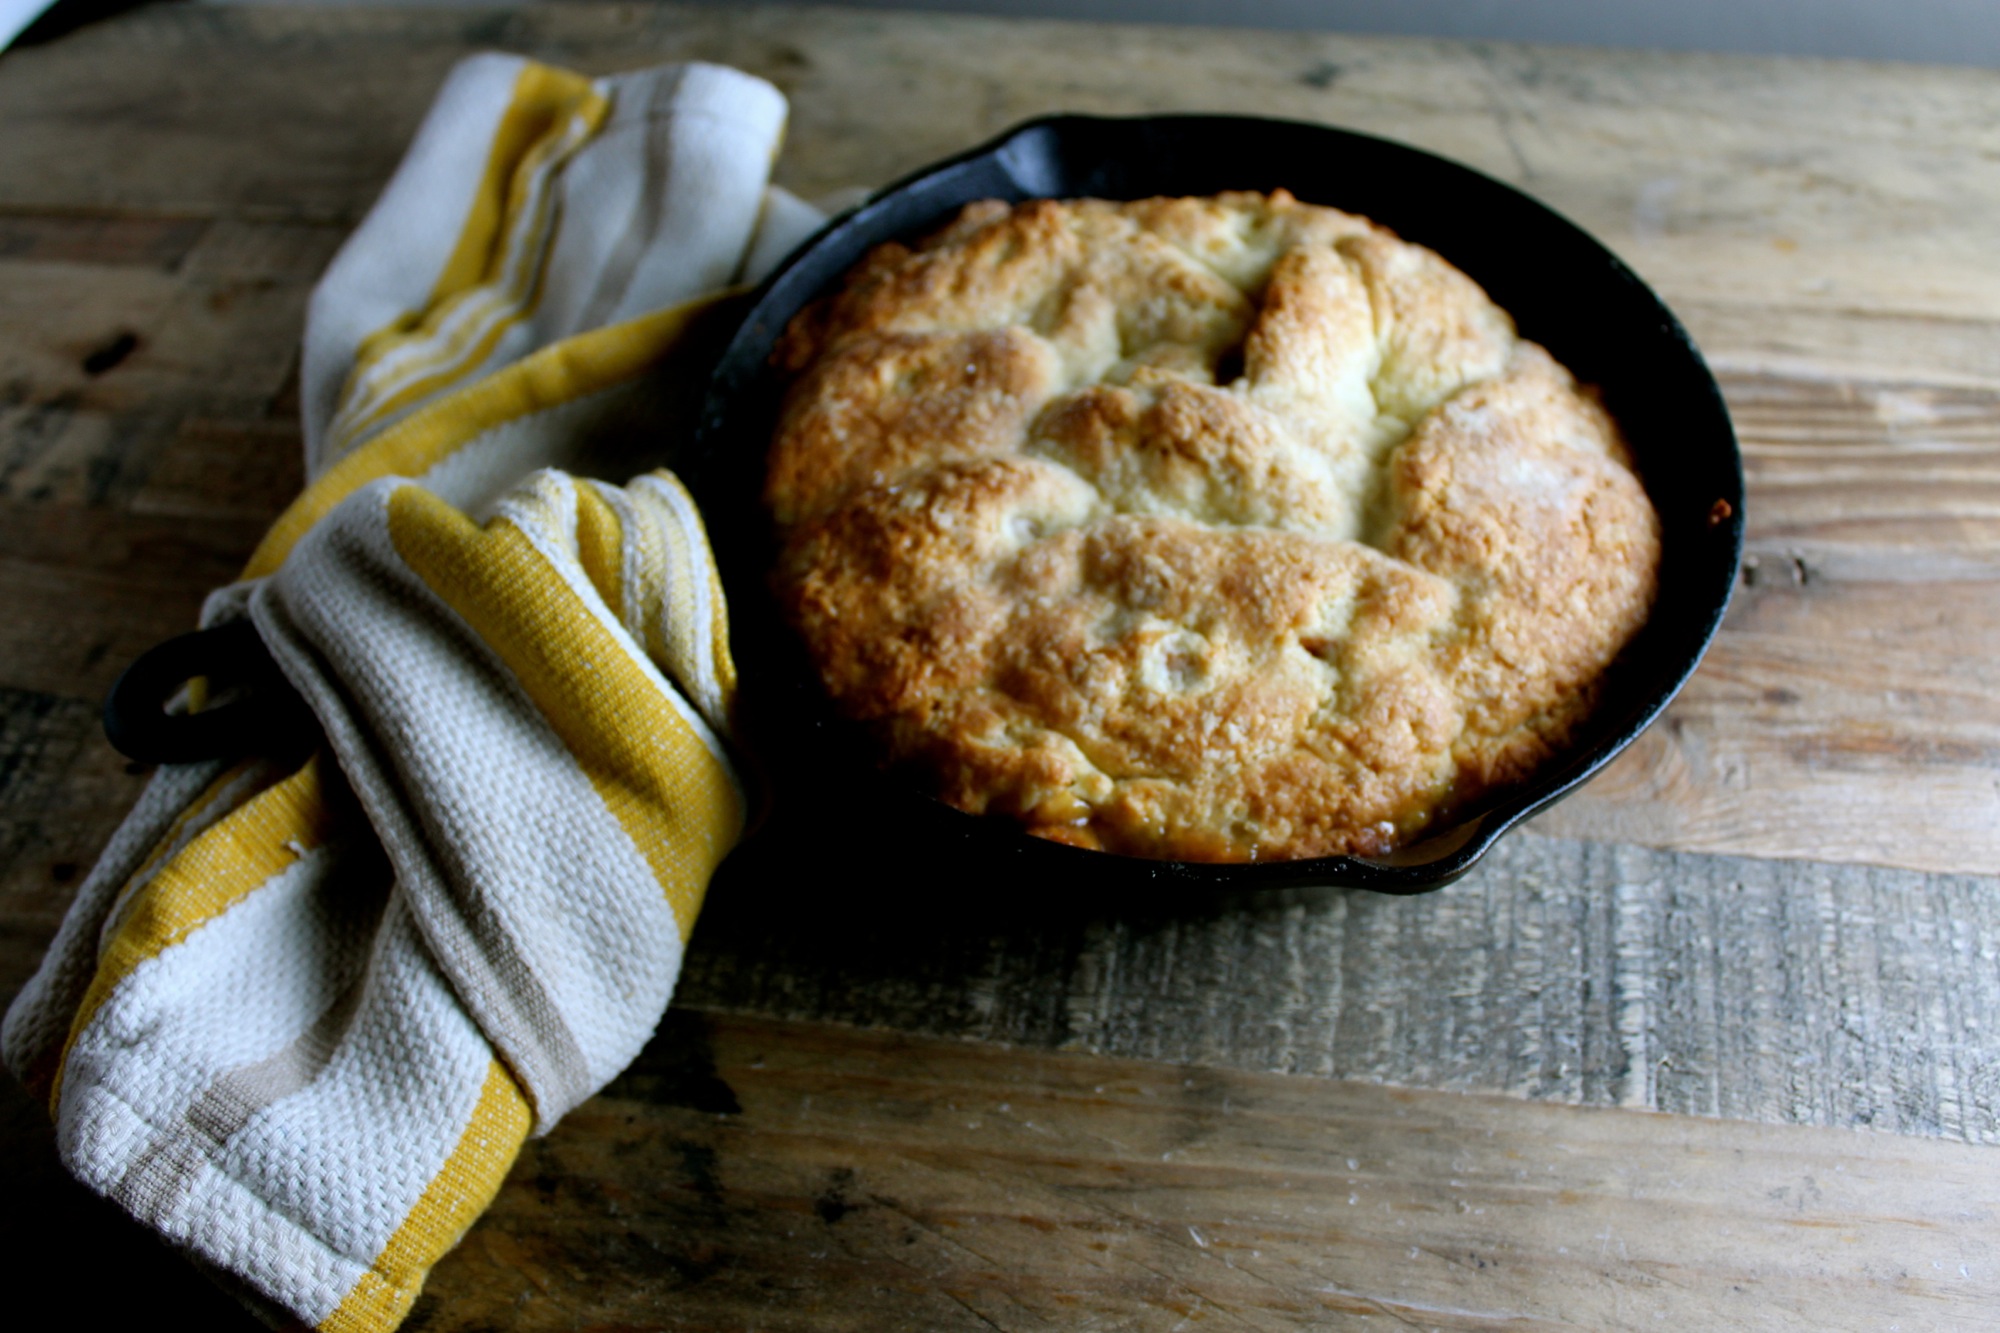
German Apple "Cake"
The cake for pie lovers.

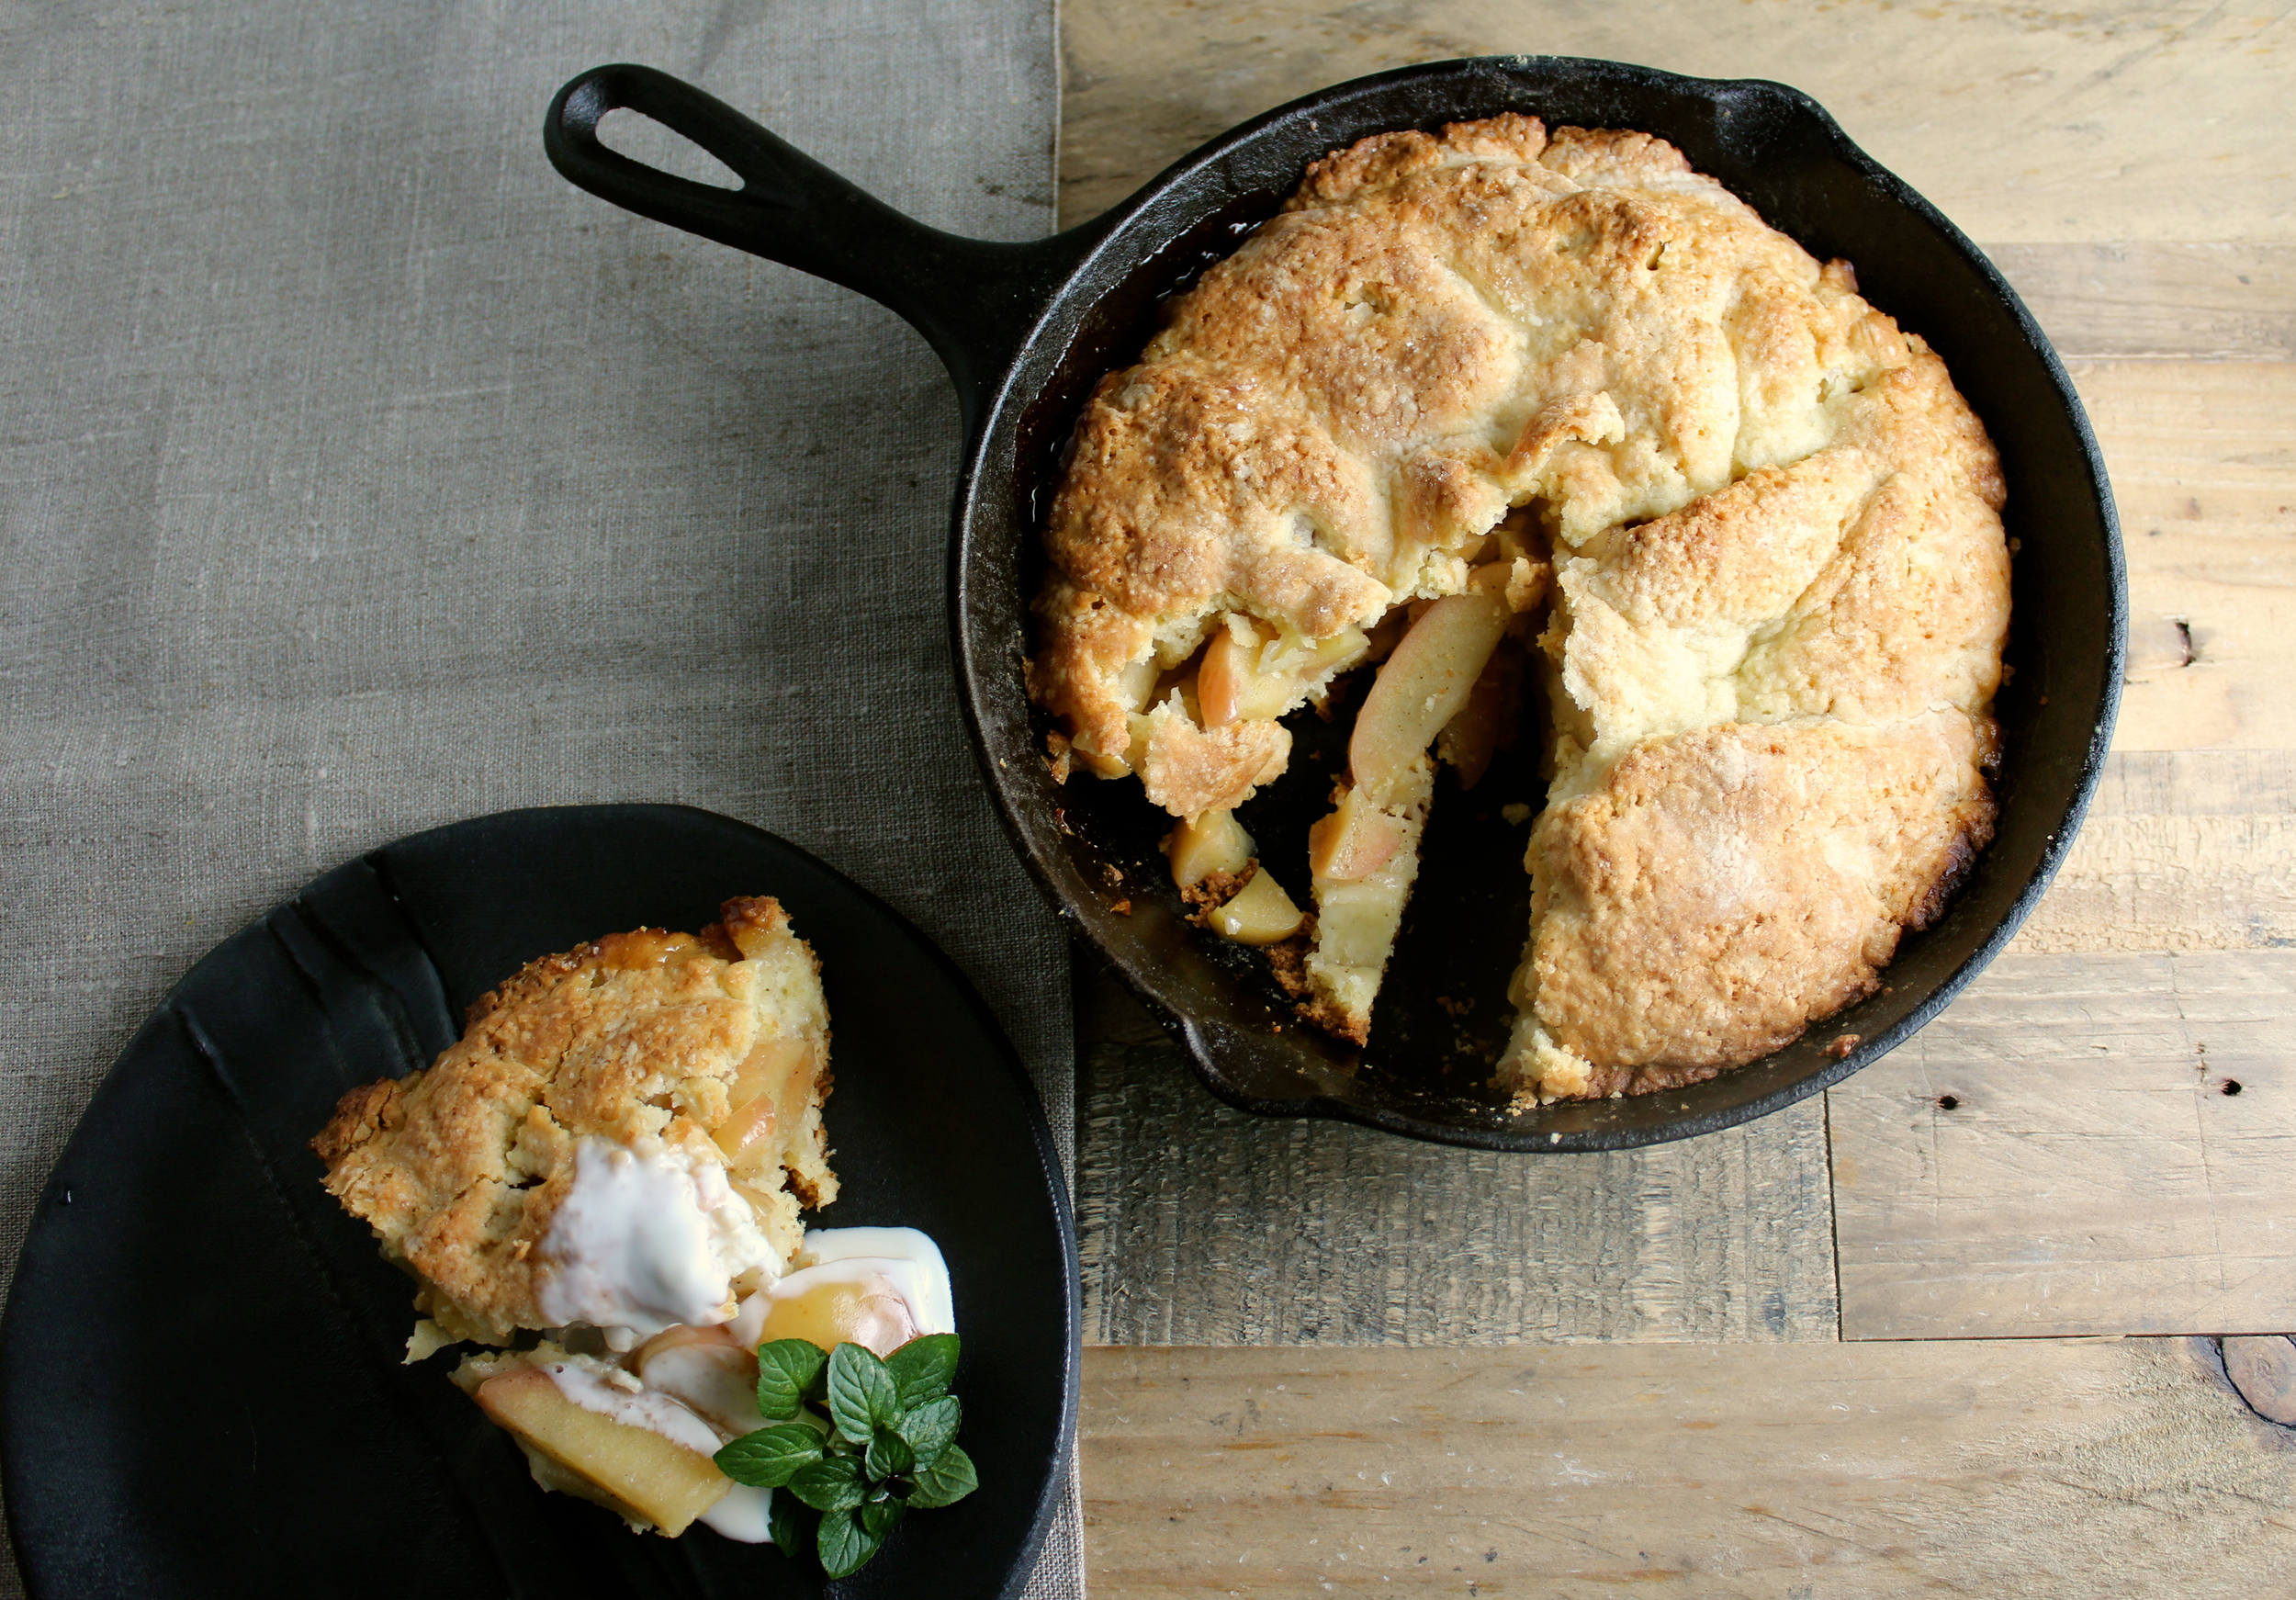
This is really more of a pie with a larger, fluffier crust than a cake (hence the quotation marks). I first encountered a version of this recipe on Culinate where I was immediately smitten by the idea of a pie-ish cake, typically preferring the former to the latter myself. I made a few additions and baked it in a cast iron pan to bring it to what it is today. Its refined rustic-ness makes it comforting as a dessert and delightful as an afternoon snack with cheese and tea or coffee. Or a beer, really - try it! Serves 6 and can easily be doubled to serve 12.


1 cup flour - I like to use a blend of something like half rye or other whole grain and half all purpose
1/3 cup sugar
1/8 teaspoon plus one pinch salt
1 tsp baking powder
1/4 cup (1/2 stick) cold unsalted butter, diced
1 large egg
1/2 tsp vanilla
1/2 cup crème fraîche or yogurt, divided (optional)
3-4 medium apples
1 tablespoon lemon juice
Up to 2 tablespoons brown sugar
1/8 teaspoon allspice (or other warm spices such as cardamom, clove, nutmeg, and cinnamon
Dash of apple brandy (optional)
Ice cream (optional)

In a large bowl, mix together the flour, sugar, 1/8 teaspoon salt, baking powder, and butter. Work this mixture with a pastry blender or fork until it resembles coarse cornmeal.
Make a well in the center of the flour mixture and add the egg and vanilla. Mix the eggs and vanilla slightly with a fork, then gradually whisk in the flour mixture. Work and knead until the mixture forms a coherent mass and is moist but not sticky. If sticky, add a little more flour and knead it in. If too dry, incorporate crème fraîche, yogurt (milk or water also works) one tablespoon at a time (up to 2 tablespoons) until dough is moist.
Cut the dough in half and roll each half into a ball. Flatten the halves a bit, cover with plastic wrap, and allow to chill for 30-45 minutes in the refrigerator.
Preheat the oven to 350 degrees. Butter an 8-inch cast iron pan. Core and slice the apples (they can be peeled, I like to keep the peels on), then toss them in a bowl with the lemon juice, brown sugar (more or less, depending on apples and preference), allspice, pinch of salt, and optional dash of apple brandy.
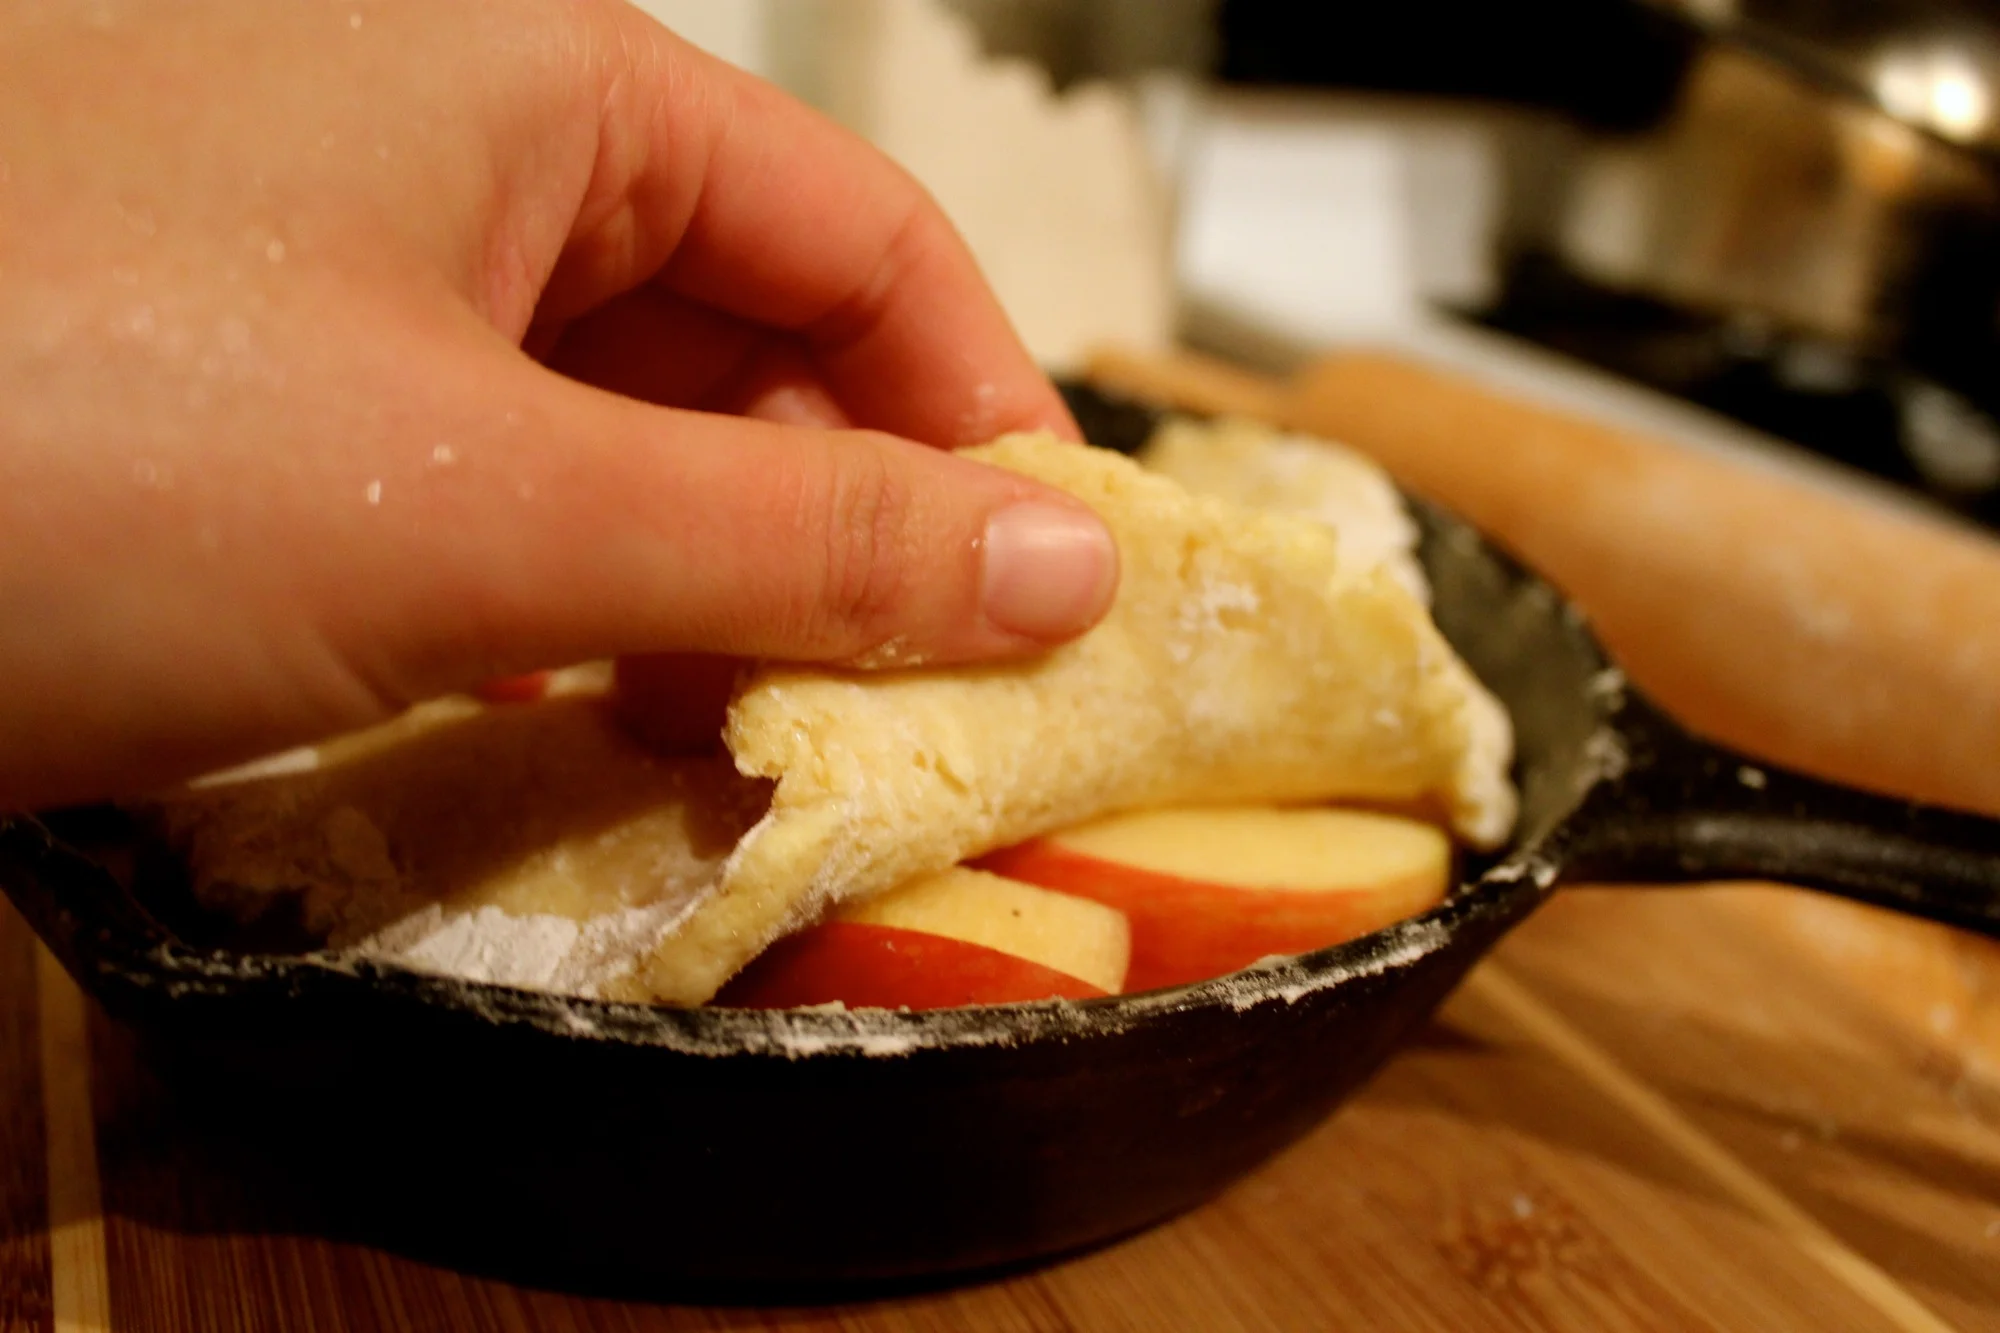
Take the dough out of the refrigerator about 5 minutes prior to rolling. Sprinkle one dough ball with flour, flip, sprinkle with more flour, and roll out on plastic wrap until is will fit snugly into the bottom of the cast iron pan. The dough can be a bit sticky, so add a little extra flour as needed. Lifting the plastic wrap, invert it into the cast iron pan.
Pile the apple mixture on the dough and rearrange apples to minimize large pockets of air. Roll out the remaining dough as you did before, but a little larger than first (so it can fit over top of apples) and place it over the apples by inverting the plastic wrap as you did the previous time. If the dough breaks, don't worry - just press it back together.
Bake the cake for 45 minutes or until the crust is golden brown and your house smells marvelous.
Serve warm, with crème fraîche or ice cream and mint garnish if desired. Also great in the afternoon with cheese.
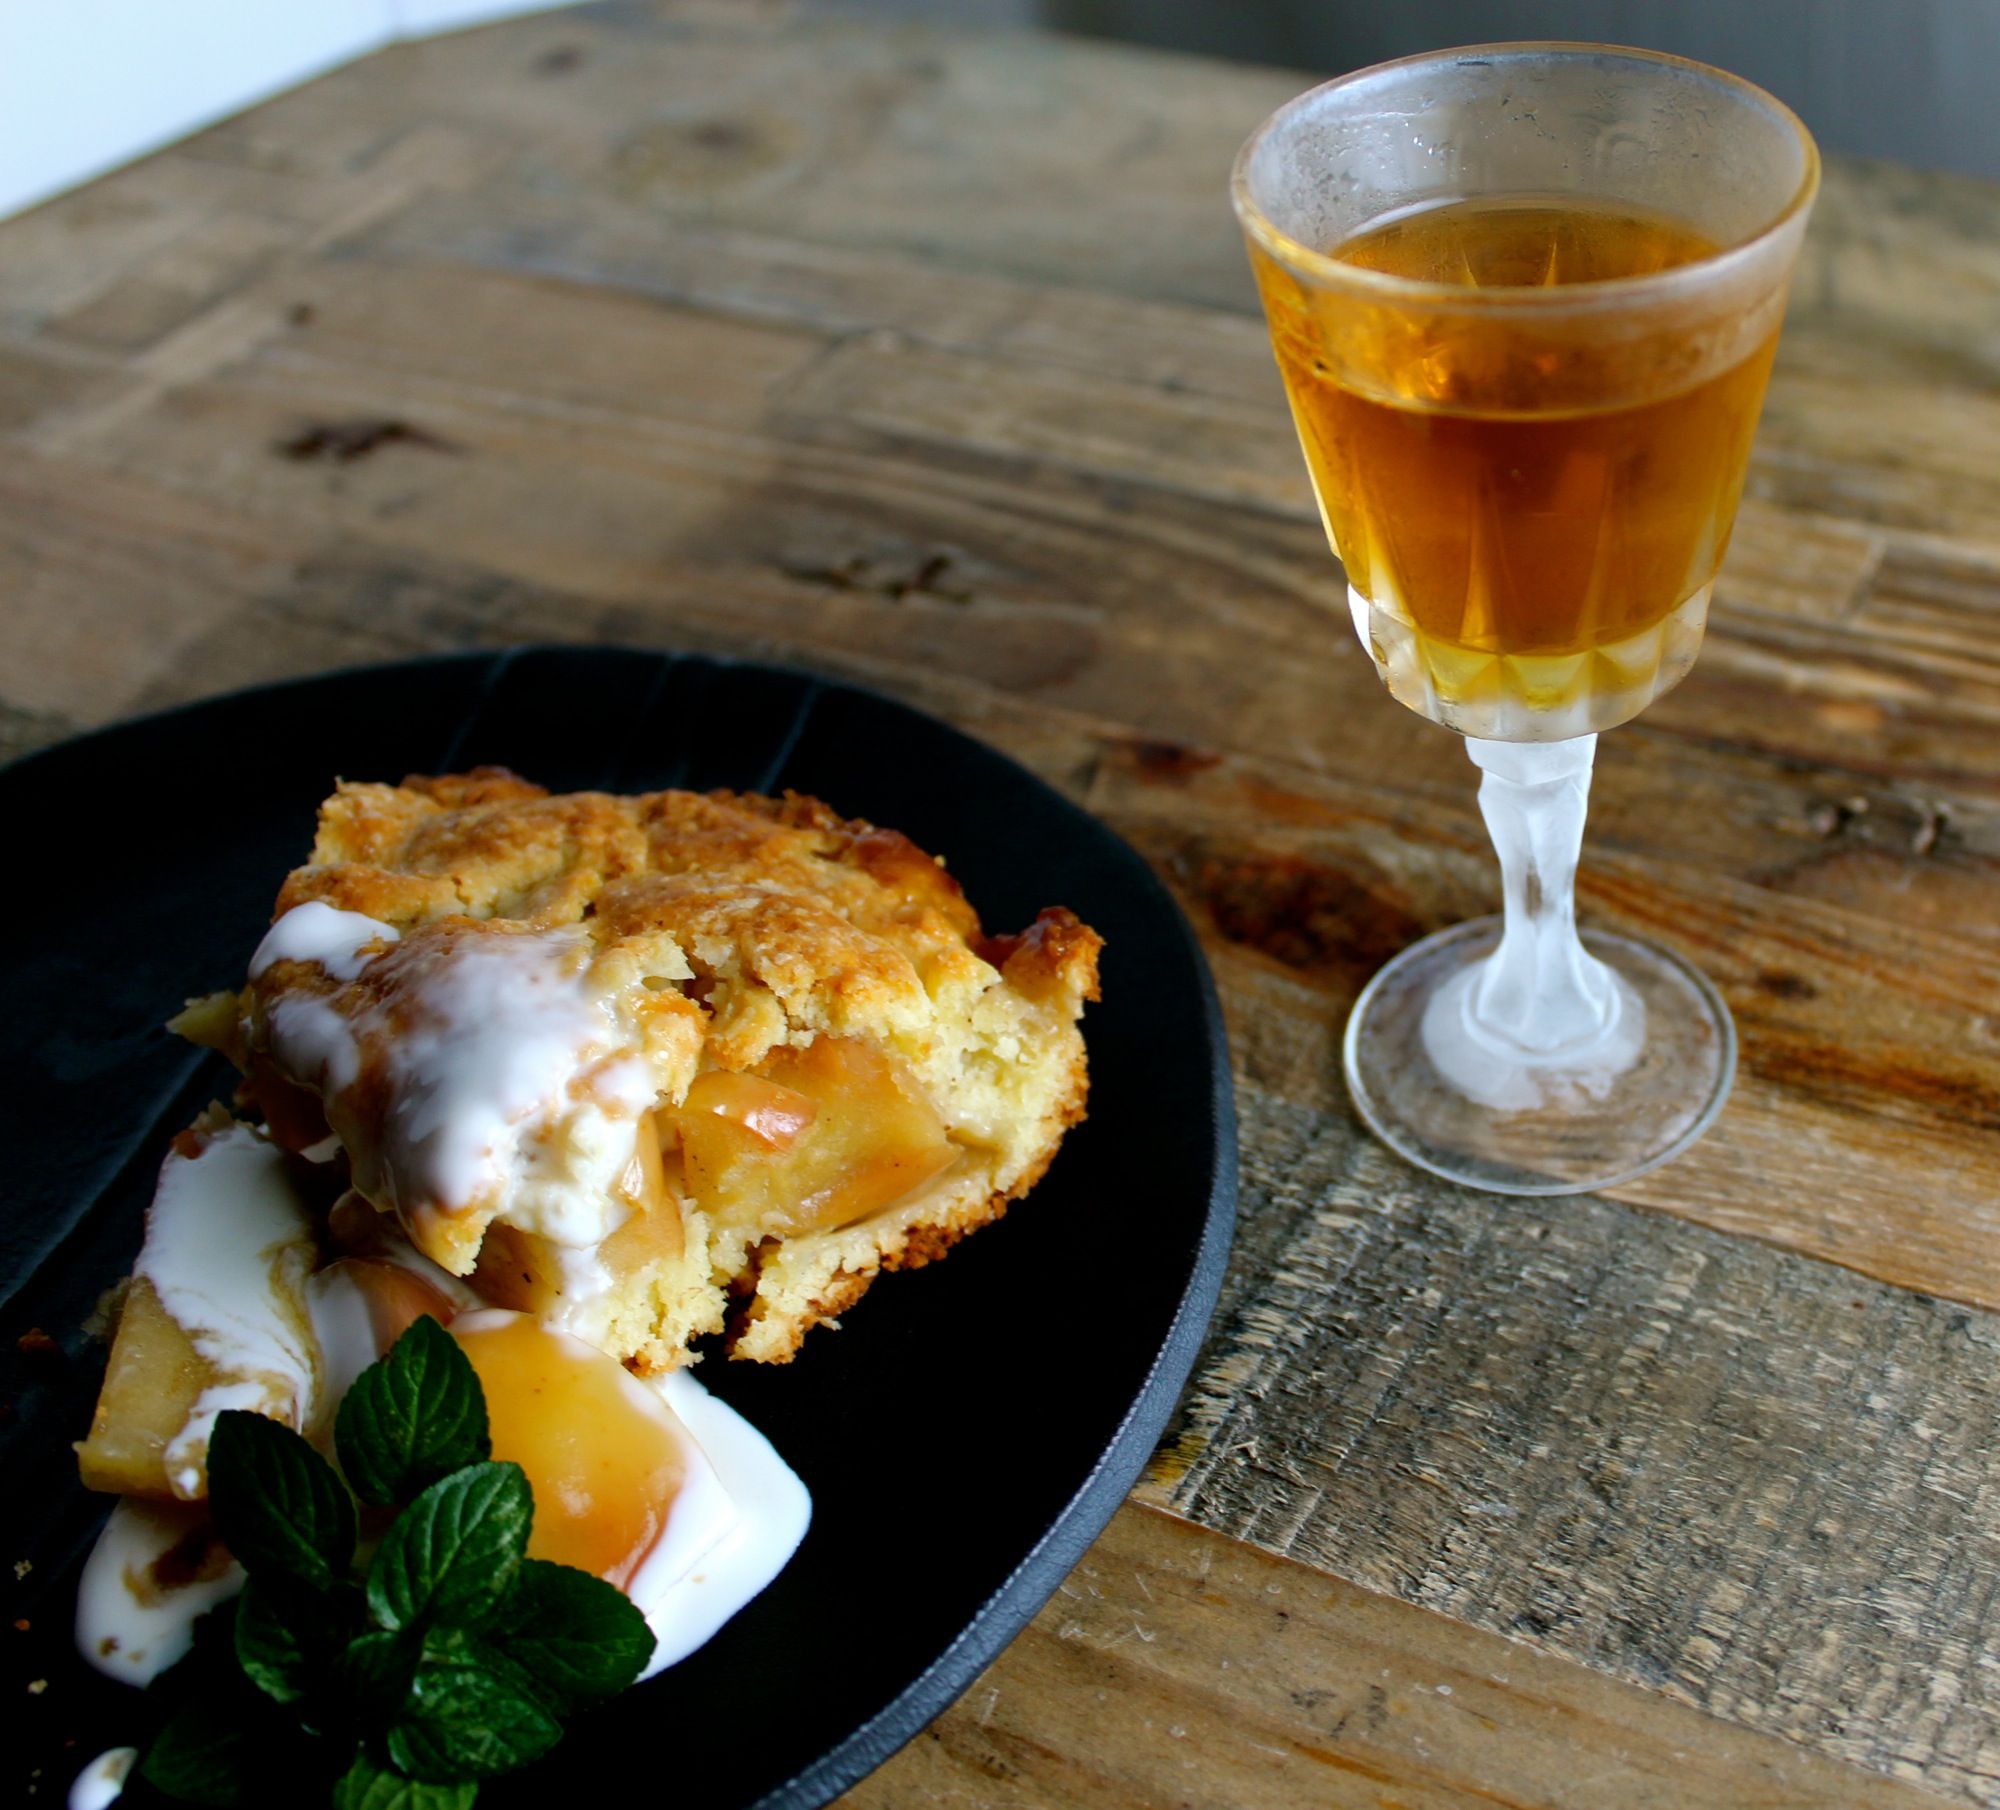
This German apple cake pairs wonderfully with cold apple brandy/calvados.

Nine Ways to Angel Food
Investigating eggs the cake way.

I teach the food science application lecture and laboratory at UC Berkeley and one of my favorite weeks is the week where we investigate eggs using angel food cake. Not only because I absolutely love angel food and honestly, even the cakes with recipes that are intentionally messed up still taste good to me, but because I think eggs are amazing. They are amazing for their incredible nutrient density (what other food gives you so much protein, vitamins, and minerals in 75 calories?), but also because they perform such a diverse array of culinary tasks, from aroma to structure. Also, I love the fact that, once out of the shell, they are so fragile and sensitive - just a few degrees can create a completely different product. Unfortunately, not everyone shares this fascination with eggs, be it because of the way they smell or unfounded worries about saturated fat (an average of 1 egg per day is completely fine, the benefits outweigh the saturated fat content). Oh well - more for me!
Angel food cake is the perfect vehicle for evaluating the properties of egg white foams. In lab, we conduct this evaluation with nine different variations in addition to the classic “gold standard” recipe.


Variations include (beginning with arrow and moving counter clockwise). Some worked as they were supposed to and others did not. See below for descriptions of what would theoretically happen to the cake, given the variation:
Cake 1, Classic: Gold Standard
Cake 2, Beat a longer time, until Stage IV: Proteins are overcoagulated, leaving cake "brittle" and stiff.
Cake 3, Beat foam a shorter time, until Stage I: Proteins not denatured/coagulated enough, no structure, does not rise.
Cake 4, Increased manipulation/folding of batter: Collapsed air cells that were created in beating the foam. Cake is dense and flat.
Cake 5, baked at a lower temperature for a longer period of time: Does not rise as high because no initial hot air.
Cake 6, cream of tartar omitted: COT is an acid that helps stabilize the proteins and bleaches anthocyanin, a yellow pigment. Cake without COT has a poorer structure, coarser crumb, and yellower color.
Cake 7, use of hand beaters in place of electric: Totally depends on the skill of the chef! May actually lead to a better, more delicate product because hand blenders often have more blades.
Cake 8, only 1/2 the amount of sugar used: Sugar helps prevent the eggs proteins from denaturing, making it take longer to create a foam and leading to finer air cells and a stronger structure. Without sugar, structure is weak and may not be high in volume, crumb is coarser, and cake is bbviously not as sweet. The lack of sugar also leads to more developed gluten because there's no sugar to draw the water away from the gluten to develop it, which means a tougher cake with less sugar.
Cake 9, lemon juice used in place of cream of tartar: Lemony tasting and structure is weaker, less consistent.