

Preserved Lemons
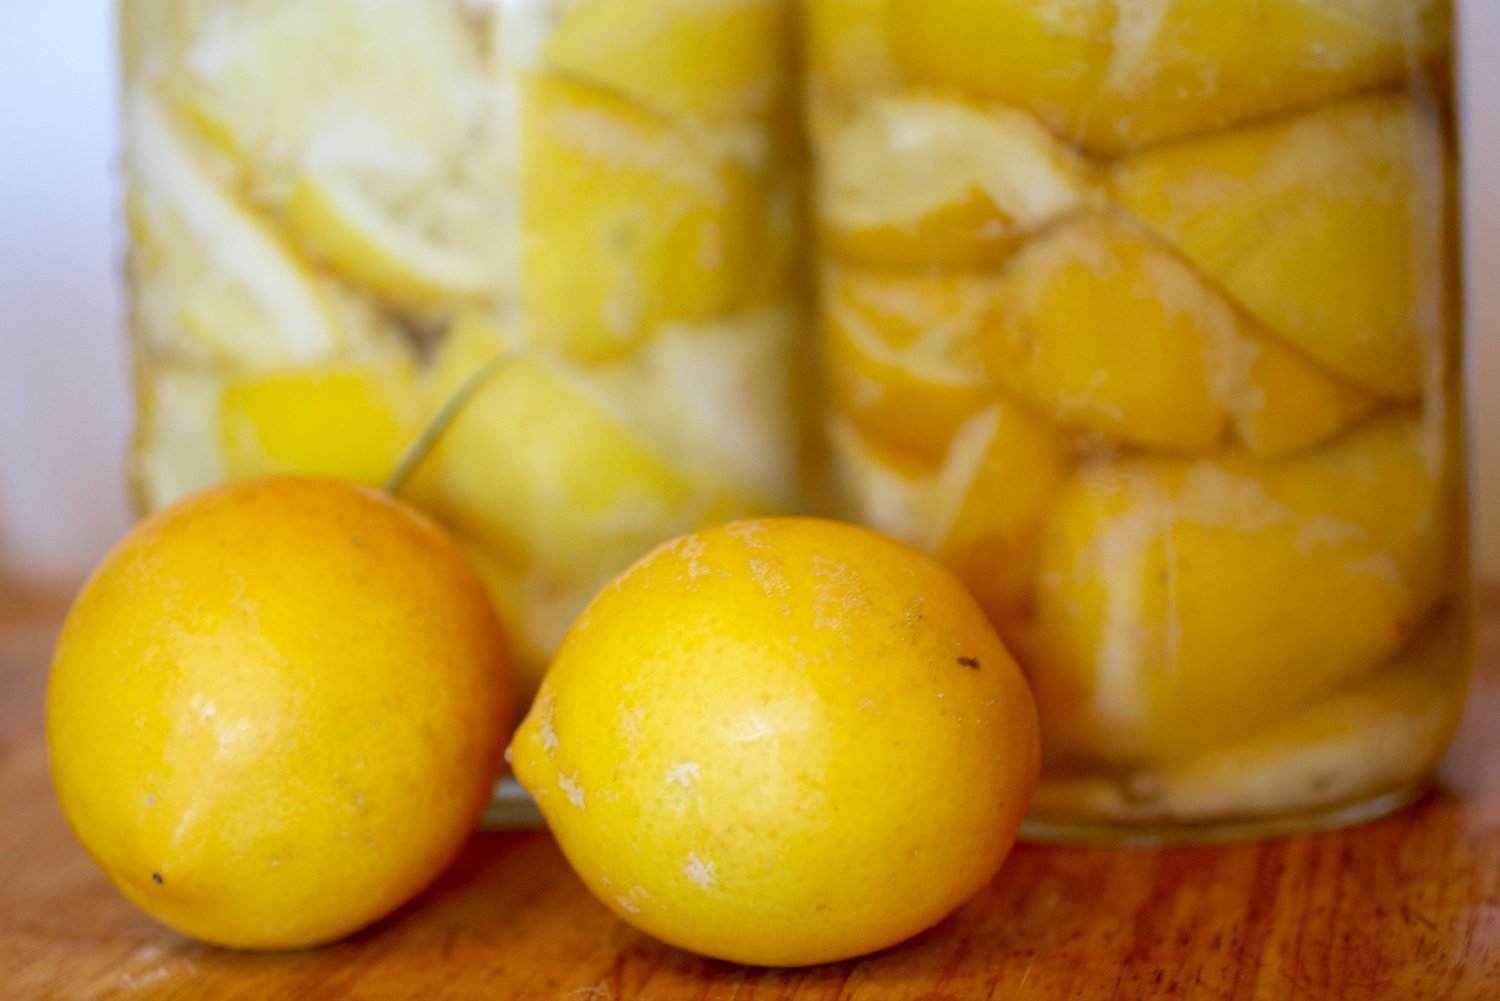
You know what they say - when life hands you lemons...preserve them! I don't remember the first time I made preserved lemons and discovered how incredibly easy it is, but I do know that I've been making them pretty much at least once a year ever since. By rubbing generously with salt and pressing under the saline brine created, fresh whole lemons are transformed over time into the best kind of funky, fermented condiment. The very acidic, salty, and oxygen-free (because you submerge them under water) environment keeps the bad microbes out while the good microbes take over to create a more delicate texture and heighten deliciousness.

Complex flavor from a simple, salty ferment.
Preserved lemons are common to Moroccan/Mediterranean/Middle Eastern cuisine, but the possibilities don't stop there. I like to chop them up and use them on all kinds of foods such as sautéed greens, grain pilafs (think couscous with cinnamon and toasted almonds/pine nuts), roasted winter squash, chickpeas or other beans, grilled fish, and slow-cooked meats or soups (think chicken with olives and saffron). Really, the possibilities are endless and delicious - adding preserved lemon is the easiest of ways to impress your friends when you serve them a meal ("what's that delightfully savory-sour flavor, you ask? Why, my own preserved Moroccan lemons of course!") I was fortunate enough recently to come across a laundry basket's worth (literally) of lemons from my parents and couldn't think of a better way to harness the power of a garden lemon for a later date.
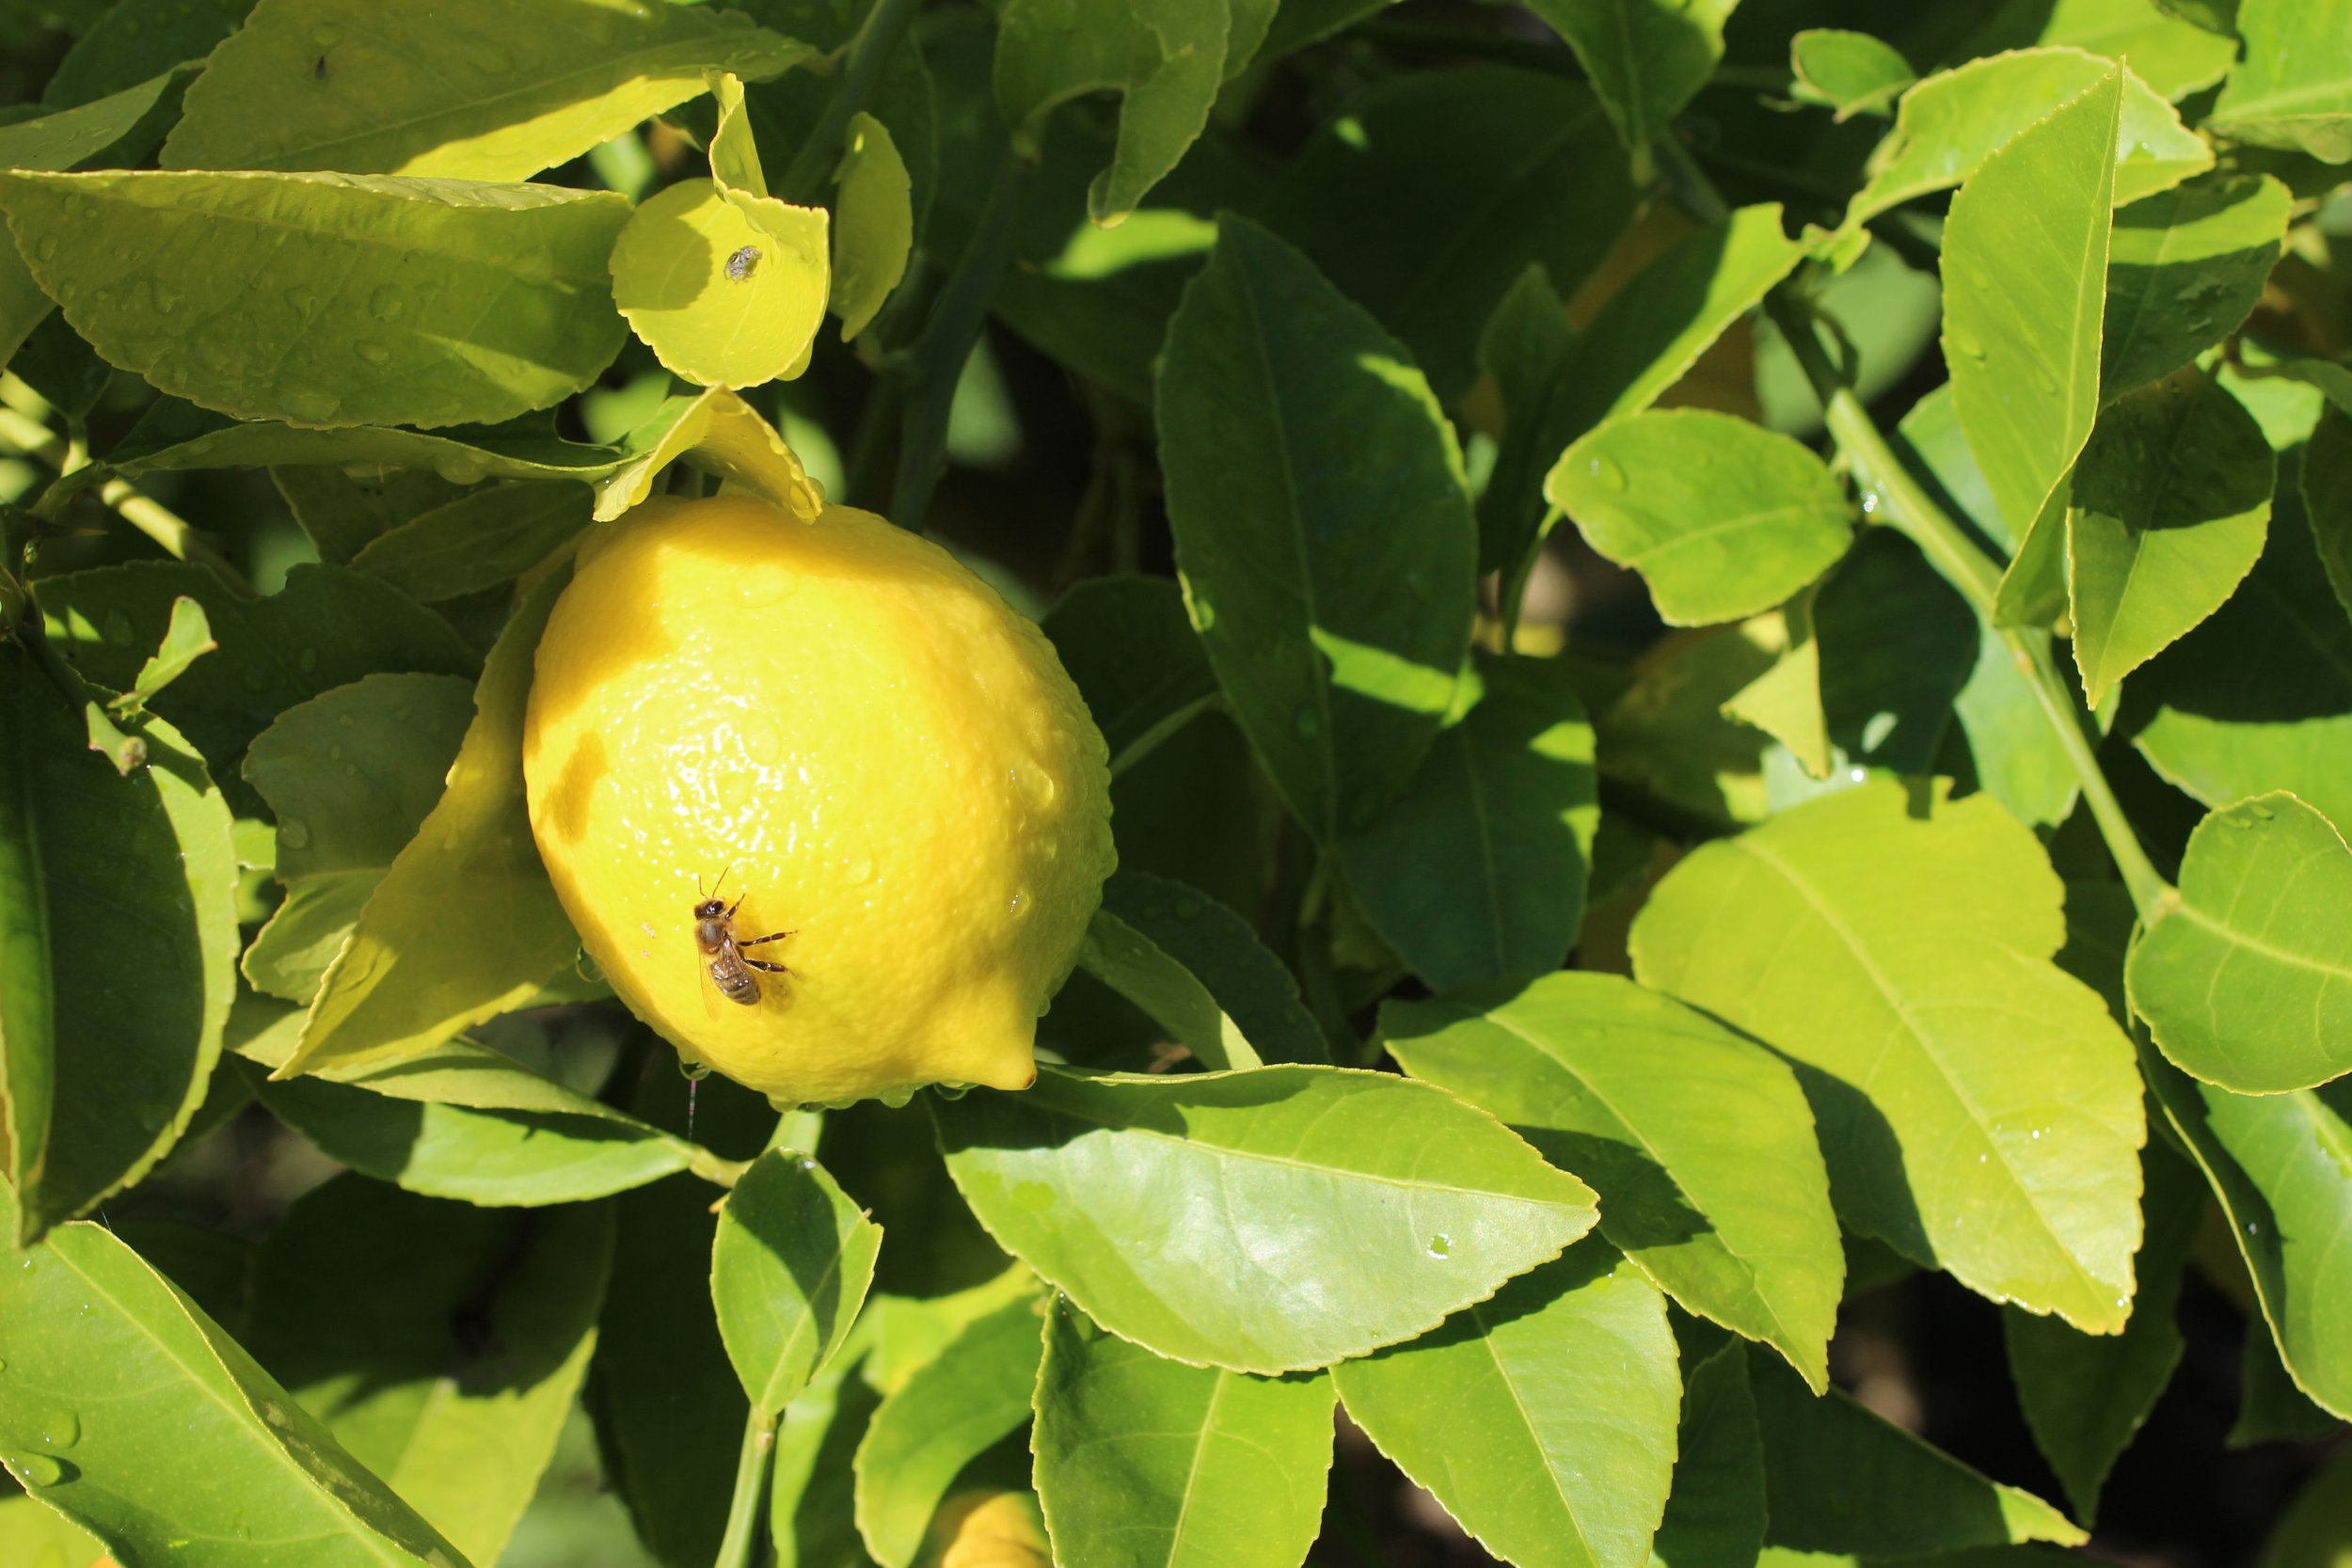
Hello bee!
When life hands you lemons…(from your parents’ tree)
A bunch of lemons (example: 10 lemons)
A bunch of coarse sea salt (example: 1/2 cup salt)
Additional lemon juice and salt as needed
Other ingredients if desired such as bay leaf, peppercorn, coriander, clove (I never use additional ingredients, as I like the lemon flavor to shine on its own)
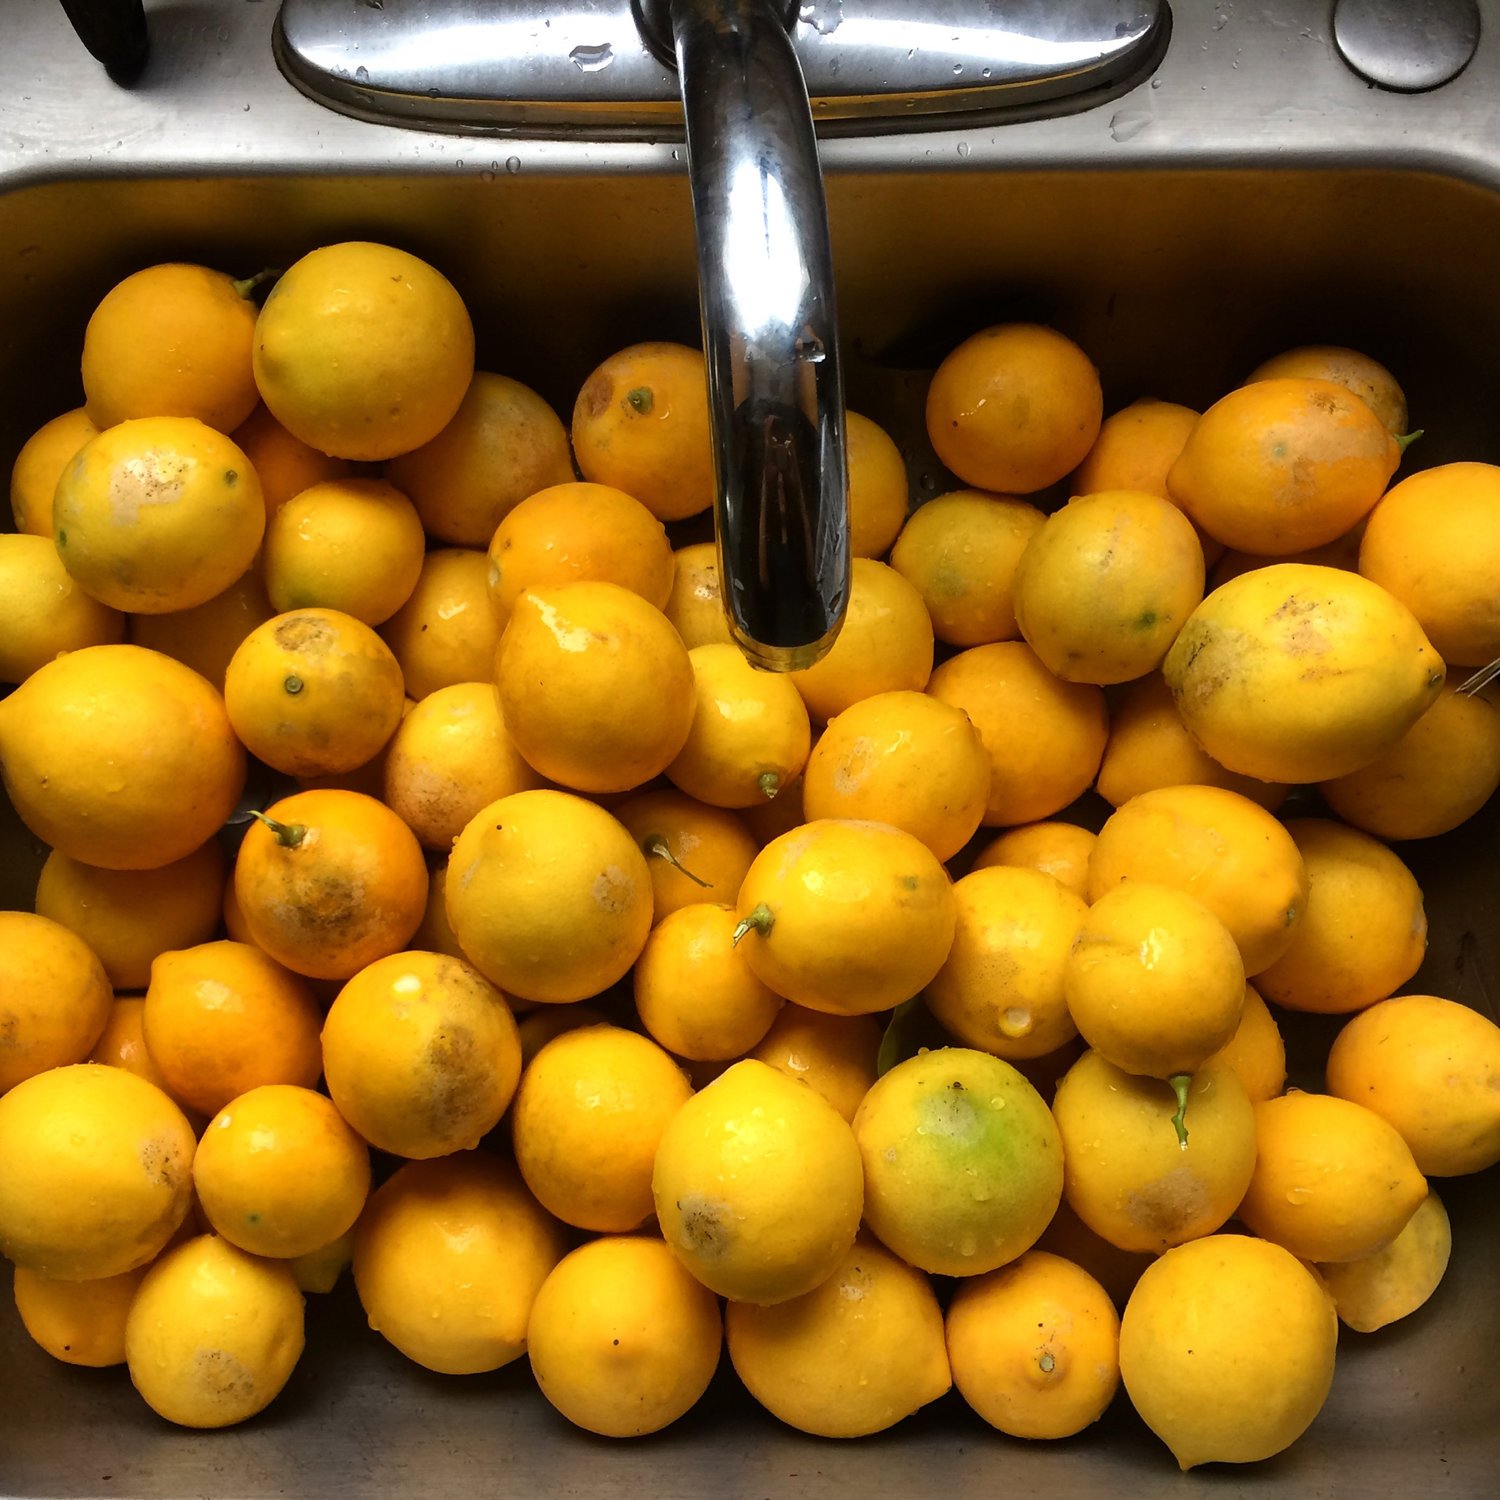
Wash mason jars (a one-pint jar will hold 3-4 lemons) with hot soapy water and wash lemons well with water, scrubbing off any dirt. For 10 lemons, you will about 4 one-pint jars or about 2 quart jars.
Cut lemons in half then quarter each half without cutting all of the way through so there are 4 attached segments on each half.
Rub lemon halves all over with salt, making sure to get in between the crevices, and press down into jars as you go. Press lemon halves on top of each other into jars tightly, squeezing out as much water as possible.
The lemons in each jar should be submerged in their own salty lemon juice. If they aren't submerged, add more lemon juice and press down again. You may need to wait a few hours and press down another time (making sure to wash your hands any time you come into contact with the lemons), as they absorb liquid and are easier to press down over time. I like to also put something (that has been well-cleaned) on top of the lemons so that they stay submerged. A smaller jar (such as a 4-ounce jar) filled with water works well for this. I have also used plastic bags filled with water for this purpose.
Leave on the counter for about 3 weeks then screw on lid and store in the refrigerator for up to one year (even 2 years in some circles, but they probably won't last that long!)* To use, remove rind, rinse, chop, and add at the end of cooking. Juice (and even chopped pulp) can be used as well - it's not as common, but has a similar flavor!
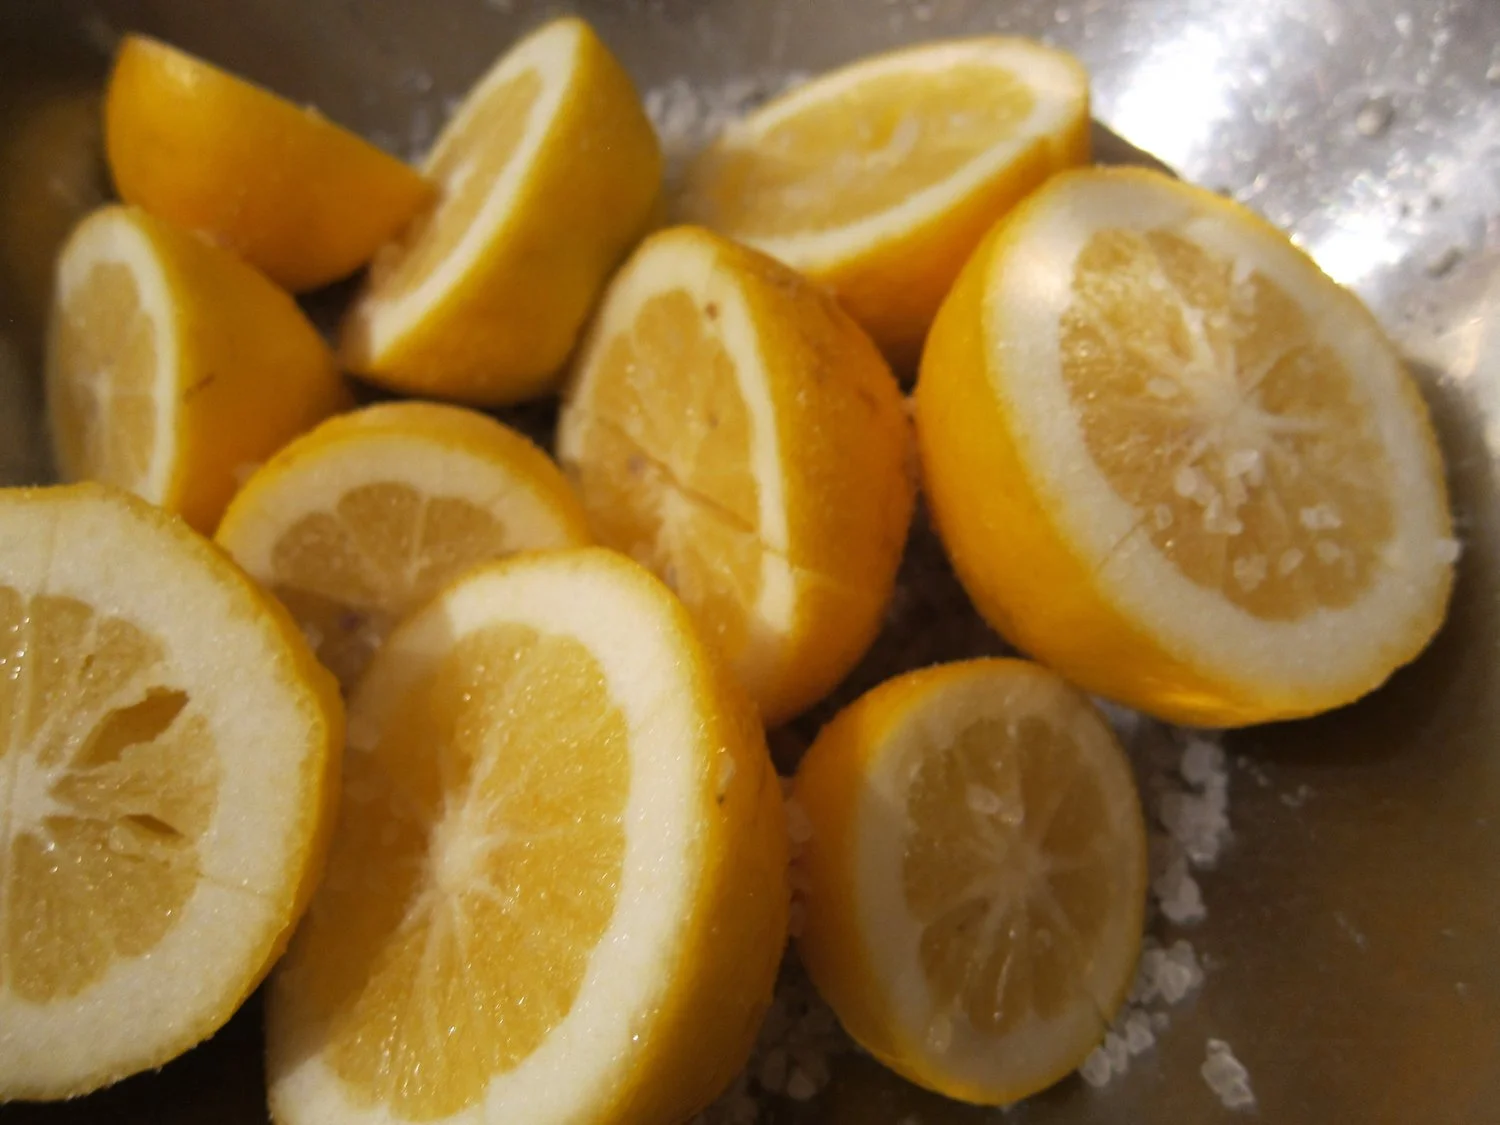
Lemons halved and quartered so segments remain attached before salting.
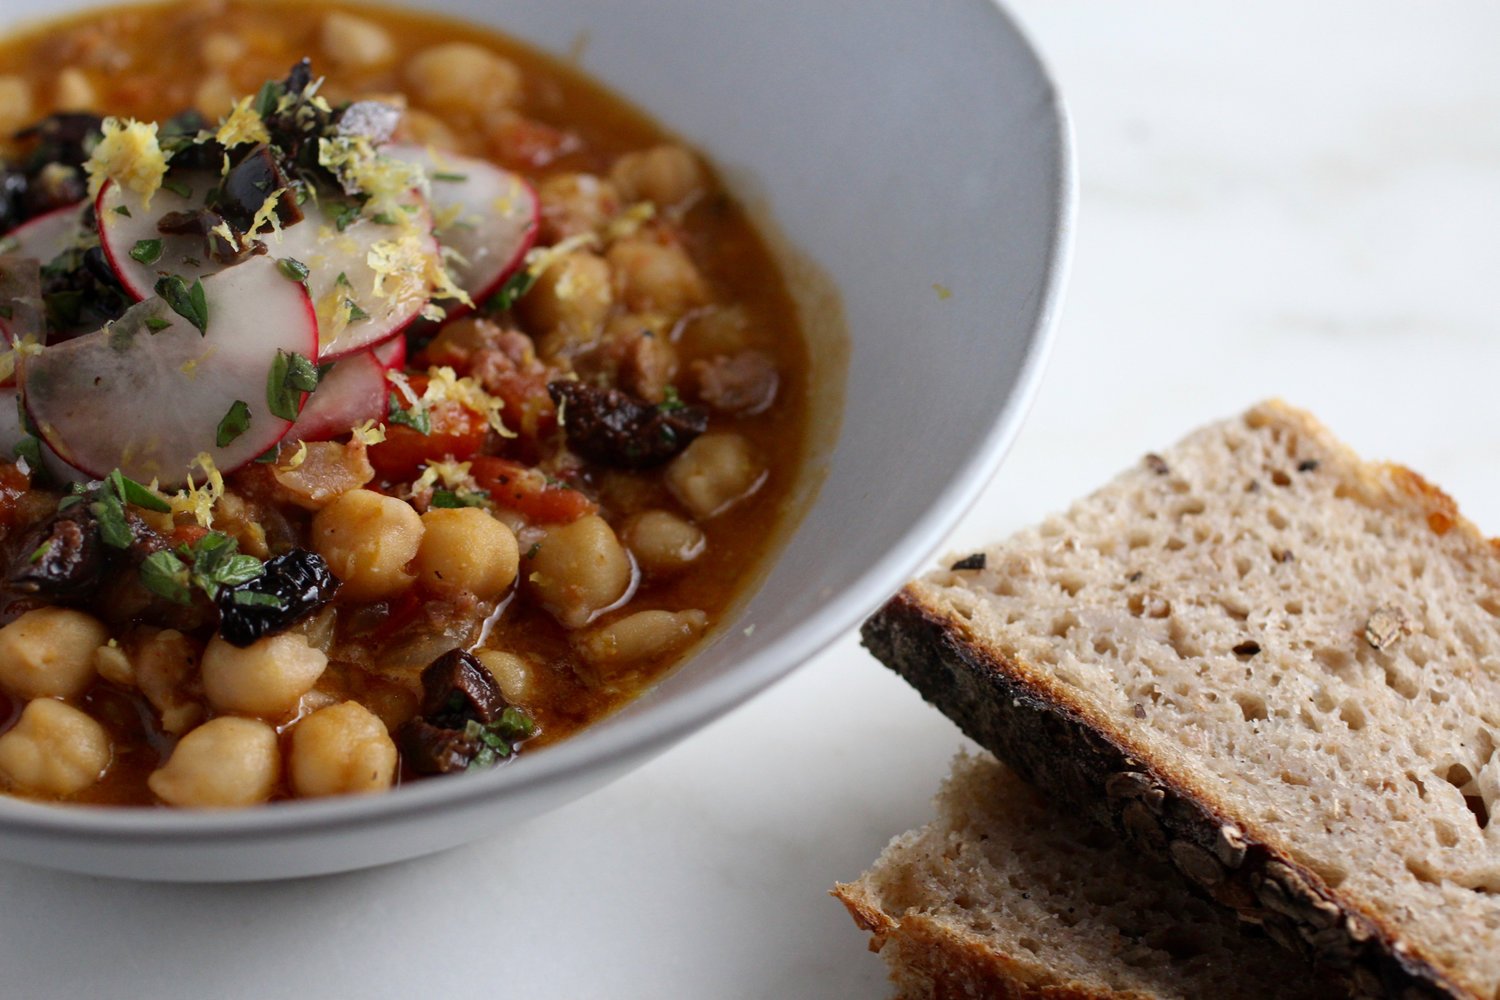
Chickpea soup with preserved lemon juice, tomato, olives, and lemon zest.

Gravlax with Dill and Peppercorn
Like panna cotta and aioli, gravlax is one of those intimidating-to-make foods that are, in actuality, incredibly easy. The most important thing to remember is to stop the curing process at the right time or your salmon will become overly salty and stiff. I learned this the hard way a few times, but luckily the stiff and salty version is still tasty when used as a condiment in omelettes and rice bowls. Thus, never fear - even if you mess up, your salmony goodness will still be appreciated.
When cured to just the right level however, gravlax reaches an ethereal luxuriousness that both impresses friends and is incredibly cheaper than the store-bought version. Everyone will be wondering how you did it and you'll be wondering why you ever eat gravlax that aren't home-cured.
Curing is a generic term that can mean anything from drying apple slices to smoking pork belly for bacon - essentially, preserving a food by altering its ingredients. Gravlax, which is a Scandinavian type of lightly cured fish, uses sugar and salt to draw water from the fish and create an inhospitable environment for microbes. This both (slightly) preserves the fish and changes the flavor and textural properties. What is incredible about humans is that so many of the processes we figured out to survive (food preservation by adding salt being one of them) resulted in foods that we now cherish. A lot of the most culturally definitive foods, from fish sauce to cheese, were originally created out of necessity, but are now valued for their gastronomy and cultural significance.

Pink peppercorn
Although no longer a necessity, gravlax is one of those cured foods that will endure because it's so darn delightful. When curing fish, it's important to have the right about of sugar, salt, and time, but beyond that the herb/spice pairing is up to you. I have made gravlax with fresh dill, as is outlined in the recipe below, but I have also used dry dill in a pinch or even other combinations of herbs and spices (for example, coriander and sweet fennel fronds), all with pleasant results. Nothing really beats the classic fresh dill, white pepper, and fennel seed combination however! the below recipe makes enough for about 12 servings as an appetizer or on a bagel, but it can be adapted according to needs (more fish will require a longer curing time). As gravlax is only lightly cured and no heat is involved, the fish is only preserved for about 5 days after the curing process. This recipe uses a ratio of 1 part sugar to 1 part salt, but you can play around with it to get it to your liking. You can also experiment with different sugars, such as turbinado or brown. This is a more classic version with granulated sugar and dill. Makes 12 ounces/4-6 servings, but can be expanded as needed.
50 grams (1.75 ounces) fine or medium grain sea salt or kosher salt
50 grams (1.75 ounces) granulated sugar
15 grams (0.5 ounce) pink or white whole peppercorn, crushed with mortar and pestle (optional)
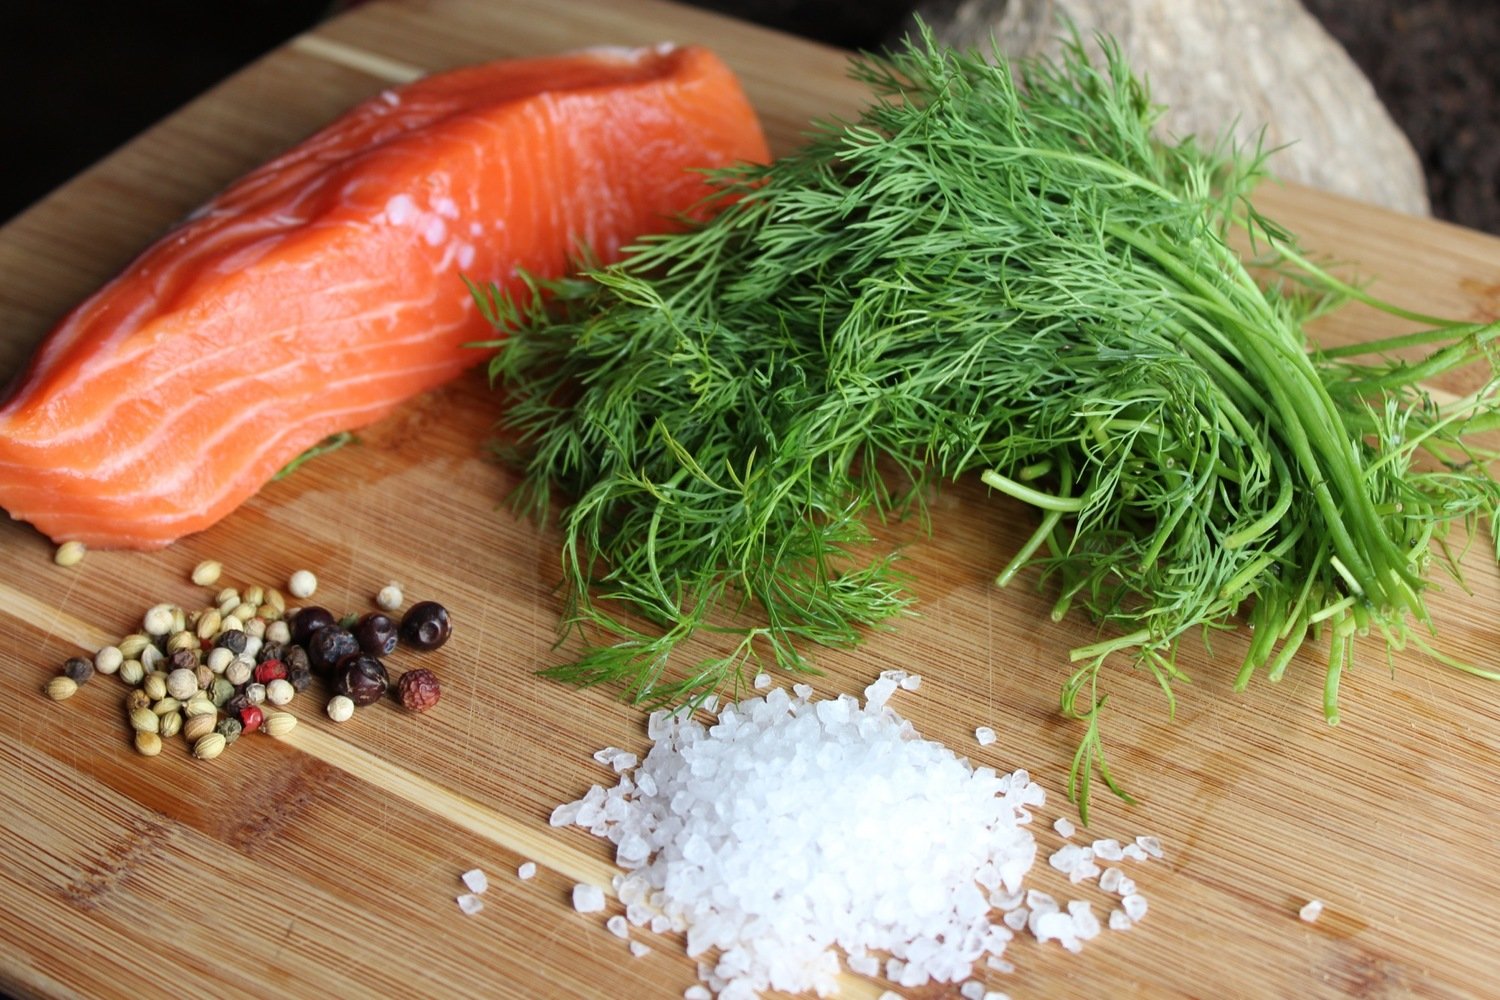
30 grams (1 ounce, about 1/2 bunch) fresh dill, chopped
0.75 pounds fresh salmon fillet, with skin
Blend salt, sugar, peppercorn, and dill in large bowl. Rub mixture evenly all over both sides of the fish and press into the surface slightly so it sticks.
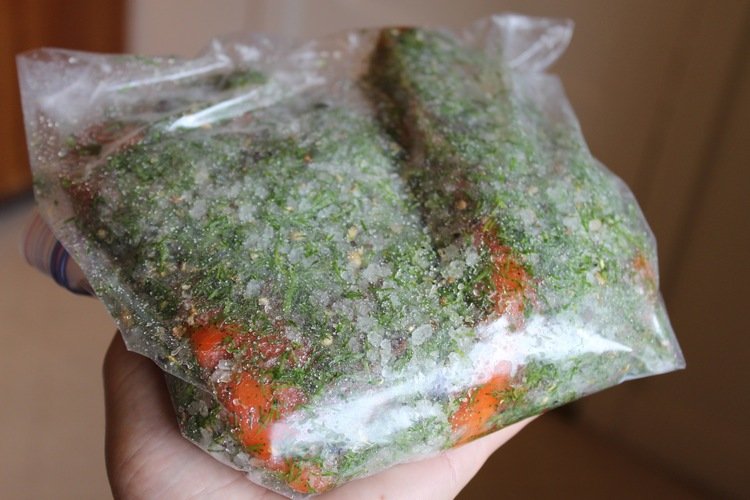
Cover the fish coated in the sugar-salt-dill mixture in plastic wrap and place in glass or ceramic baking dish (do not use metal unless you line it with plastic or parchment) or, alternatively, put everything into a large ziplock bag. Weigh down the fish to express moisture as it cures. Some items that can be used include another smaller baking dish or jars filled with liquid.
Salmon with salt and herbs for curing.
Refrigerate the salmon for 48 hours. At 24 hours, flip the fish and weigh down again. Once curing is finished, rinse the salmon and -delicately- slice away the skin. Gravlax can be stored in the refrigerator for up to 3 weeks wrapped in parchment paper or plastic. Mine never lasts that long however!
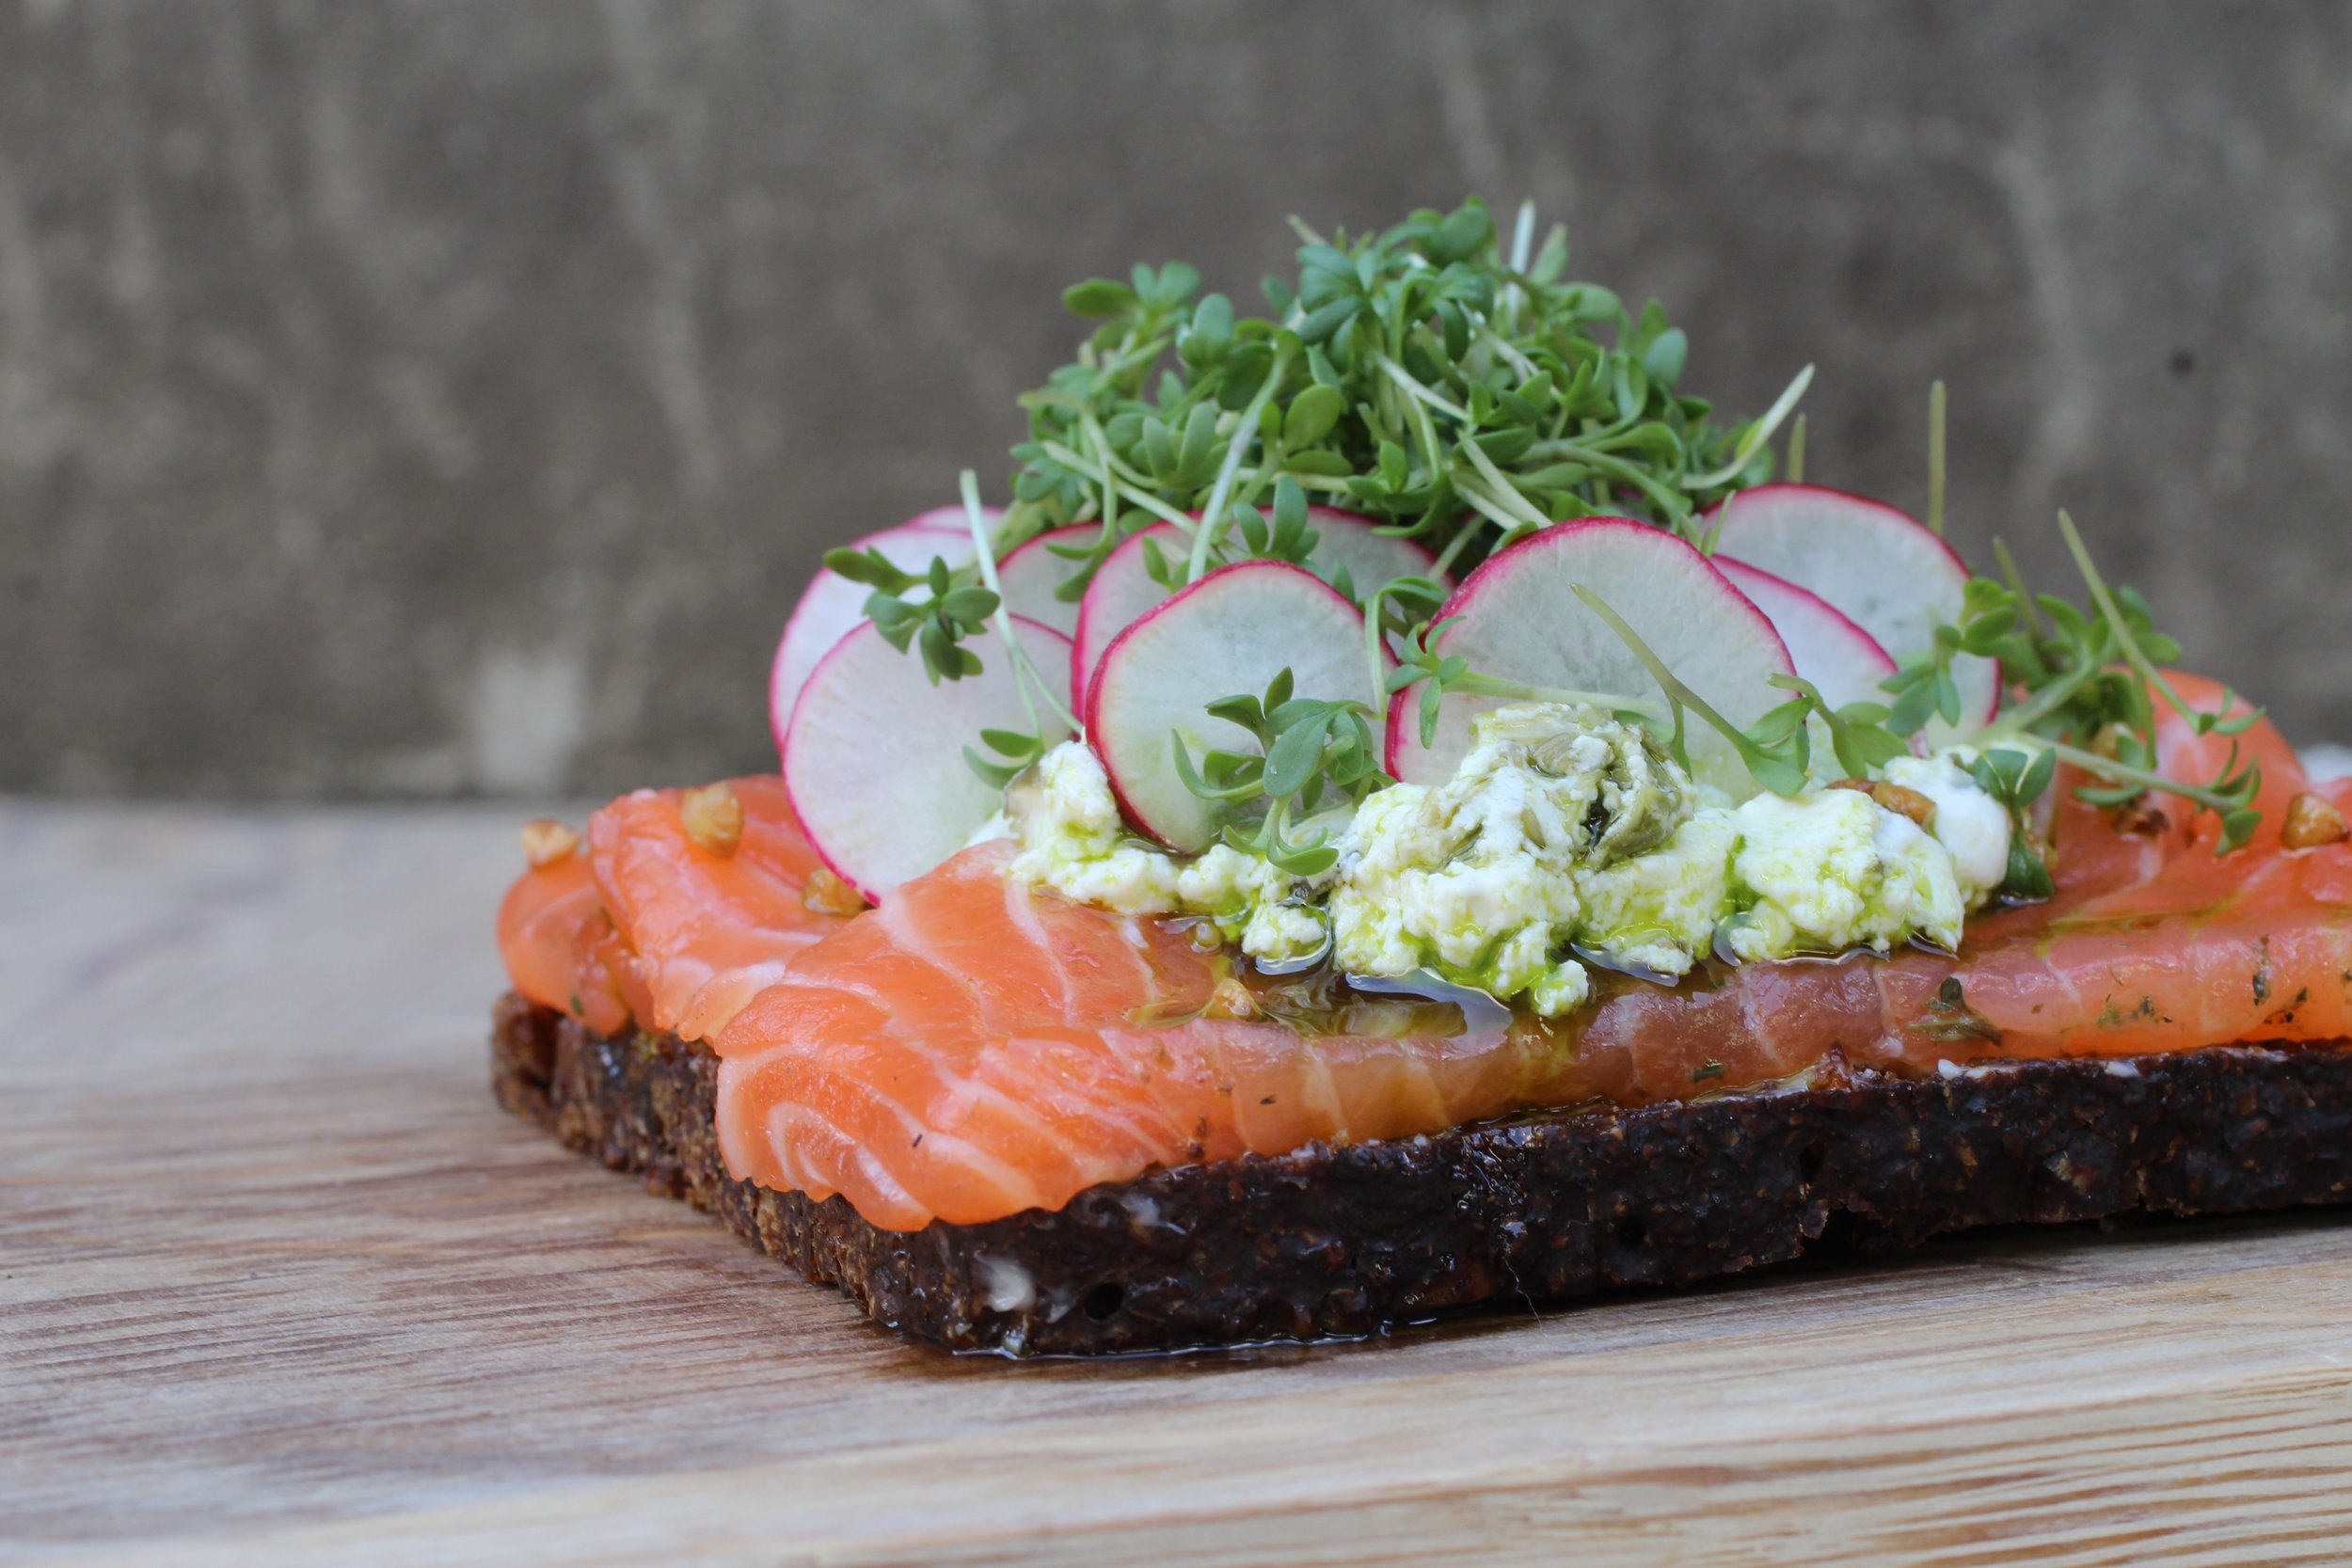
To serve, slice the fish thinly and use as an appetizer atop rye bread/crackers or cucumber with crème fraîche, on the classic bagels and cream cheese, or in a number of other creative ways, such as the smørrebrød (buttered bread with toppings) you see below!

Smørrebrøod - open faced rye with gravlax.
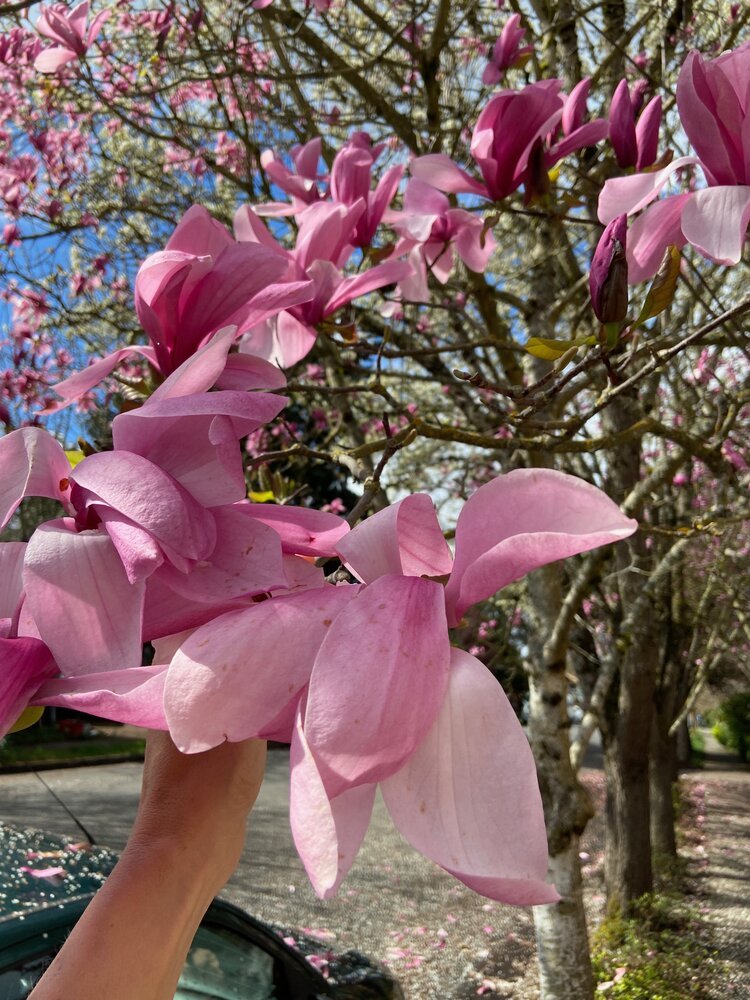
Pickled Magnolia Blossoms
Pickled magnolia blossoms

Fresh and pickled magnolia blossoms.
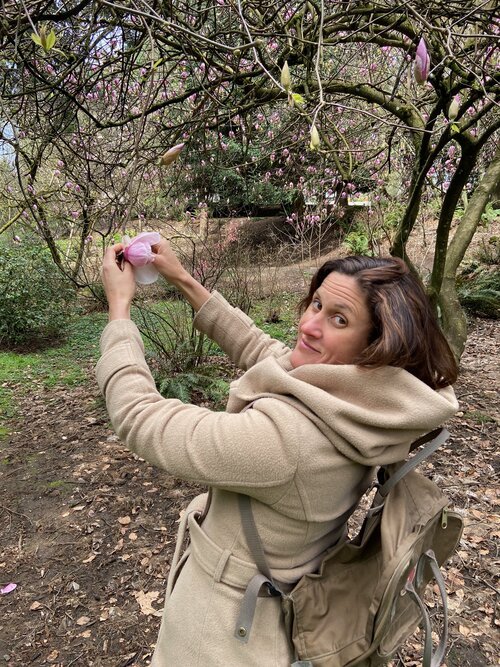
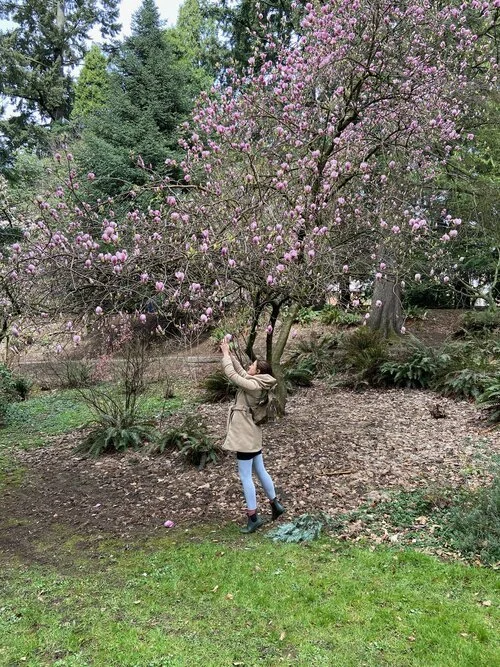
When magnolia trees bloom, they aren’t shy about it - they burst forth in seductive, fragrant glory and leave a slew of thick, oxidizing, hard-to-clean-up flowers in their wake. I love them for this and was pleasantly surprised to find out that the blossoms are also edible. Let’s be honest, these past two (pandemic) springs has been surreal and anxiety-provoking, so having an excuse to go outside and work on a foraging project is and was definitely appreciated. Most magnolias bloom in the spring and all varieties of Magnolias are edible - star magnolia, saucer magnolia, lily magnolia - you name it. The blossoms have variations in color/flavor/texture, so I’d recommend tasting a sliver and seeing what works best for you. Fresh, they have a texture similar to endive with a spicy/floral flavor.
Uses: Prior to this experiment, I’d only used fresh magnolia petals to top desserts, more for decorative purposes than anything. But, you can also use them in small amounts in salads/grain bowls/etc. or they can be pickled, which is the most common application. I would like to try infusing a liquor with them as well, but haven’t gotten around to that yet! Any time you handle the flowers (if you care at all about their appearance) it’s important to be very careful, as the petals bruise/brown easily.
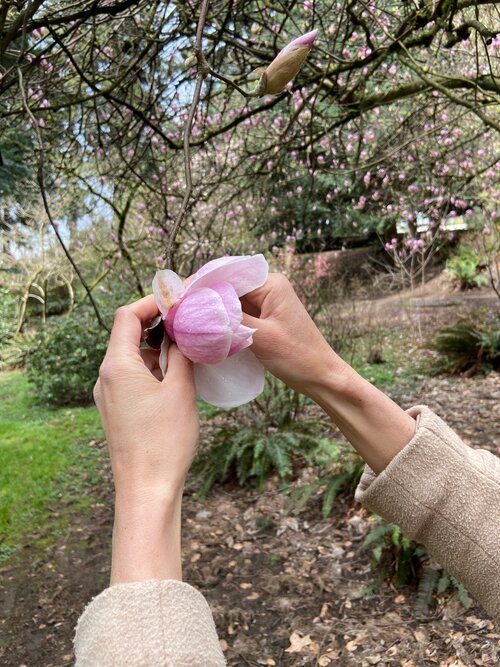
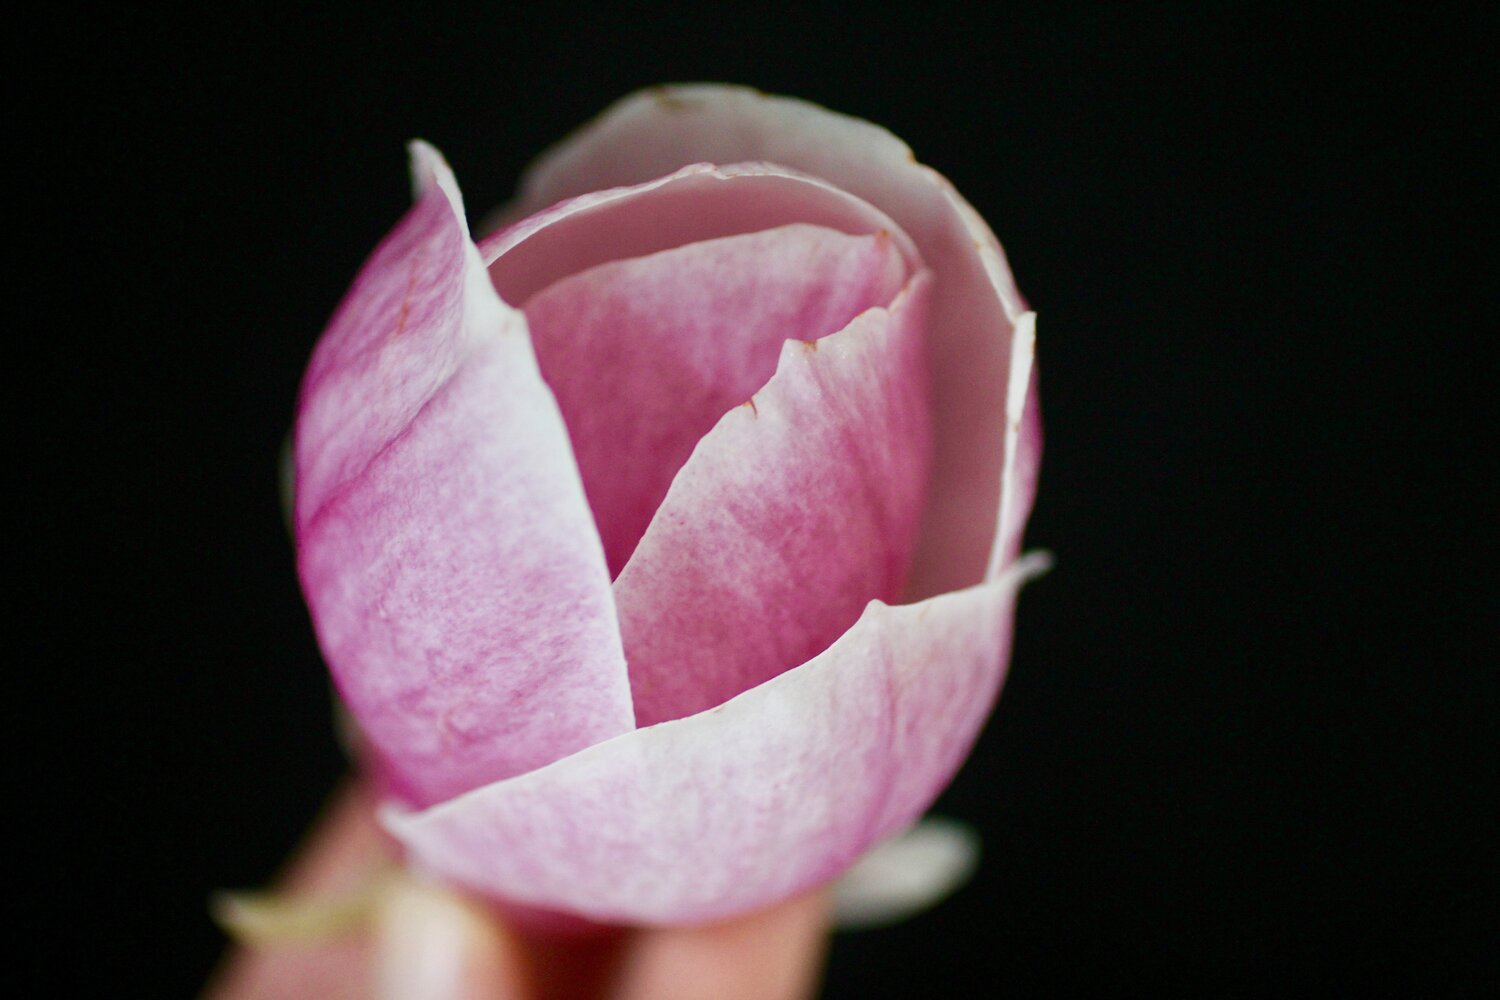
Gorgeous magnolia blossom - for eating raw, the younger leaves are best.
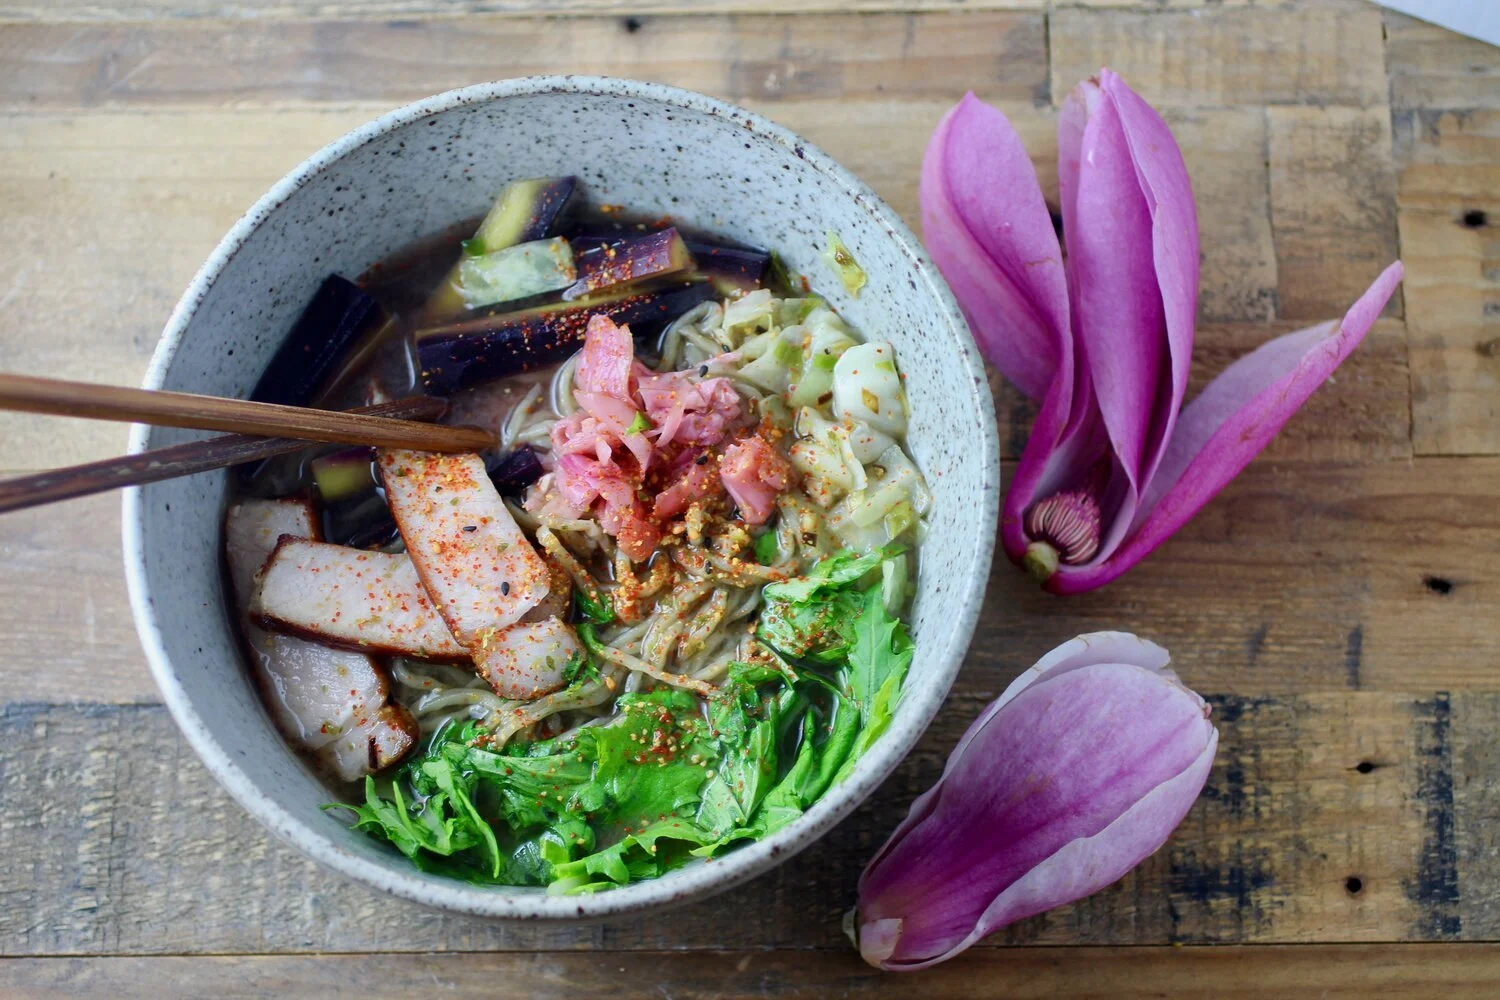
Pickled Magnolia Blossoms: This recipe is an adaptation/combination of two recipes I found (shoutout Medium and eatweeds.co.uk) along with what seemed like it would work and taste the best to me. You can liken the final product to a strong/very floral pickled ginger (with an appearance/texture to match). As you might guess, they work really great with Japanese/Asian flavors like sesame, soy, and seaweed - I’ve used them in a miso noodle bowl (pictured below) and am looking forward to trying it out in a brown rice/sesame bowl or maybe with some homemade sushi/salmon? I could see pickled magnolia being great in any application where pickled ginger sounds good, but also creamy foods to counter the spicy like a compound butter or mild fresh cheeses. The vinegar can be used as you would use regular vinegar as well - for both petals and vinegar, a little goes a long way. Below recipe makes about 1 cup.
220g magnolia flowers (about 6-7 cups packed) - For pickling, it’s ok to have older leaves. For eating fresh you want the younger nicer leaves.
500mL rice vinegar (about 2-¼ cups) - Other light-bodied vinegars or a combination also works, I see a lot of people use apple cider vinegar, but I wanted the subtlety of the rice vinegar.
110g granulated sugar (about ½ cup)
2 teaspoons Kosher salt
To Prepare
Clean and dry flowers - carefully so you don’t bruise the petals.
Add petals to a quart jar or two pint jars (pack tightly). Naturally, jars should be clean.
Heat vinegar with sugar and salt to simmer and sugar/salt is dissolved, stirring as needing.
Pour hot brine over petals.
Using a clean spoon or other utensil, submerge petals under brine several times as they inevitably rise to the top. Optional: I like to use a clean plastic bag or smaller mason jar with a little water to make sure the petals stay submerged.
Cover with lid, allow to come to room temperature, then refrigerate.
Pickled blossoms are ready in 24 hours and will keep in the refrigerator for 4 months to 1 year (still looking into this as I keep them in my fridge - I know that the color will become browner).

Pickled magnolia blossoms in a bowl of miso-ramen.

elderberry jam
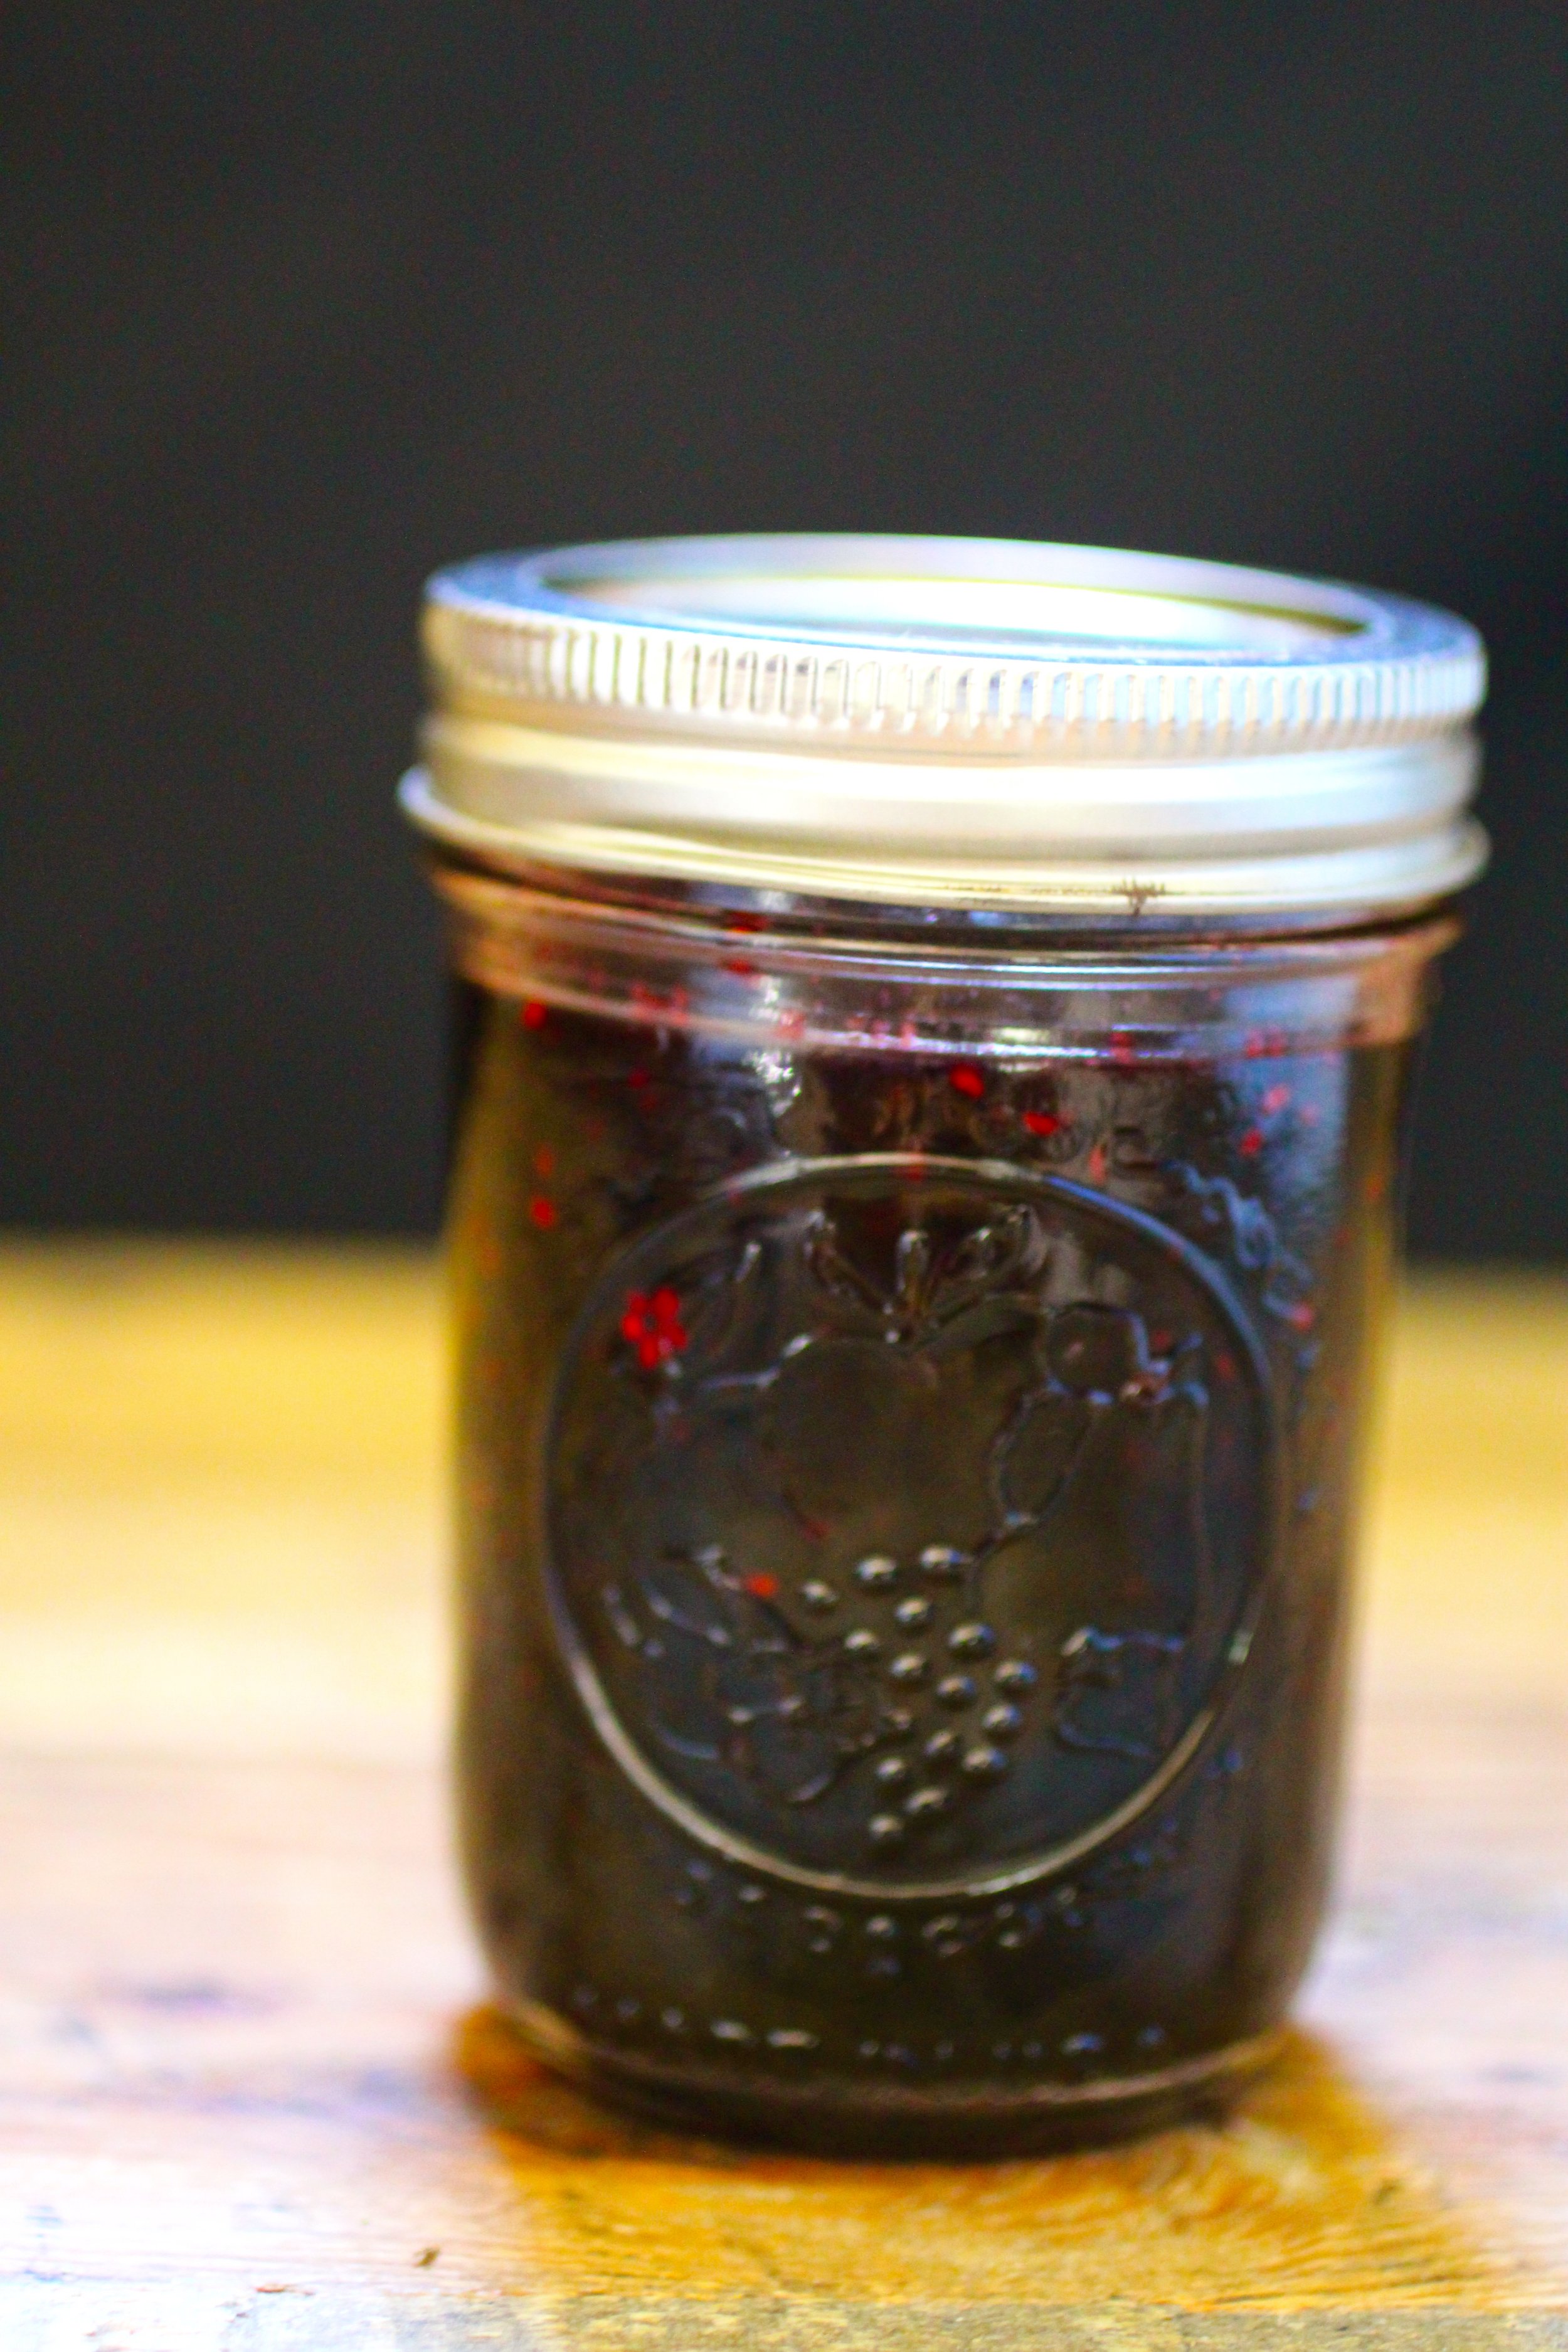
More information on foraging and exploring elderberry here.
This recipe is a great way to quickly preserve the flavor of elderberries for later use on toast or in dessert applications. Makes 4 half-pint jars.
4 cups fresh elderberries
3 cups granulated sugar
2 tablespoons lemon juice
Sterilize 4 half-pint Mason jars.
Bring ingredients to a boil, stirring until sugar dissolves. Continue boiling, stirring occasionally, until mixture reaches 220° or jam falls in a “sheet” when spoon is removed, about 20 minutes.
Pour evenly into jars and seal.

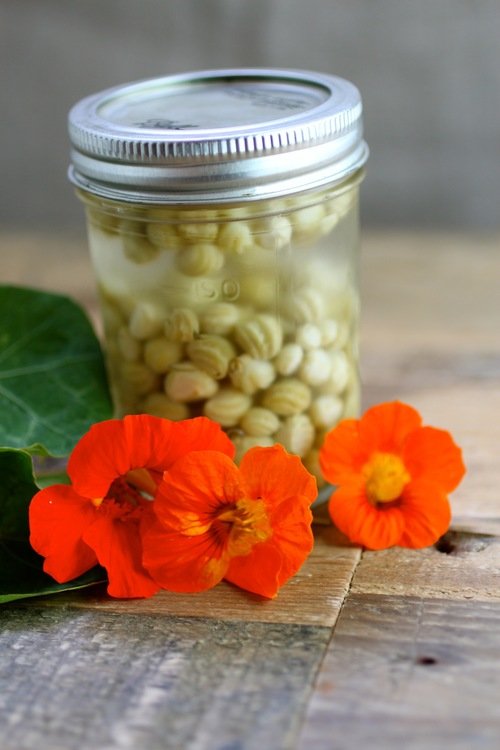
California Capers
California Capers.

As I explore in a previous post, the nasturtium plant (Tropaeolum majus) has so much more going on than a pervasive vine with peppery bright flowers, including incredibly spicy leaves and (the subject of this post) pungent, clear-your-nasal-cavity seed pods. You want to pick the seed pods when they're young and green, as they toughen and get bitter with age (but are still edible). Try them raw - their wasabi-like flavor is so intense, it'll wake you right up! I like eating them as a snack, but as they are so intense a little goes a long way. By pickling them, you can preserve and enjoy these pearls of flavor for up to one year. As with most things in the culinary world, someone else has already done this and coined them "California Capers" - a designation I love and truly wish I'd created!
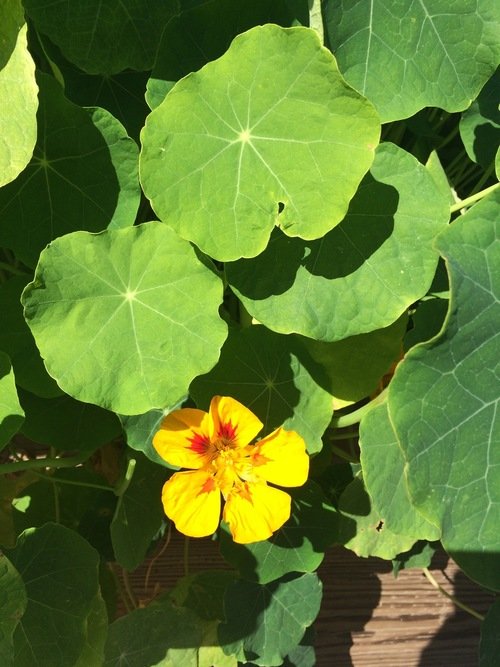
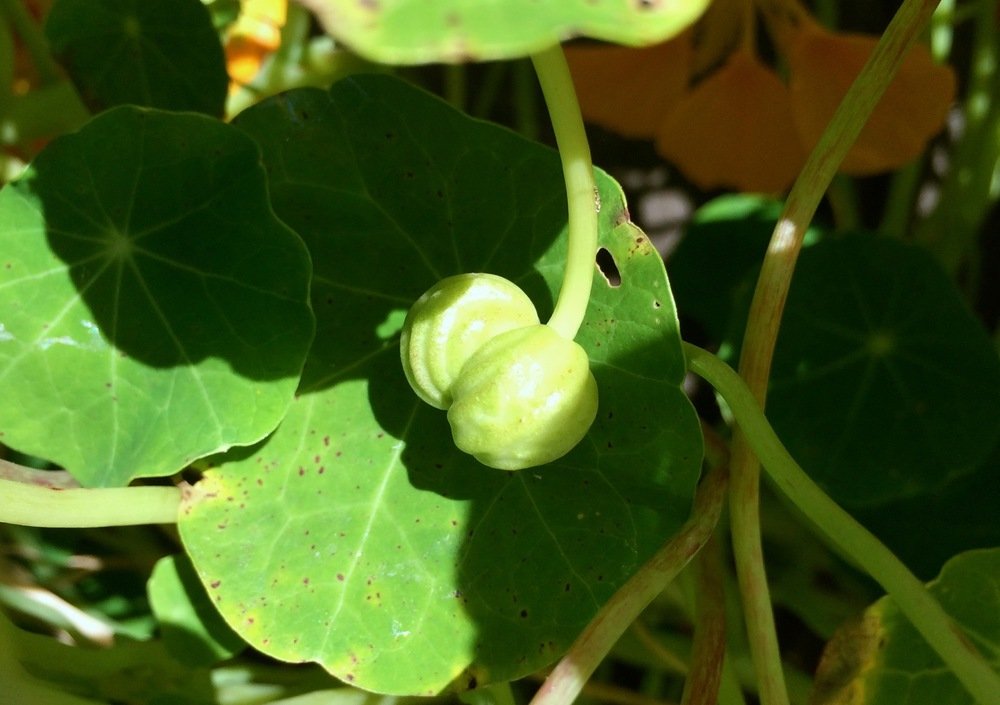
The nasturtium plant in all its glory.

Nasturtium seed pods stuck together in groups of three - these need to be separated before washing and preserving.
Don’t worry about sounding professional. Sound like you. There are over 1.5 billion websites out there, but your story is what’s going to separate this one from the rest. If you read the words back and don’t hear your own voice in your head, that’s a good sign you still have more work to do.
Be clear, be confident and don’t overthink it. The beauty of your story is that it’s going to continue to evolve and your site can evolve with it. Your goal should be to make it feel right for right now. Later will take care of itself. It always does.
I've tried making California capers a few ways, some ways more complex than others, but I find that I like the simple version from this site best, with a few alterations. If you find the caper pungency to be too strong, you can always submerge them in a salty brine for a few days (1/4 cup salt: 2 cups water). Pickled nasturtium pods work anywhere you'd use regular capers - they're amazing on bagels and lox (anything with smoked or preserved fish, really), pasta pomodoro, braised chicken, in tuna or egg salad, green salad, etc.
Makes 1 pint
1-1/3 cups young nasturtium seed pods
2 bay leaves
About 1-1/3 cups distilled white vinegar
2 teaspoons Kosher or sea salt
Separate seed pods that are stuck together - they are often joined in groups of three.
Soak seed pods in water to remove any dirt/debris, then drain and place in two sterilized half-pint jars along with 1 bay leaf per jar.
In a small saucepan over medium-high heat, bring the vinegar and salt to a simmer and stir until salt is dissolved. Pour hot vinegar mixture over seed pods, covering them completely.
Let the jars cool to room temperature before sealing with lids. Refrigerate for at least 24 hours before eating and enjoy for up to one year.

Umeboshi with Wild Plums
Umeboshi wish California wild plums.
Wild plums and red shiso make for impressive color.
As it turns out, you can't find ume plums (Prunus mume) easily on the West Coast to make a truly traditional umeboshi, or Japanese salt-pickled plum. Fortunately, wild plums are small and tart enough to work in much the same way. Ume plums are actually more closely related to an apricot, so if you eat them raw the texture will (theoretically, I have never eaten them myself) be very different than a wild plum from the West Coast, but when pickled the different is very subtle.
By preserving wild plums in salt, you keep the harmful bacteria out and, over time, create many amazing complicated flavors. The resulting wild plum umeboshi can be chopped and used as a condiment to bring bright, tart, pungent, savory/sweet flavor to a wide variety of dishes. Traditionally, it's eaten with rice, but I've tried it sautéed with sweet corn and in a nectarine compote that topped seared pork and I'm definitely looking forward to more experimentation! The salty-tart juice leftover from the umeboshi can be used for quick-pickling radishes or as an interesting addition to sauces and dressings.
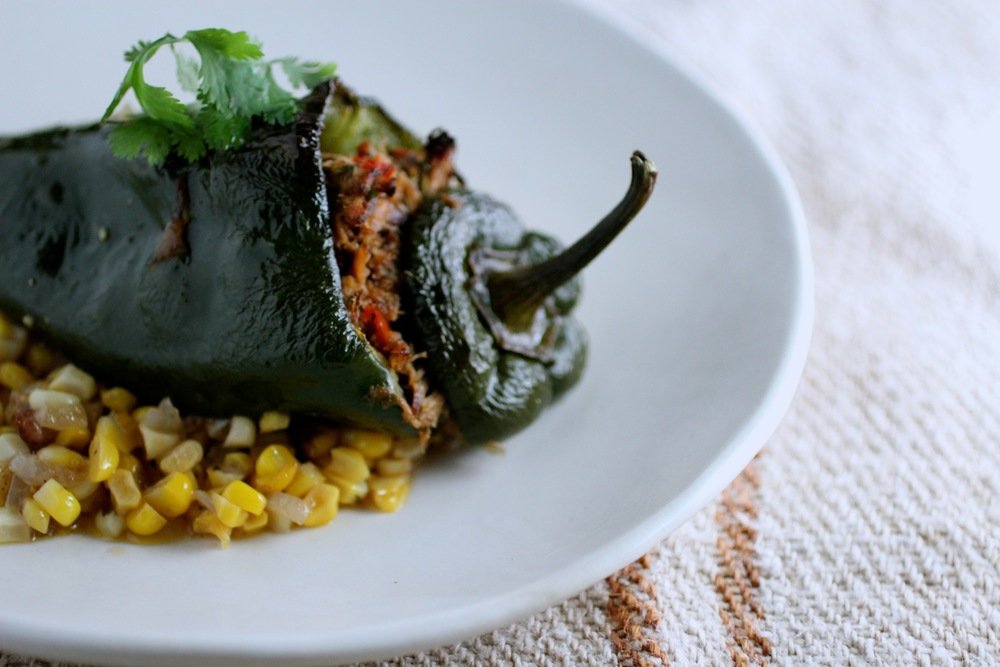
One of my favorite discoveries - sautéed sweet corn with umeboshi and butter.
The below recipe is adapted from from here, which is supposedly the most popular umeboshi recipe translated into English and can be adjusted as needed for amount of plums that you have. We made a few batches with shiso (purple shiso from our garden) and a few without and although the shiso is nice, it's pretty subtle and both versions are great. Be careful handle the plums VERY gently - any bruising and cutting can lead to mold.
1 pound (metric example = 1 kilogram) small wild plums, about the size of cherries or slightly larger and still firm (we picked up red ones from Tilden Park - yellow can be used, but the color will not be as characteristic)
2 cups (metric example = 1 liter) vodka or other distilled alcohol (such as shochu), for rinsing plums
1.6 ounces (metric example = 100 grams) red shiso leaves (about 10% by weight of plums)
1.6 ounces (metric example = 100 grams) coarse sea salt or Kosher salt (10% salt solution)*
Step 1: Sterilized the plums and process the shiso
Remove stems from plums. Wash plums in water twice then soak in a bowl of cold water and allow to soak overnight. This removes some of the bitterness in the plums (wild plums are less bitter than ume plums, but I went ahead and did this to be safe).
Drain plums, dunk in a bowl of vodka, and set out on a clean towel to dry. The alcohol helps to ensure any mold spores that might still be on the outside of the plum are removed/rendered safe.
Wash shiso leaves, remove tough stems, sprinkle with salt and massage leaves with fingers until they are limp.
Step 2: Get your plums nice and salty so they ferment
Clean a large, wide-mouthed container (such as a gallon-sized jar) that can hold all of your plums. Spray with vodka to disinfect it, then allow to air dry.
Fill your pickling container with salt and plums by starting with a layer of salt, then a layer of plums, followed by a portion of shiso. Repeat until all ingredients are used and weigh down with a plastic bag filled with water or another smaller jar filled with rocks and water (make sure these are clean). Once the container is full and weighed down, cover the top with cheesecloth and secure with a rubber band. You might have to wrap cheesecloth around the weight then secure with a rubber band. As long as the top is covered with cheesecloth, all is well. It doesn't have to be pretty!

Salt, shiso, and plums weighted down and covered with cheesecloth.
Leave fermenting plums in a cool, dark area until the plums are soft and completely immersed in a reddish liquid (about 1-2 weeks). This liquid is extracted from the plums by the salt. If liquid is not completely covering plums, try increasing the weight. Liquid should be about 1 inch above the top of the plums. Leave the plums in the liquid until you are ready to dry them, about 2-3 weeks.
Step 3: Hoshi/boshi ("to dry") your plums
Wild plums (or ume plums in Japan) are harvested in June and drying traditionally occurs on a specific date after the rainy season is over. Be sure to dry your plums at a time when the weather is dry and at least 2 weeks after plums have been submerged in liquid.
Put the plums in a single layer and the shiso leaves in spread-out clumps separately on flat baskets - we used a bamboo steamer - . Leave the baskets outside in a sunny place with good ventilation for about 3 days, turning them at least every 24 hours. If it rains, be sure to take them inside before they get wet. At the end of the drying process, they should look wrinkly.
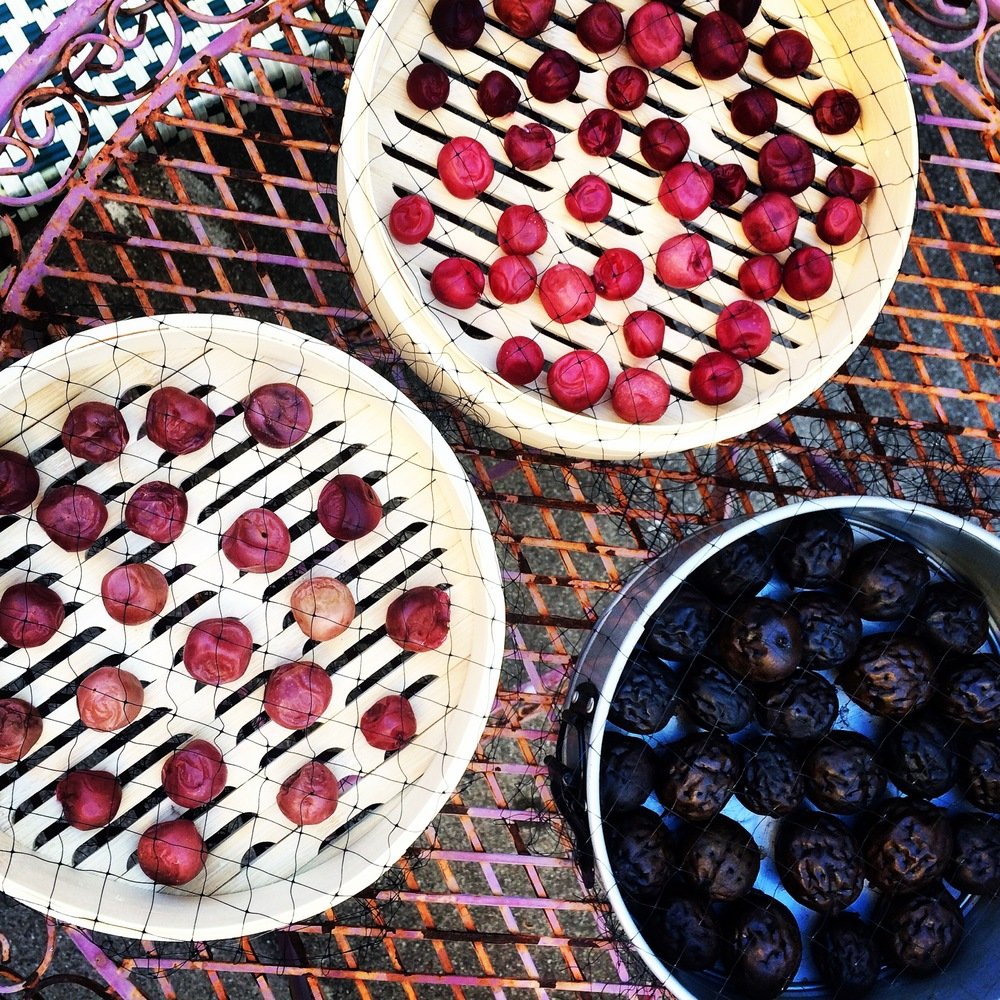
Umeboshi drying on bamboo steamer liners. Also in the photo are green walnuts in the process of pickling (but have nothing to do with the umeboshi, don't be confused!)
Step 4: Store and enjoy
Store plums in jars, pouring back in some of the ume liquid if you prefer softer plums (we did not do this, as we like them firmer). As I mentioned earlier, this ume liquid can be used for other things, such as quick pickles. The shiso leaves can be layered in with the plums, but we keep the shiso out for other uses, as they didn't have the best texture and we wanted to keep our umeboshi "clean". The umeboshi is now ready to eat - they can be eaten for up to 10 years (!) and grow in complexity over time, but I doubt we'll still have ours after even 1 year!
*Other salt solutions can be used, from 8% - 20%. The higher the salt percentage, the saltier the umeboshi will be (obviously). The lower the salt percentage, the more likely they are to mold. It is recommended that beginners use at least 10%.
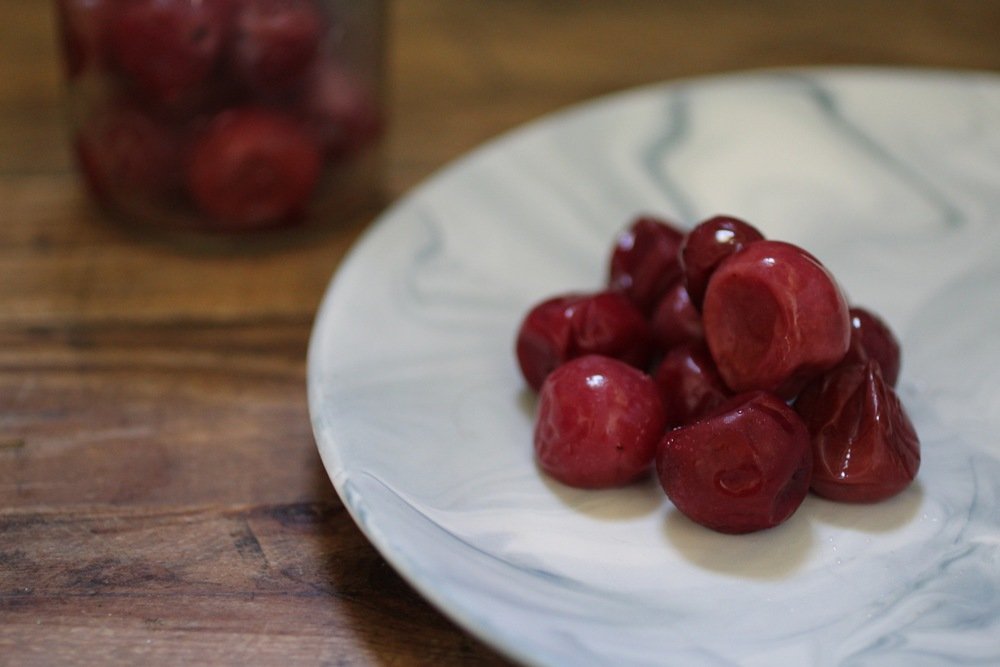
Finished umeboshi straight from the jar.
Plum-Rosemary Jam and Spiced Chutney
One neighbor's discarded plums are another's treasure.

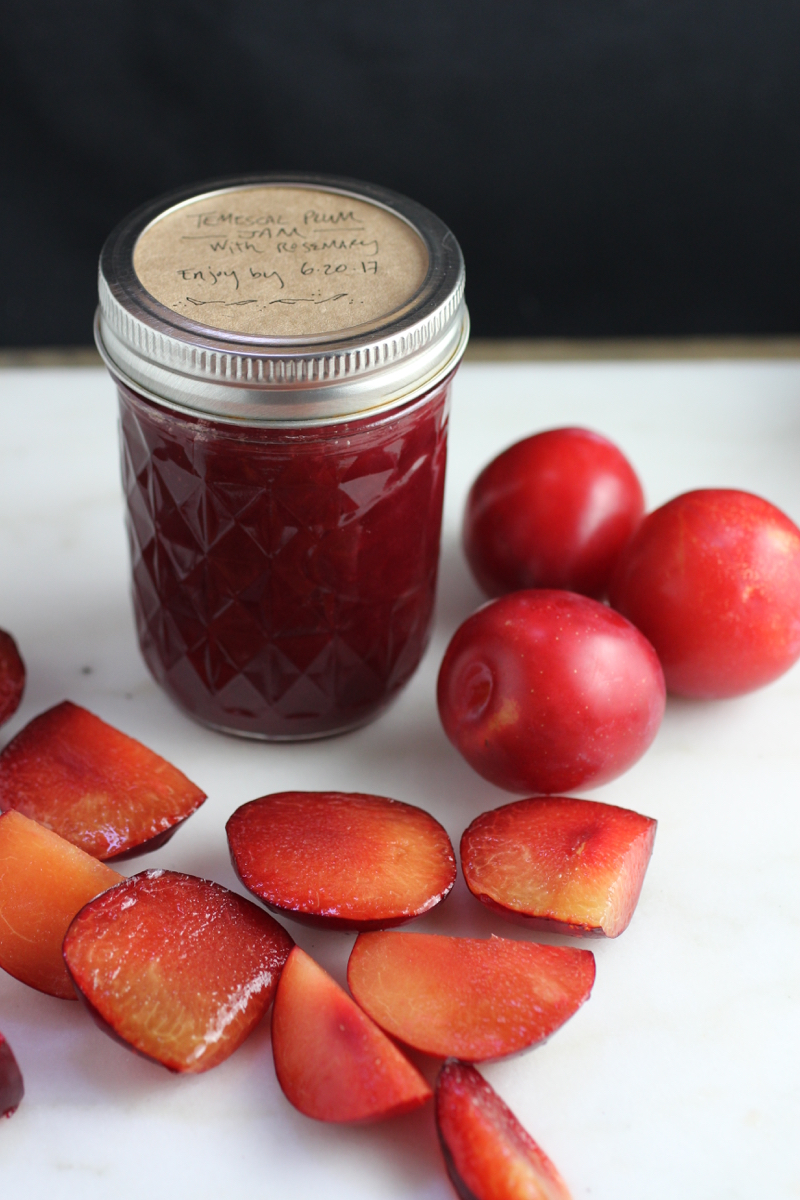
Preserves are a great way to preserve!
There are times that I especially appreciate how fortunate I am to live in California. Plum season is one of those times. During the months of June, July, and sometimes August, many neighborhoods in the Bay Area are literally dripping with plums. These plums are often there for anyone willing to put in the effort, as many plum tree owners can't seem to keep up with the production. While the small and tart wild plums that you can find in many parks and urban environments are lovely (especially for California wild plum umeboshi, recipe coming soon!), the Santa Rosa plums that are much-loved cultivated variety in the area are pretty ethereal. They are sweeter, but not cloyingly so, with beautiful flesh and an almost rose-like scent. When my neighbors told me that they had more of these plums than they could handle and told me to take as many as I could I knew I hit the plum jackpot. Low hanging fruit for sure!
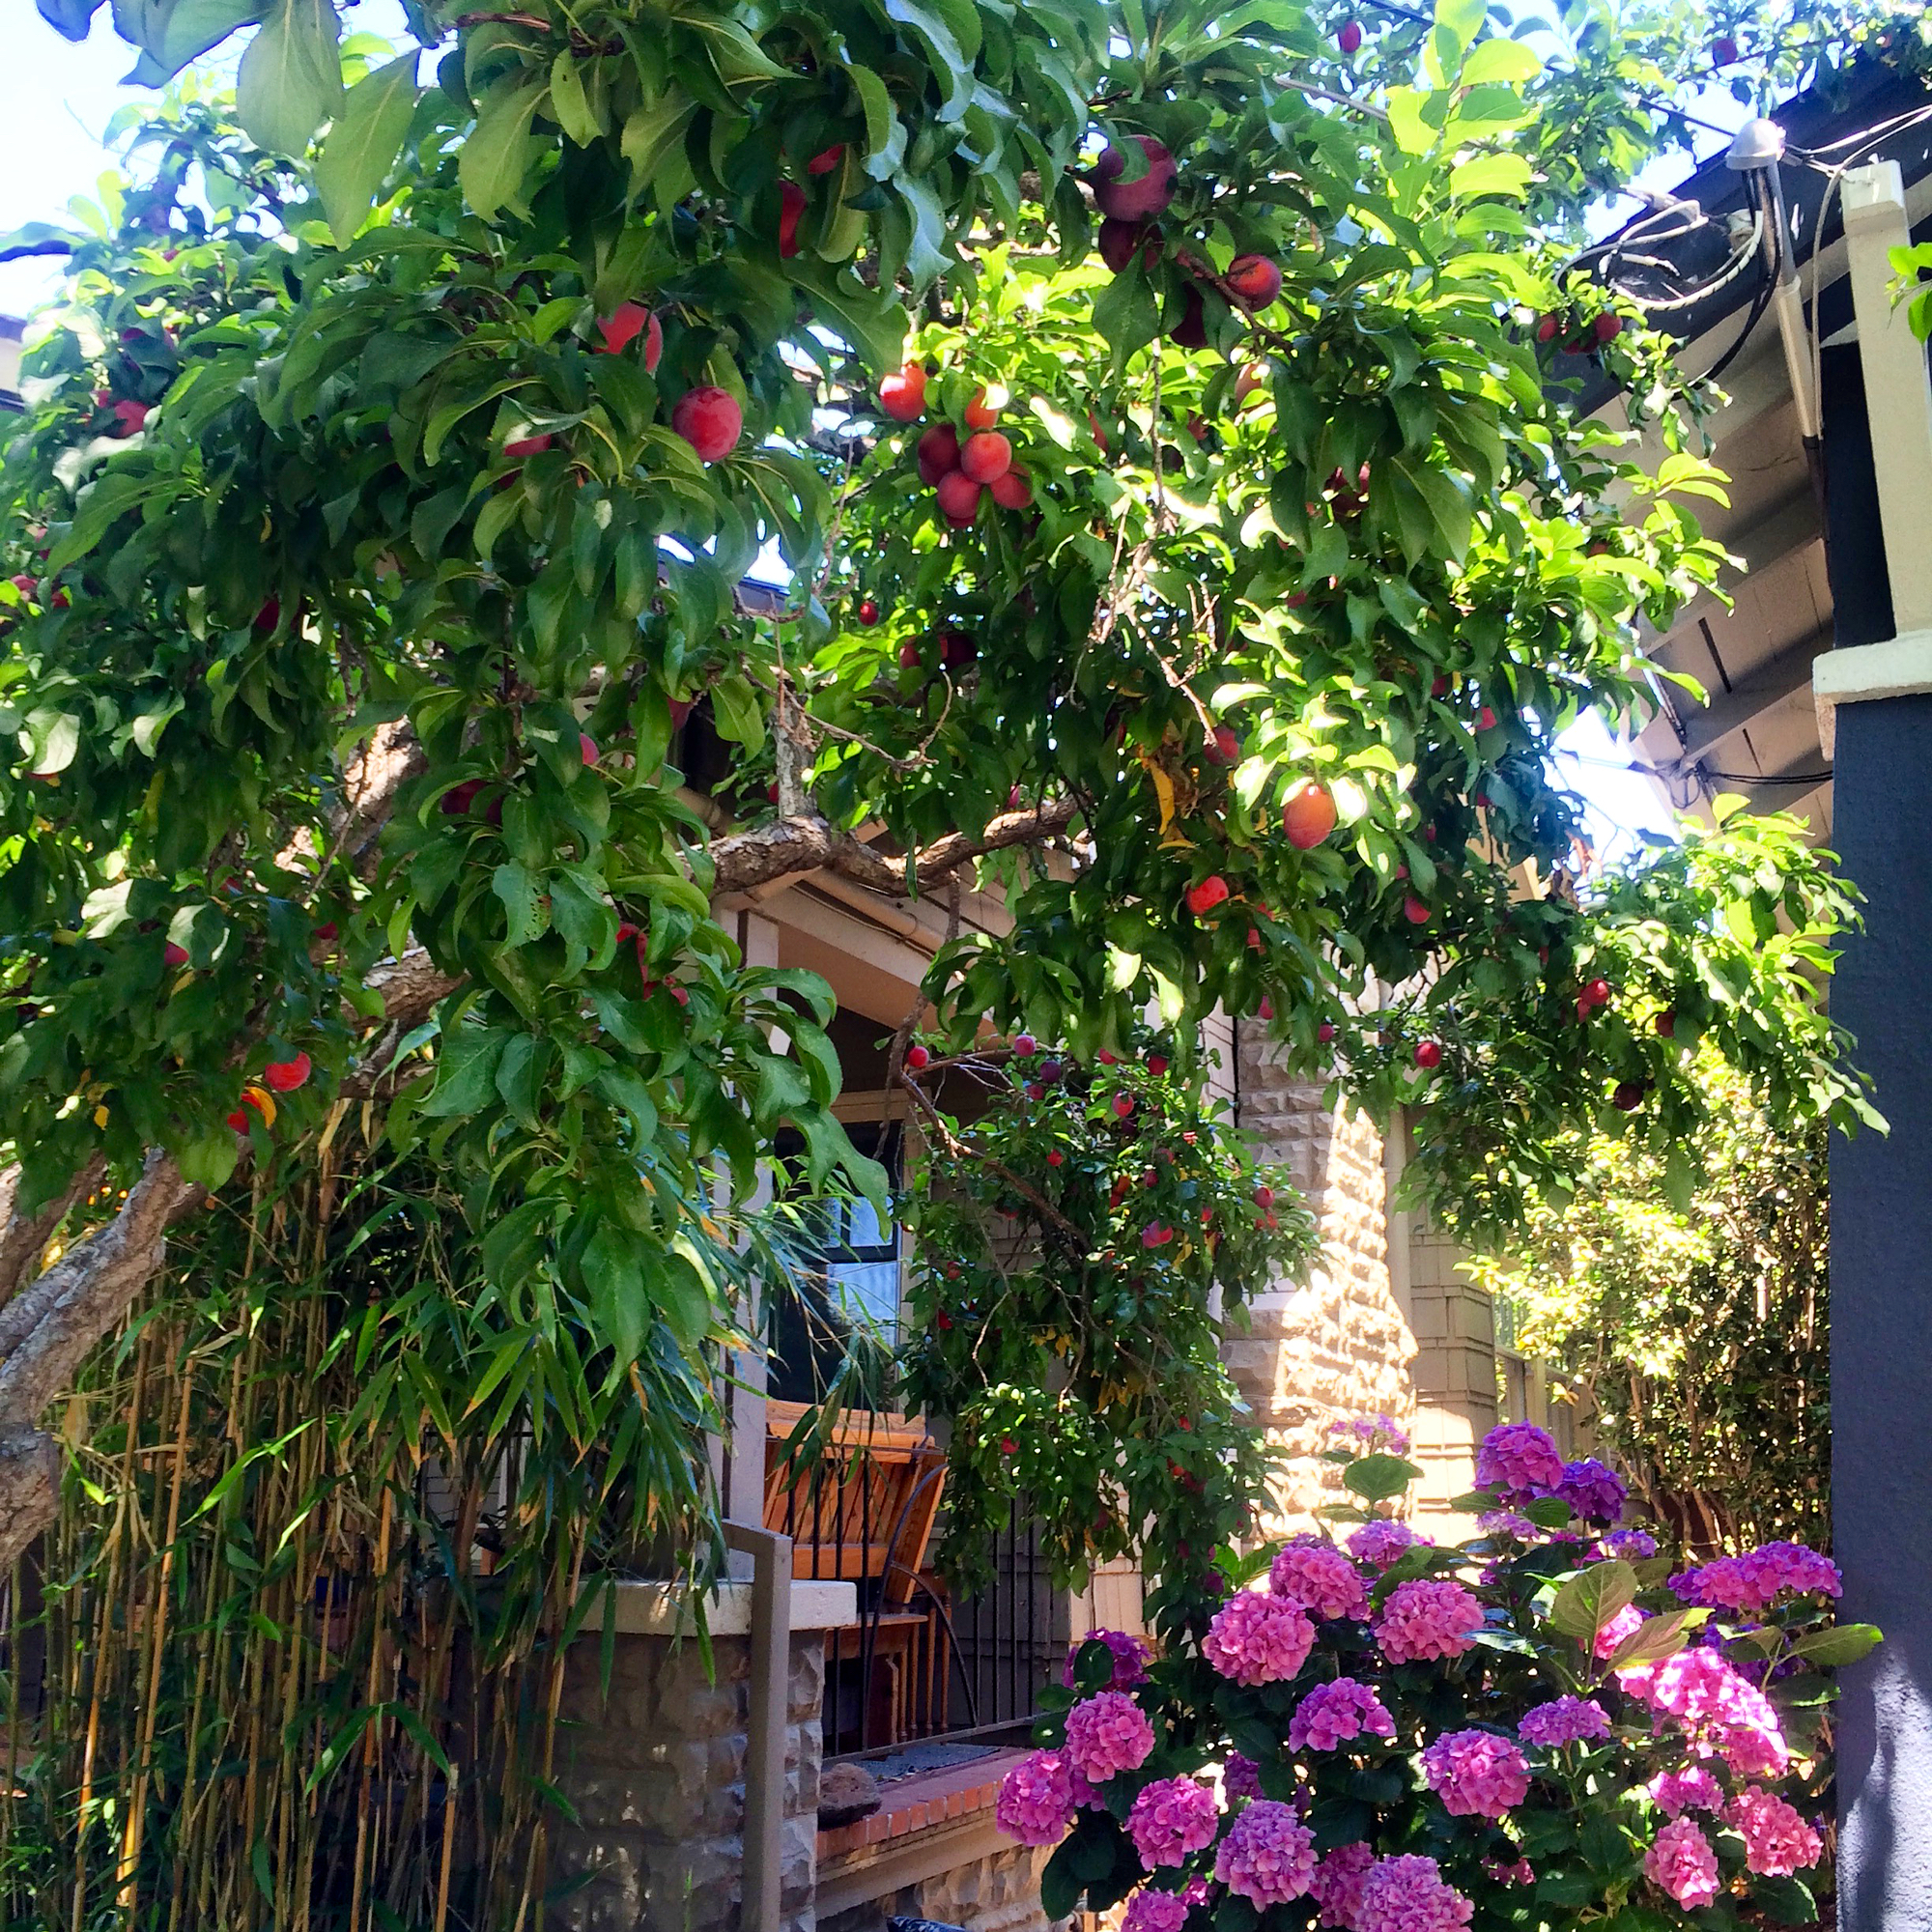
I gotta lotta neighbors with a lotta unused plums.
There are many ways to enjoy plums like use them in place of apricots in this ginger almond galette or simply eat them fresh and let the juices run down your chin, but if you're in need of putting up (isn't that a great phrase?) a lot of them for later use, preserves (hence the name) are a classic way to go. When I have a bunch of fruit, I like to make both jams and chutneys because it's nice to have a classic jam for topping toasts and yogurt, filling pastries, and making cocktails, but chutney is great to have around for savory applications. Serve it with blistered green beans or roast chicken eh, voilà! All of a sudden that ho-hum dish is exciting. The jam uses store-bought pectin - I used to only make my own pectin from citrus pith, but (although fun) it can be quite time consuming and the Pomona pectin is a faster way to success. The quantities and spices in both the jam and the chutney are adaptable to availability and preferences!
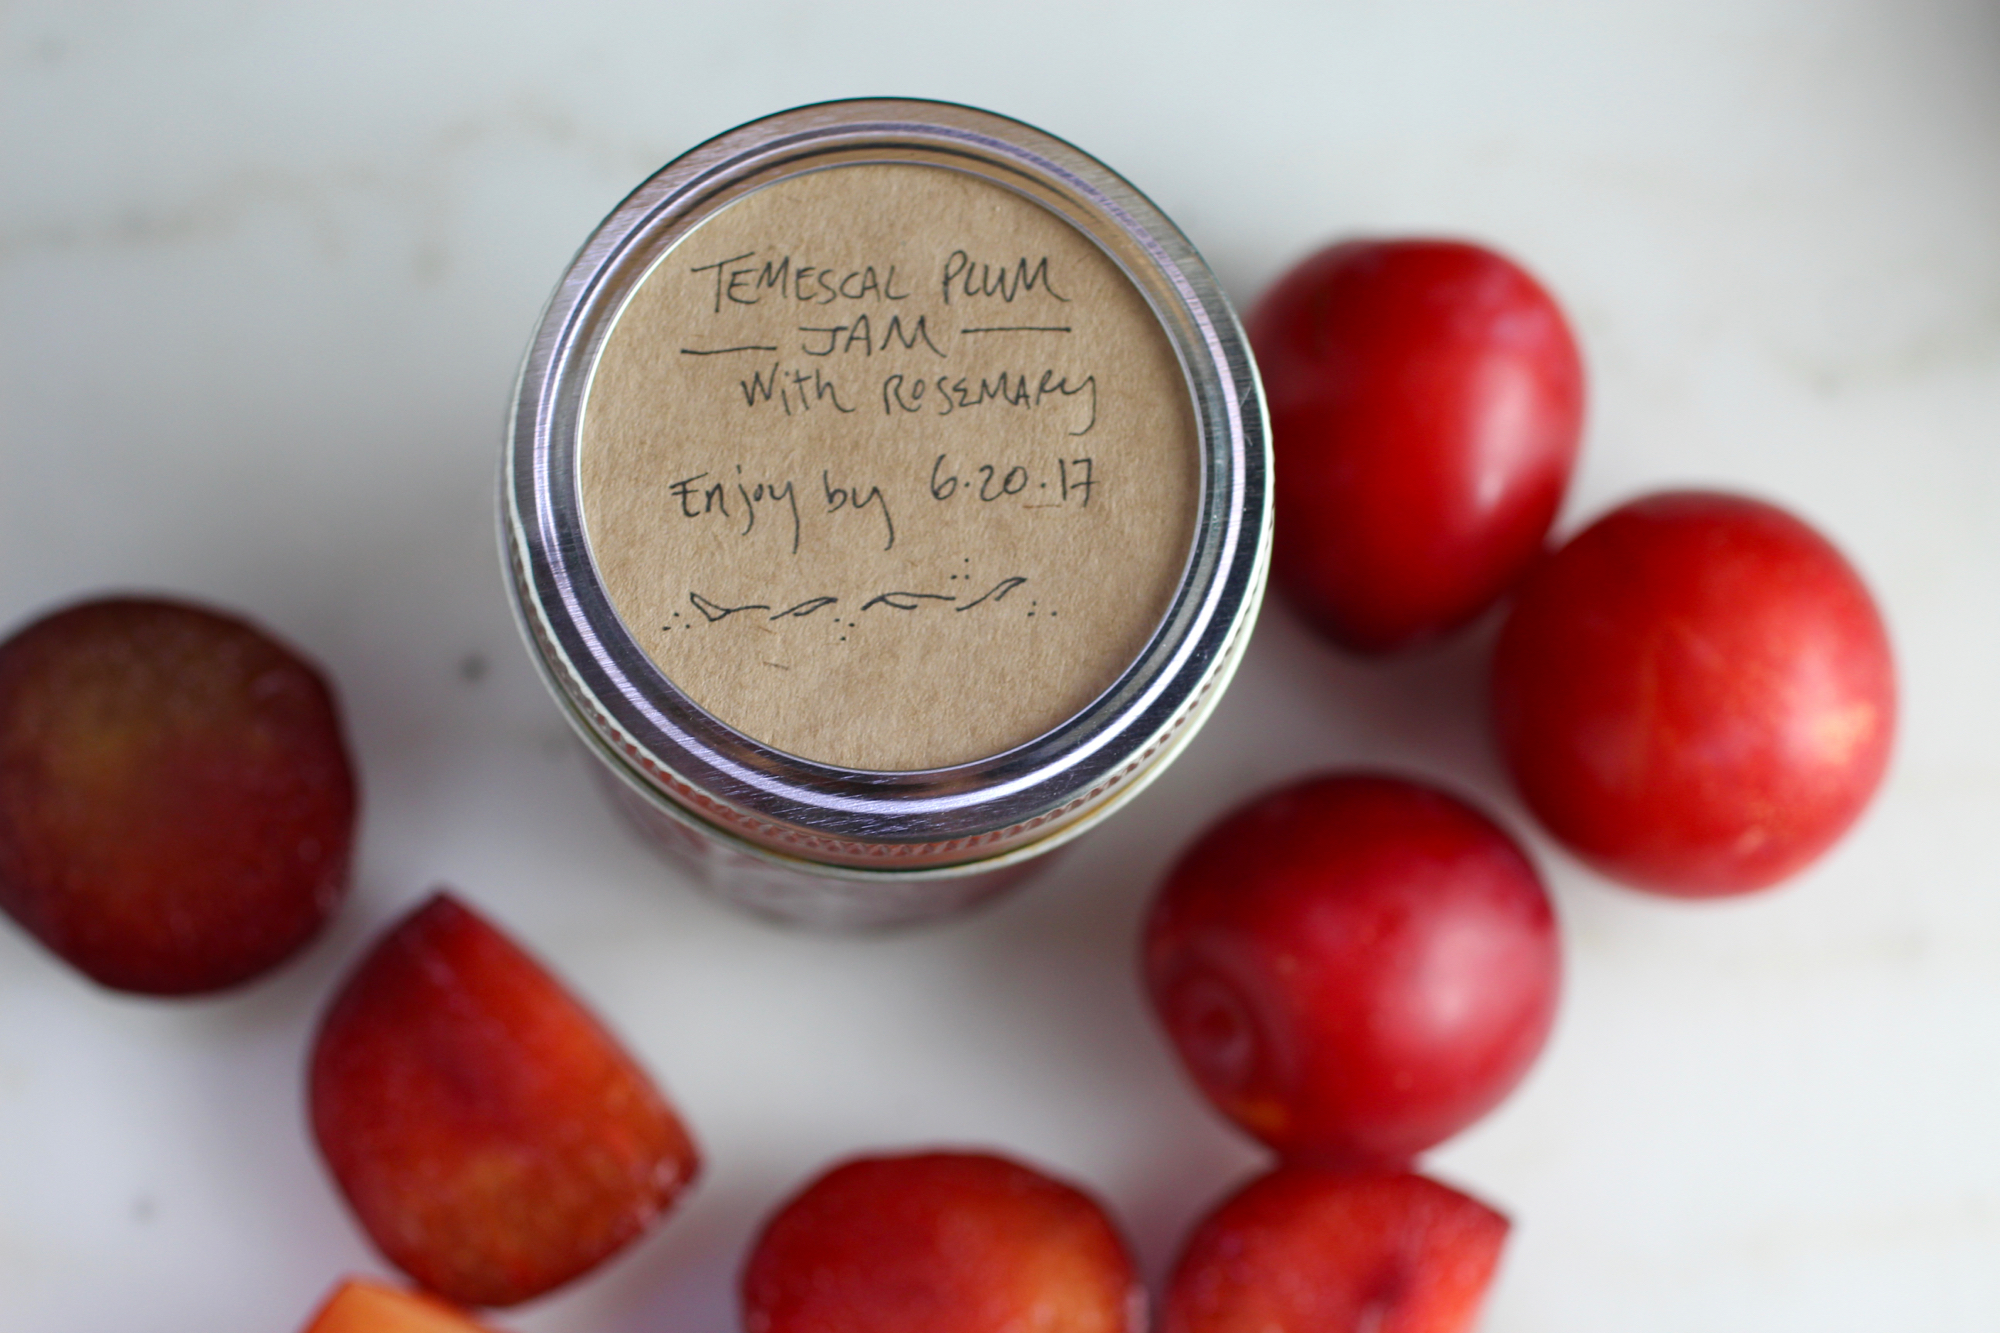
Plum-Rosemary Jam
Makes about twelve, 8-ounce jars. Recipe adapted from Serious Eats.
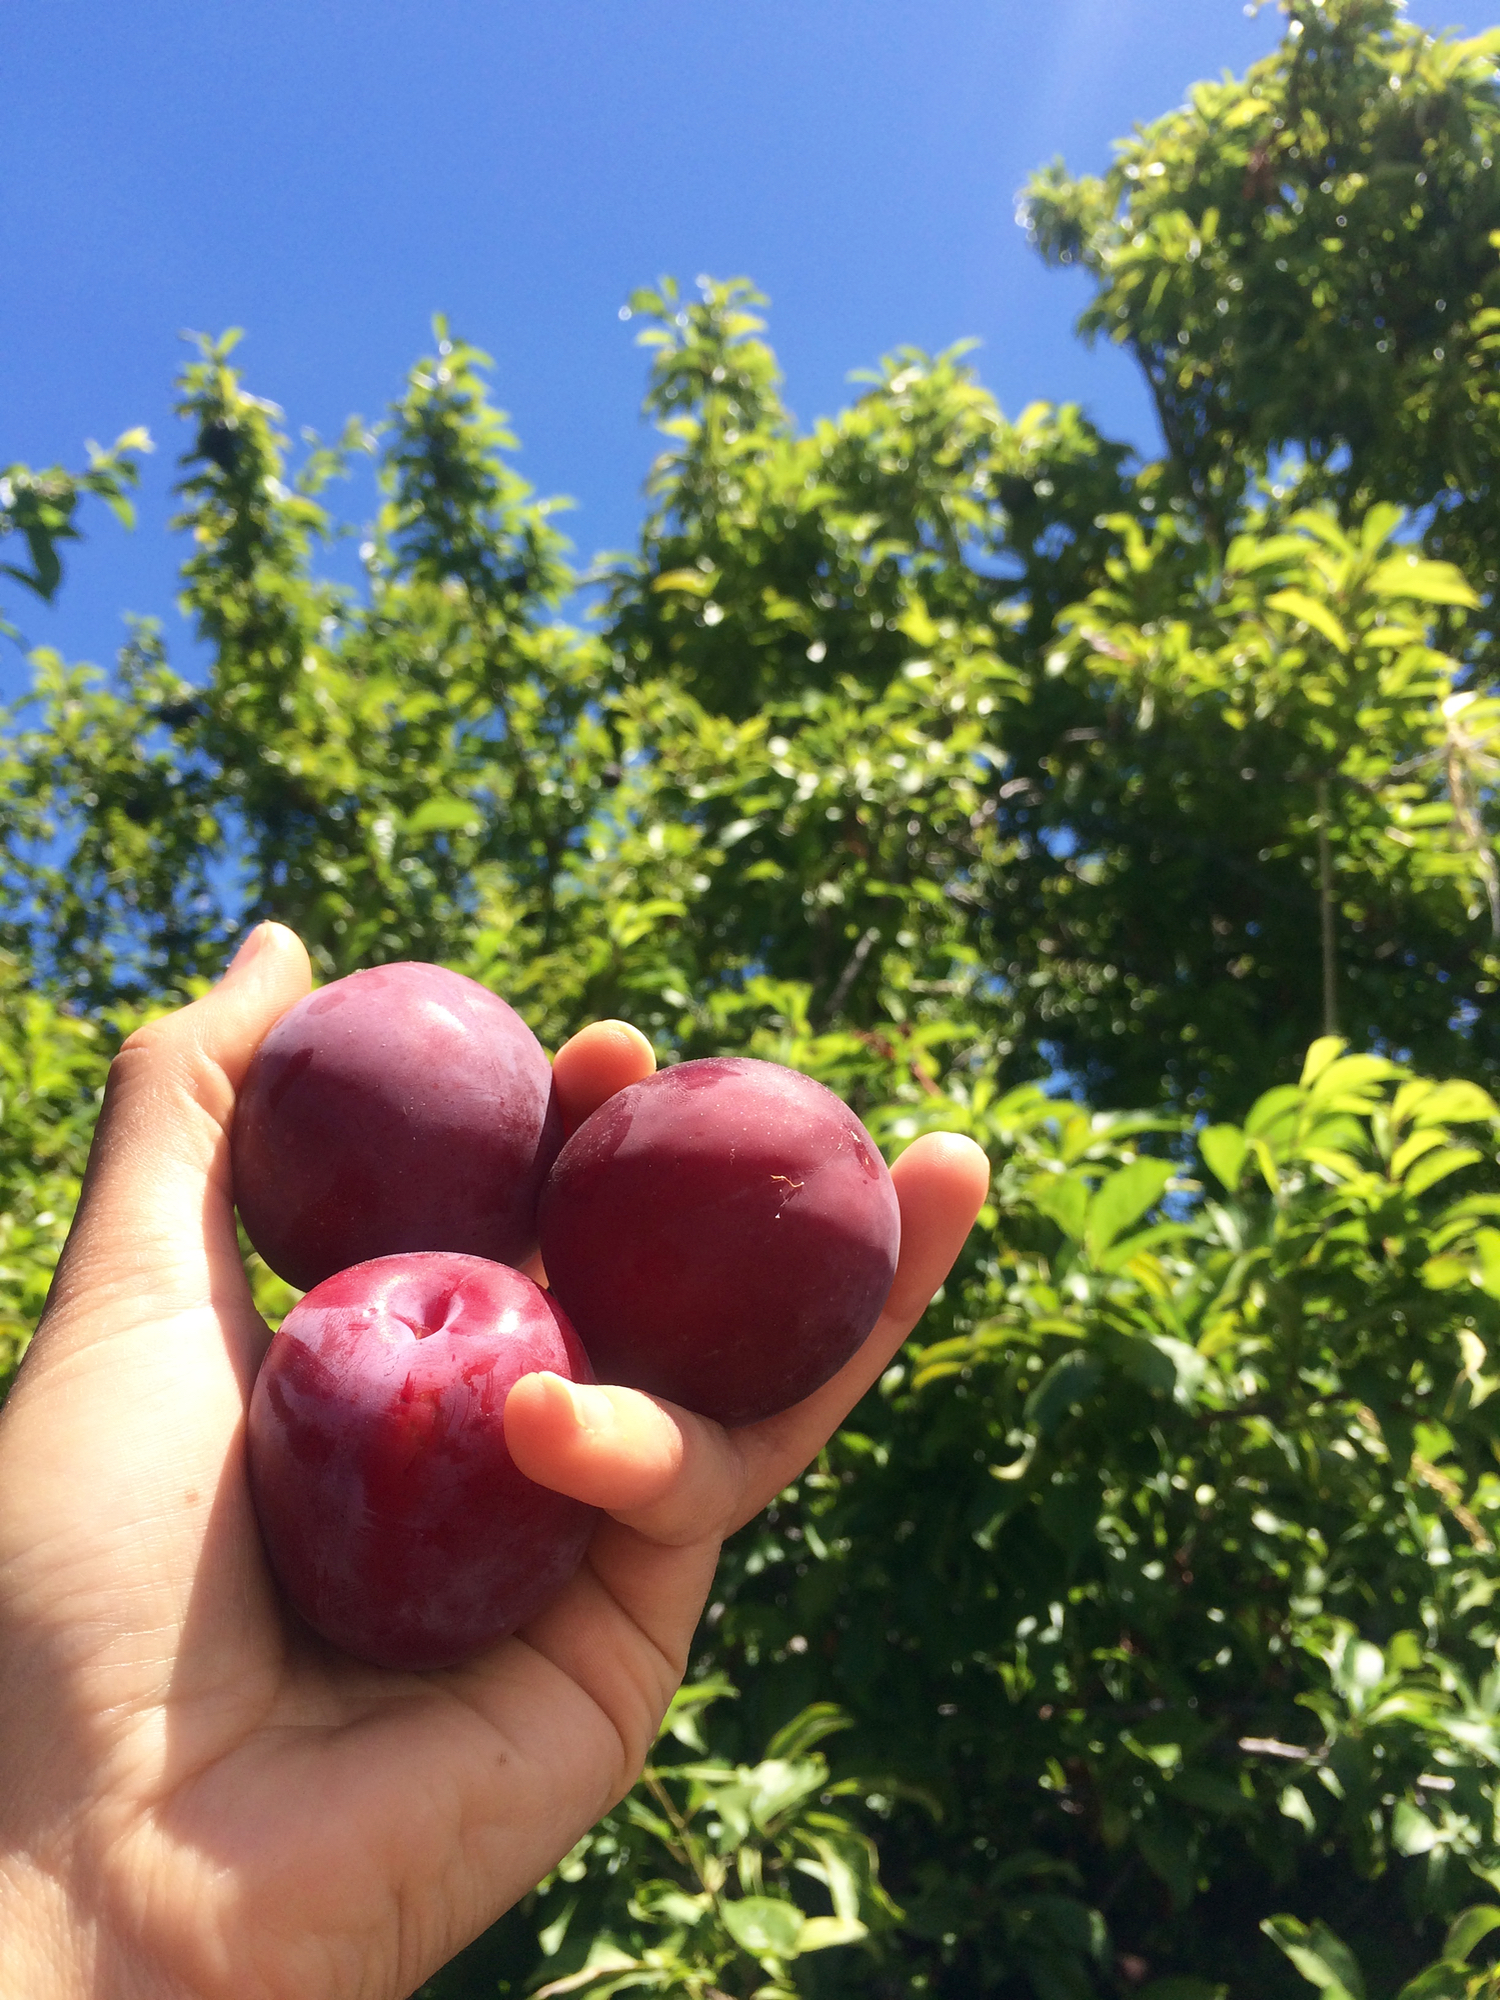
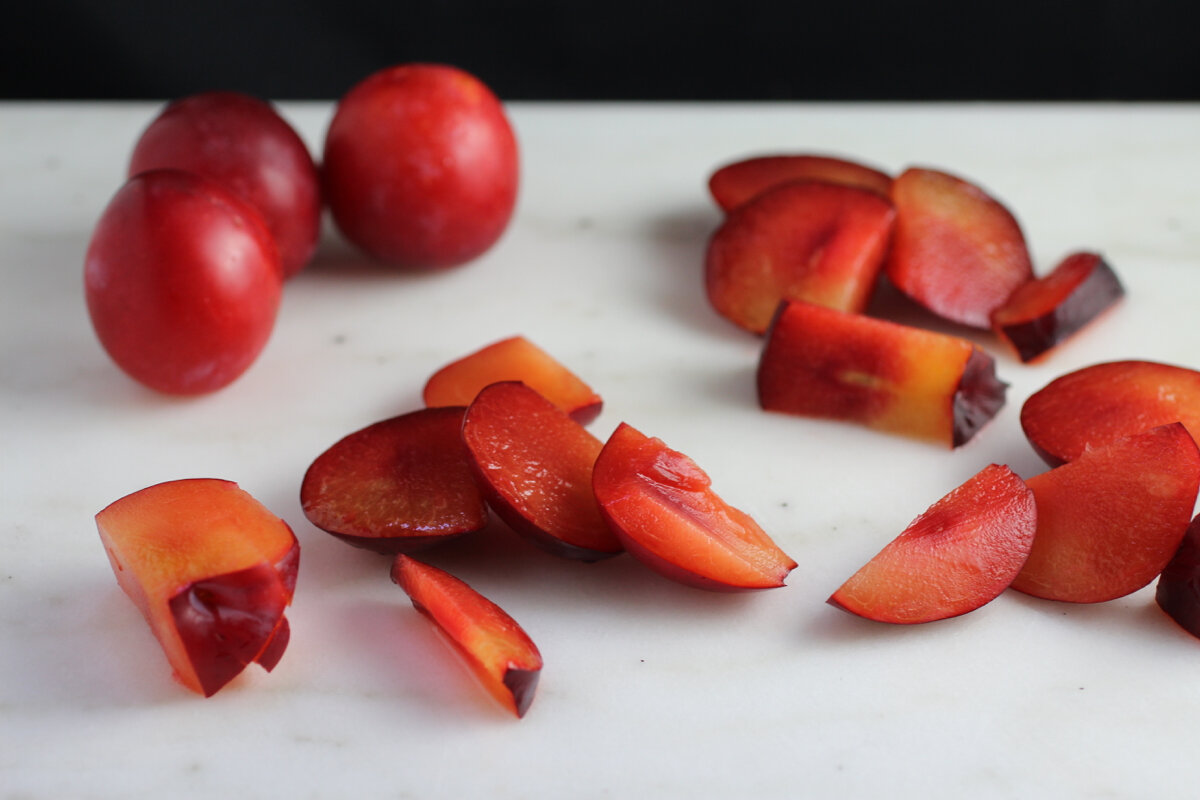
Glorious Santa Rosa plums.
6 pounds plums, pitted and chopped
2.25 pounds granulated sugar
1.5 Tbs Pomona's Universal pectin or other low-sugar pectin
2 Tbs calcium water (comes in pectin package)
2.25 ounces lemon juice (about 2 lemons)
3 sprigs rosemary
Toss plums with sugar and pectin in large bowl. Cover, refrigerate overnight (optional - this may be helpful if you don't have time to make jam after picking fruit and want to save it until the next day).
Put two spoons in the freezer.
Heat in large pot on medium with calcium water, lemon juice, and rosemary sprigs, stirring frequently. Cook for 30 min - 1 hour, skimming off foam* and smashing to desired texture. An immersion blender can also be used to break down fruit, but rosemary sprigs should be removed before blending.
Check for doneness by putting jam on spoon and putting back in freezer for 2 minutes. When you run your finger through the jam on the spoon, it should leave a track and jam should cling to the spoon (rather than running off). The jam in the pot will also be a lot glossier/smooth.
While jam is cooking, wash and sterilize jars and rings by submerging under water and boiling for 10 minutes. Throw in the lids once they’ve boiled for 10min and turn off water.
Remove rosemary sprigs and fill jars, leaving 1/2 -inch headspace. Screw on rings loosely, submerge again in water for another 10 minutes to seal.
Store at room temperature. Jam is good for up to 1 year.
*The foam is tasty and has a cool texture, kind of like meringue! Next time I do this, I want to blend into egg white foam and see if it will set up into a cookie, but is great and fun on desserts regardless.
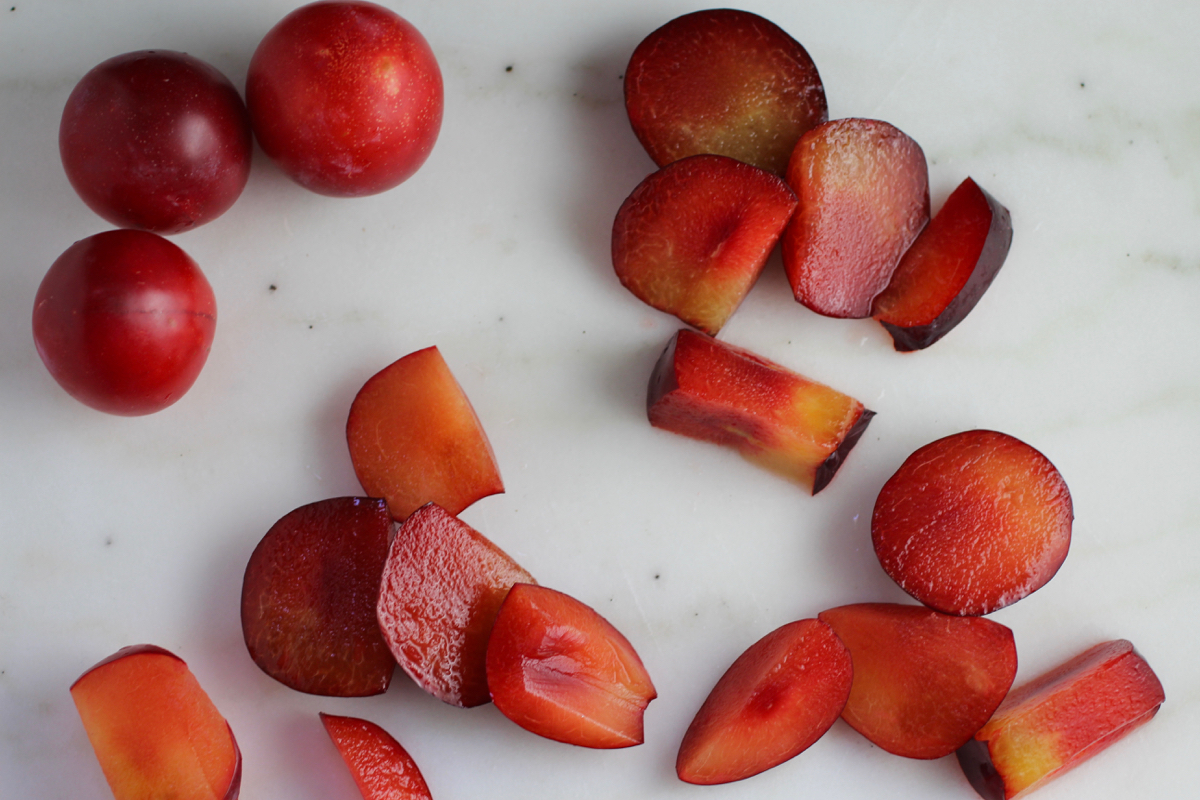
The flesh is yellow in color and the taste tart-sweet. Cut around the pit, as it does not fall out willingly.
Spiced Plum Chutney
Makes about four, 8-ounce jars. Recipe adapted from Jamie Oliver (with a lot more kick added!)
2.2 pounds plums, pitted and chopped
4 shallots, thinly sliced
1 tablespoon neutral oil (grapeseed or vegetable)
3 fresh bay leaves
7 cloves
9 allspice seeds
1 tablespoon black or yellow mustard seeds
1 tablespoon coriander seeds
2 teaspoons red pepper flakes (optional - this amount is pretty spicy)
1-3/4 cups brown sugar
3 tablespoons grated ginger
Zest from 1 large orange
Juice from 1 large orange
300ml cider vinegar or 200ml red wine + 100ml water
1/2-1 teaspoon salt
Cook shallots in oil on low until golden.
Add bay leaves and all spices except for ginger and sauté for 1 minute.
Stir in plums. Add sugar, ginger, and orange zest. Squeeze juice from orange into measuring cup, top off with cider vinegar or vinegar/water combination until it reaches 450ml. Add this to plums and bring to a boil. Simmer until thick about 30 minutes - 1 hour. Salt to taste.
While chutney is cooking, wash and sterilize jars and rings by submerging under water and boiling for 10 minutes. Throw in the lids once they’ve boiled for 10min and turn off water.
Remove bay leaves and as many allspice seeds as you can and fill jars, leaving 1/2 -inch headspace. Screw on rings loosely, submerge again in water for another 10 minutes to seal.
Store at room temperature. Chutney is good for up to 1 year.
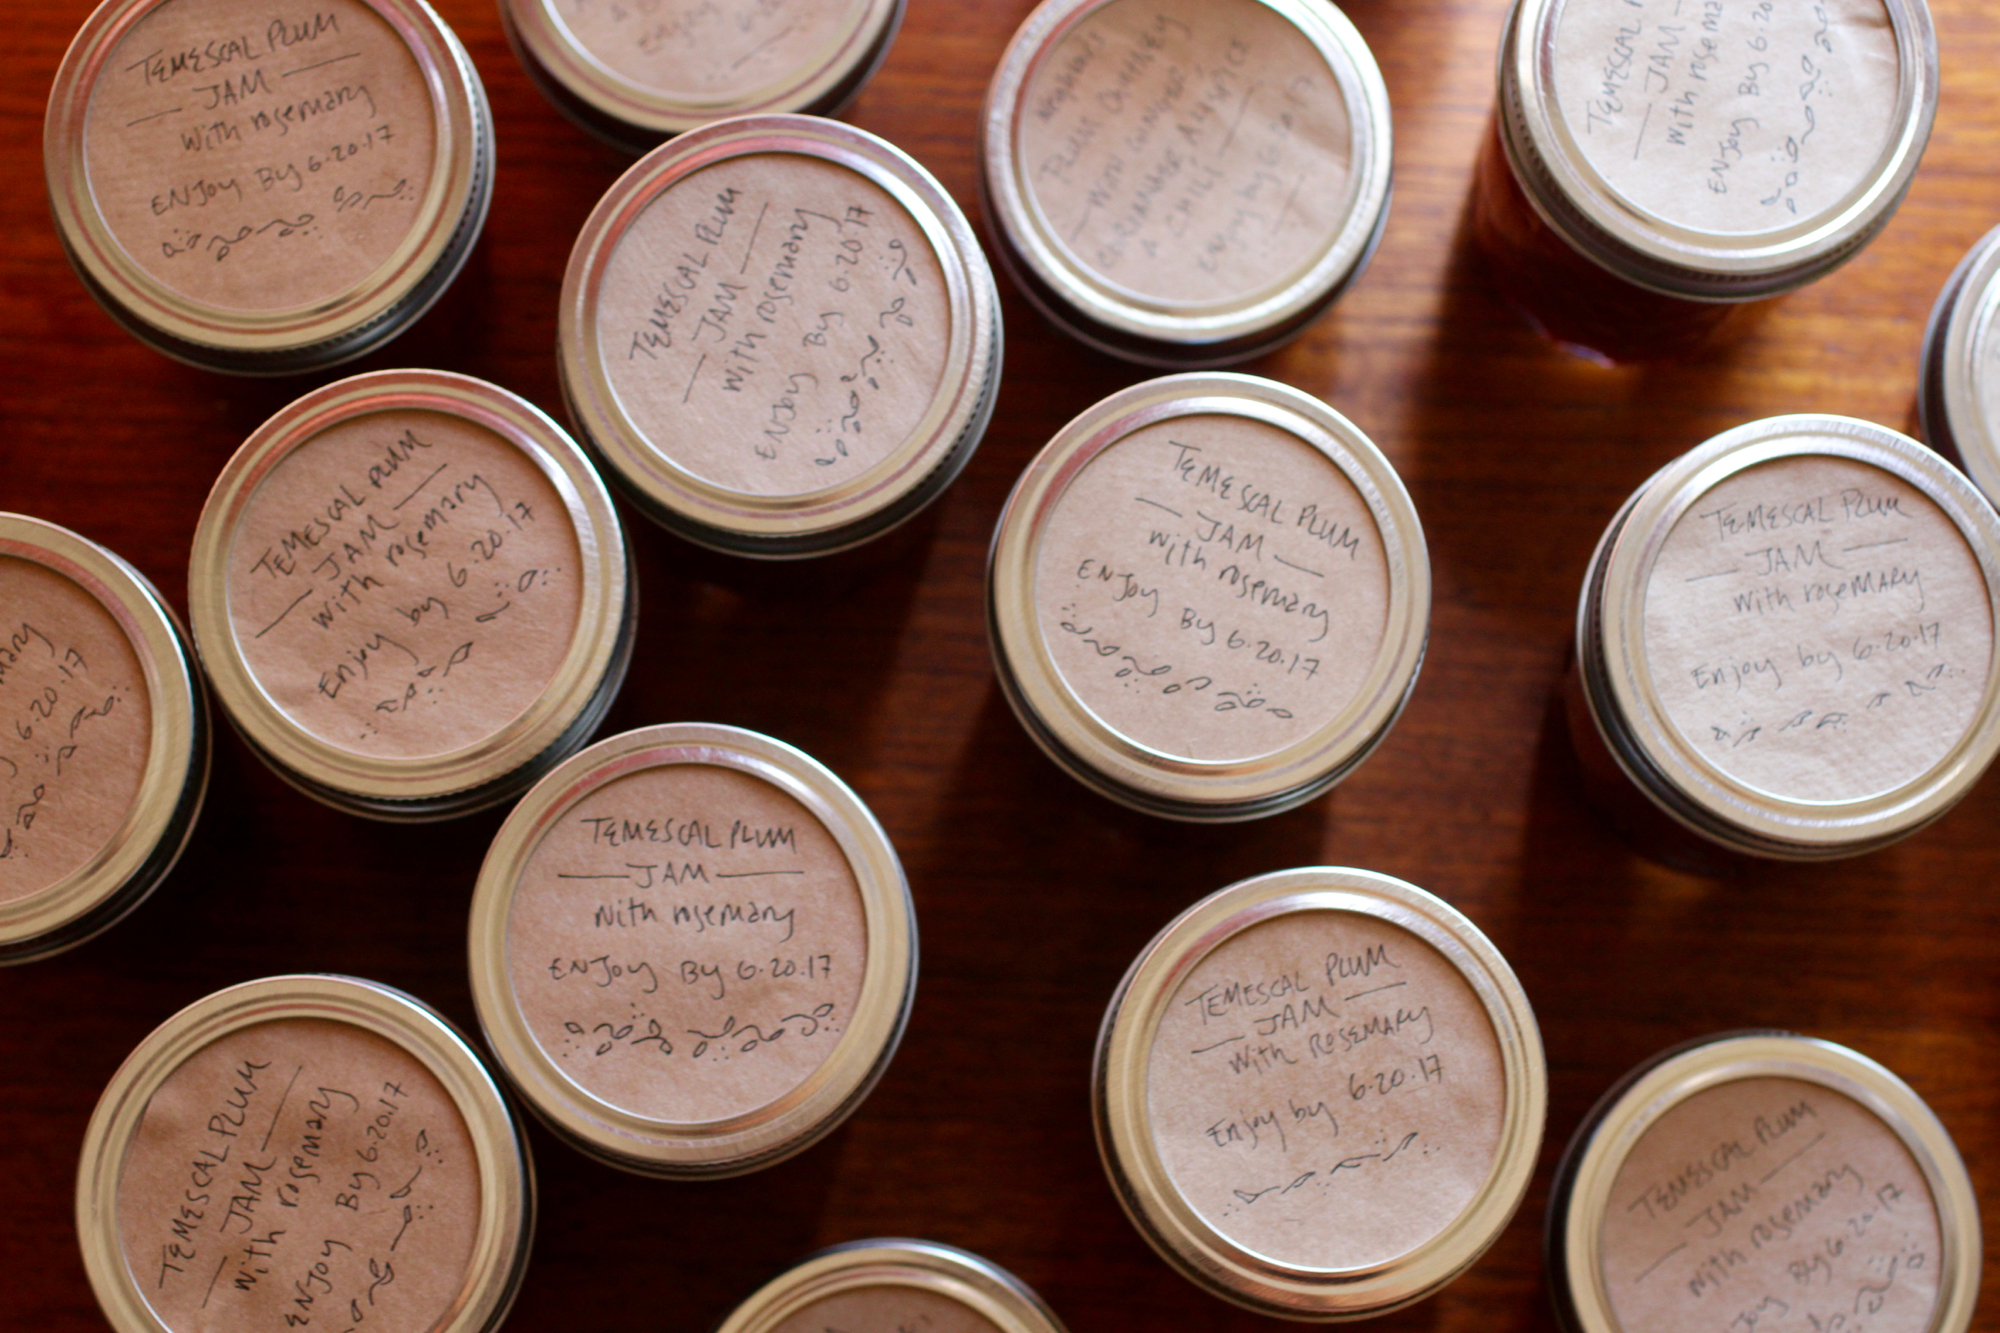
To label jam, I use old paper grocery bags - just trace the outside of a ring, cut out a circle slightly smaller than the outer edge, and then screw on top of the lid.
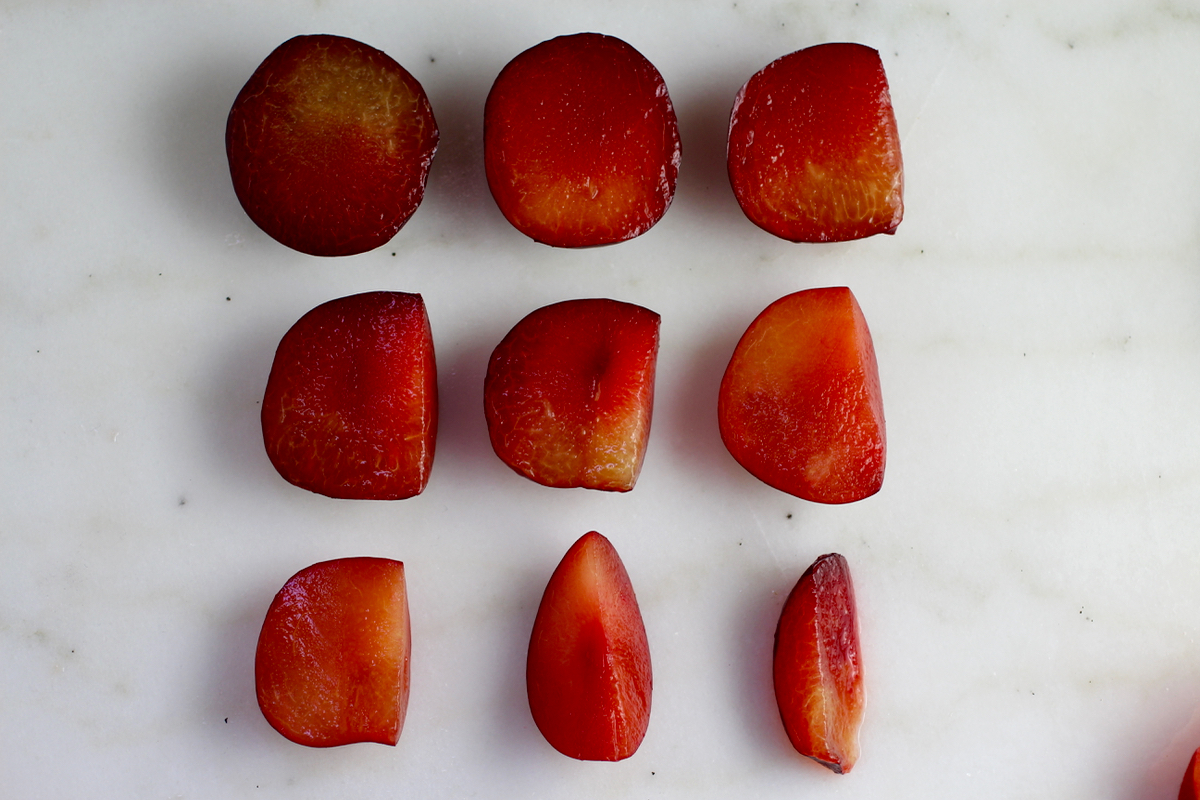
Phases of plum.
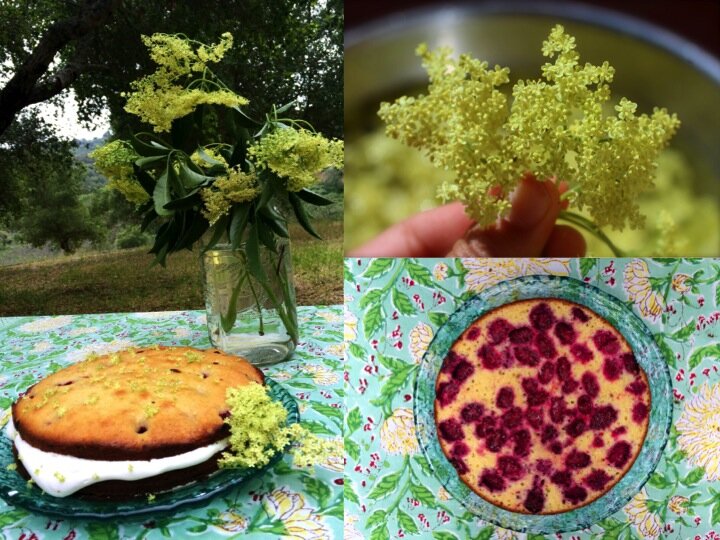
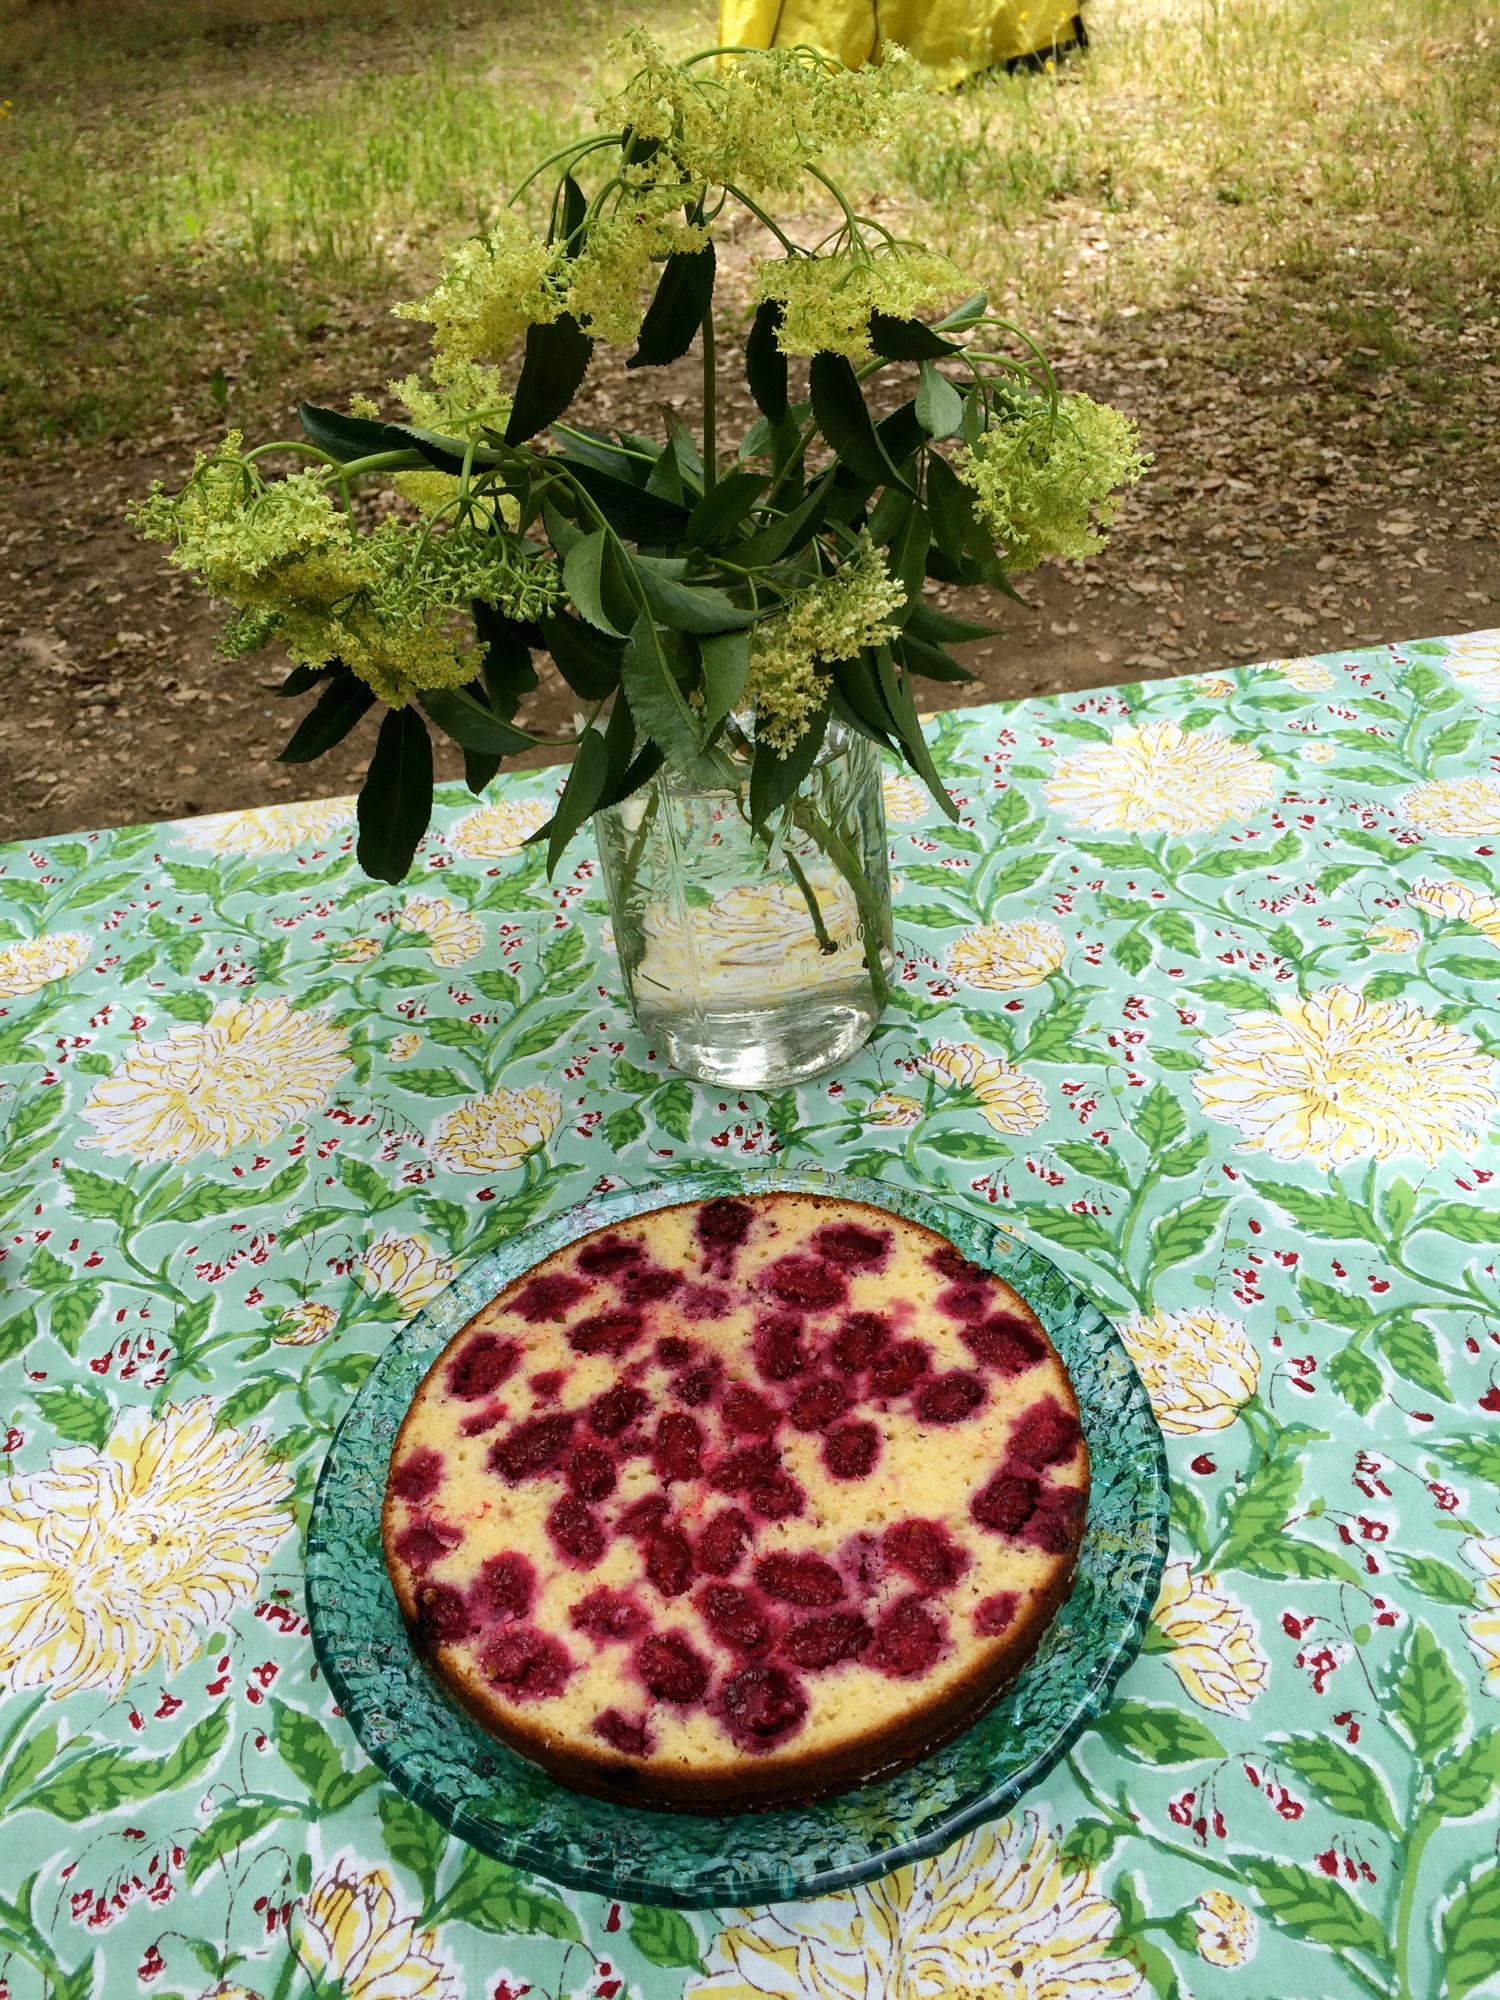
Classic Elderflower Cordial & Elderflower berry birthday cake
Bring the spring to any beverage or dessert.

Any search for the culinary uses of elderflower will pull up elderflower cordial. By cooking the flower head in what is essentially a diluted simple syrup, you can pretty easily preserve its fragrance for future use. Which is great, because elderflower is an amazing, special plant that deserves to be savored. The most common way to enjoy elderflower cordial is by using it in cocktails (gin, elderflower, and lemon, is a tasty simple classic) or adding a bit to sparkling wine or even sparkling water for a nice kid-friendly afternoon refreshment. I also love drizzling elderflower cordial over any dessert for a quick and easy way to make that dessert oh-so-special (such as for my huckleberry-elderflower birthday cake below).
Elderflower cordial: Makes about 1 liter.
20 medium elderflower heads (about 2-3'' across)
Grated zest of 2 lemons
Juice of 2 lemons
4 cups water
3.5 cups sugar
Note: Some recipes call for citric acid (about 1 teaspoon for this batch), which helps the cordial keep for longer.
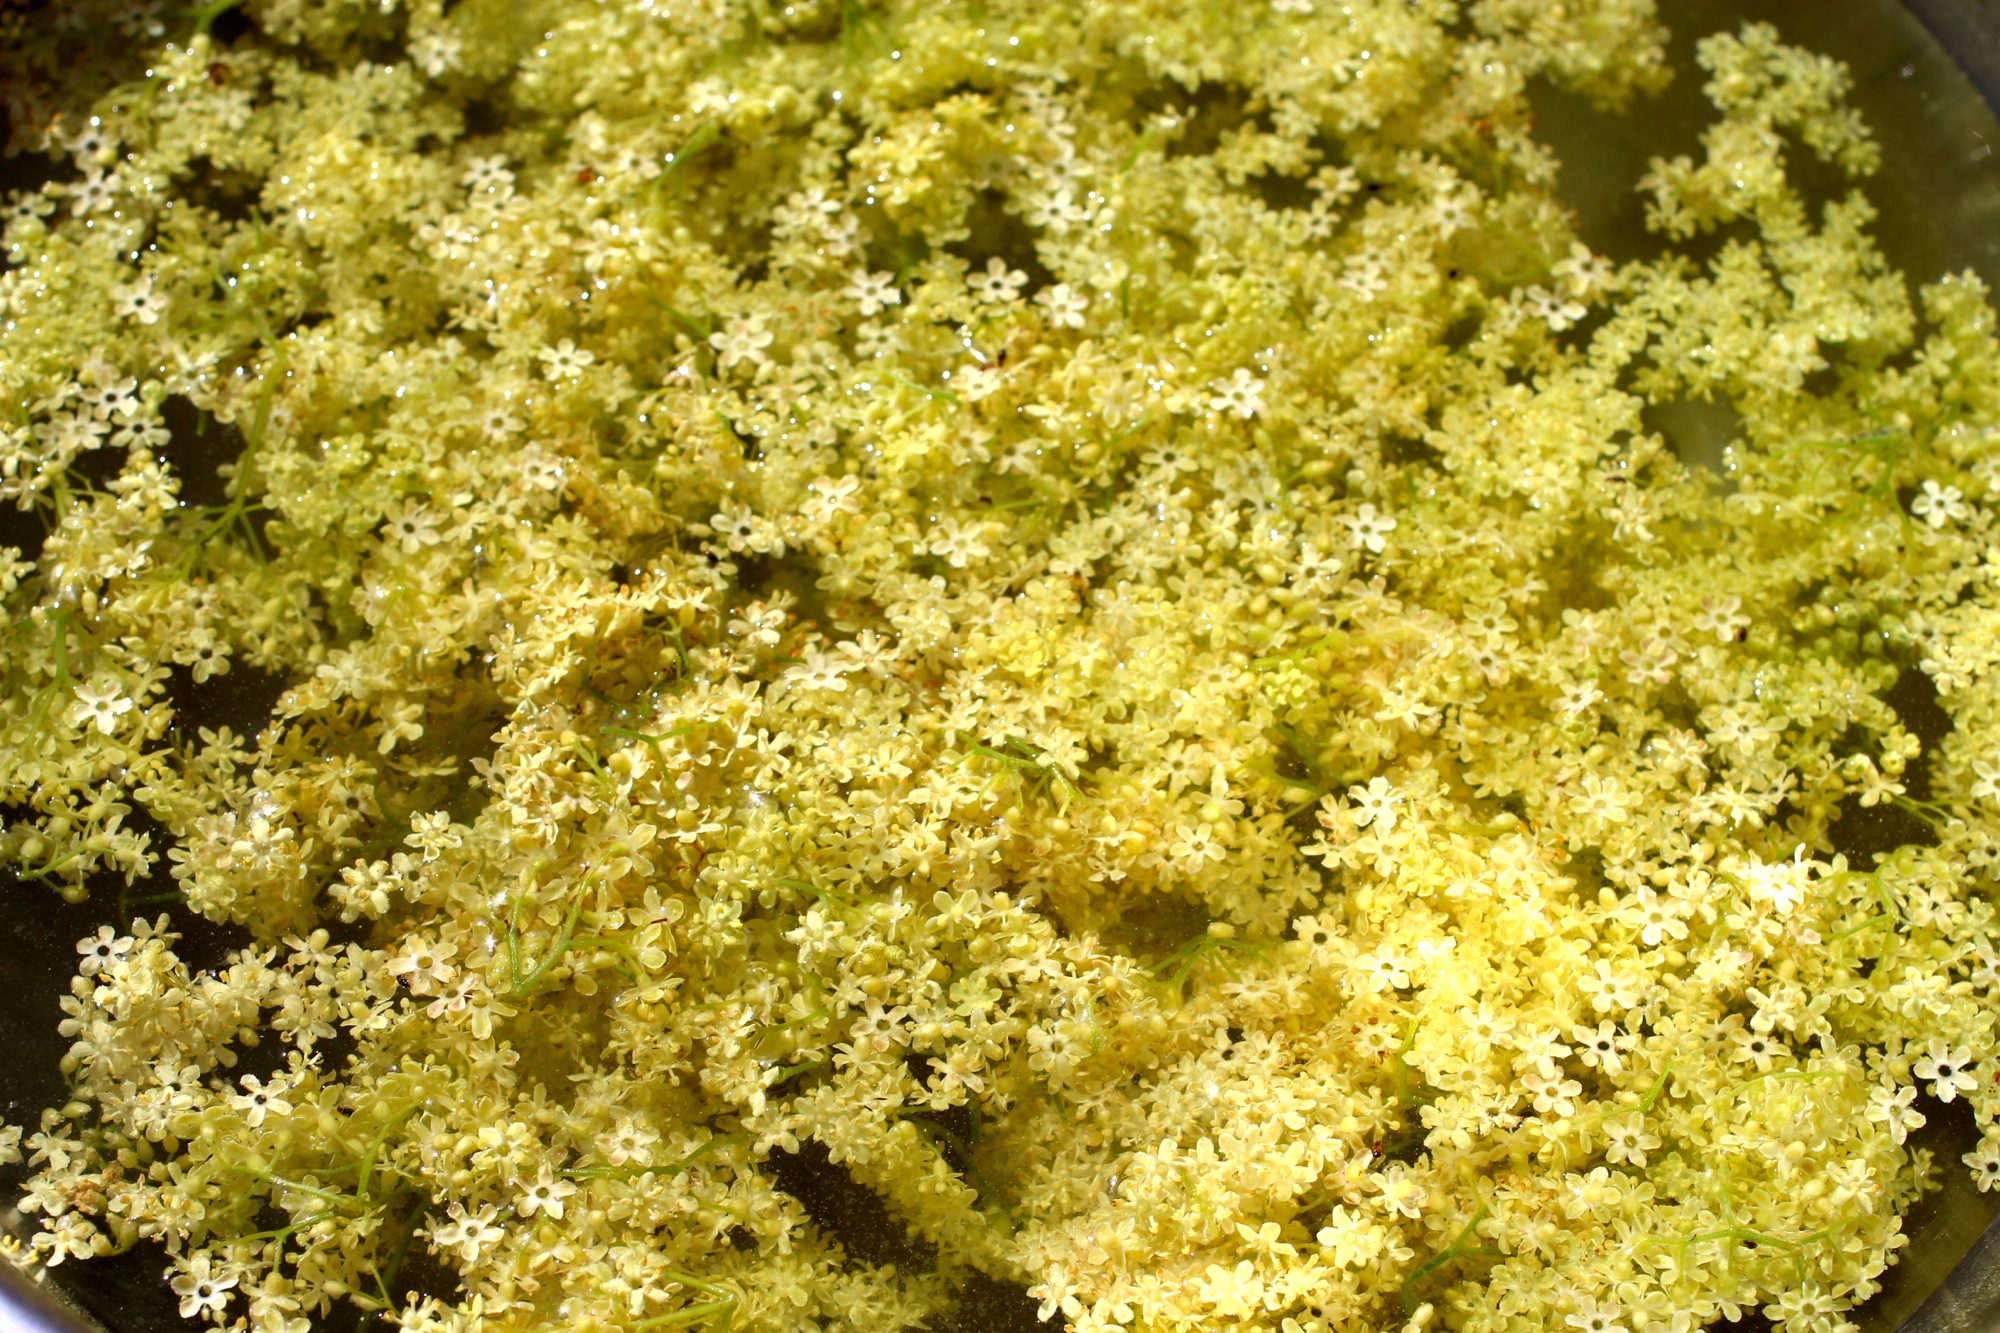
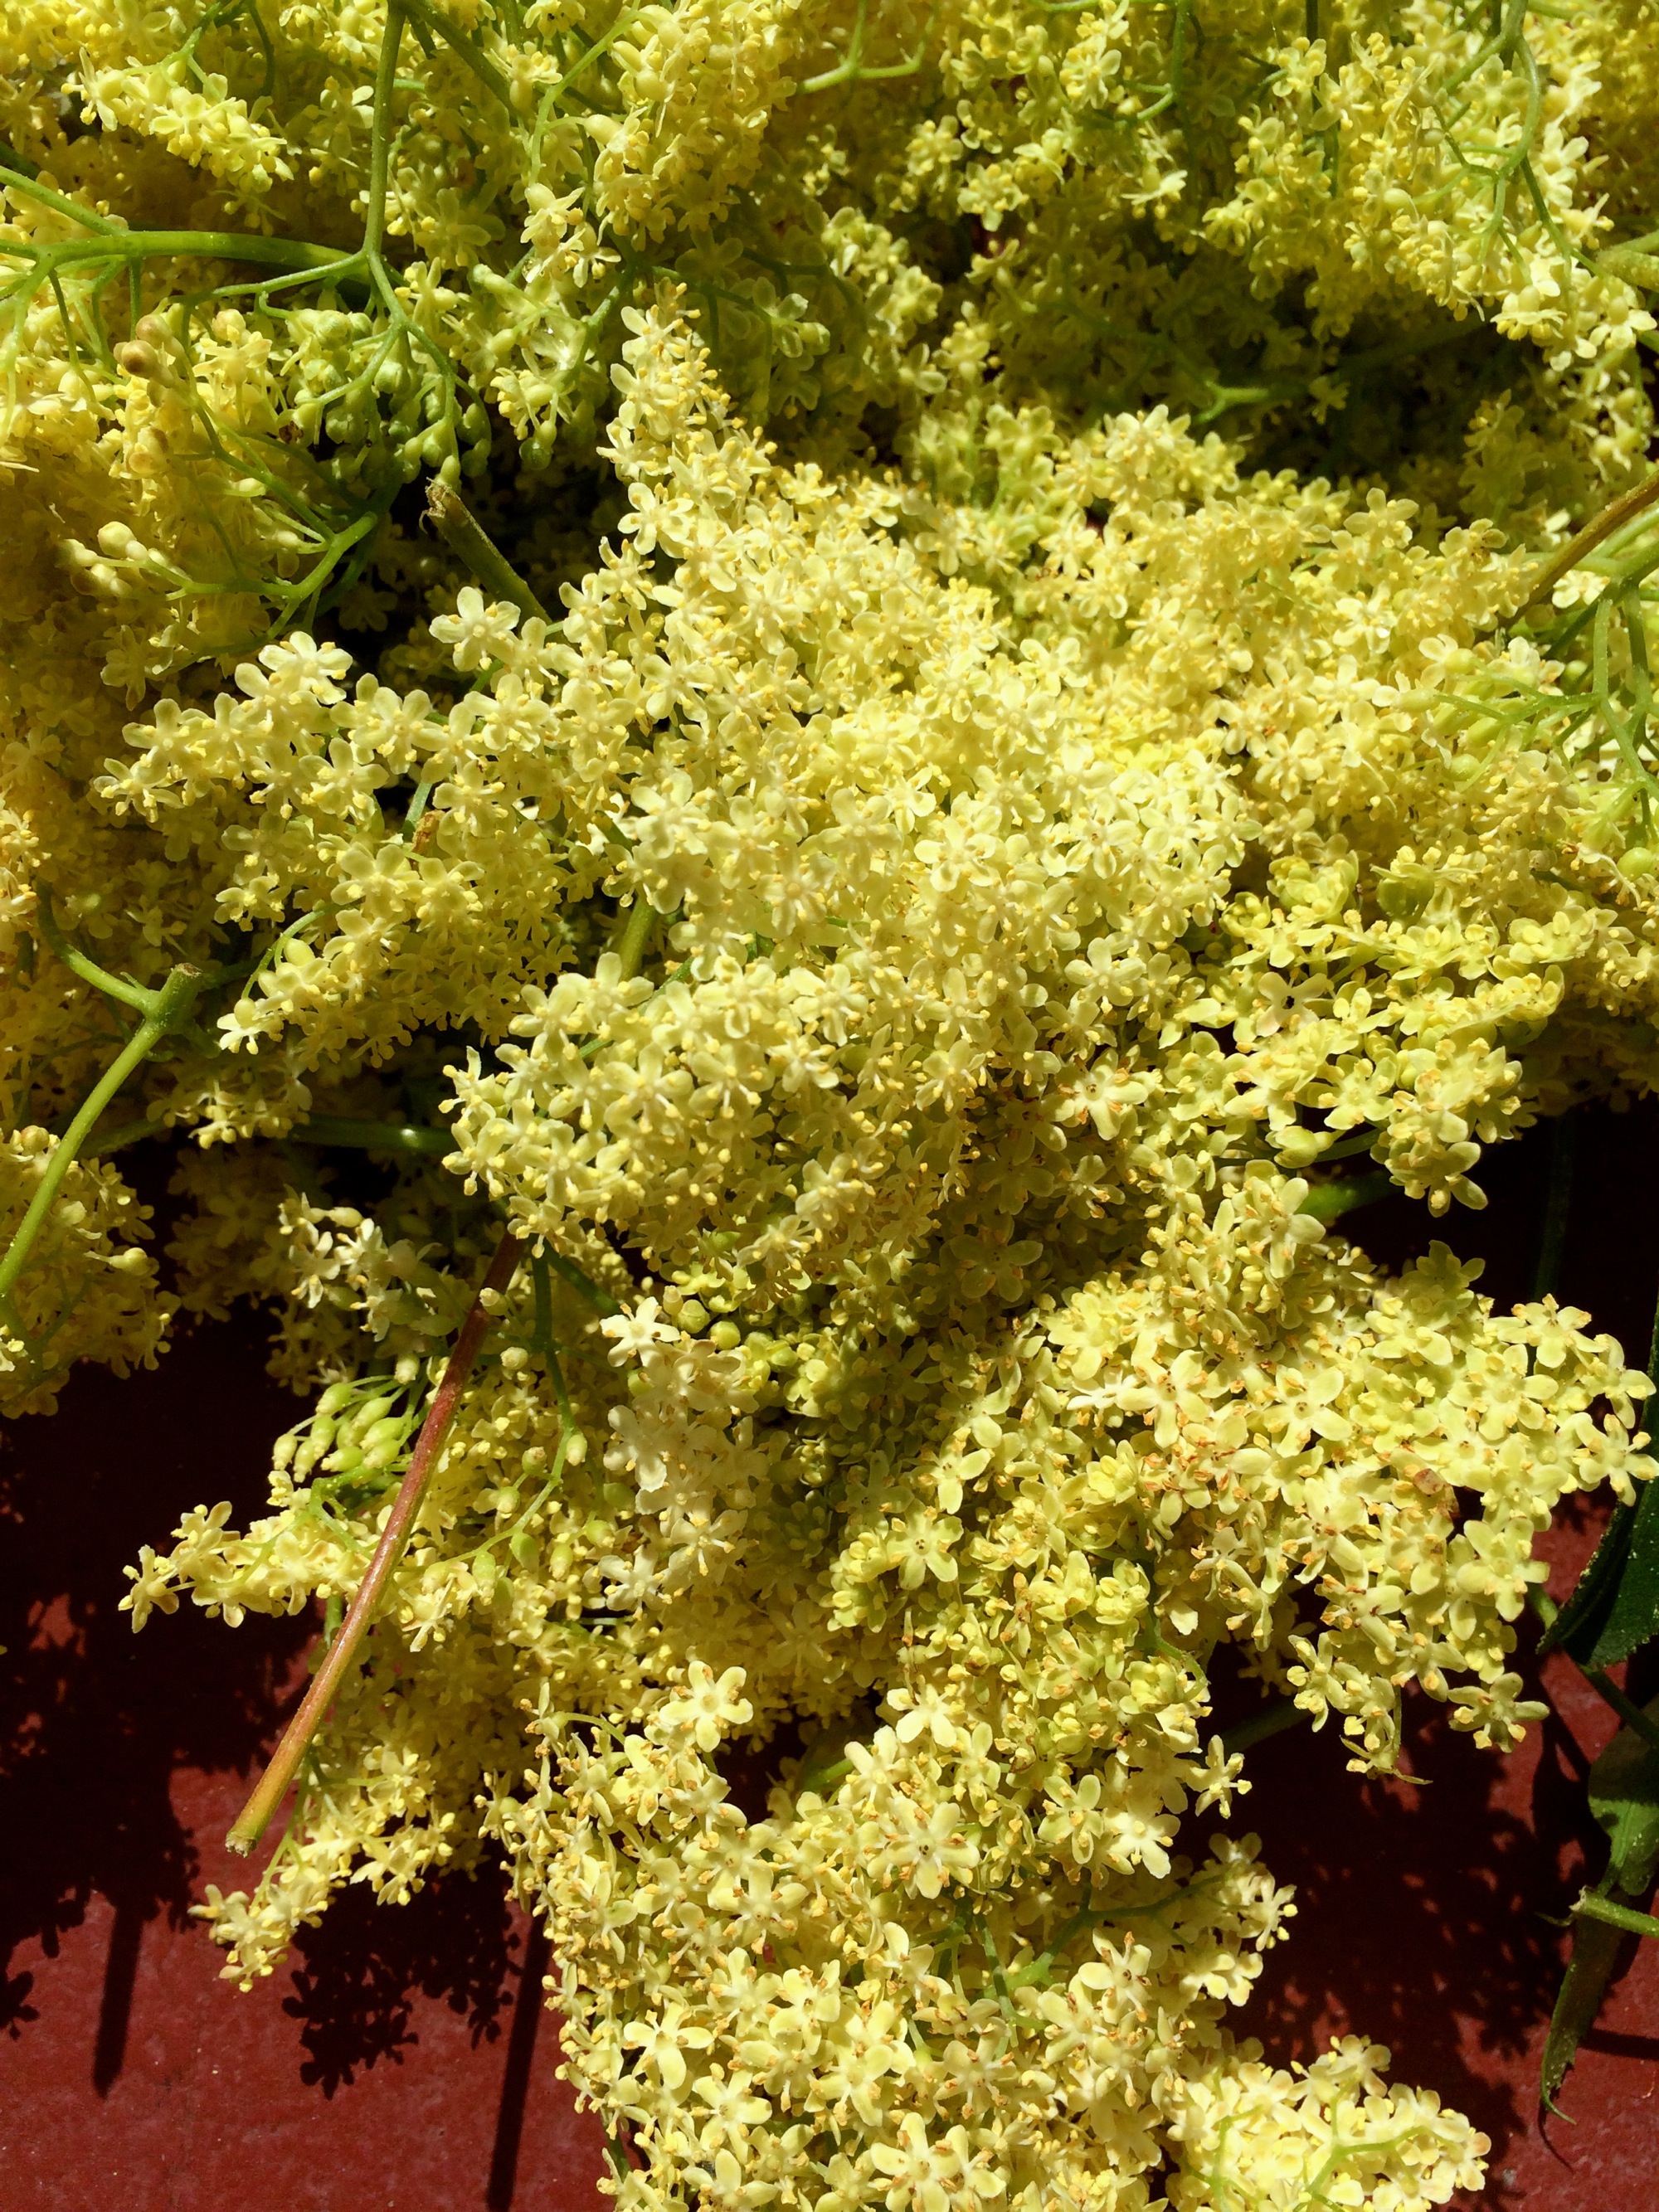
Infusing water with elderflower essence.
Inspect the elderflower heads carefully and remove any insects. Remove flowers from most of stems (especially the large ones), wash by quickly submerging in cold water, and drain. Place the flower heads in a large bowl together with the lemon zest.
Bring water to the boil and pour over the elderflowers and citrus zest. Cover and leave overnight to infuse.
Strain the liquid through cheesecloth and pour into a saucepan. Add the sugar and the lemon juice. Heat gently to dissolve the sugar, then bring to a simmer and cook for 2-3 minutes.
Use a funnel to pour the hot syrup into sterilized bottles and seal with a sterilized cap or cork. Bottles can be sterilized by washing with soapy water then plunging into boiling water for 5 minutes and allowing to air dry.
Allow to cool then store in the refrigerator or freezer. Cordial will keep in the fridge for 2 weeks and in the freezer for 1 year. I like to freeze the cordial in smaller batches so I can use it as needed.
Elderflower-Mulberry Birthday Cake: Serves 12.
Bottom half of the cake has been drizzled with cordial and is about to be spread with tart whipped cream.
For my birthday last weekend, I had an inkling to make a cake infused with elderflower cordial, but had a hard time deciding exactly what else to include - apricots and almonds? loquats and honey? lemon and poppyseed? Spring is a fun time to daydream about desserts! While walking through my surprisingly abundant neighborhood however, I was lucky enough to stumble upon some mulberries, which helped to complete my vision. My birthday party was a campout and the cake held up nicely for several hours, even though I was impatient and made the tart whipped cream earlier than necessary:) My photos do not show the final spread of whipped cream on the top, as it was too dark for photos when I added this piece.
1/2 cup plus 5 tablespoons unsalted butter, room temperature
3/4 cup plus 2 tablespoons granulated sugar
4 eggs
2 tablespoons yogurt
3 tablespoons plus up to 3/4 cup elderflower cordial
1 cup all-purpose flour
1/2 cup almond meal
2 teaspoons baking powder
3/4 teaspoons salt
2 cups fresh mulberries, washed and dried
3/4 cup whipping cream
1/2 cup crème fraîche
1/2 teaspoon vanilla extract
Grease a 9-inch springform pan and preheat the oven to 350 degrees F.
Cream the butter and 3/4 cup sugar in a mixer until they’re light and fluffy. Beat in the eggs one at a time then incorporate the yogurt and 3 tablespoons of the elderflower cordial.
In a separate bowl, mix together the flour, almond meal, baking powder, and salt and slowly whisk this into the wet mixture in 3 batches. Once its fully incorporated, pour half of the batter into the greased springform pan, then spread mulberries evenly over the top, followed by remaining batter and bake for 1 hour. Cake is done when a toothpick comes out clean. Remove from oven and allow to cool.
While cake is baking, beat whipping cream until almost stiff, continue beating as you add in 2 tablespoons sugar and vanilla and then lightly whisk in crème fraîche.
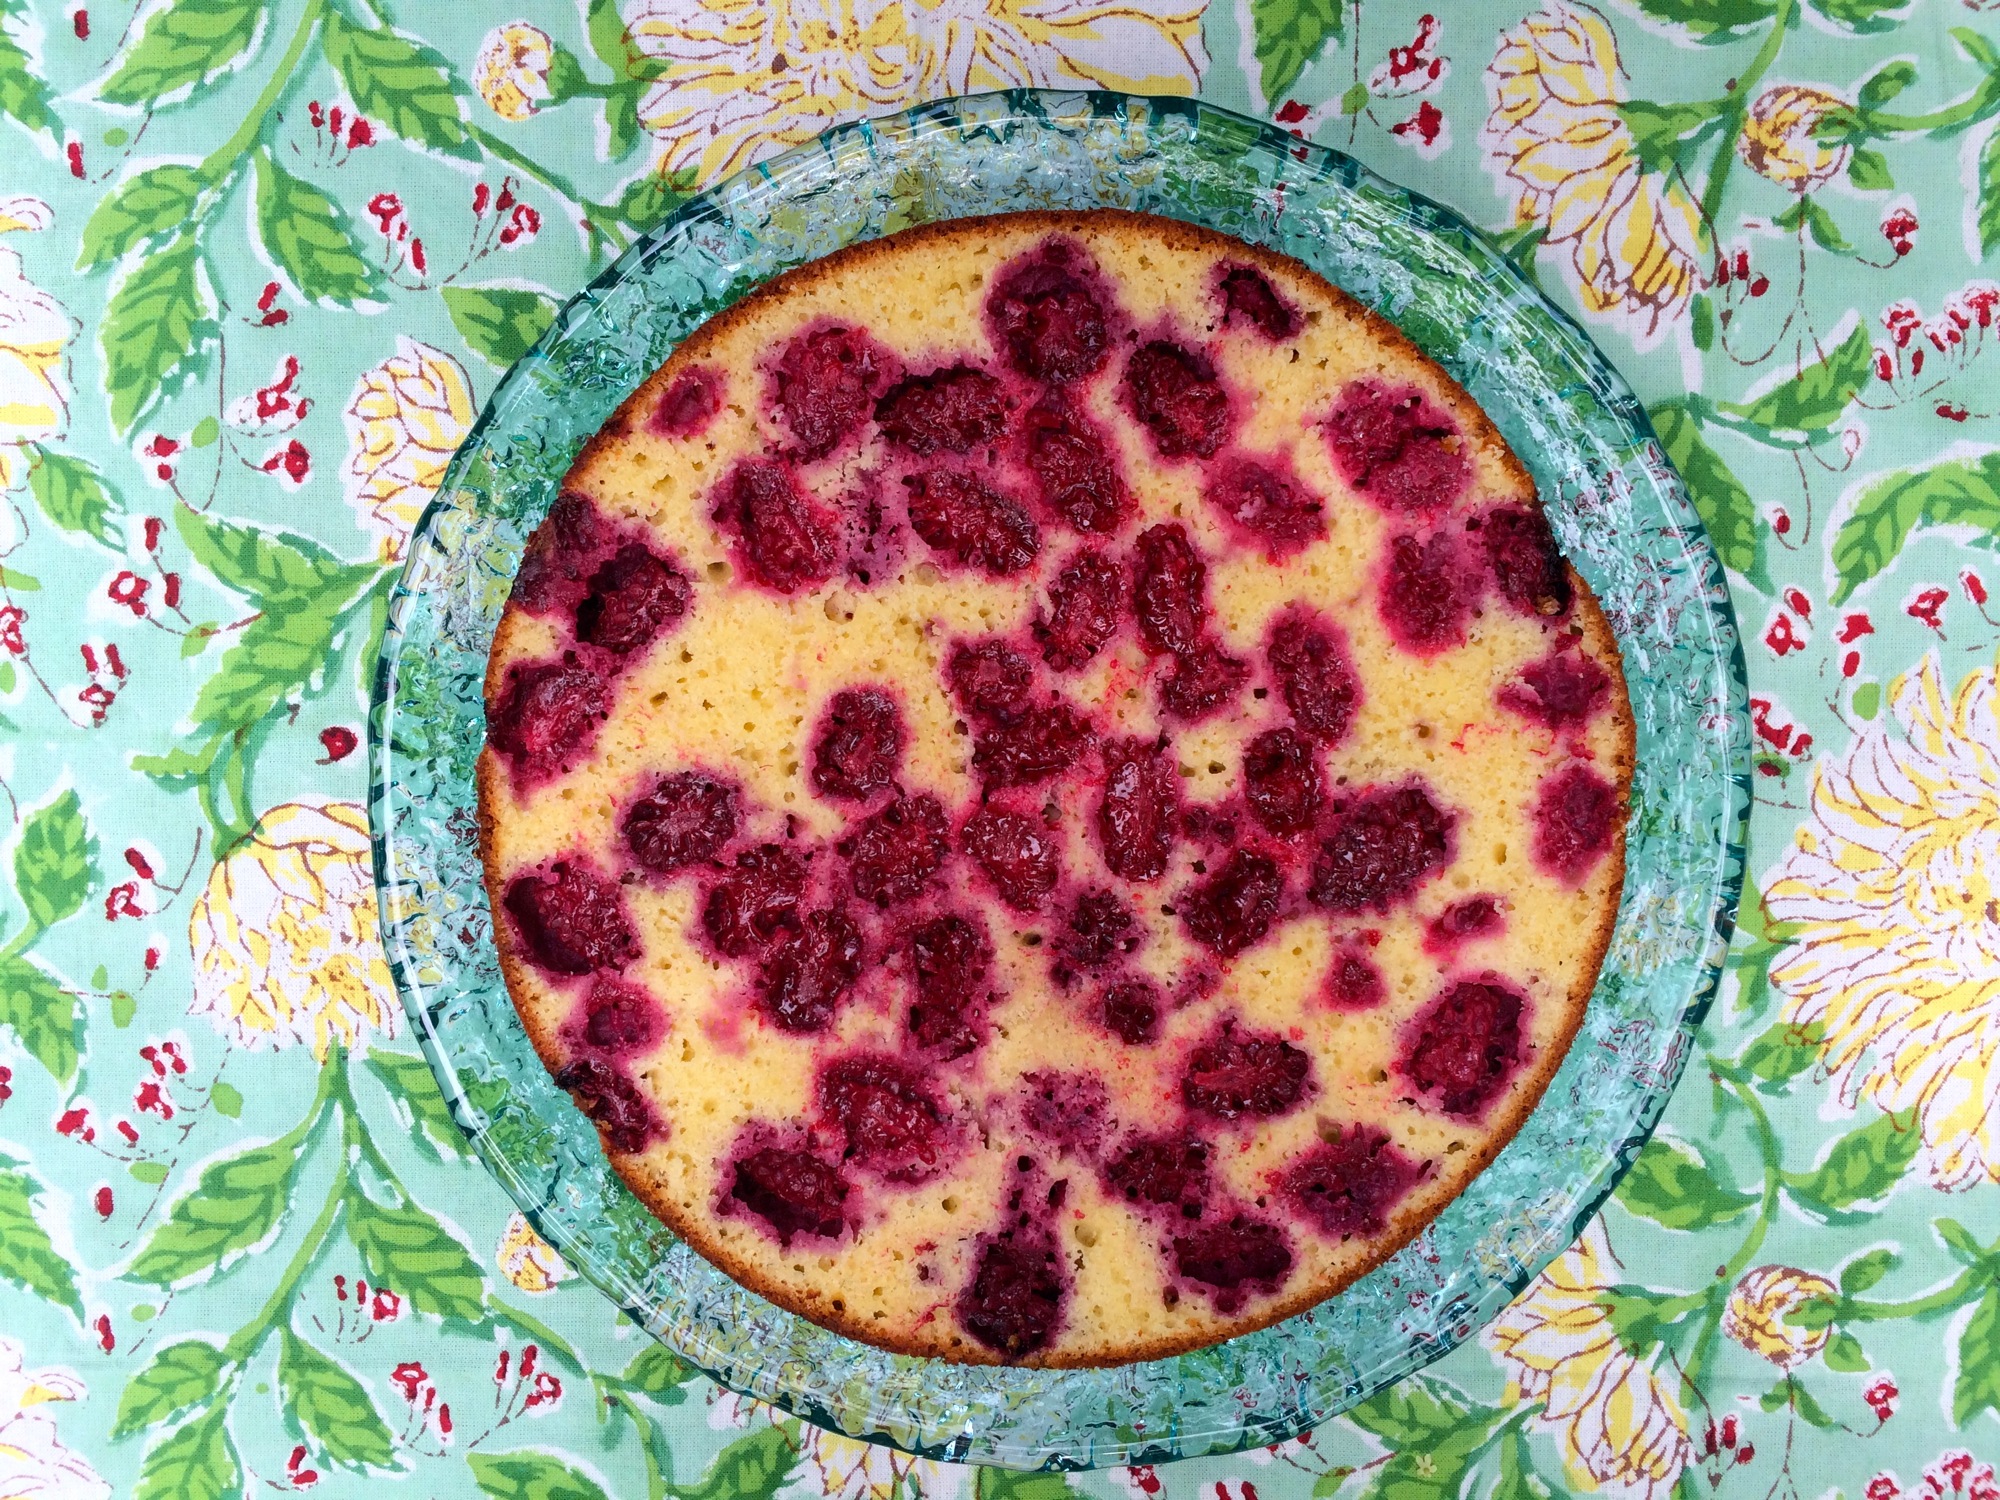
The gorgeous mulberry layer is revealed!
Once cake has cooled, cut in half to make two layers using a large serrated knife. You should be cutting right through the berry layer and at this point, you will be able to see all of the beautiful mulberries hiding inside.
Drizzle up to 1/4 cup of elderflower over the bottom layer and top with half of the tart whipped cream, followed by the other half of the cake. Drizzle up to another 1/4 cup of elderflower (for both of these, it depends on how sweet/moist/elderflowery you want the cake) and spread the other half of the whipped cream over the top. Top with a sprinkling of fresh elderflowers if you have them and drizzle each piece of cake with a little more elderflower cordial before eating.

This version is before the addition of the final tart whipped cream layer.

Fermented Beetroot-Apple Relish with Star Anise and Cloves


Salt fermentation is one of the greatest things out there. By adding salt, you keep out the bad microbes and foster an environment to the good microbes to "do their thing". Namely, to eat up the sugar and proteins and create new, delicious flavors and textures.
Additionally fermented foods, such as this relish, contain probiotics to help you digest almost anything. Fermenting foods at home can be intimidating, but once you get the hang of it, you can let the microbes do the work for you! Relish is great paired with sausage, smoked fish, potatoes, or on a cheese plate. Makes 16 ounces.
1 large red beet
1 large apple
1 whole star anise
3 whole cloves
1 teaspoon sea salt, plus more if needed
Sterilize one wide-mouthed 16-ounce mason jar by washing with soapy water, rinsing, and then submerging in boiling water for 15 minutes. Remove from water and set aside to air dry.
Peel and shred beet and apple using cheese grater and toss with star anise and cloves. Incorporate salt by sprinkling in 1/4 teaspoon at a time and stirring.
Scoop shreds into mason jar and mash with a wooden spoon to release their juices. The shreds should be entirely submerged, as the salty water from the beet and apple mixture will keep oxygen and bad bacteria out. If they are not, then create a brine by dissolving 1 teaspoon sea salt in 1 cup filtered water and pour this over the shreds until they are completely covered.
Cover with cheese cloth or clean towel and ferment at room temperature for 3-4 days or longer, depending on your desired level of sourness. The longer you let the relish ferment, the more sour it will become.
Once relish is the level of sourness that you desire, cover and refrigerate. Use within 6 weeks. Relish can also be processed in a blender or food processor if you desire a pastier texture.

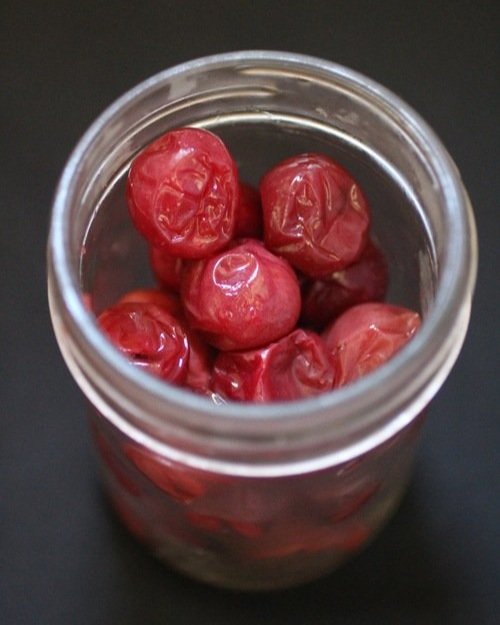
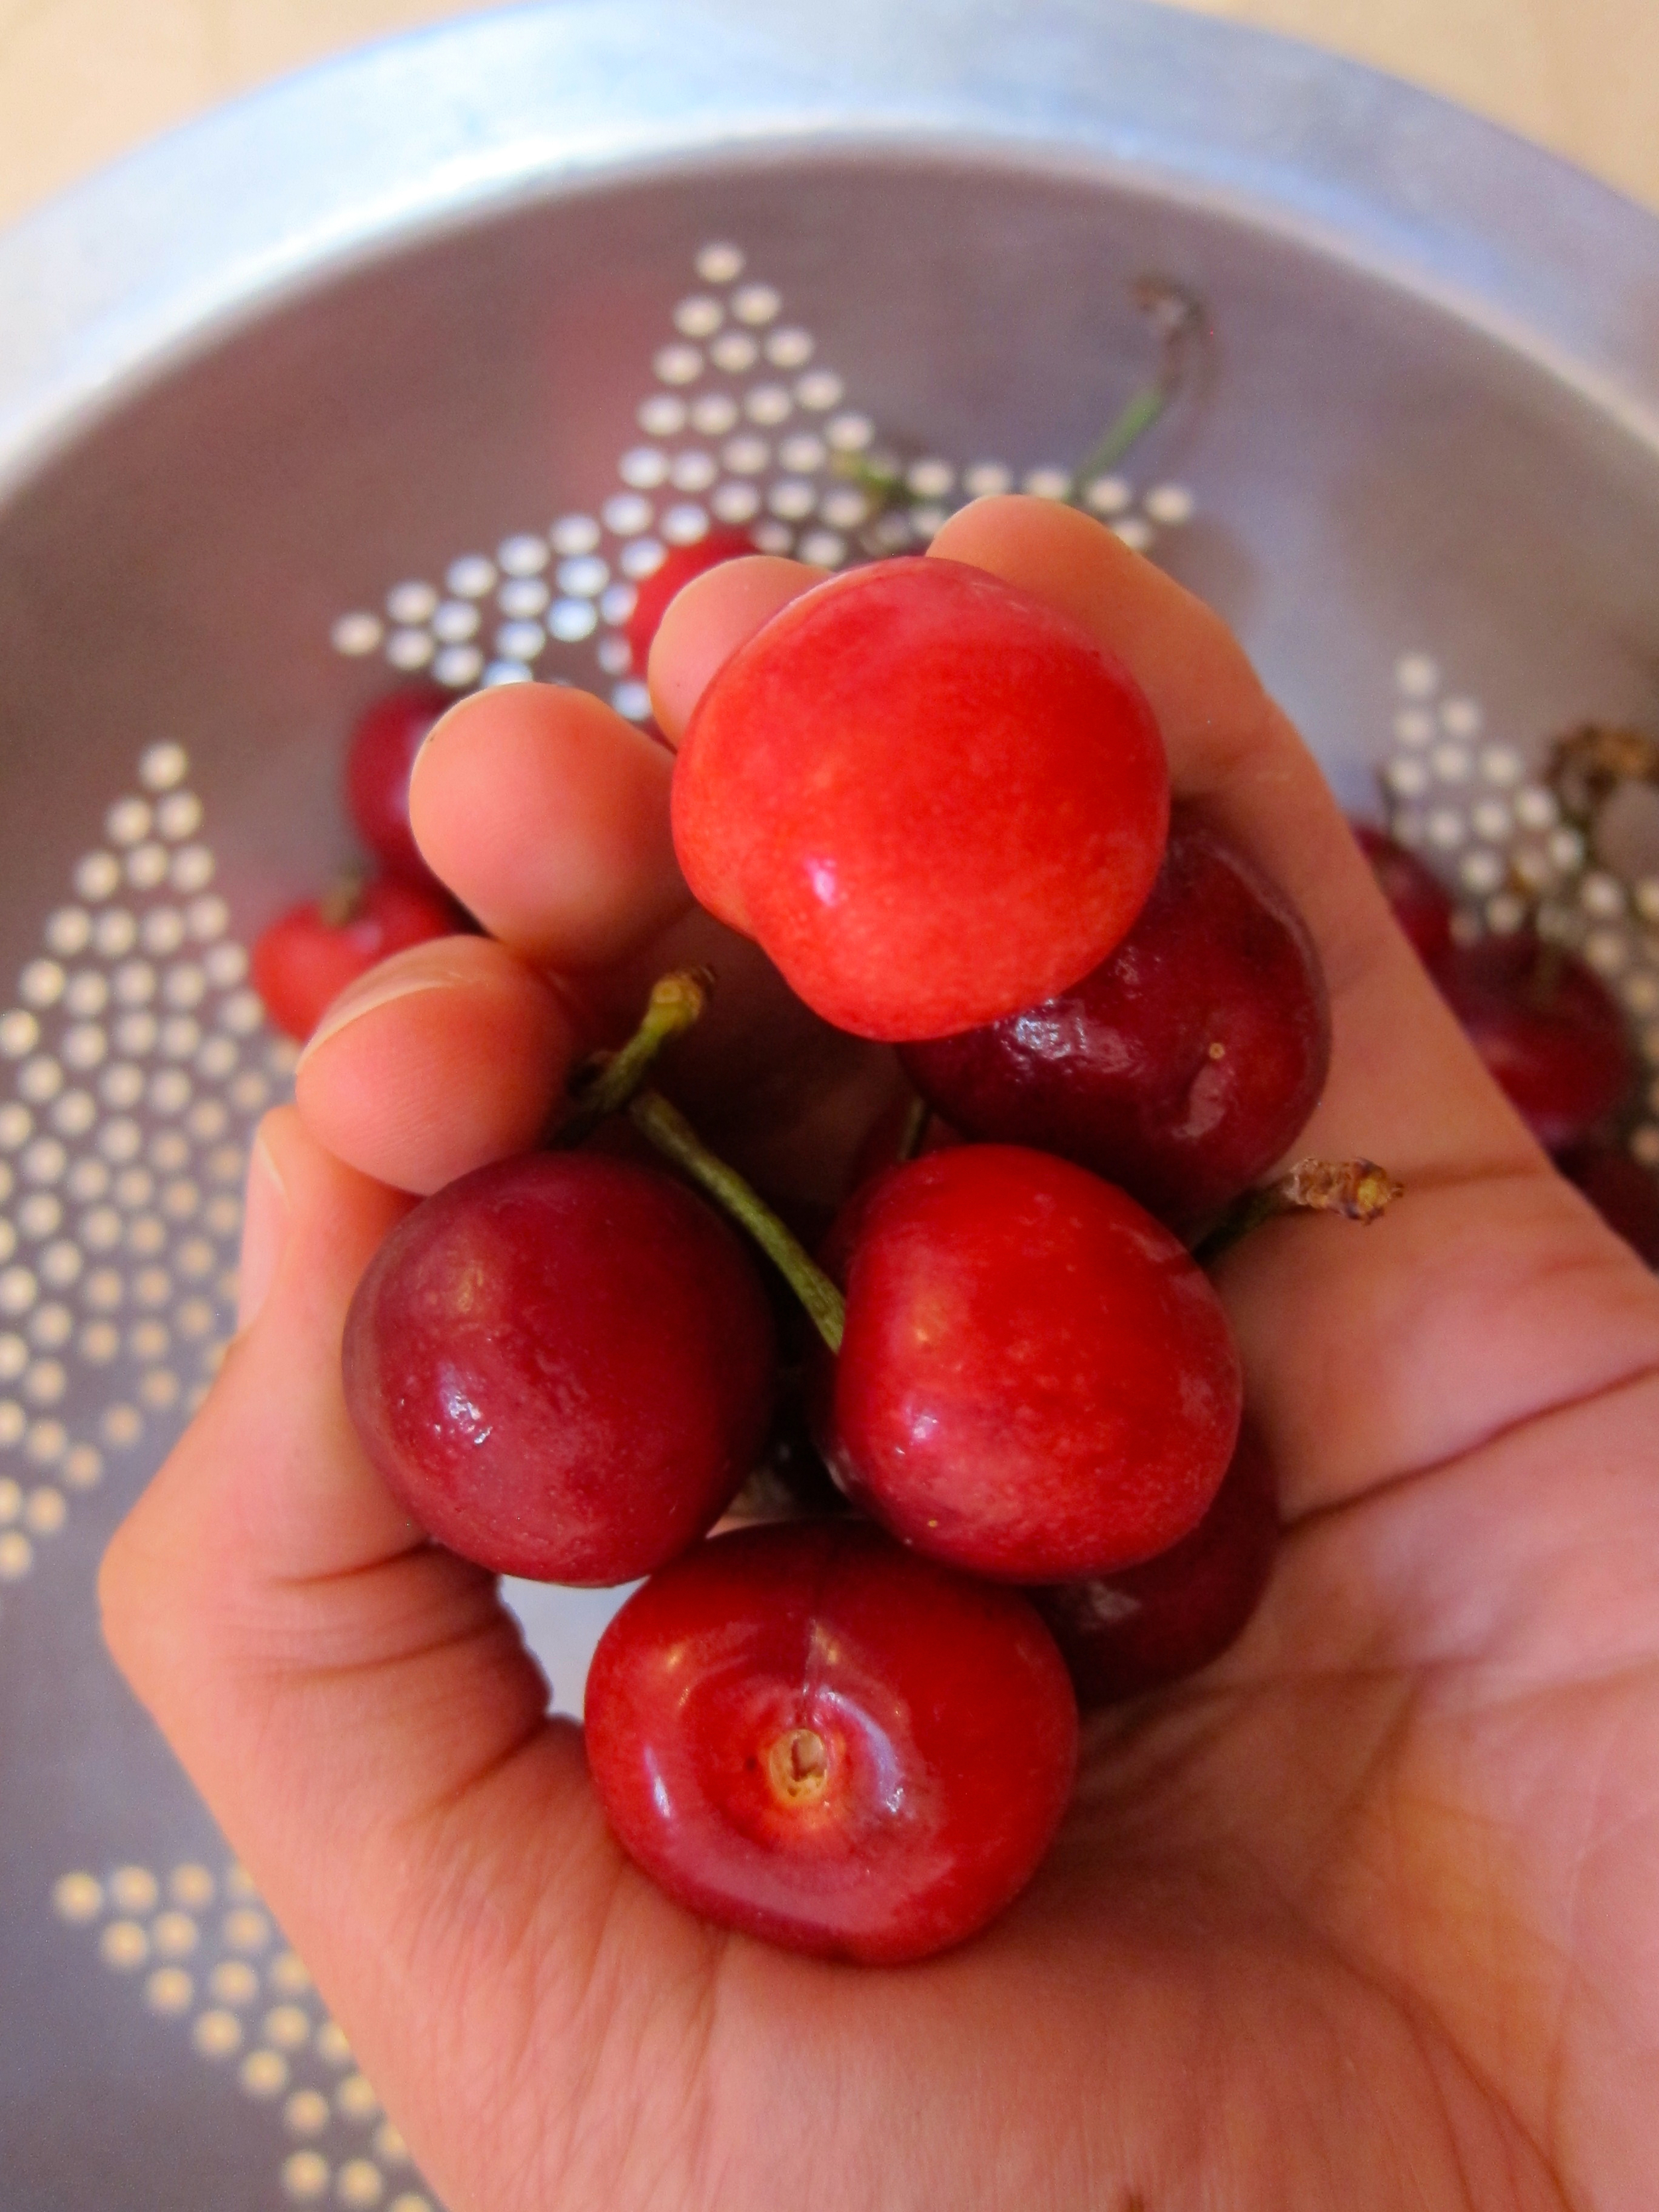
House Brandied Cherries
What life can be like.


Brandied Cherries - If life is a bowl of cherries, I hope I have the opportunity to brandy some of mine. Every year around June or July, I can't help but make a jar or two of these preserved morsels. Although fresh cherries are hard to pass up, it's worth it a few months later when you have a rich taste of summer for your cocktails.
Once brandied, the cherries are good for 6 months in the refrigerator, but don't expect them to last that long. After all, there’s always a manhattan to make for someone or ice cream that needs a unique and boozy topping. Below recipe makes about 2 pint jars.
About 1lb fresh cherries, washed, stems removed (you can also remove pits, but I find they have better texture/flavor with pits intact)
1/2 cup water
1/2 cup sugar
2 tsp fresh lemon juice
1/2 vanilla bean pod
1 to 1-1/2 cups brandy
Peppercorn or other spices (optional)
Heat water, sugar, lemon juice and vanilla bean (scrapings and pod) until simmering. Add cherries and simmer 3 minutes.
Remove from heat, add 1 cup brandy and allow to cool for 5 minutes.
Transfer to clean jars, top with remaining brandy to cover cherries (if needed), and place in refrigerator uncovered until completely cool. Once cool, top with jar lids. Cherries may be eaten after 24 hours and will keep about 4-6 months refrigerated.

Homemade Nocino
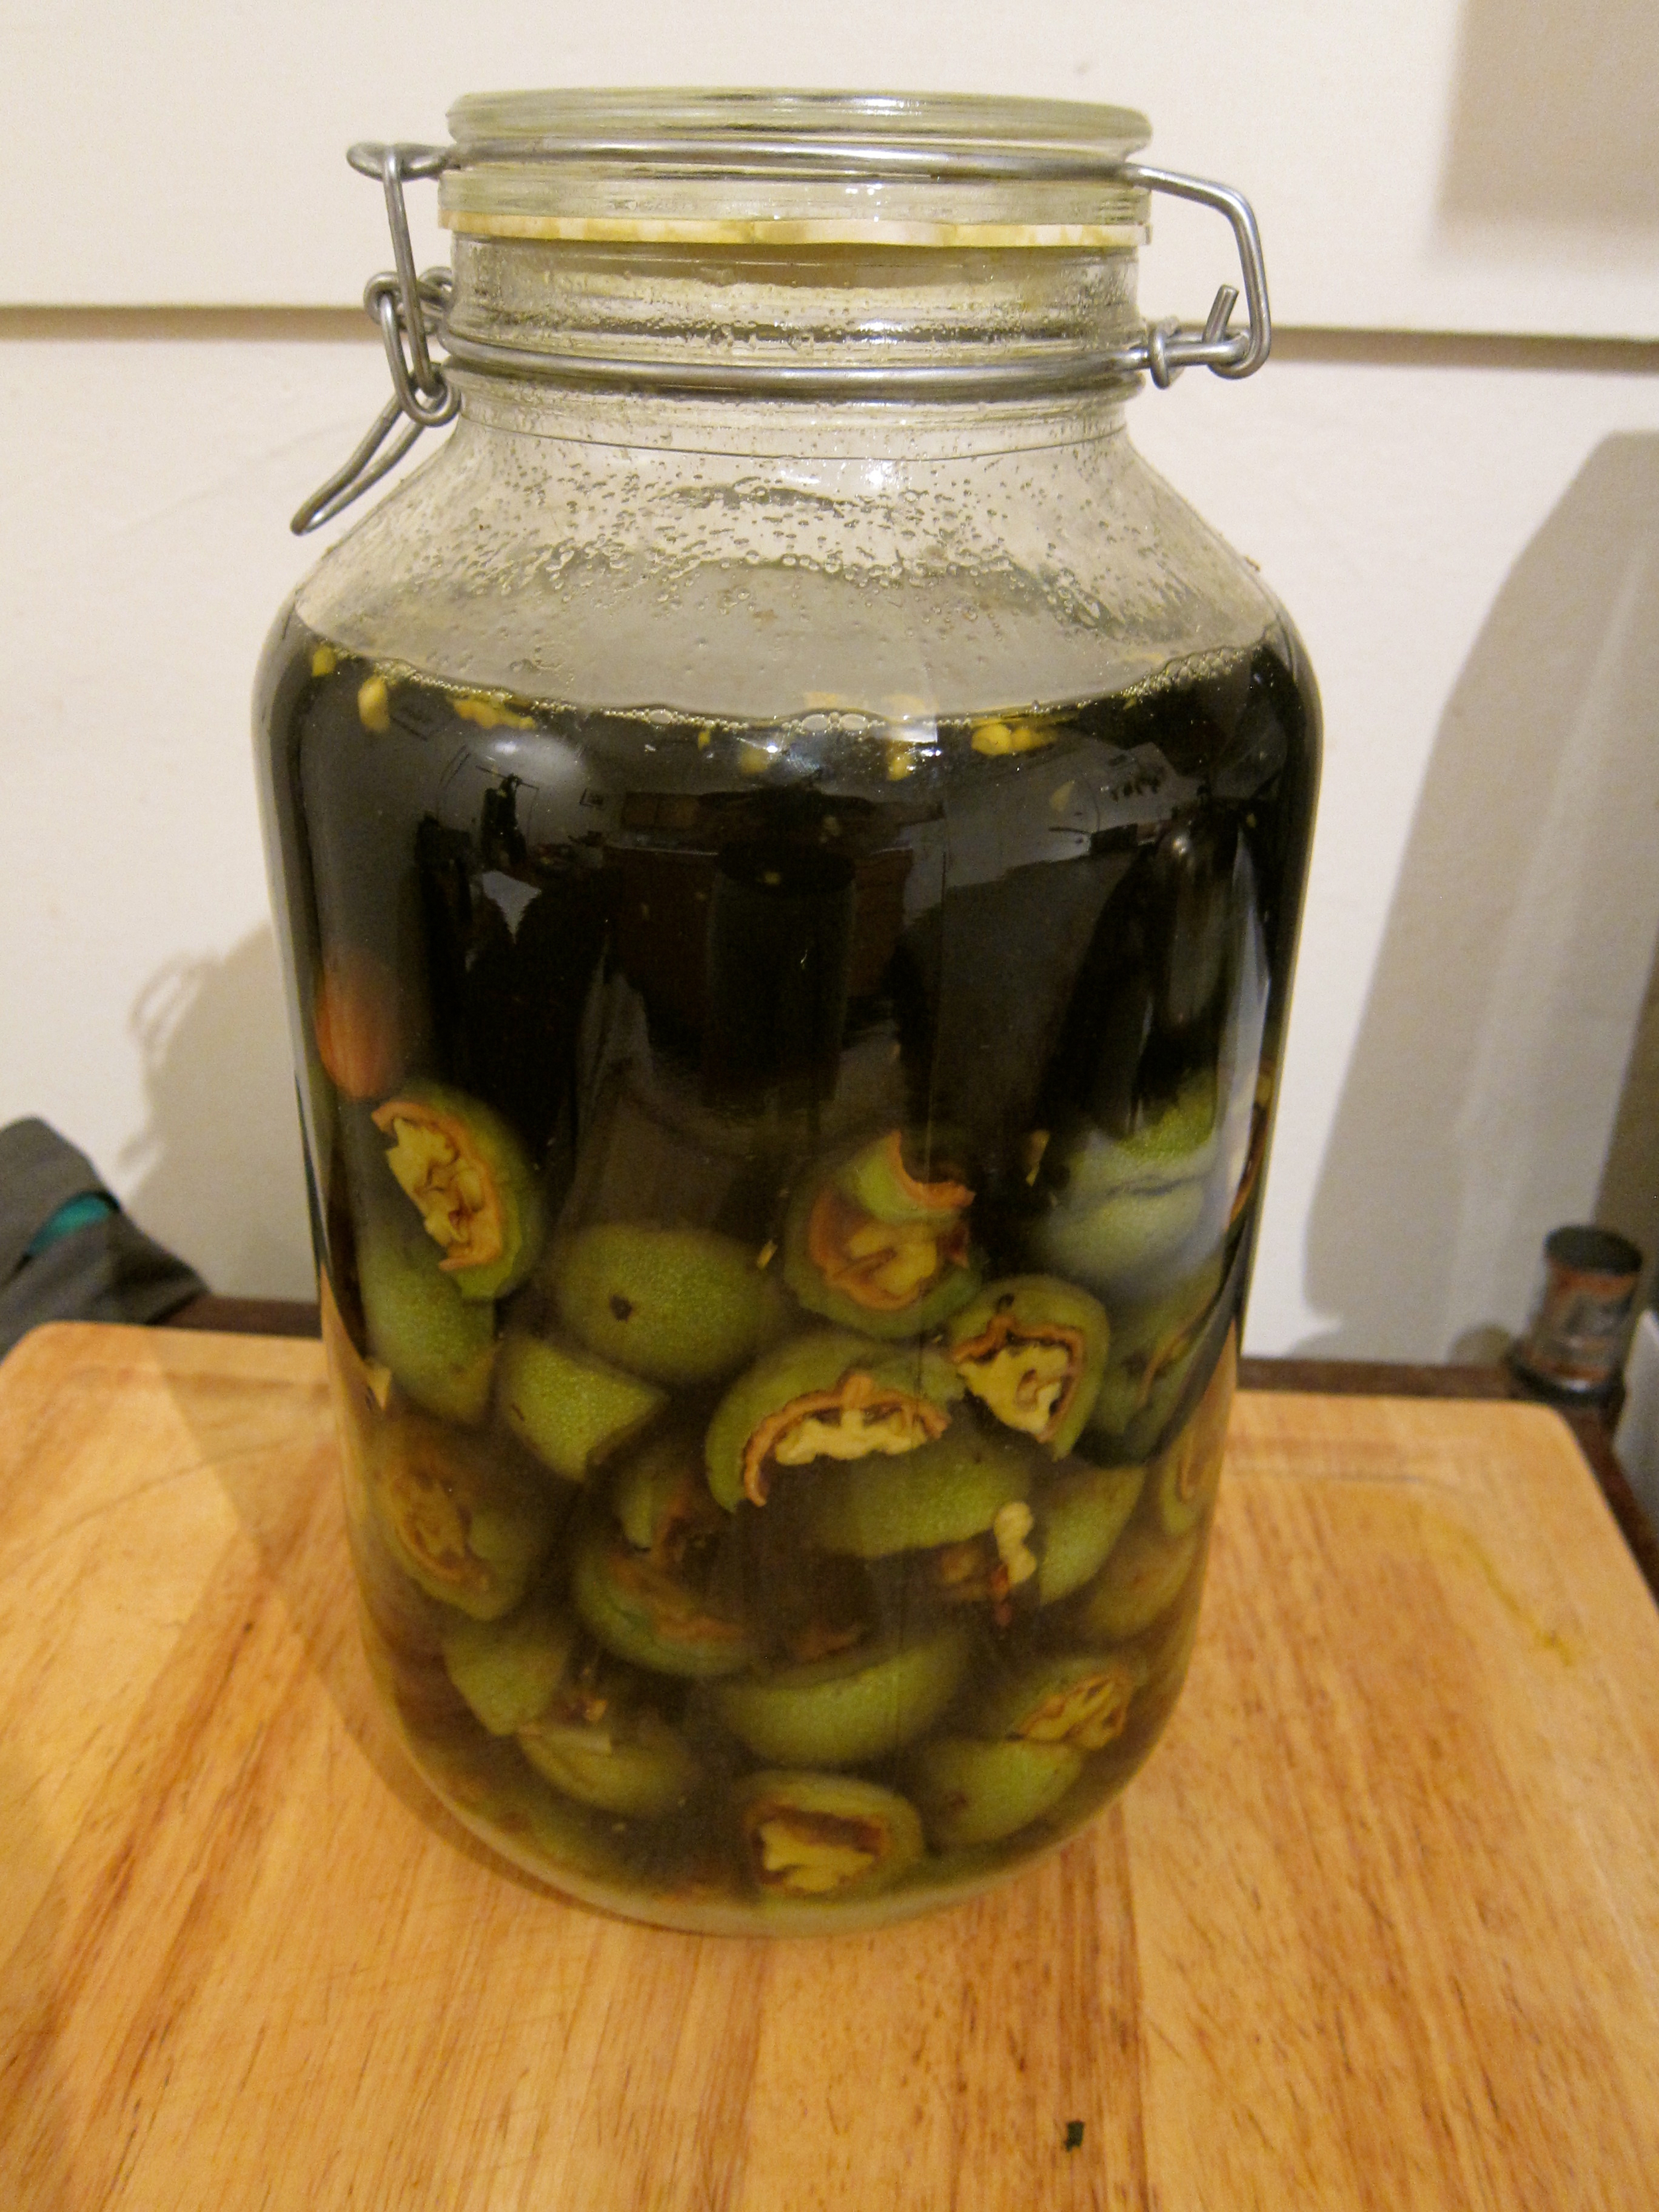
Italian green walnut liqueur.

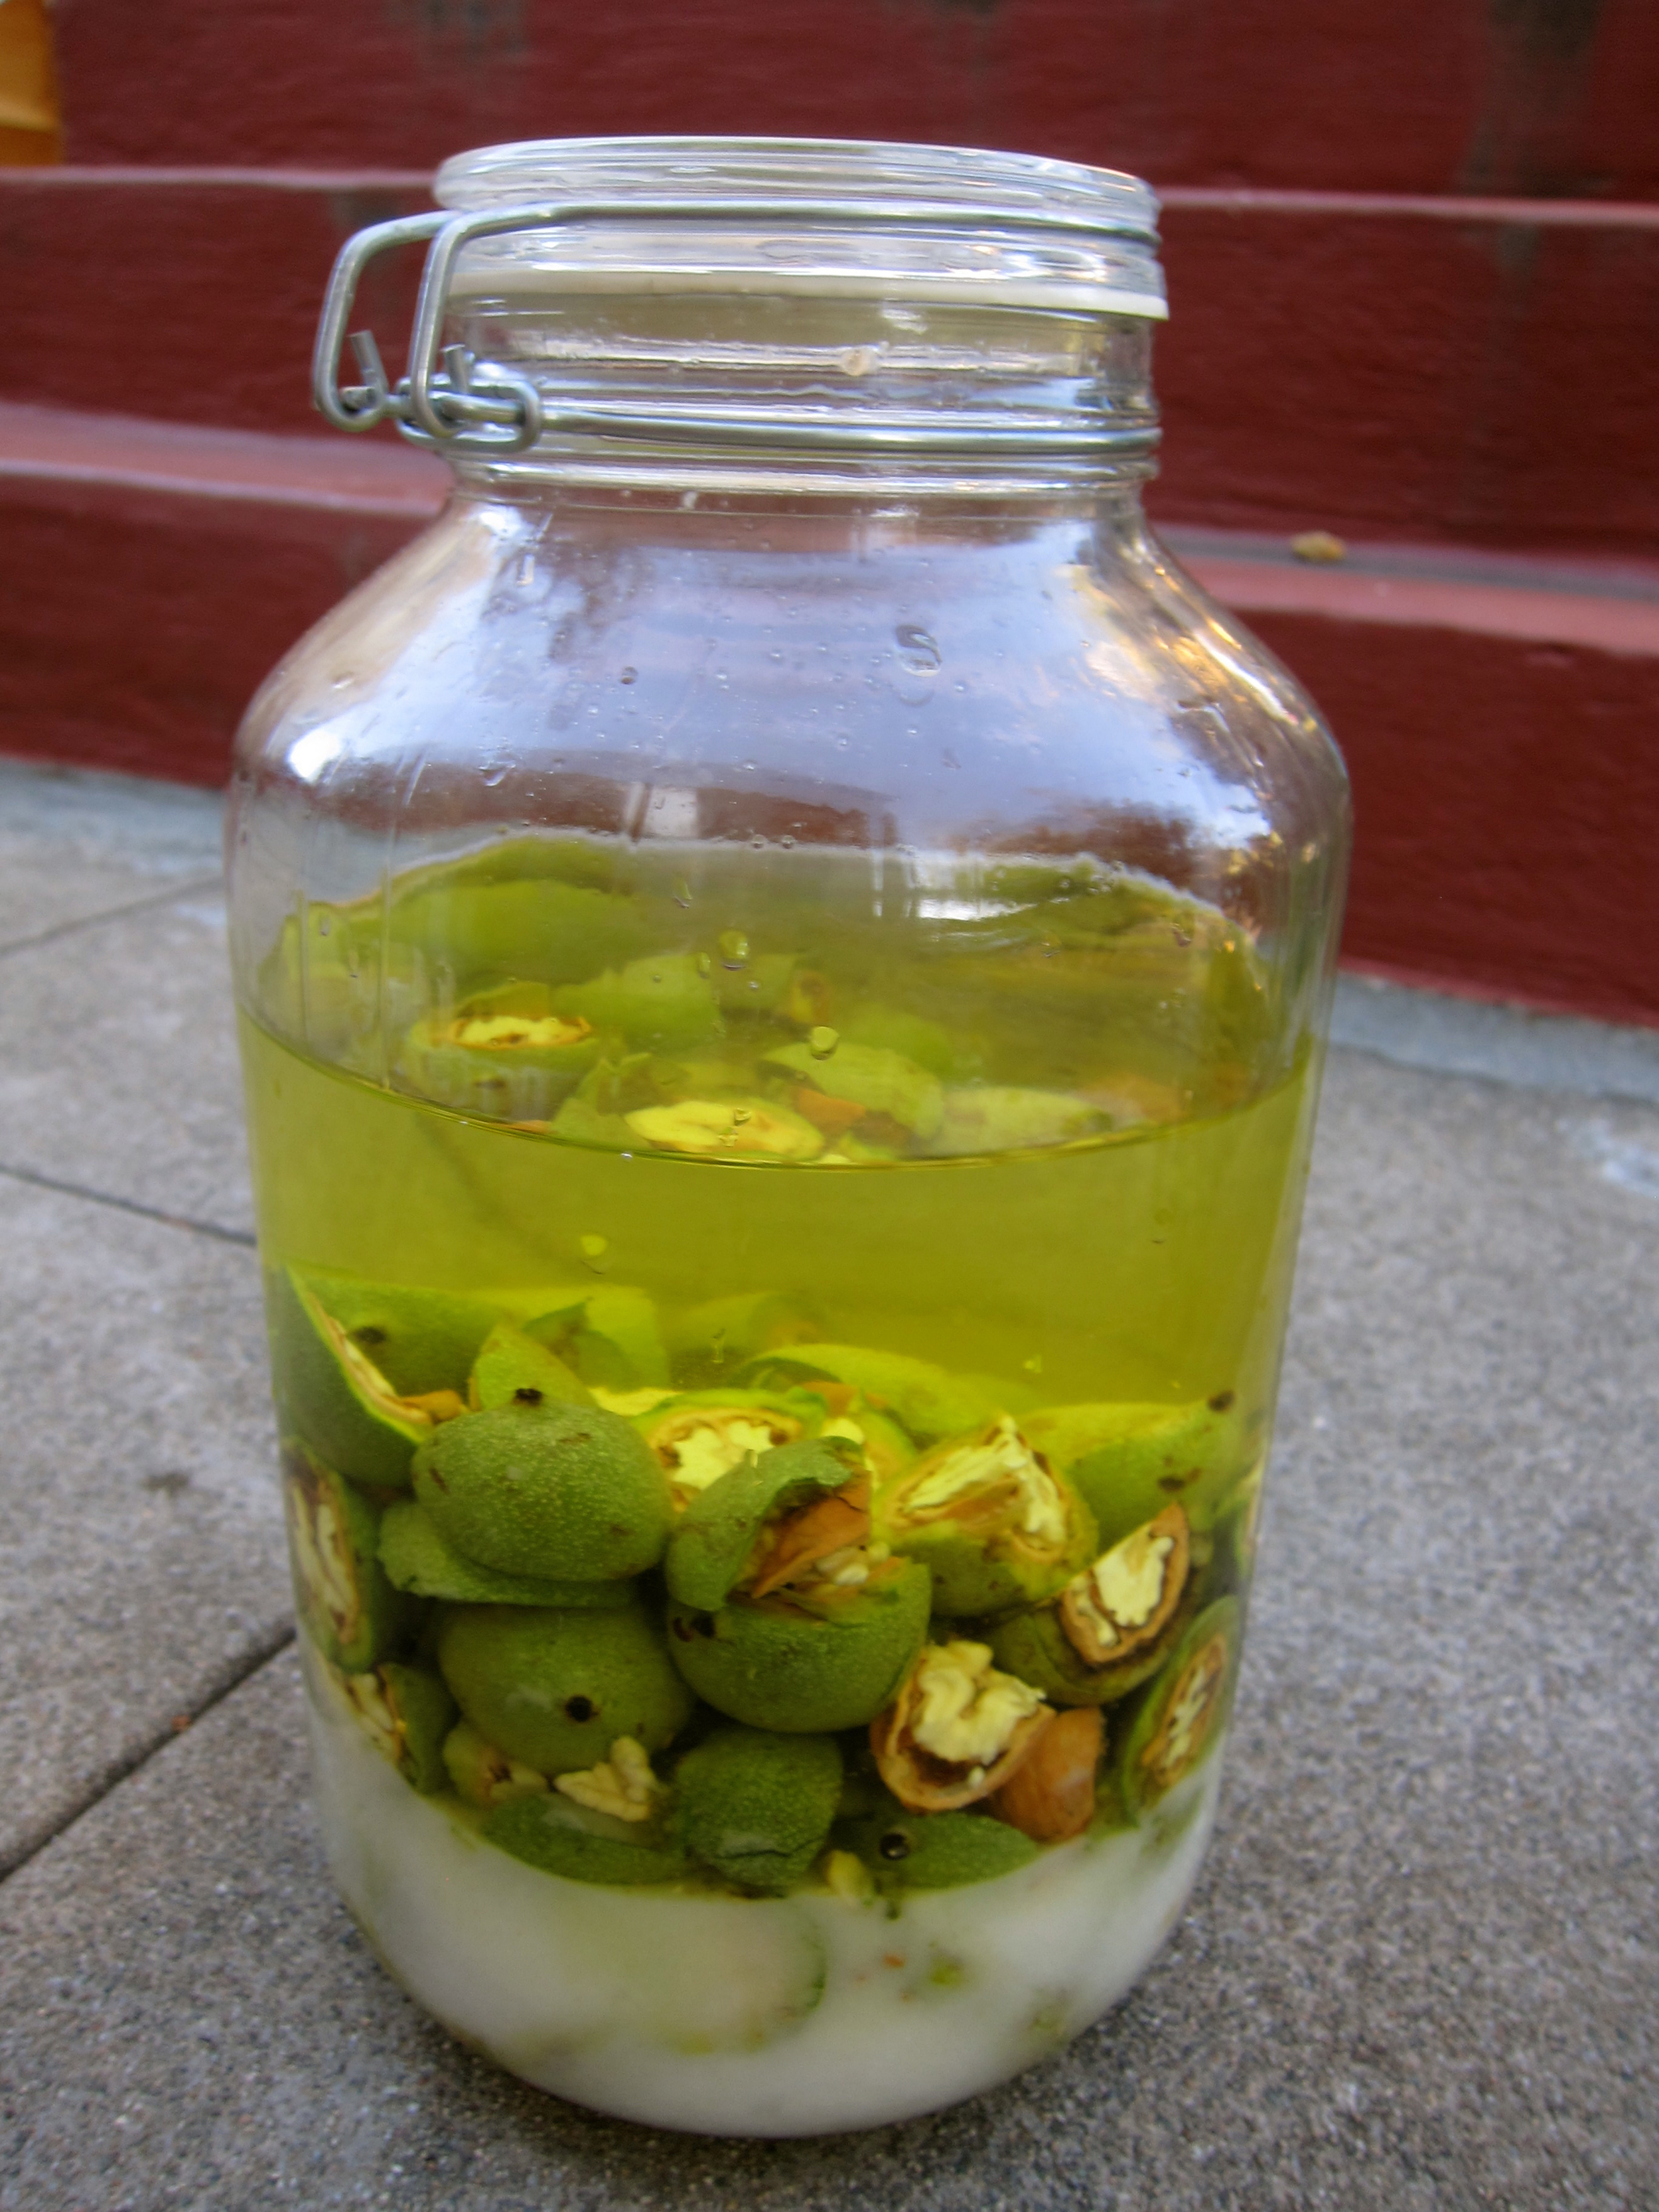
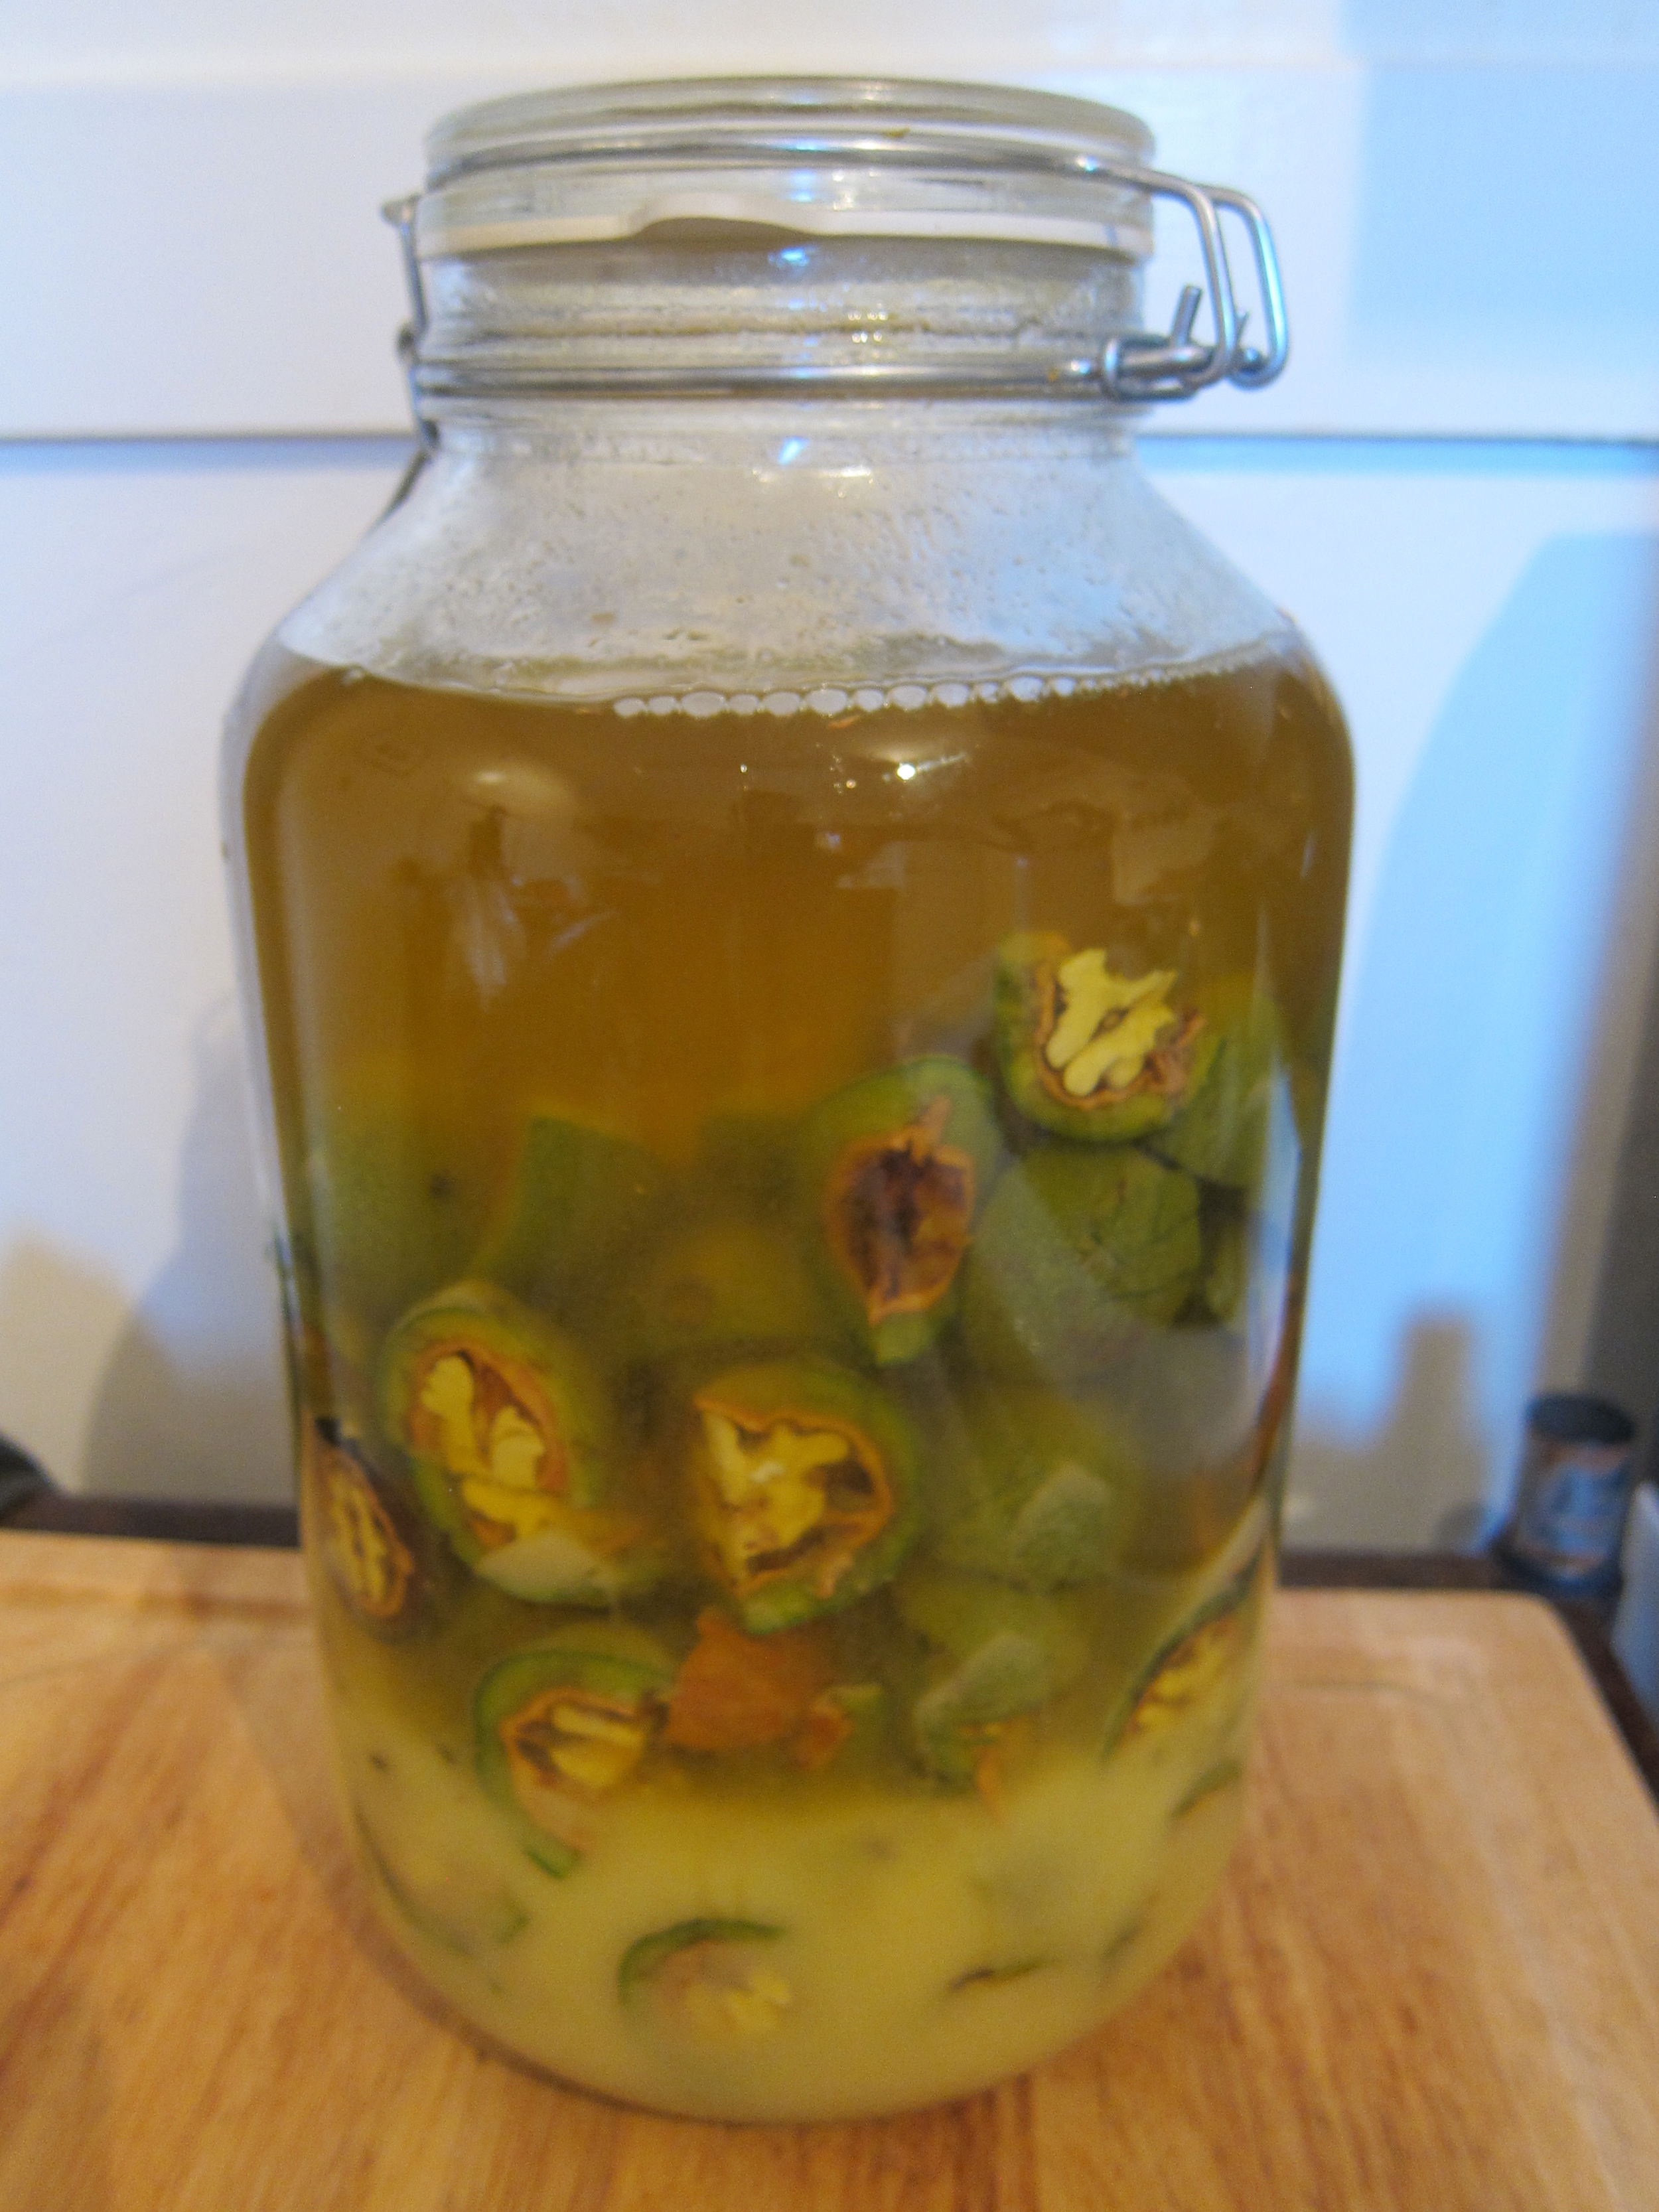
Nocino is an Italian liqueur made from fresh green walnuts that are cured in a sugar and alcohol solution. I first discovered this "black gold" while dining at Flour + Water in San Francisco and have been making it each season for the past three years since. The amazing think about nocino is by adding incredibly tannic walnuts, clear sugary alcohol is magically transformed into a thick, luscious, nearly black liqueur.
Making nocino requires a few steps and a lot of patience, but the results are worth it! I love it on it's own after dinner, but have also used it in in cocktails and to top ice cream (with crushed toasted walnuts as well, of course).
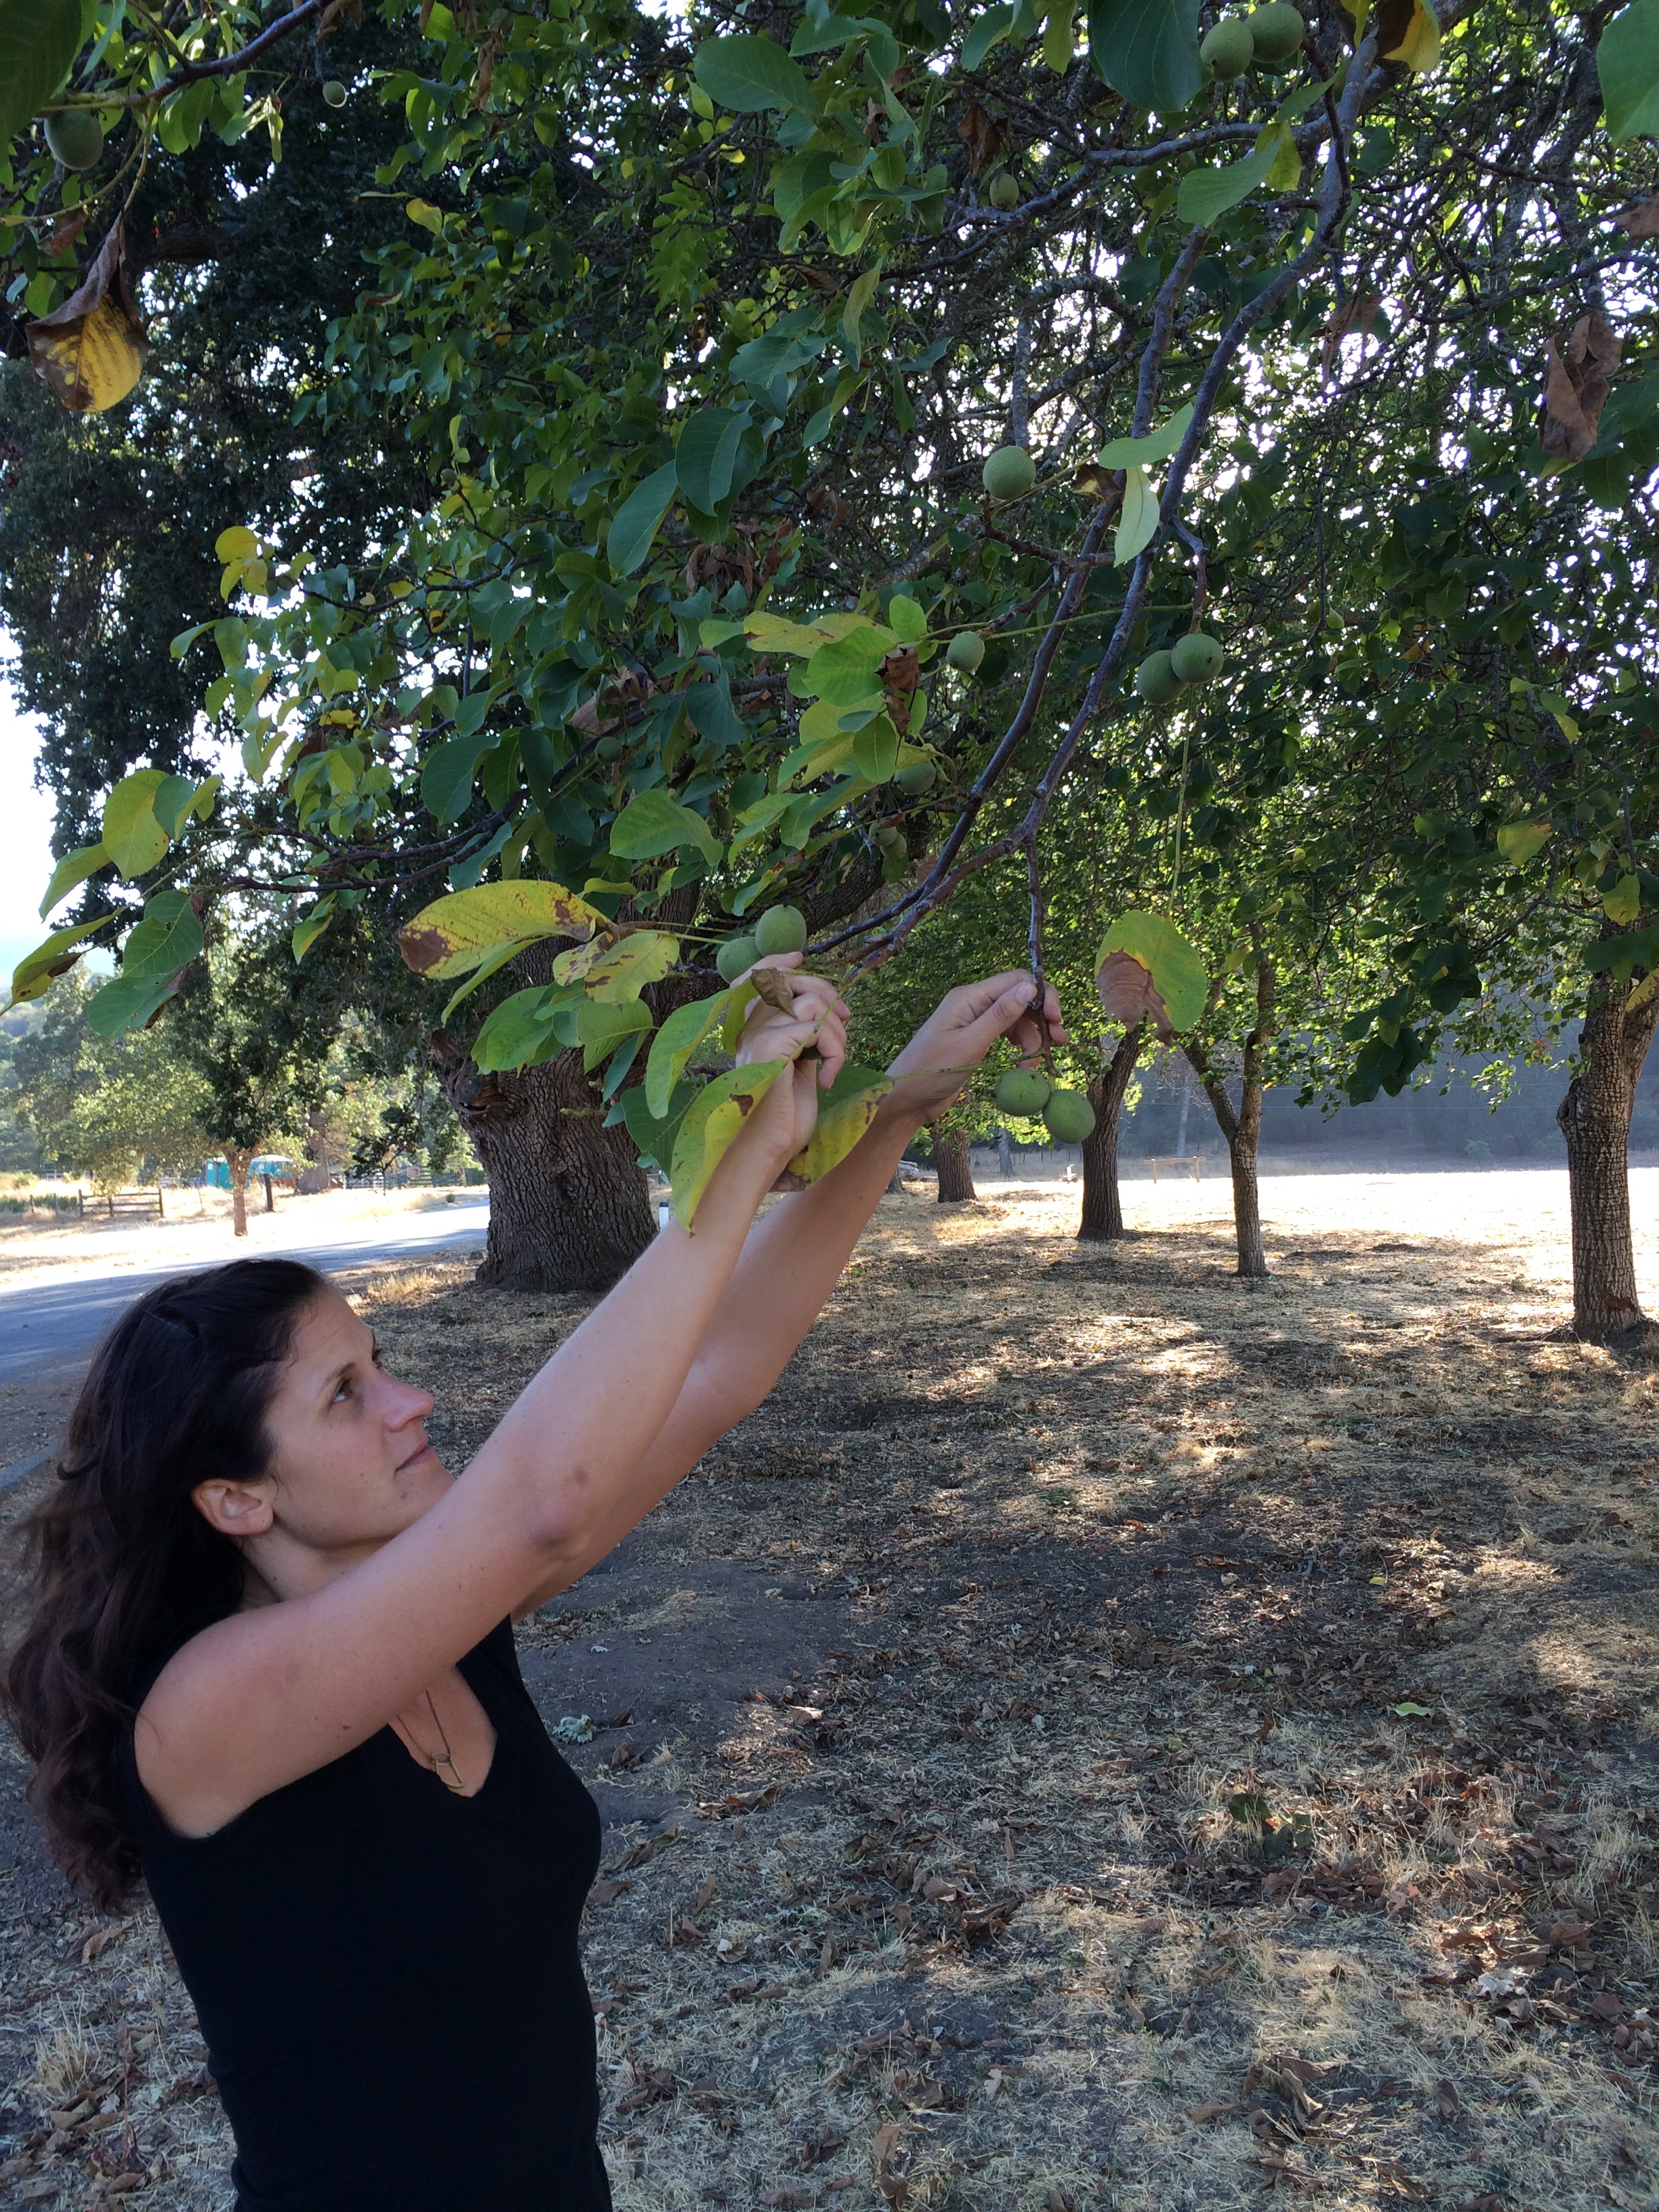
The green walnuts you're looking for are only available in May/June (traditionally harvested on June 24th, the day of St.John the Baptist, by virgins) and quite hard to come by. The first time that I made nocino I was able to find some through the Capay Valley Farms CSA I started up at work, but the last two years I went ahead and foraged them.
The most recent batch that we made was using walnuts picked in September, which is much later than desired (oops - too many food projects!) The walnuts were very hard to cut through because the shell had begun to harden and we're not sure how this is going to affect the flavor of the nocino, but we went ahead and made it anyway. We'll see in 6 months - if it's anything like the last couple of batches, it will be more than drinkable! As the recipe is written it makes about 2 liters of nocino, but the recipe can be multiplied as necessary for the amount of walnuts that you have on hand. Remember that green walnuts stain - if you're concerned with having inky looking fingers for a week, be sure to wear gloves.
“Walnut trees grow in hot, dry climates. Look for them if you’re camping in the South Bay - that’s where we found them, but we’re not going to reveal our source!”
“I like to keep my nocino pure, in order to be able to taste the walnutty goodness, but have tried vanilla bean and it was a nice addition, especially if you’re planning on using nocino for ice cream topping.”
4-1/4 cups granulate sugar
1.75 liters of Everclear (Vodka also works, but not as well)
50 green walnuts
Other ingredients- citrus peel, cinnamon sticks, pepper, vanilla bean, etc.
Wash 4 half-gallon mason jars well with hot soapy water, rinse, and air dry.
While jars are drying, quarter walnuts then divide into jars with 1/4 each of the Everclear and sugar. Screw the lids tightly onto jars and shake vigorously. Over time the nocino liquid will darken. It happens quite fast and it's pretty impressive! Allow jars to sit for 6 weeks in a cool dark place, shaking occasionally to dissolve sugar.

Using a cheesecloth or fine mesh strainer, strain the liquid and discard the walnuts. Add any other ingredients of your choosing (vanilla bean, orange peel, etc.) and pour nocino from the jars into smaller bottles. Close bottles and let the liqueur marinate for another 6 months to 1 year. You can taste the nocino as it rests to learn about the flavor changes and begin drinking once it's to your liking.
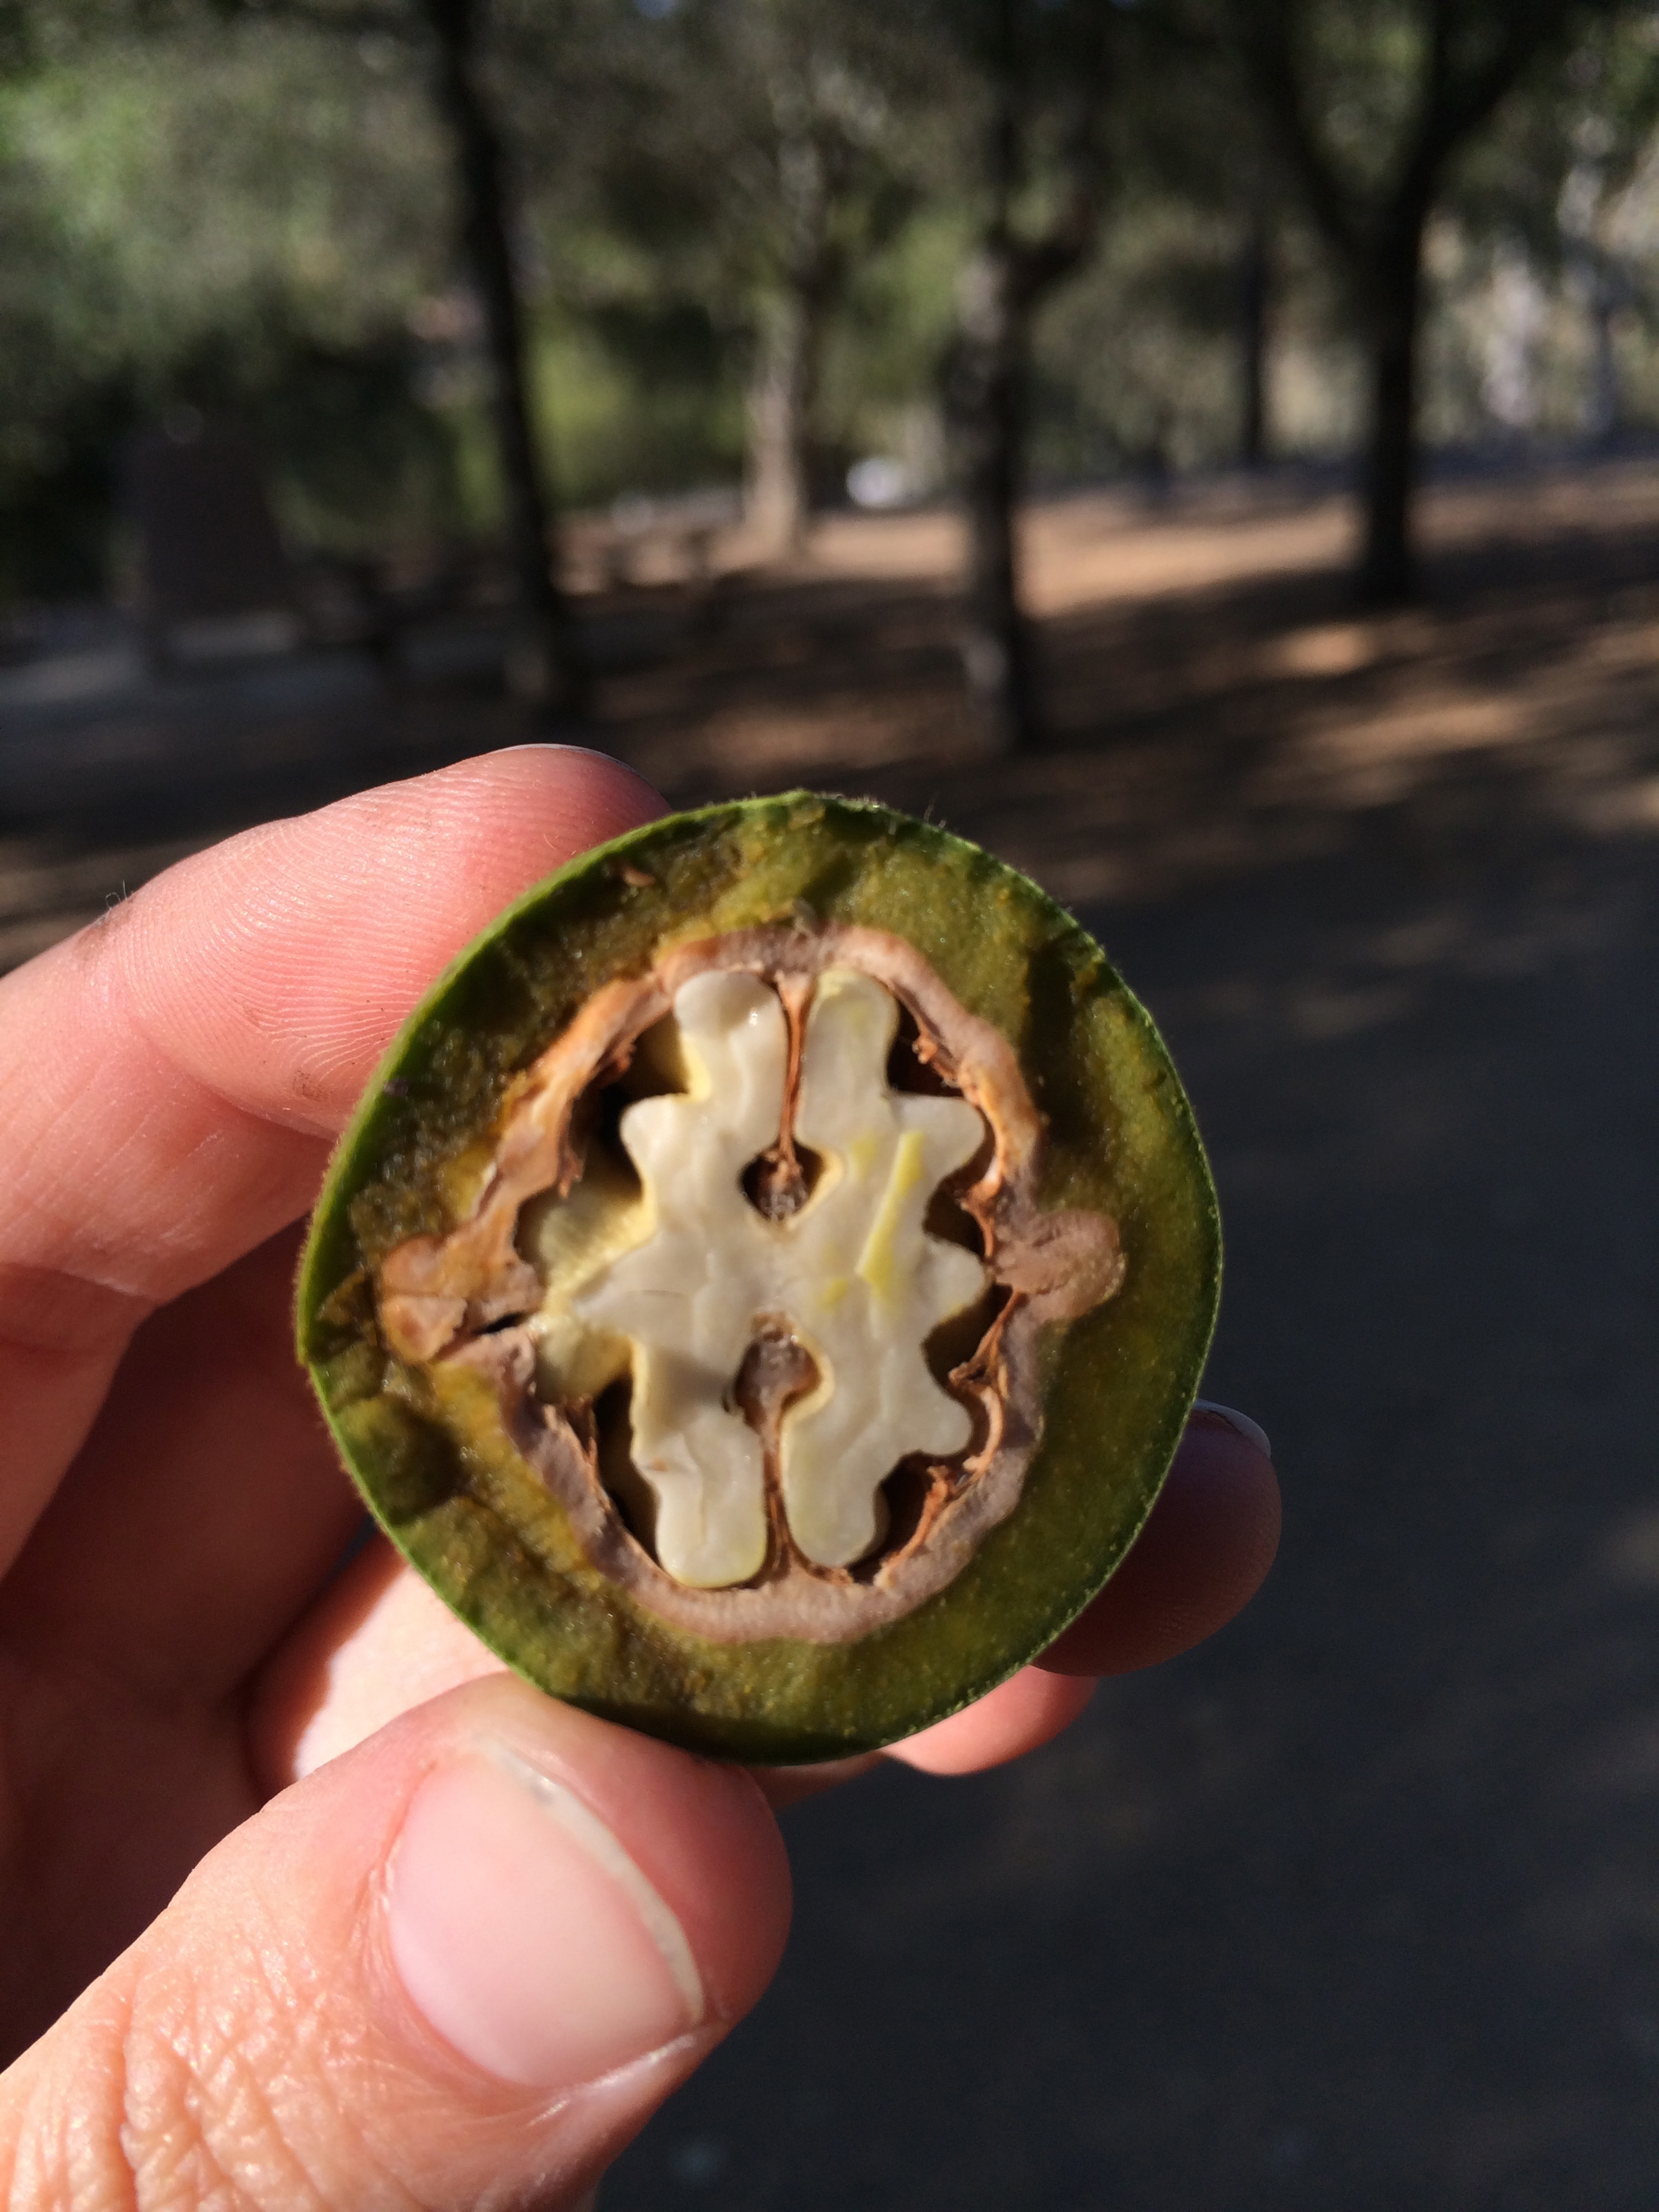
If walnuts are harvested too late in the season, the shells will have started to harden.
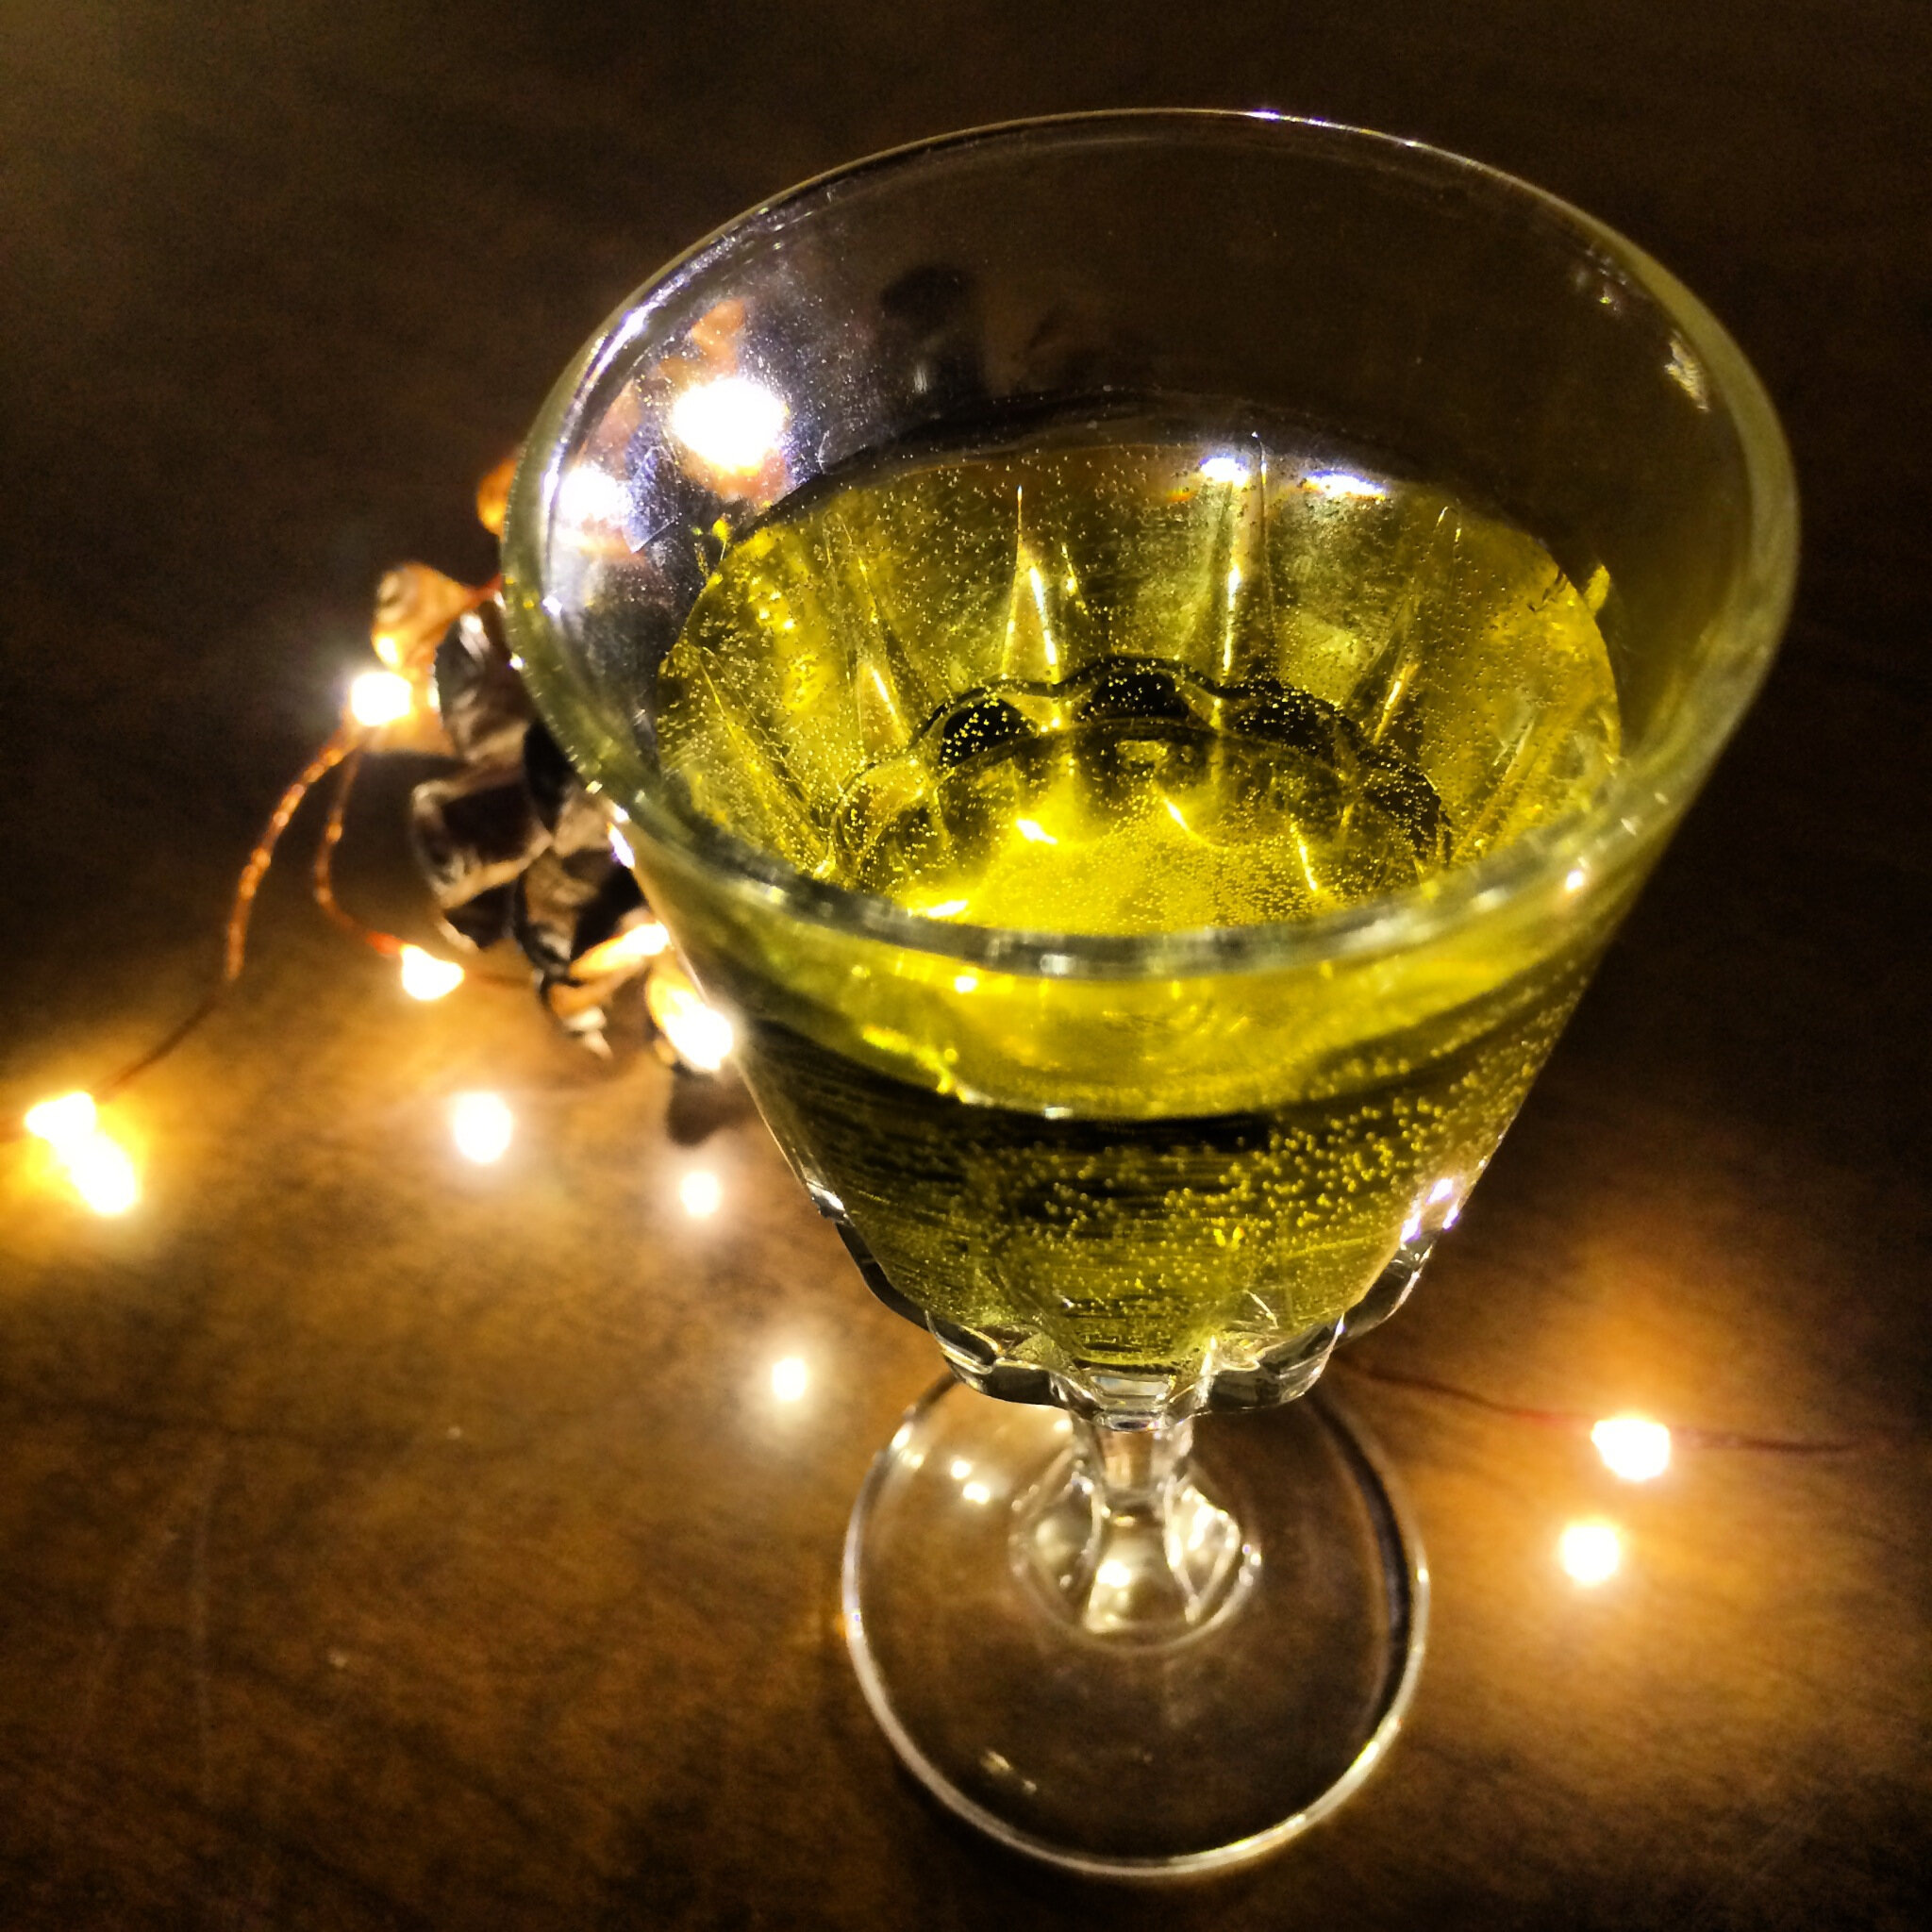
Dandelion Wine: Aged 6 months
Tasting summer.

Last June I made wine from foraged dandelion flowers that would otherwise be considered weeds. I read that in the darkest days of winter, some cultures will pull out the aged dandelion wine, usually on winter solstice, for a taste of summer. This idea intrigued me a sparked the impetus for a winter solstice party.
After 6 months, the wine had a beautiful golden color, lovely vegetal/pollen aroma and taste, and slight effervescence. Although it could use another few months of aging for a more balanced flavor, it’s definitely off to a great start. Until then!
Update in June 2014: I believe we waiting too long and the dandelion wine is now more of a vinegar! Noted for next time I make dandelion wine, at 6 months it tastes pretty good and should be tasted every month thereafter to determine when it's at its peak.
Full dandelion wine making process can be found here.
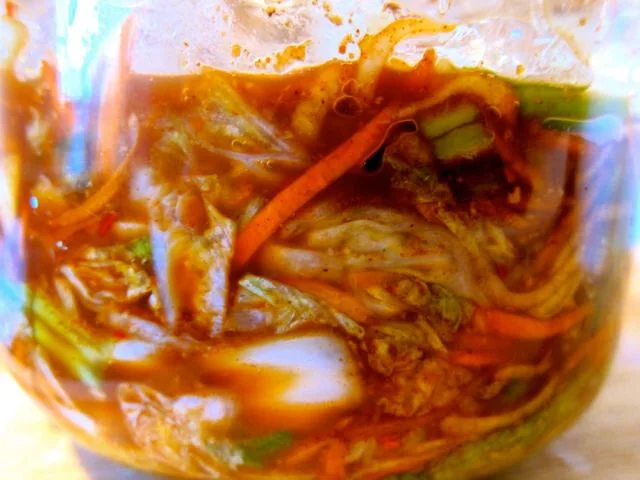
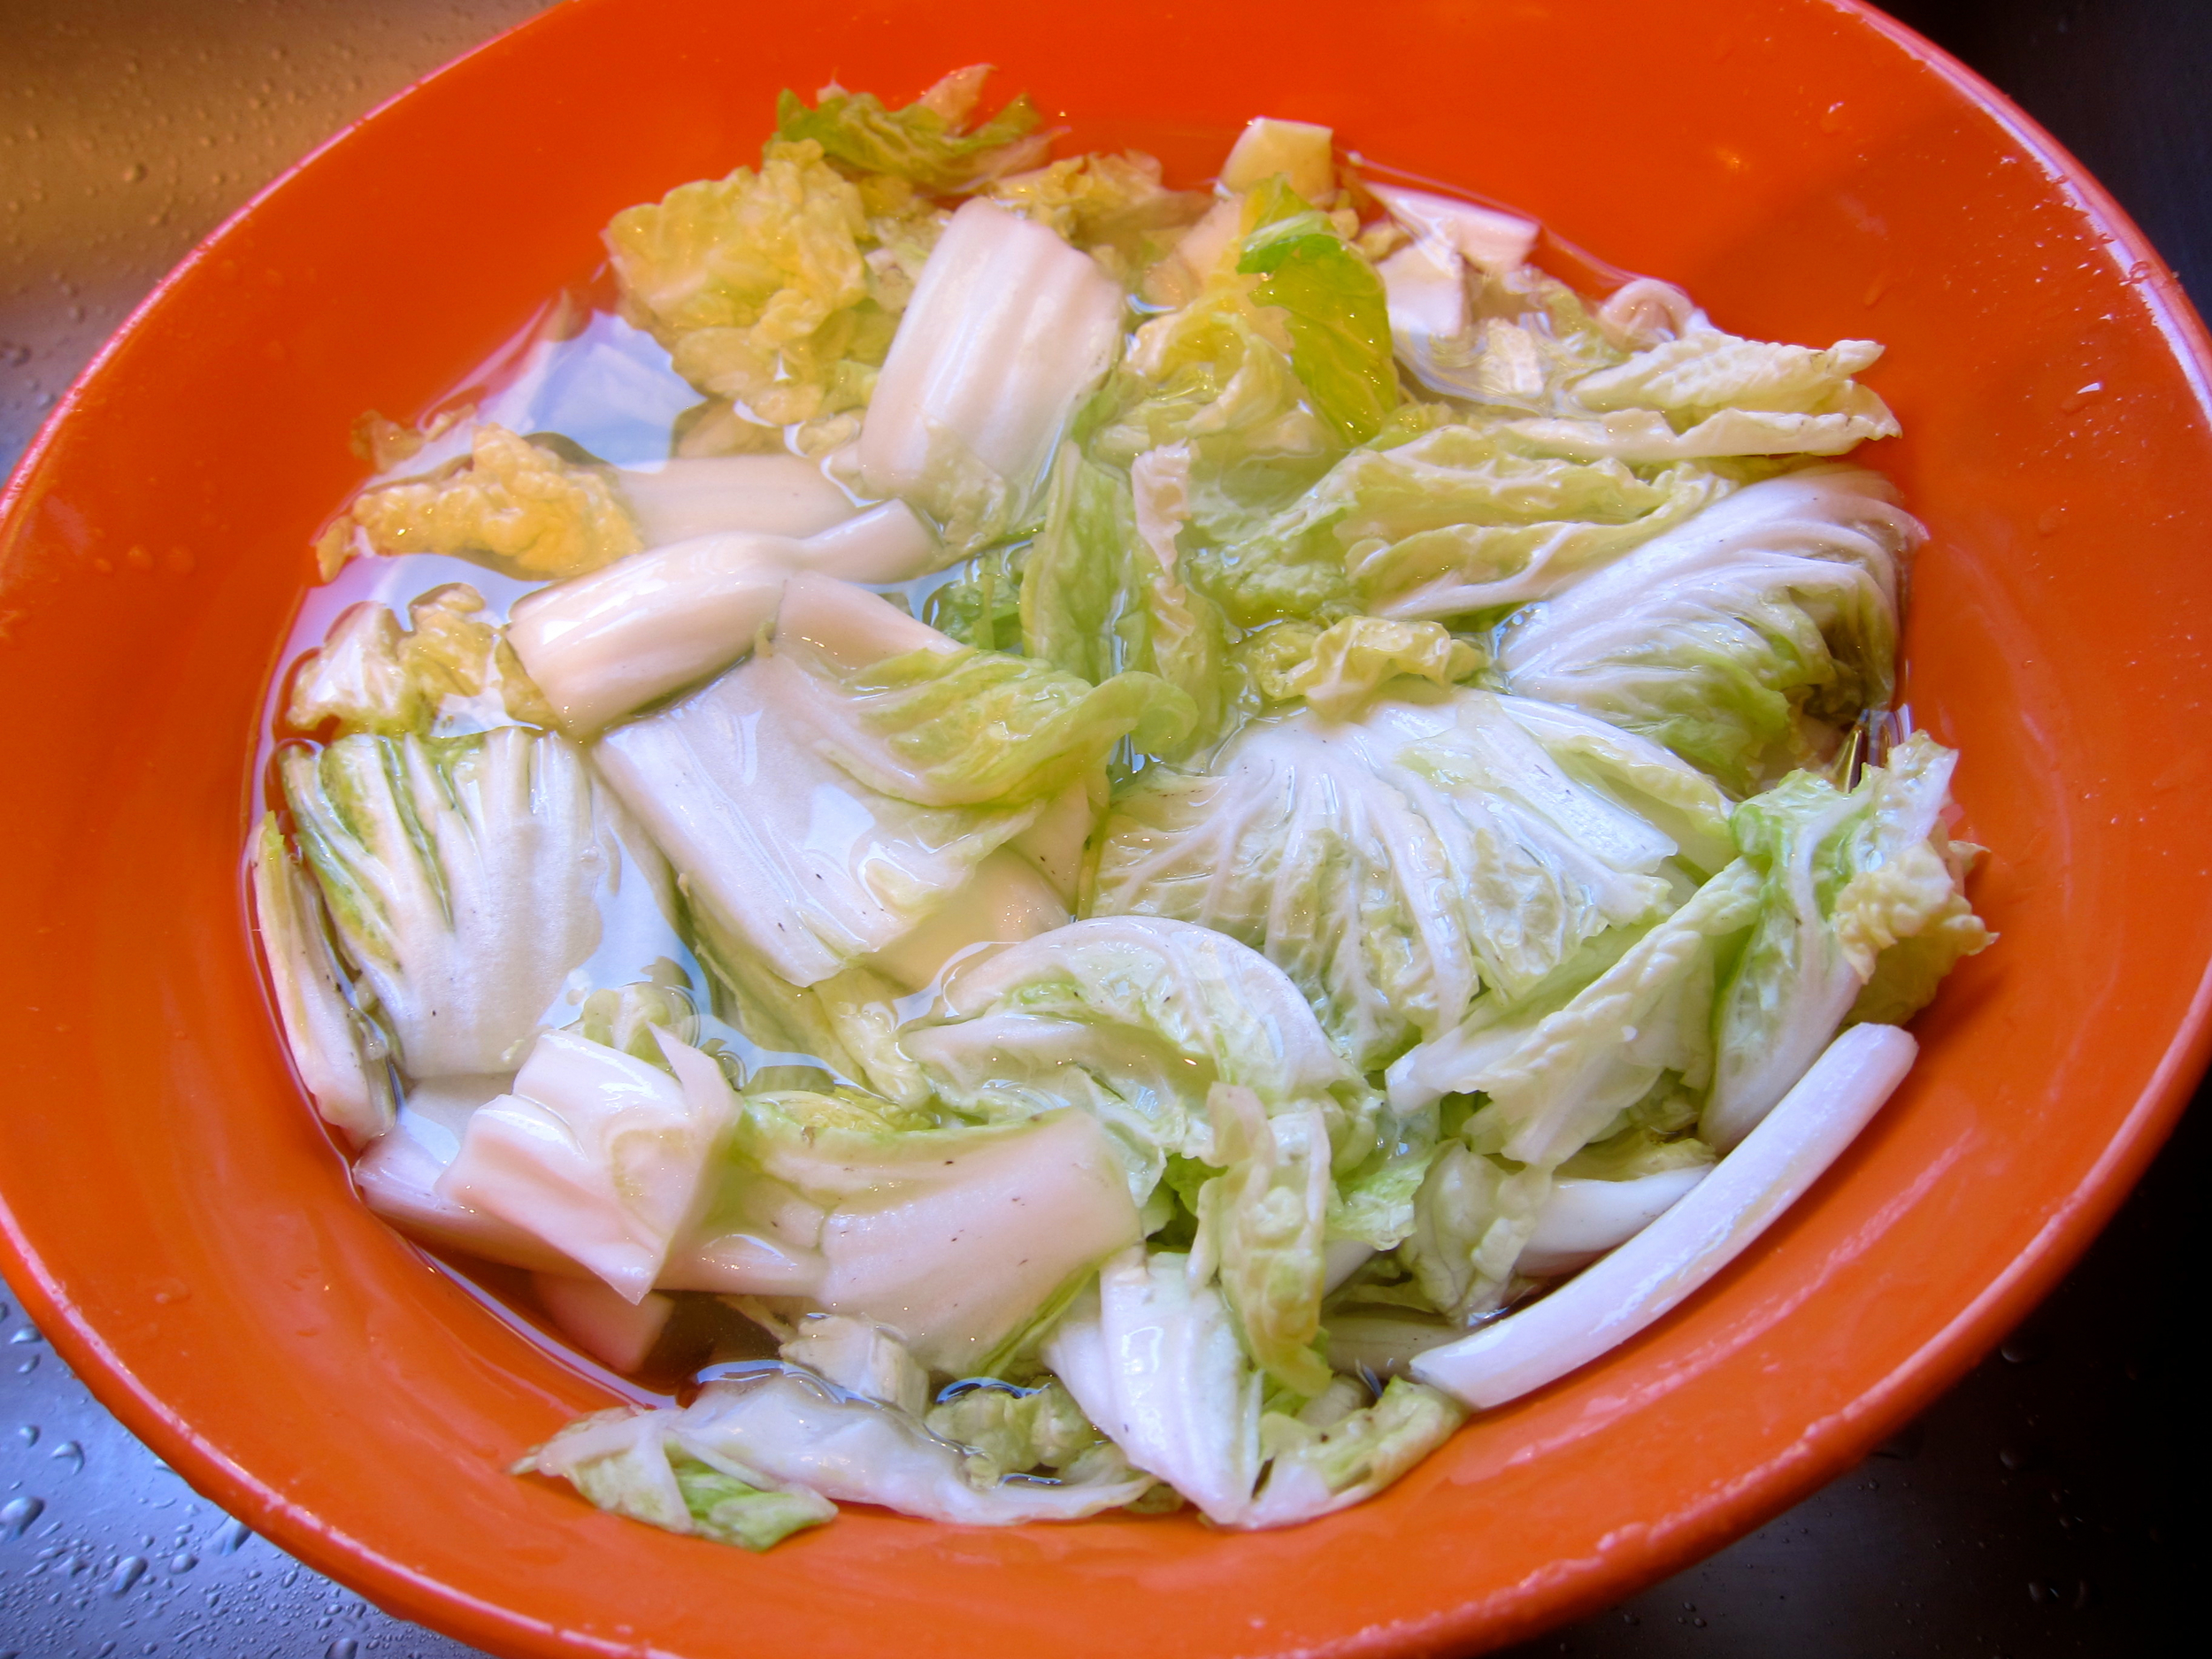
Homemade Kimchi
Kimchi state of mind.

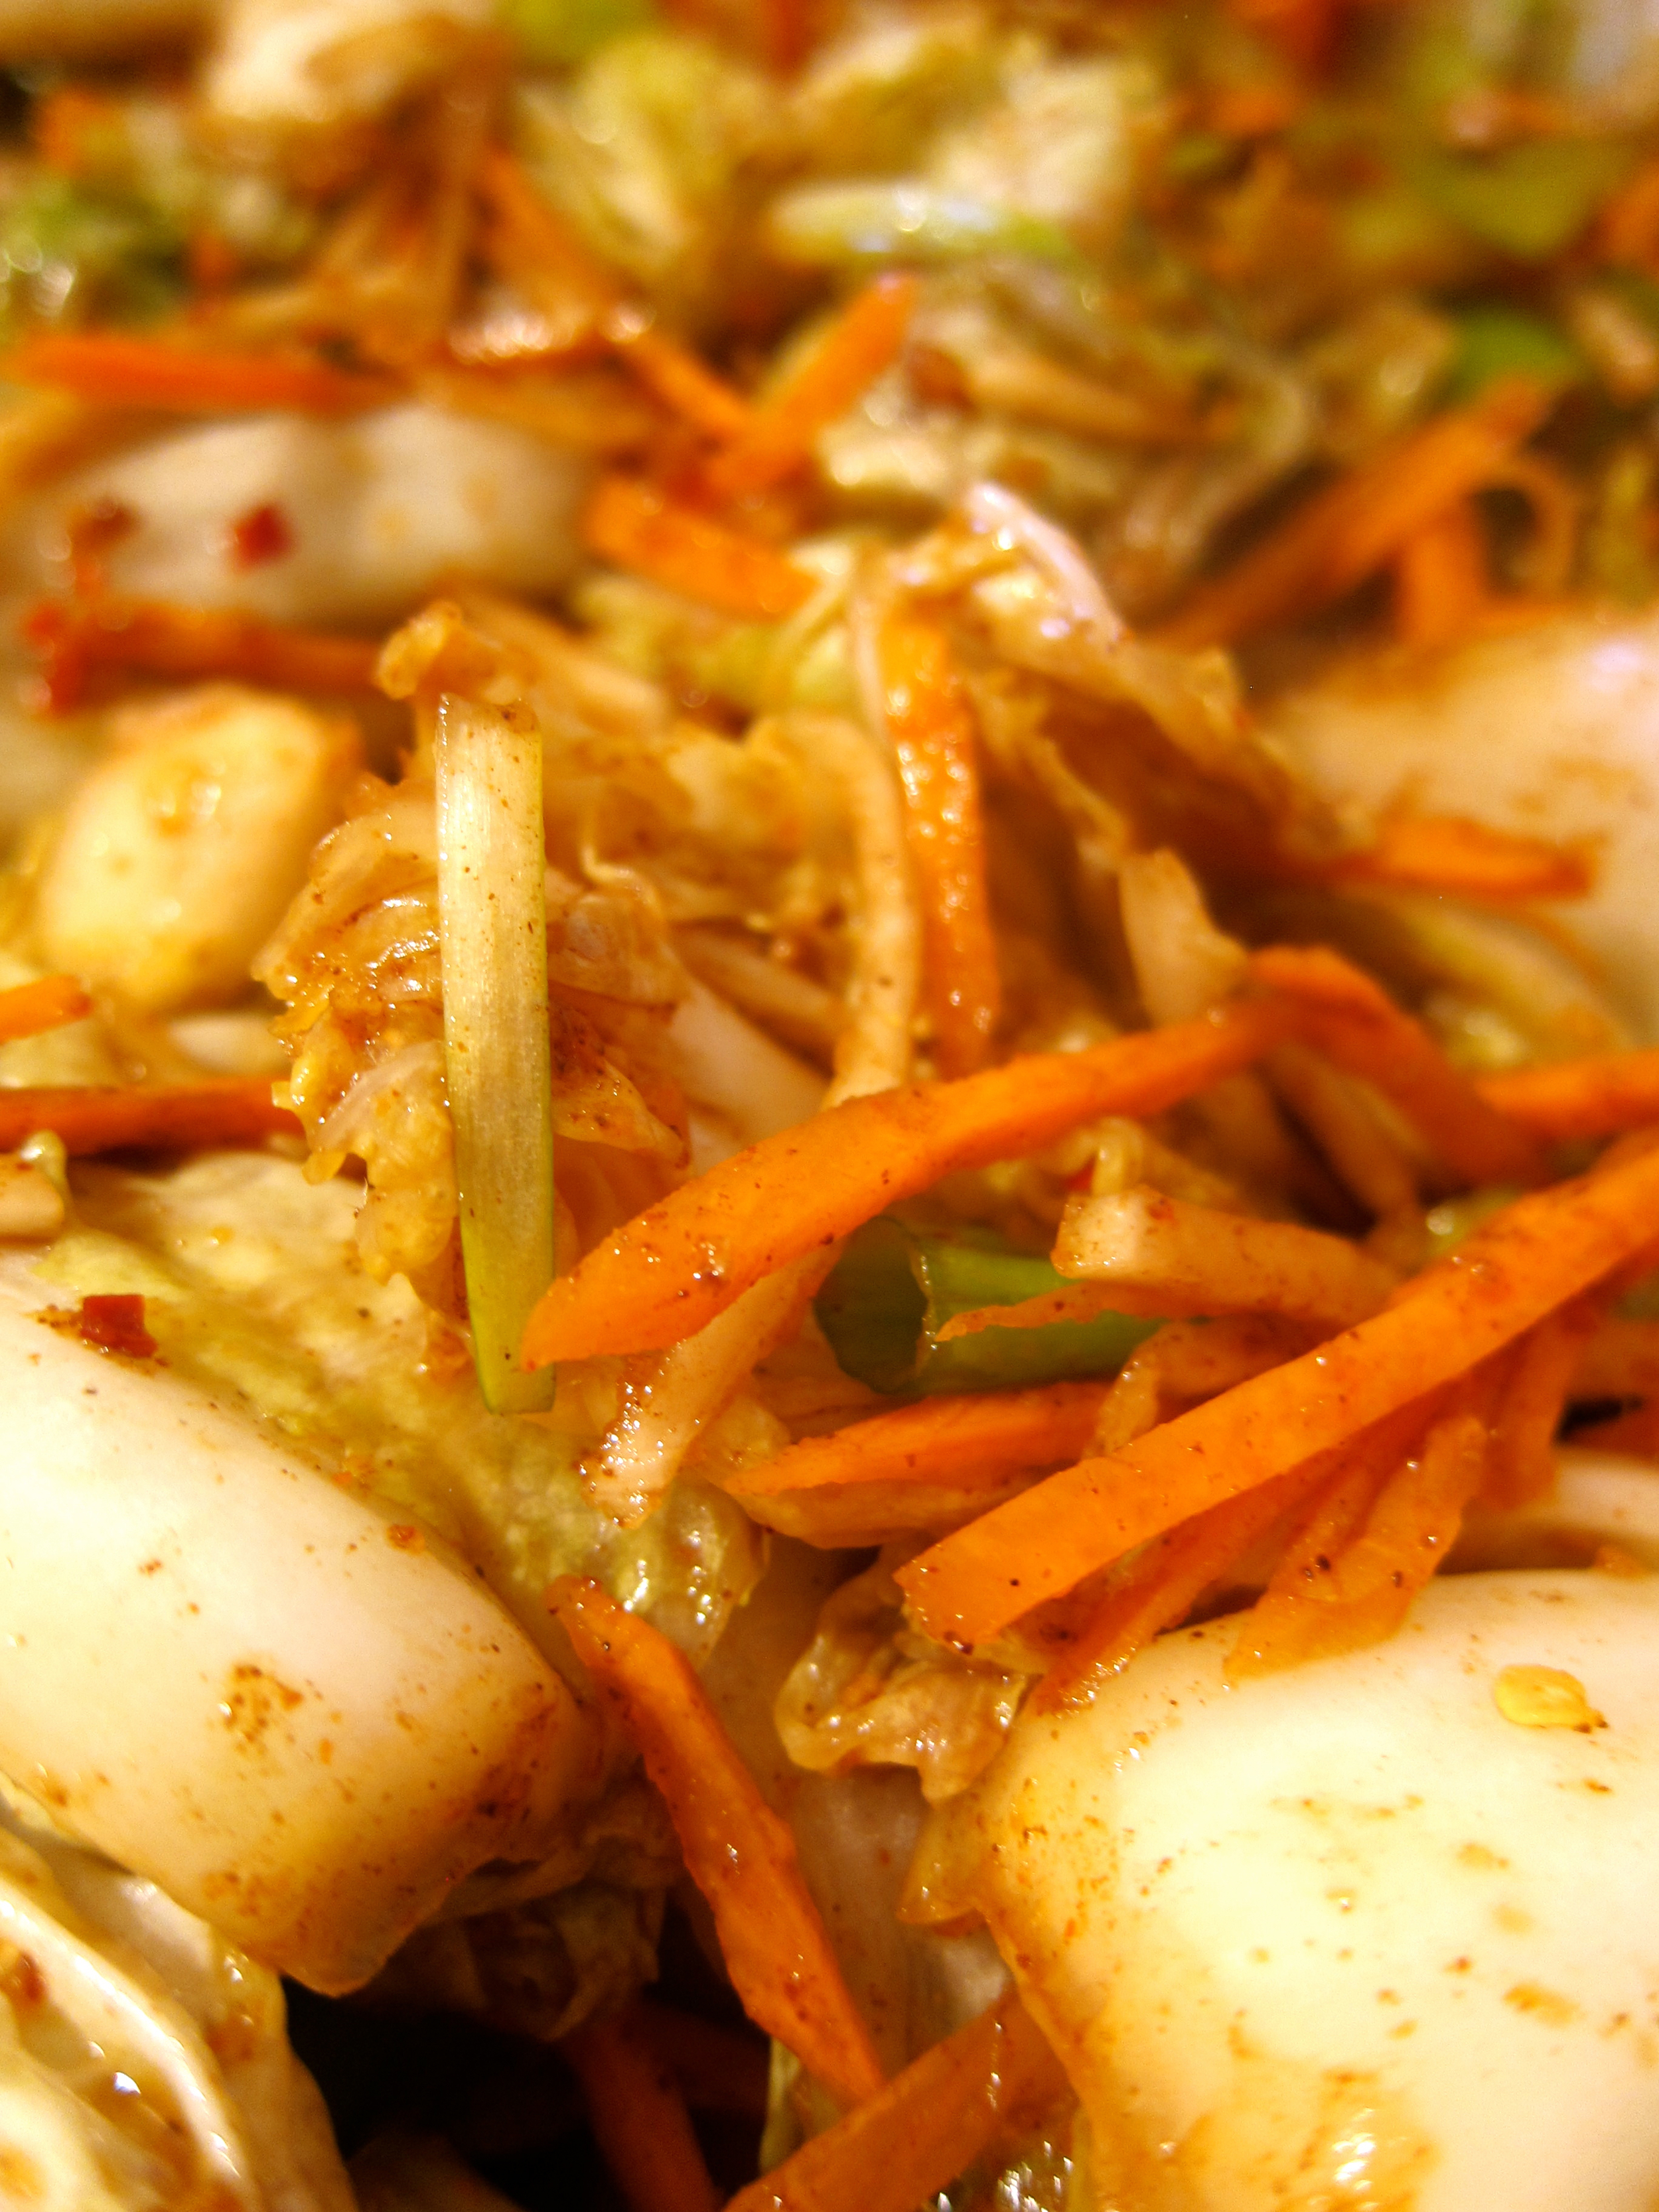
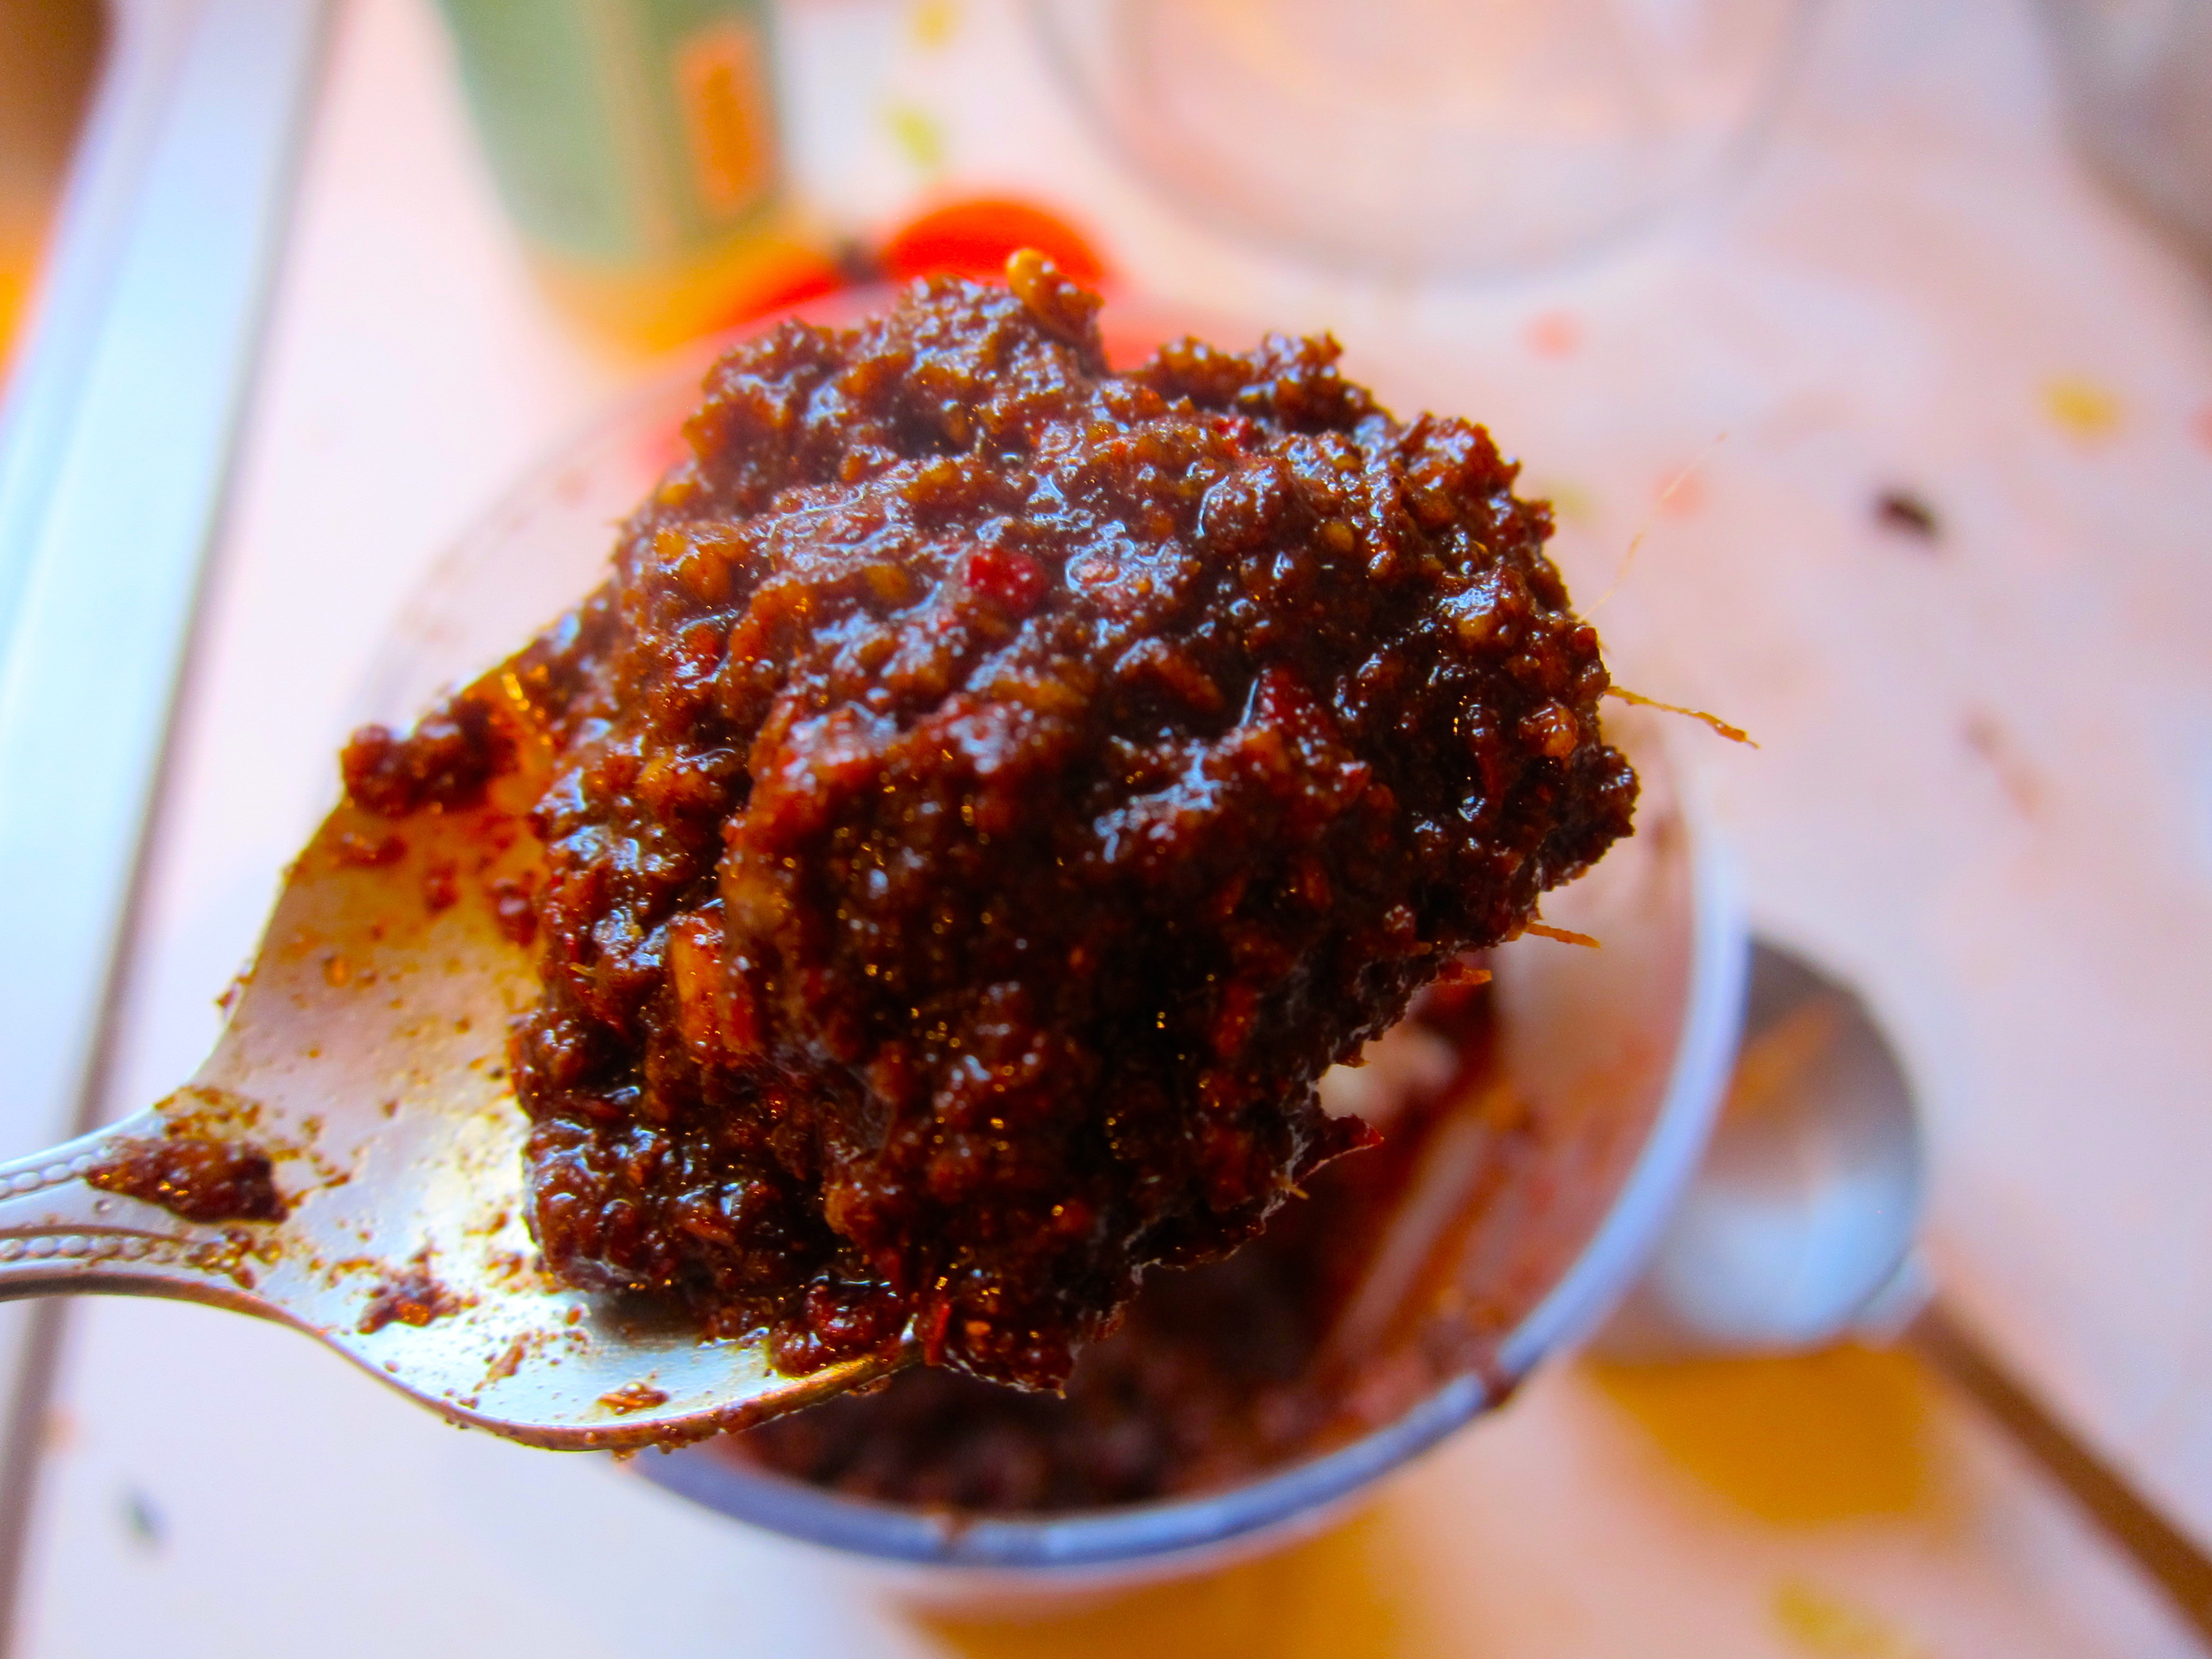
Spicy and effervescent, there are many ways to make this naughty cousin to sauerkraut. I looked at a wide variety of recipes, took bits and pieces from all of them, and then kind of abandoned ship to do my own thing. Below is my basic proportion of ingredients, but I ended up making more chili paste than was needed to coat the kimchi, which is nice because I’ll save it for something else. As long as you keep things clean, soak cabbage in salt/use salt or salty substance (like fish sauce) in paste, and don’t leave it at room temp for too long, you’ll make a safe kimchi. So taste as you go and have fun with it. I can’t wait to use mine in stir-fried rice, with greens and eggs, and to attempt a kimchi pancake!
1 head of napa cabbage, chopped into 1-2” pieces (depends on how coarse you like your kimchi
2 large carrots, grated
1/2 cup grated daikon or radish
1 bunch green onion, chopped (all but very coarse dark green ends)
1/4 cup fresh chopped ginger, about 3” piece
1 small head garlic, peeled and chopped
1/4 cup + 1 tablespoon sea salt
3 tablespoons fish sauce
3 tablespoon chili powder (Korean preferred)
1 tablespoon cayenne
1/4 cup chopped fresh or about 7-11 small dried peppers/chilis, chopped (I had dried chinese peppers and used 9 of them)
1 tablespoons unrefined sugar
Put cabbage in large bowl and sprinkle with 1/4 cup salt. Cover with water, stir until dissolved and let sit 20 minutes. Remove and pat dry.
While cabbage is salting, blend all other ingredients but carrots, daikon, and green onion in food processor or blender until you form a paste.
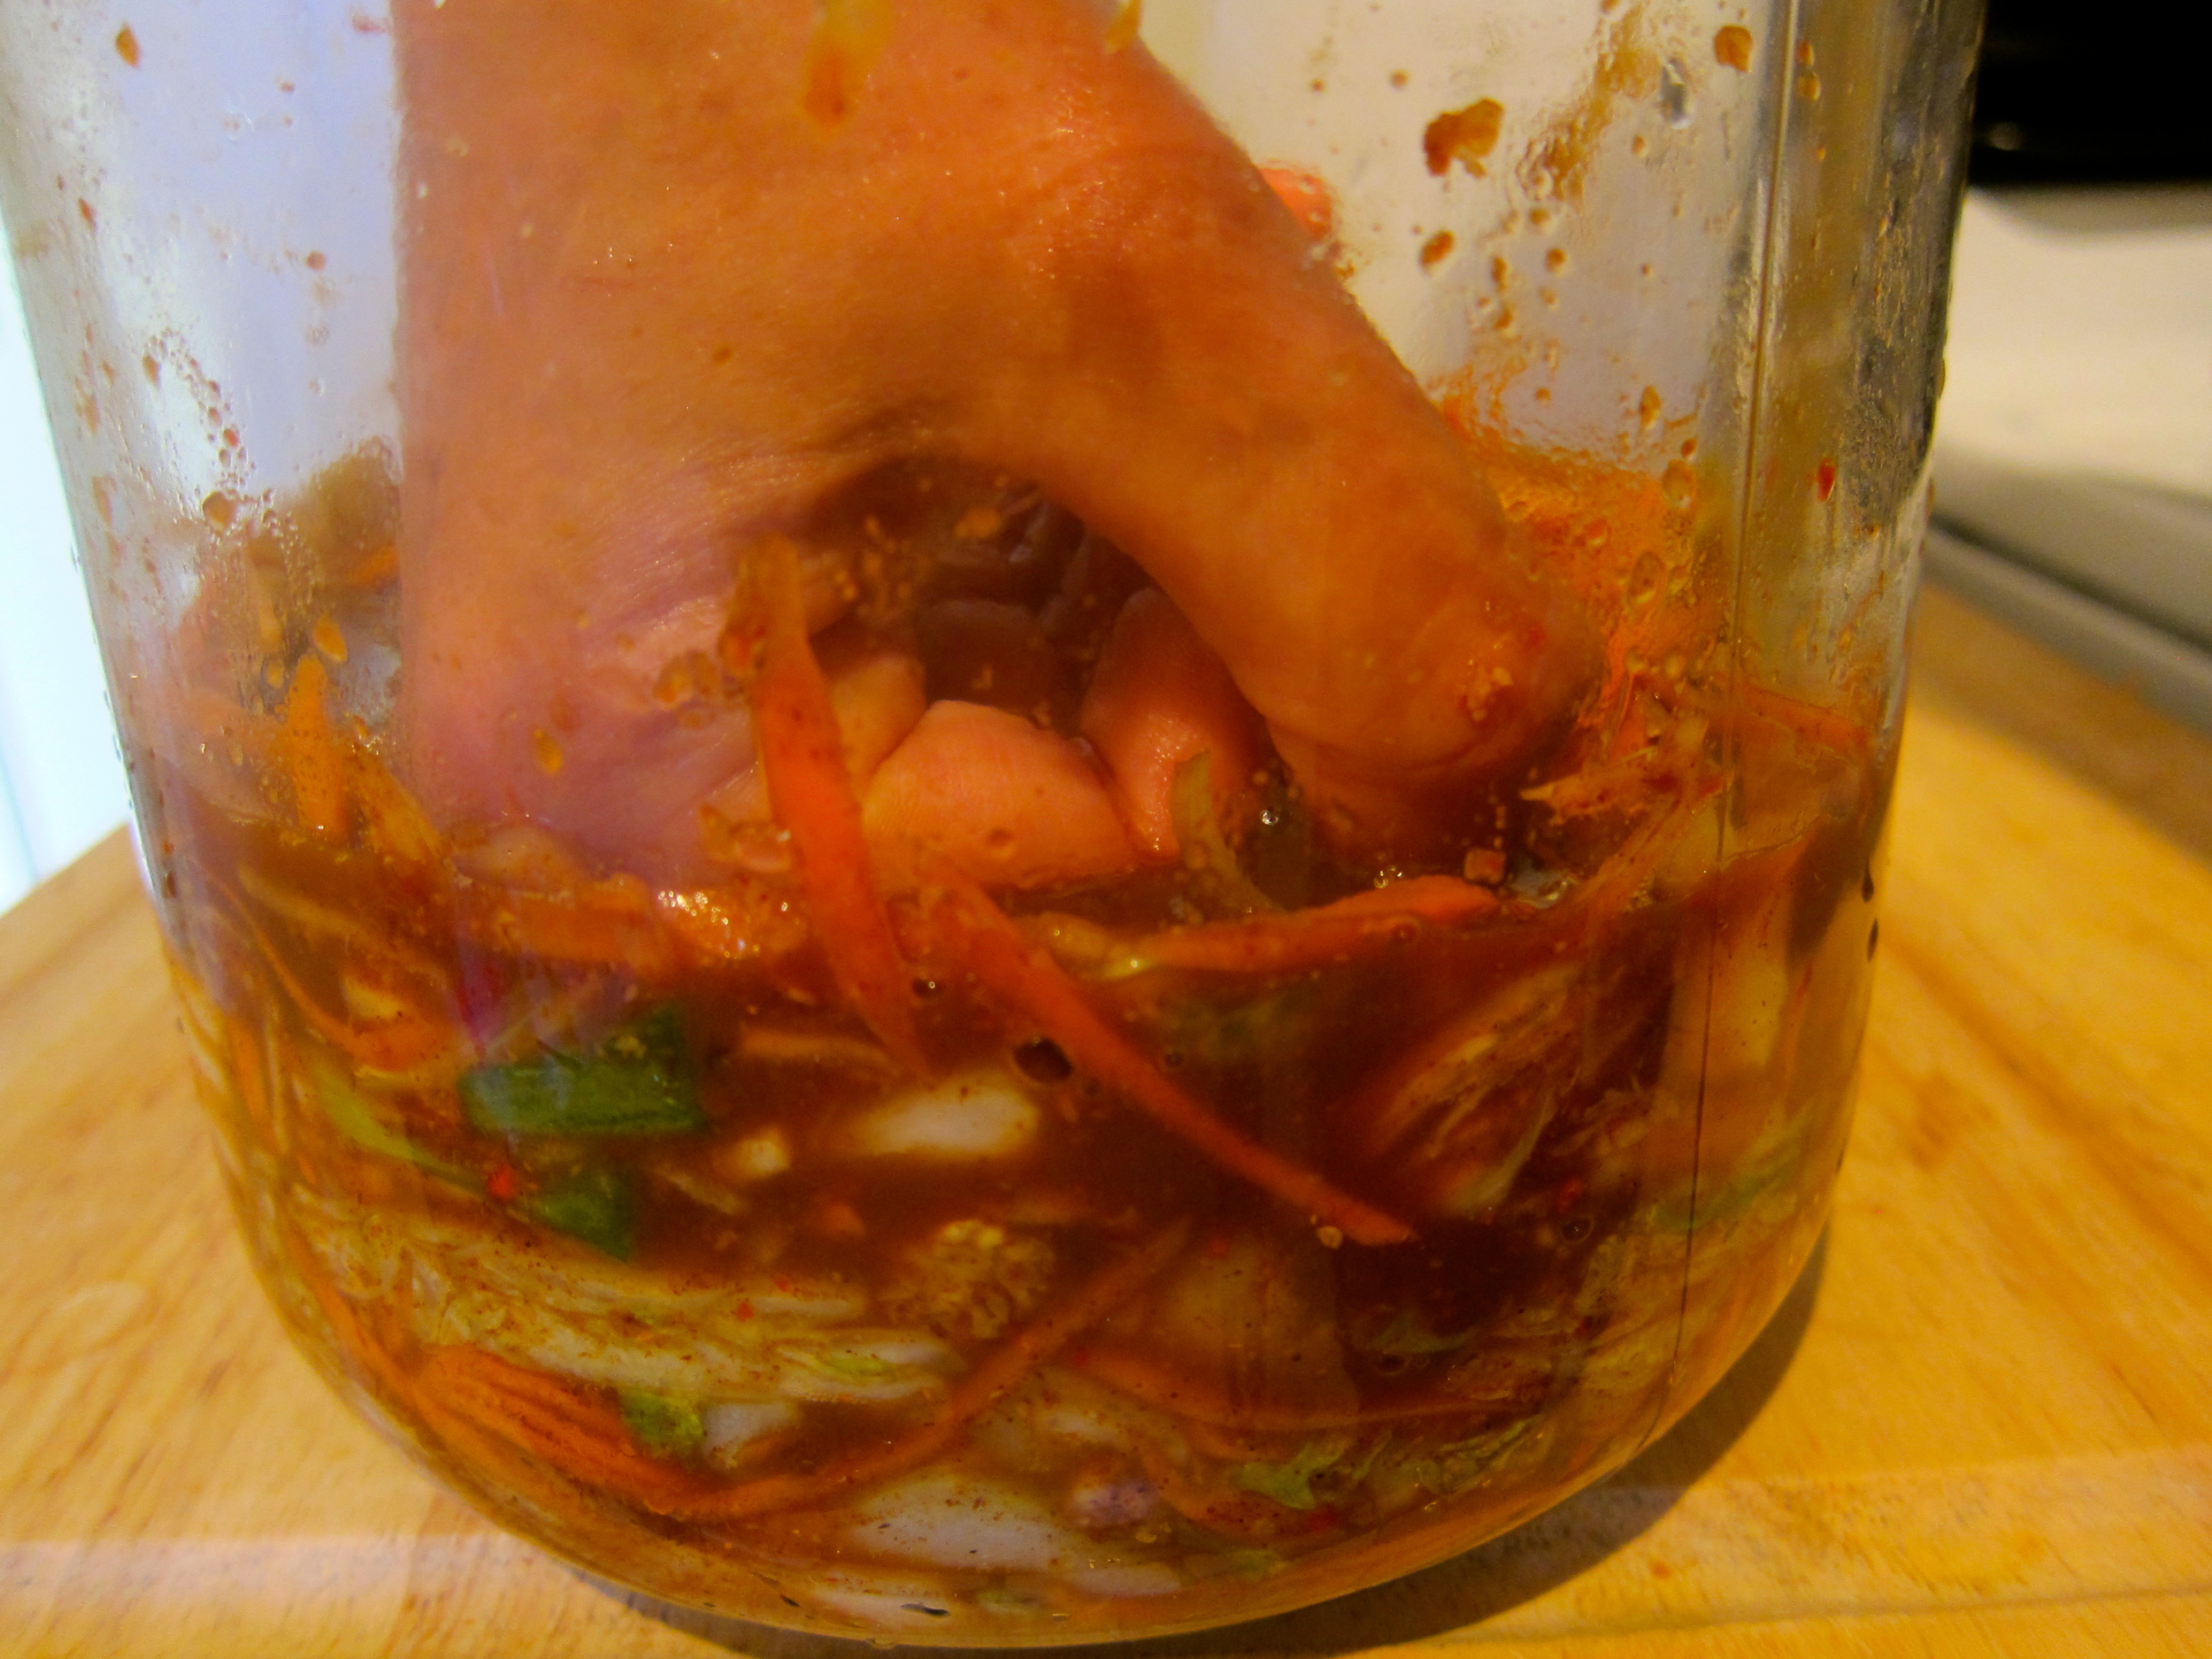
Toss cabbage with carrots, daikon, green onion, and enough paste to coat (taste until of desired heat strength, recognizing that fermentation will bring out more complex flavors).
Place into large glass or ceramic vessel. Press down with (CLEAN) hands to allow juices to escape and if water does not completely cover cabbage, then use a clean stone or plastic bag filled with water to ensure it stays until water.
Seal jar/vessel and let ferment for 2-3 days, depending on weather (hotter temps will make for faster fermentation) and desired strength.
Move to refrigerator and enjoy for up to 5 weeks.
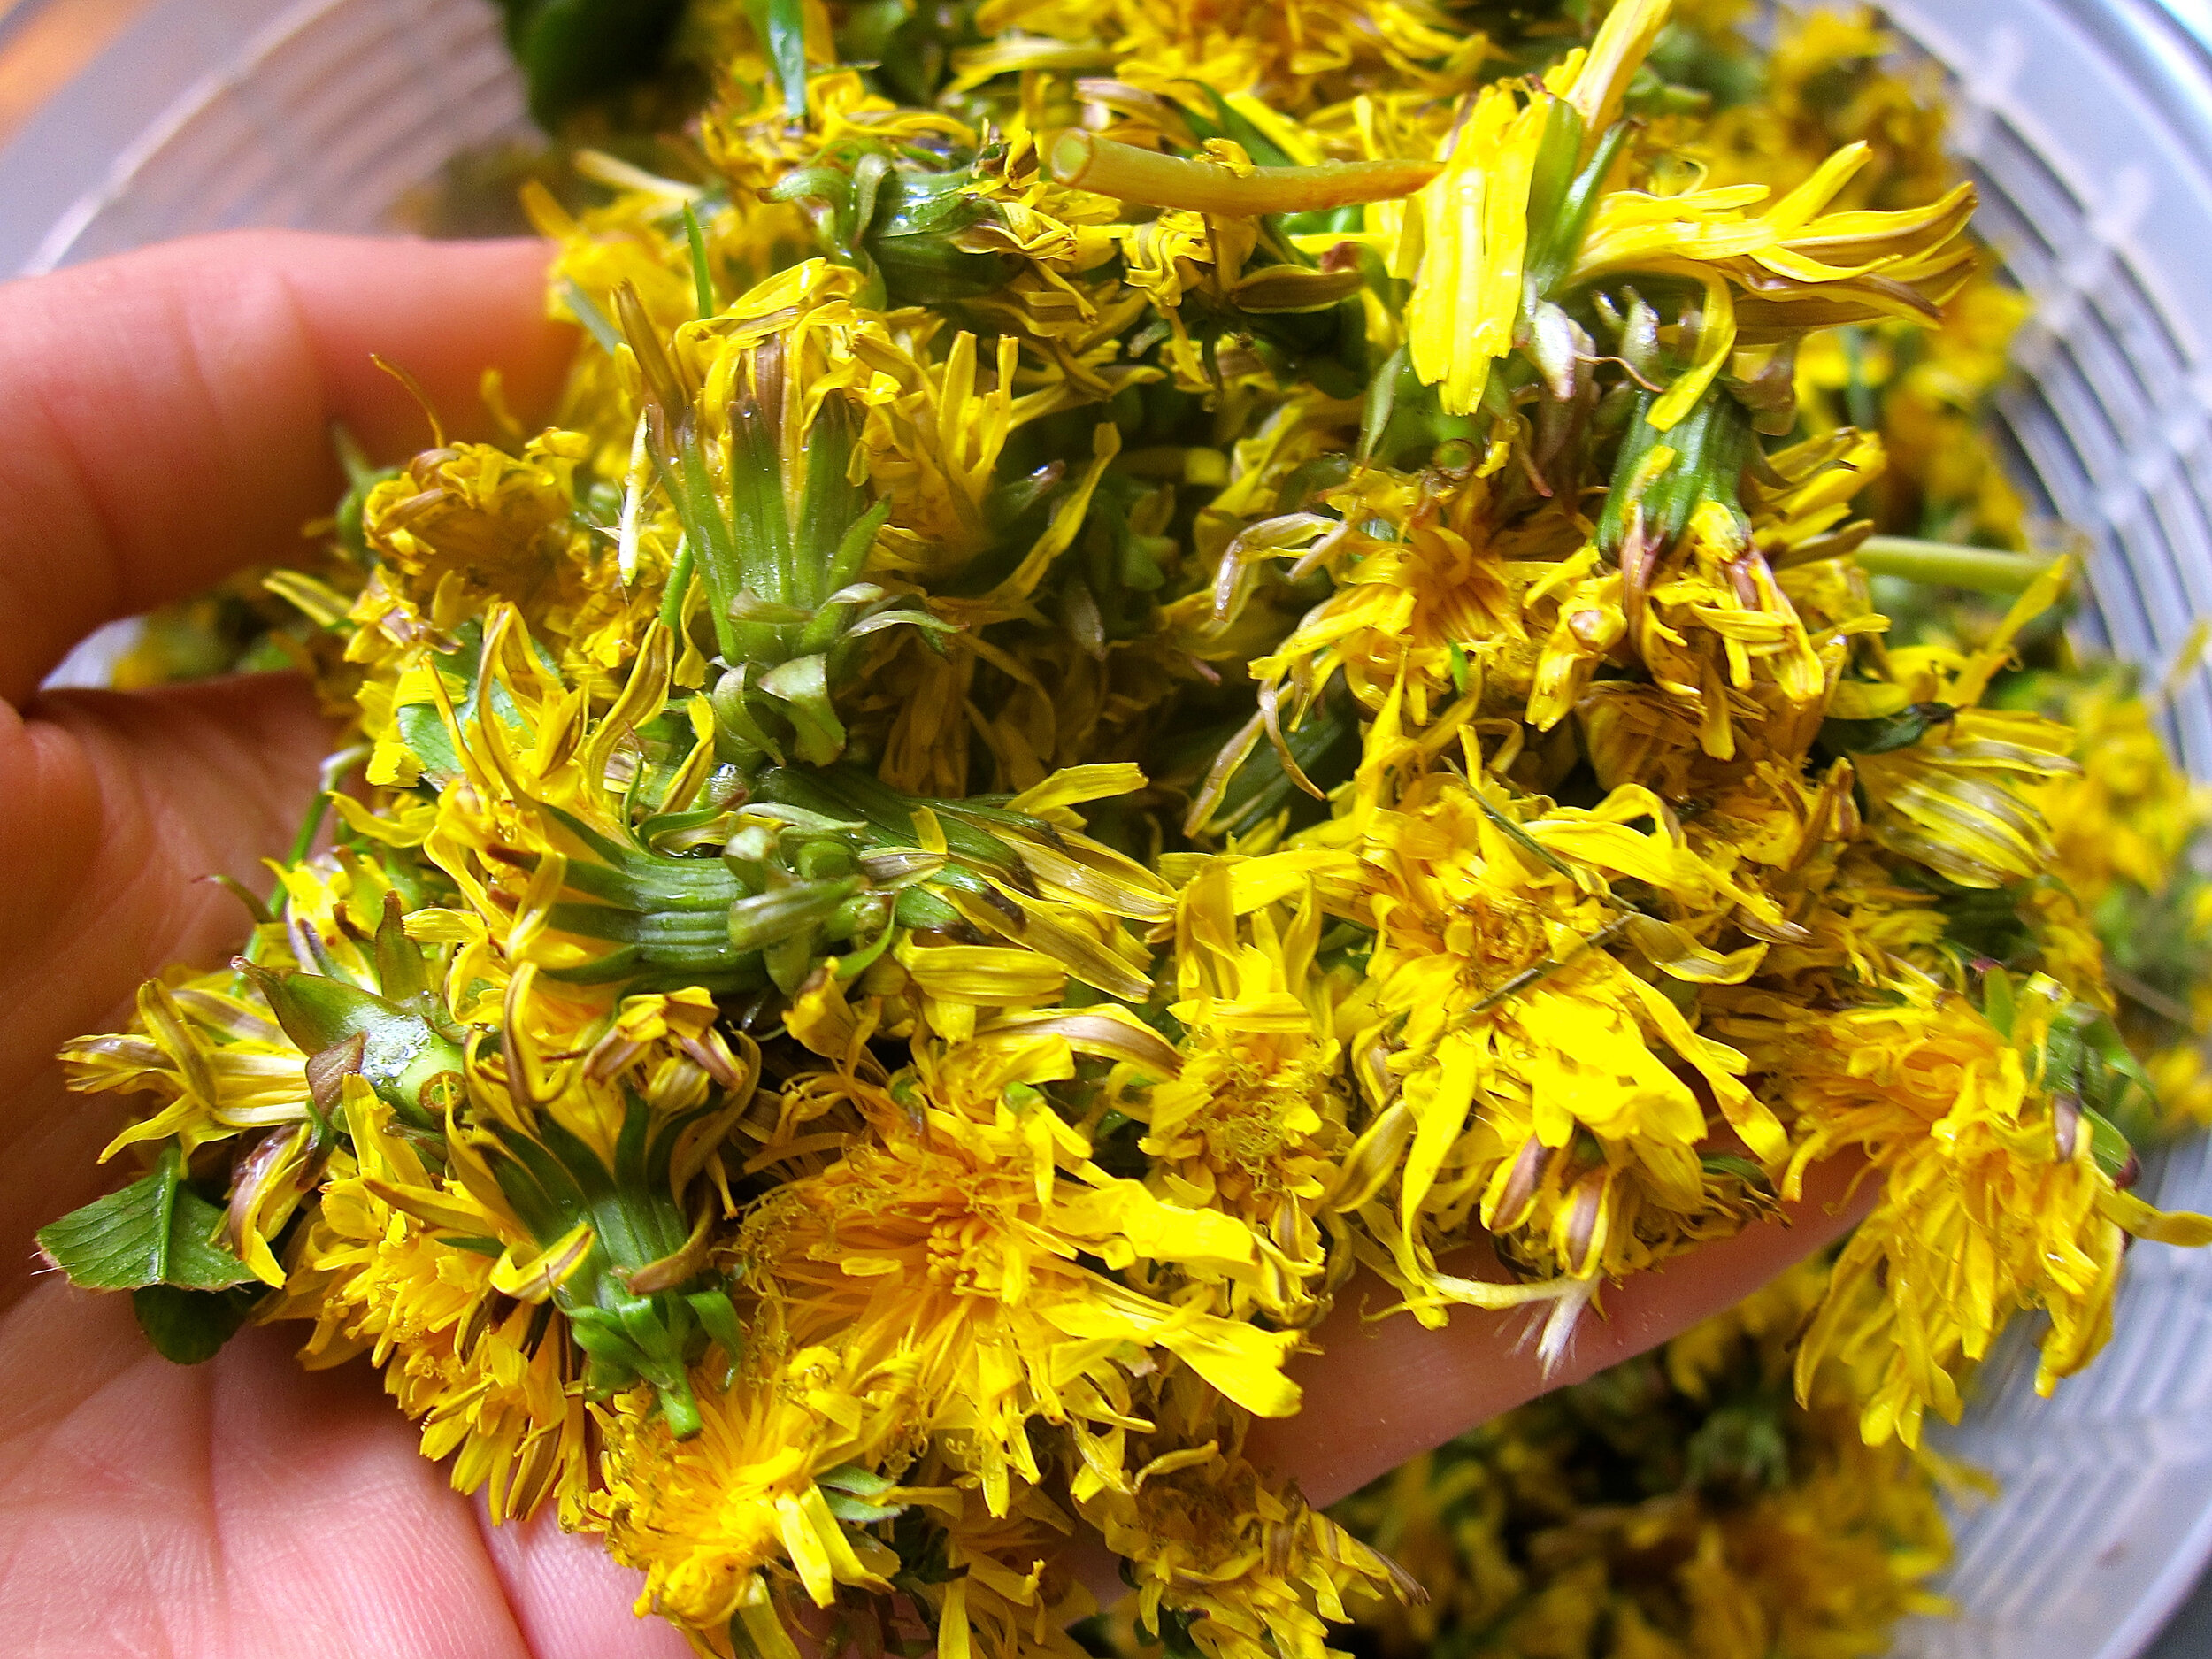
Dandelion Wine
A classic method for preserving a taste of summer.

I told someone that I had made dandelion wine and they said, “that’s really a thing?”. Yes, it’s a thing. I have always wanted to make dandelion wine - not sure where the desire came from (maybe because how even the sound of it delightfully rolls of the tongue?), but it aches all the same. So finally this spring I set forth on the task and have several delicious looking bottles put up to age from 6-12 months. My plan in to try them in 6 (because I won’t be able to resist) and drink some with others on the Winter Solstice.

1 gallon dandelion flowers, can leave ends of flowers on, but remove stems (your leg muscles may or may not be sore for a few days after this excursion)
2 cups turbinado sugar*
1 1/3 cup honey*
3-4 oranges
2-3 lemons
1-2 teaspoons/1/2 packet yeast (I used champagne yeast for dry, delicate flavor. Bread yeast is not recommended)
Few pinches of yeast nutrient (not necessary, but recommended)
*Sugar quantity will determine potential alcohol and potential sweetness, use more or less depending on your preferences.
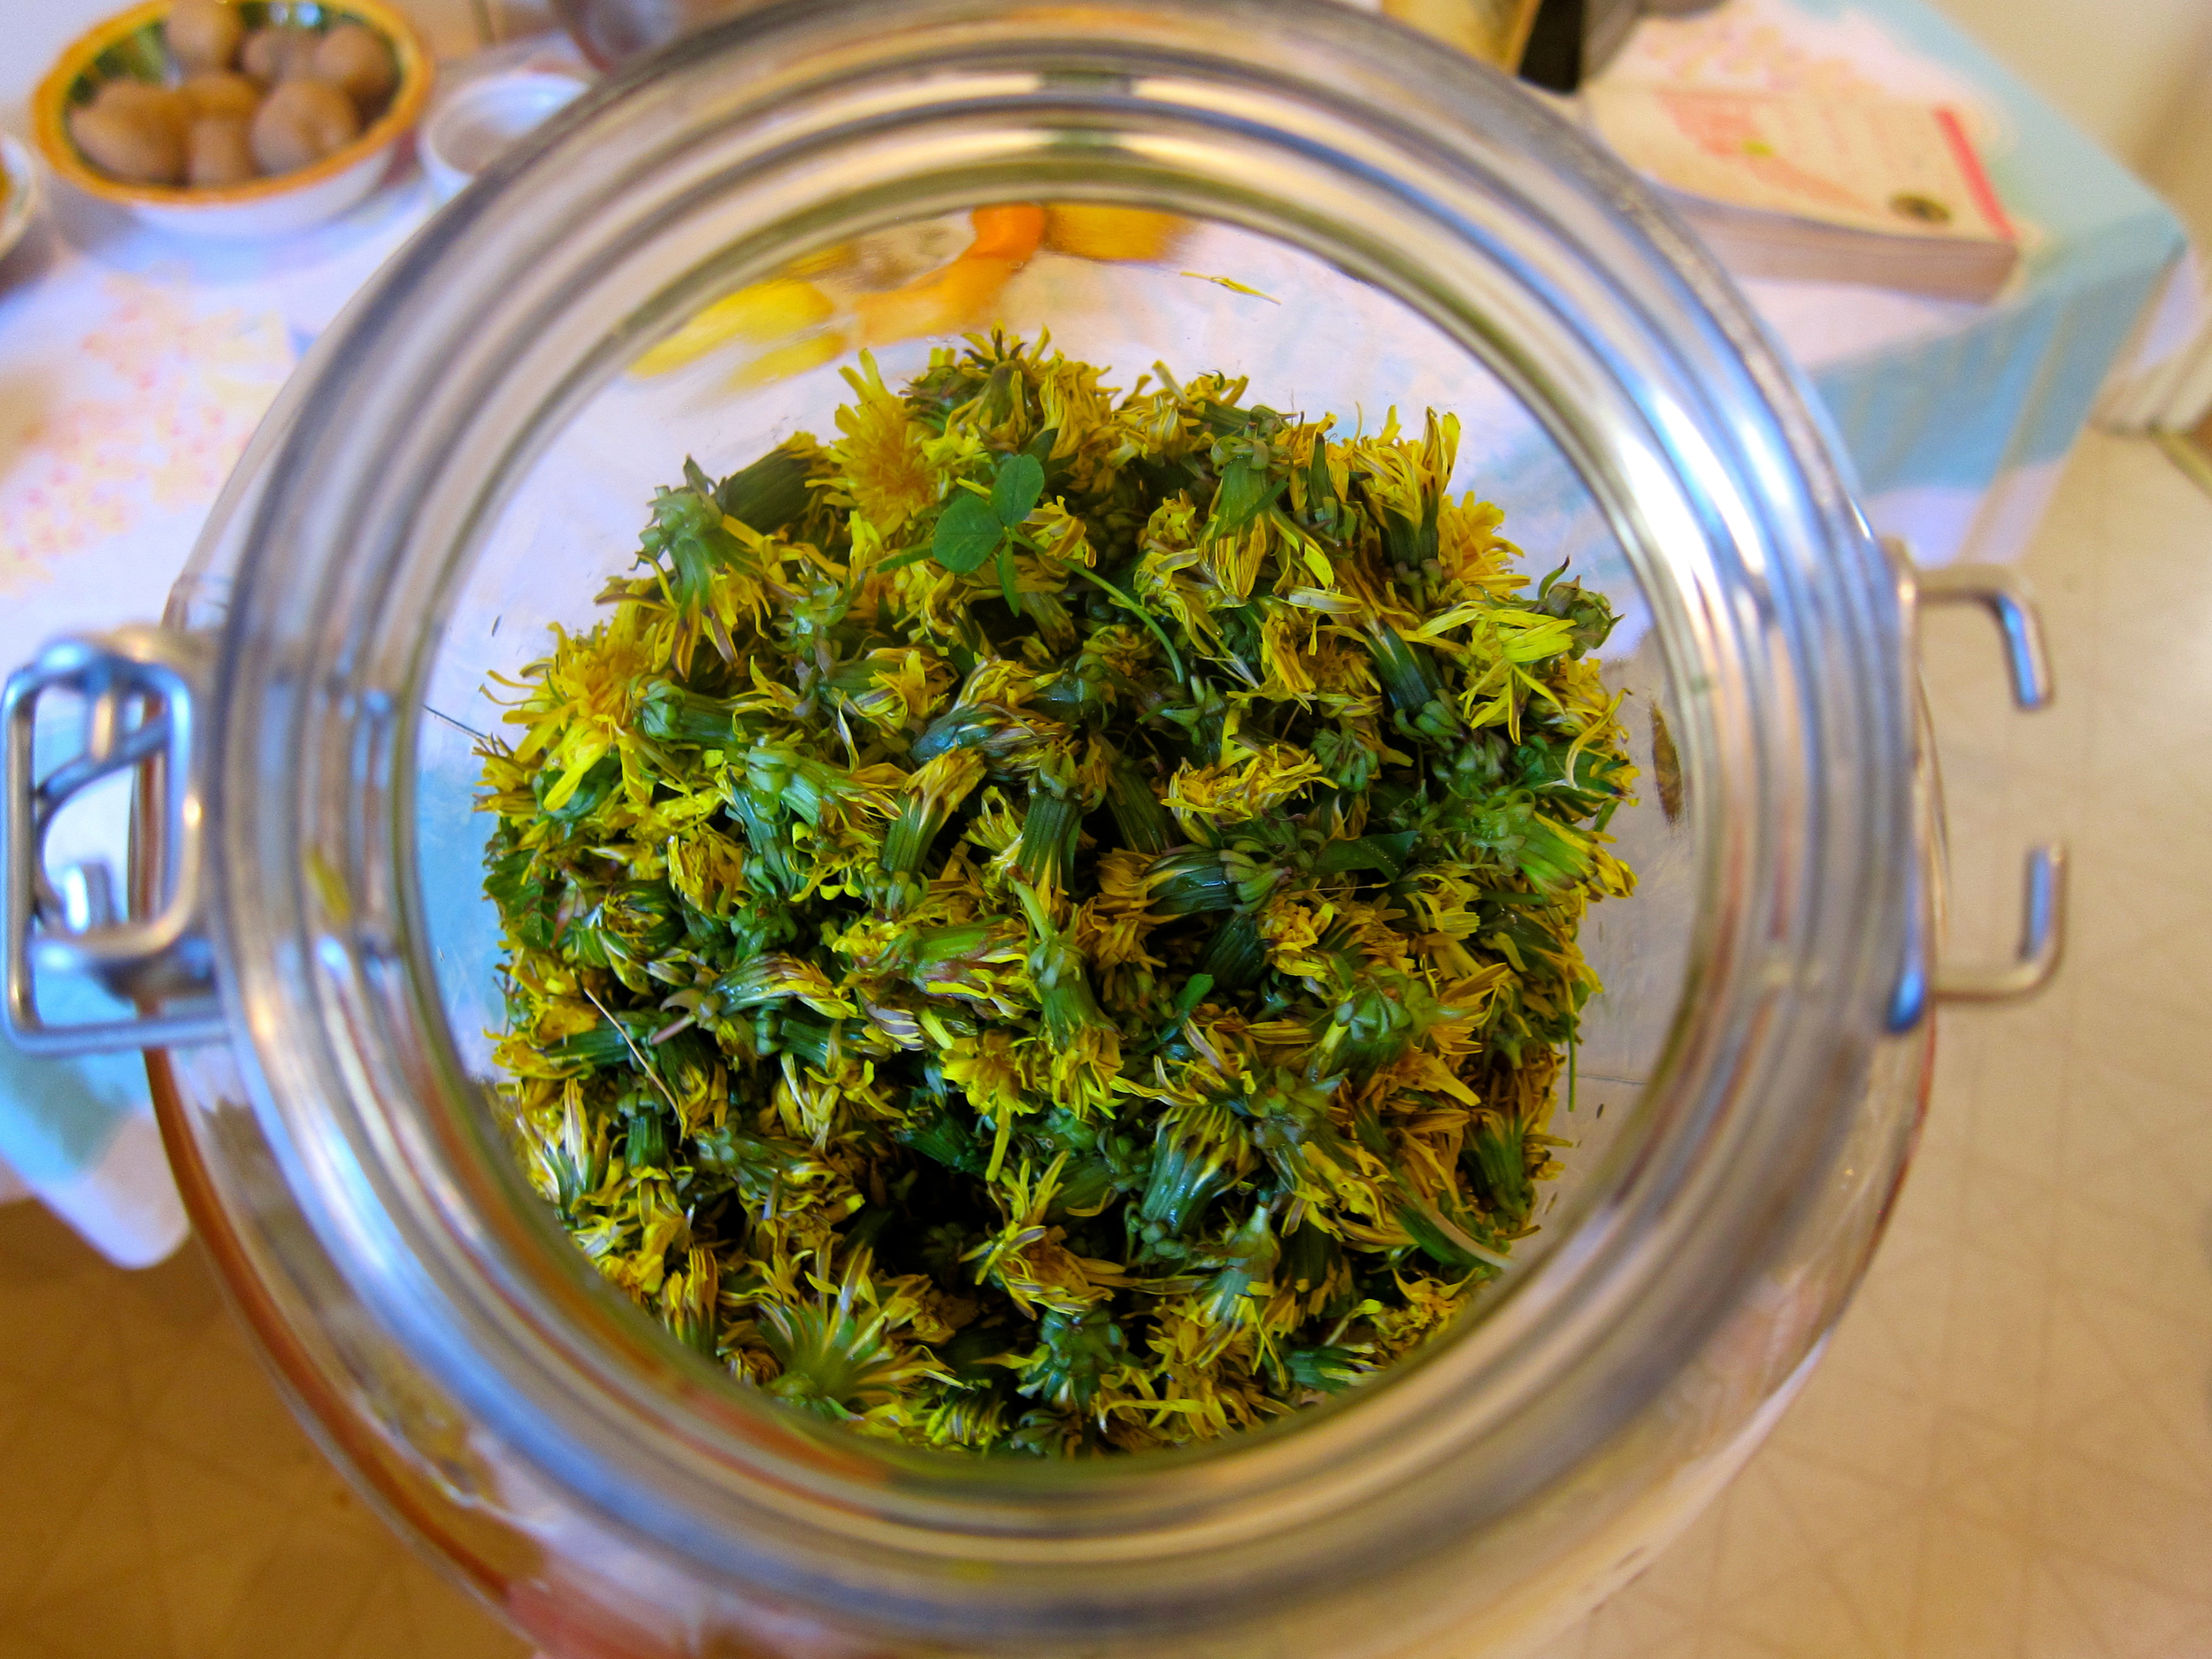
Process One (2 days) - Make Dandelion Infusion
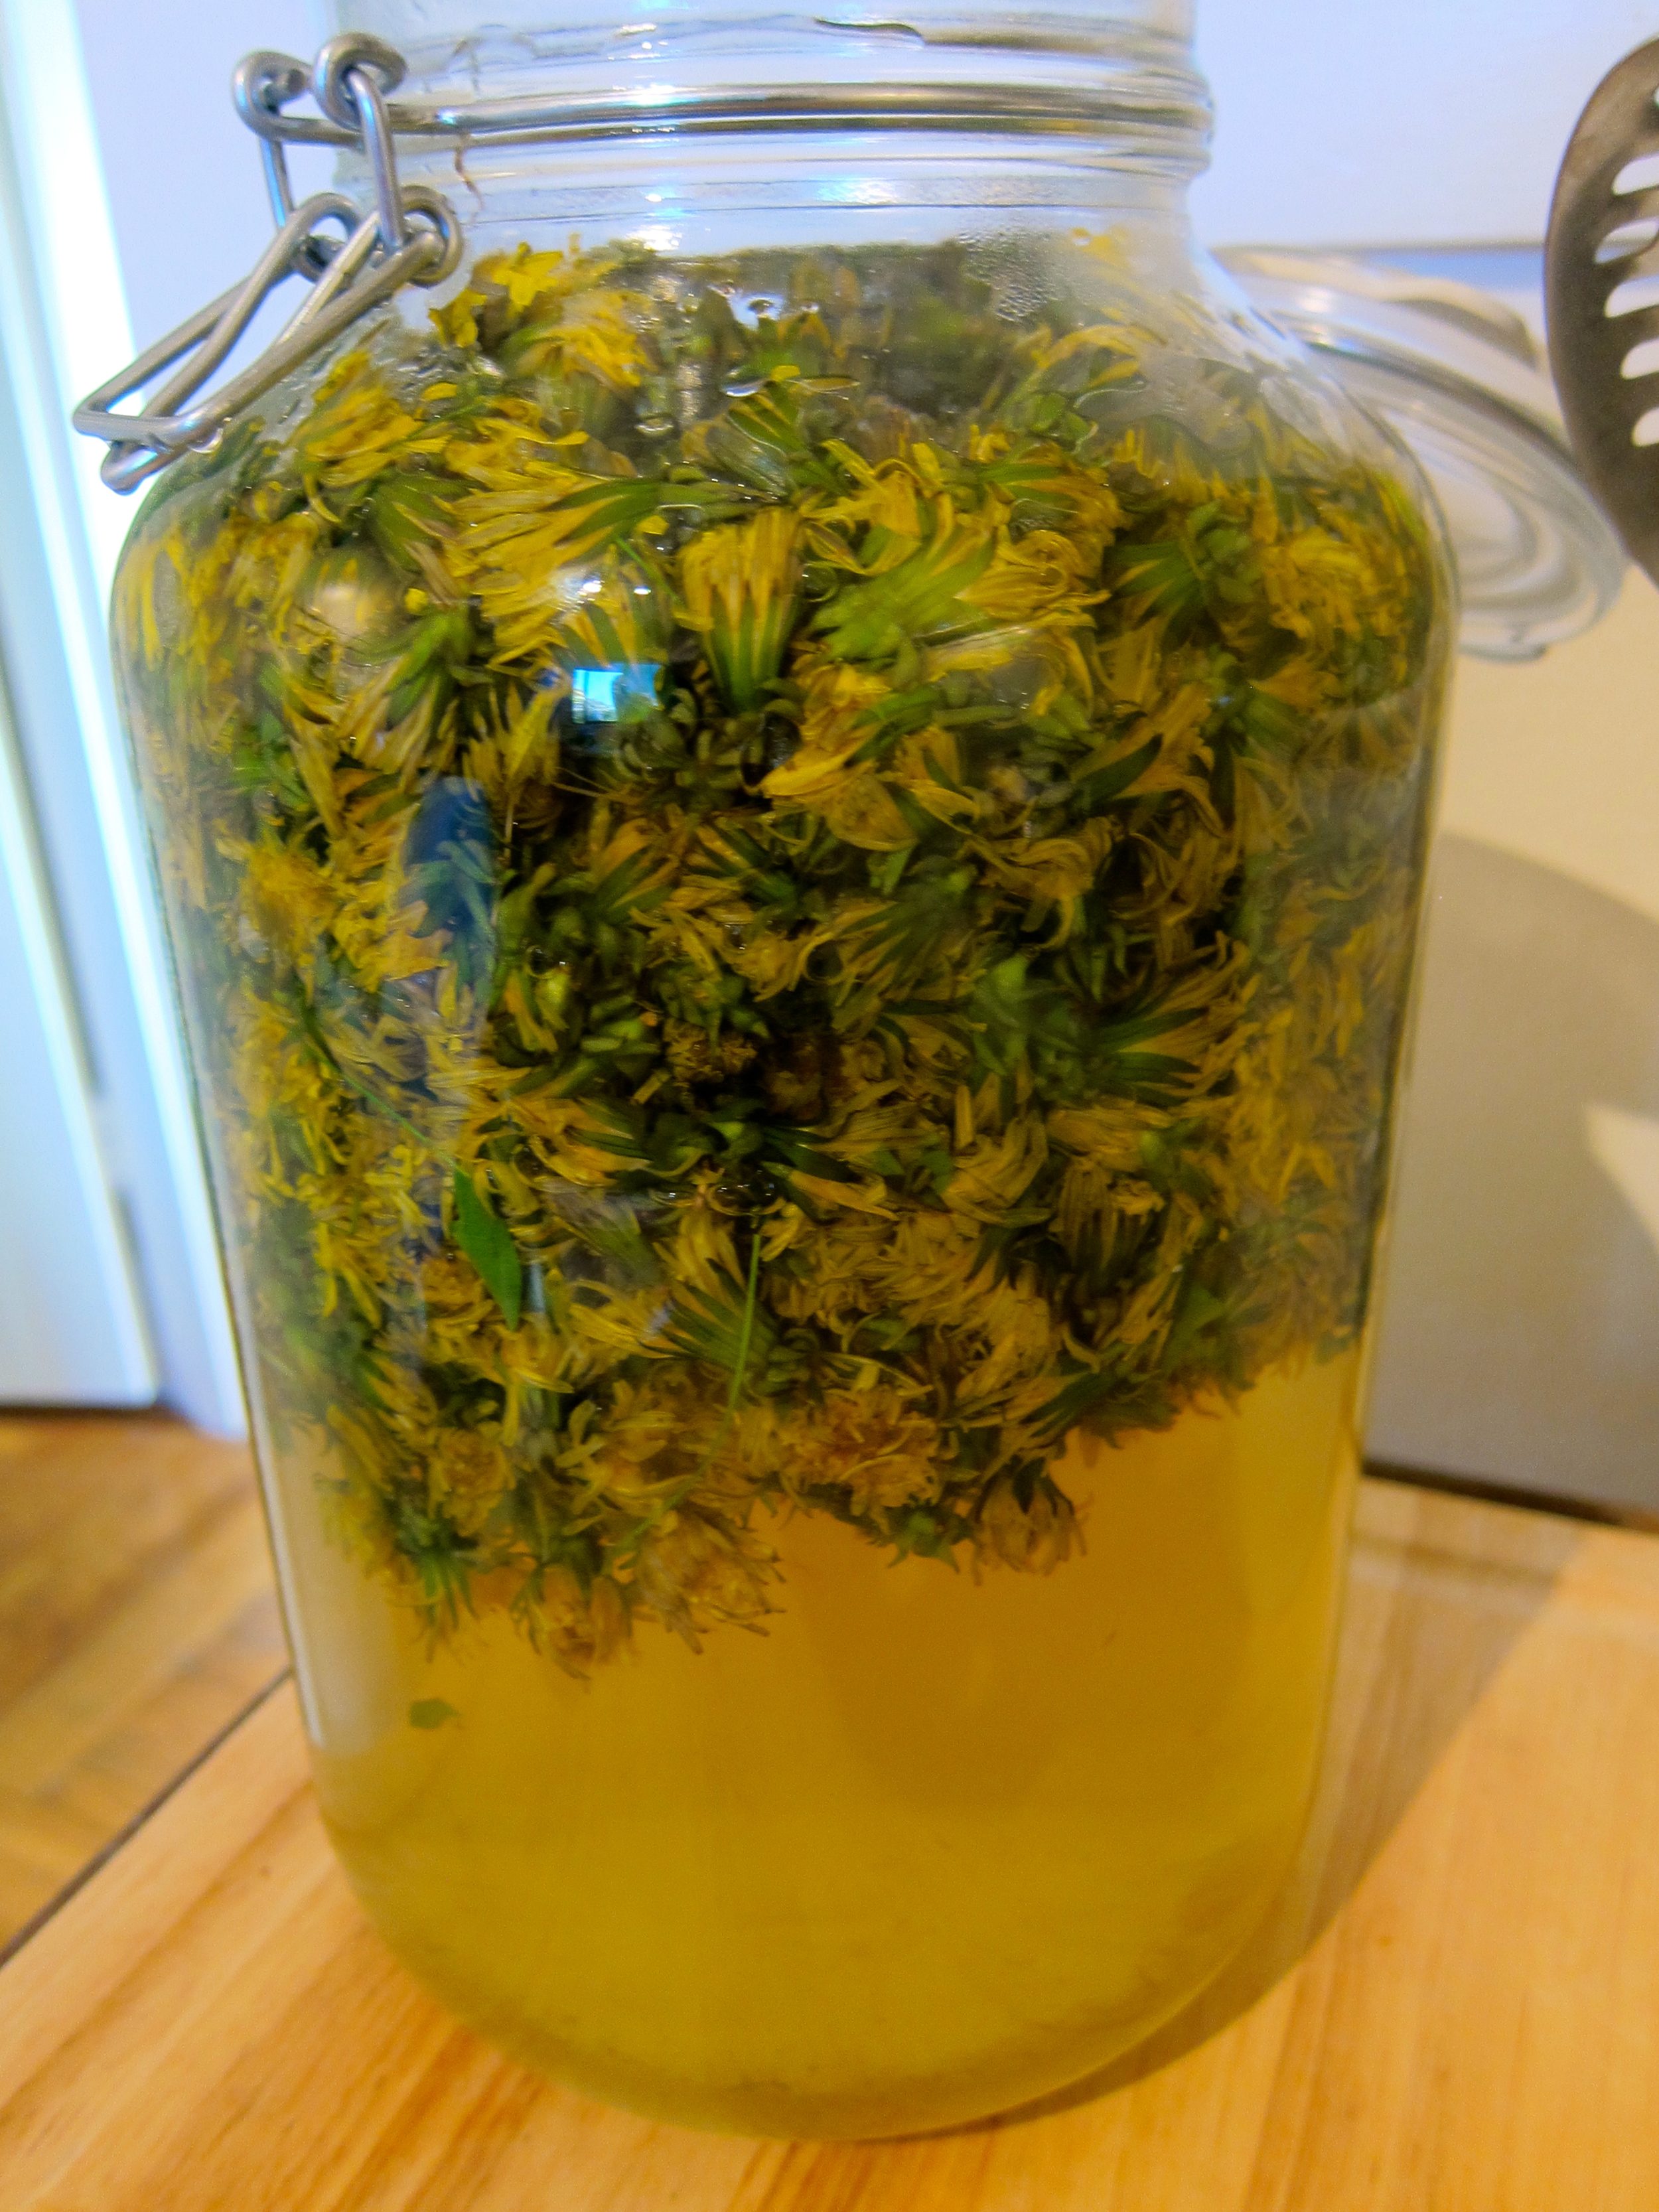
Boil 1 gallon of water, pour over dandelion flowers in glass or food-grade plastic container at least 1.25 gallons large.
Cover and let sit for 48 hours.
Strain out liquid, squeeze flowers to extract remaining liquid.
Process Two (2-3 weeks) - Fermentation
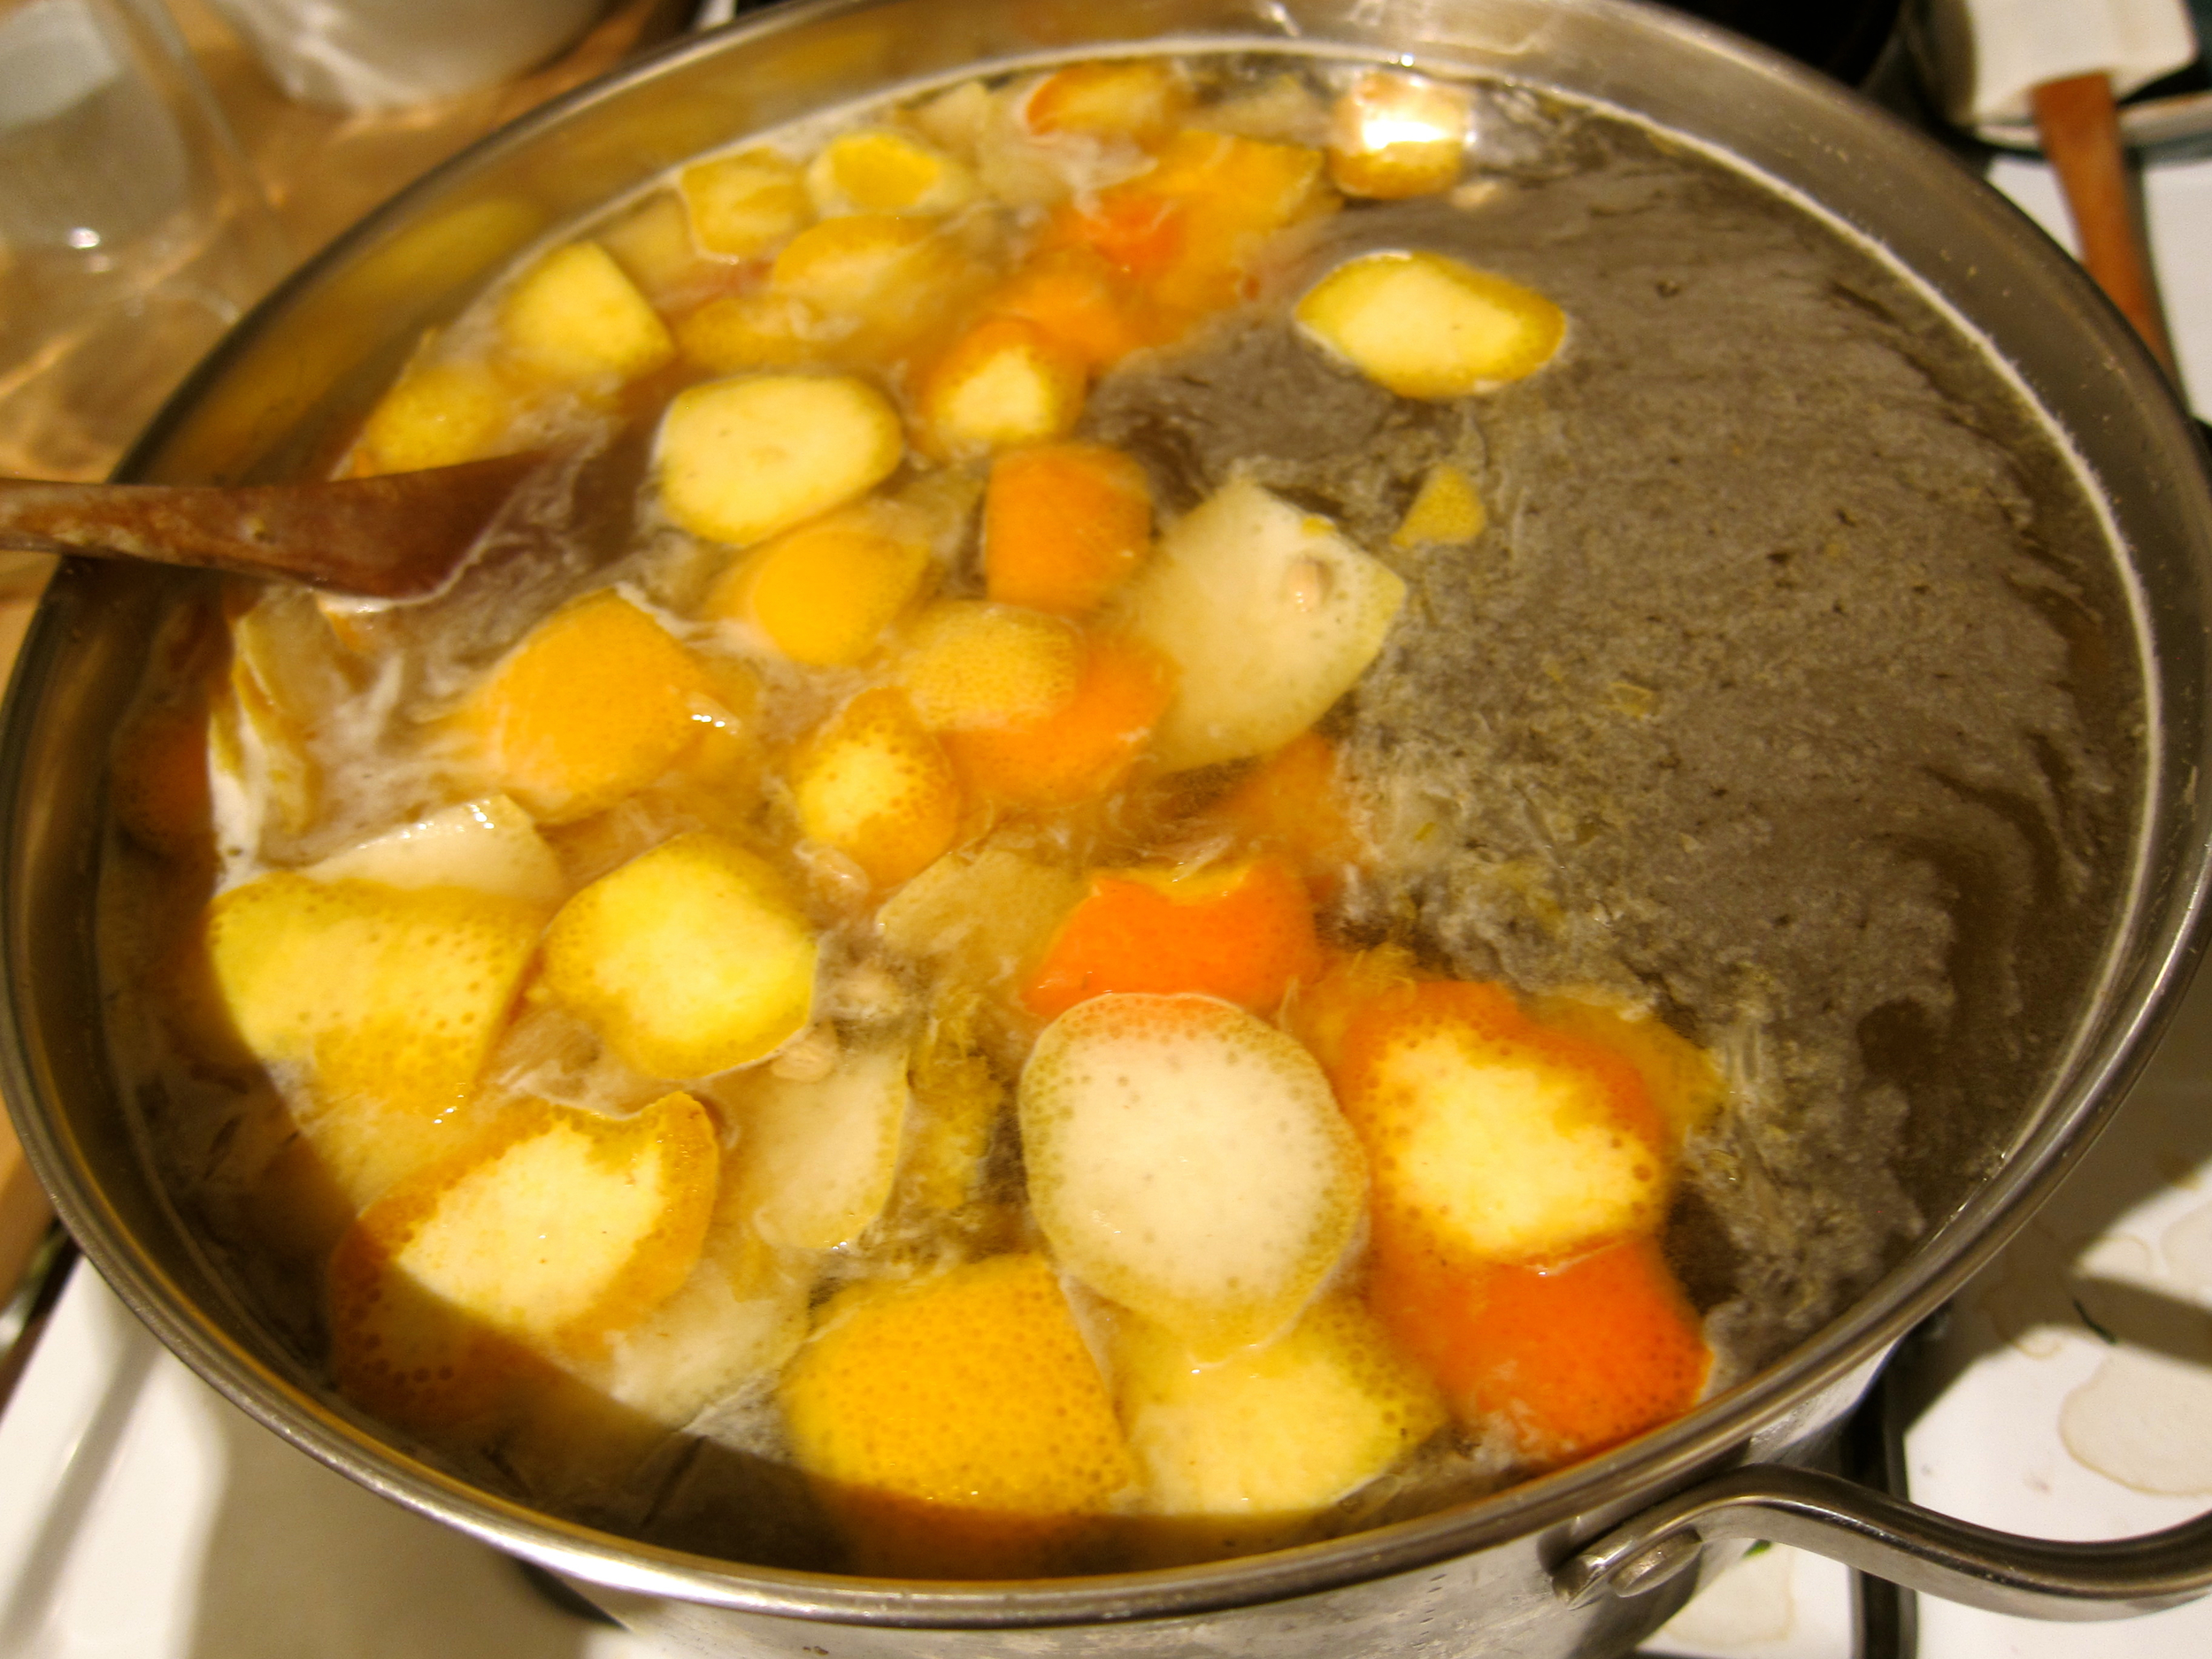
Heat dandelion liquid with sugar, honey, and the juice and skin from the citrus (cut the skin off and slice prior to juicing) for 30 minutes on medium heat, stirring occasionally to dissolve sugar. Cool to lukewarm.
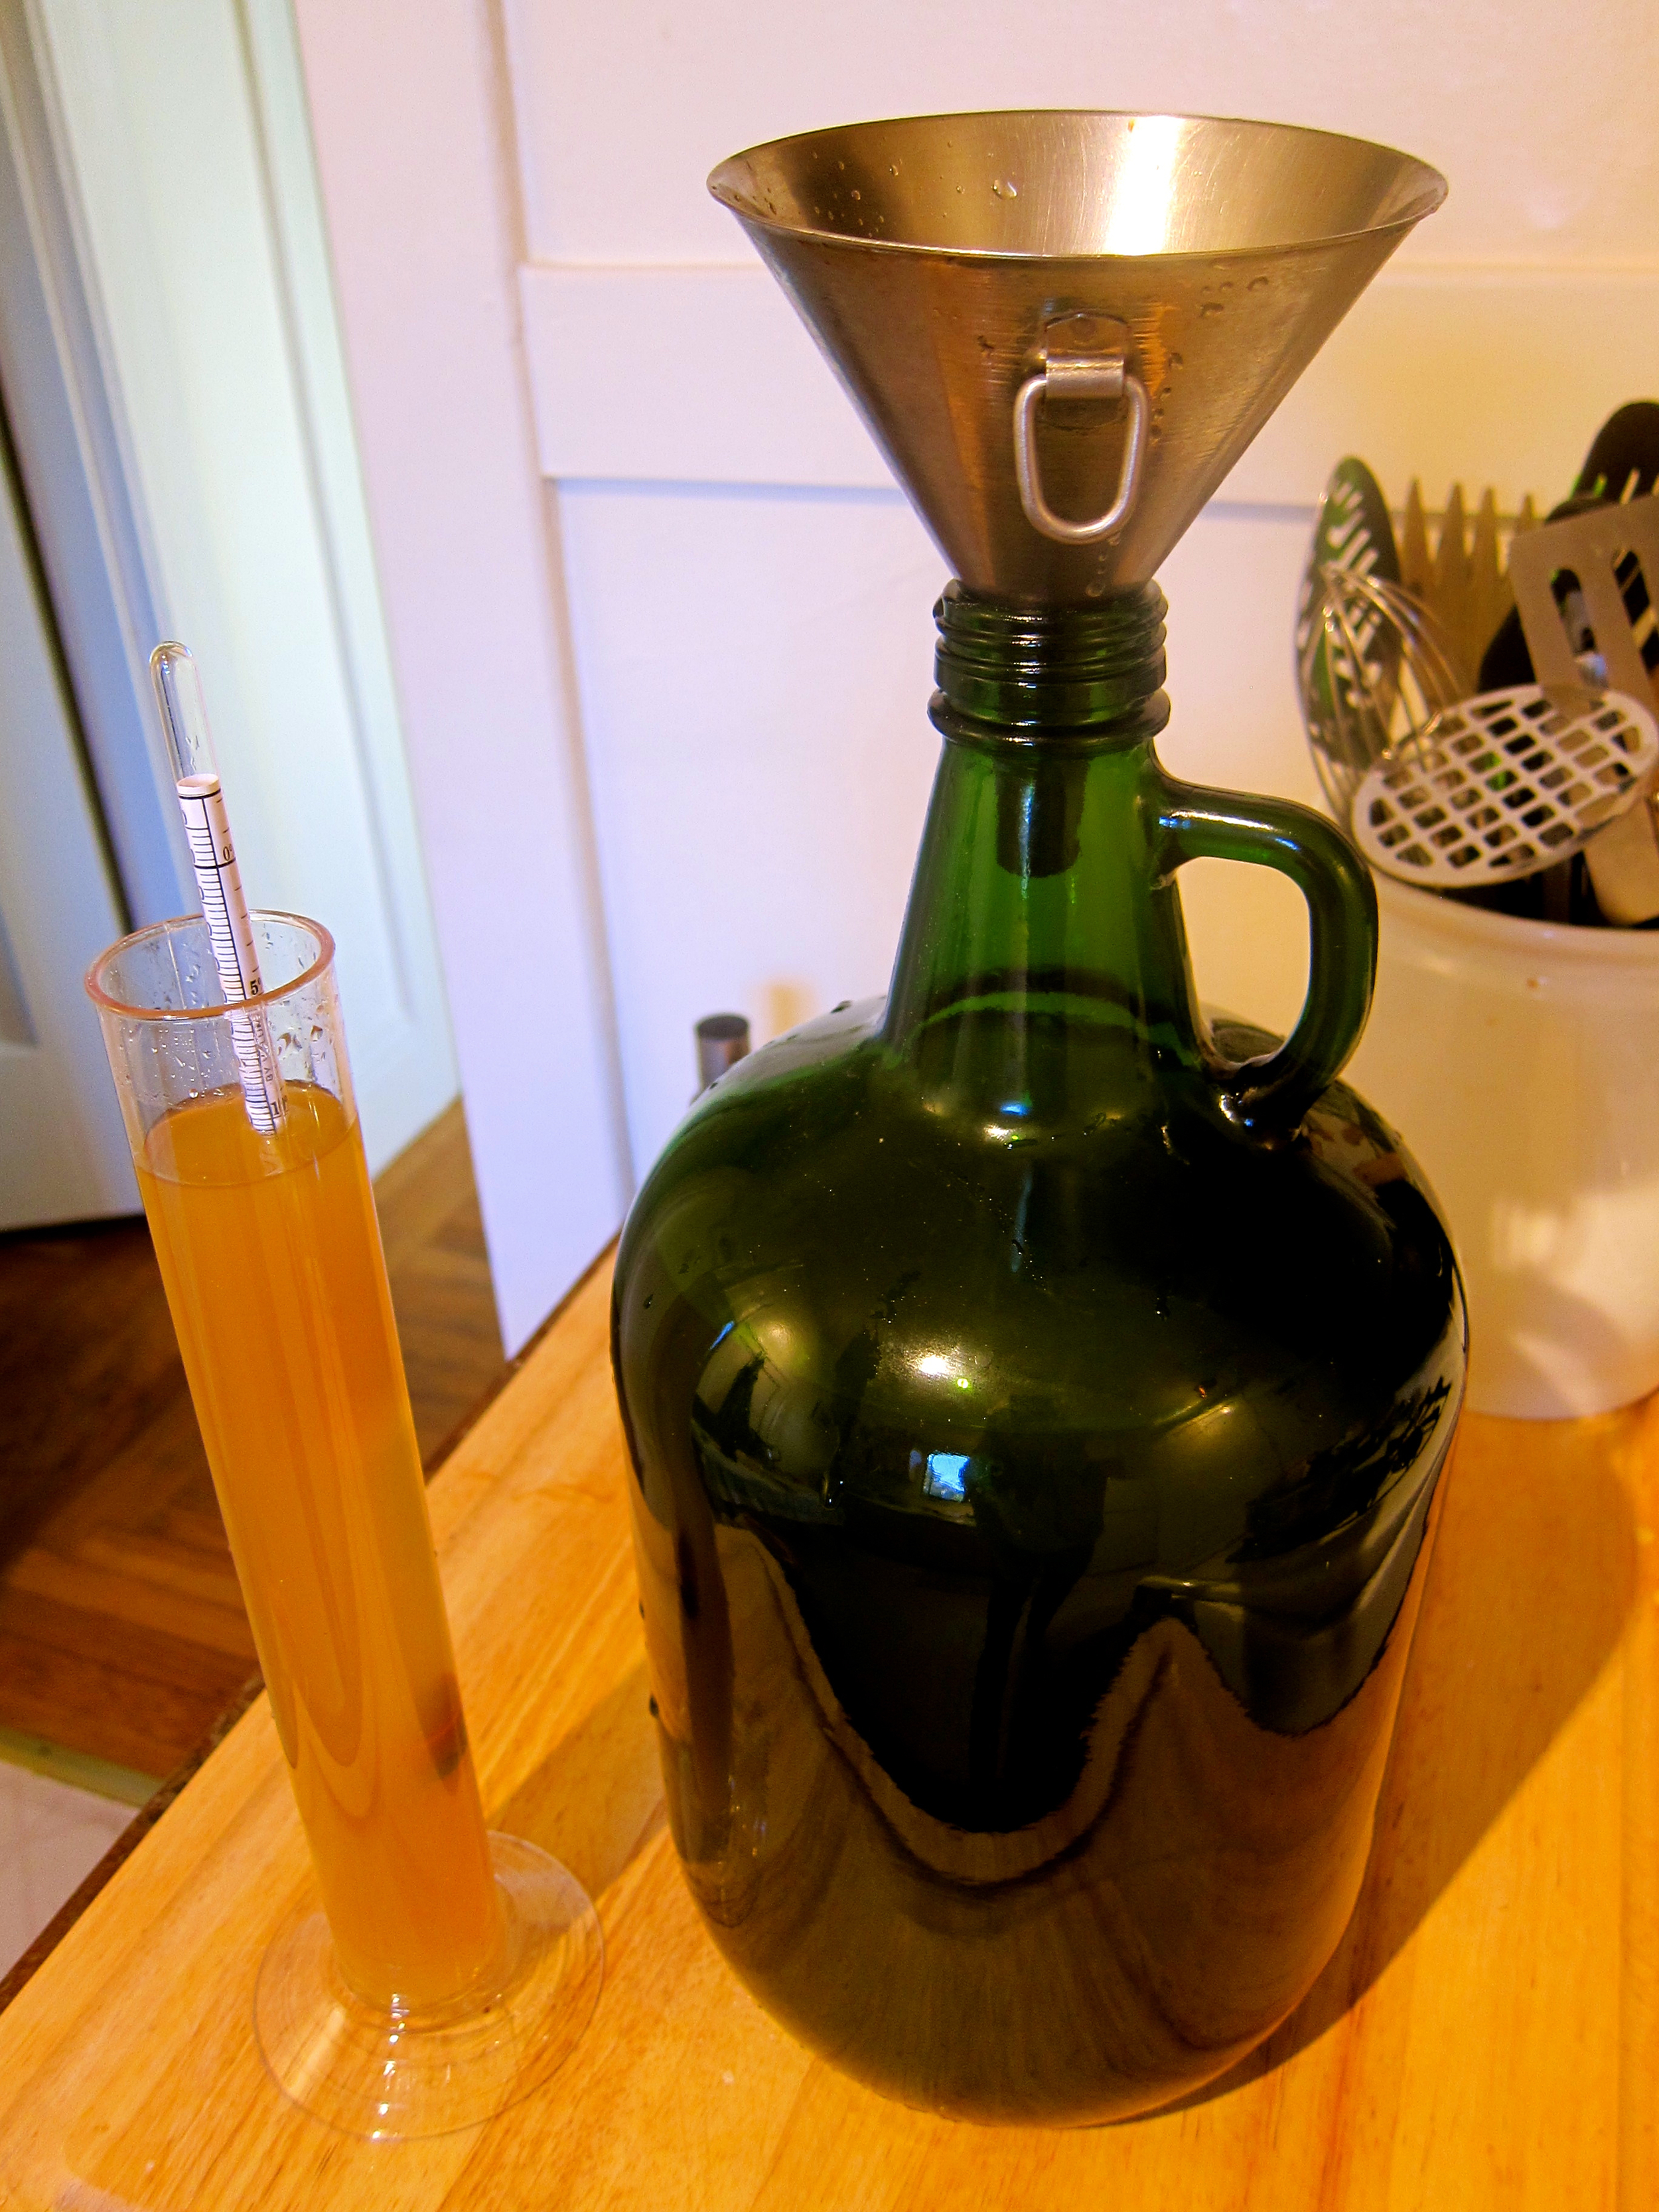
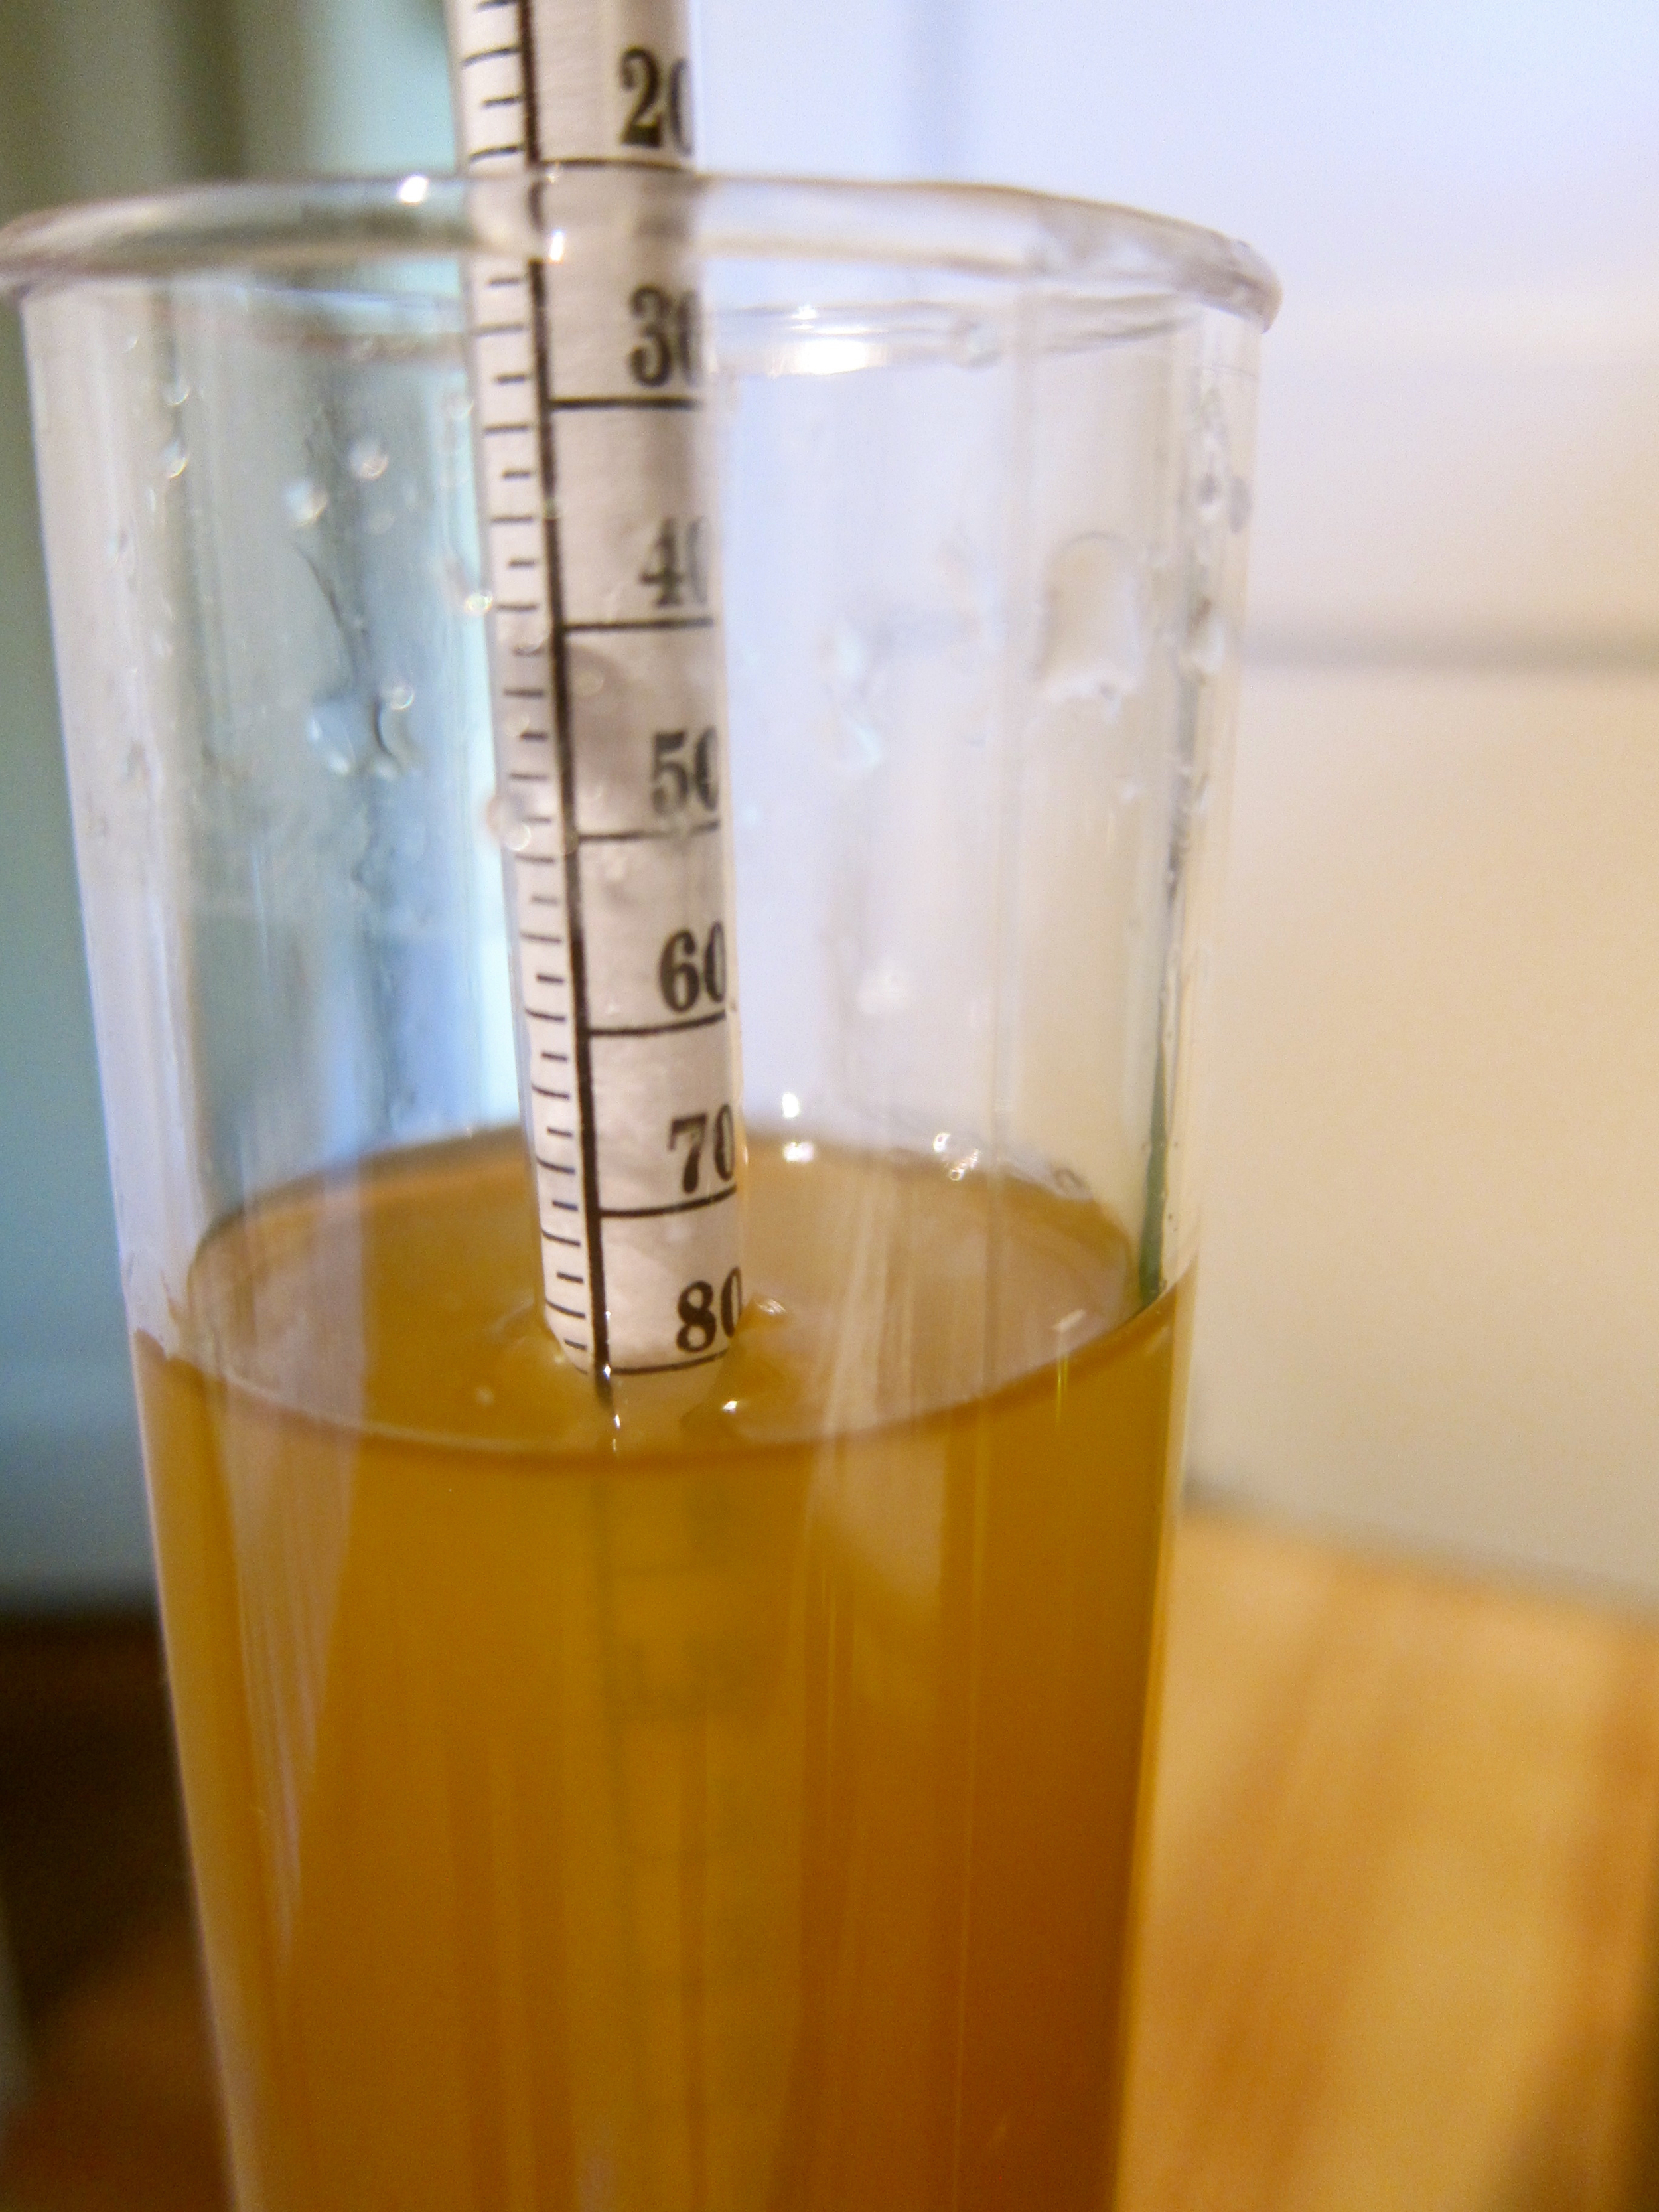
Take the specific gravity or brix to determine your “Potential Alcohol”. Essentially, by measuring the sugar content, you can determine how much nutrient is available for the yeast to turn into alcohol, but depending on where you stop fermentation, your wine will have more or less alcohol. My specific gravity at this point was 1.08 (Brix = 20%), which is a PA of 11%. There’s a calculation that I got really excited about, but ended up using this table.
Put in jug with yeast and nutrient, cork with fermentation lock or cover with cheesecloth (more risky bacteria-wise, I used lock) for 1-3 weeks, or until bubbling stops. You can stop the process anywhere you’d like, depending on desired alcohol content and sweetness (longer=more alcohol, less sweet). I stopped mine after bubbling stopped.
Take specific gravity/brix again so you can determine the alcohol %. My specific gravity was 1.00, or 0% alcohol, meaning that all of the sugar had been eaten by the yeast. This took about 2 weeks because the weather was quite warm. To determine the total alcohol, I just subtract this from the PA, 11-0 = 11%. No residual sugar, which I prefer.
Process Three - Aging (6 months - 1 year)
When your wine has reached the desired alcohol/sugar content, remove from large jug and bottle. I tasted it at this point - definitely tastes like ridiculously young (and not so good wine - but has potential!)
Age 6 months - 1 year in cool place.
See you at the winter solstice!
Update: Here's how it tasted after 6 and 12 months. An 8 month fermentation may be optimal!

Beer of many flavors (and yeasts)

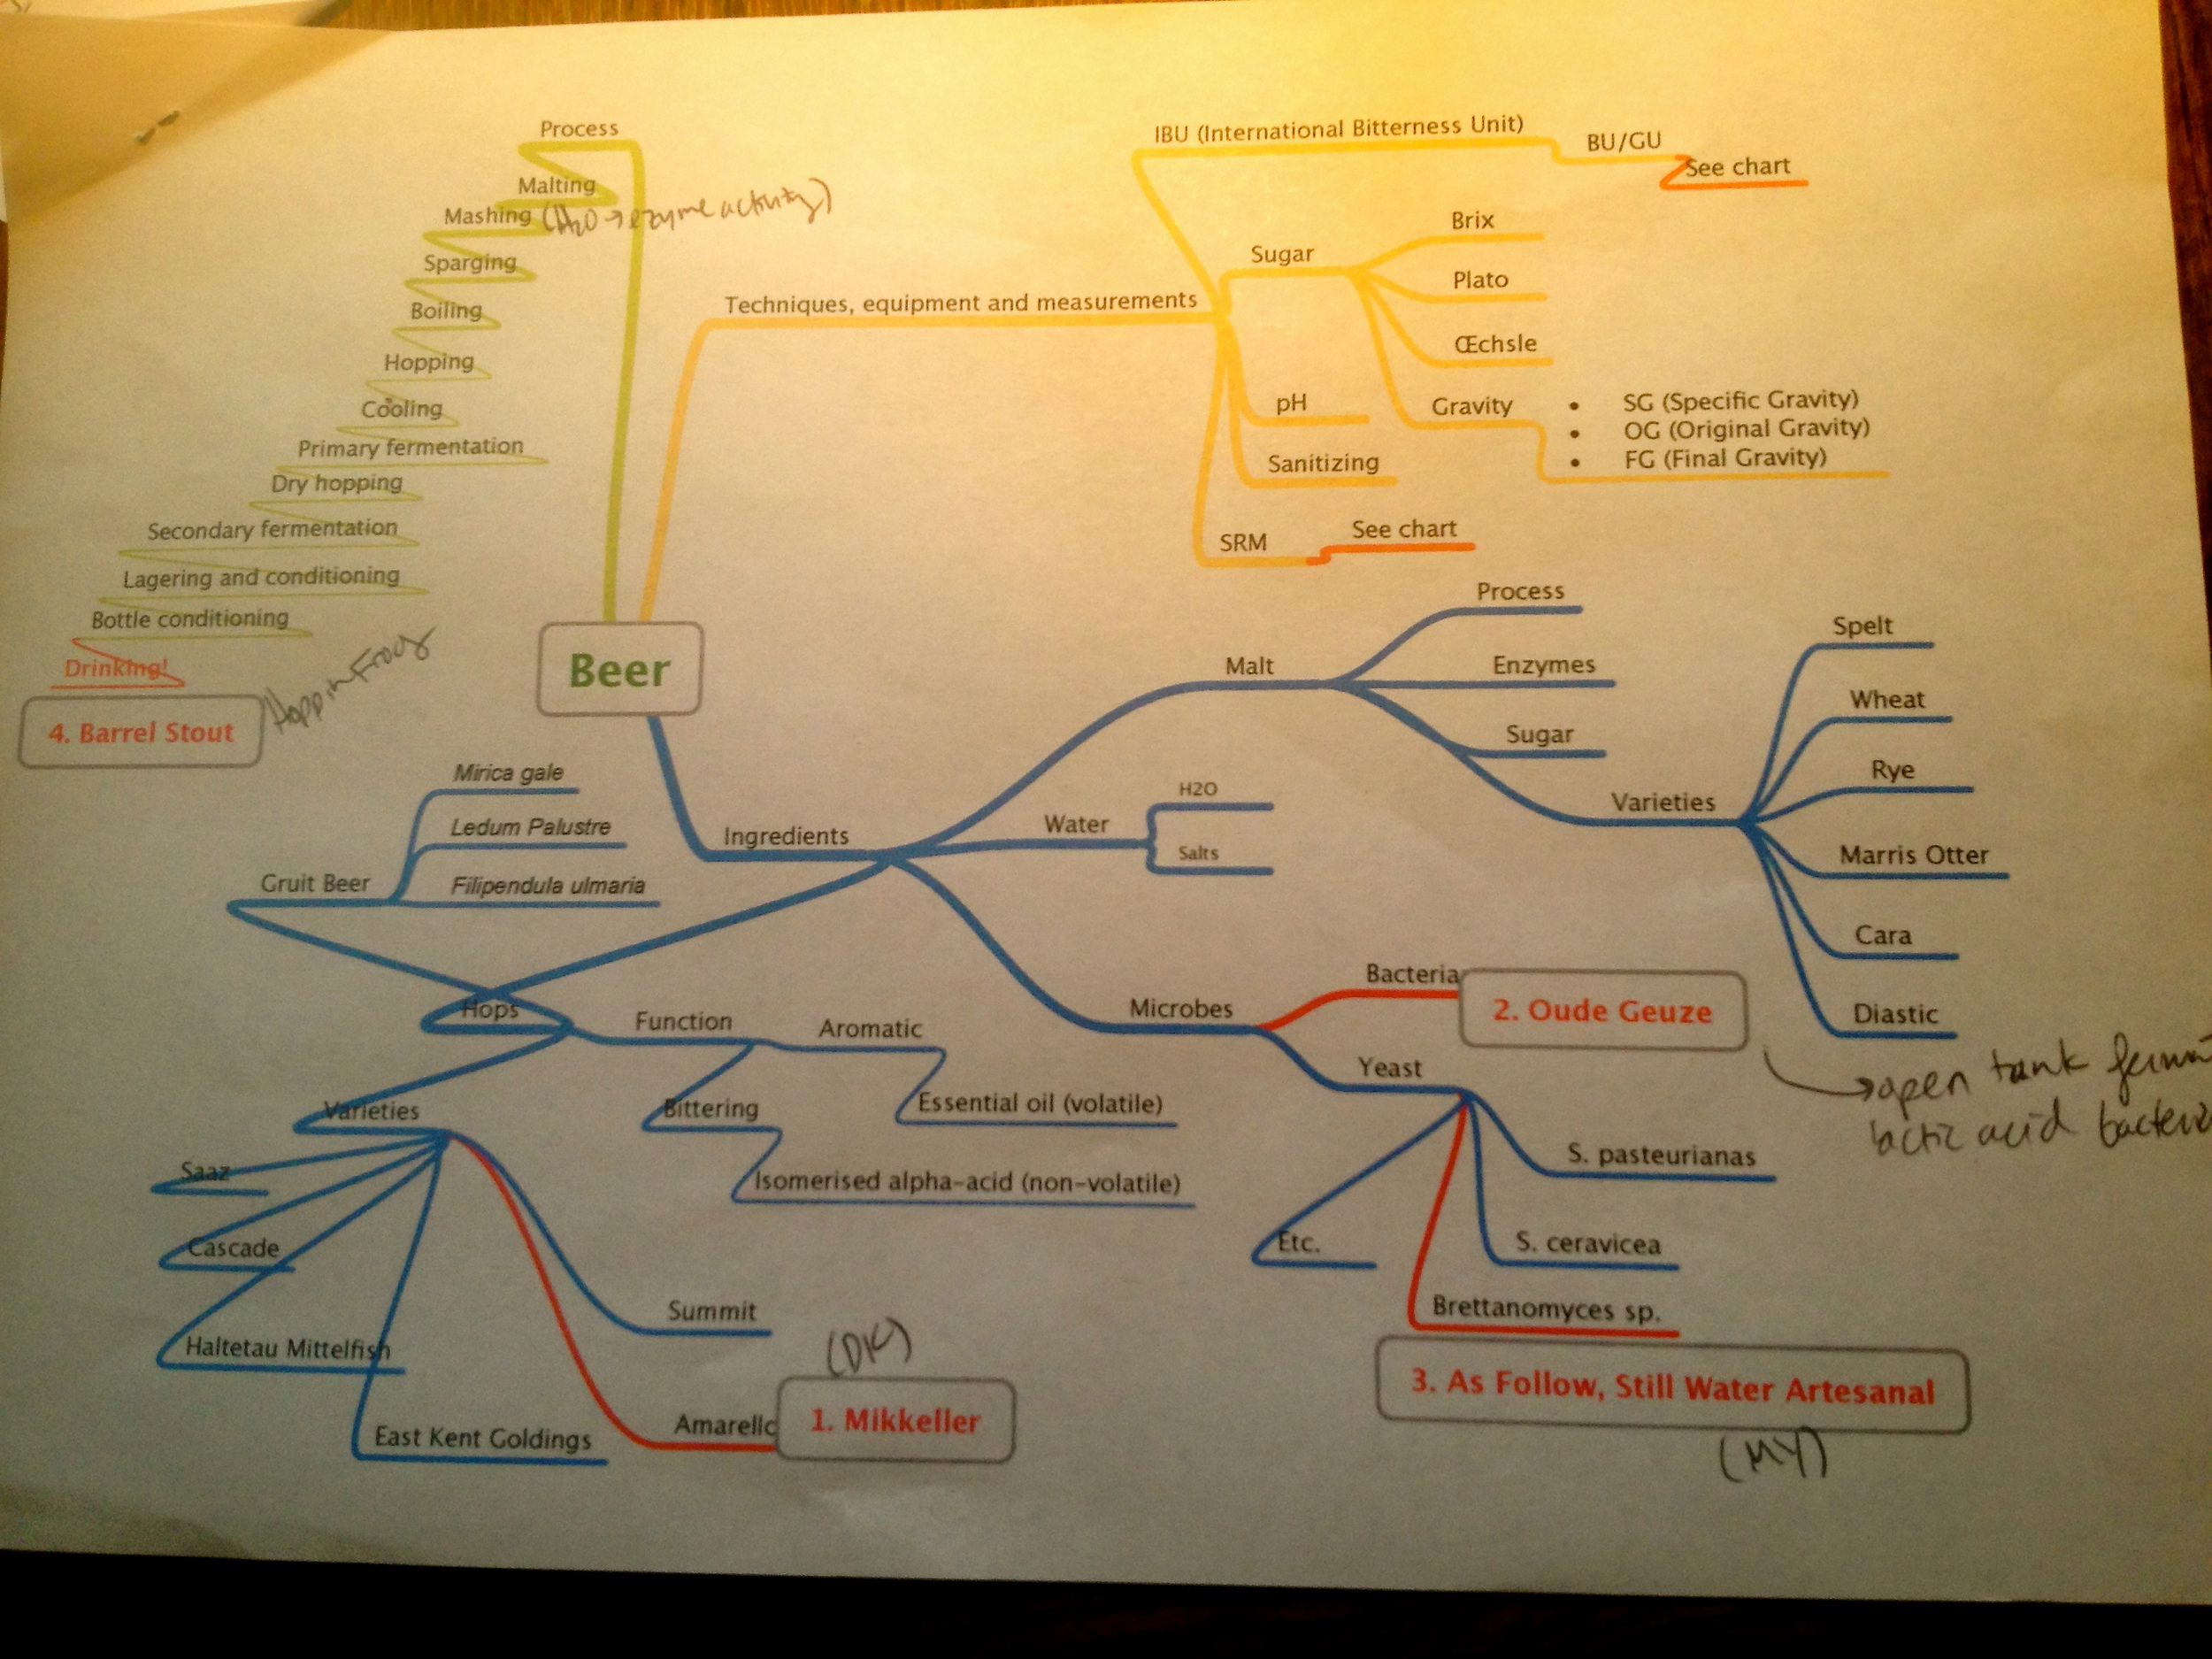
A fine day for an afternoon beer tasting at the lab with Noma stagiers. The tasting was informal in nature, including four (strong and delicious) beers as well as various yeasts, grains, and malts.
What most stuck with me was the complexity of using different yeasts in the various beers. Although I was aware of this, it was interesting to first smell the yeasts in all of their glory and then hear a conversation about how “Brett" (or the yeast Brettanomyces) is gaining in popularity for its funky, wild, and mushroom-like characteristics that are very apparent in both the yeasty grain and the finished brew.
I was proud to also note a California ale yeast on the table.