

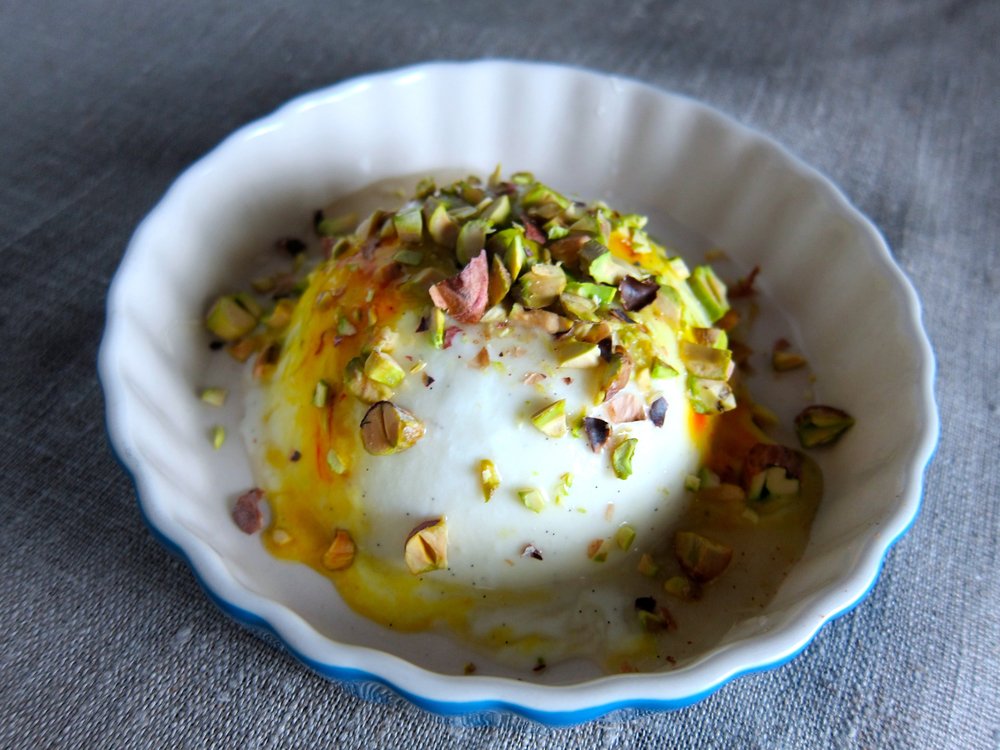
Yogurt Panna Cotta with Saffron & Pistachio
For those of you who have not made panna cotta, you might be intimidated by the idea. I was. After all, the results are impressive and seemingly skill-requiring - Italian grandmother slaving away all day skill-requiring. On top of that, panna cotta uses gelatin, something that isn't found in most present-day pantries and comes animal by-product. Yes, traditional panna cotta is not vegetarian.
What if I were to tell you that panna cotta is incredibly easy to make and not only that, it's also very forgiving? By forgiving, I mean that you can adjust the milk to cream ratio, incorporate yogurt or buttermilk, or even play around with dairy-free milks or vegan gelatin and still create a luscious and beautifully wobbly gel. The other great thing about panna cotta is that it's the perfect canvas for a variety of flavor combinations from saffron pistachio to berry compote and nutmeg to dusted dark chocolate or bay nuts.
There's nothing wrong with serving panna cotta in its container with a spoon, but it doesn't require much more work to remove the gel from it's container and put it on a plate and doing this elevates the dessert to very classy level. Recipe below is adapted from a Smitten Kitchen recipe and makes 4 individual servings.
Grapeseed oil, to crease ramekins or other containers used to hold panna cotta
A few saffron threads per panna cotta
1-1/2 teaspoons (or 4 grams) unflavored gelatin
1 cup plain whole-milk yogurt
1/2 cup heavy cream
1/2 cup whole milk
1/4 cup granulated sugar
2 teaspoons lemon juice
1/2 vanilla bean
1/4 cup toasted pistachios, chopped
Honey, to drizzle
Lightly grease containers for panna cotta with grapeseed oil and add a few saffron threads to each container. Ramekins or small cups or bowls work well. Taller/more narrow containers such as jars also work, but make it harder to remove the panna cotta once it has cooled.
Place 2 tablespoons of water in a small bowl. Stir in gelatin and allow to soften, about 10-15 minutes.
In a large bowl, whisk together yogurt with 1/4 cup cream and 1/4 cup milk. Add remaining cream and milk to a saucepan, stir in granulated sugar, and bring to a simmer. Stir in gelatin mixture to dissolve, remove from heat, then whisk into dairy mixture. Scrape the inside of the vanilla bean into mixture along with lemon juice and whisk. Pour into cups, stir once with a fork or chopstick to mix around saffron, and chill in the refrigerator for at least 2 hours. This can be done the night before.
To unmold the cups, fill a saucepan with about 3/4-inch of water and bring to a simmer. Turn off heat and a dip panna cotta cup into the water for 5 seconds, then invert it onto a flat plate. Repeat with remaining cups.
Right before serving, drizzle with honey and top with 1 tablespoon of chopped toasted pistachio. See below for inspiration for other panna cotta variations.

Panna cotta variation with blueberry compote and thyme.

Panna cotta variation with dusted foraged bay nuts and olive oil.

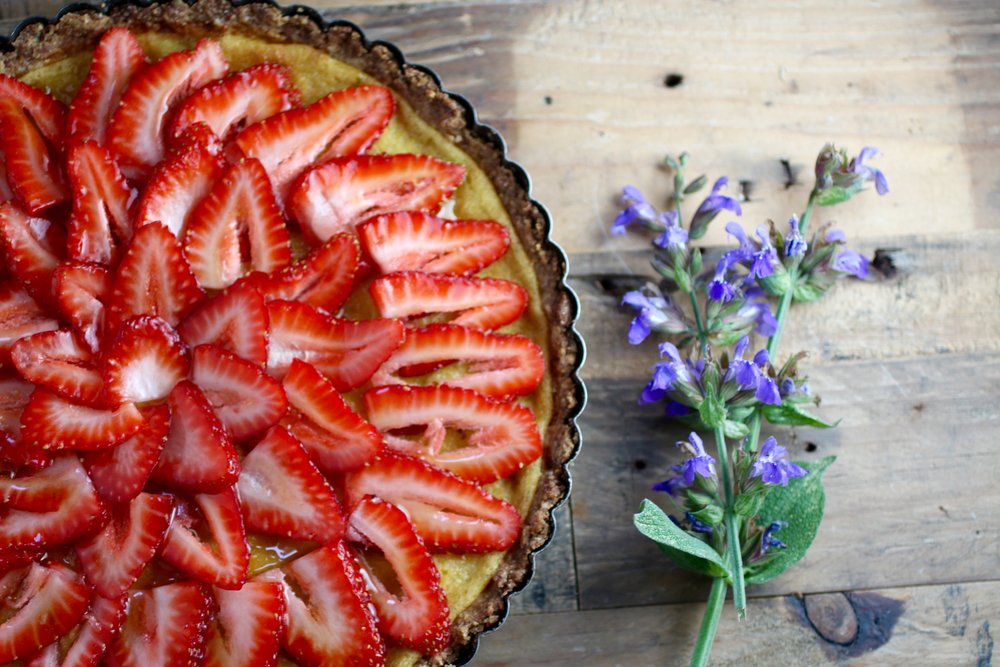
Strawberry Mascarpone Tart with Lavender

Strangely, I have made this tart (or variations on this tart) several times and have never recorded the recipe - it is just that easy and forgiving! In the interest of posterity and the sharing of deliciousness, I decided to finally post the recipe to the blog.
As mentioned, this recipe is very forgiving so variations are accepted and encouraged, though the combo of cornmeal-strawberry-mascarpone-lavender should not be treated lightly. The cornmeal crust is a variation on a classic pâte sucrée that I use for almost every tart shell. I have also subbed the cornmeal for buckwheat, which is just as delightful, but a little darker/nuttier. Other variations include brown sugar in place of white, addition of different herbs and spices such as rosemary, cinnamon, or saffron, different fruit, etc. Again however, you might want to just stick to this very delicious combination! Makes one tart, about 6-8 servings.

Mascarpone tart awaiting strawberry slices.
7 tablespoons cold unsalted butter, plus more for greasing the tart pan, diced
1/2 cup plus 2 tablespoons all-purpose flour
1/2 cup cornmeal (medium-grind)
1/2 teaspoon plus one pinch salt (medium-grind), divided
2/3 cup granulated sugar, divided
2-3 tablespoons plain yogurt, cold milk, or cold water (I prefer yogurt for its tangy quality)
8 ounces mascarpone
1 large egg
1/2 vanilla bean pod scrapings
1/2 teaspoon vanilla extract
1 pint strawberries
1/4 cup lavender flowers (other edible flowers can be used, but lavender is very easy to find as it often grows wildly or is feral on roadsides)
Honey, for drizzling
To Prepare
Lightly grease the bottom and sides of an 8-inch or 9-inch tart pan. Set aside.Mix flour, cornmeal, 1/2 teaspoon salt, and 1/3 cup sugar and cut in butter. Using pastry blender, fork, or hands mix butter into flour mixture until the dough resembles small peas. Add yogurt, milk, or water and blend until dough sticks together when pressed, but is still crumbly.
Press dough into and up sides of pan, chill in refrigerator for 30 minutes. Preheat oven to 350 degrees F and bake for 15 minutes, until golden-brown. Remove from oven and allow to cool.
While tart shell is cooling, remove the tops from the strawberries and thinly slice. set aside.
Whisk mascarpone with remaining 1/3 cup sugar, egg, vanilla bean pod scrapings, vanilla extract, and pinch salt until combined. Once tart shell is completely cool, spread mascarpone evenly over shell and bake for 30-35 minutes, or until set. Tart will turn golden and may have some areas of browning and start to rise some - don't worry, that's what is supposed to happen!
Remove from oven and cool for 20-30 minutes. Top mascarpone with strawberries in overlapping concentric circles, starting with the largest strawberry slices around the outer edge and working your way in until the entire tart is covered with strawberries.
Top with lavender flowers and drizzle with honey. Serve at room temperature or cold.
Strawberries laid out in concentric circles - now just awaiting the lavender and honey!

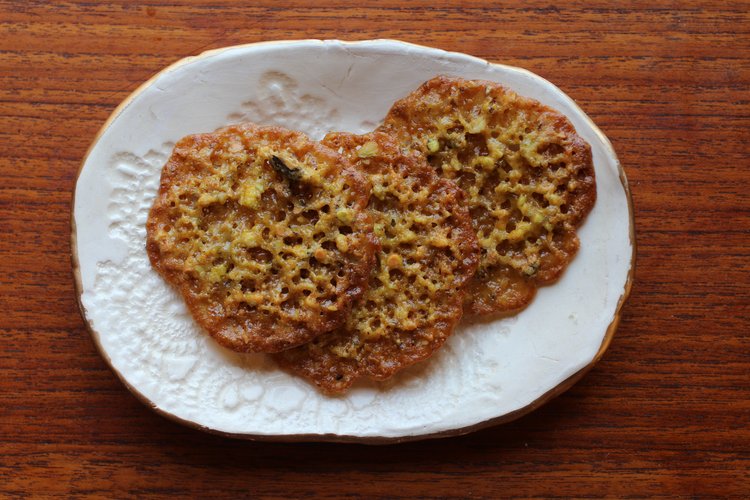
Saffron Pistachio Laceys

Brittle and delicate with amazing crunch and flavor.
More toffee than cookie, I grew up with lacey cookies purchased from the local grocery store. Although not invented by the Humboldt County company that made them in my hometown, they definitely cornered the market and brought "Laceys" (now a registered trademark) to the forefront of local graduation parties, holiday gatherings, gift baskets, and this girl's heart.
The classic registered trademark Laceys cookie is composed of melted chocolate sandwiched between two toffee cookies, which is delightful and worth making, whereas this version is uniquely different and much lighter, with pistachio, saffron, and and absence of chocolate (trust me) for a truly crisp taste and more unique Middle Eastern/Indian flavor. Lacey cookies have barely any flour, but a relatively larger amount (compared to typical cookie recipes) of sugar that, when heated, caramelizes and, in combination with the butter and nuts, create more of a brittle nutty candy than cookie.
I'm a sucker for caramelly, nutty, crunchy, slightly salty, exotic-spicey desserts and this version of a lacey cookie (or Laceys®) takes the cake - er - cookie! This version has a great brightness from the orange zest (just in time for the approaching citrus season!) and is light enough to warrant pairing with vanilla ice cream or frozen yogurt, no complaints! Or perhaps making an ice cream sandwich that crackles to the bite and turns into a saffron-pistachio toffee ice cream in the mouth? Just a thought. Additional bonus is that they're so thin, one batch makes quite a lot and they keep well in the freezer - just remove, thaw for 5 minutes until you can slice them and cook them up as directed. Recipe is adapted from one found here and makes about 48 cookies, depending on how thick you slice them.
2 1/2 tablespoons unsalted butter, melted
1/8 teaspoon finely chopped saffron threads
3/4 cup unsalted shelled pistachios (about 3 ounces)
1/2 cup granulated sugar
1/4 teaspoon almond extract
1/4 cup all-purpose flour
2 teaspoons grated orange zest
2 tablespoons orange juice
In a small bowl, add saffron to melted butter and let sit for five minutes.
In a food processor, pulse pistachios and sugar until nuts are very finely chopped. If you do not have a food processor, you can simply chop them with a knife until fine, but it will take some time.
In a medium bowl, stir together saffron butter, pistachio-sugar mixture, almond extract, flour, orange zest, and orange juice.
Cover bowl and chill in refrigerator for 15 minutes (dough will be too sticky to handle otherwise).
Remove from refrigerator and roll into two logs about 1/2-inch in diameter. Wrap in plastic wrap or parchment paper and freeze at least one hour.
Preheat oven to 325 F.
Using a sharp knife, slice each log into about 1/4-inch thick slices. Place sliced dough discs two inches apart from each other on parchment-paper or Silpat-lined cookie sheets.
Bake 10 minutes or until golden.
Cool on cookie sheets (the cookies will break if you remove them while warm).
Store layered between parchment in an airtight container at room temperature for up to a week. If you leave them out to open air for more than a few hours, they will absorb any moisture from the air and potentially become soggy.
Try using for toffee ice cream sandos!
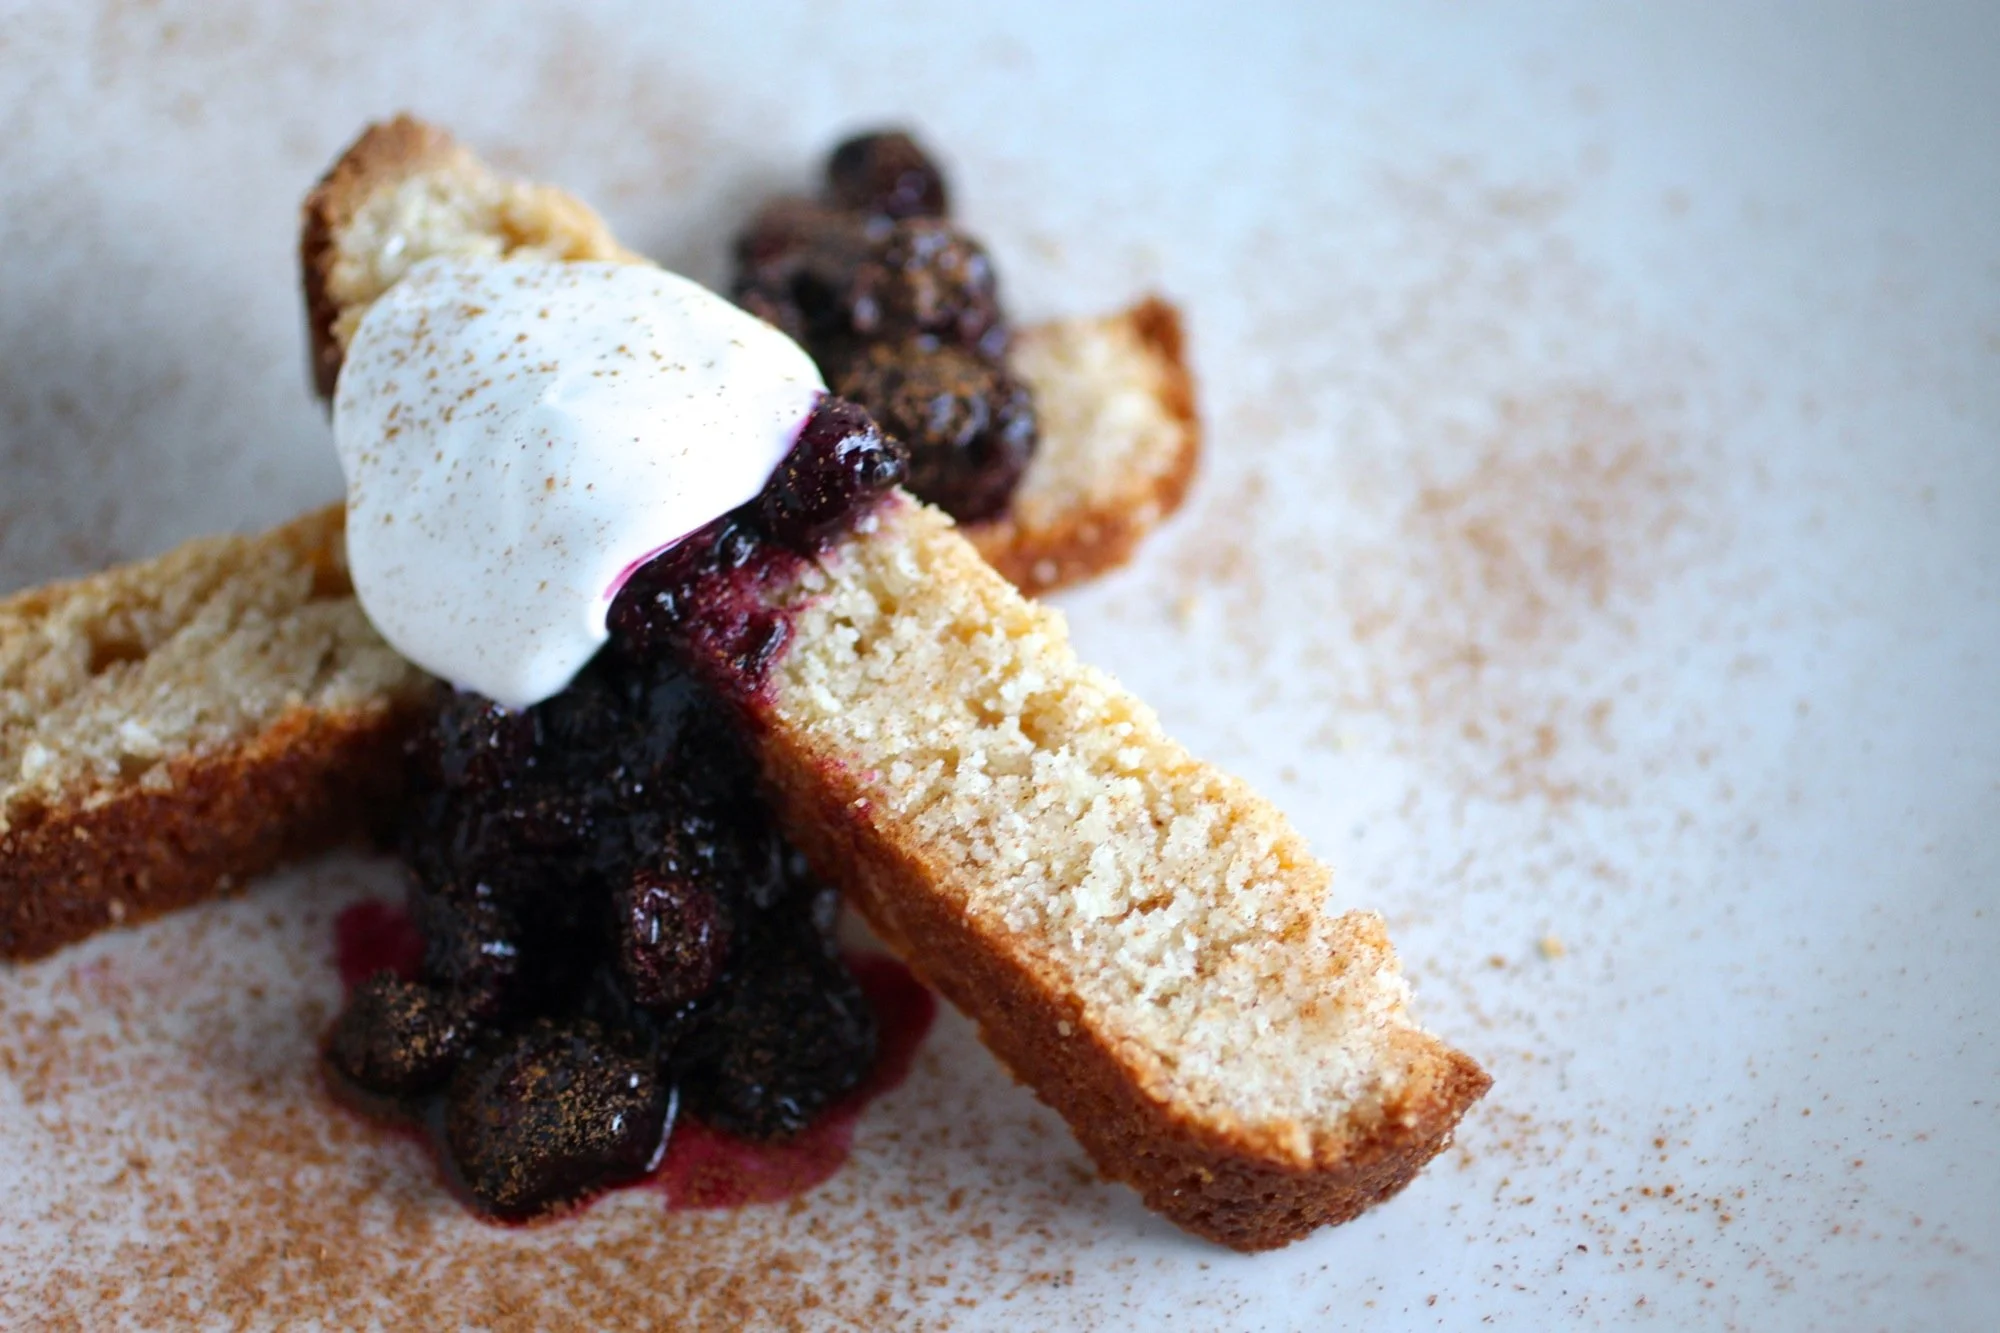
Danish Almond Sweet Bread

While at my parents' house over the holidays, some friends were visiting one morning and I had to scramble to bake something using ingredients from the pantry, which was pretty bare (note: by no fault of my parents, it had just been many days of feasting). Santa brought my sister a small Danish recipes cookbook where I found a recipe for "Danish Almond Bread". I didn't actually like the look of the recipe in the cookbook, but it inspired me to adjust another recipe I had to ultimately create what I was looking for - something very nutty and chewy, but sweet and satisfying. My parents didn't have almond meal on hand, so I put my niece to work picking out almonds from a mix of nuts that I then blended and, surprisingly, it worked just fine. I have since made the recipe two times and each time it has been quickly devoured.
The batter itself is more like cookie dough than bread or cake batter and is lovely sliced thin and topped with crème fraîche and berry or citrus compote and a dusting of cinnamon. I could also see it pairing well with a variety of other ingredients - sautèed stone fruit and herbs, chestnut purée and honey, fresh cherries and fennel seed... Makes one loaf that serves 8-12.
2/3 cup butter, room temperature
1 cup sugar
2 eggs
1 cup almond meal
1/2 teaspoon almond extract
1/2 teaspoon ground cinnamon
1 cup all-purpose flour
1 teaspoon baking powder
1/2 teaspoon salt
Preheat the oven to 350 degree F and grease a loaf pan.
In a large bowl, beat the butter and sugar until soft and fluffy using a pastry blender or electric beater. Gradually beat in the eggs, one at a time, until incorporated. Add the almond meal, almond extract, and cinnamon and mix thoroughly. Blend in the flour and baking powder and salt.
Spread the batter into the loaf pan (it will be thick) and bake for 50 to 60 minutes or until a toothpick inserted in the center comes out clean and top is golden brown.

Prickly pear salty caramels
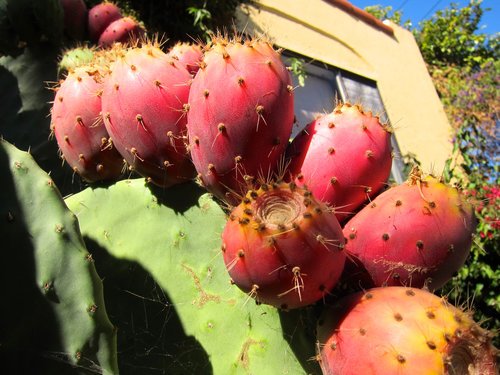
Prickly pear margaritas, prickly pear sorbet, prickly pear cheesecake, prickly pear fermented beverage, prickly pear marinade - you name it, I've tried it with prickly pear. This is primarily because at my house in Oakland has a giant prickly pear cactus (Opuntia) that is very, VERY productive. Like, part-time job in the late summer/fall productive. At first, I was so pumped that I wasn't very generous with the fruit, but now, when I hear someone comment on the prickly pear cactus (which happens quite often) I run out and give them a bag of frozen fruit. You can read more about my harvesting methods here. Since there's so much fruit, I now pretty much stick to the second process listed, which is a loss of the pulp, but dramatically less work.
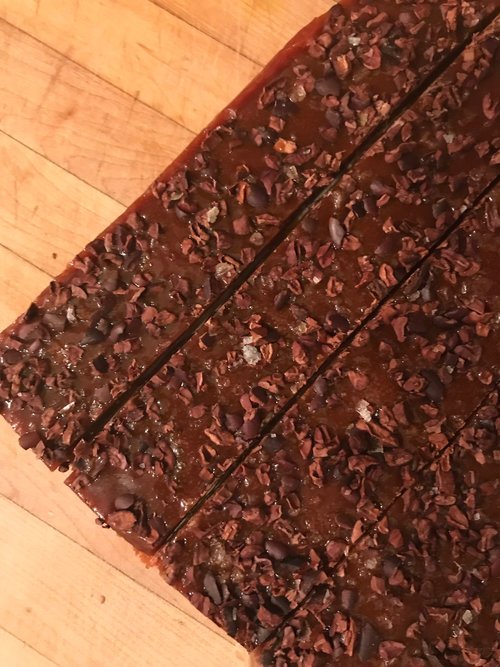
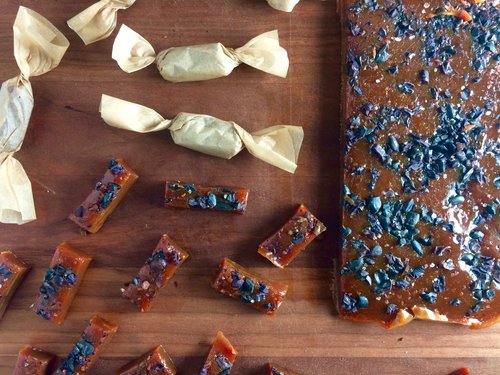
Cutting caramels into squares.
A few years ago, in an effort to get rid of as much juice as possible, I was trying to think of recipes where reducing the juice was required. I remembered making apple cider caramels at some point, so I decided to give that a try using this Smitten Kitchen recipe for apple cider caramels, but substituting out cider for prickly pear juice. There are also a few other changes, like adding cacao nibs to the top and omitting cinnamon (wouldn't be bad, but just already a lot going on). The caramels were above and beyond my expectations - a deep, rich sweetness balanced by the salt and toasty cacao nibs. Really so, so good and now my favorite prickly pear concoction. Additionally, they can be wrapped and keep well, so a great unique holiday gift item! Recipe makes about 50 caramels, depending how large they are cut.
4 cups (945 ml) prickly pear juice
8 tablespoons (115 grams or 1 stick) unsalted butter, cut into chunks
1 cup (200 grams) granulated sugar
1/2 cup (110 grams) packed light brown sugar
1/3 cup (80 ml) heavy cream
Up to 1/4 cup cacao nibs
Up to 2 teaspoons flaky sea salt, such as Maldon, or less of a finer salt
Neutral oil for the knife, if needed
Boil the prickly pear juice in a 3- to- 4- quart saucepan over high heat until it is reduced to a dark, thick syrup, about 1/2-3/4 cup in volume. This takes about 40-60 minutes on my stove. Stir occasionally.
Meanwhile, get your other ingredients in order, because you won’t have time to spare once the candy is cooking. Line the bottom and sides of an 8- inch square metal baking pan with 2 long sheets of crisscrossed parchment. Set it aside. Put salt and cacao nibs in a small dish.
Once you are finished reducing the juice, remove it from the heat and stir in the butter, sugars, and heavy cream. Return the pot to medium- high heat with a candy thermometer attached to the side, and let it boil until the thermometer reads 252 degrees, only about 5 minutes. Keep a close eye on it. Stir occasionally. (Don’t have a candy or deep- fry thermometer? Have a bowl of very cold water ready, and cook the caramel until a tiny spoonful dropped into the water becomes firm, chewy, and able to be plied into a ball.)
Immediately remove caramel from heat and give the caramel several stirs to distribute it evenly. Pour caramel into the prepared pan then sprinkle with cacao and salt. Let it sit until cool and firm—about 2 hours, though it goes faster in the fridge. Once caramel is firm, use your parchment paper sling to transfer the block to a cutting board. Use a well- oiled knife, oiling it after each cut (I have never had to do this...), to cut the caramel into 1-by-1-inch squares or 0.5-by-2-inch. Wrap each one in a larger piece of parchment or wax paper, twisting the sides to close. Caramels will be somewhat on the soft side and will keep for 2 weeks at room temperature, 1 month in the refrigerator.

elderberry jam
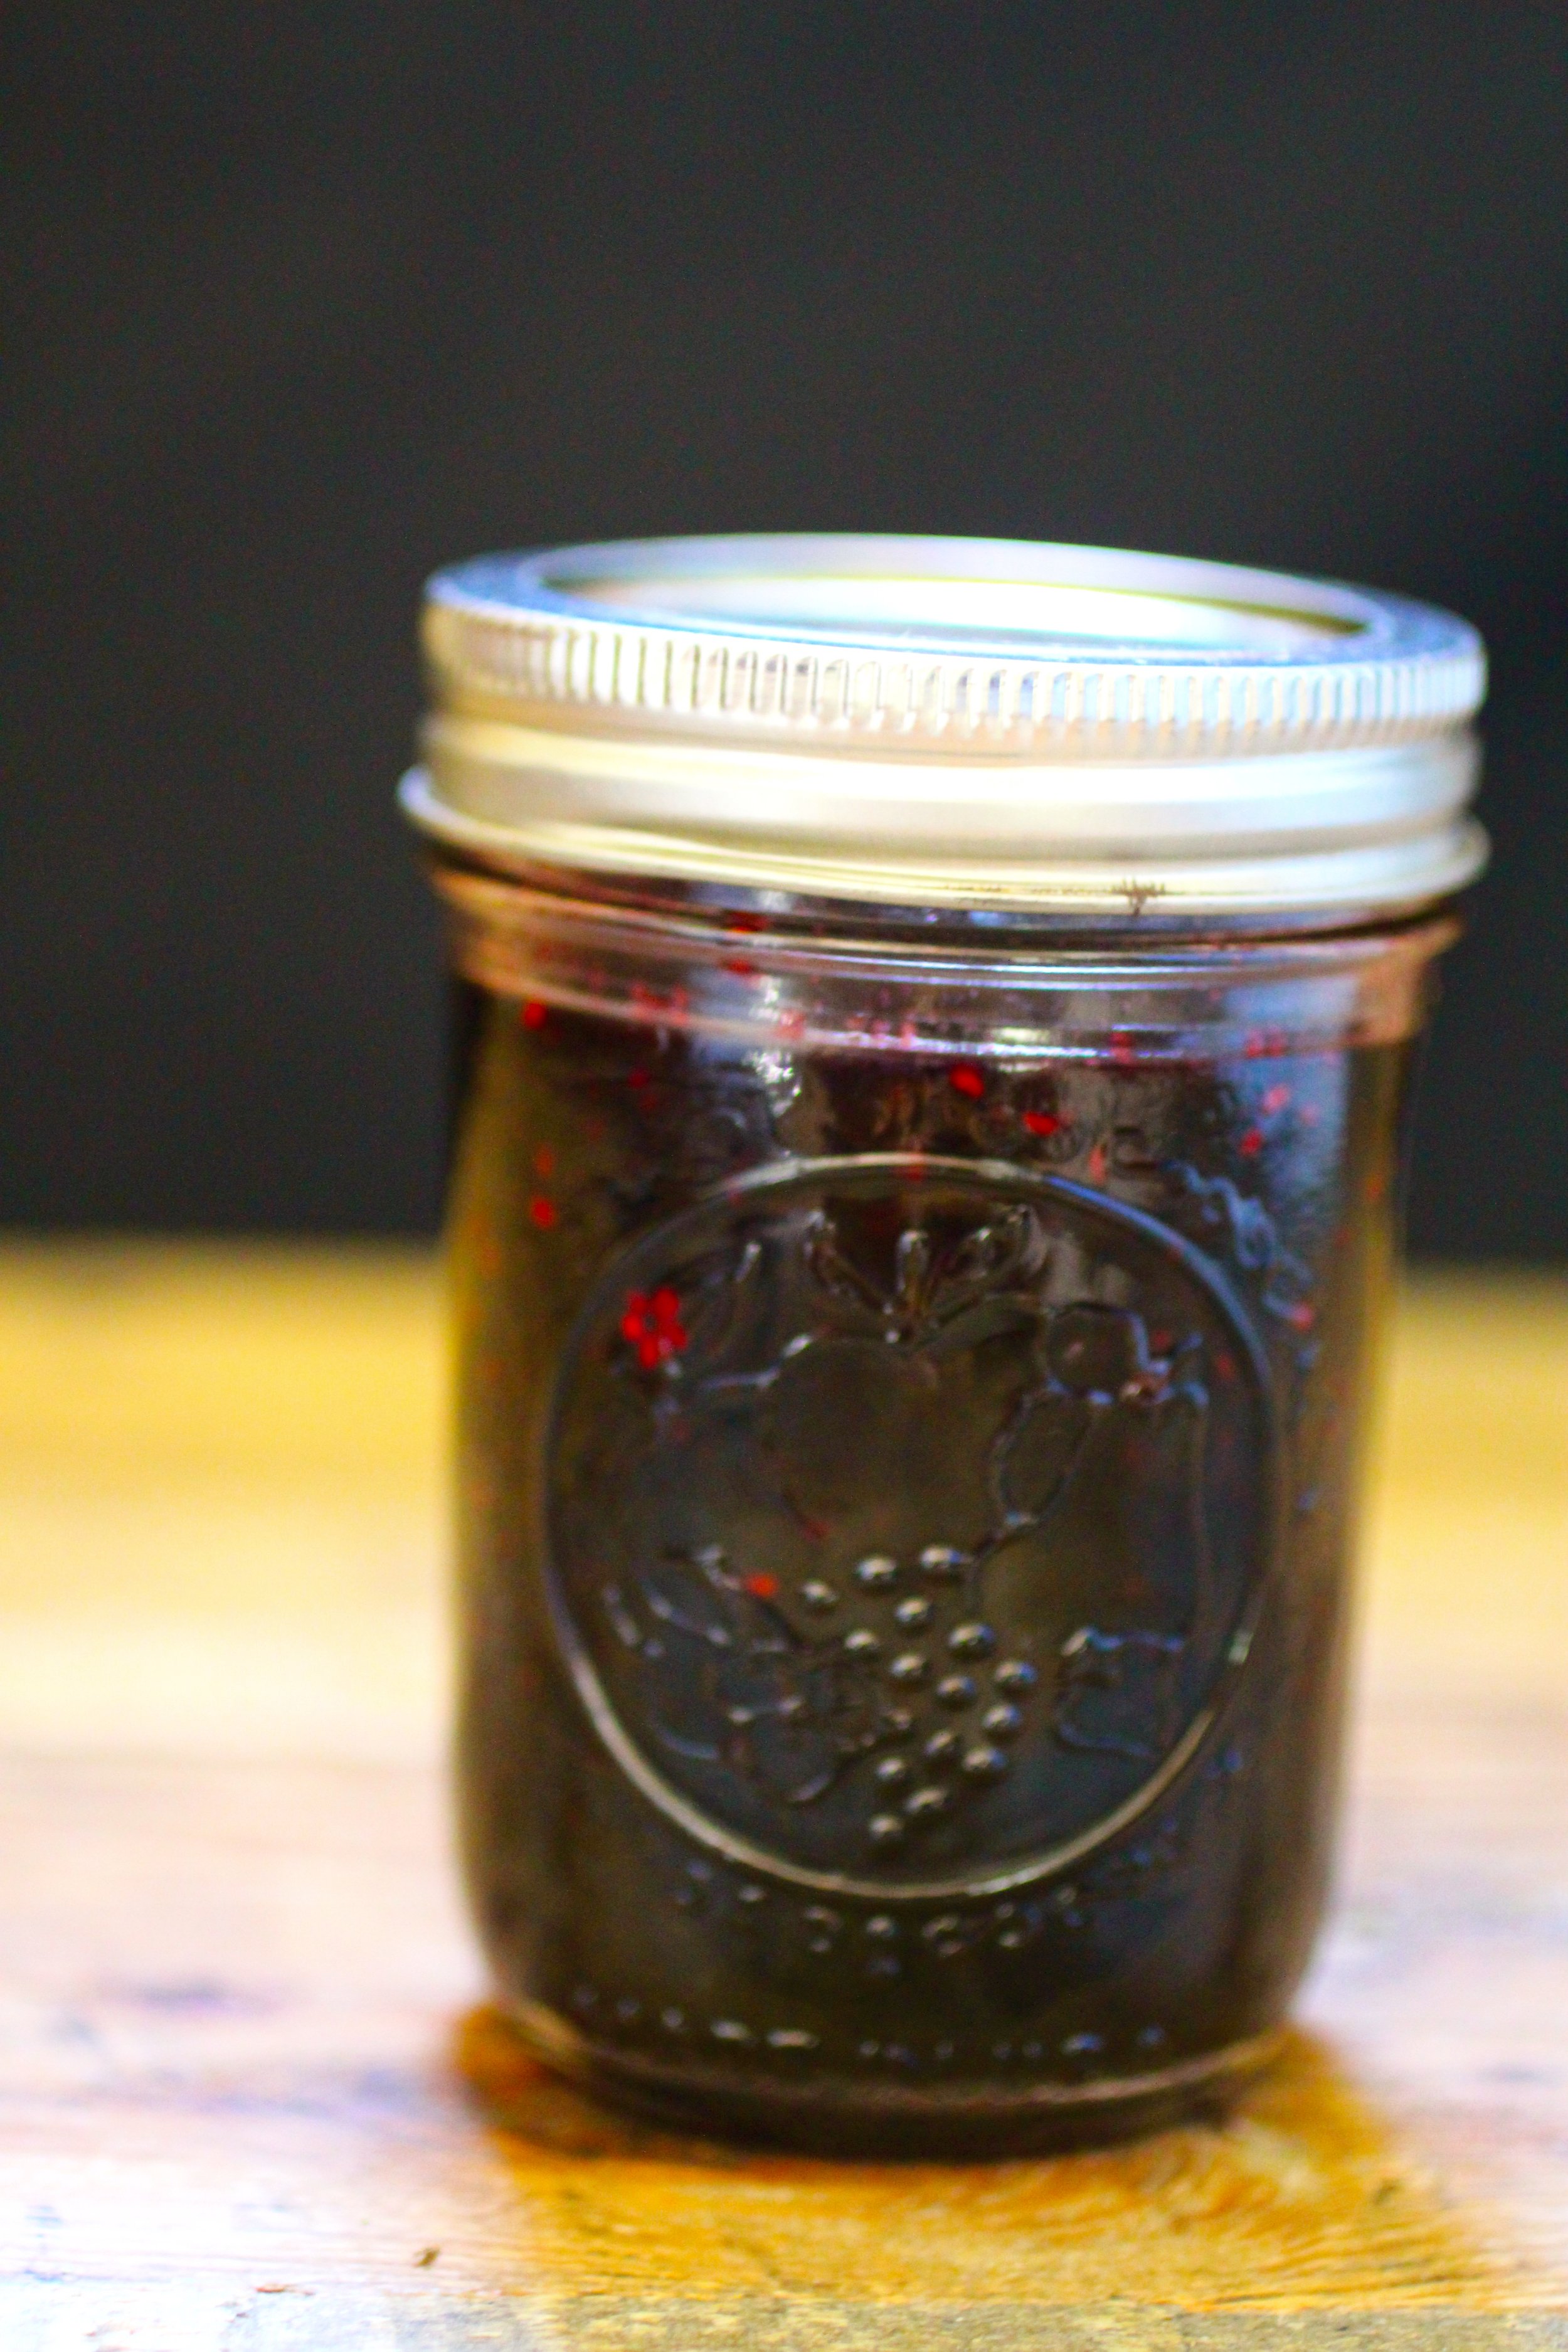
More information on foraging and exploring elderberry here.
This recipe is a great way to quickly preserve the flavor of elderberries for later use on toast or in dessert applications. Makes 4 half-pint jars.
4 cups fresh elderberries
3 cups granulated sugar
2 tablespoons lemon juice
Sterilize 4 half-pint Mason jars.
Bring ingredients to a boil, stirring until sugar dissolves. Continue boiling, stirring occasionally, until mixture reaches 220° or jam falls in a “sheet” when spoon is removed, about 20 minutes.
Pour evenly into jars and seal.
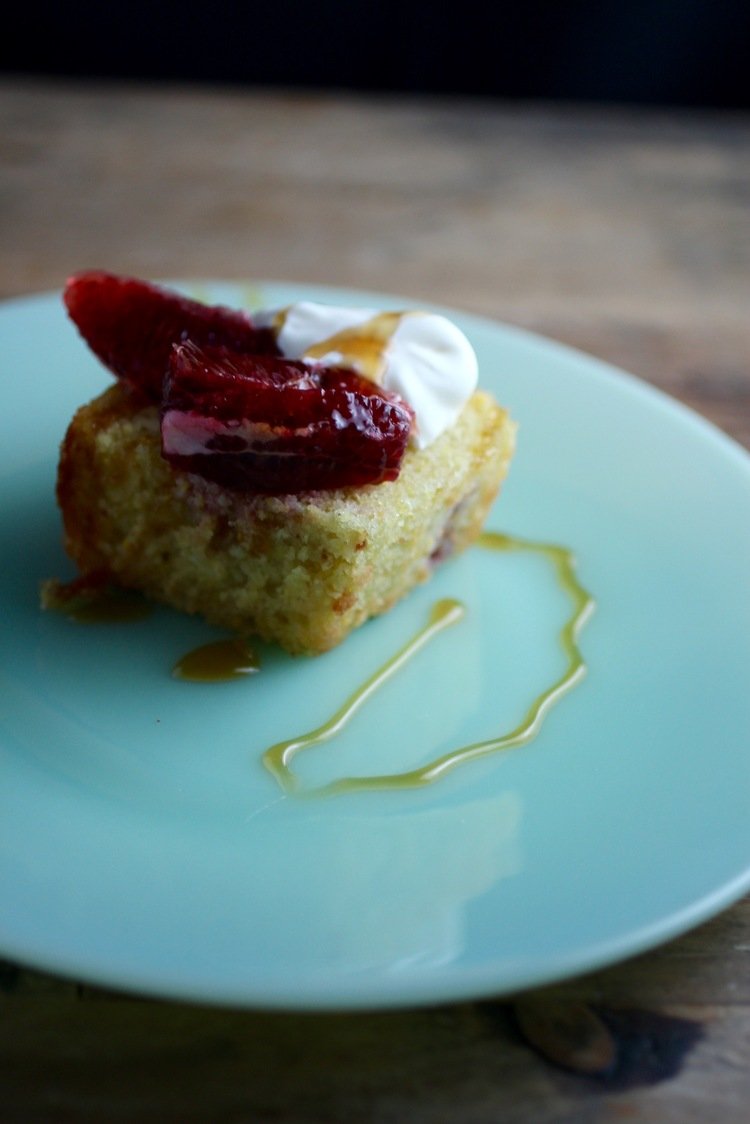
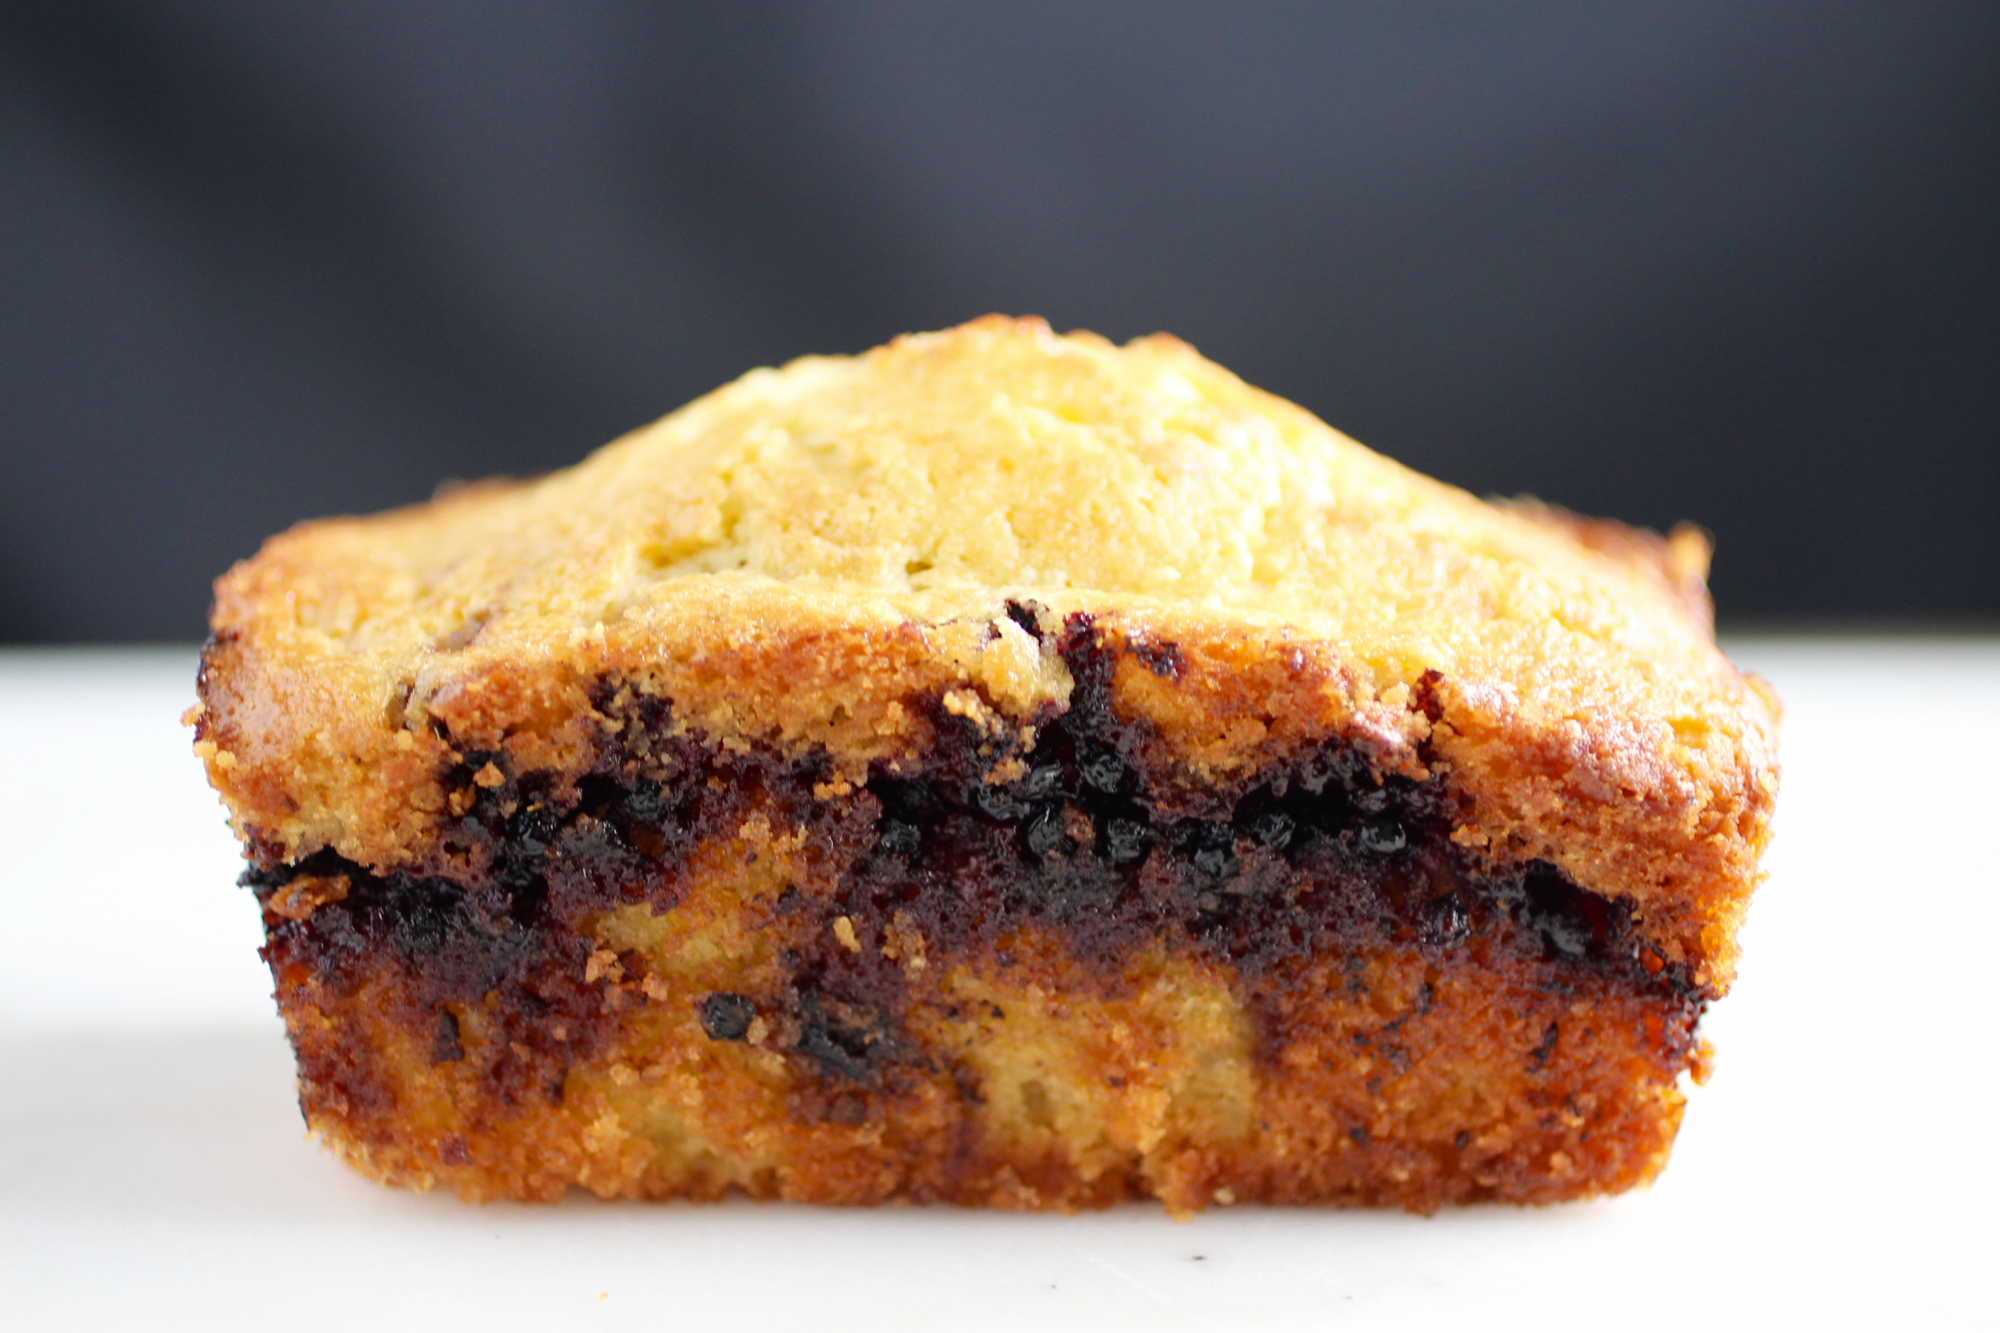
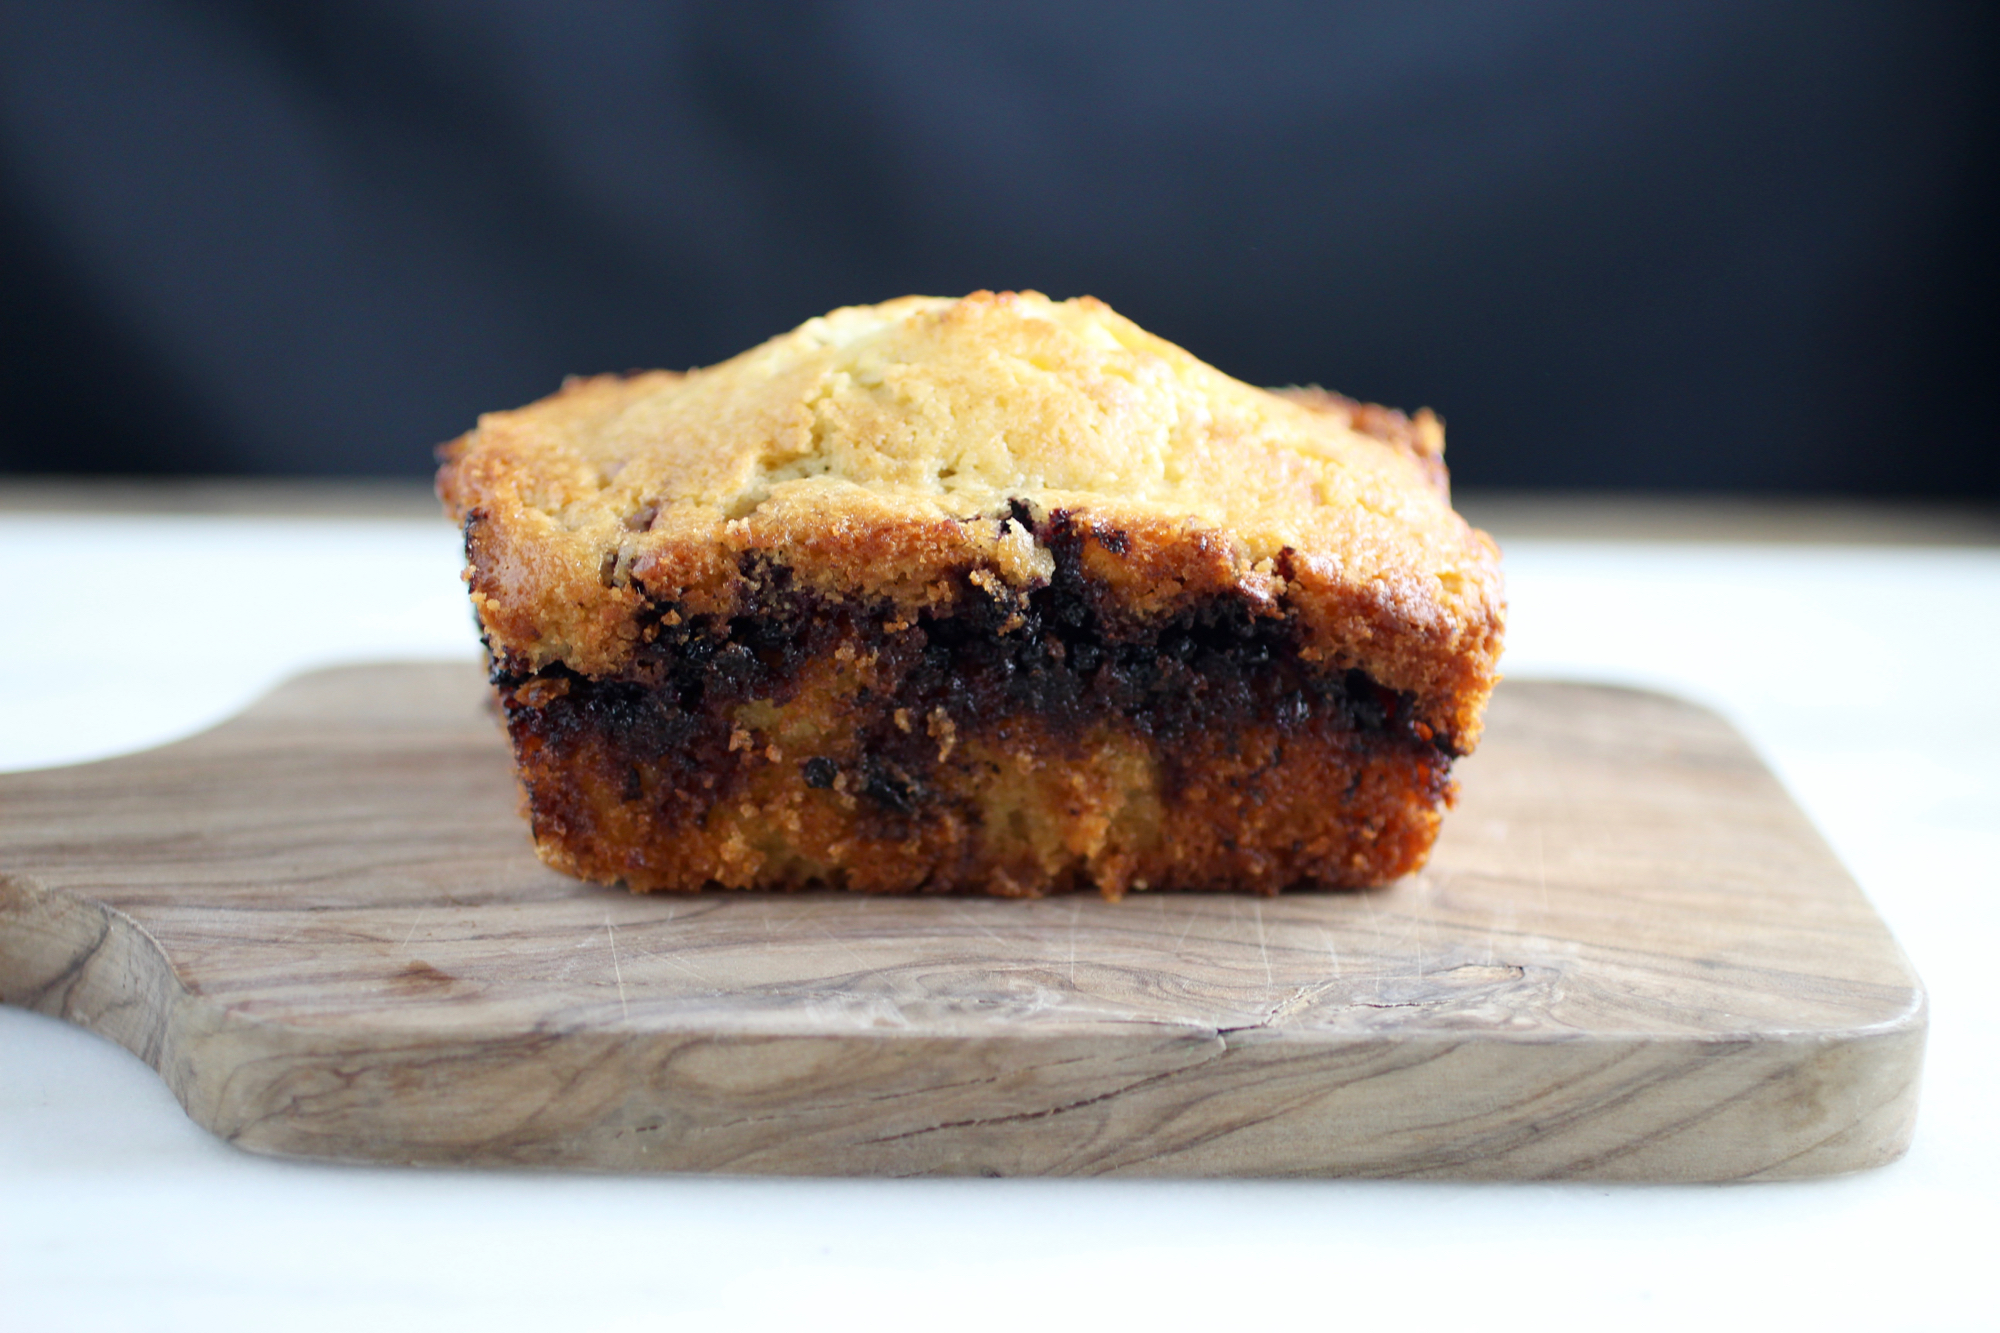
Olive oil cornmeal cake with blood orange and honey

A bit more olive oil can also be drizzled over the top - definitely won't hurt!
We recently returned from our honeymoon in Peru, where we picked up some palta (avocado) honey at the peak of summer to the other side of the equator where it is currently a different kind of seasonal peak - the height of the winter doldrums. Fortunately, grey winter days are not without their culinary delights, one of them being amazing citrus. Given our recent honey purchase, the cold weather begging me to "get my baking on", and beautiful blood oranges that fold so lovely into an olive oil cake, this combination was calling my name. The palta honey has very unique dark, earthy quality to it, but any honey that you enjoy will do for drizzling.
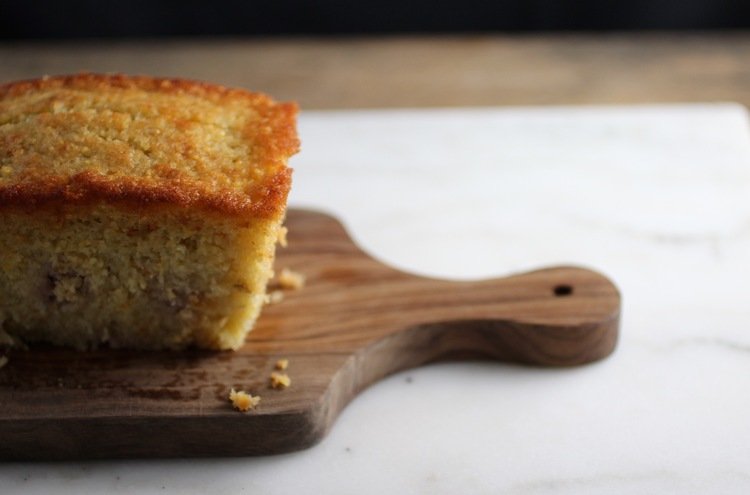
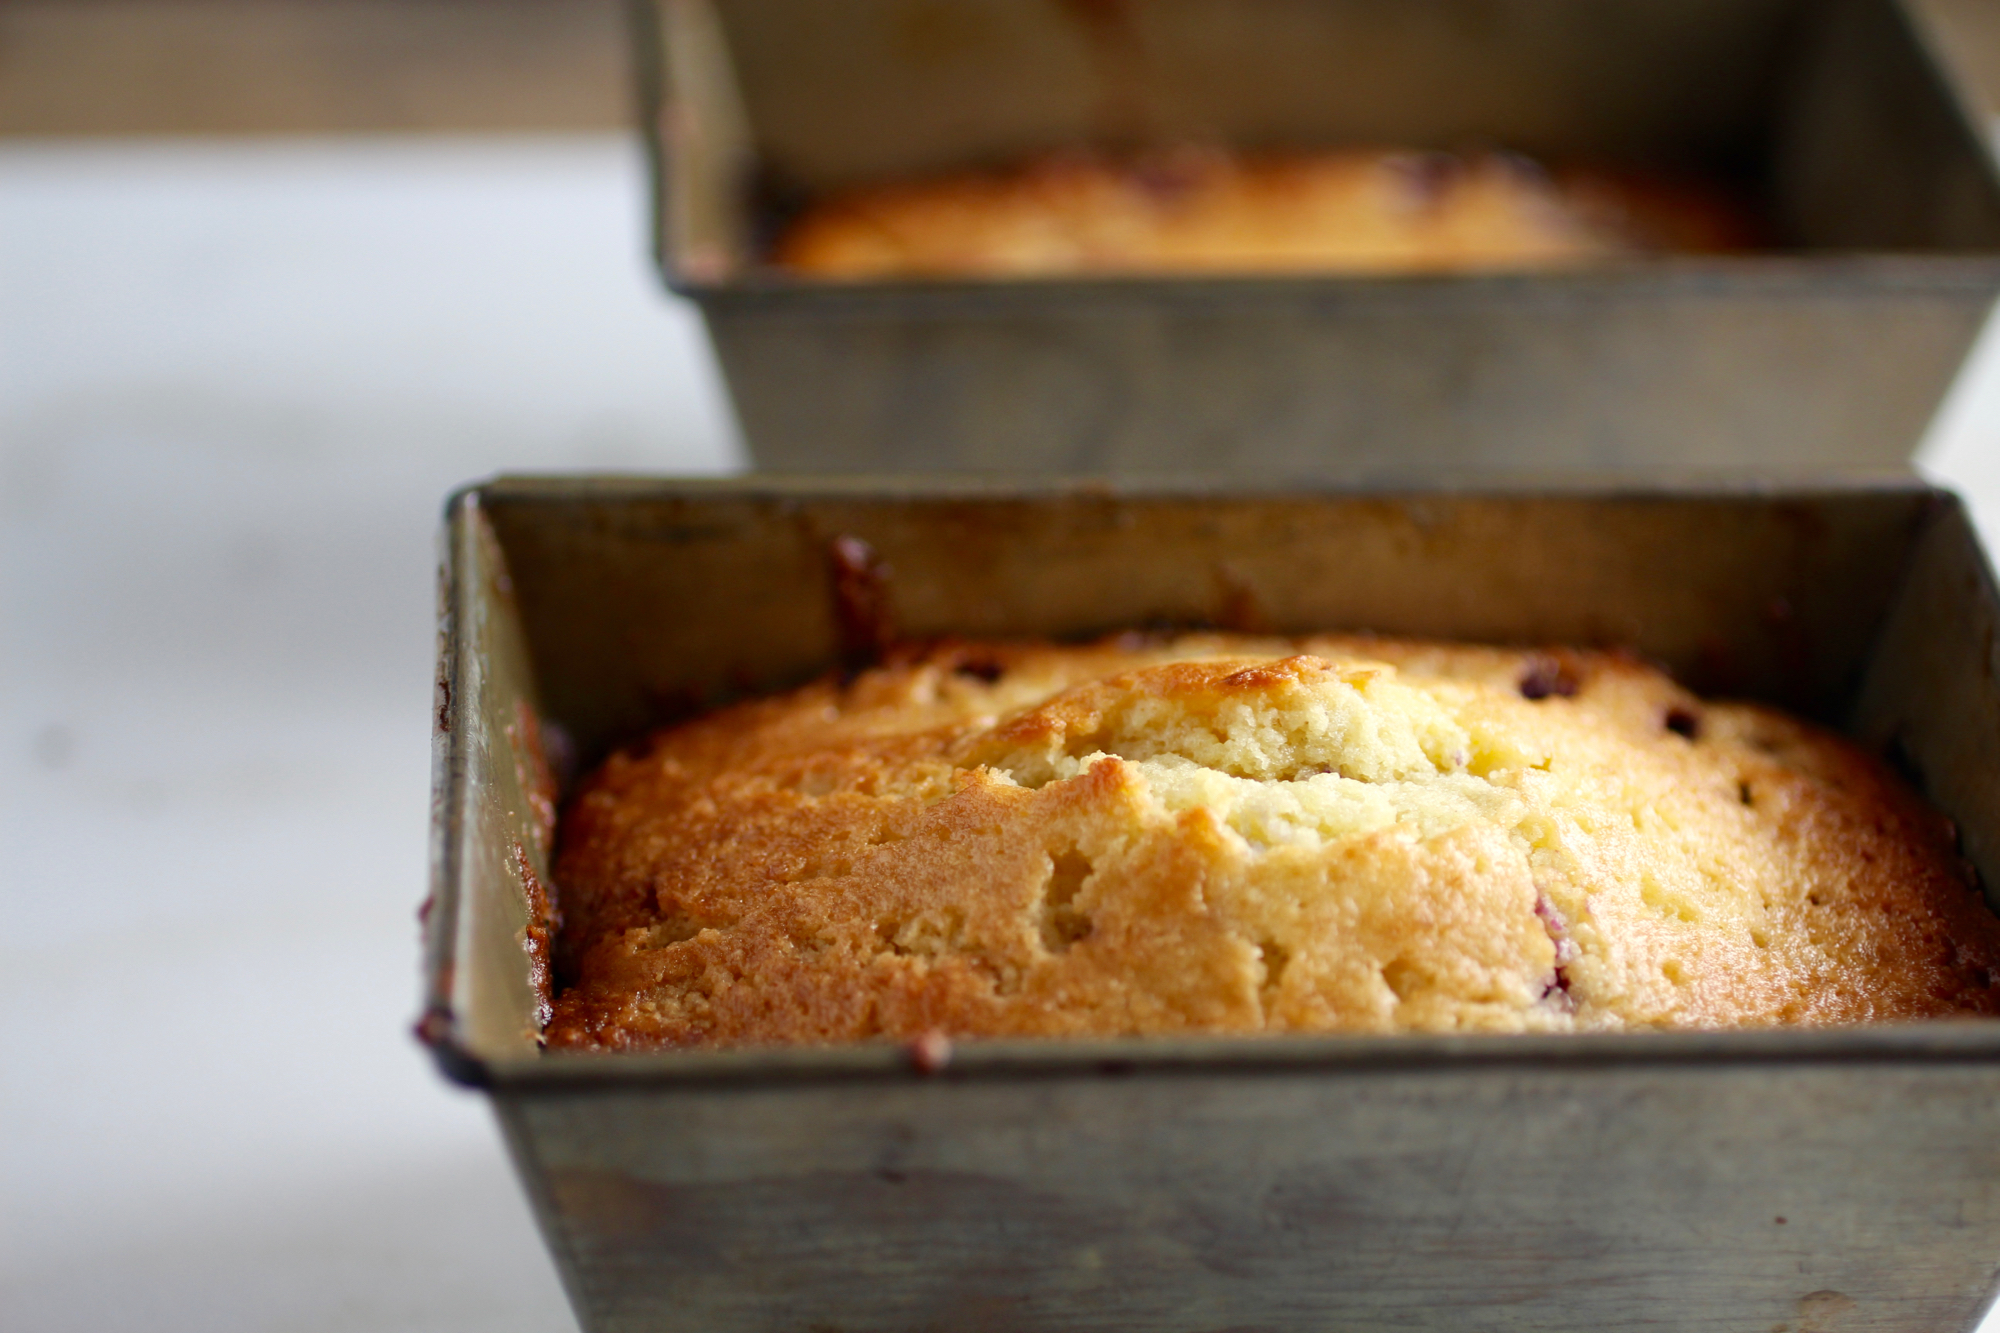
The recipe is adapted from a Smitten Kitchen recipe in a few ways including to incorporate cornmeal and deconstruct the compote - blood orange slices are so gorgeous it's a shame to chop them up for this application and we wanted the honey to shine on it's own. Makes one 9x5-inch loaf pan or four, 5x2.5-inch loaf pans. I happen to have four of these small loaf pans and am always looking for excuses to use them because they are pretty darn cute and more surface area = more crispy bits = delicious.

Butter for greasing pan
5 blood oranges
1 cup (200 grams or 7 ounces) sugar
About 1/2 cup (118 ml) plain yogurt
3 large eggs
2/3 cup (156 ml) extra virgin olive oil
1 cup plus 2 tablespoons all-purpose flour
6 tablespoons cup medium grind cornmeal
1-1/2 teaspoons (8 grams) baking powder
1/4 teaspoon baking soda
1/2 teaspoon salt
Honey, for drizzling
Crème fraîche for serving (optional, but perfect - just do it)
Preheat oven to 350 degrees. Butter a 9x5-inch loaf pan or four 5x2.5-inch loaf pans. Grate zest from 2 oranges and place in a bowl with sugar. Using your fingers, rub ingredients together until orange zest is evenly distributed in sugar.
Supreme an orange - aka "segment citrus like a boss" (I created that instructional post and just found out through this recipe that this technique is called "supreming"!). Break up segments with your fingers into about 1/4-inch sized chunks.
Halve 2 oranges and squeeze juice into a measuring cup; you’ll will have about 1/4 cup. Add buttermilk or yogurt to juice until you have 2/3 cup liquid altogether. Pour mixture into bowl with sugar and whisk well. Whisk in eggs and olive oil.
In another bowl, whisk together flour, cornmeal, baking powder, baking soda and salt. Gently stir dry ingredients into wet ones. Fold in pieces of orange segments. Pour batter into prepared pan.
Bake cake for 50 to 55 minutes (9x5-inch loaf pan) or 25-30 minutes (5x2.5-inch loaf pans), or until it is golden and a knife inserted into center comes out clean. Cool in loaf pan(s). While cake is cooling, supreme 2 more oranges and keep refrigerated until served.
Slice cake and serve with crème fraîche, blood orange slices, and a drizzle of honey. You can also drizzle some more olive oil over the top if you're feeling wild. Keeps for 3-4 days.
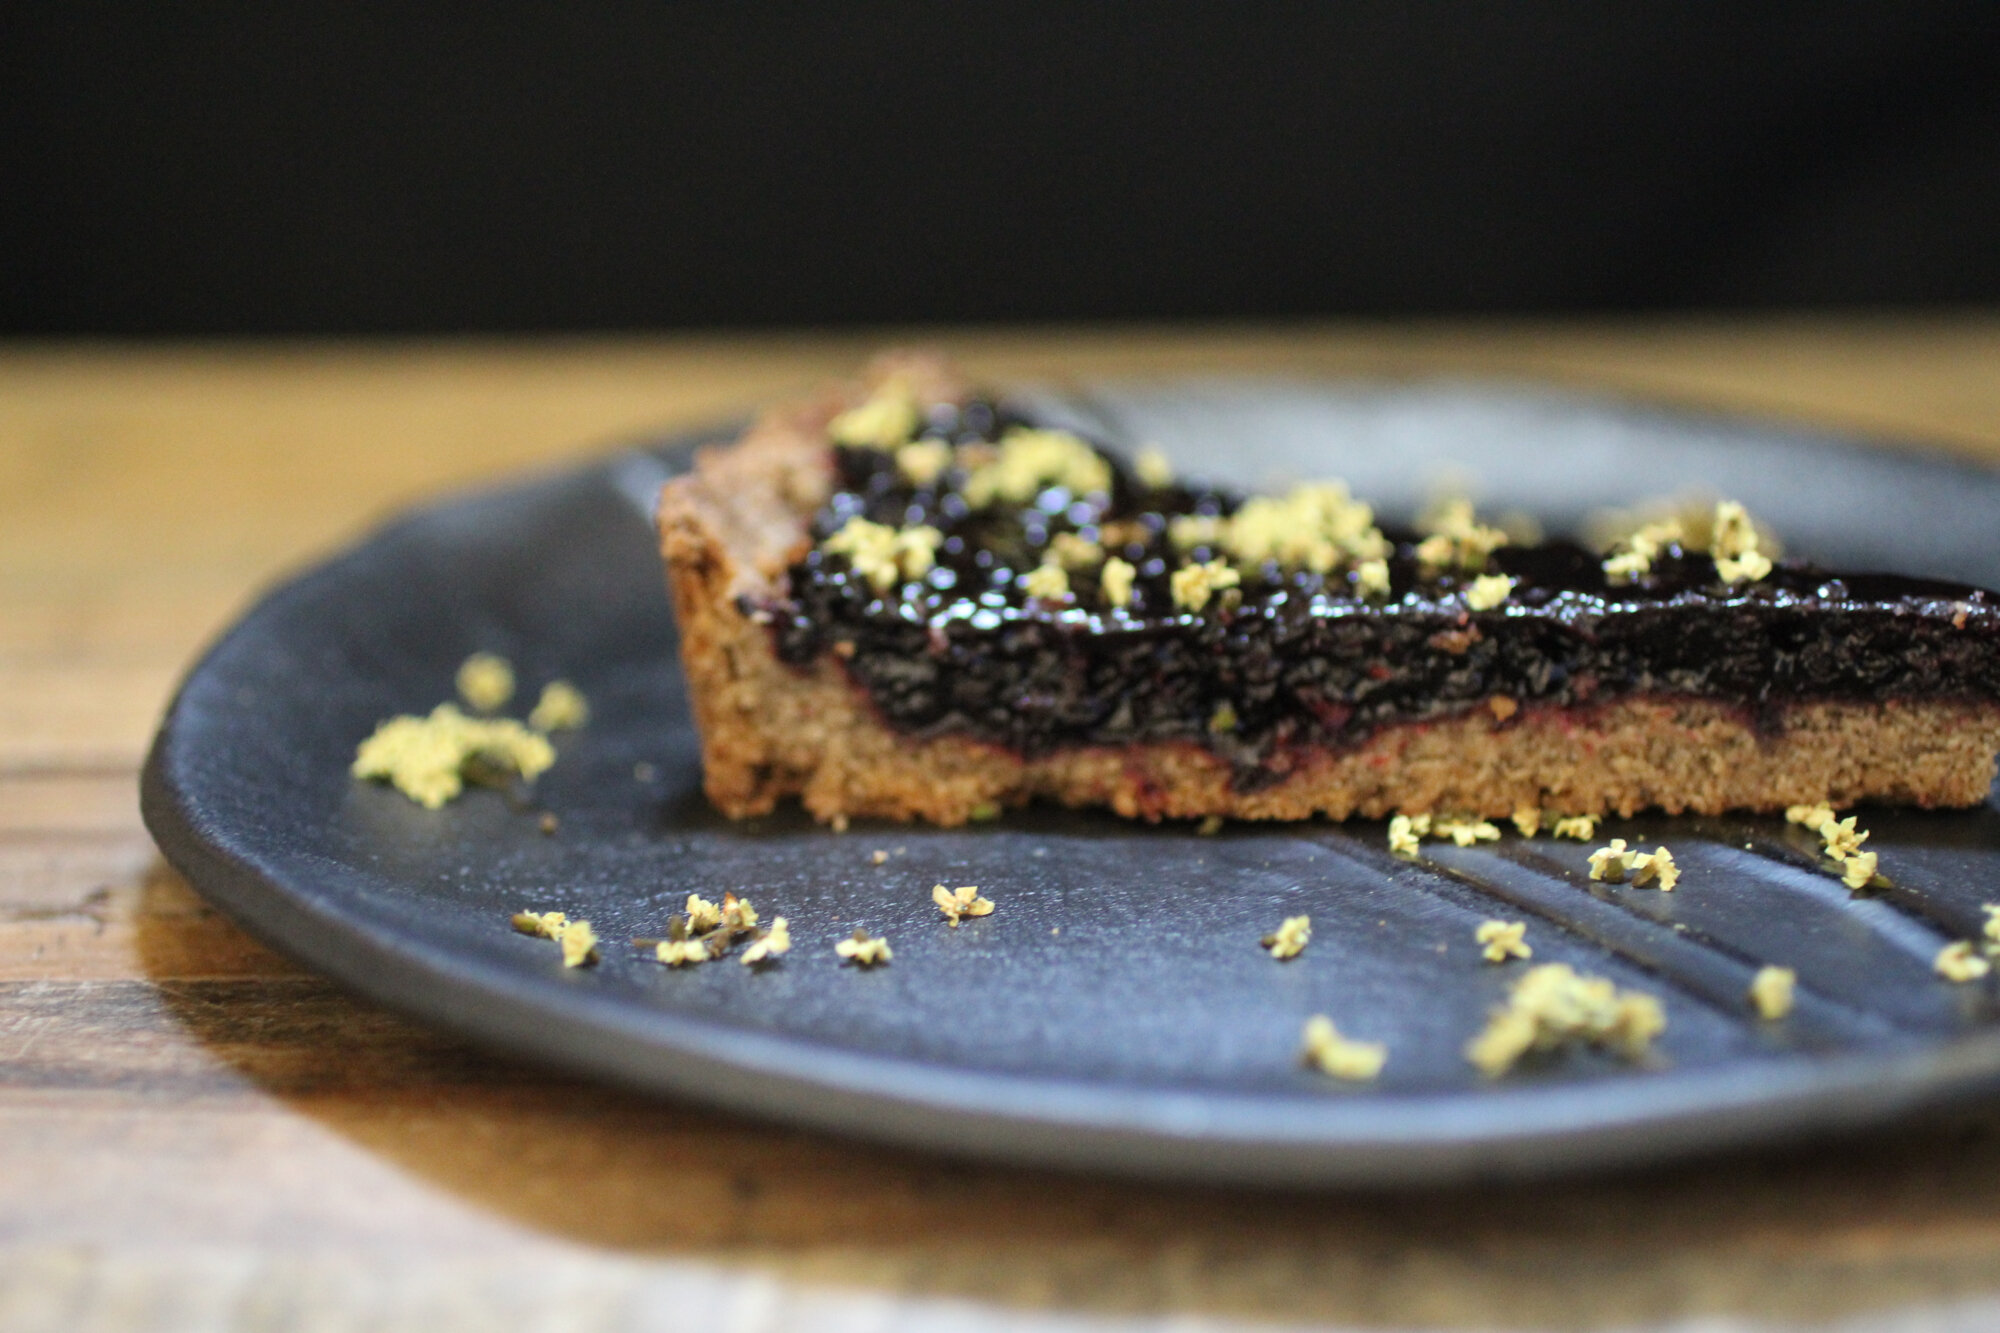
Elderberry Buckwheat Tart

More on elderberry and foraging here.
Nutty buckwheat pairs perfectly with the tartly sweet berries balanced by a bright kick of ginger. Serves 8.
9 tablespoons unsalted butter, divided, plus more for greasing pan
½ cup buckwheat flour
½ cup plus 2 tablespoons gluten-free flour blend (or all-purpose flour)
⅓ cup plus ½ cup granulated sugar, divided
¾ teaspoon salt, divided
2–3 tablespoons cold milk or water
3 cups fresh elderberries
1/3 cup light brown sugar
2 teaspoons fresh grated ginger
2-3 tablespoons cornstarch
1 tablespoon lemon juice
Lightly grease the bottom and sides of an 8-inch or 9-inch tart pan. Set aside.
Mix flours, 1/3 cup sugar, 1/2 teaspoon salt, and cut in 7 tablespoons butter. With pastry blender, fork, or hands, mix butter into flour mixture until the dough resembles small peas. Sprinkle in milk or water by the teaspoon and blend until dough sticks together when pressed, but is still crumbly.
Press dough into and up sides of pan, chill for 30 minutes. Preheat oven to 350°and bake for 15 minutes until golden-brown. Remove from oven and allow to cool.
While tart shell is cooling, add elderberries, remaining ½ cup granulated sugar, brown sugar, remaining ¼ teaspoon salt, and ginger to a large pot and heat on medium-high. Blend cornstarch with 1 tablespoon water to create a slurry, and then add to the elderberry mixture, stirring to dissolve slurry and sugars.
Bring to simmer and continue cooking, stirring frequently, until mixture thickens, about 5 minutes. Add another tablespoon of water-thinned cornstarch if needed to get mixture to thicken.
Turn off heat, stir in lemon juice, and pour elderberry mixture into cooled tart shell. Dot with remaining 2 tablespoons butter and bake for 40 minutes until set.
Serve warm or at room temperature, ideally with vanilla ice cream.

Apricot Ginger and Almond Galette
Rustic, yet classy free form tart with a ginger kick.

There's something about me and tart shells - something...special. No matter the style or variation, I just can't seem to do wrong. I'm not sure what it is - call it skill or call it kismet, but you have to agree that it's also called delicious, delicious fate.
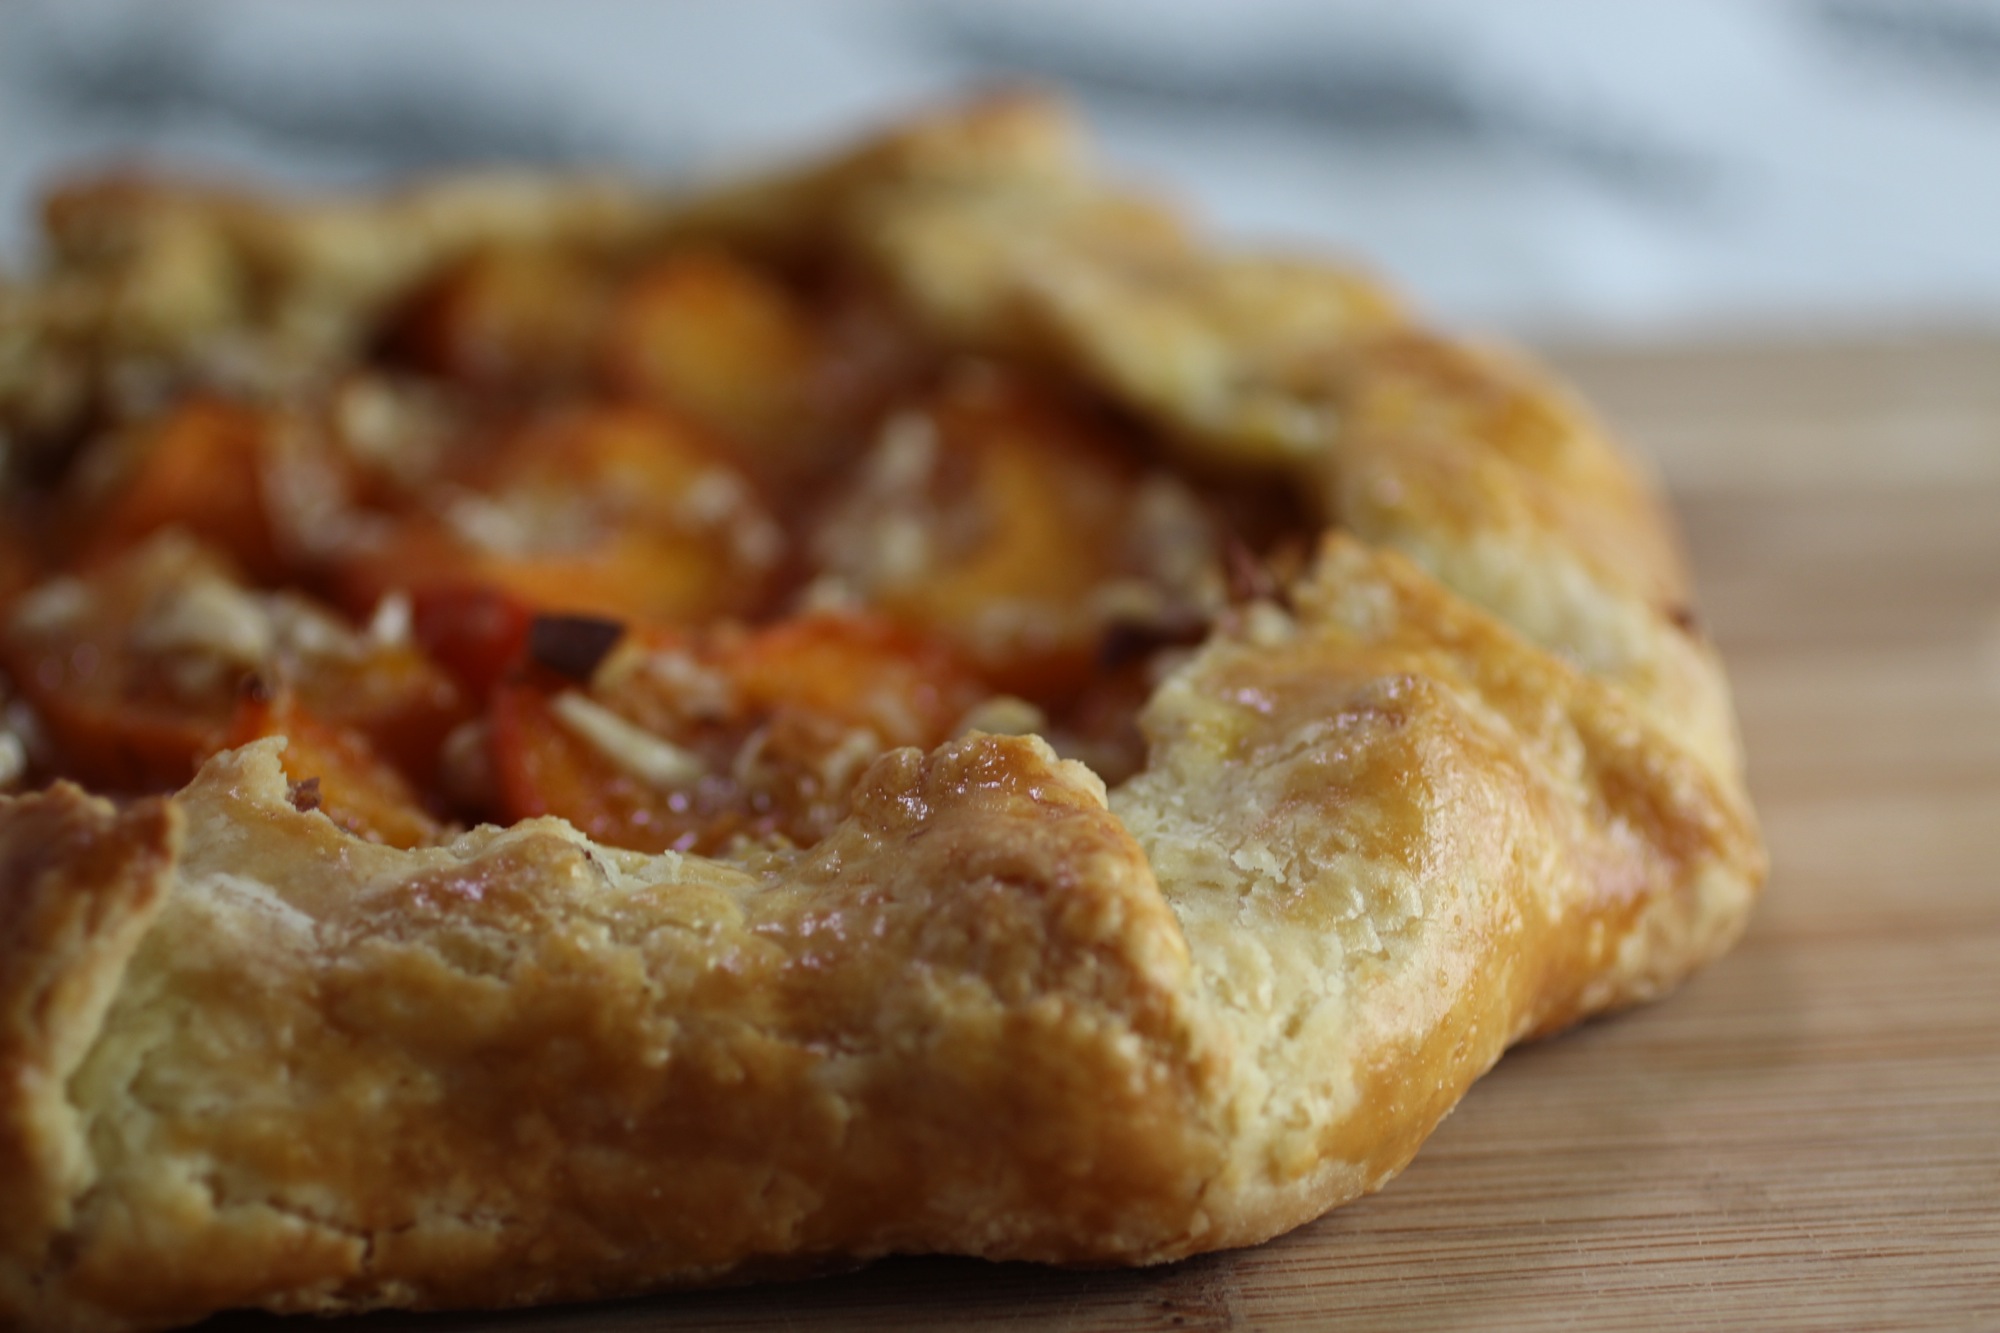
See what I mean? This flaky tart shell is off the hook.
This particular tart shell is a galette, meaning that it's free-form. The free-form shell is great because, as there is no pan, you can use the dough to make a whole bunch of smaller galettes if that sounds fun. Also, it has a very classy rustic look and can be eaten with your hands, like a slice of pizza - perfect for picnics!
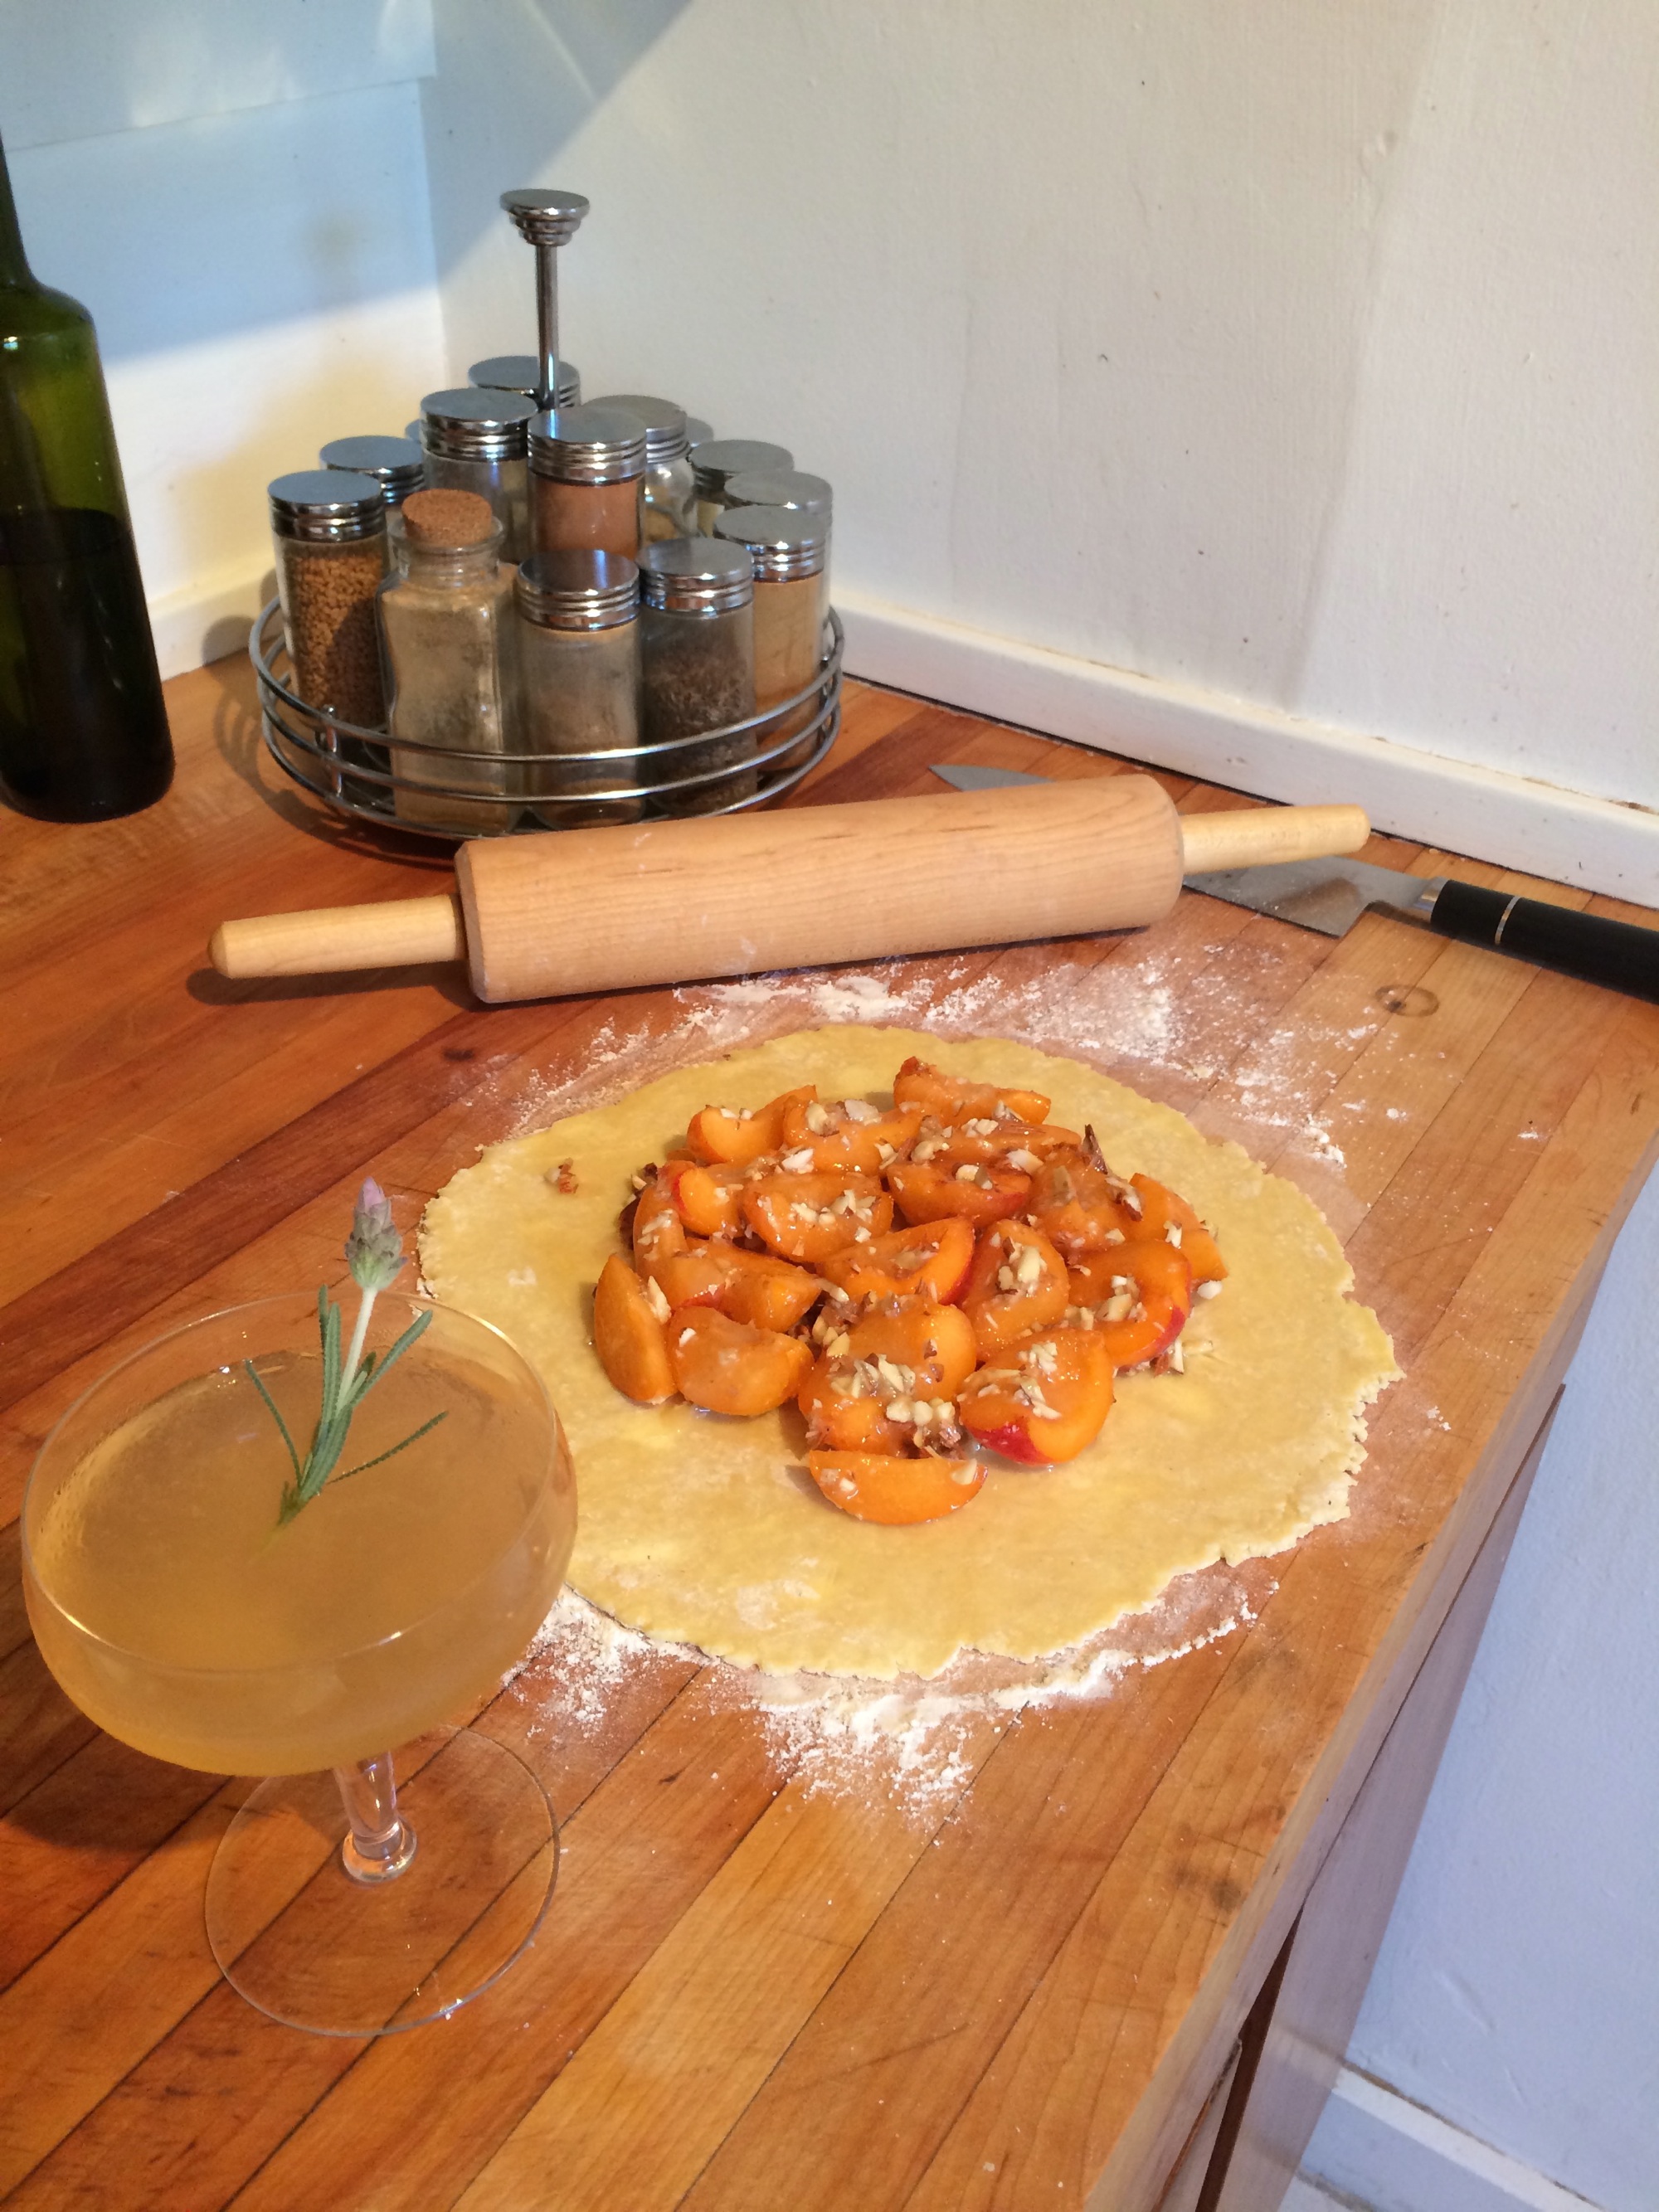
Free form tart shell ready to be folded over filling. Also, a cocktail - rolling out pastry dough can leave you parched!
The other thing I love about tart shells is that the ingredient combinations are endless, from a simple pairing of fresh raspberries and honey to more complex variations like nectarines and cardamom brown butter or dark chocolate salty caramel. Stone fruit is one of my favorite bases for fillings (yay to summer!) and the ginger and almond in this galette pair beautifully with the apricot. Feel free to use this pâte brisée in any number of other combinations - the egg mixed it makes it ideal for rolling out and folding over scrumptious fillings as a galette. Go on, get crazy with your tart self!
Pâte brisée
1-1/3 cup all-purpose flour, plus more for rolling out
1/2 teaspoon fine sea salt
8 tablespoons unsalted butter, cold, diced
2 eggs, lightly beaten, divided
Ice water
Filling
1 pound apricots, pitted and quartered
1/4 cup sugar
1 teaspoon lemon juice
1/4 teaspoon almond extract
2 teaspoons cornstarch
Pinch coarse sea salt
1/4 cup slivered almonds
1 tsp grated fresh ginger
Honey, for drizzling (optional)
Crème fraîche, for serving (optional)
Mix flour with 1/2 teaspoon fine sea salt. Cut in butter and, using pastry blender or fingers, incorporate until mixture looks like pea-sized crumbs. Form a well in the center, crack in 1 egg, then stir egg into flour/butter mixture until incorporated. Add ice water as needed (you may not need it) just until dough holds together, but is not sticky.
Roll dough into a ball, flatten into a thick disc, cover with plastic wrap, and refrigerate for 30 minutes.
Meanwhile, preheat oven to 375 degrees F and toss all filling ingredients except honey in a medium bowl.
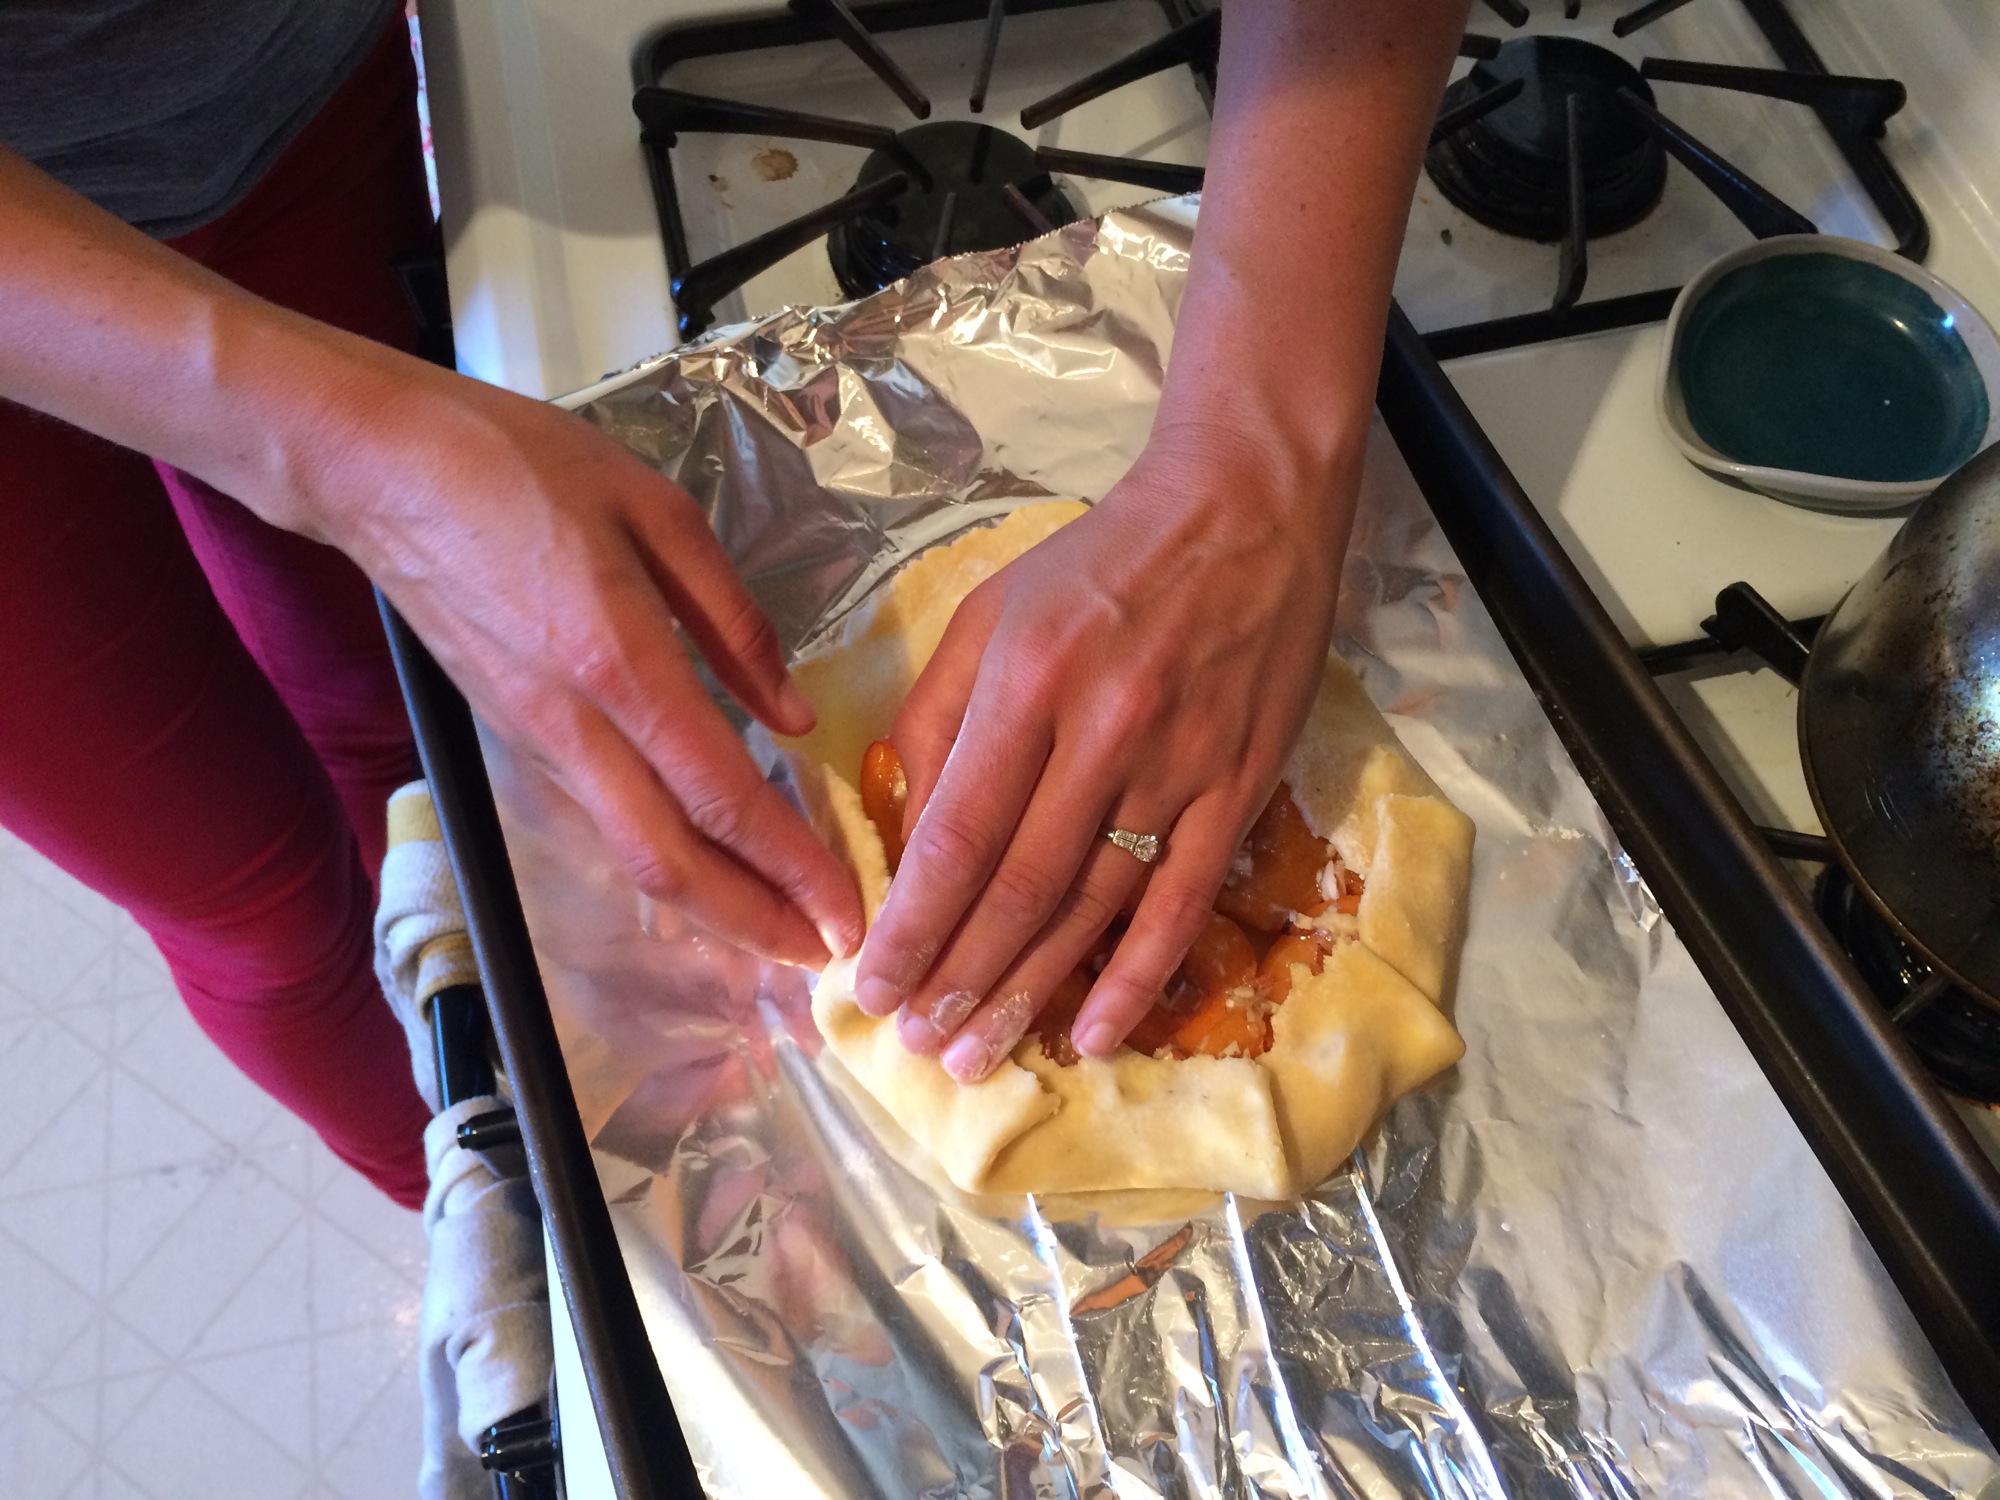
Folding over pastry dough edges.
Remove dough from refrigerator, allow to thaw for 5 minutes, and roll out dough in a circle on a floured surface to about 1/4-inch thick. Spread apricot filling in center, leaving 1.5-inches around edge. Fold over, pastry edges, brush with remaining lightly beaten egg, and place on a baking sheet lined with aluminum foil or parchment paper. Bake galette for 30 min or until golden.
Serve at room temperature or warm with crème fraîche and a drizzle of honey, if desired.

Bay Nut Ricotta Cake
A lovely use of foraged and roasted bay nuts

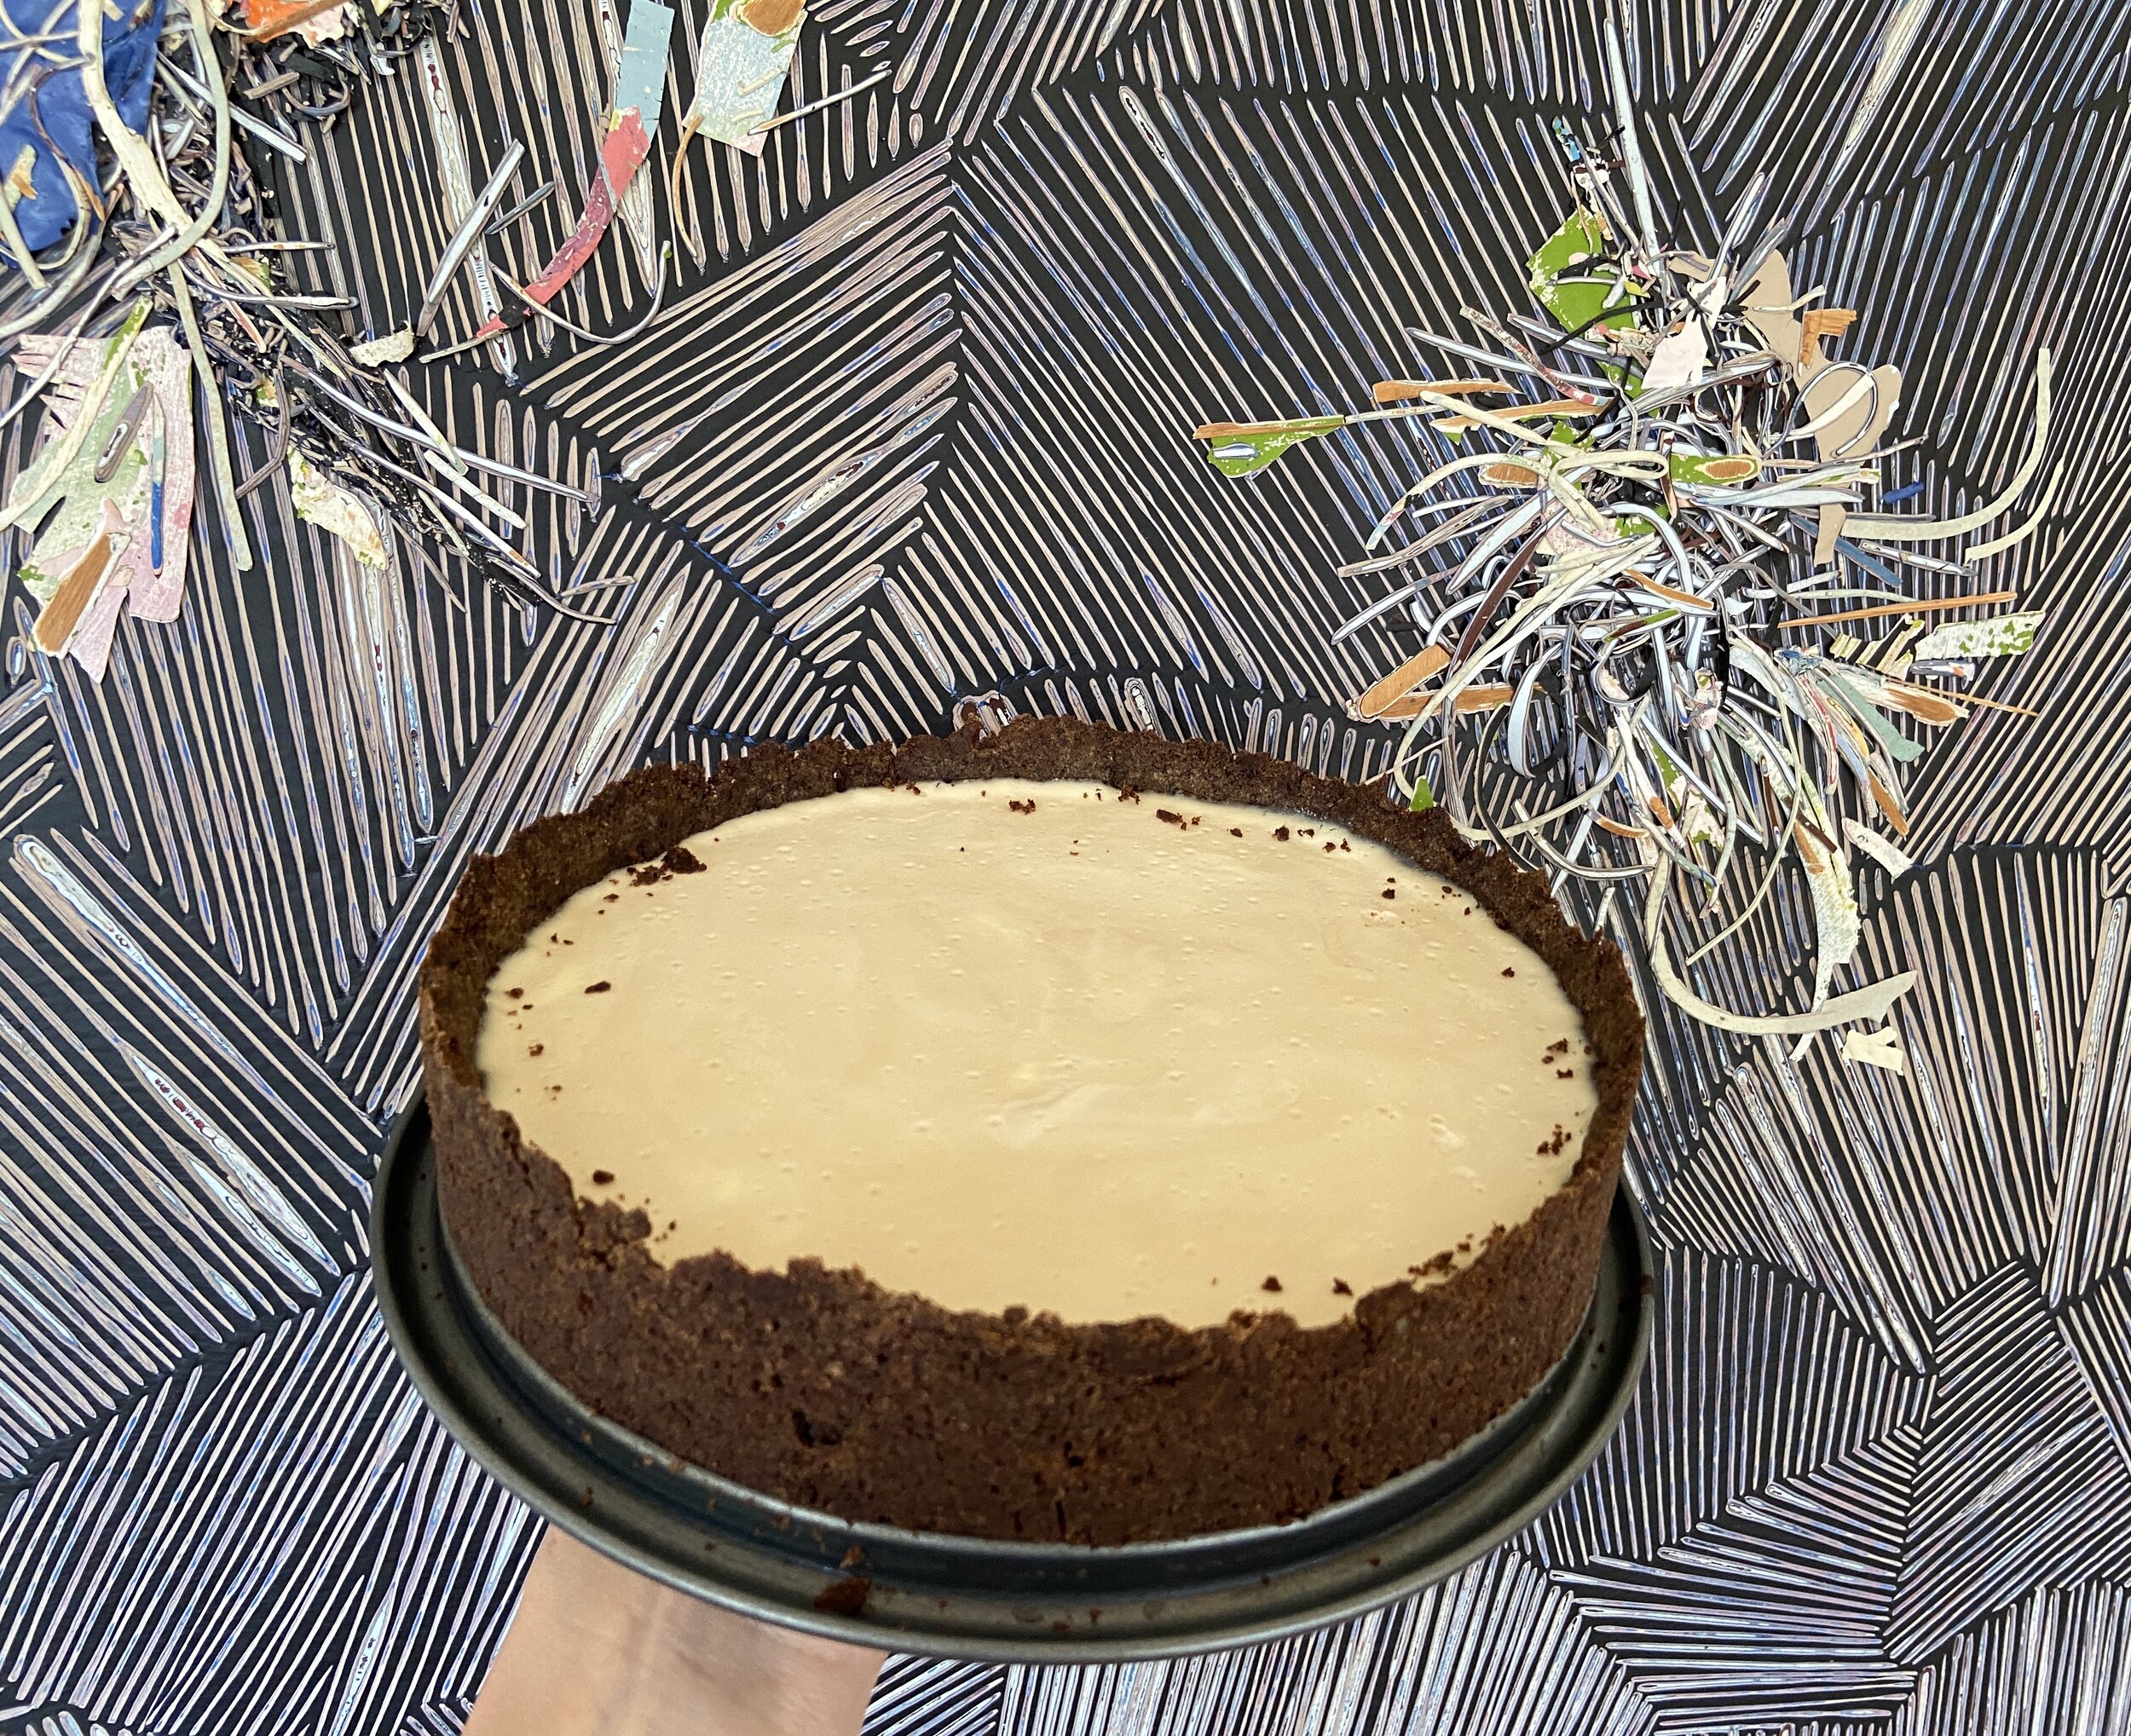
Cake in foreground, my brother’s art in background.
Here’s the deal: everyone likes coffee and chocolate. Okay, so that may not be entirely true, but who are we kidding? I probably don’t want to associate with those individuals anyway.
For those of us with *good* taste, the knowledge that there is a wild edible commonly found on the West Coast (the bay nut - more including foraging info here) that, when roasted, produces a flavor that can be likened to a combination of coffee and (bitter) chocolate is mind blowing. Now think about taking that amazing ingredient and adding it to a ricotta cheesecake - not bad. This brings us to the bay nut ricotta cake.
“A graham cracker crust also works, but doesn’t have the same rustic qualities as buckwheat flour. Buckwheat is also gluten free - make the dessert gluten free by replacing the all purpose flour with a gluten free substitute. An entirely buckwheat crust can work, but is a little too crumbly. ”
Crust Ingredients
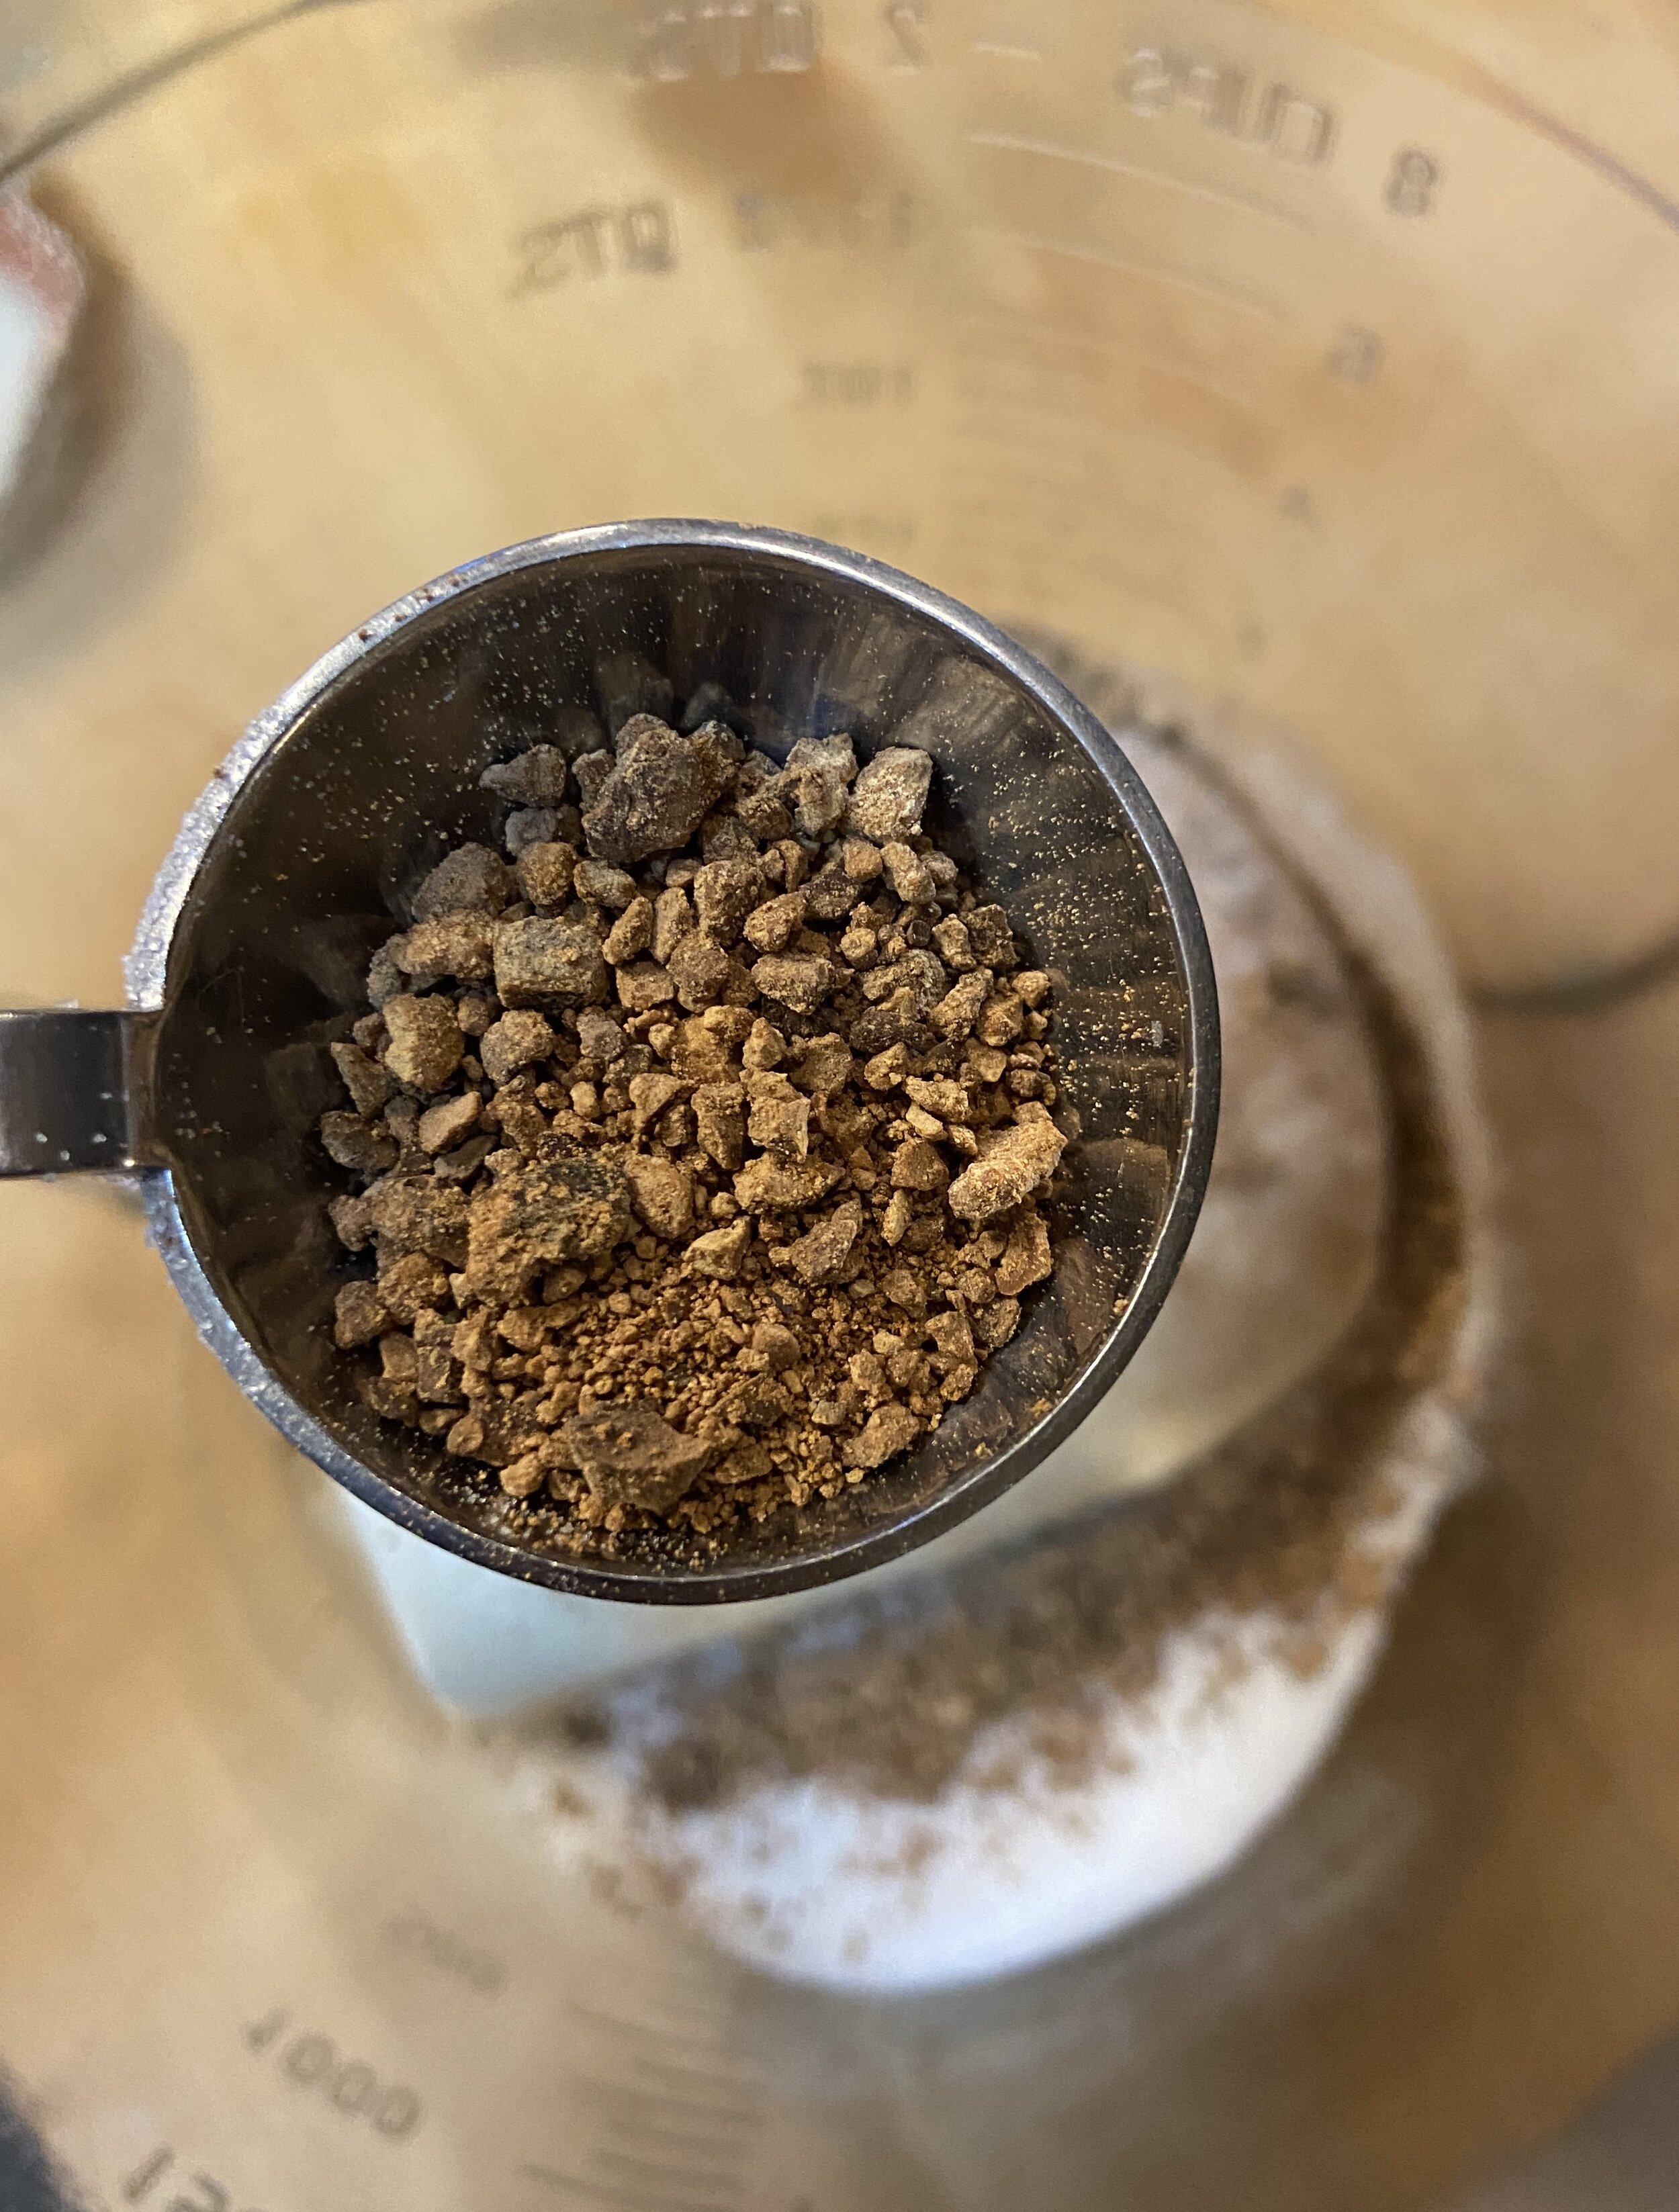
1/4 cup coarsely ground bay nuts - I used a coffee grinder for several pulses. You could also chop with a knife.
1 cup buckwheat or other flour of choice
2 tablespoons all purpose flour
1-2 tablespoons roasted bay nuts, finely ground
1/3 cup granulated sugar
1/4 teaspoon salt
1 tablespoon orange zest
7 tablespoons unsalted butter
1-2 tablespoons cold milk or water
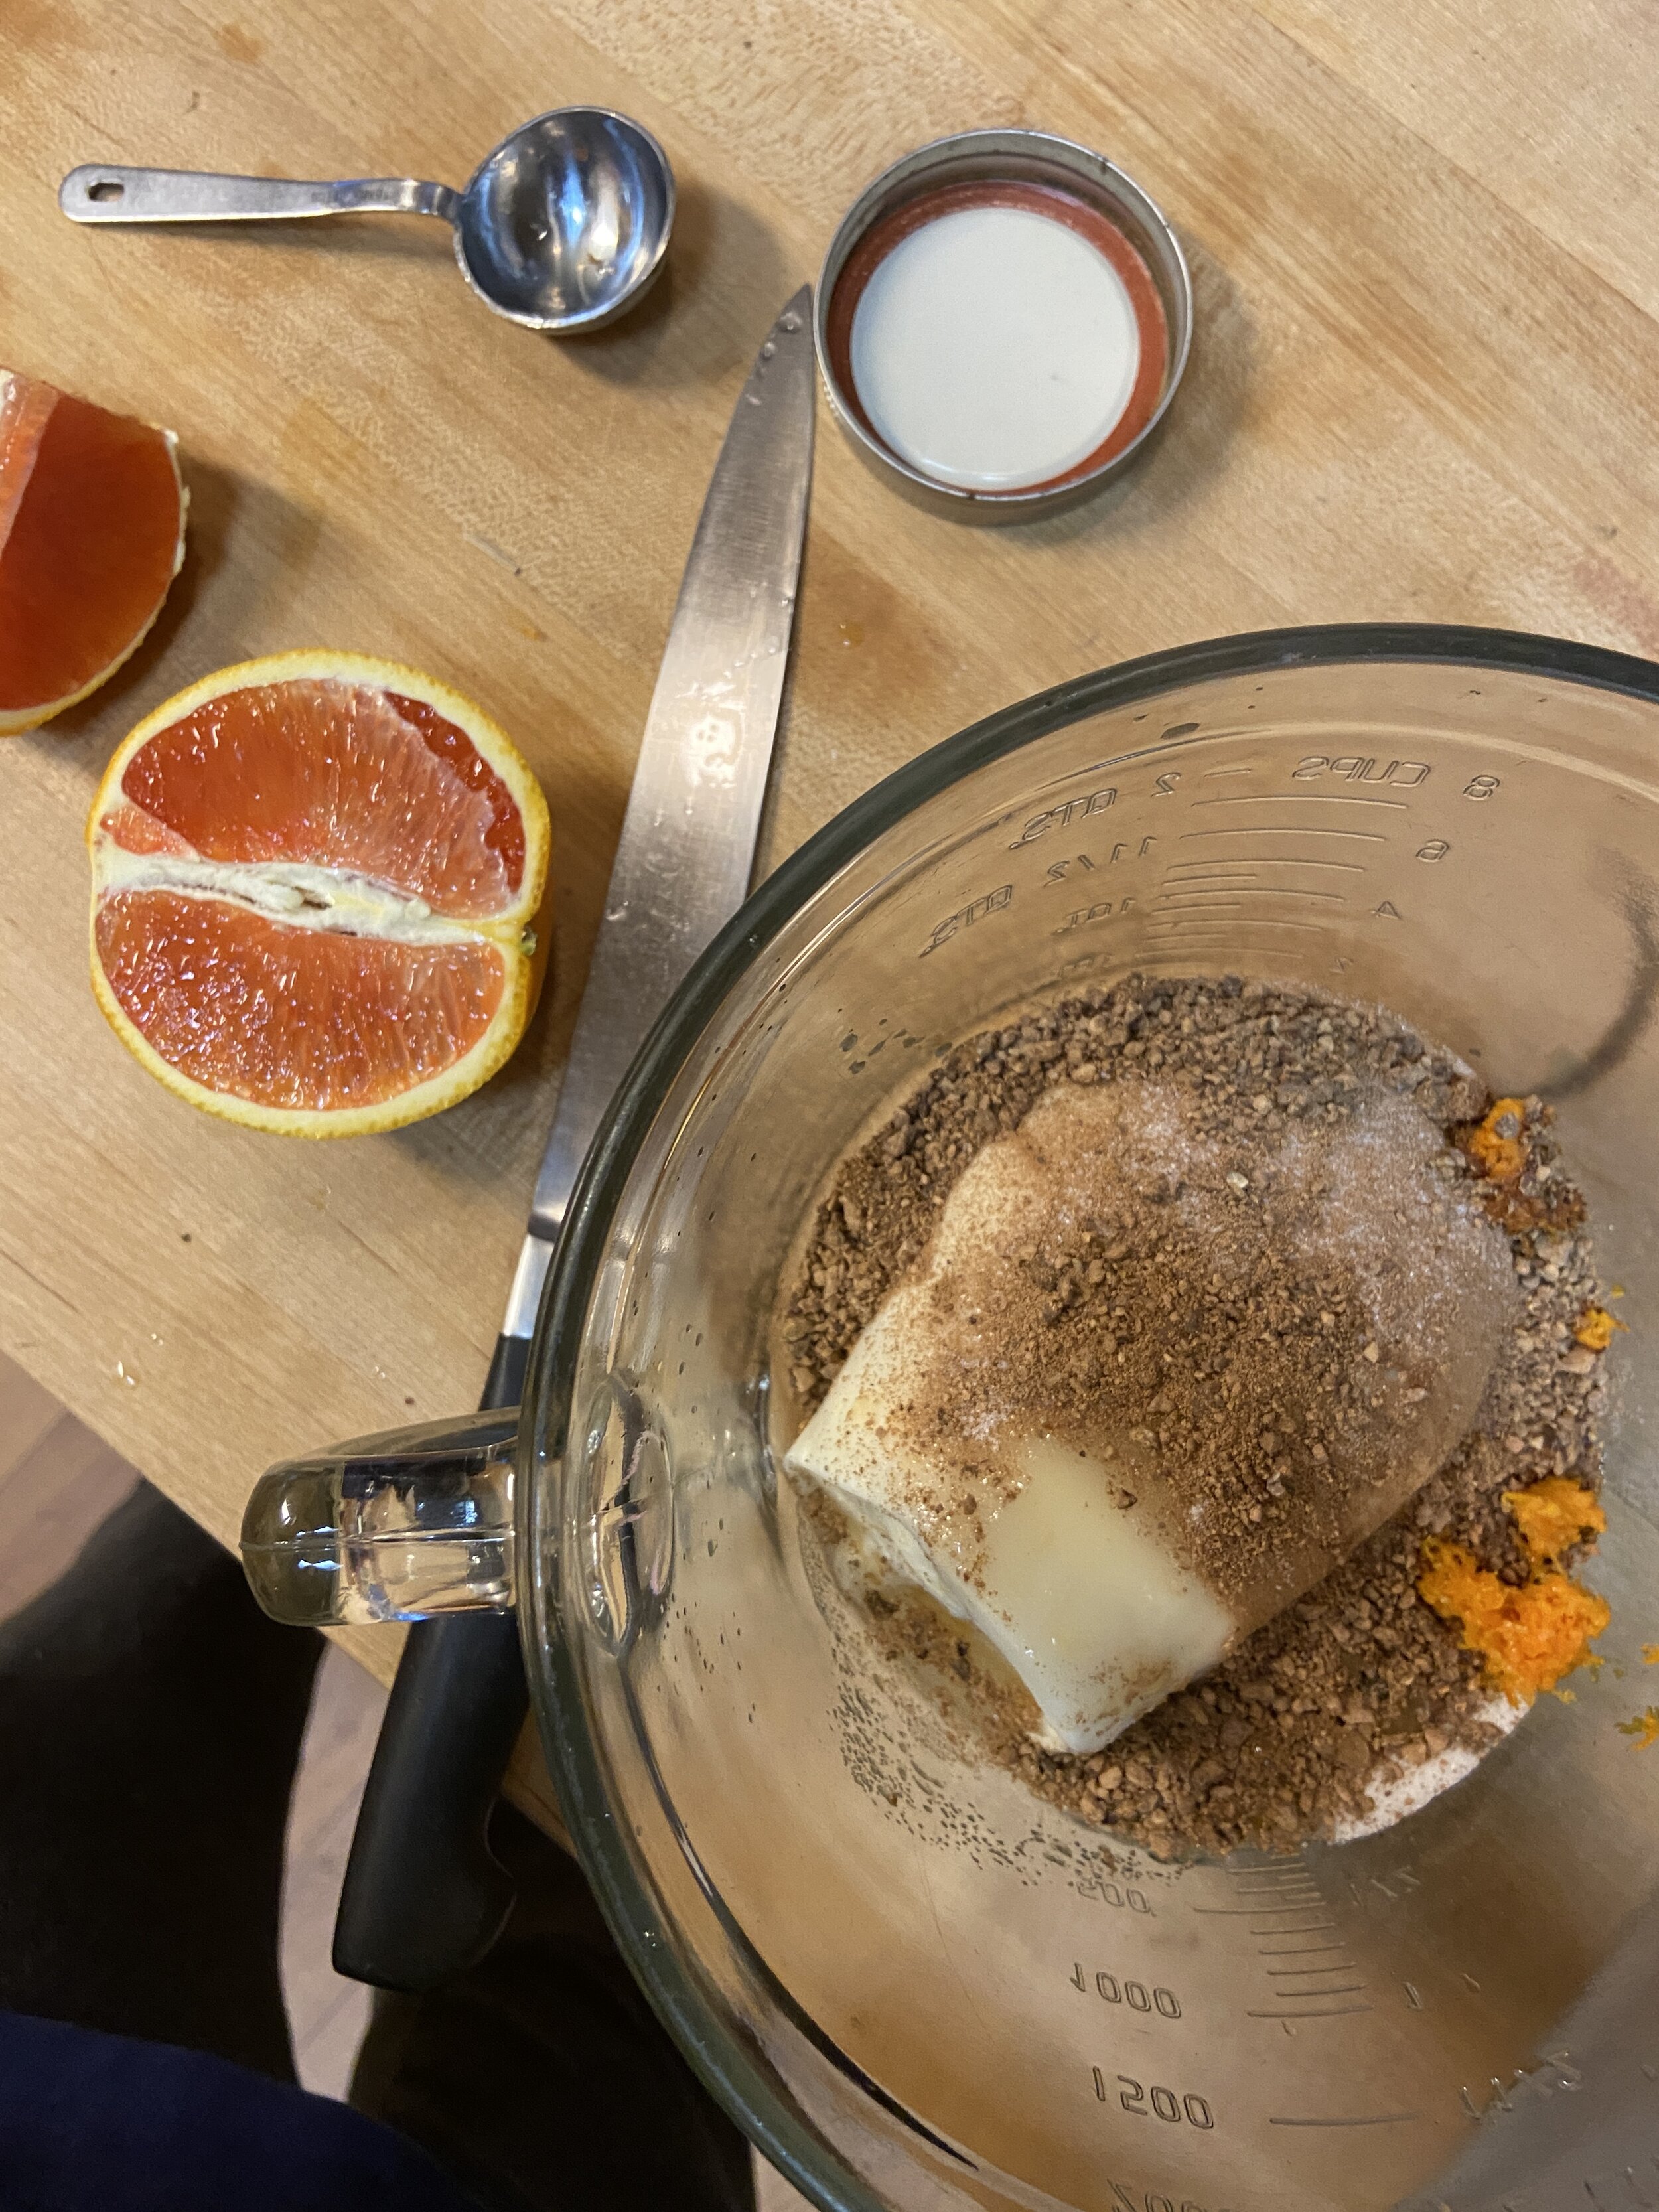
I forgot to add citrus zest to the crust, so I threw it into the ricotta mix, as seen here:)
Filling Ingredients
16 ounces ricotta cheese
1/4 cup granulated sugar
1/4 cup roasted bay nuts, coarsely ground
1 egg, lightly beaten
2 teaspoons juice from an orange (optional)
Topping Ingredients
8 oz. sour cream
2 tablespoons sugar
1 teaspoon vanilla extract
Preheat oven to 350. Mix flours, 1/3 cup sugar, salt, 1-2 tablespoons bay nuts, and zest. Cut in butter, mix until pea-sized crumbs. Add water or milk until dough comes together when pressed, but is not too wet. Press into greased 9” springform pan and bake for 10-15 minutes until browned. Remove from oven and cool.
Blend filling ingredients until thoroughly mixed. Pour onto cooled shell, bake in oven for about 40-50 minutes, until cake is set and jiggles only slightly. You make need to cover with foil if top gets too brown.
Remove from oven and let stand for 15-20 minutes while you mix together the topping ingredients. Spread out topping mixture and put back in the oven for another 10 minutes. Remove and cool until served.
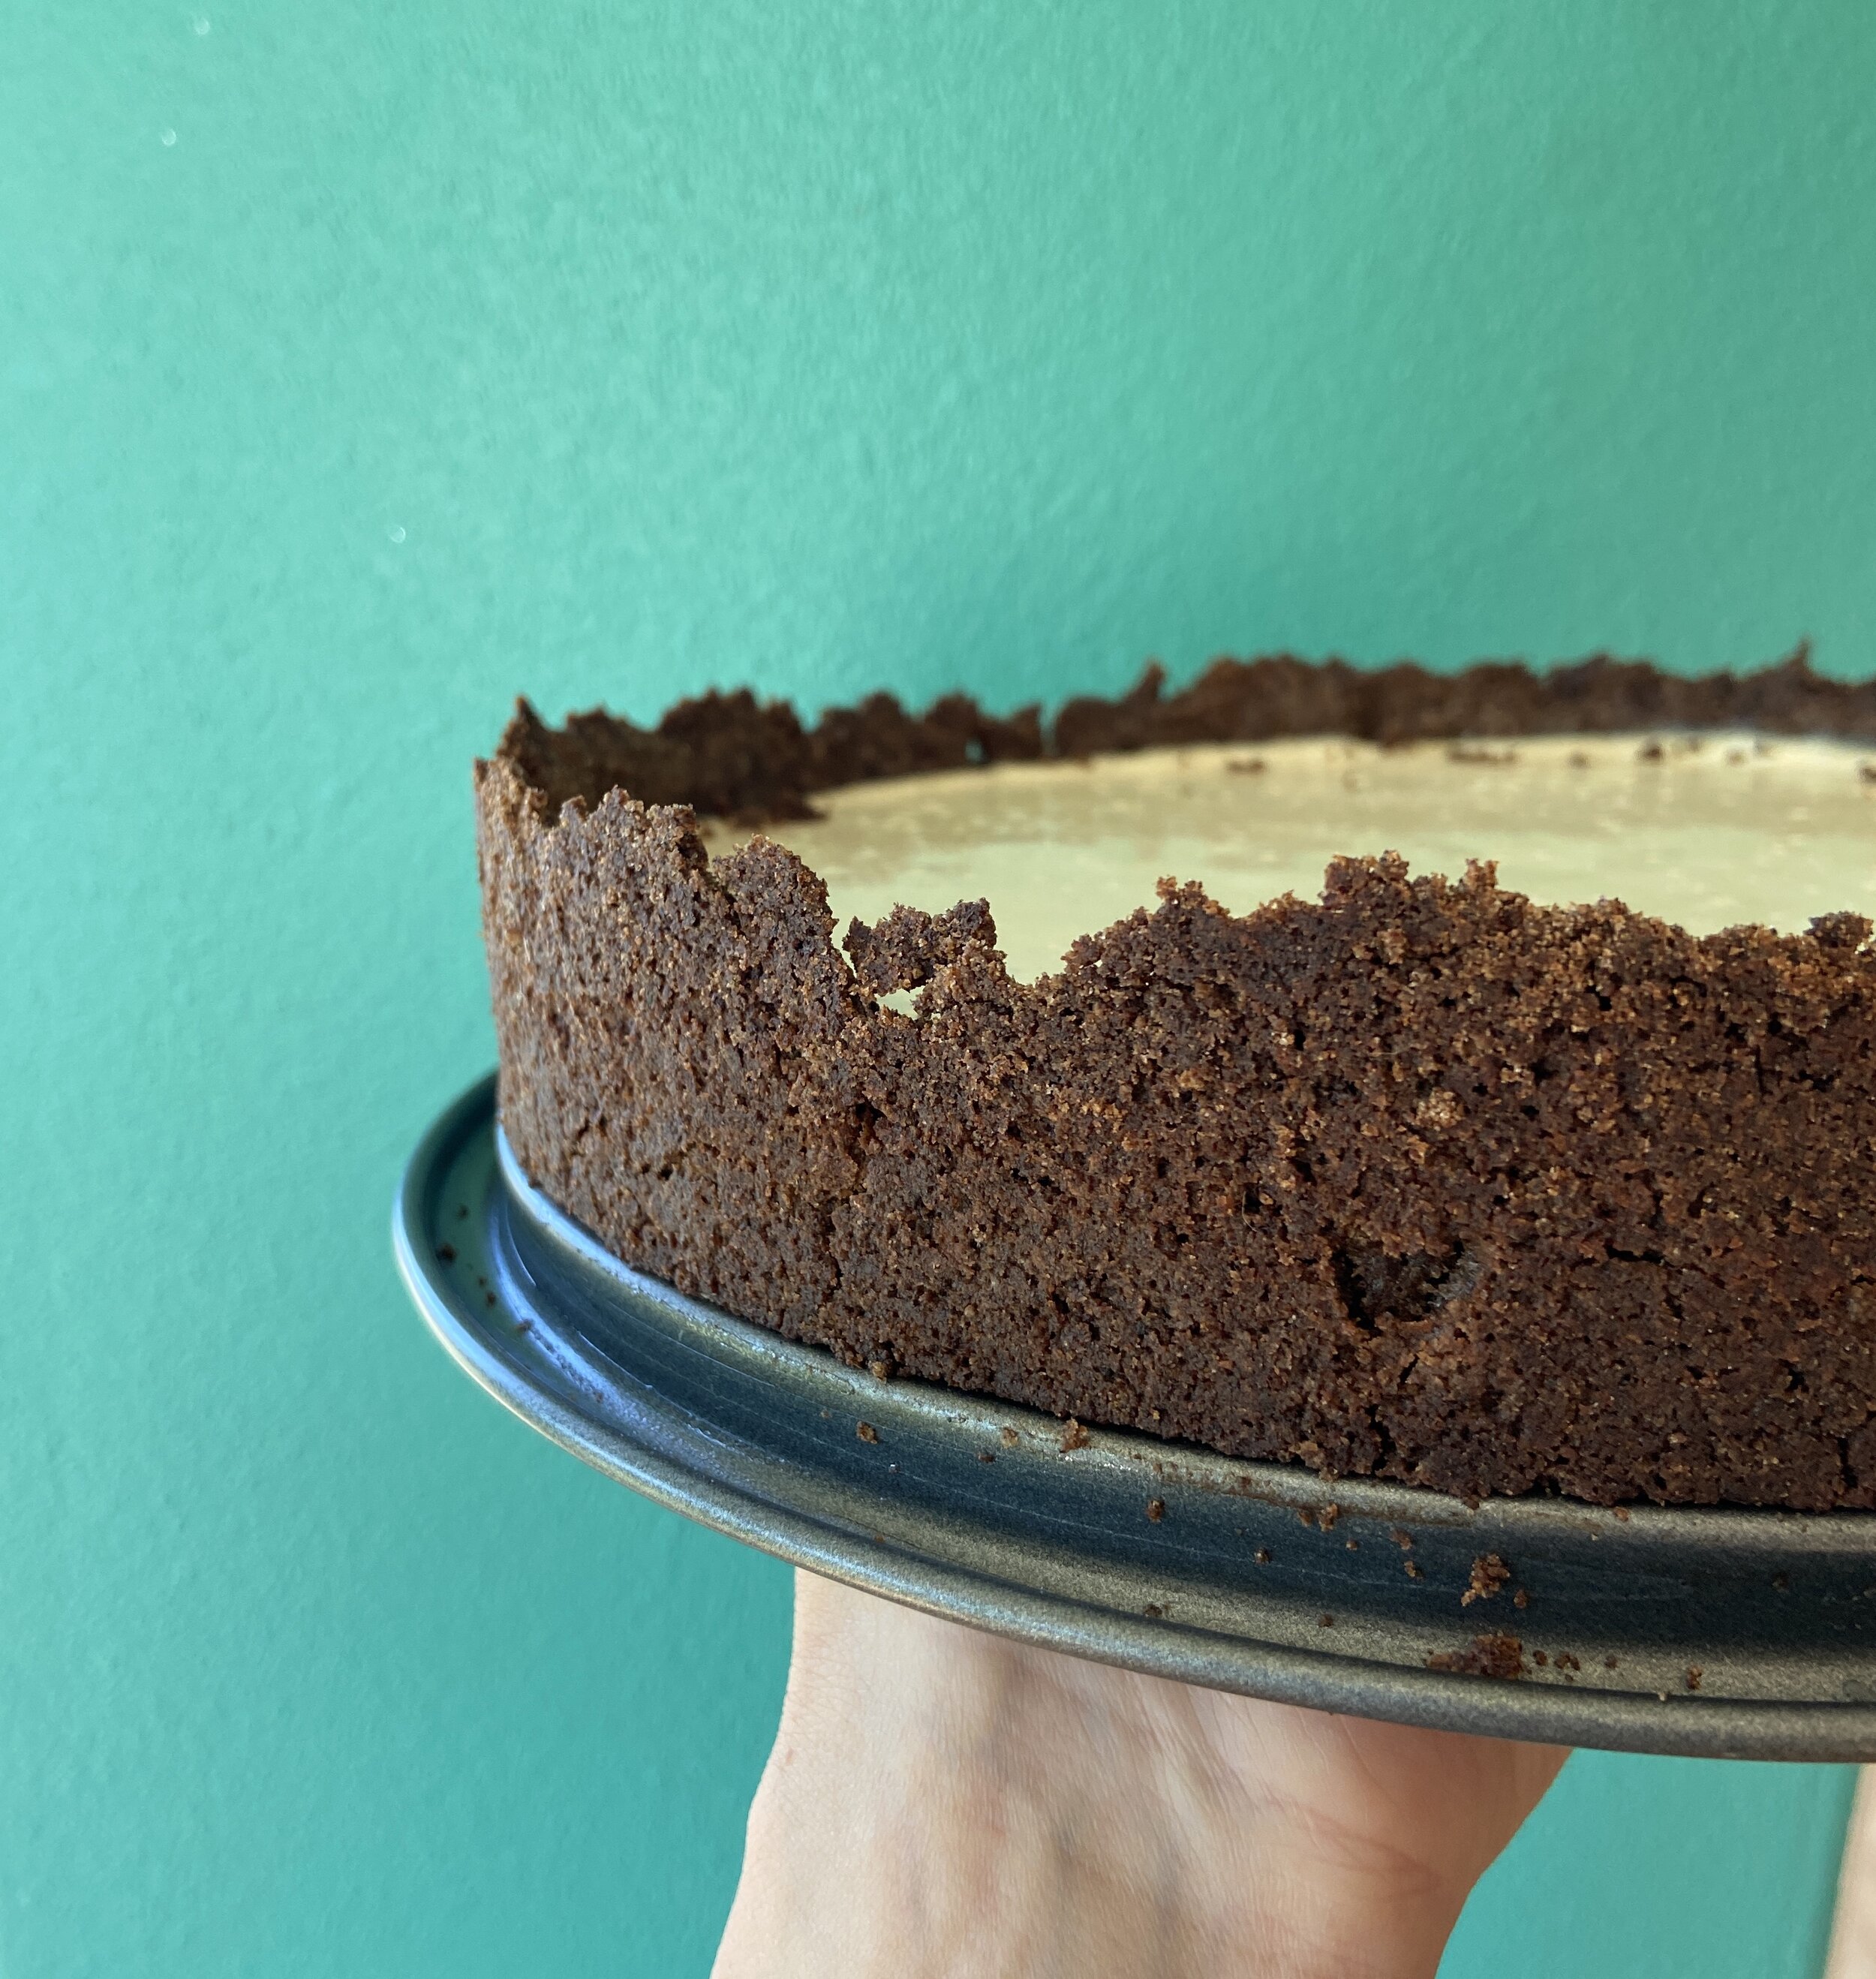
Crust me! I like to smash the crust up higher than the filling will be for a more dramatic rustic look.

Buckwheat Hazelnut Shortbread

Shortbread is called short bread because it is very high in fat, which gets in the way of gluten development, thus "shortening" the gluten strands. Gluten is a very strong and stretchy protein, so when a lot of fat gets in the way of its development, the tenderness and melt-in-your mouth effects increase. Food scientists wanted to capitalize on this so they created a fat product that shortens really well, in addition to being cheaper than butter and more solid and shelf-stable than vegetable oils. They call it shortening (naturally). However, in light of the fact that the trans fat in shortening is incredibly bad for your healthy and that butter tastes way better and is more sustainable, we will be using butter in our shortbread.
This twist on shortbread incorporates buckwheat flour and hazelnuts, producing a rustic, dark, and nutty cookie that is always a crowd-pleaser. Dough can be made in advance and frozen for later use. Makes 6 dozen cookies (recipe can be halved). “If you prefer a crispier crunch and more classic hazelnut shortbread, just replace the buckwheat flour with all-purpose flour, as buckwheat flour does absorb some moisture. ”
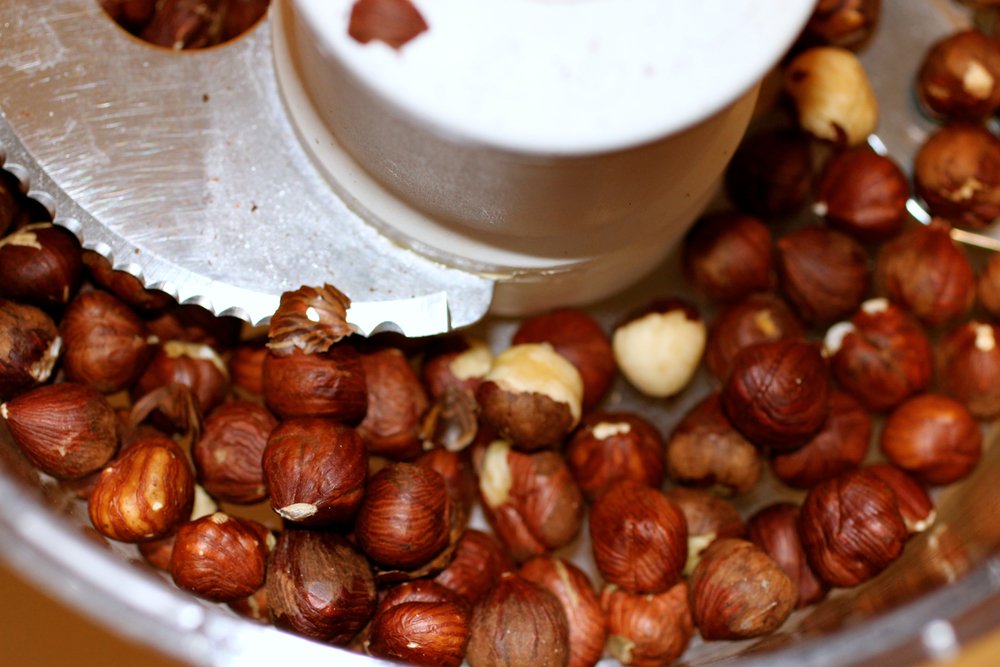
Blending hazelnuts in food processor.
1 cup hazelnuts (preferably raw, but I have done it with toasted - the shortbread is just…toastier!)
1-1/2 cup all-purpose flour
1/2 cup buckwheat flour
1 teaspoon baking powder
1 teaspoon sea salt
2/3 cup granulated sugar
16 tablespoons (2 sticks) unsalted butter, room temperature, diced
1 teaspoon vanilla
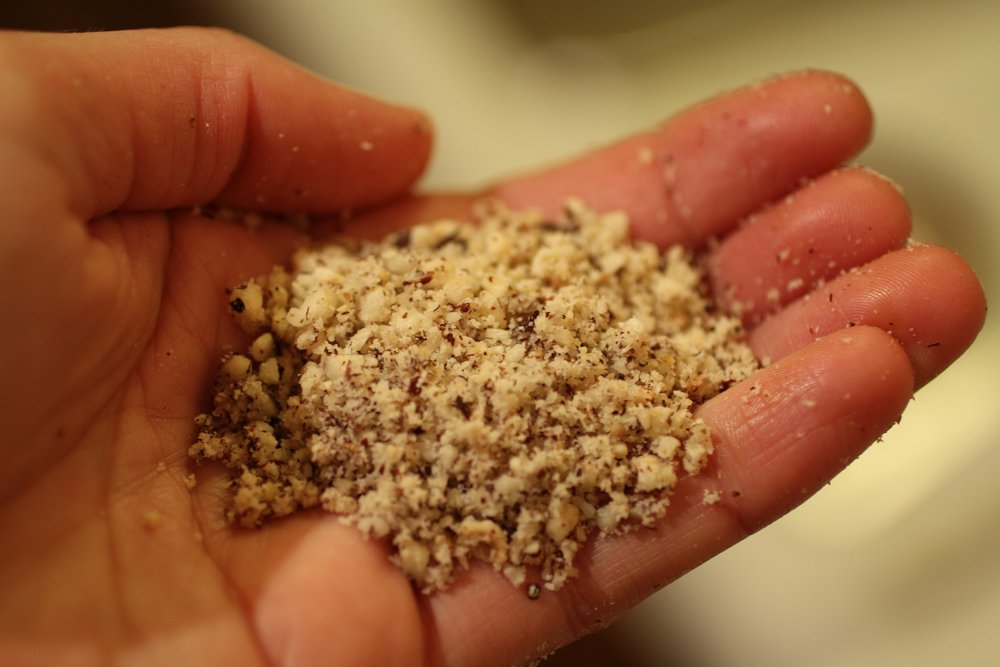
Hazelnuts post grinding.
Preheat oven to 350 degrees F.
Blend hazelnuts in food processor or with immersion blender until mostly fine, but with some medium-sizes coarse granules remaining, about 1 minute. Set aside.
Whisk all-purpose flour, buckwheat flour, baking powder, and salt in a medium bowl.
In large bowl, cut sugar into butter with fork, pastry blender, or hand blender until fluffy. Add vanilla and hazelnuts, mix to combine. Add flour mixture and blend until just incorporated.
Roll a ball, flatten, cover with plastic, and refrigerate 20 minutes. Remove from refrigerator and roll out onto lightly floured surface about 1/4” thick. Cut into rectangles about 1” x 2” and bake for 11-13 minutes until lightly toasted.


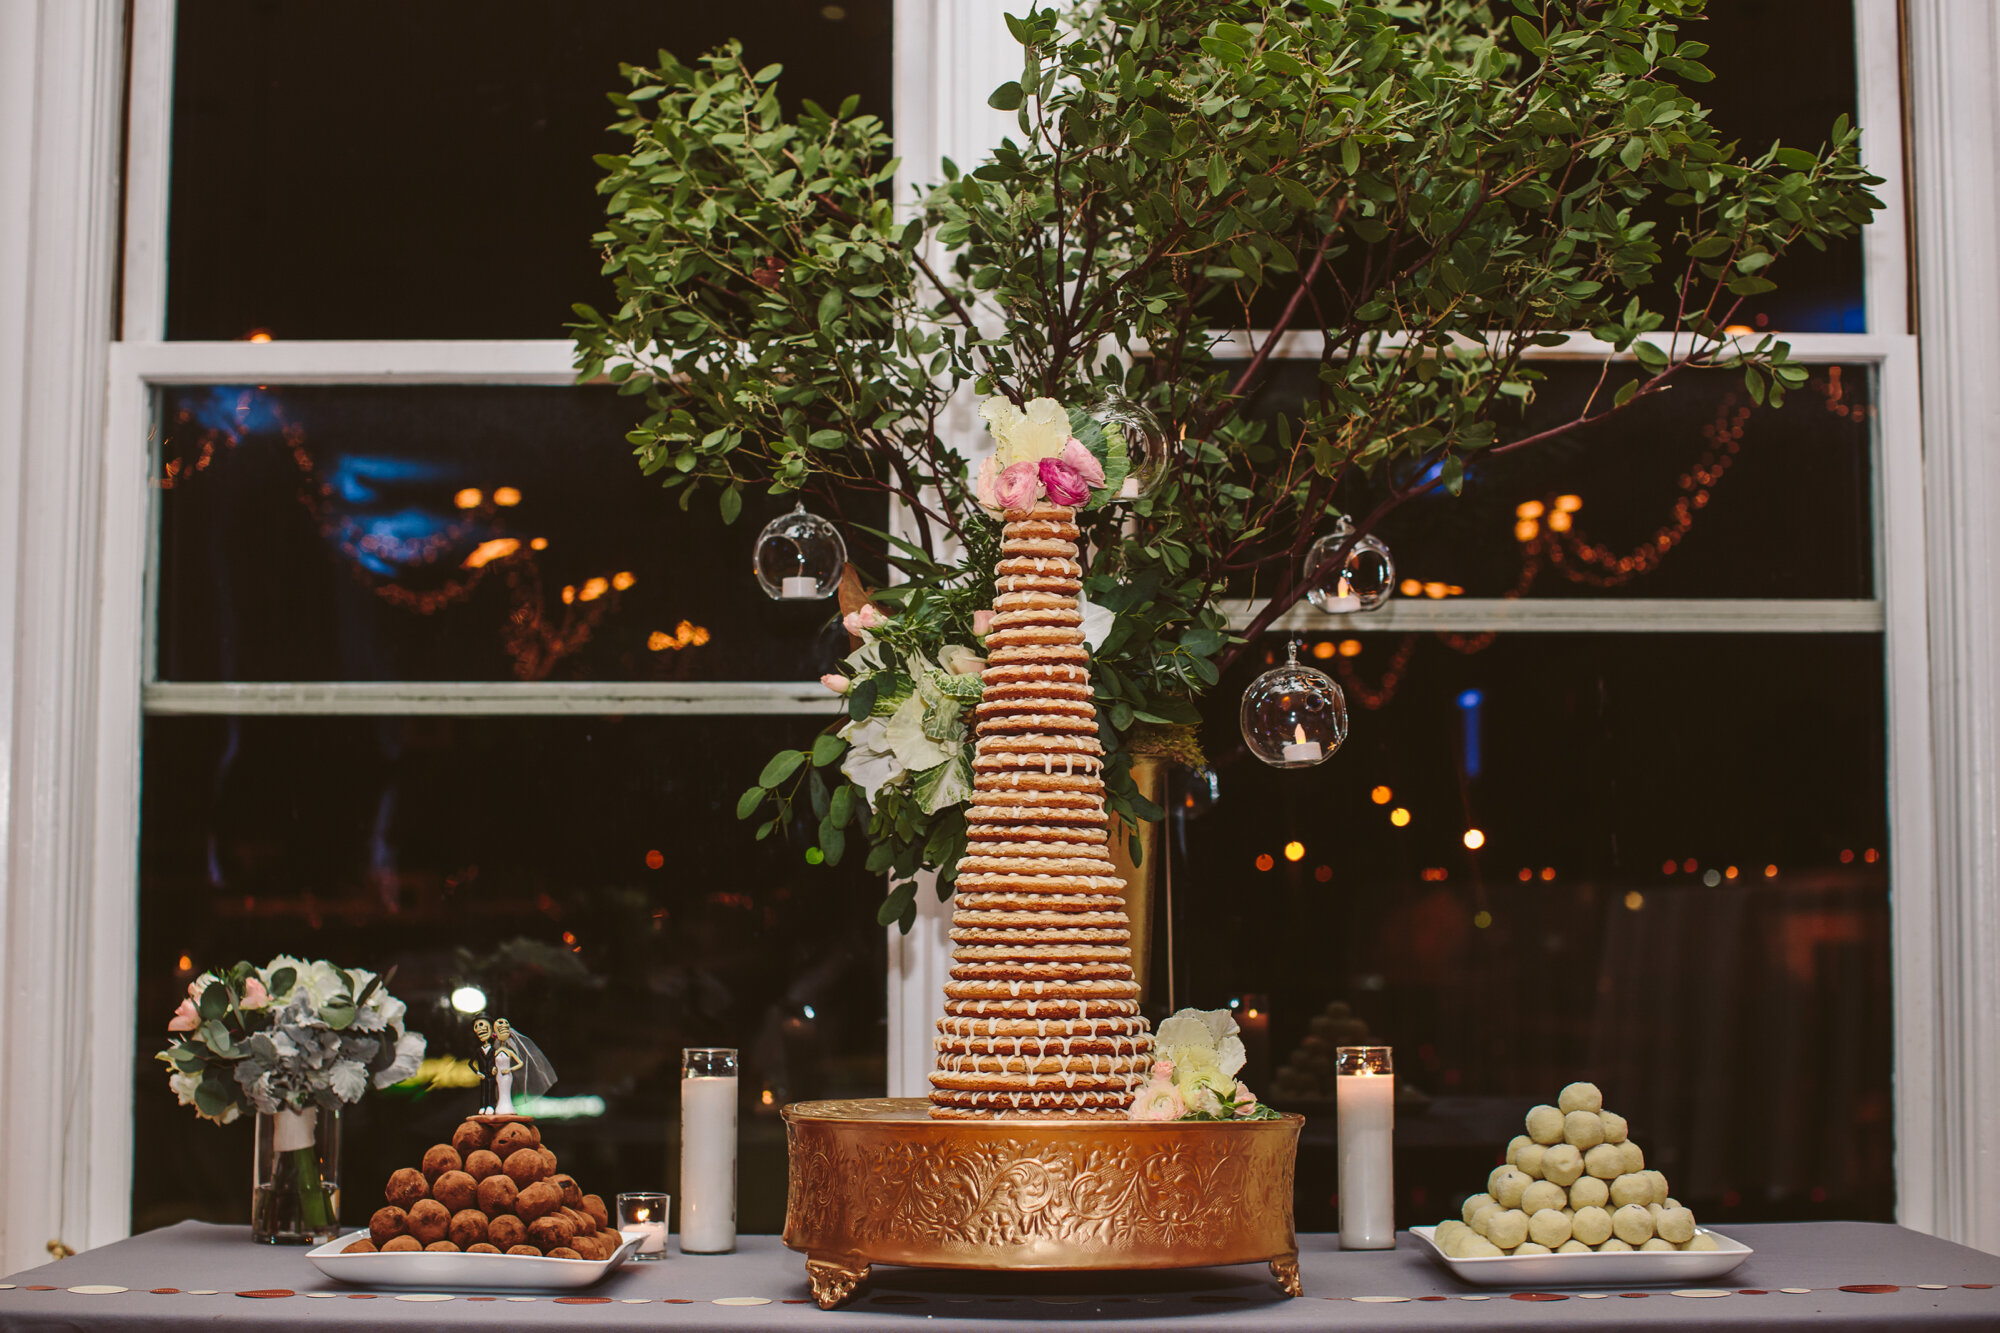
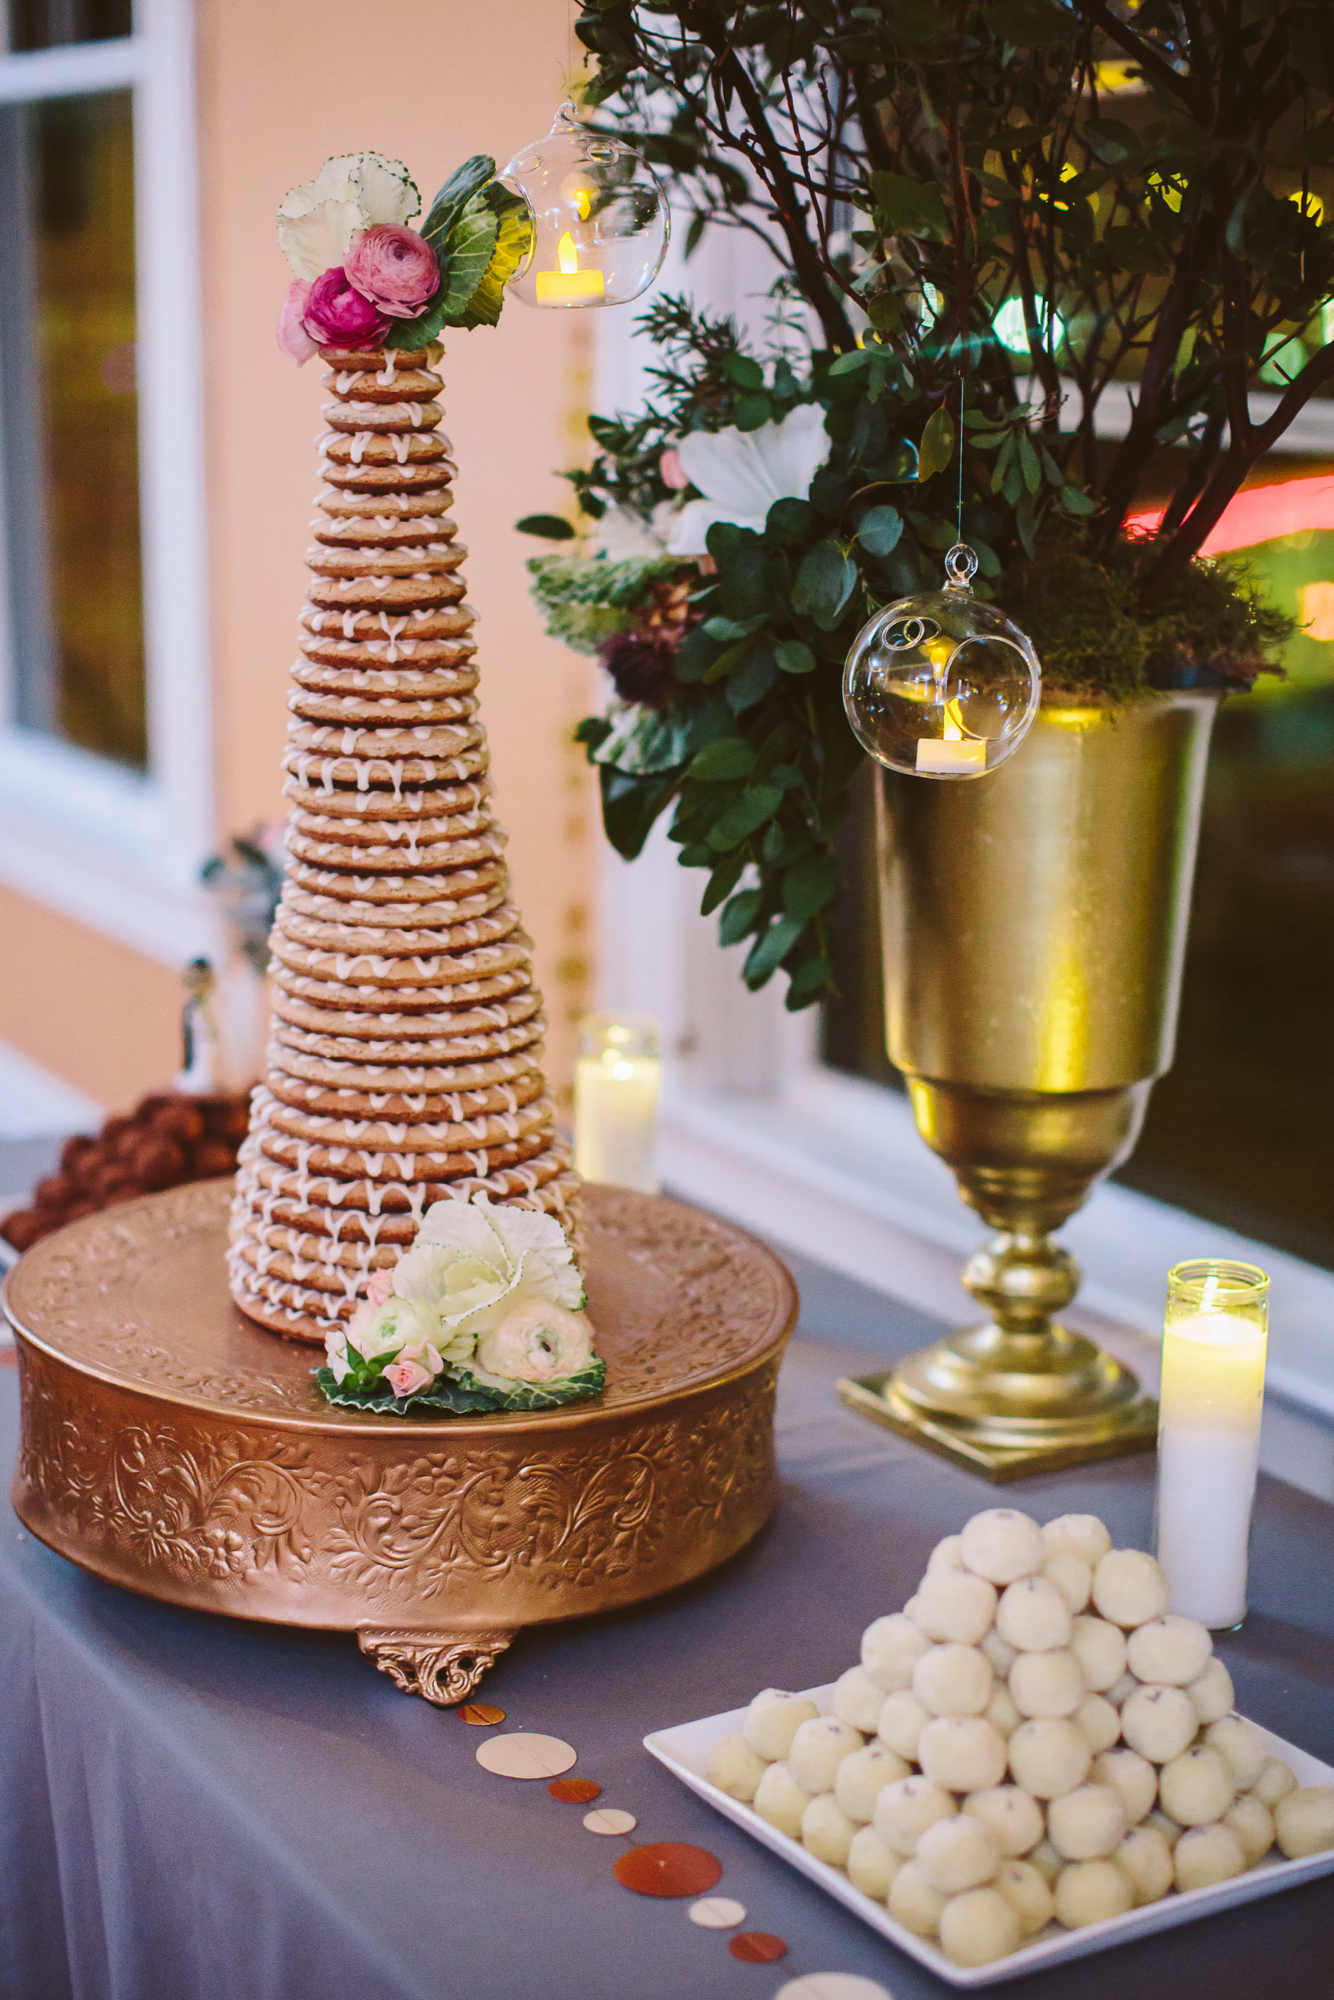
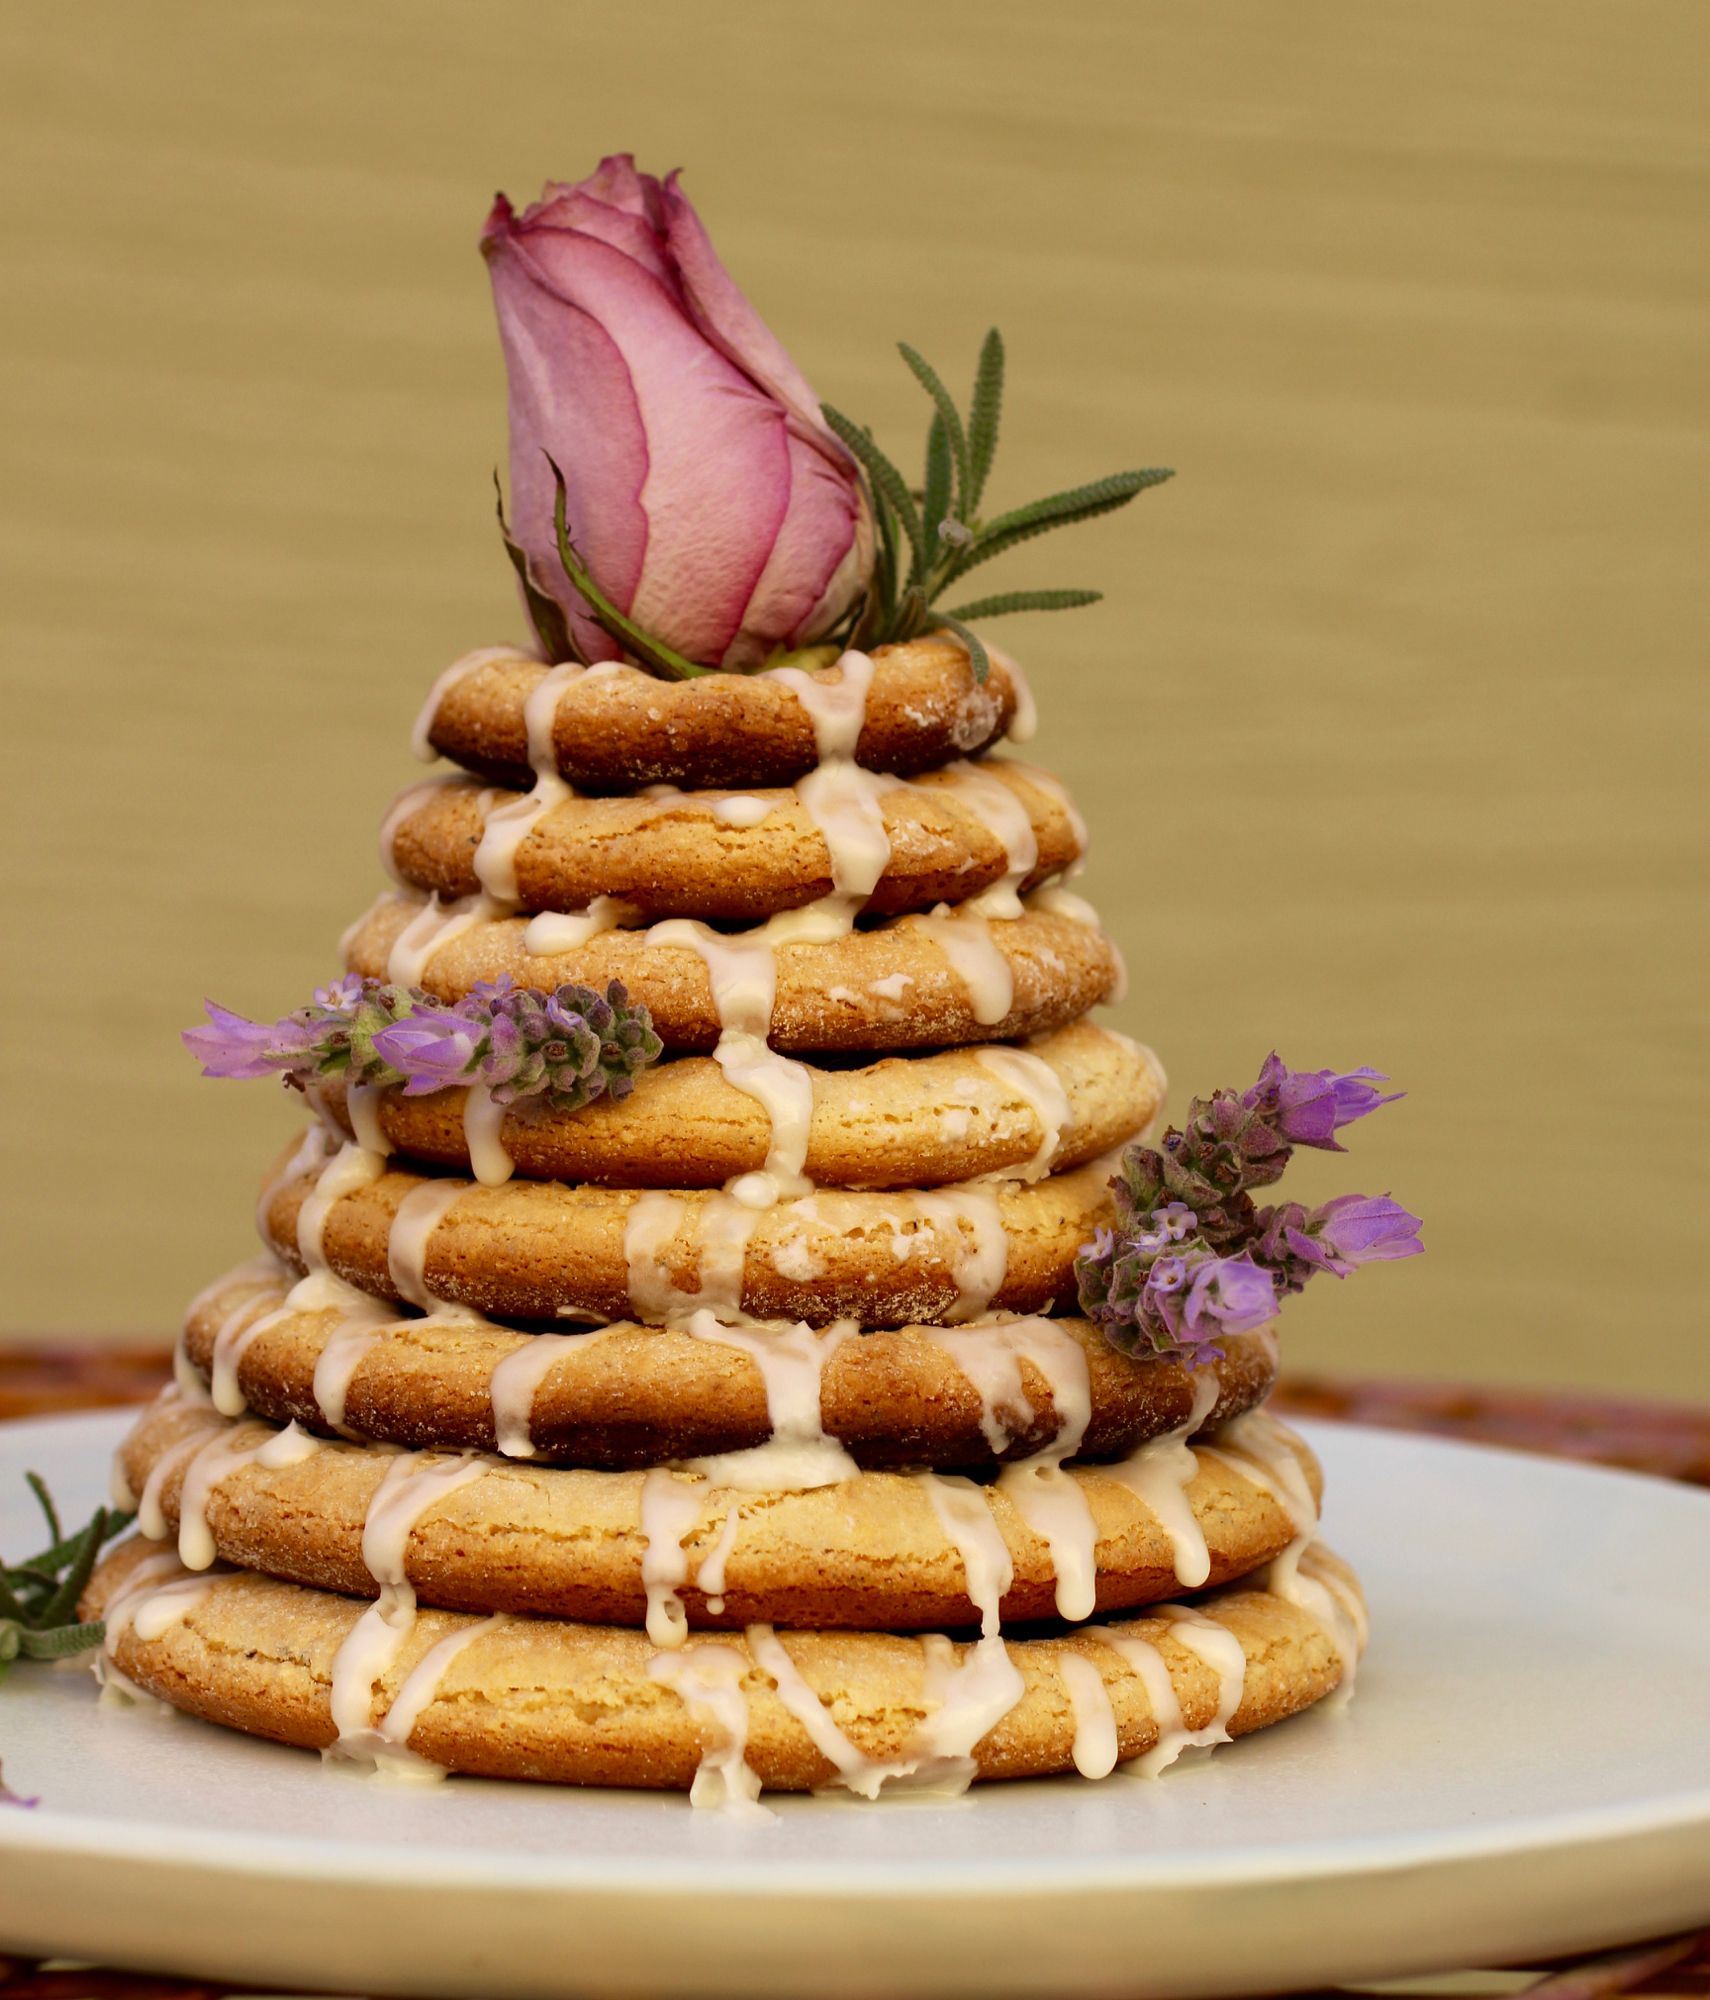
Kransekage: Danish almond (wedding) ring cake
Cardamom-flavored chewy rings traditional at weddings and New Year's Eve parties.

Beautifully stacked kransekage tower.
Like many Americans, I can trace my ancestry back to many, many different countries. However, whether because my last name is Rasmussen, a classic Danish last name, (and my great-grandfather was Rasmus Rasmussen) or because I just love the culture so much, I feel the biggest connection to my Scandinavian-Danish heritage. So when I was betrothed and started diving into the (very wide) world of weddings, I immediately began looking up Scandinavian and Danish wedding traditions. There were a few traditions that jumped out at me, including one that involves cutting the groom's tie to symbolize his imminent wife's good sewing skills, which we decided to forego, but just one that stuck. Naturally, the one that stuck was the traditional wedding cake, called Kransekage.
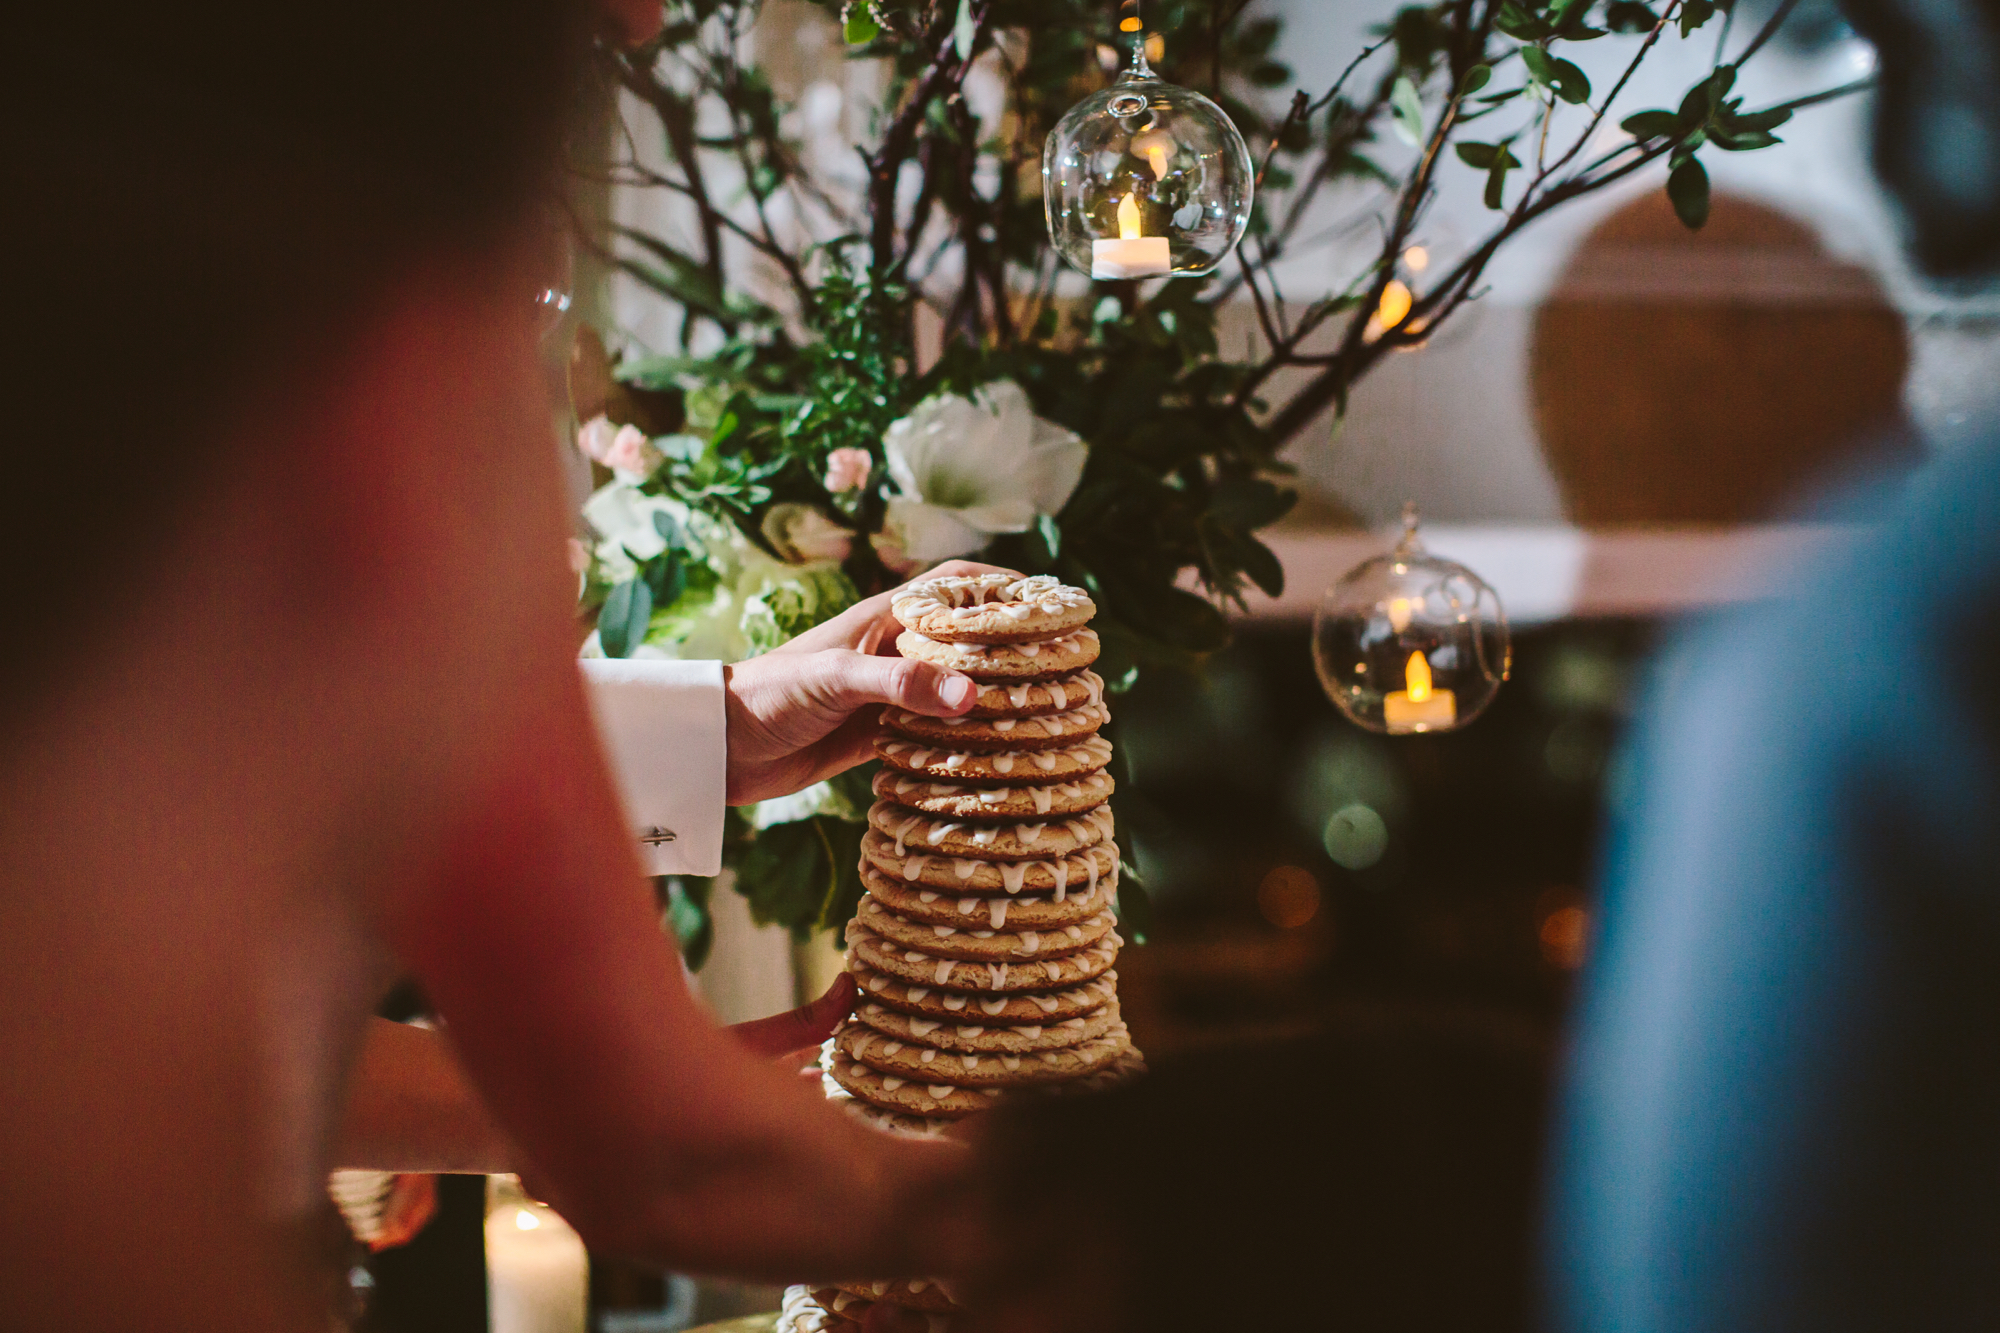
More cookie than cake, kransekage is typically served at weddings and New Year's Eve parties and our wedding just happened to be on December 31st. The cake rings symbolize wedding rings and I suppose for NYE they are symbolic of the year going 'round and 'round, but I'm just hypothesizing. Apart from the serendipity, I was also drawn to kransekage because it's flavored with cardamom, probably my favorite dessert flavoring, and made with almond meal, egg white, and sugar, which is a recipe for success in my book. Lemon zest is the final ingredient that provides a welcome brightness. That's right, just a total of five ingredients and if you're into the world of gluten free (I eat everything, but just sayin'), then this dessert is for you. On a romantic note, serving this cake at our wedding made sense because my now husband visited me in Denmark (I was on a research stint there for a summer) way back when we first started dating. I've told him numerous times that if he hadn't visited it probably wouldn't have worked out because, I mean, come on - live a little! Luckily, he did.
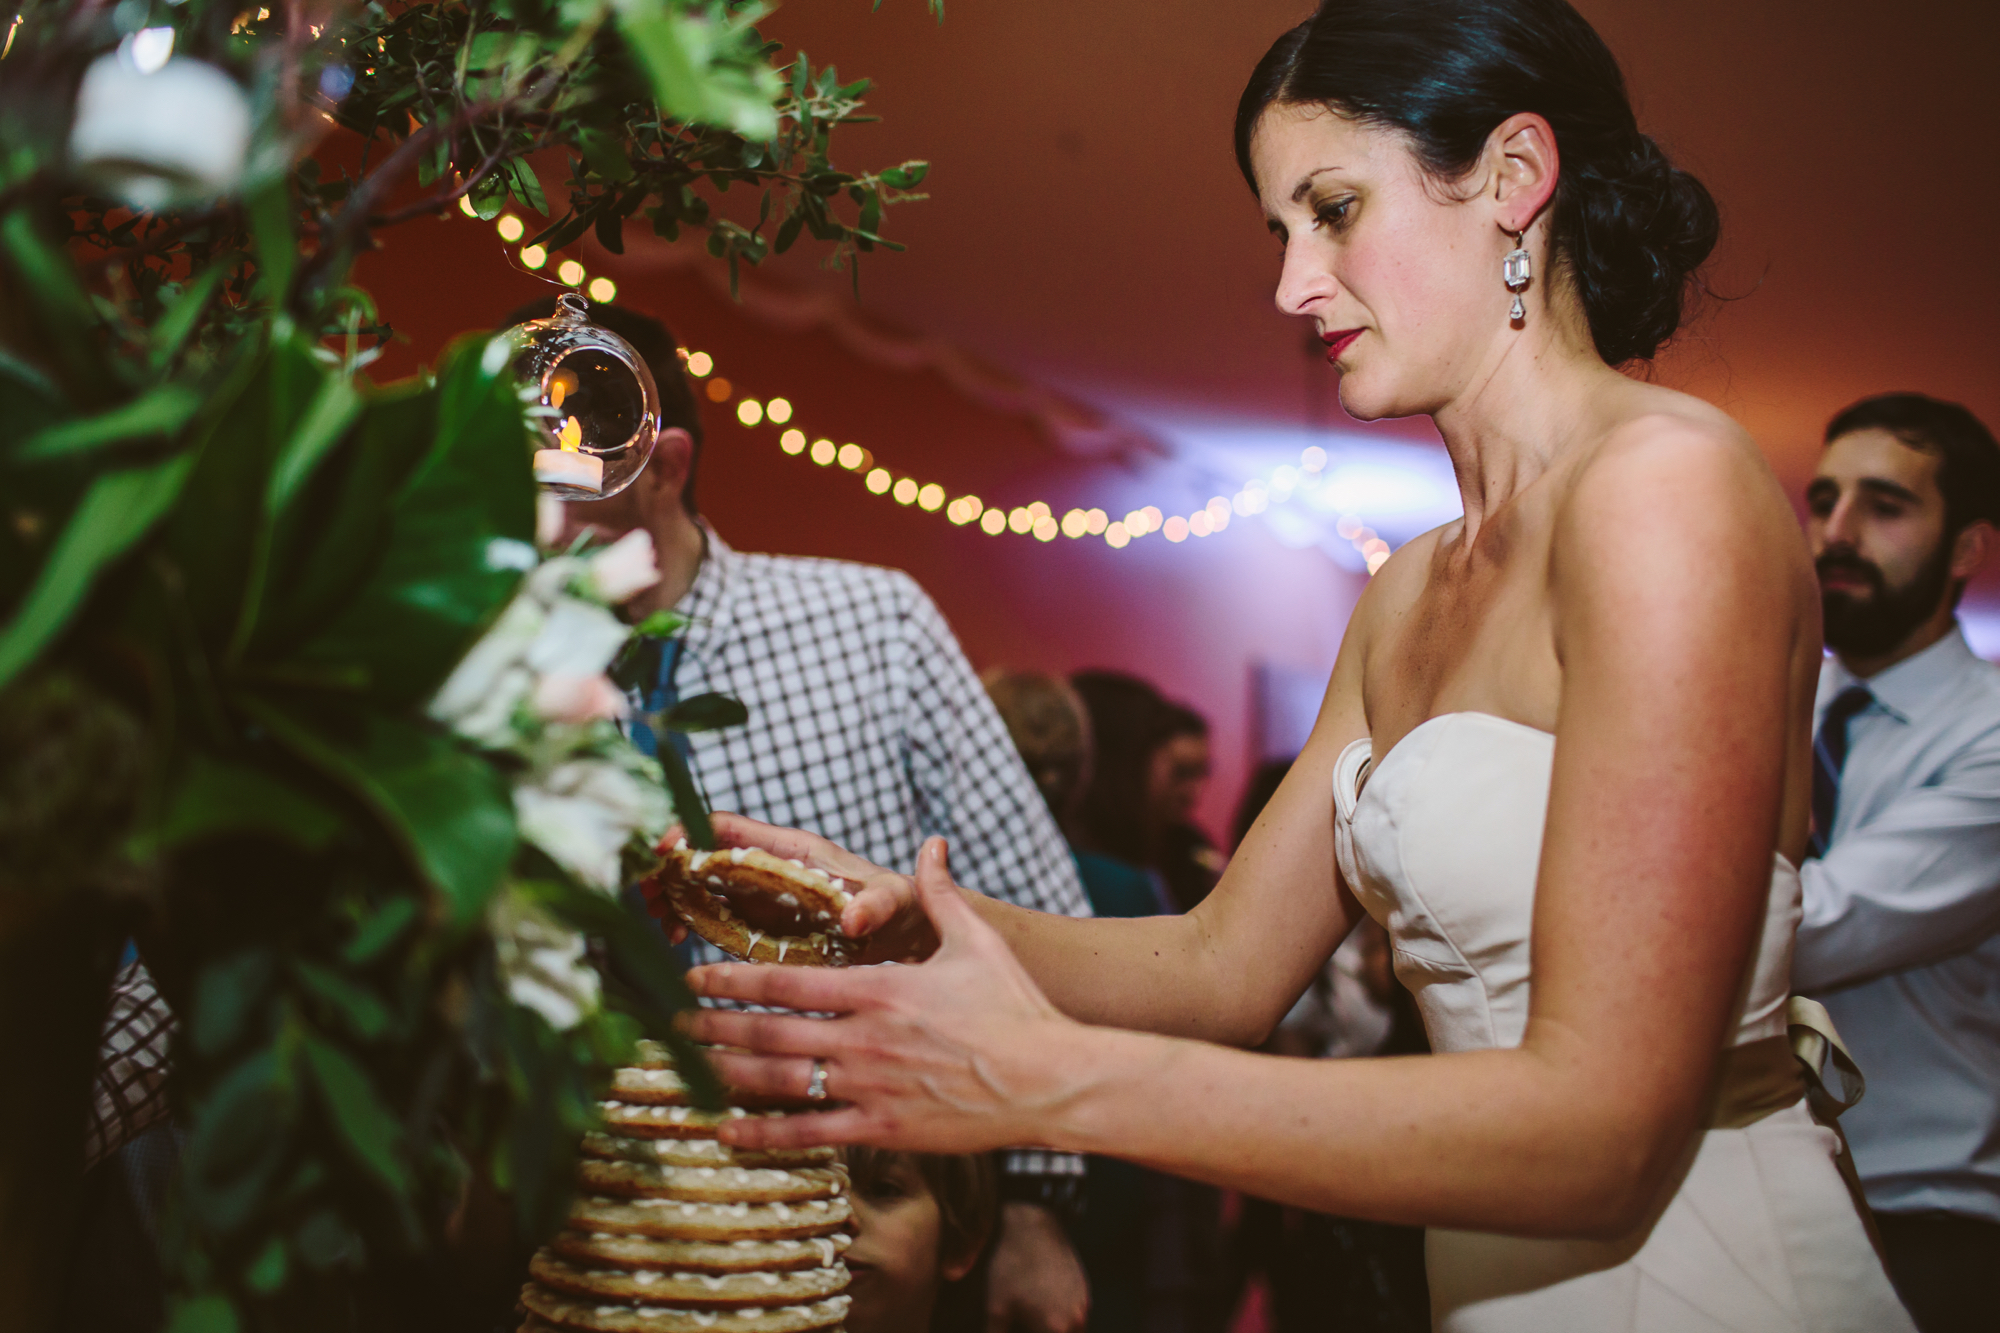

I originally intended to purchase a kransekage cake from a baker for the wedding, but being the crazy person that I am, I ended up making it. I'm not saying this to brag (okay, maybe I am just a little), but really - the cake is that easy that a bride can make it for her own wedding! I made my other friend's more classic American wedding cake and I would never put that pressure on myself as a bride. Also, I did have some delicious back-up truffles made by a local baker just in case. The great thing about this cake is that, in addition to being super simple and forgiving, you are supposed to make it a few days in advance to let the rings reach their optimal chewiness. Truly! Don't let the fact that you need special pans turn you away, as you can buy them on Amazon for twenty bucks. That being sad, I am absolutely willing to sell this cake to anyone who's interested in my making it for their wedding!
My wedding cake test-run.
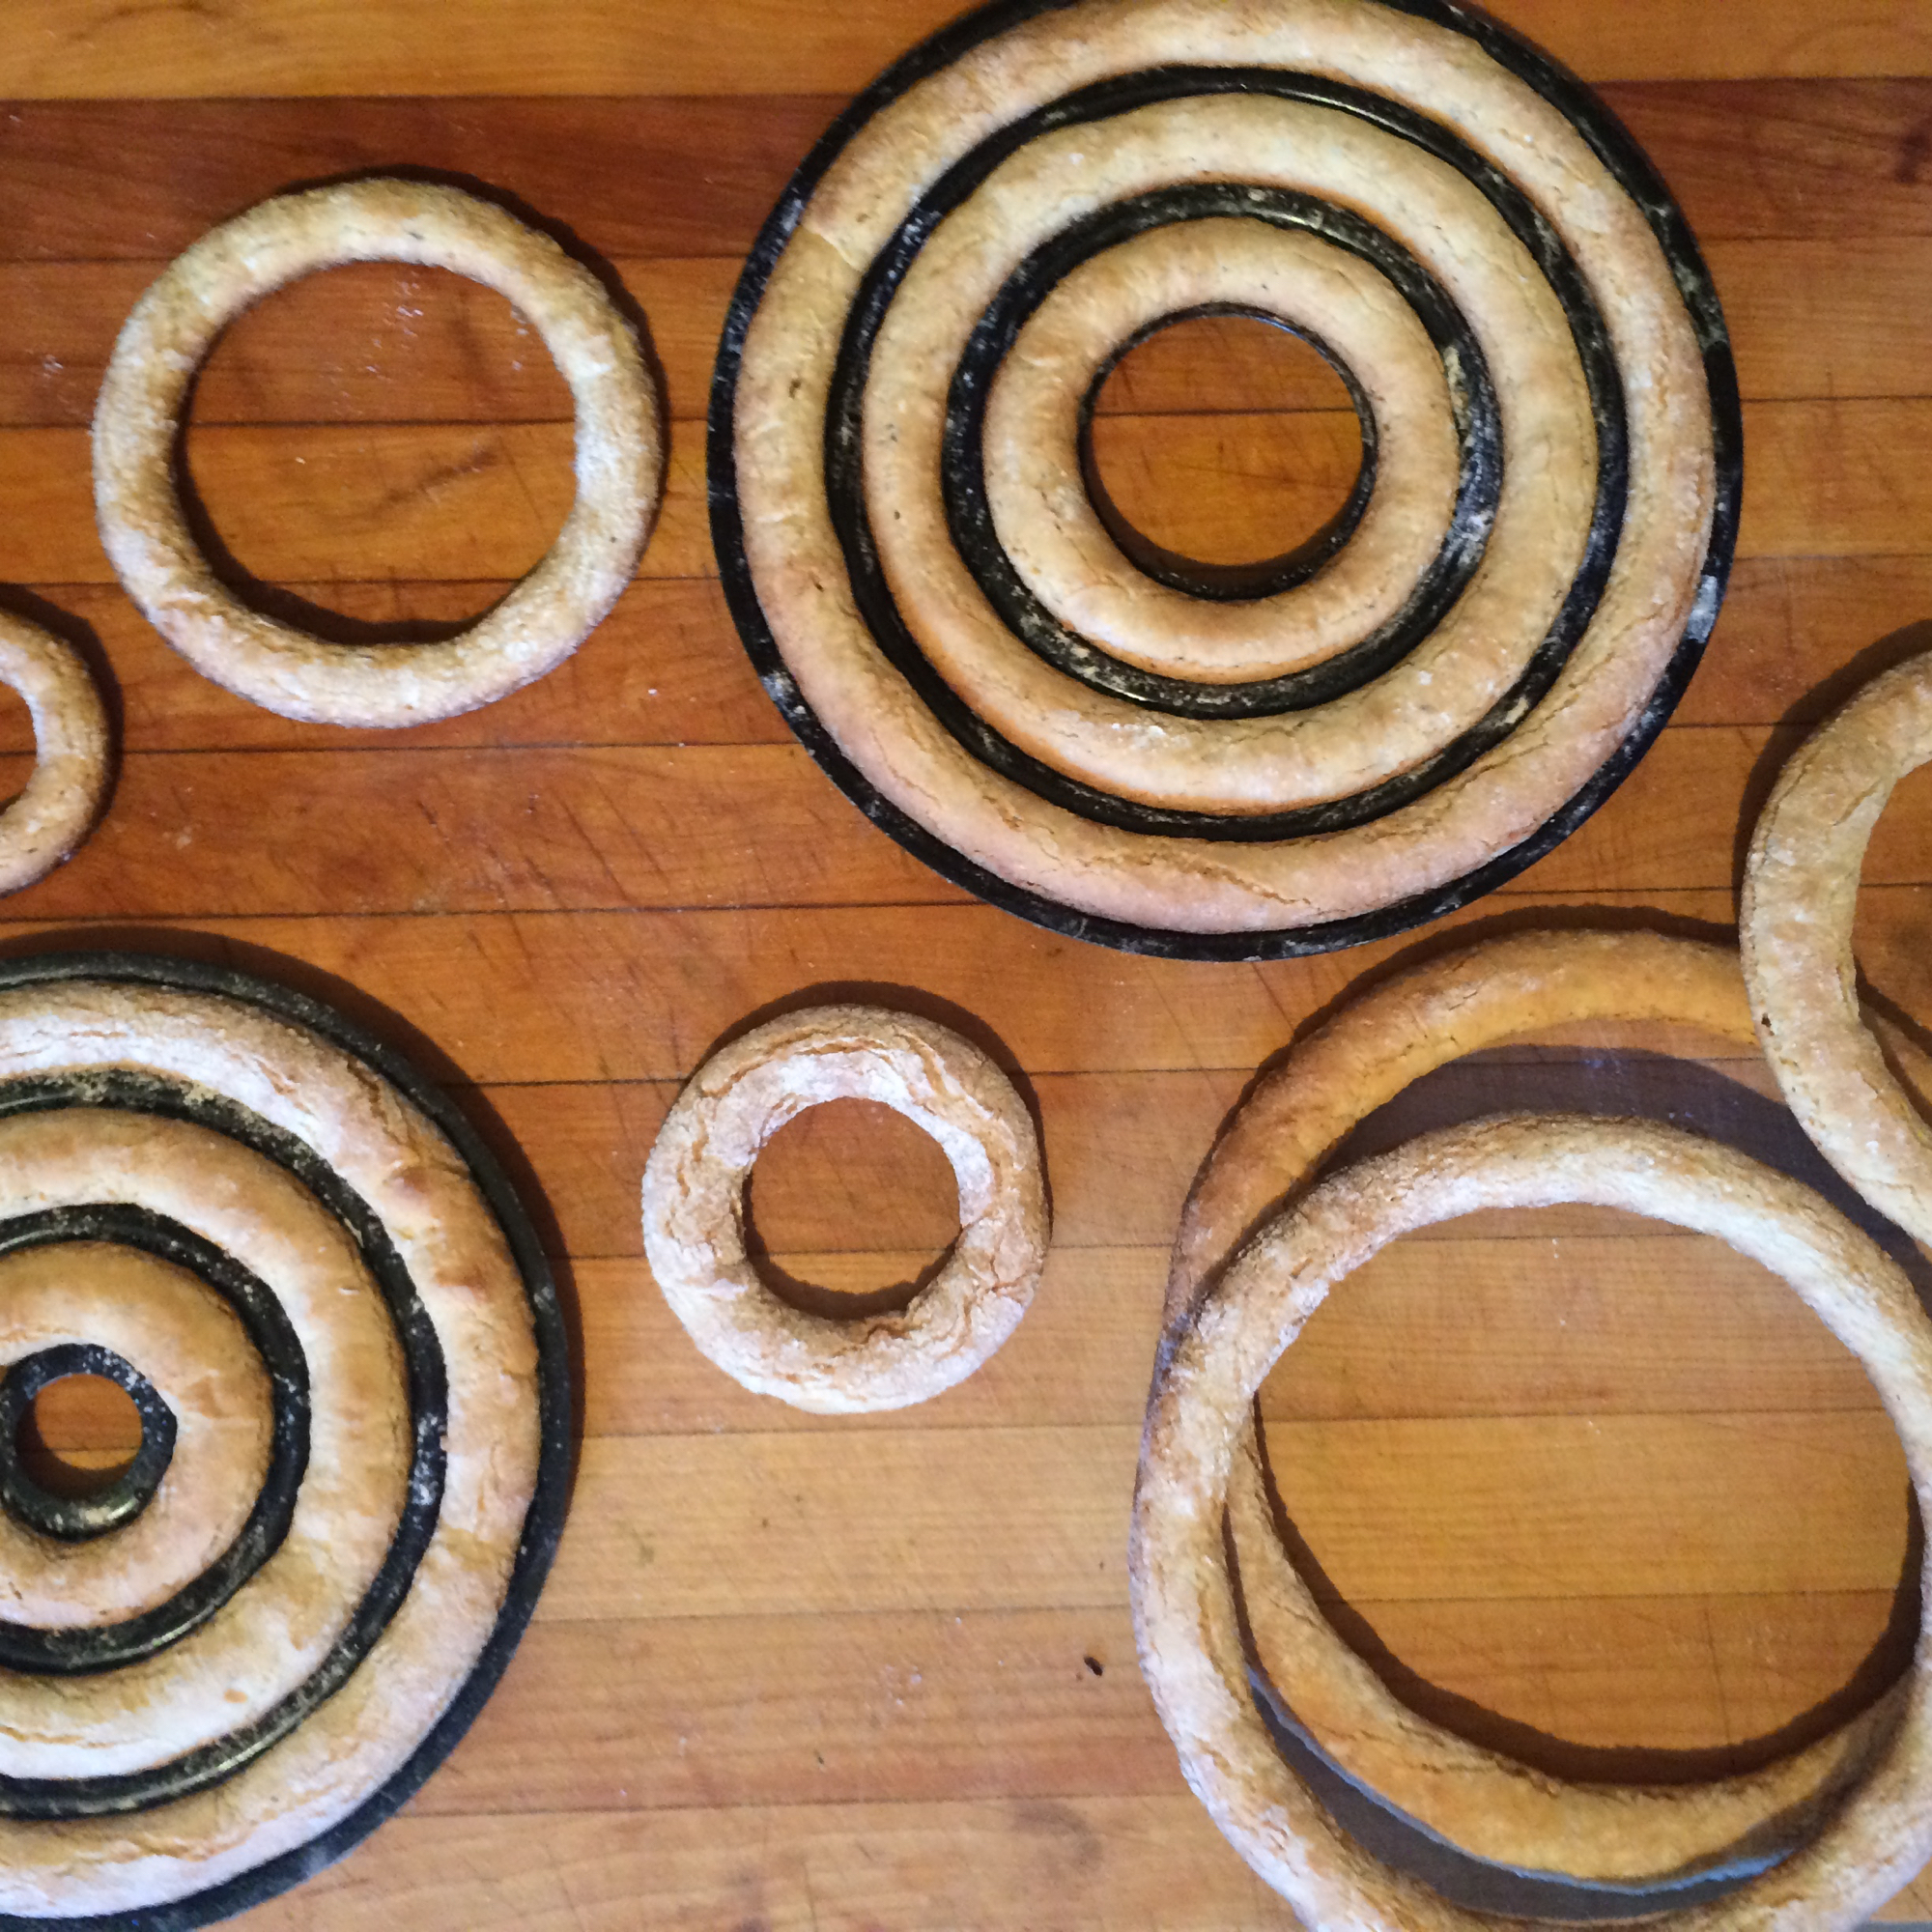
Almond-cardamom cake rings fresh from the oven.
I've been meaning to post this recipe for some time, but now that it's been nearly a year since our wedding(!) and I plan on making it again for our anniversary/NYE, I thought it was the appropriate time. Below I have the recipe to make about one (set of) pan's worth as well as 3x that, which is what I used for the wedding that served about 80 adults (though it went fast!) The preparation method is same for both. The measurements are in metric weight and U.S. volume, which I know is strange, but that's what worked the best for me!
Krasnsekage A Ingredients*: Makes enough dough for one set of these pans (~25 servings)
410 grams almond flour or finely ground almond meal (125g/cup), Bob's Red Mill's normal bag is 450g almond flour
410 grams powdered sugar
Up to 40 grams gluten-free, rice, or all-purpose flour (about 9g/Tbs, I ended up adding 3 Tbs at first, then 4 more Tbs)
3 tsp freshly grated lemon zest
3 tsp ground cardamom
1/2 tsp salt
3 large egg whites (= 90g)
Extra flour and grapeseed oil or cooking oil spray for greasing the molds
1 set of kransekage ring molds (18 rings)
Krasnsekage B Ingredients*: Makes enough dough for 3x one set of these pans (~80 servings)
1,100 grams (1¼ lbs) almond flour, or finely ground almond meal (125g/cup), Bob’s Red Mill normal bag is 450g almond flour
1,100 grams (1¼lbs) powdered sugar
Up to 100 grams (about 3/4 cup) gluten-free, rice, or all-purpose flour (about 9g/Tbs, I ended up adding 1/4 cup at first, then 6 more tablespoons)
2 tablespoons plus 2 teaspoons freshly grated lemon zest
2 tablespoons plus 2 teaspoons ground cardamom
1-1/2 teaspoons salt
8 large egg whites
Extra flour and grapeseed oil or cooking oil spray for greasing the molds
1 set of kransekage ring molds (18 rings)
Preparation: Same for both versions, but you'll prepare and bake 3 batches for Kransekage B.
Preheat the oven to 400°F. Spray the ring molds with cooking oil spray or lightly brush them with grapeseed oil. Lightly dust them with flour. Set them onto cookie sheets.
In a large bowl or bowl of electric mixer, combine the ground almonds, icing sugar, one-half of the flour, lemon zest, cardamom, and salt. Mix on low speed using hand mixer or Cuisinart to combine. Add egg whites one at time and beating well after each addition.
The dough should be starting to come together and come away from the sides of the bowl. You can tell if the dough is moist and pliable enough by pinching some of it between your fingers. It should stick nicely together. If it is too moist, add more flour by tablespoon. You are aiming for the texture of soft ‘playdough’.
Scrape the dough onto your work surface and pat it into a large ball. Cut the ball into quarters and roll each chunk into a smaller ball. Work with one ball at a time and keep the rest covered with plastic wrap to prevent them from drying out.
Roll each ball into a long, even rope. I found it handy to use a ruler to keep the ropes uniform. For my 18-ring set of molds, 1/2 inch thick. Lay a piece of rope into one ring at a time, pinching off the excess length and smoothing the ends together to seamlessly join them. The dough is very forgiving, and it`s easy to re-roll a few rings if you don`t have enough dough to make the last ones.
Bake in the preheated oven, in batches, for 8-12 minutes, until the rings are a golden caramel color. The smaller ring pans tend to cook faster, so check on them at 8 minutes.
Leave the cakes to cool in the pans, then carefully remove them. You may have to insert a knife tip underneath the rings to help them pop out of the pans. For Kransekage B, cool the cakes before removing, then wash, dry, and re-grease the pans for the next batch. Store cakse at room temperature for a 1-3 days, preferably 48 hours to give the perfect amount of chewiness. I found that it was better to leave to open air than putting in plastic bags.
Icing Recipe: Make below x1 for Kransekage A and x3 for Kransekage B
1 small egg white
1.5 cups (225 gms or ¼lb) icing sugar
1 teaspoons fresh lemon juice
Icing Preparation: Whisk together the egg white(s) and icing sugar. Add enough lemon juice to make it a good drizzling consistency. Spoon the icing into a piping bag with a small round tip, a squeezable plastic piping bottle made for icing, or a heavy duty plastic bag and snip off a tiny bit of one corner to make a round hole.
To assemble the cake, lay out your rings in order of size. Start with the largest ring and attach it to your base or plate with a ring of icing. Pipe zig-zags of icing loosely over the top of the ring. I added an extra squeeze of icing all the way around the ring, as added insurance since this wedding cake was so tall. If you are making a regular height cake, you won`t need the extra ring of icing -the zig-zags will be enough to hold the rings together. Place the next smallest ring on top and repeat. Continue until you reach the smallest ring at the top.
<img src="https://images.squarespace-cdn.com/content/v1/53df581ae4b0461efc5879aa/1481141410783-4NQ94ALIT65IOCK998HM/image-asset.jpeg" alt="The cake worked!" />

The cake worked!
Elder Almond Pound Cake
Elderflower and elderberries unite for a perfect taste of summer, in all its glory.

This nutty loaf cake uses both elderflower cordial and elderberries for the complete elder experience. Cordial can be substituted for any sweet syrup and elderberries for other berries, if you only happen to have one of the gifts from the elder tree on hand. The time for harvesting elderflower in the Bay Area is May through June/July and elderberry season is July through September. See related the Regal Elderlflower article for information on the elder tree and harvesting elderflower - more information on harvesting elderberries will be available soon as July approaches! Serves 8.
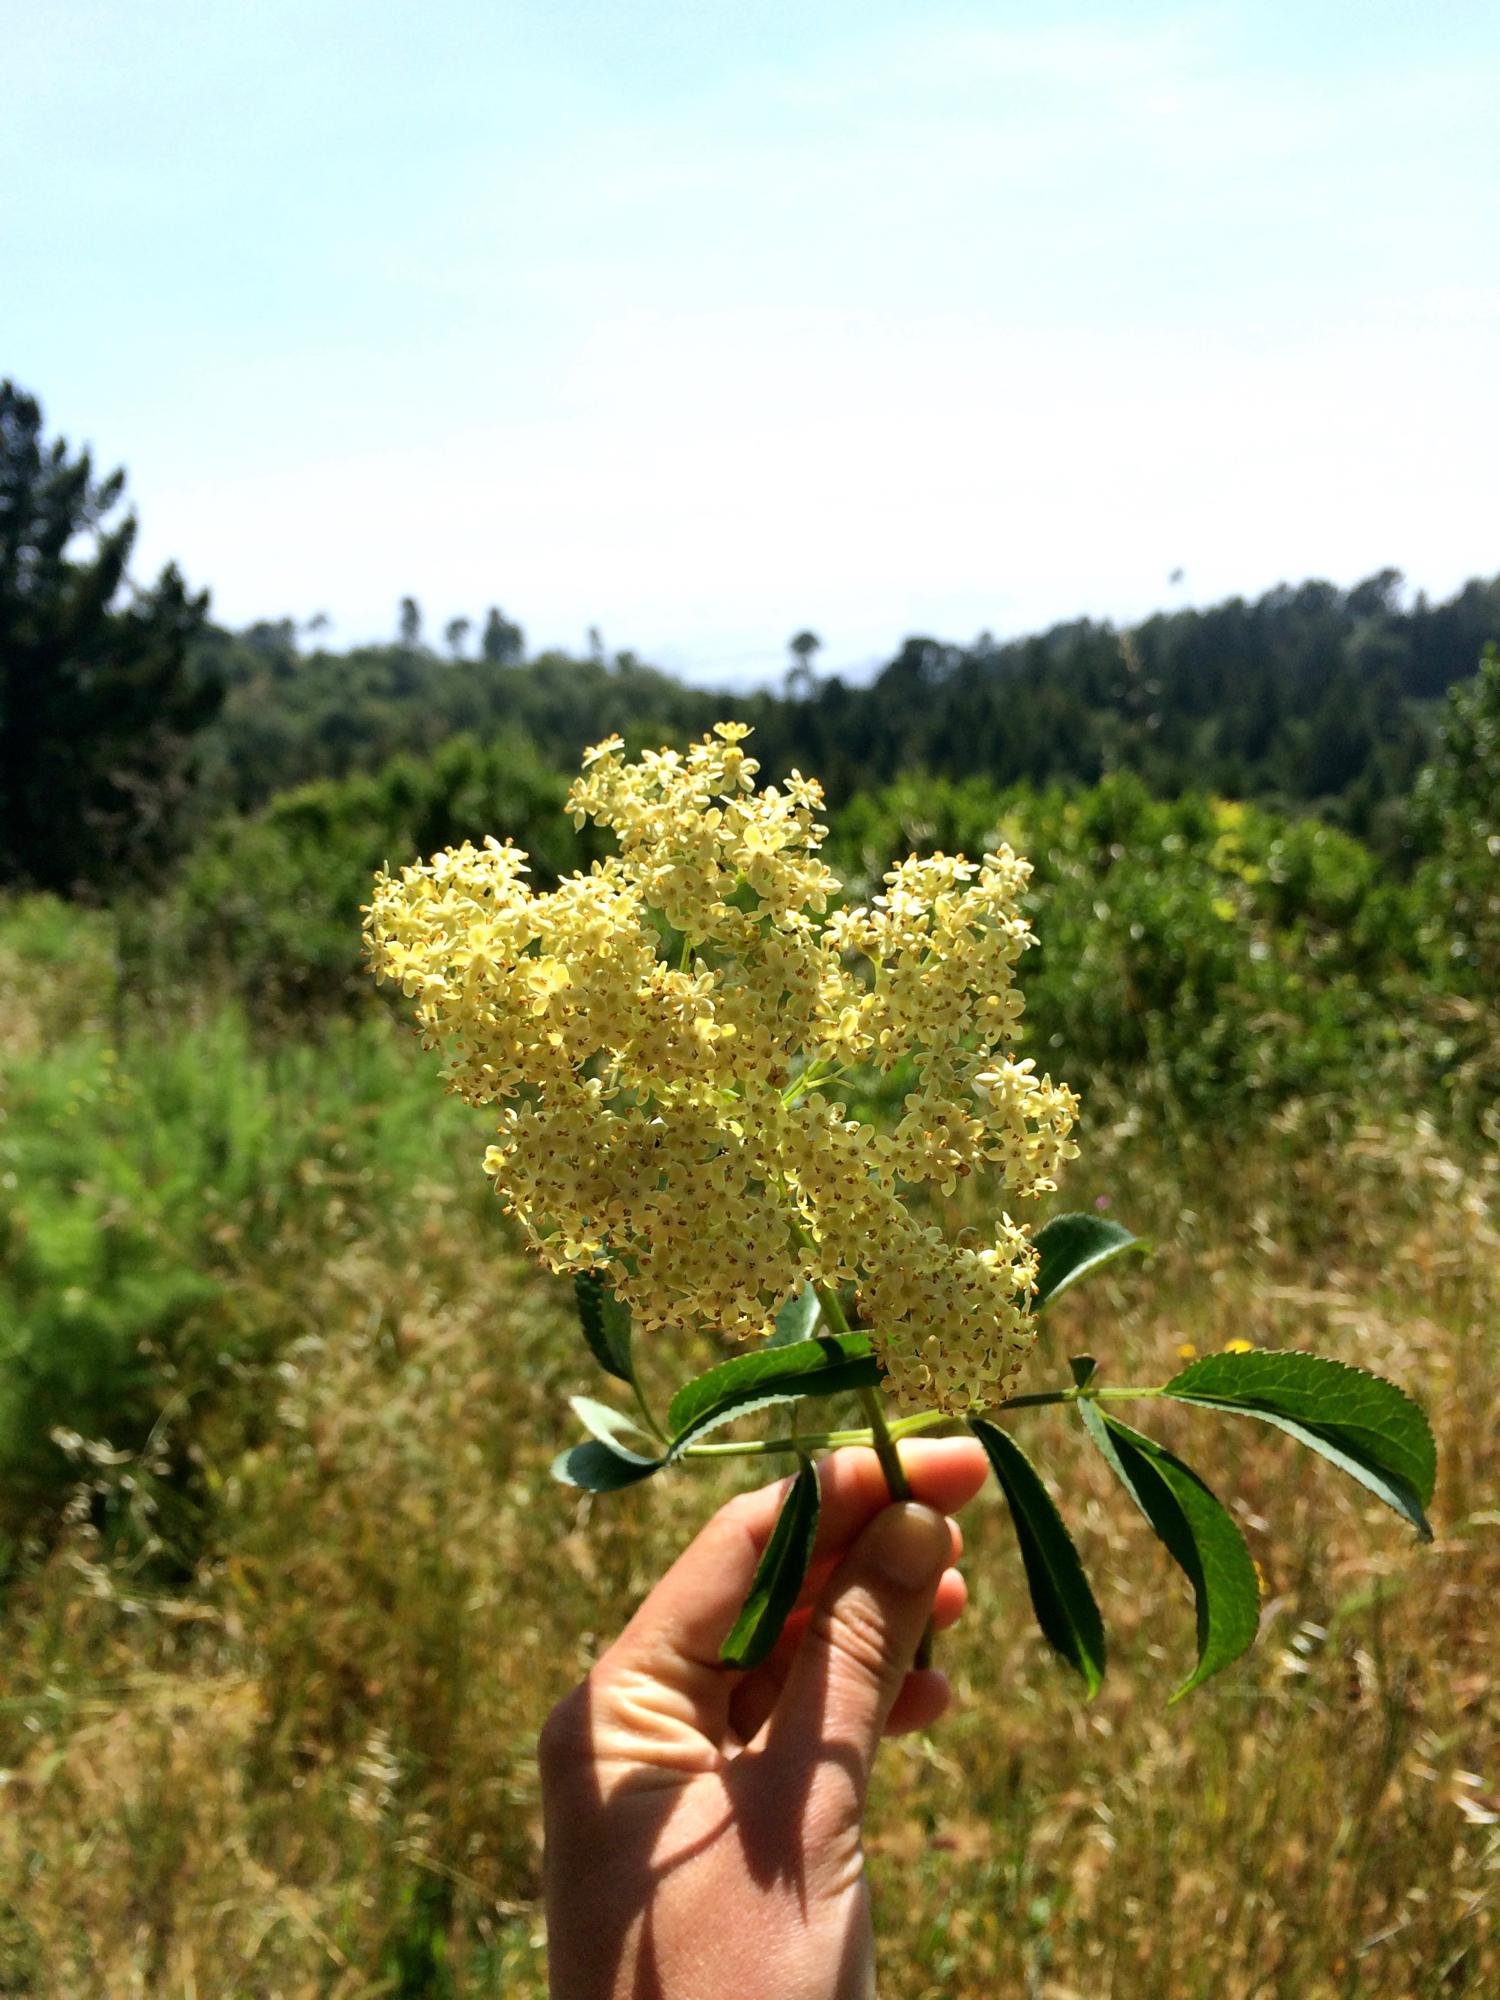
Elderflower
Harvest May - July.

Elderberry
Harvest July - September.
3/4 cup unsalted butter, room temperature
3/4 cup granulated sugar
4 eggs
2 tablespoons plain yogurt
6 tablespoons elderflower cordial (see Edible East Bay Summer 2016 issue for recipe or use St.Germaine or any other sweet syrup), divided
1 cup all-purpose flour
3/4 cup almond meal
2 teaspoons baking powder
3/4 teaspoons salt
2 cups fresh elderberries, washed and dried (may be previously frozen, can use other berries if needed)
1 cup whipped cream or crème fraîche (optional)
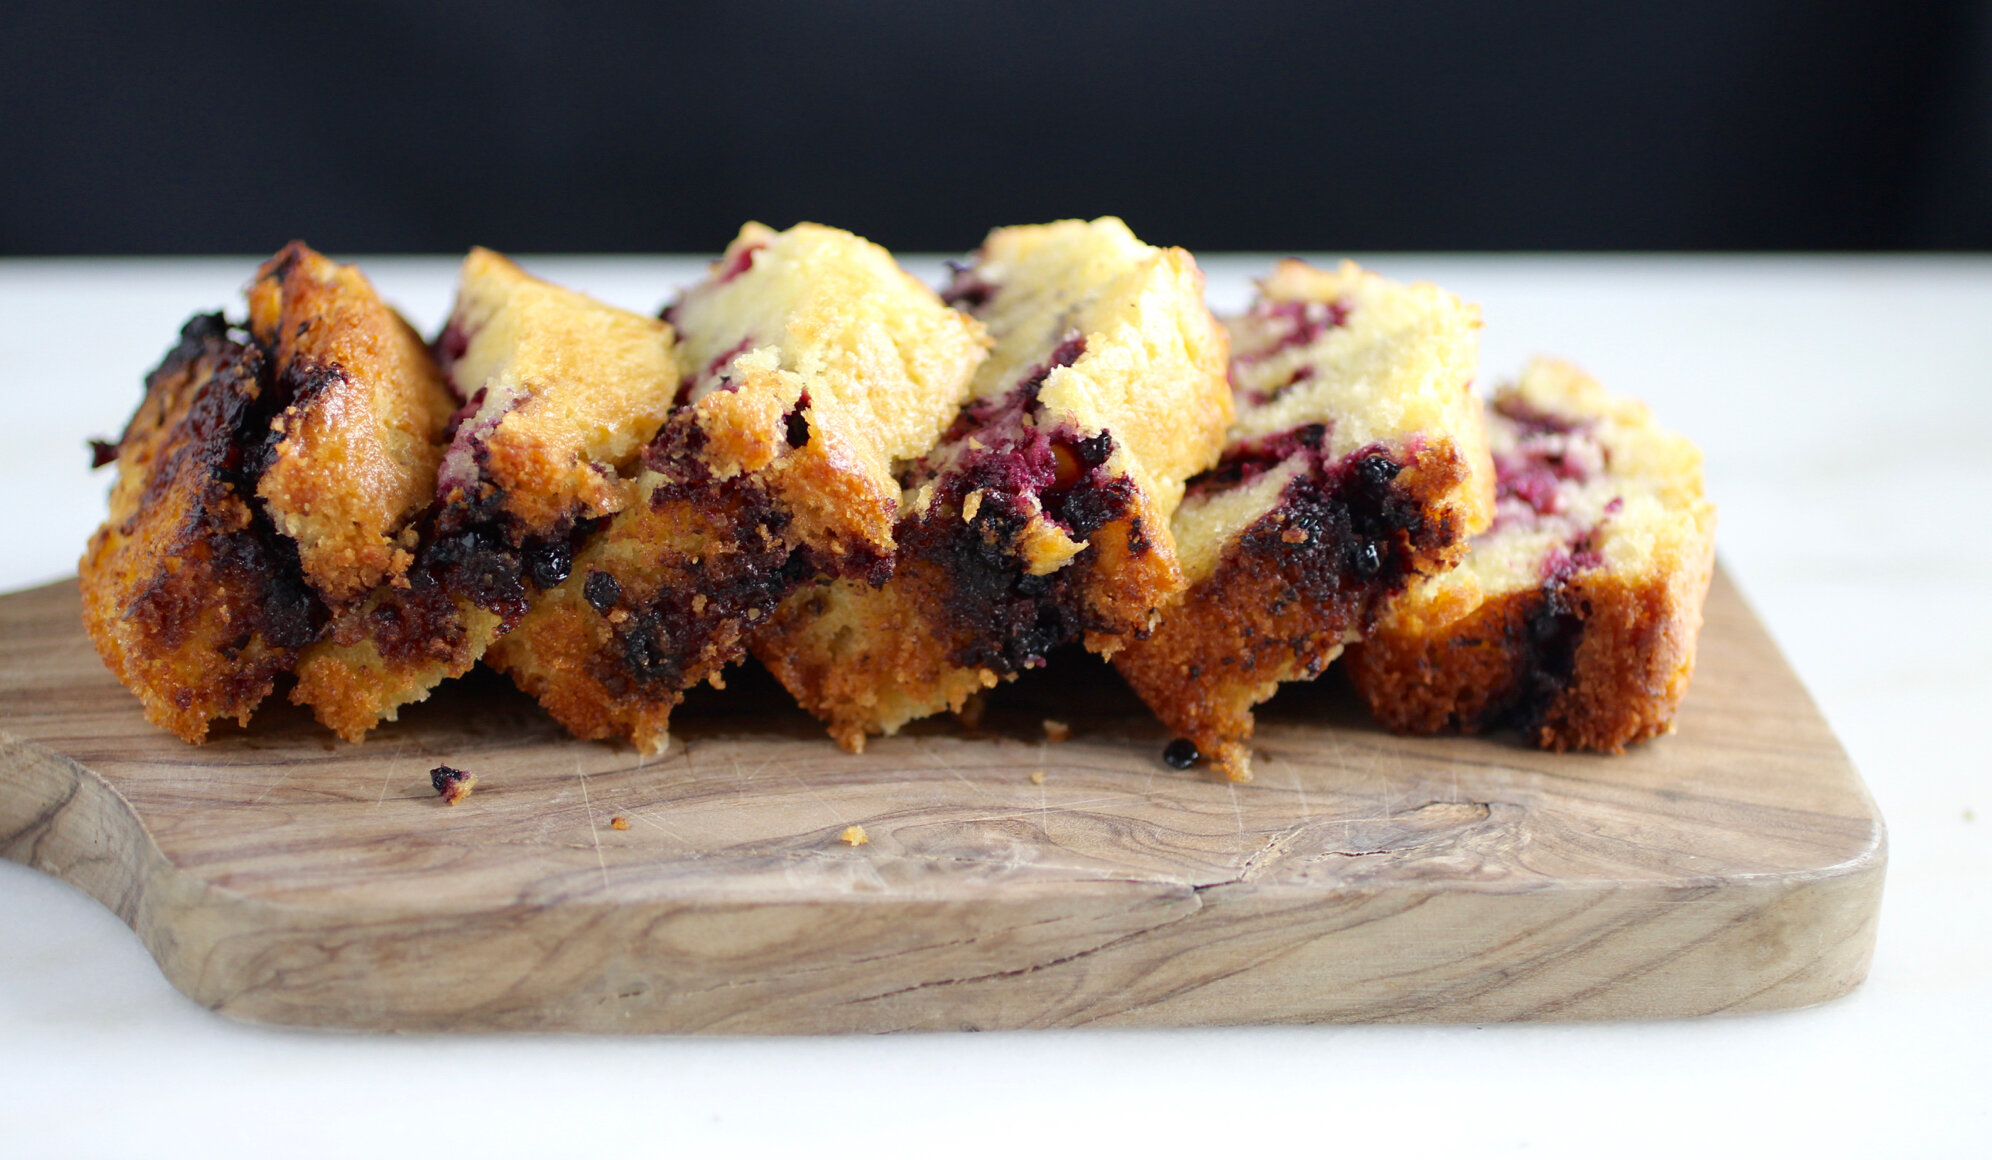
The line of elderberries in this pound cake is delicious as it is visually appealing.
Grease one 9 by 5-inch loaf pan (or 4 mini loaf pans) and preheat the oven to 350 degrees F.
Cream the butter and granulated sugar until they are light and fluffy. Beat in the eggs one at a time then incorporate the yogurt and 3 tablespoons of the elderflower cordial.
Wait for a golden crust and clean toothpick.
In a separate bowl, mix together the flour, almond meal, baking powder, and salt and slowly whisk this into the wet mixture until incorporated. Pour half of the batter into the greased loaf pan(s). Toss elderberries with remaining 3 tablespoons elderflower cordial and spread evenly over the batter in the loaf pan(s), followed by the remaining batter. Bake for 1 hour or 30 minutes if using the mini loaf pans. Cake is done when top reaches a golden brown and a toothpick comes out clean. Remove from oven and allow to cool.
Remove cake(s) from loaf pan(s), slice into pieces to reveal berry layer, and serve with optional whipped cream or crème fraîche.
Mini loaf pans or a standard 9x5-inch loaf pan can be used. Serve with whipped cream or crème fraîche (optional).

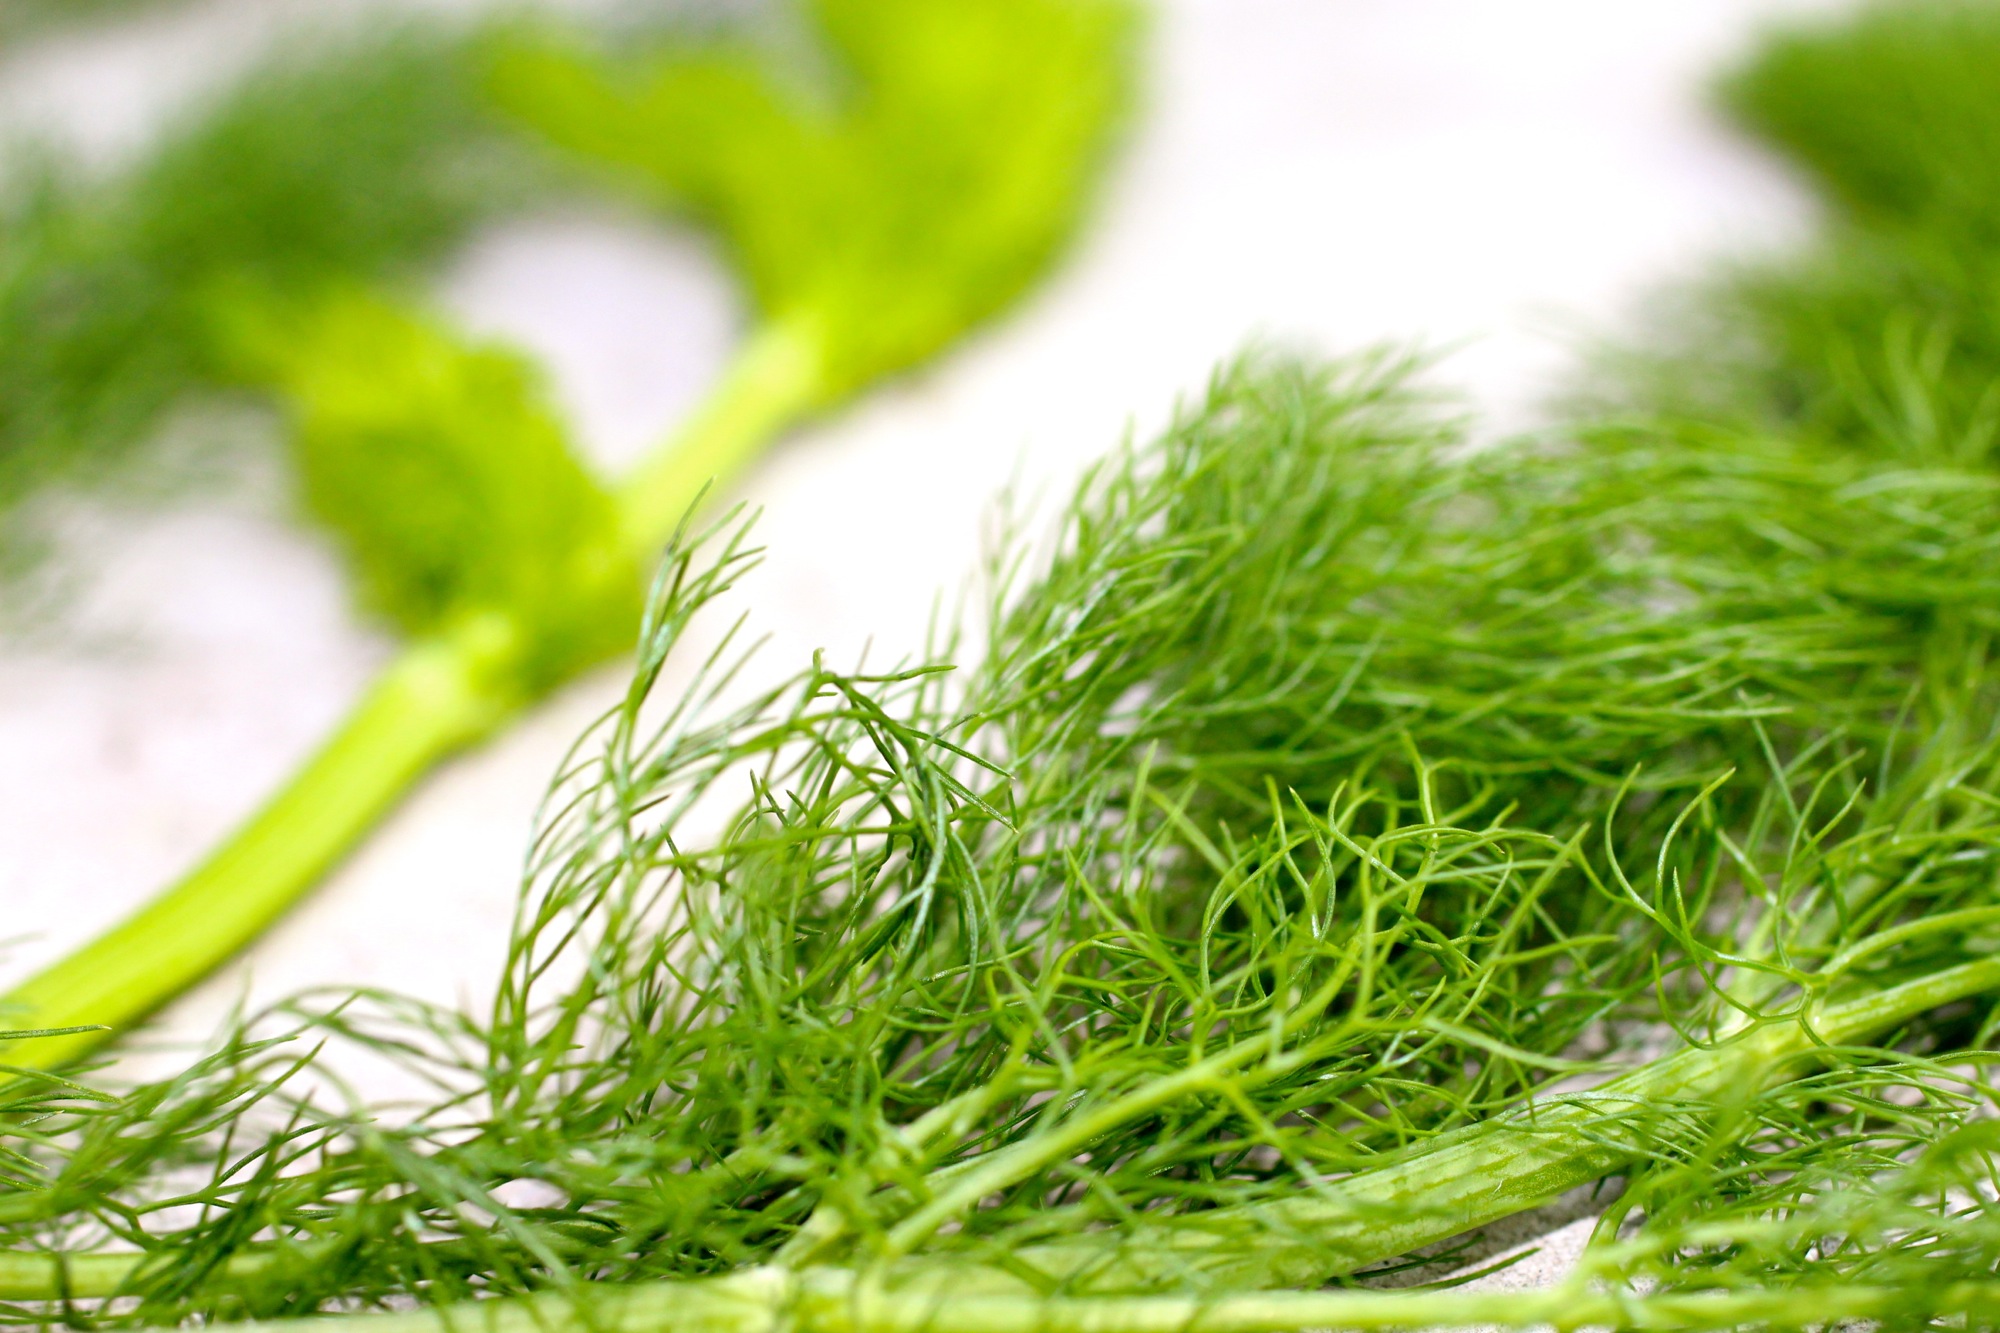
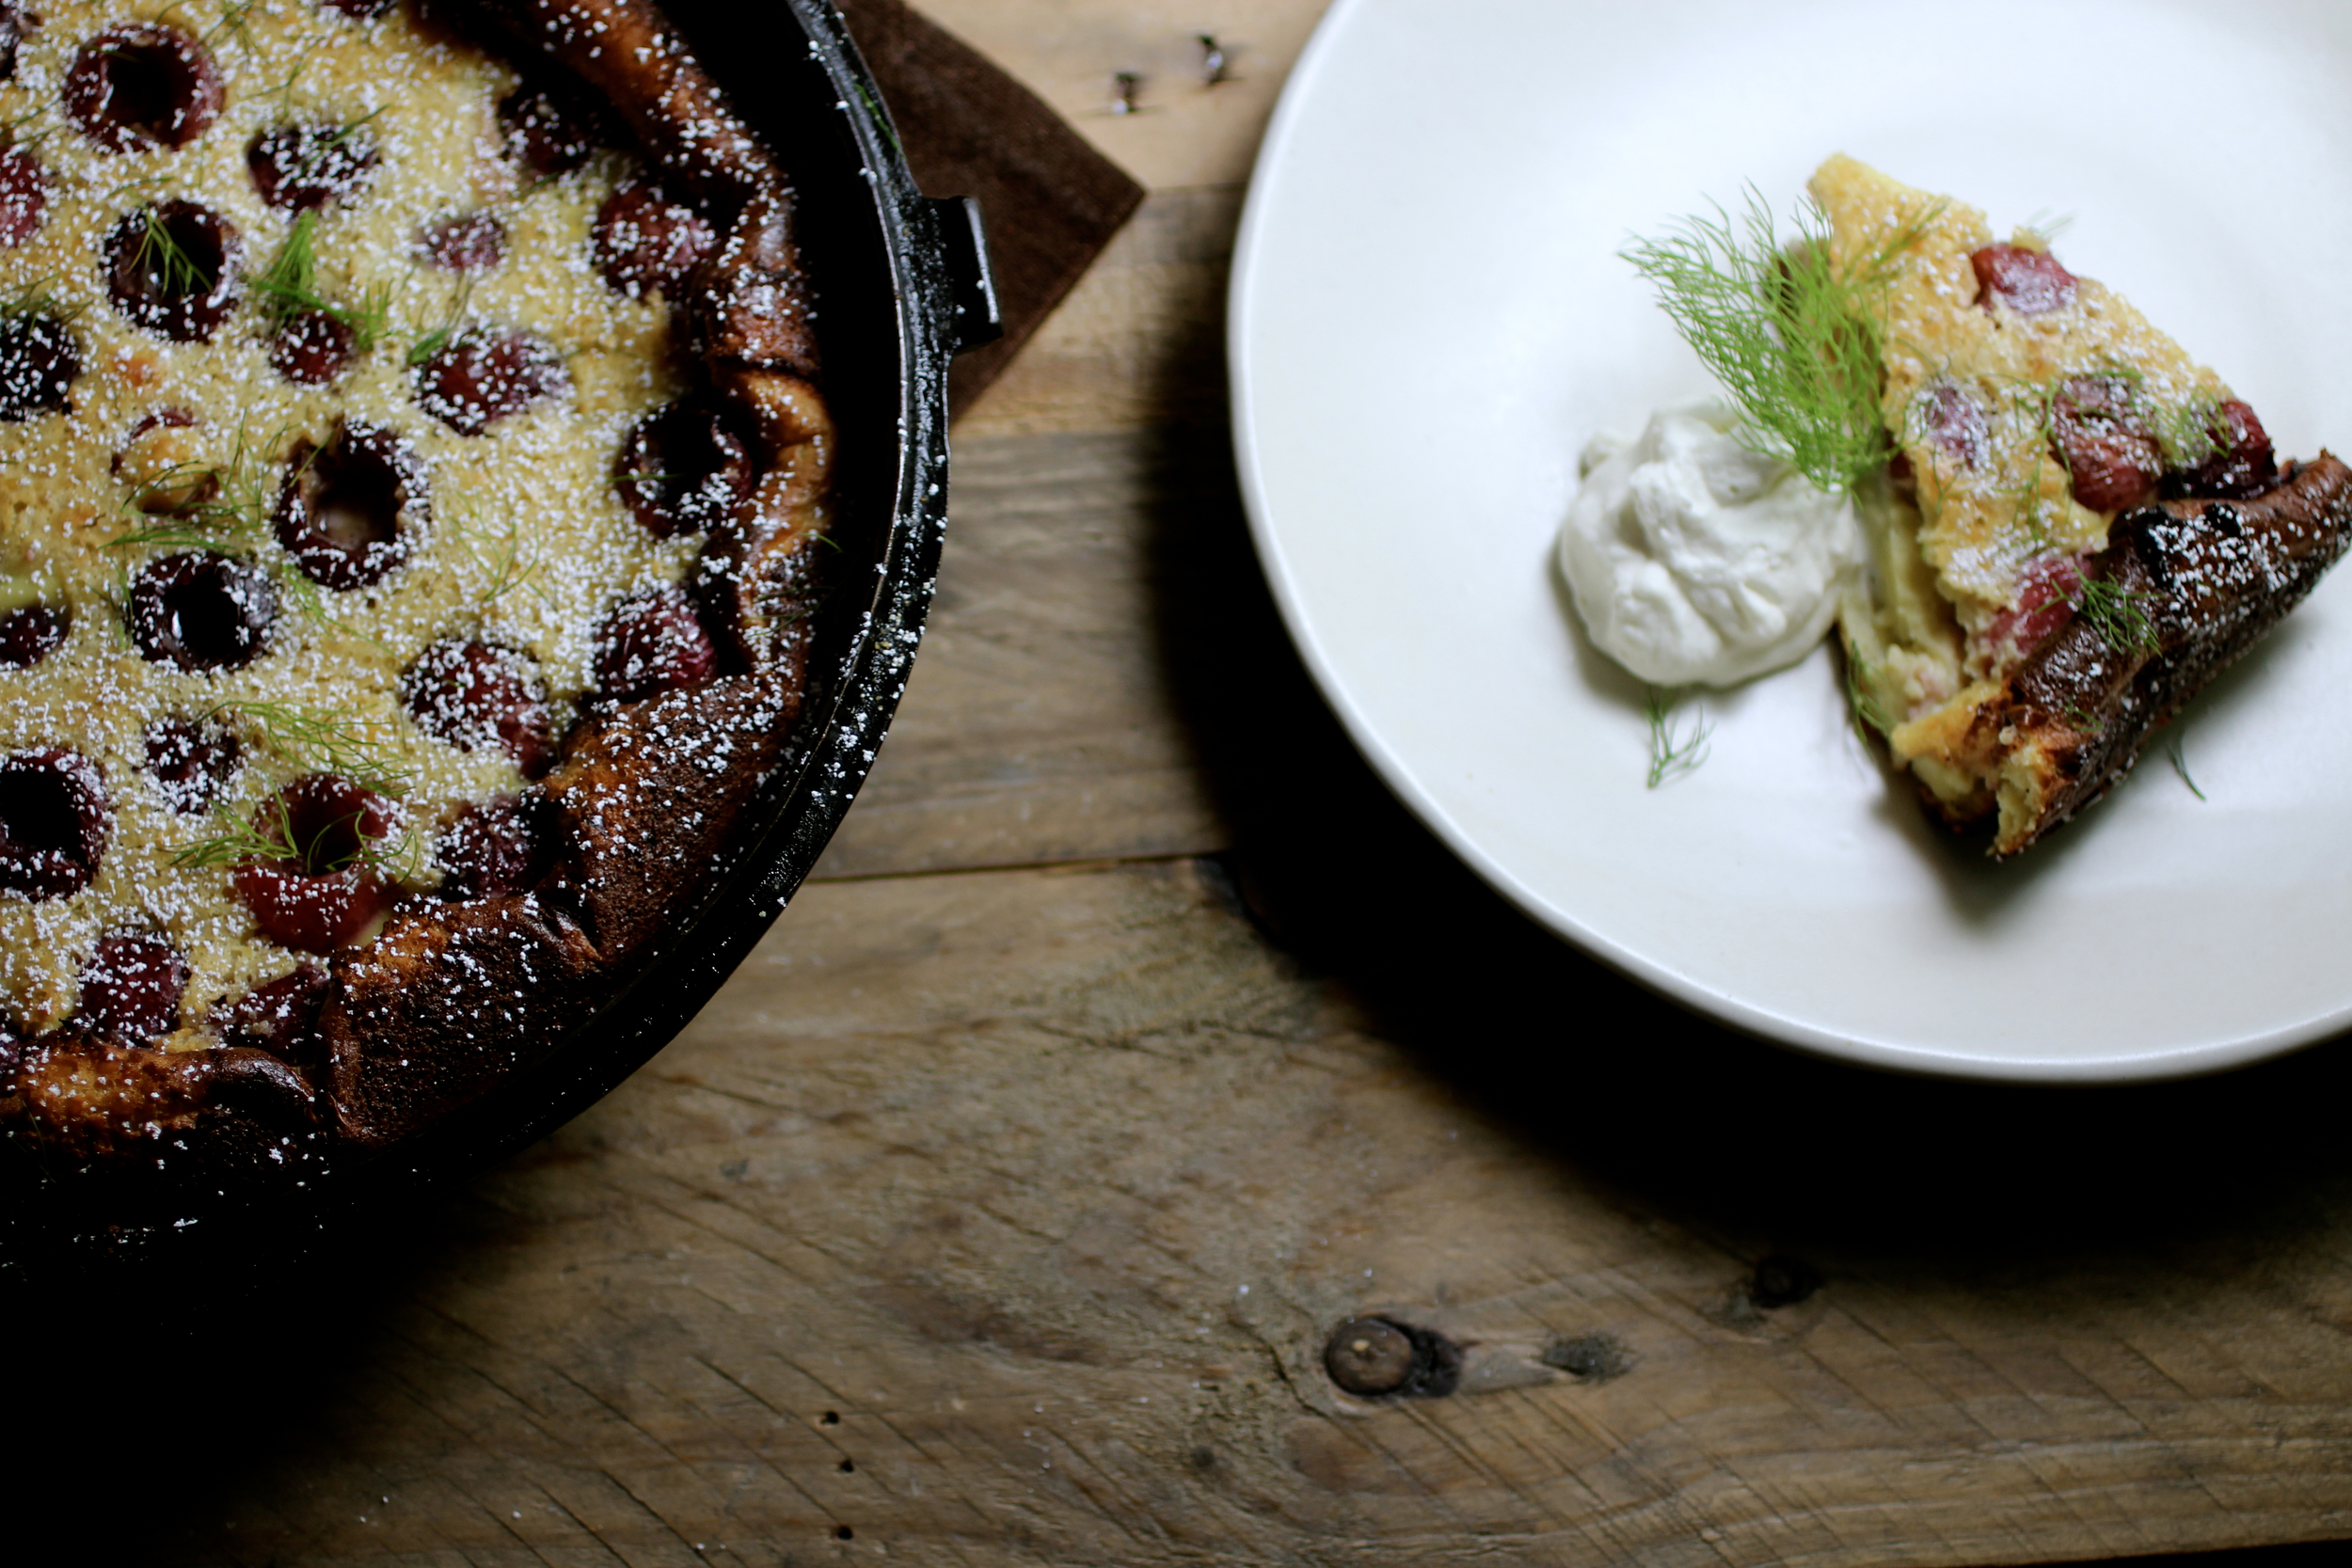
Cherry and Wild Fennel Clafoutis
The easy dessert that doubles as breakfast!

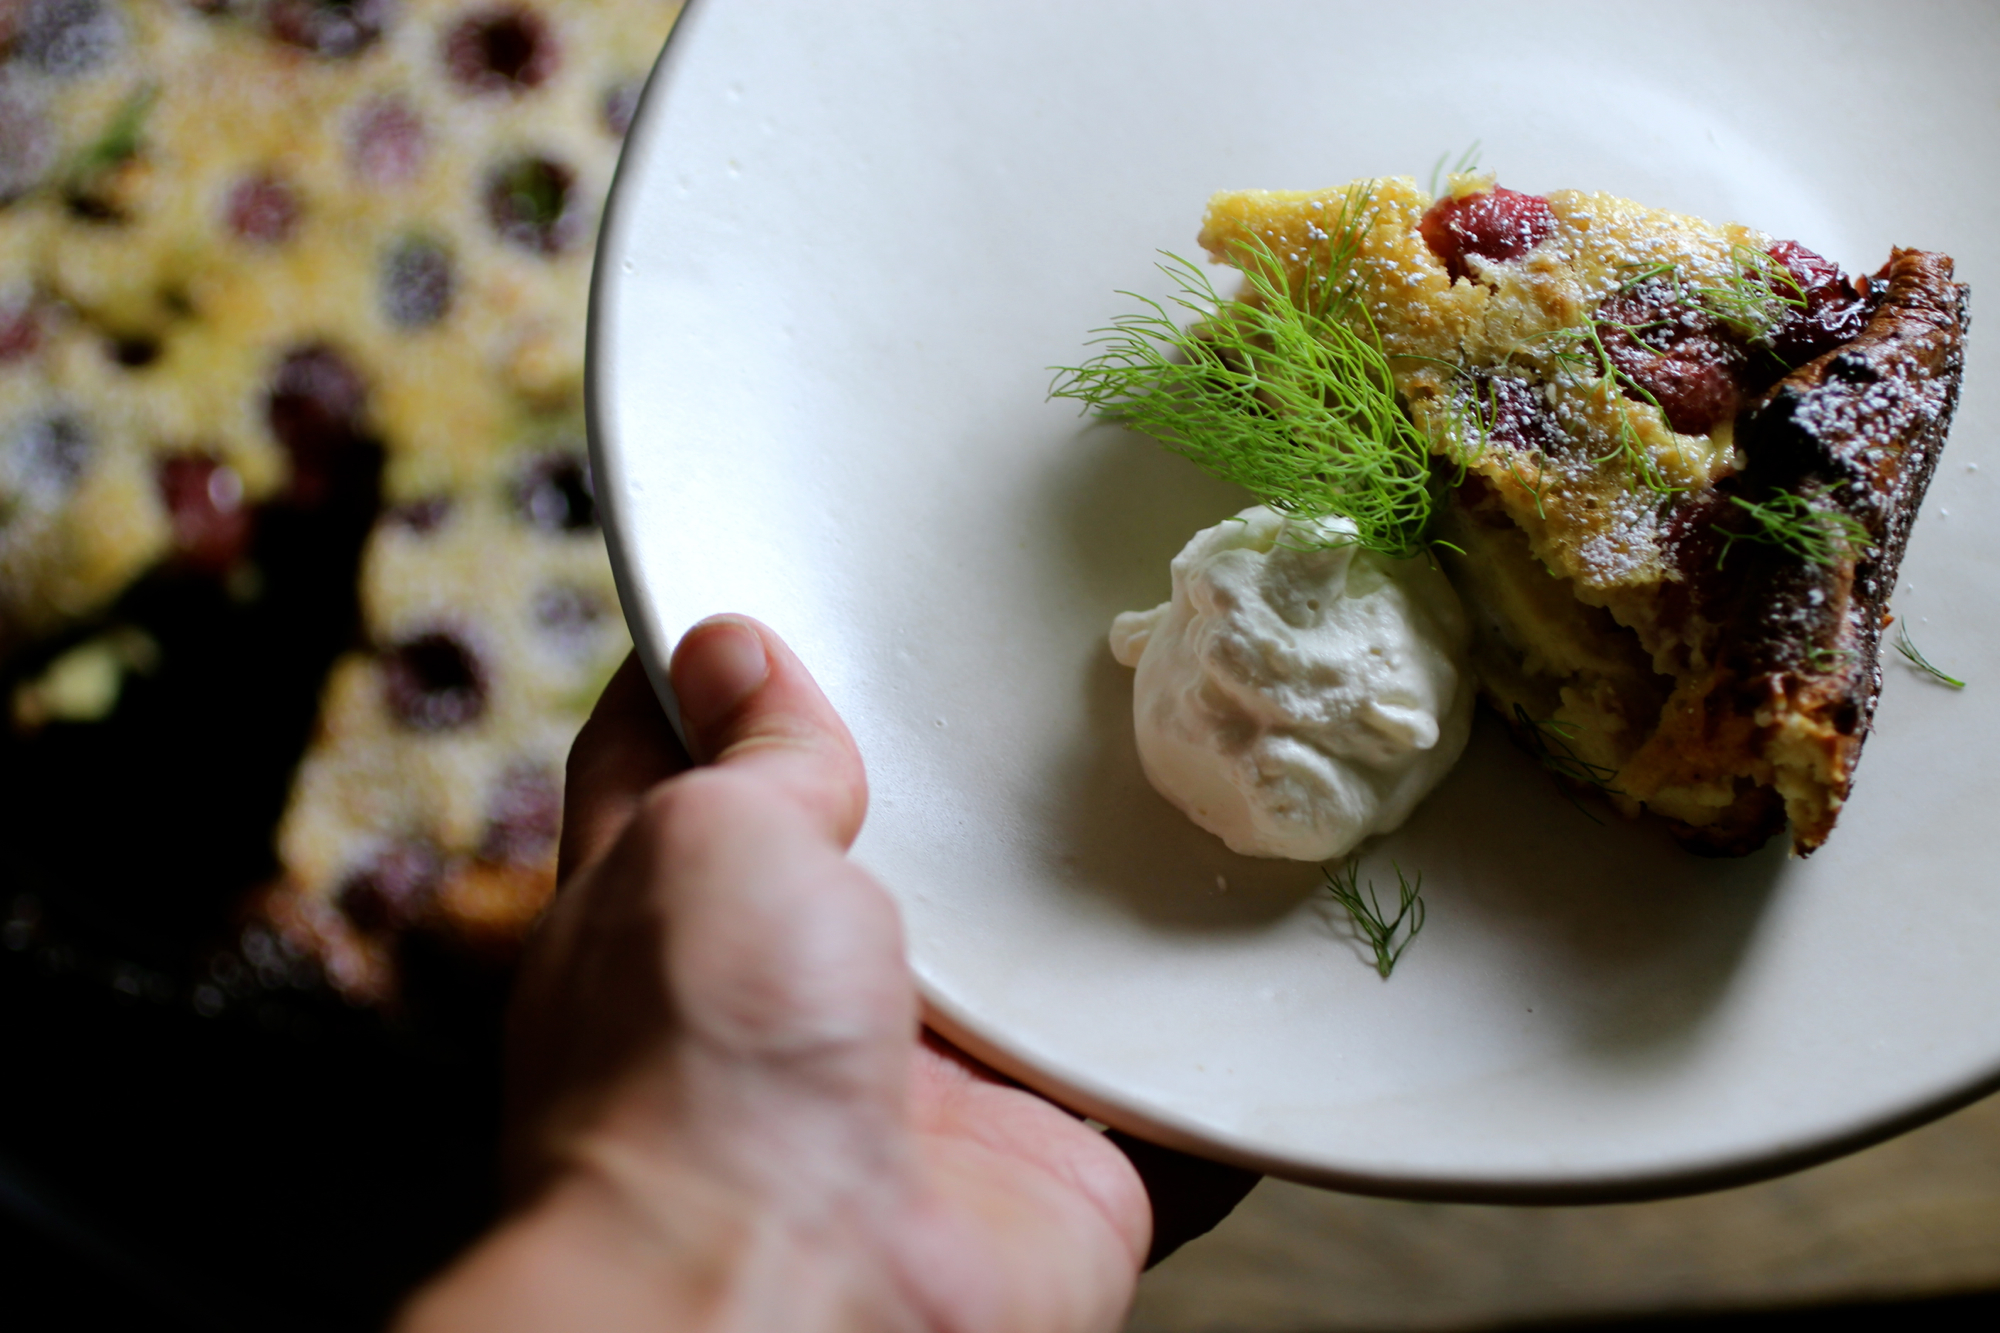
Sometimes, a word for a dish or a food preparation method I have never used will come to me and I will not rest until I have experienced it. That is what happened with "clafoutis" - I have no idea where I was introduced to the word, but after we picked up some cherries on our way back from a wedding in beautiful Los Olivos, all I could think about was making a cherry clafoutis, while at the same time asking myself, "cherry clafoutis is a thing, right?" This is where the internet came in, helpfully proving that cherry clafoutis is, indeed, a thing and although I don't necessary need a reason to make special desserts, my mother was serendipitously visiting for Mother's Day. Using a recipe from Saveur as a base, I decided to decrease the egg because some comments complained of eggy-ness and I tend to shy away from really eggy desserts and include wild fennel (more on wild fennel including foraging here), as cherry and fennel go together in a delightful way.
There are a few great things about this dessert. The first is that it's easy - really easy. It's also visually impressive in the cast-iron pan and versatile in ingredient options (apricot + almond? pear + bergamot?) and, because it's not super sweet, it's also versatile in potential eating occasion. We enjoyed it with fennel whipped cream as dessert and again the next day with coffee for brunch and I'm pretty sure no one would turn their nose up to a clafoutis at tea time. So, now you have no excuse - get out there, forage some fennel (which is all over the bay area), buy some cherries, and make this deliciously easy puffed crepe-like cake! Recipe below serves 8.
“Cherries can also be unpitted, which provides a more rustic flavor and texture, but I did not this time, as I knew my mom wouldn’t like it!”
1 cup chopped wild fennel fronds, plus a few fronds for garnish
1/2-1 cup whipping cream, depending on how much your group likes whipped cream (optional)
7-8 tablespoons sugar, divided
1 tablespoon plus 1/2 teaspoon vanilla extract, divided
1/2 tablespoon butter
1-1/4 cups whole milk (can be substituted for a combination of 3 parts reduced fat and 1 part whipping cream, if you happen to have these around like I did)
2 tablespoons kirsch or Luxardo (I had Luxardo, but think it would be better with kirsch)
5 eggs
1/2 teaspoon medium coarse Kosher salt, divided
3/4 cup all-purpose flour
3 cups black or sour cherries, pitted (see post on how to pit cherries like a boss)
Confectioner's sugar, for dusting
Infuse whipped cream with wild fennel by allowing whipping cream to impart fennel flavor overnight.
To make fennel whipped cream: Place 1/2 cup chopped fennel in a mason jar, pour whipped cream over top, cover, and refrigerate overnight. Remove fennel then beat cream until whipped, adding 1-2 tablespoons of sugar and 1/2 teaspoon of vanilla toward the end of beating. Refrigerate until used.
Heat oven to 425 degrees F. Grease a 9'' cast-iron skillet and set aside. Whisk milk, sugar, kirsch or Luxardo, vanilla, eggs, and 1/4 teaspoon salt until combined. Add flour and whisk until smooth, about 30 seconds.
Pour batter into buttered skillet, then distribute cherries evenly over top. Bake until a skewer inserted into batter comes out clean and a golden brown crust has formed on top and bottom of clafoutis, about 25 minutes. Dust with confectioners' sugar and serve with a dollop of fennel whipped cream, if desired.
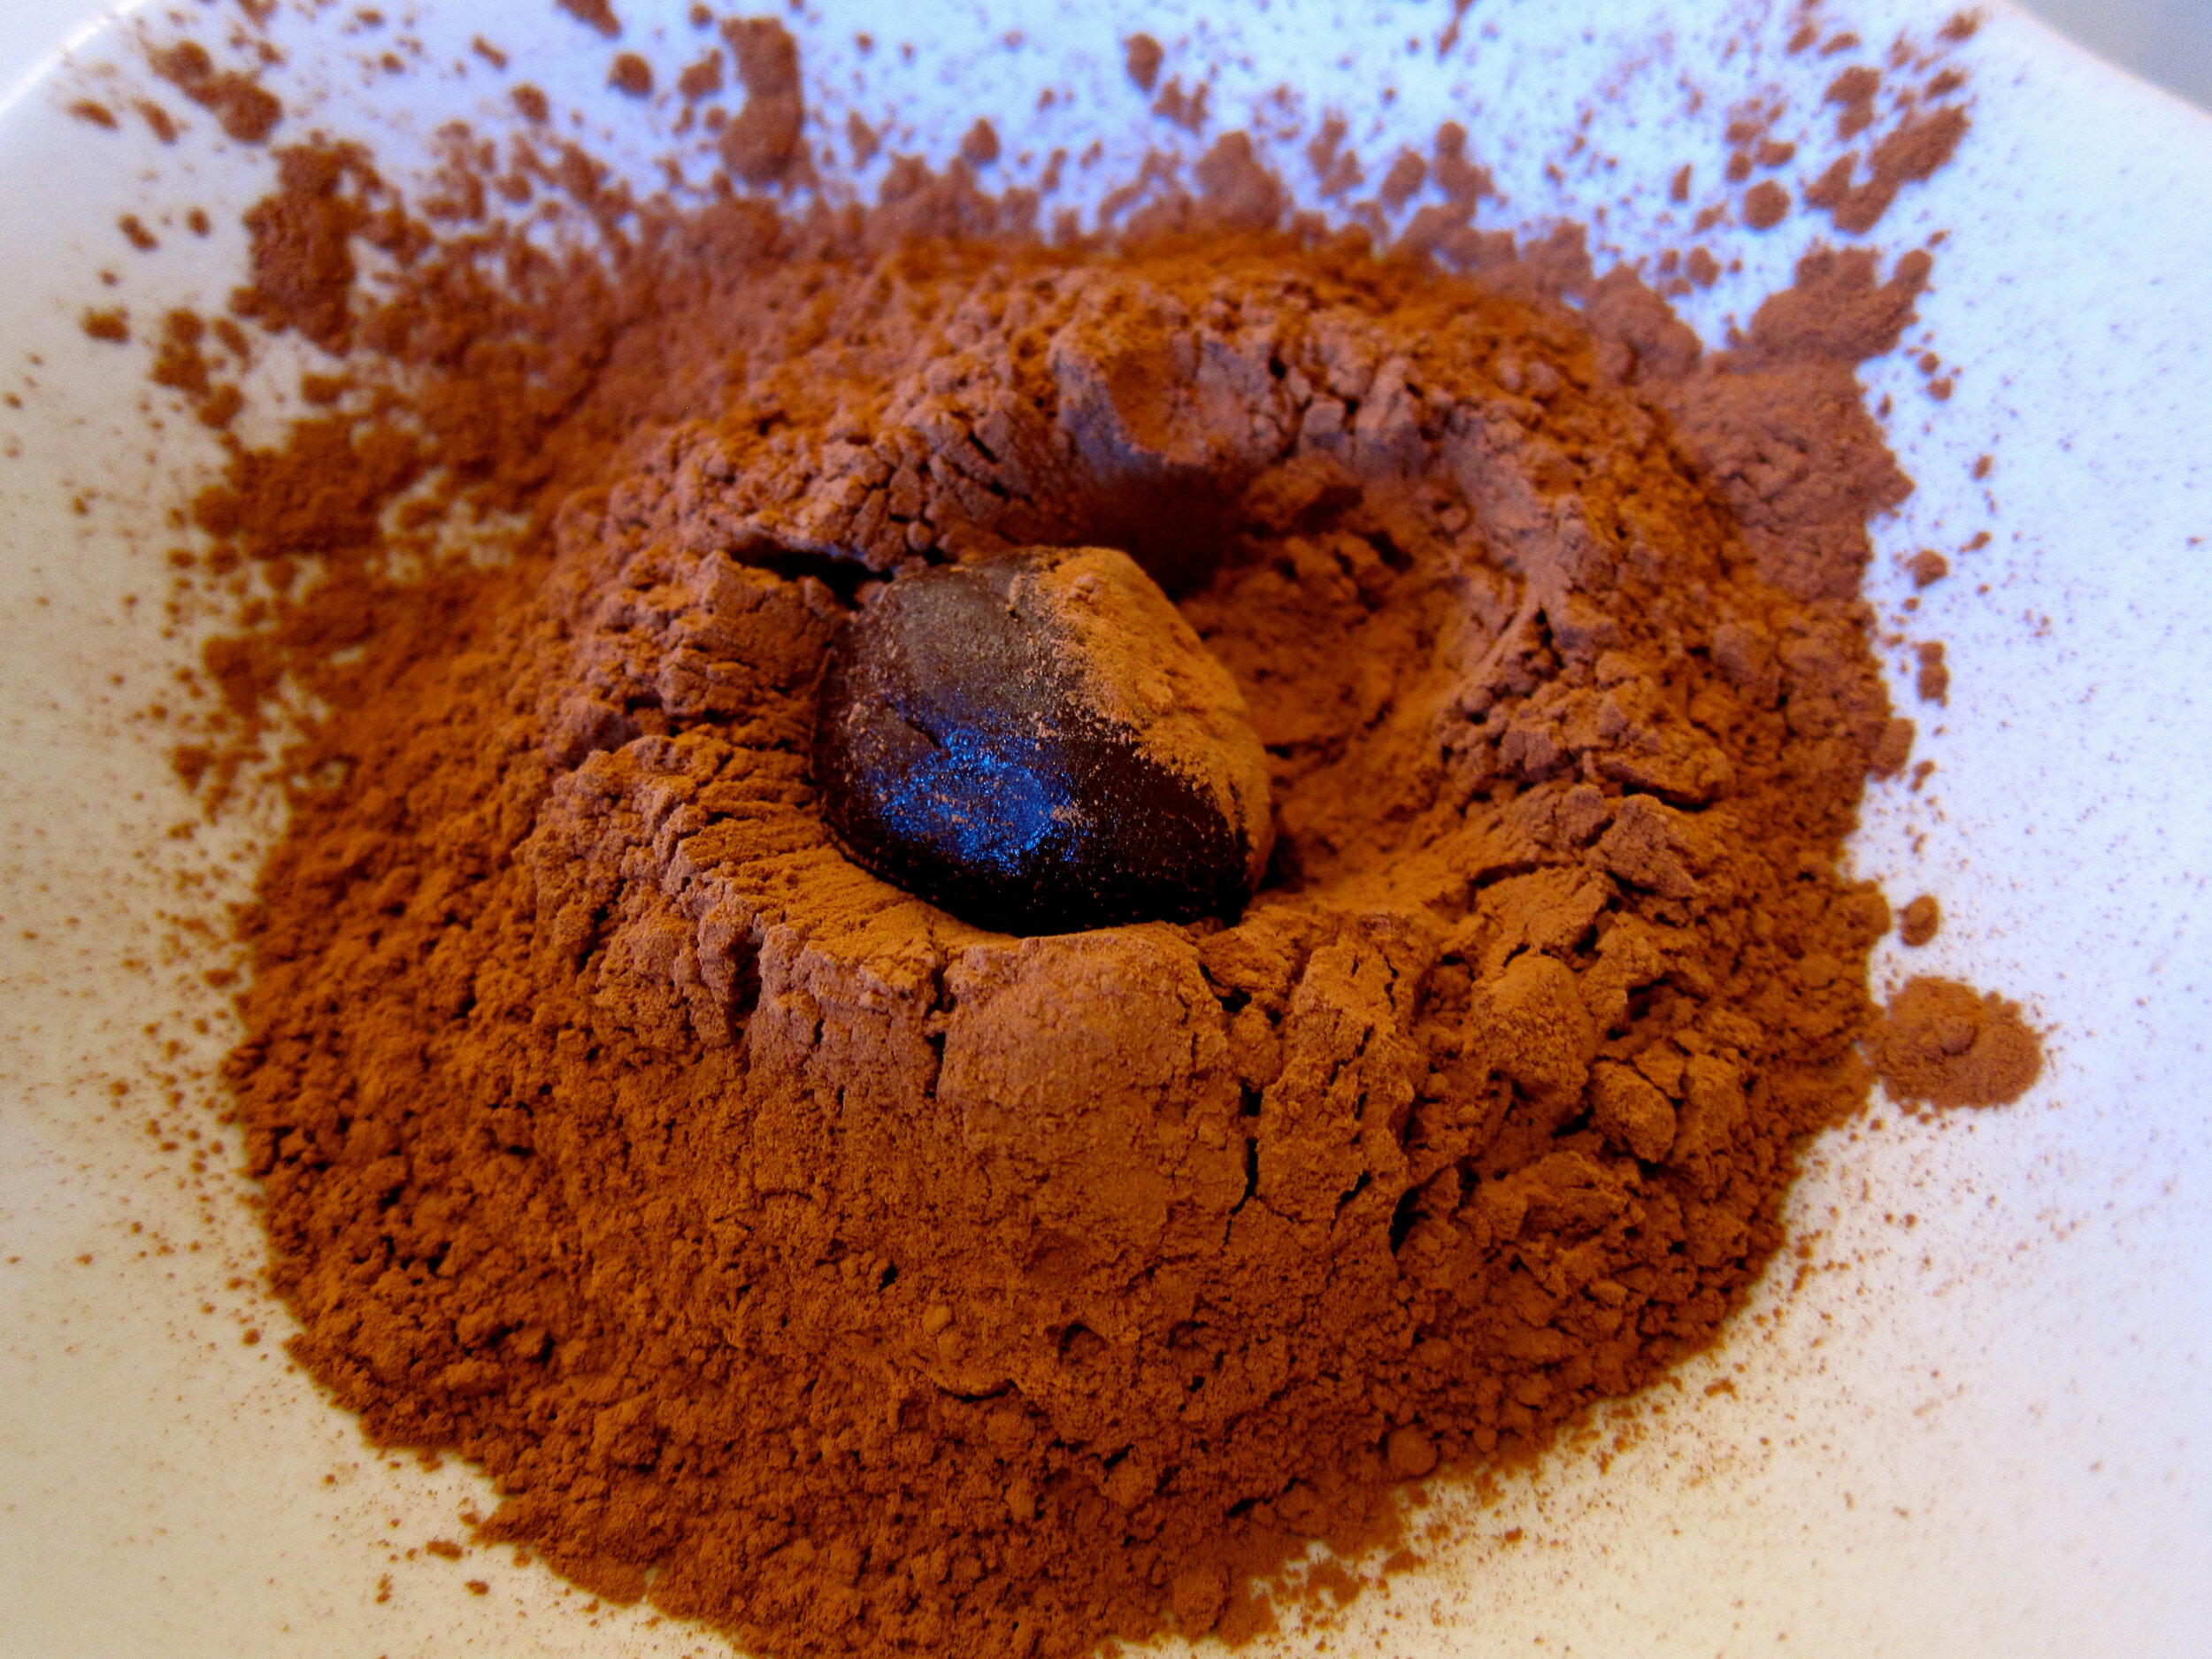
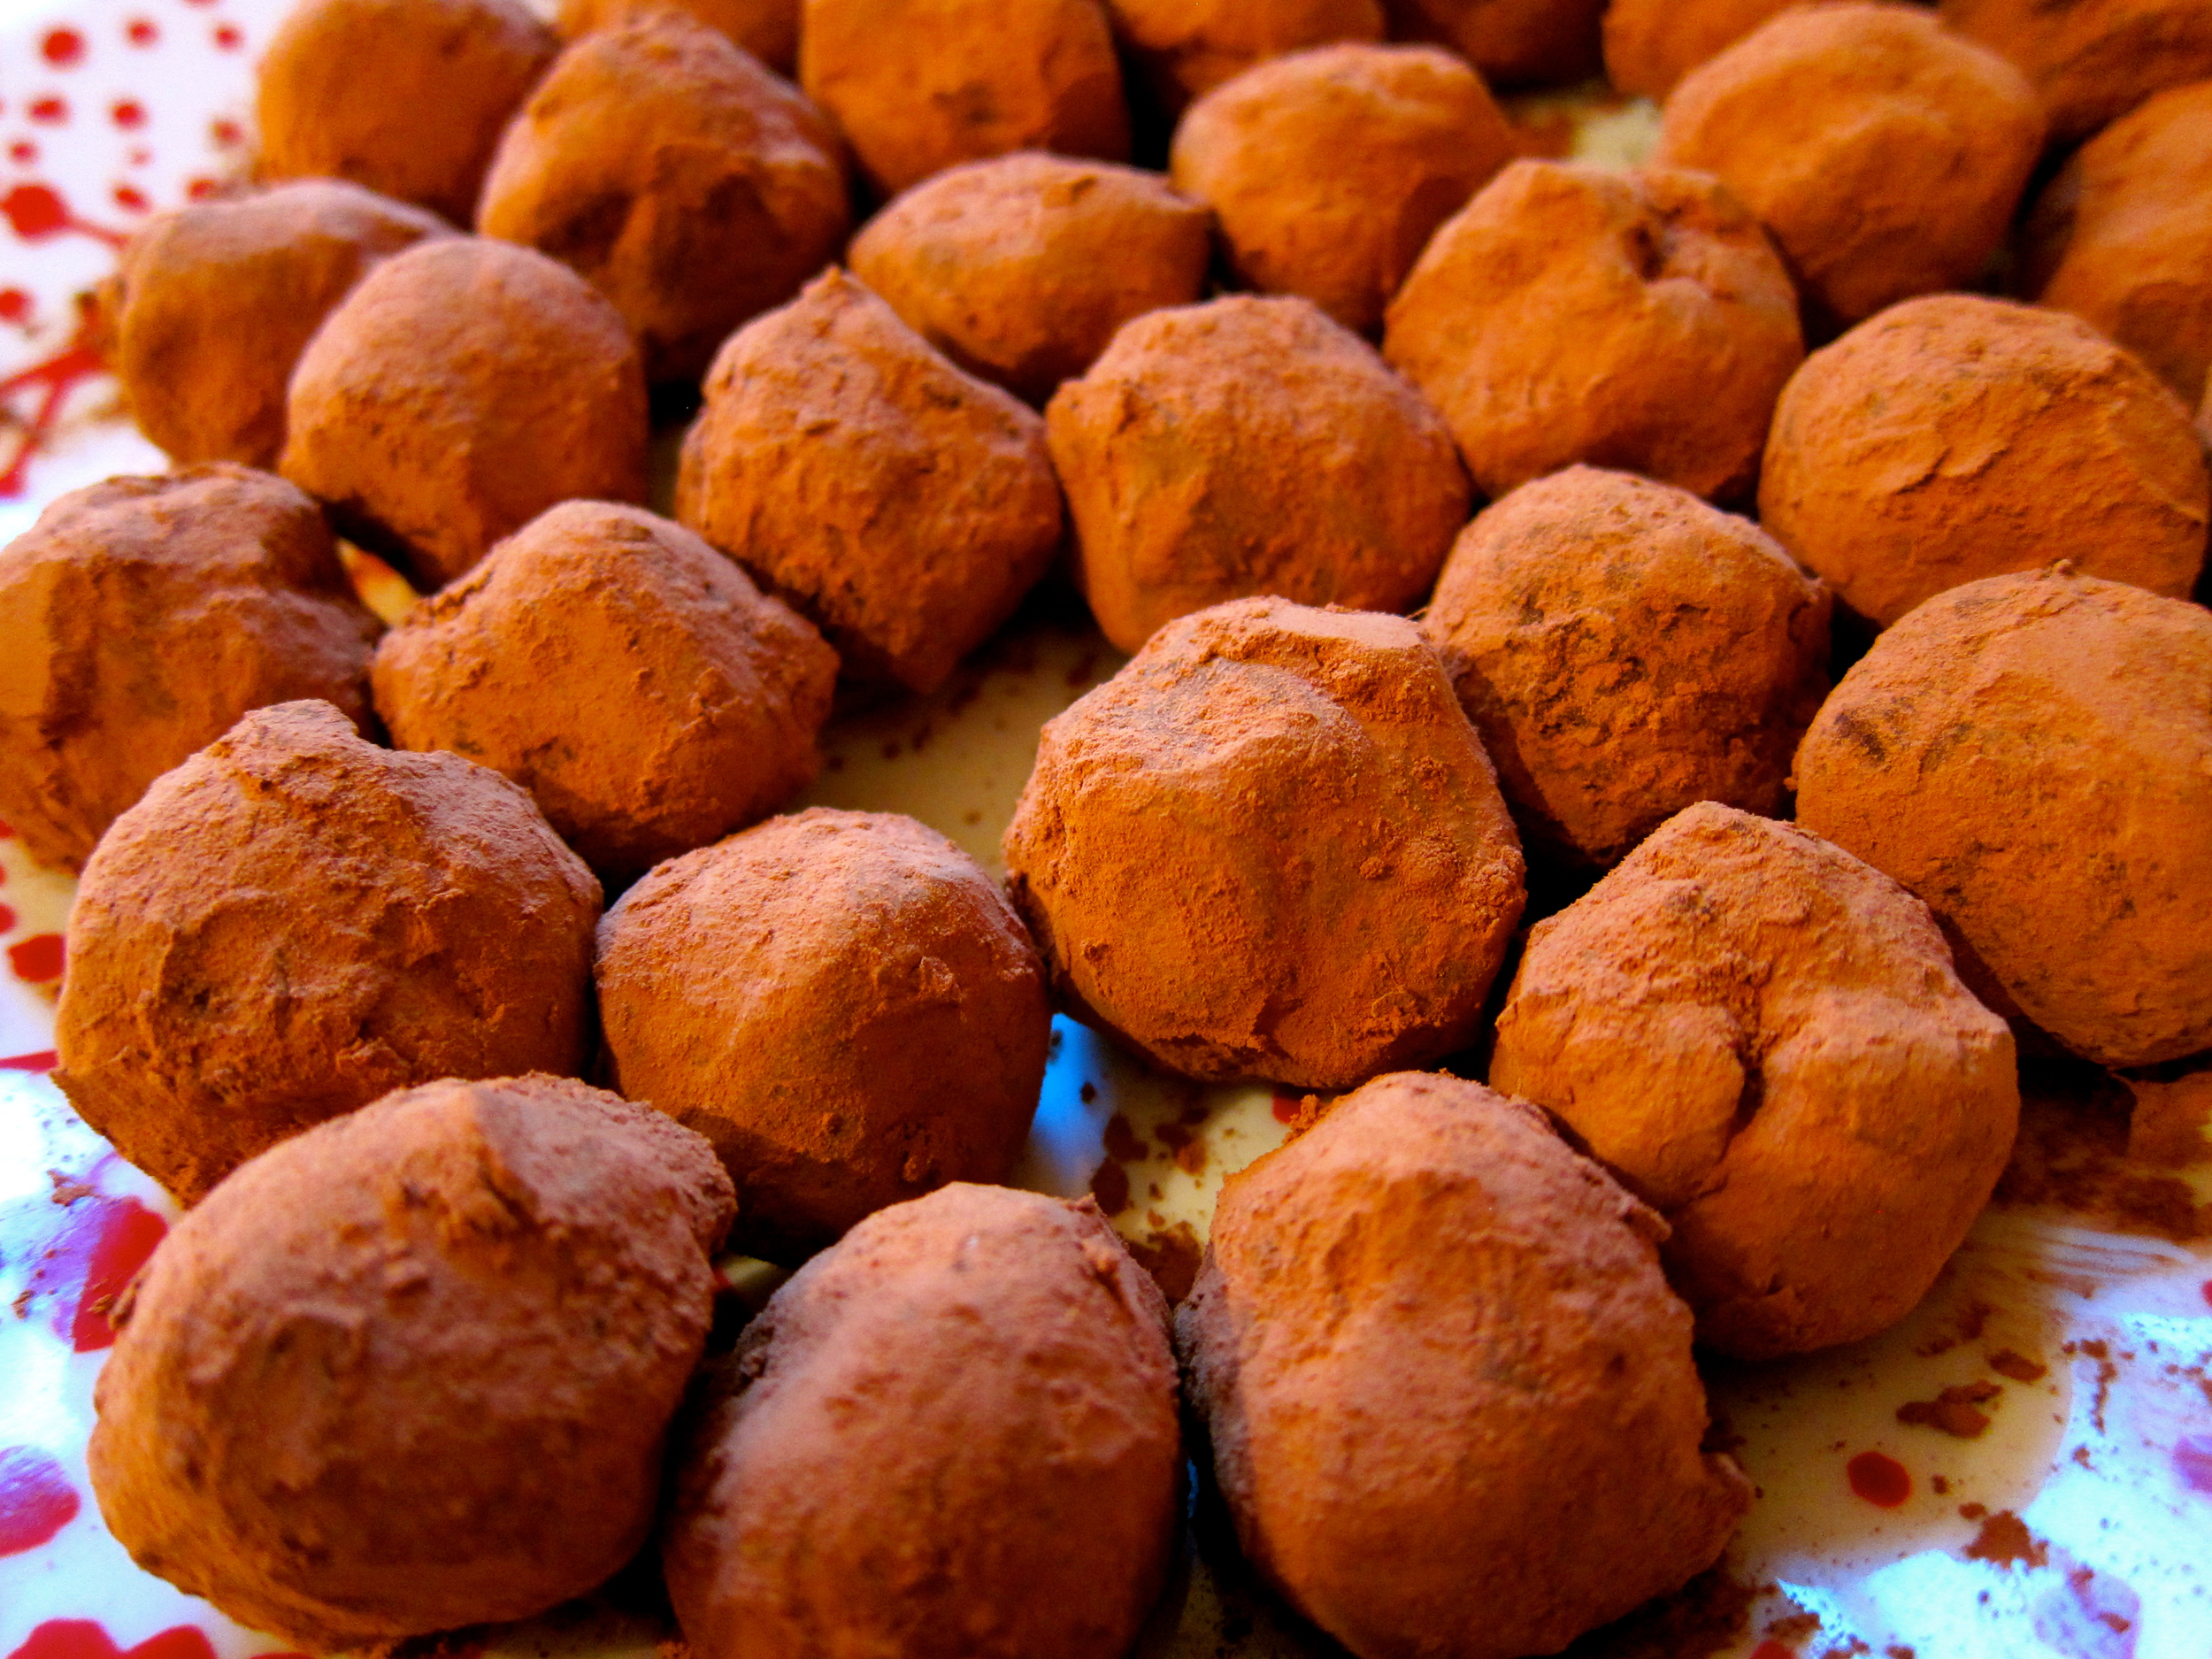
Dark Chocolate and Cardamom Truffles
Put your own spin on this decadent favorite.

Valentine's Day is just around the corner - forget the store bought, everyone would prefer homemade confections! This recipe very easy recipe is also reliable and adaptable, but it does take patience. I’ve also made variations with raspberry jam, orange marmalade, rum/coconut, and black pepper.
8oz bittersweet or semi-sweet chocolate (go high quality, you won’t regret it), very finely diced or shaved
1/2 cup heavy cream
1-2 Tbs brandy
1 tablespoon medium grind coffee
Sea salt, for sprinkling
Unsweetened cocoa powder, for dusting
Place diced chocolate into a large heatproof bowl. Bring cream just to a boil in a small saucepan over medium-high heat; pour over chocolate in bowl. Stir in brandy and coffee. Cover with plastic wrap; let stand 10 minutes. Stir until smooth. Let stand until thick, about 15 minutes.
Pour chocolate mixture into a shallow 8-inch dish or pie plate and sprinkle with sea salt, if desired. Cover with plastic wrap, and refrigerate until mixture is very cold and set but still pliable, about 30 minutes.
Using a teaspoon or a 1/2-inch melon baller, scoop balls of chocolate mixture, transferring them to a baking sheet lined with parchment paper as you work. Refrigerate truffles 10 minutes.
Using hands dusted with cocoa powder, dip each truffle in cocoa powder to coat, then quickly shape truffle into a rough round. Refrigerate truffles in an airtight container until ready to serve, up to 2 weeks; before serving, reshape into rounds, and roll each truffle in cocoa powder, if desired.
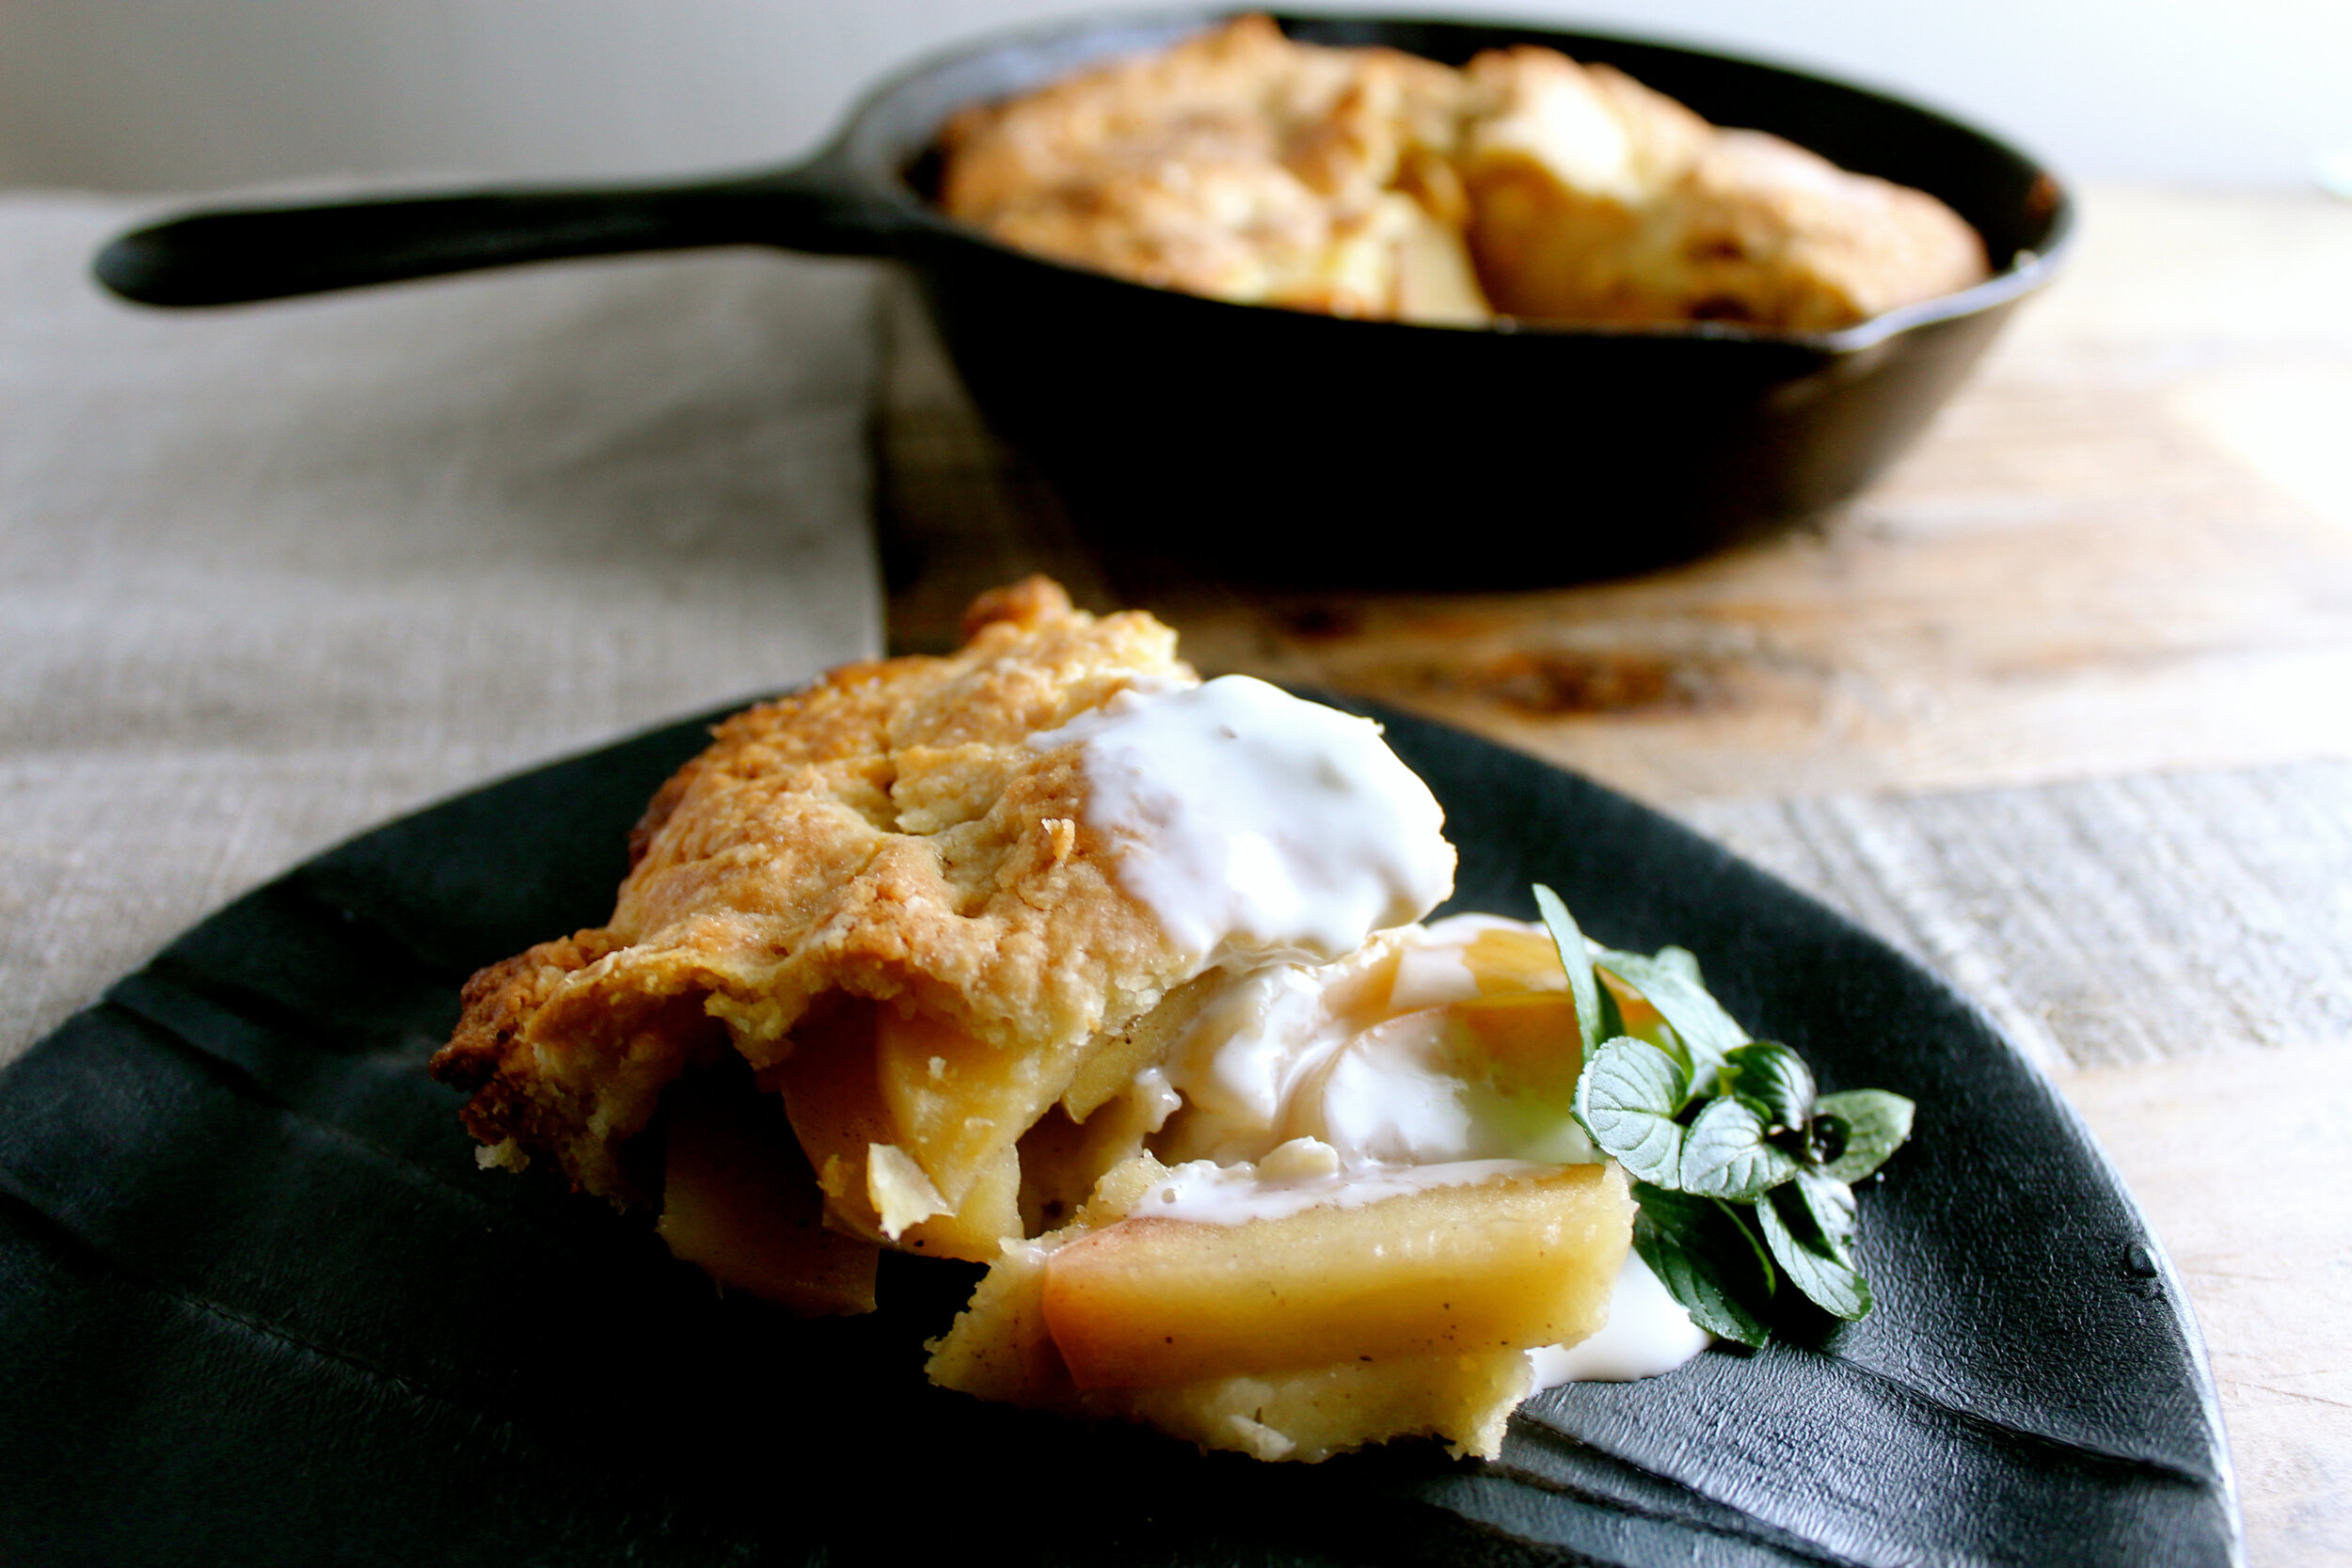
German Apple "Cake"
The cake for pie lovers.

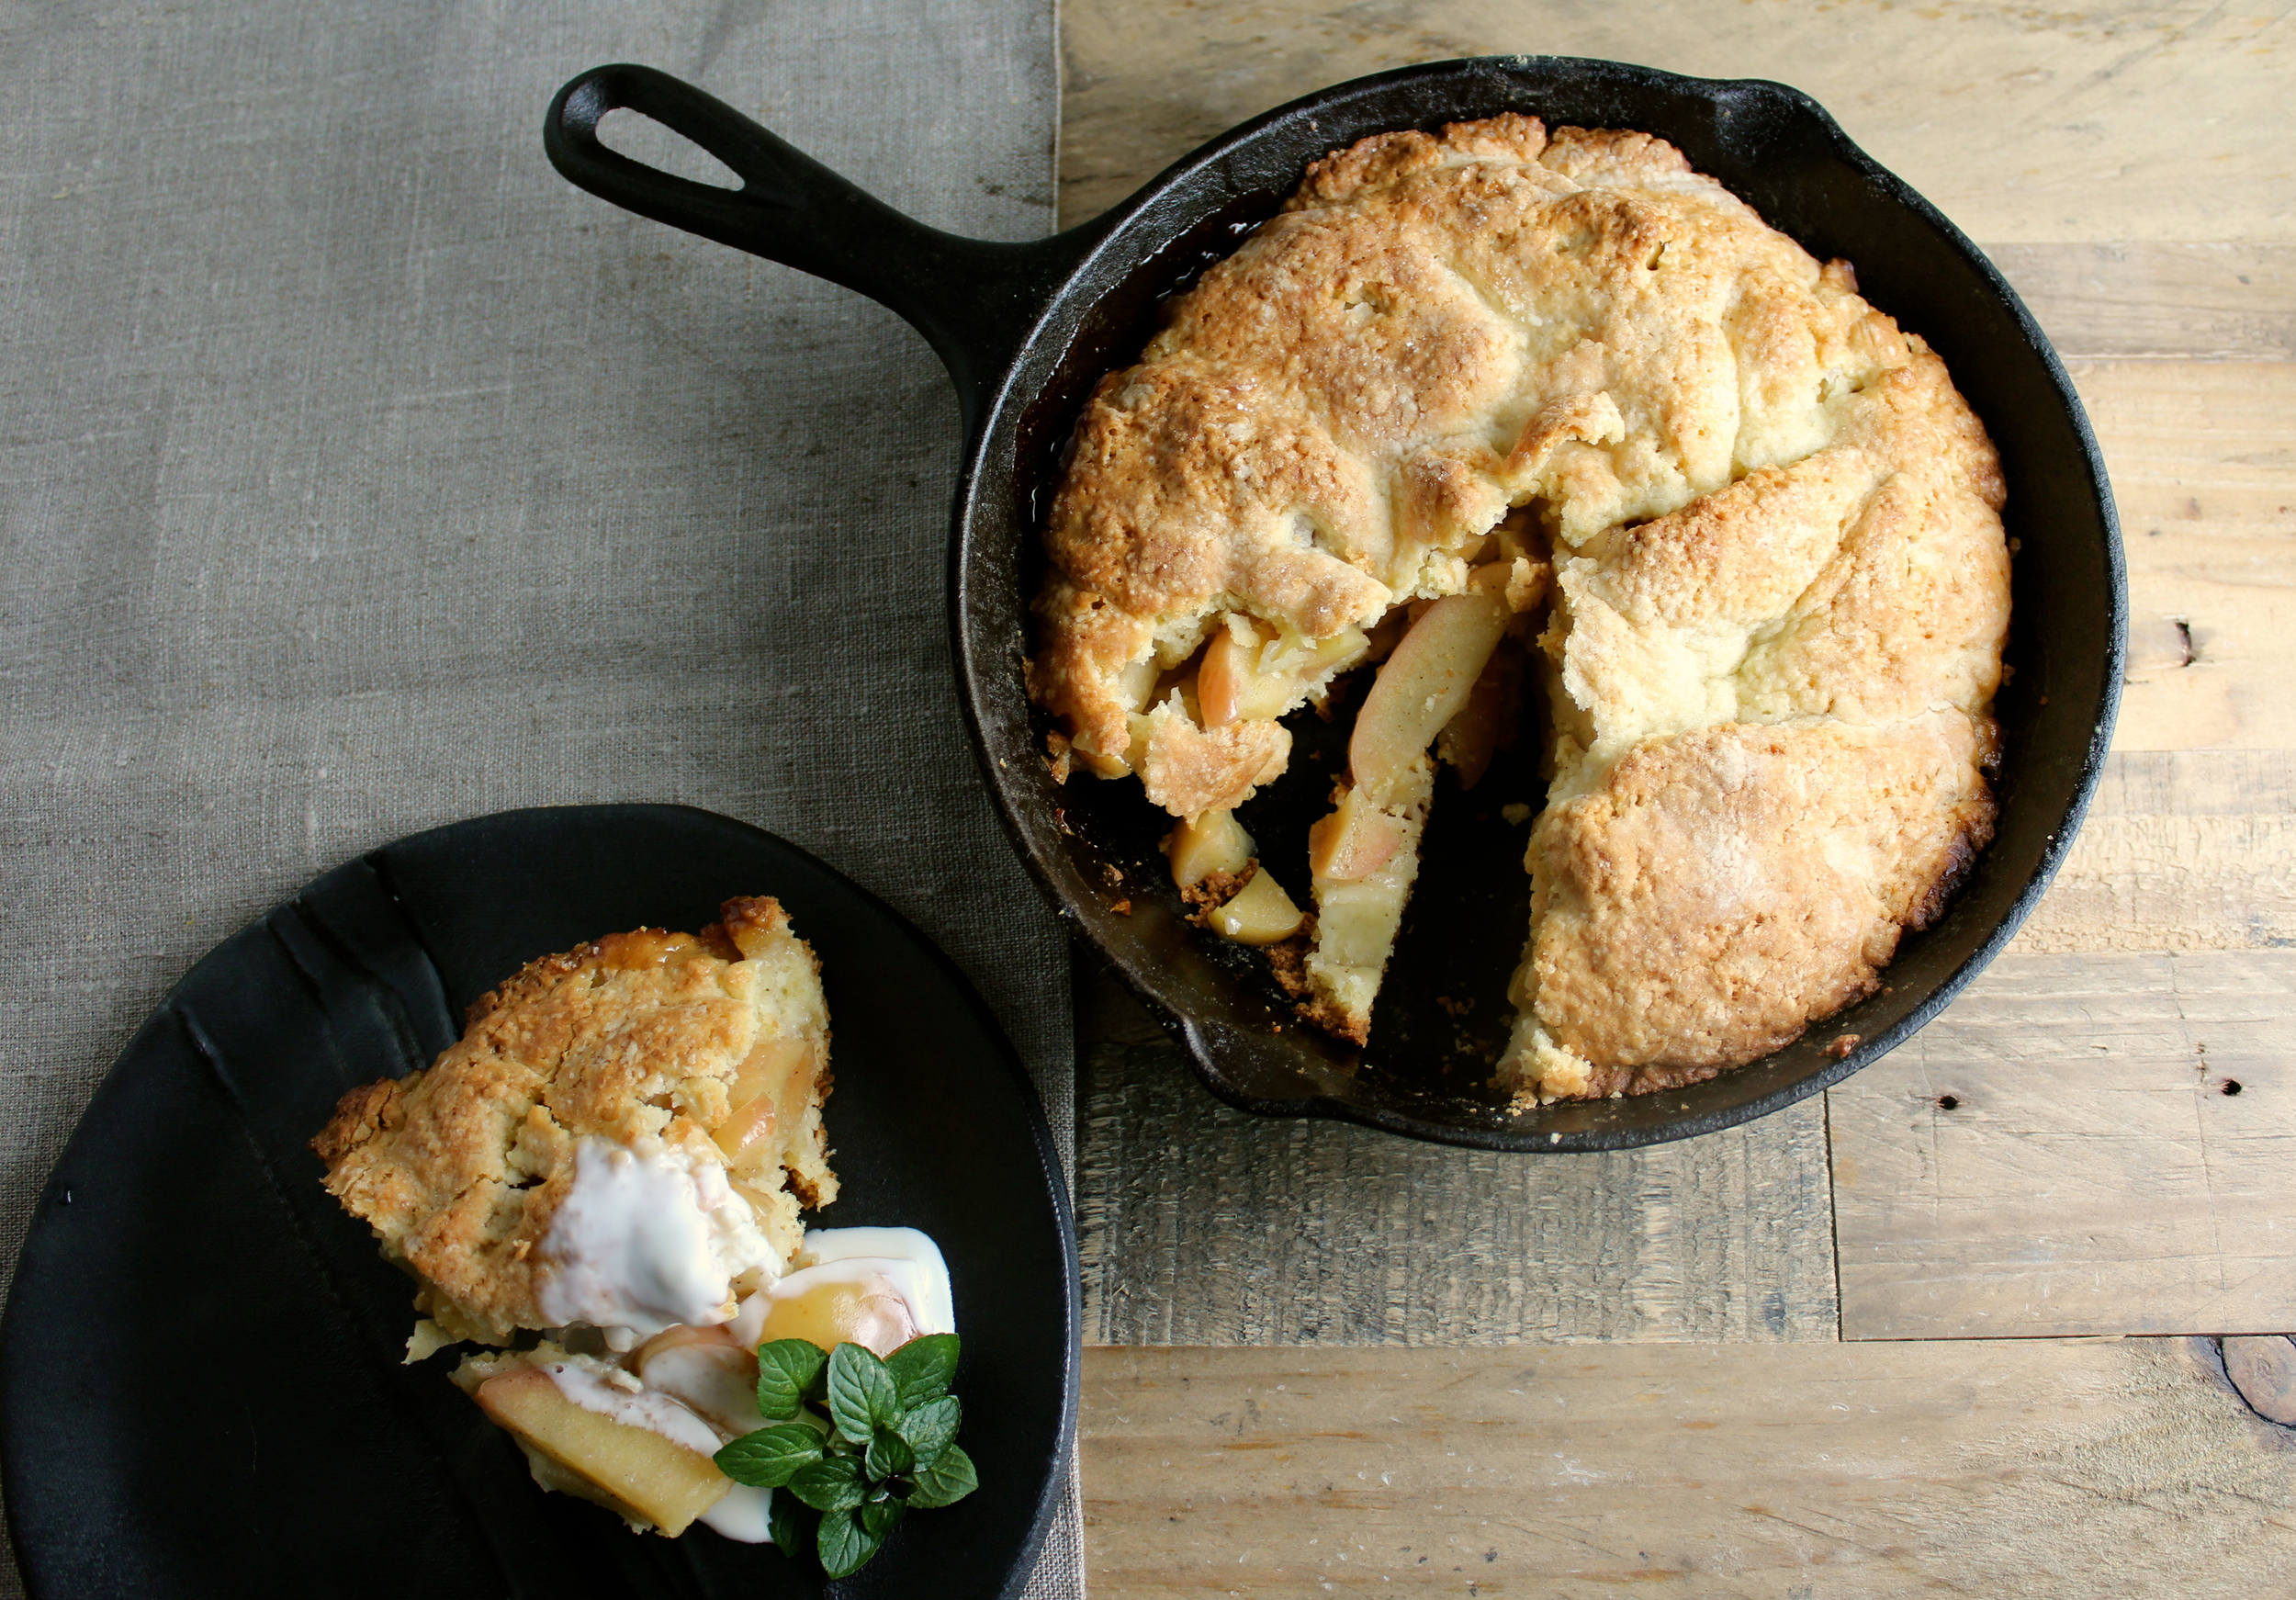
This is really more of a pie with a larger, fluffier crust than a cake (hence the quotation marks). I first encountered a version of this recipe on Culinate where I was immediately smitten by the idea of a pie-ish cake, typically preferring the former to the latter myself. I made a few additions and baked it in a cast iron pan to bring it to what it is today. Its refined rustic-ness makes it comforting as a dessert and delightful as an afternoon snack with cheese and tea or coffee. Or a beer, really - try it! Serves 6 and can easily be doubled to serve 12.


1 cup flour - I like to use a blend of something like half rye or other whole grain and half all purpose
1/3 cup sugar
1/8 teaspoon plus one pinch salt
1 tsp baking powder
1/4 cup (1/2 stick) cold unsalted butter, diced
1 large egg
1/2 tsp vanilla
1/2 cup crème fraîche or yogurt, divided (optional)
3-4 medium apples
1 tablespoon lemon juice
Up to 2 tablespoons brown sugar
1/8 teaspoon allspice (or other warm spices such as cardamom, clove, nutmeg, and cinnamon
Dash of apple brandy (optional)
Ice cream (optional)

In a large bowl, mix together the flour, sugar, 1/8 teaspoon salt, baking powder, and butter. Work this mixture with a pastry blender or fork until it resembles coarse cornmeal.
Make a well in the center of the flour mixture and add the egg and vanilla. Mix the eggs and vanilla slightly with a fork, then gradually whisk in the flour mixture. Work and knead until the mixture forms a coherent mass and is moist but not sticky. If sticky, add a little more flour and knead it in. If too dry, incorporate crème fraîche, yogurt (milk or water also works) one tablespoon at a time (up to 2 tablespoons) until dough is moist.
Cut the dough in half and roll each half into a ball. Flatten the halves a bit, cover with plastic wrap, and allow to chill for 30-45 minutes in the refrigerator.
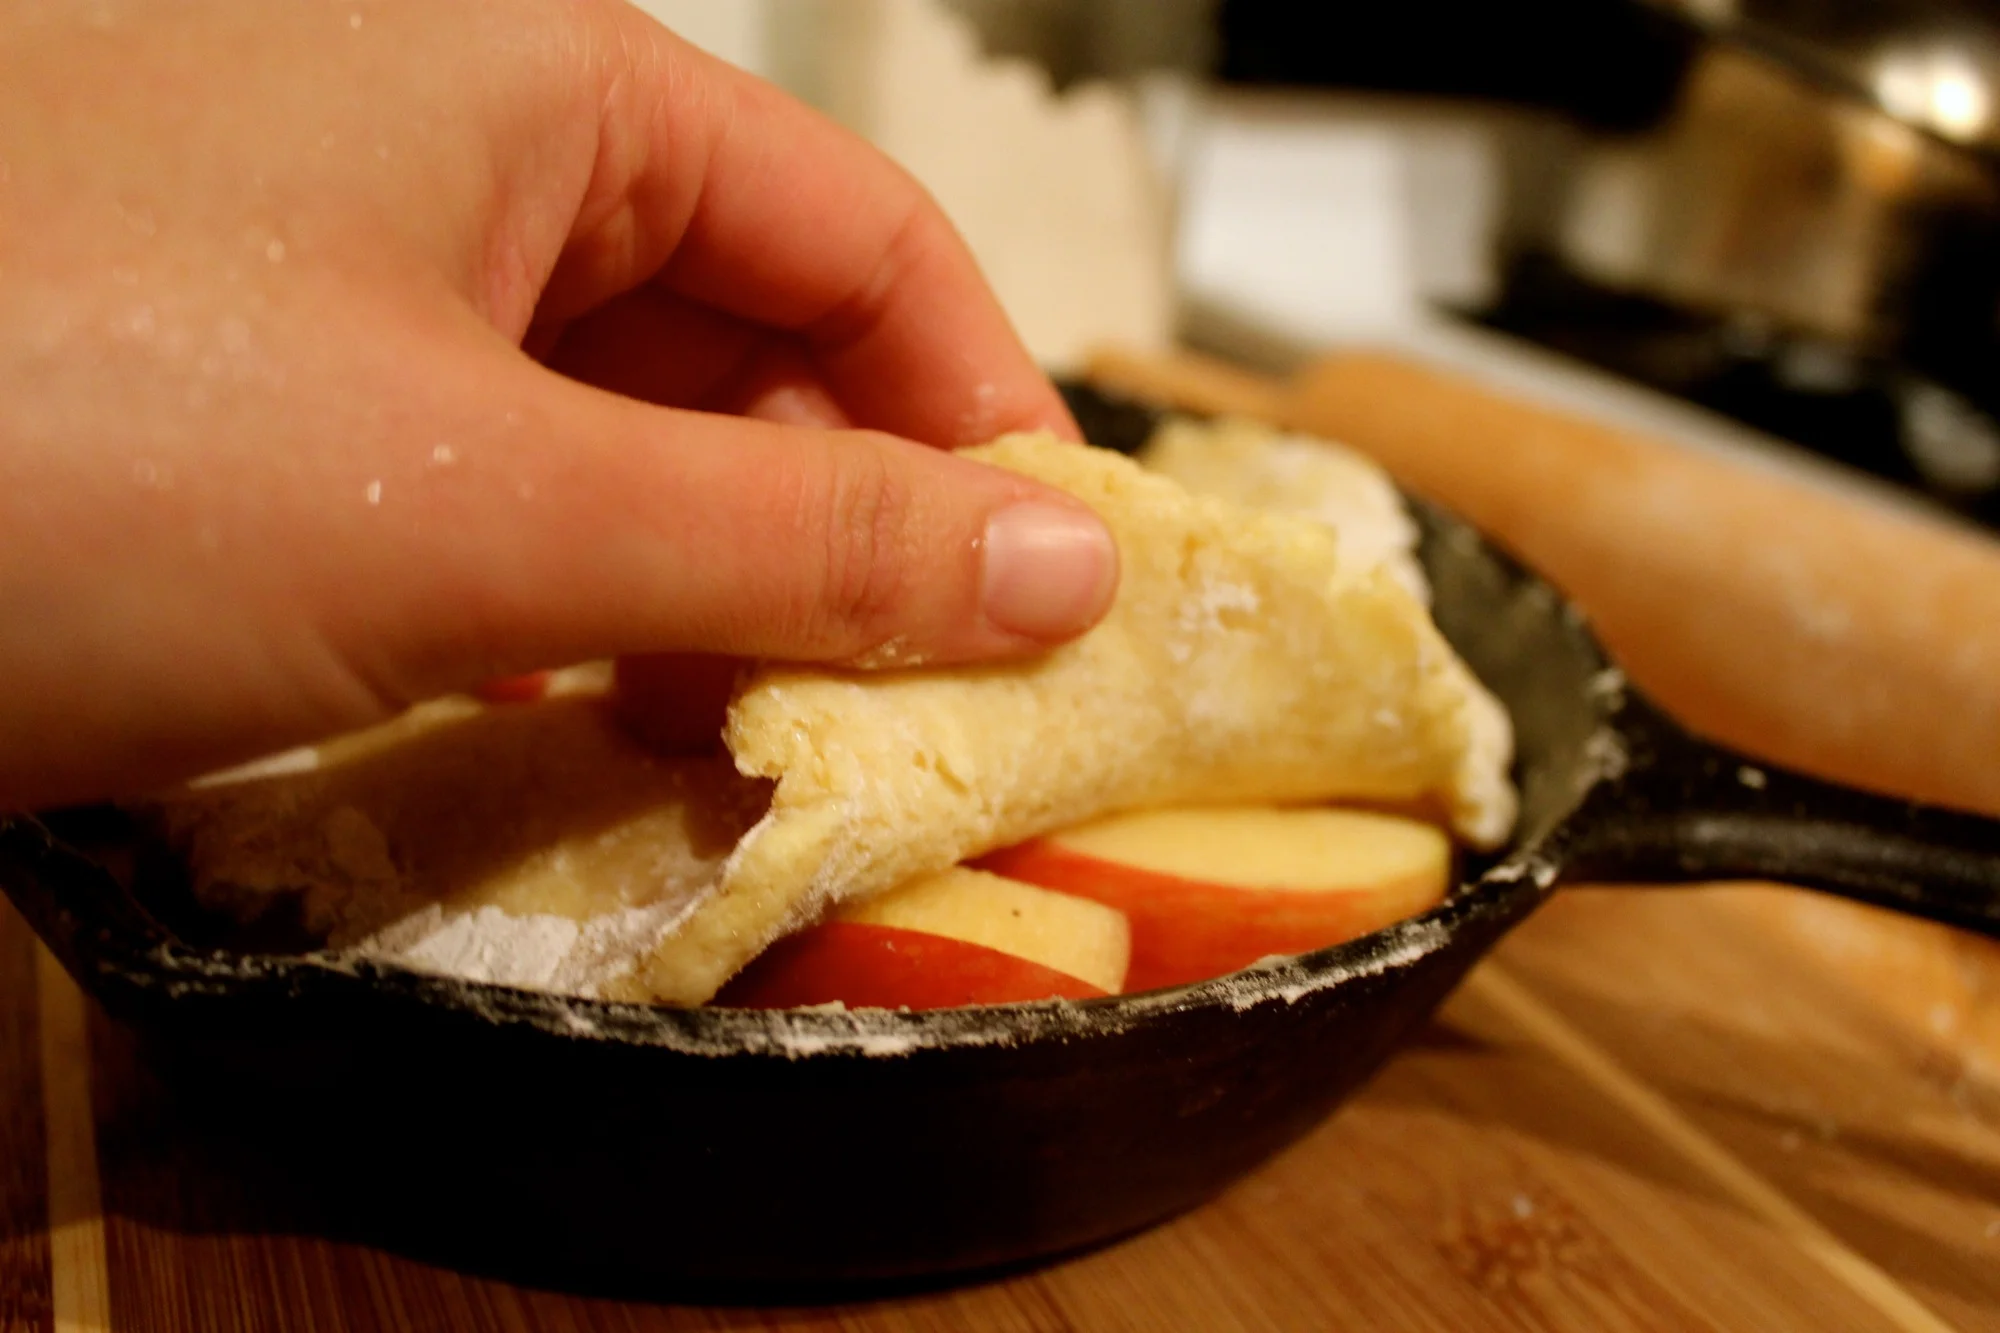
Preheat the oven to 350 degrees. Butter an 8-inch cast iron pan. Core and slice the apples (they can be peeled, I like to keep the peels on), then toss them in a bowl with the lemon juice, brown sugar (more or less, depending on apples and preference), allspice, pinch of salt, and optional dash of apple brandy.
Take the dough out of the refrigerator about 5 minutes prior to rolling. Sprinkle one dough ball with flour, flip, sprinkle with more flour, and roll out on plastic wrap until is will fit snugly into the bottom of the cast iron pan. The dough can be a bit sticky, so add a little extra flour as needed. Lifting the plastic wrap, invert it into the cast iron pan.
Pile the apple mixture on the dough and rearrange apples to minimize large pockets of air. Roll out the remaining dough as you did before, but a little larger than first (so it can fit over top of apples) and place it over the apples by inverting the plastic wrap as you did the previous time. If the dough breaks, don't worry - just press it back together.
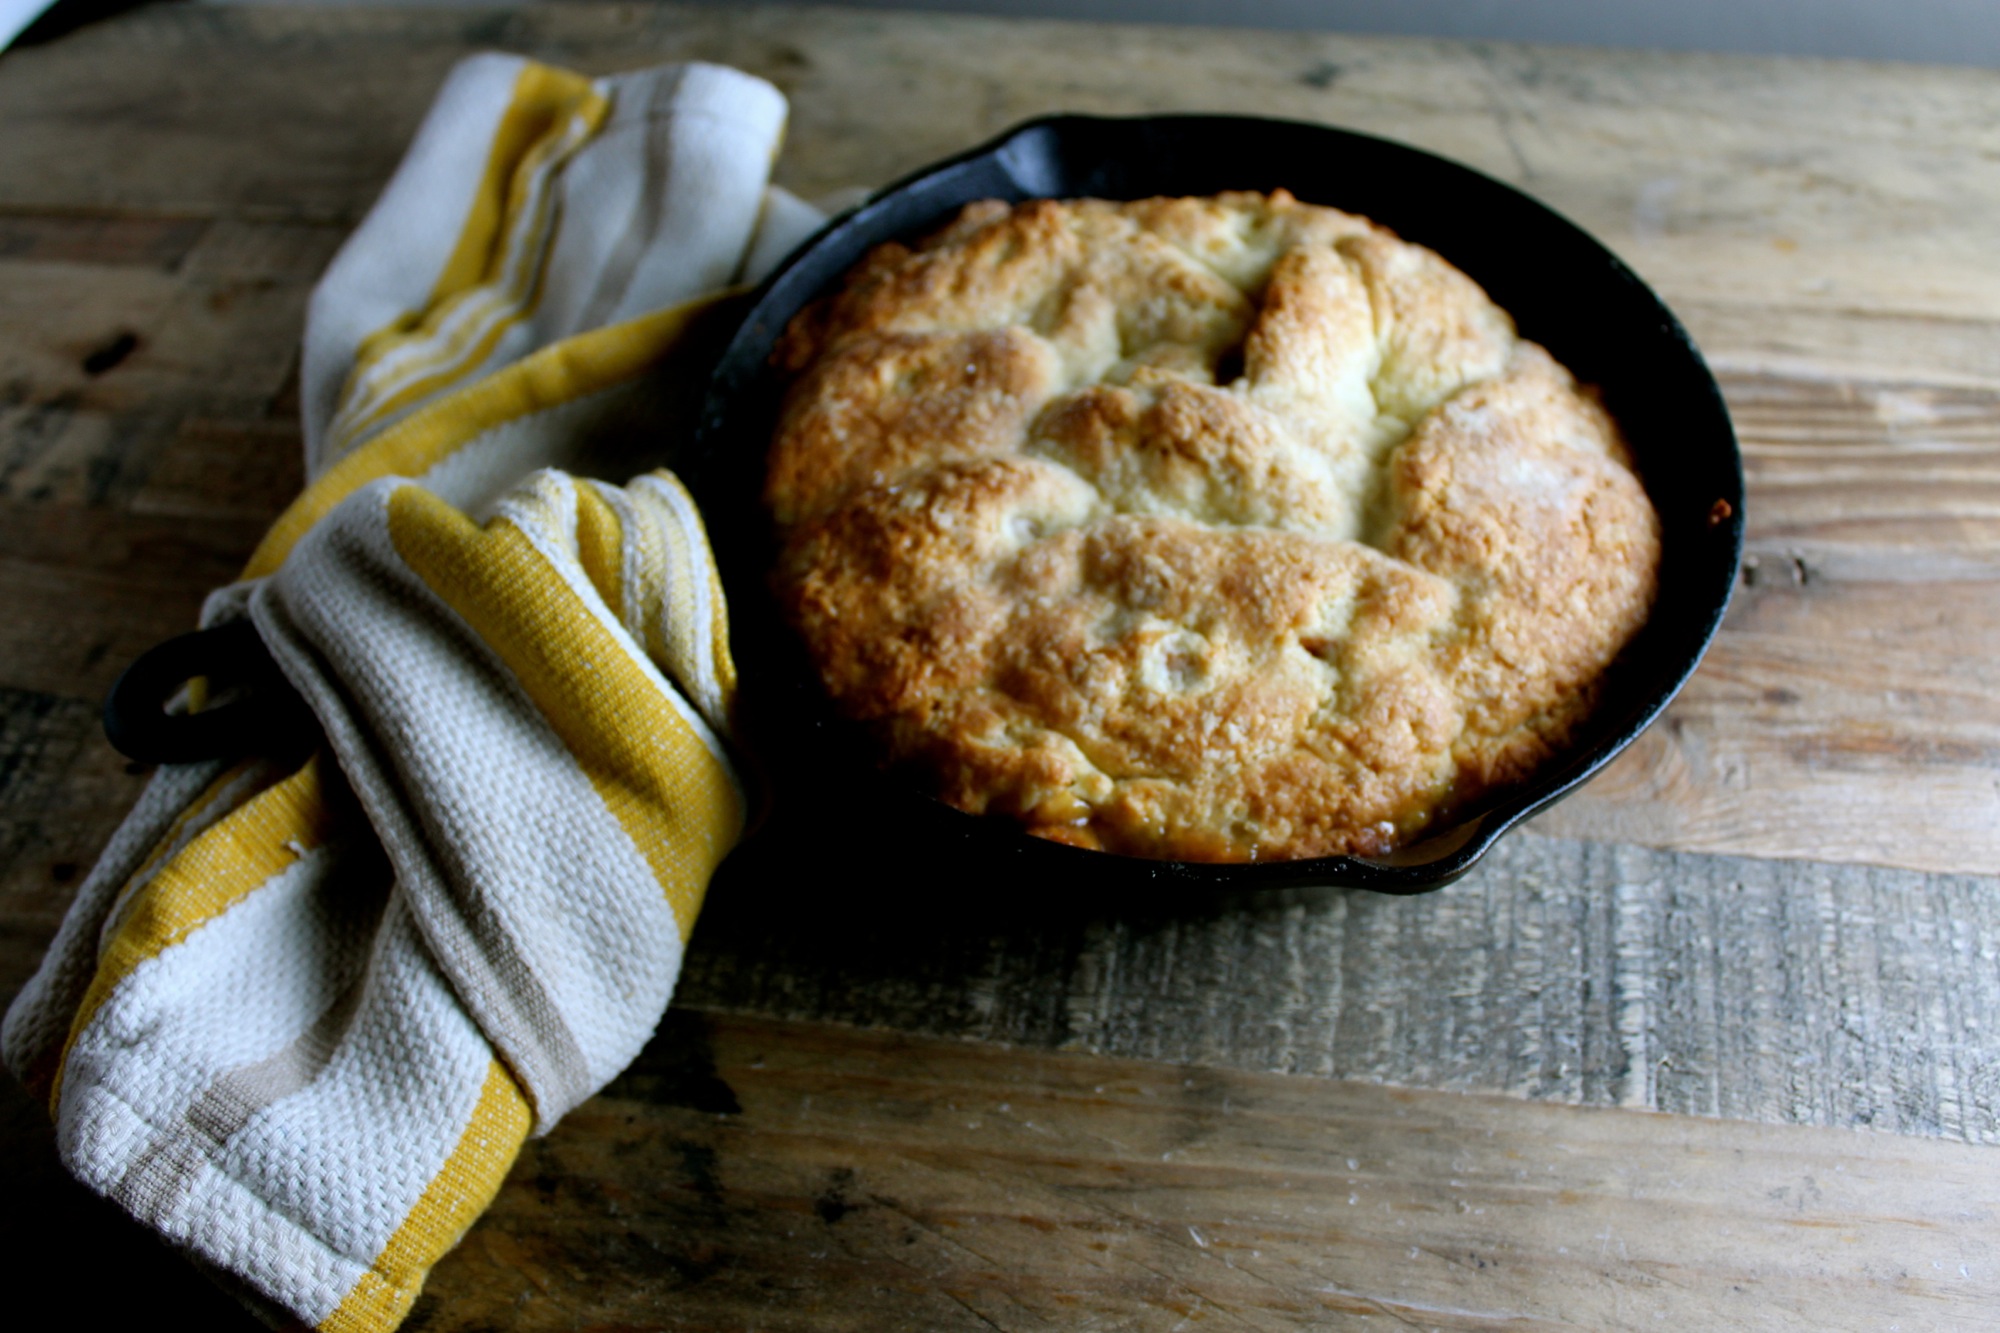
Bake the cake for 45 minutes or until the crust is golden brown and your house smells marvelous.
Serve warm, with crème fraîche or ice cream and mint garnish if desired. Also great in the afternoon with cheese.
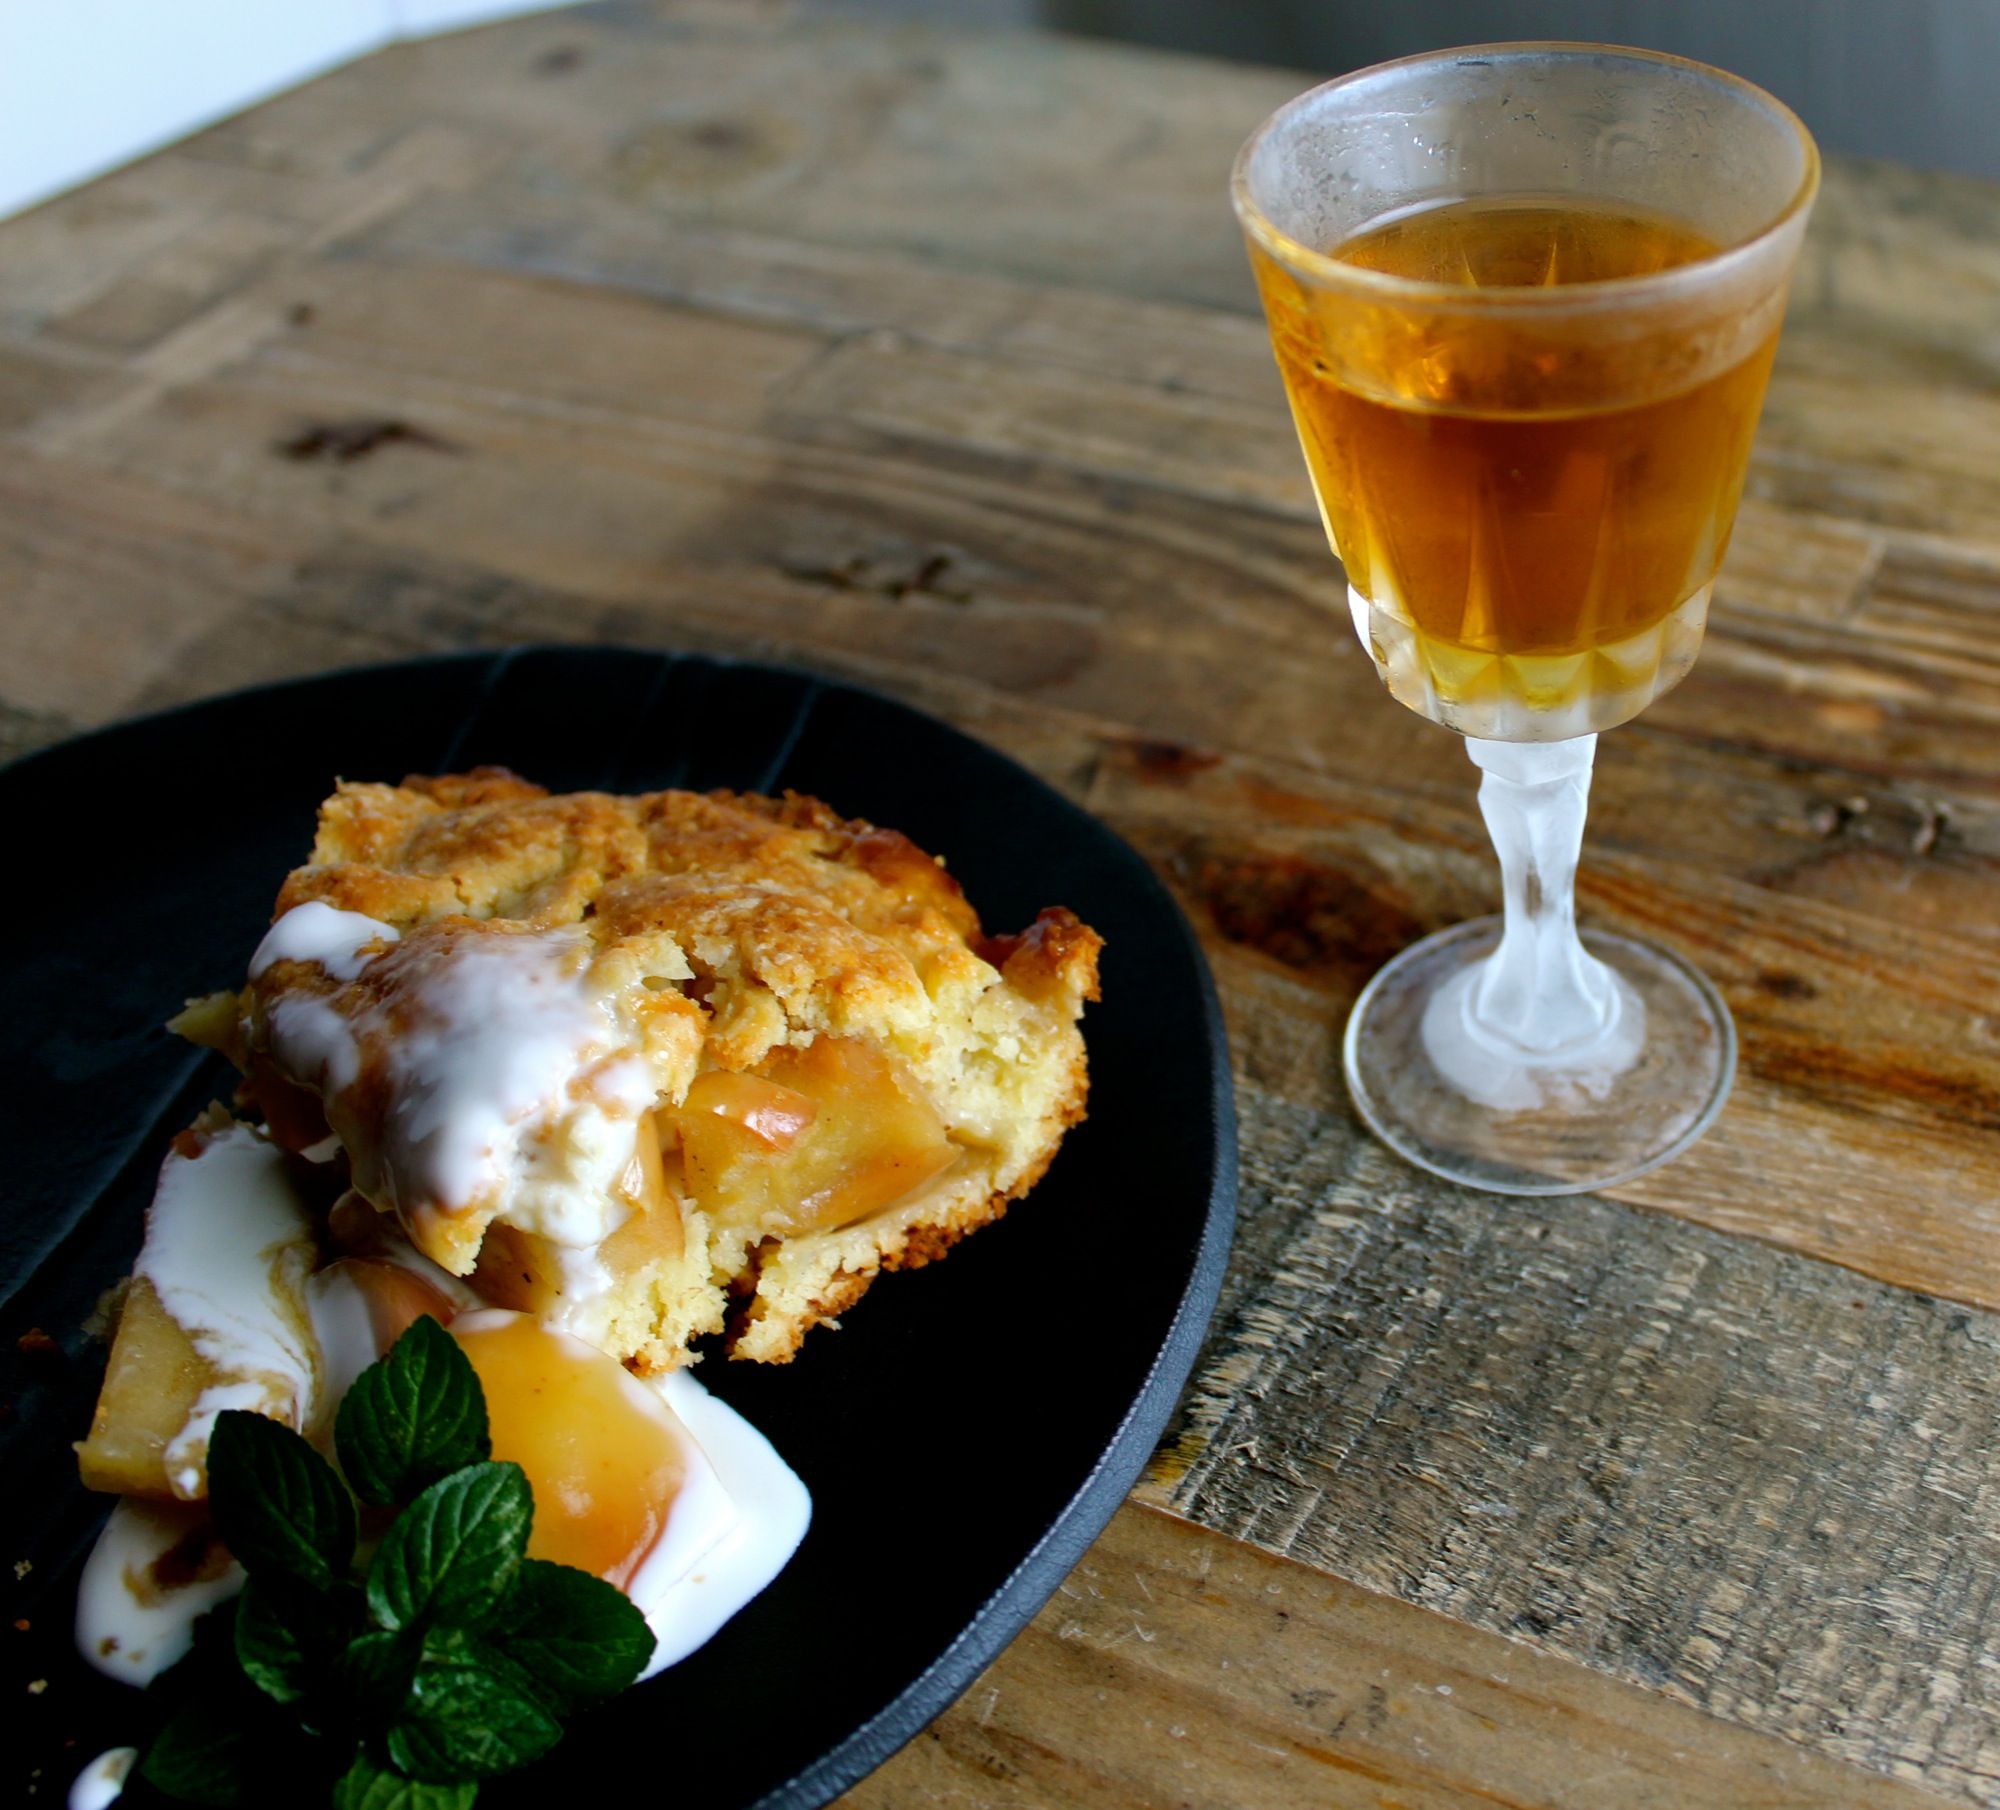
This German apple cake pairs wonderfully with cold apple brandy/calvados.
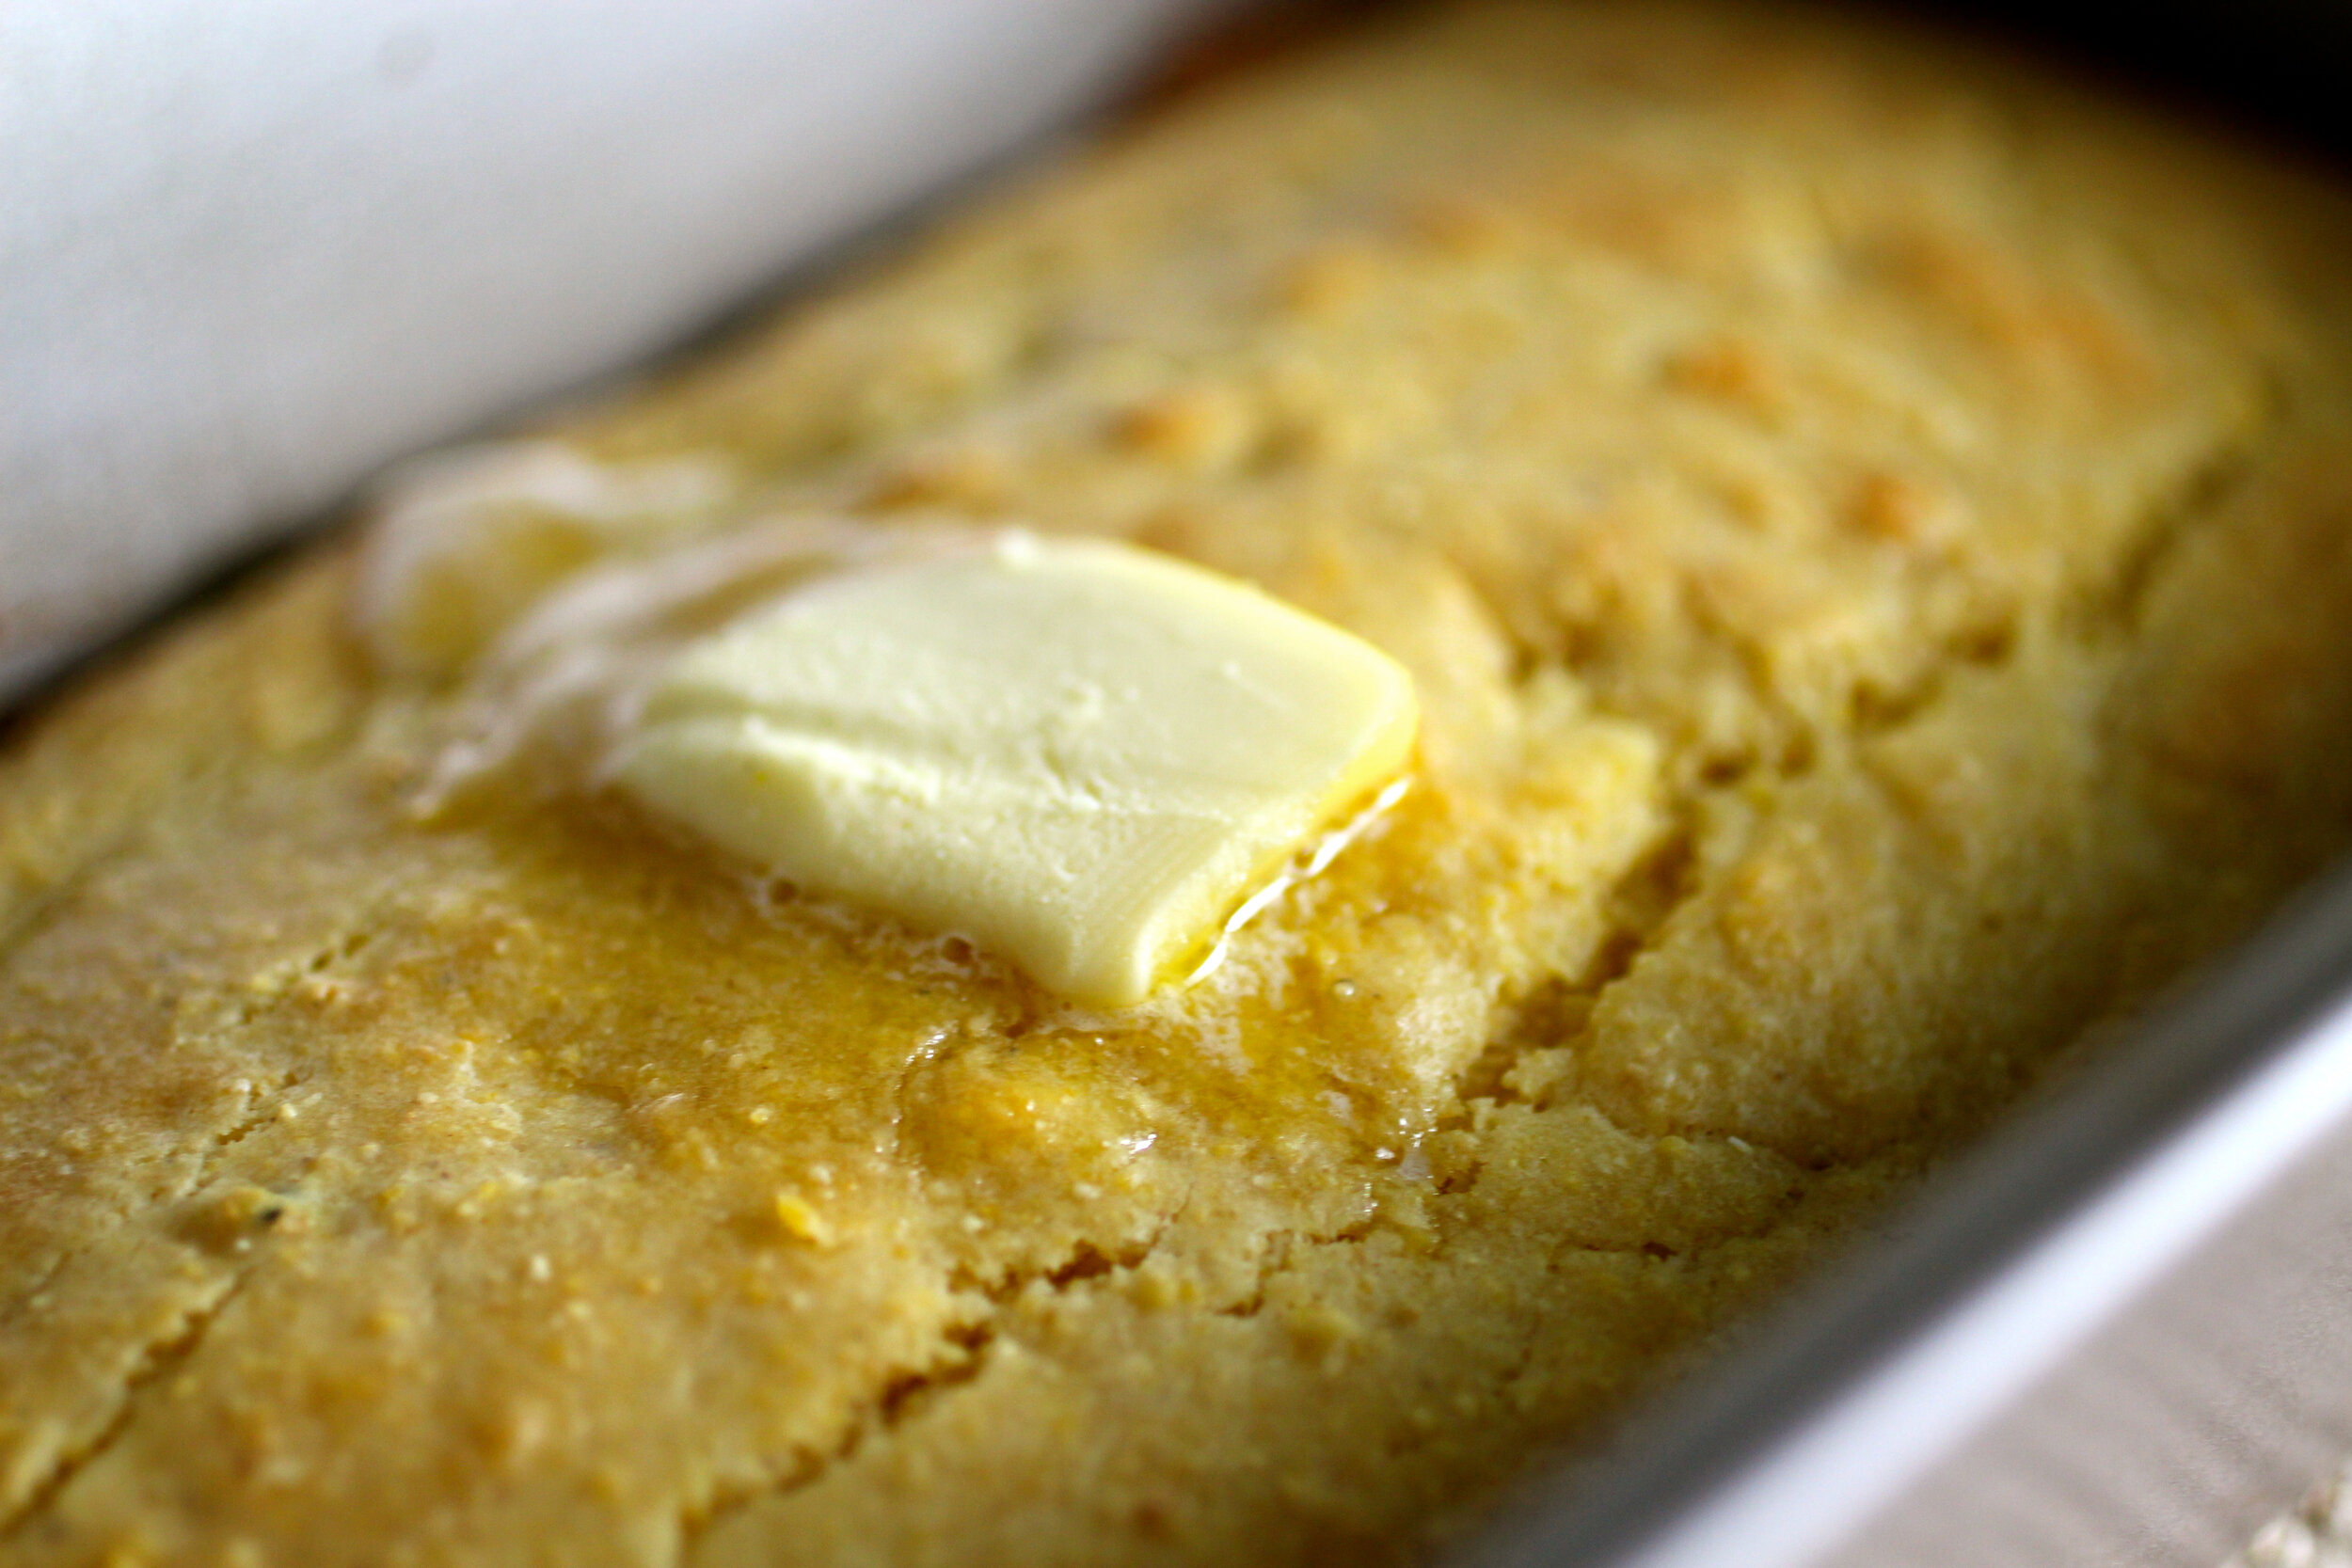
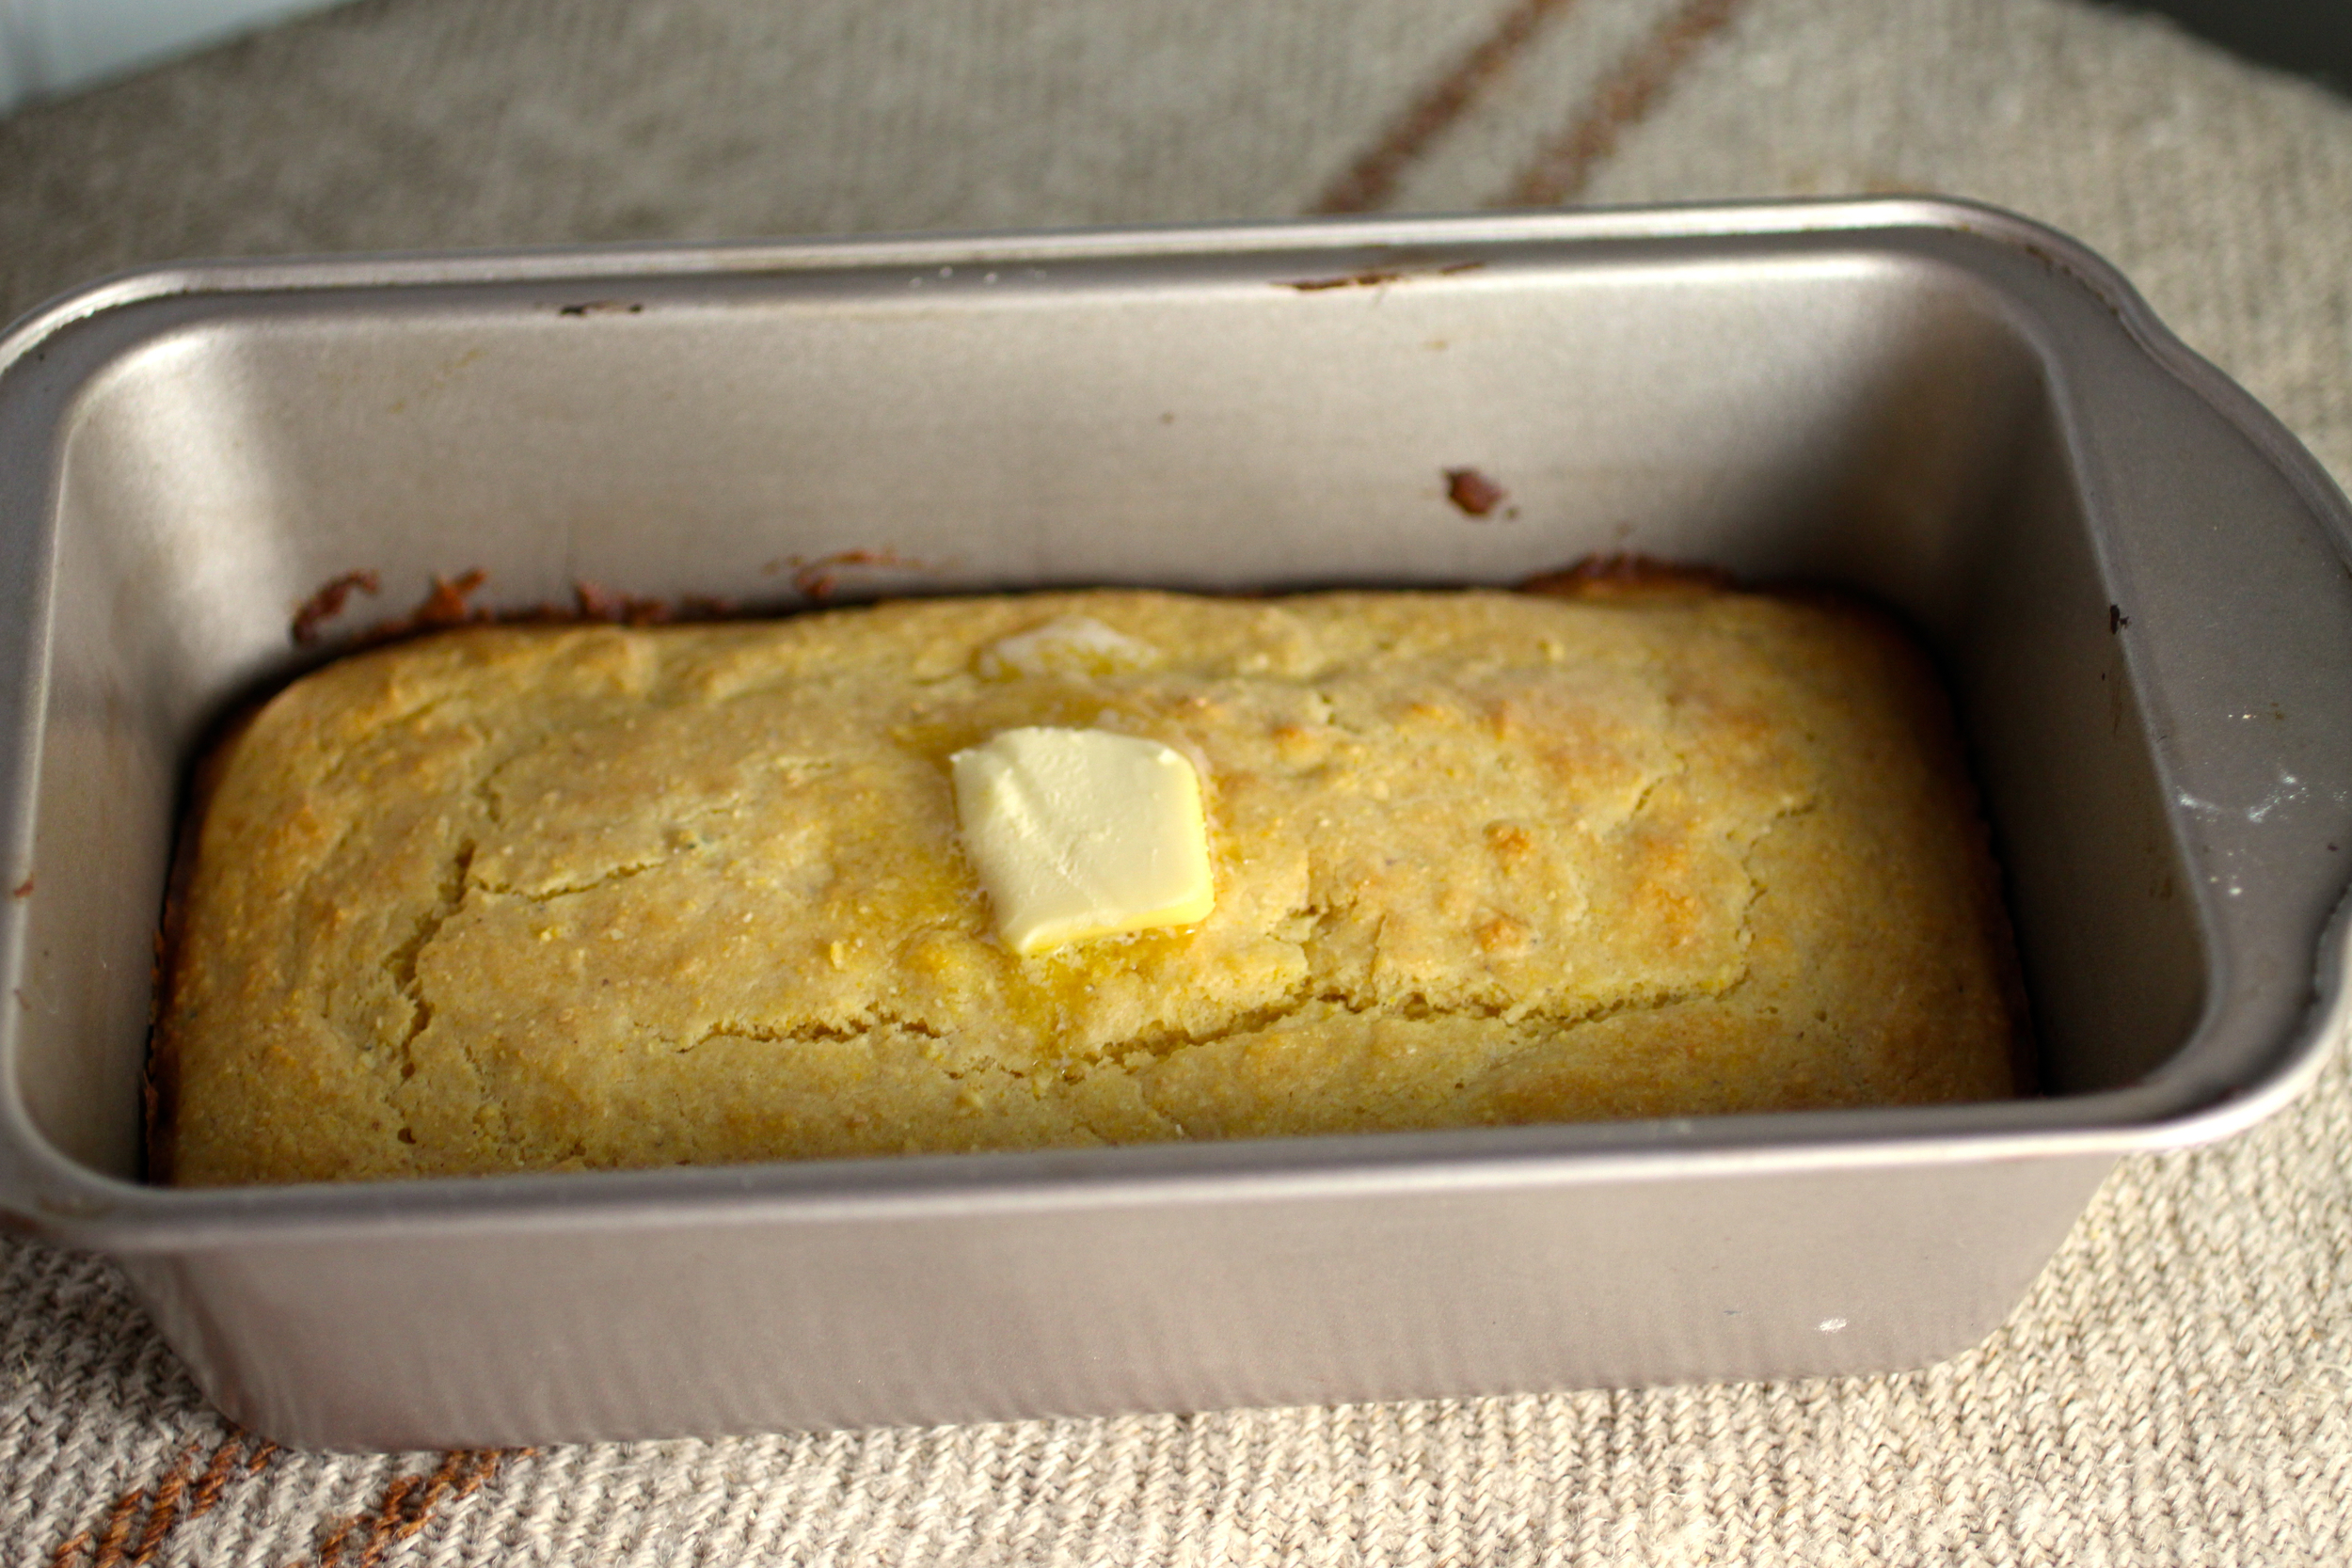
Buttermilk Cornbread
A slice of rustic homespun heaven.

Show me a person who doesn't like cornbread and I'll show you someone that can't be trusted.
Cornbread is really a quickbread, in the same category as your banana and zucchini breads, as it is leavened with baking soda rather than yeast. The use of cornmeal in addition to all-purpose flour gives it the pleasantly grainy quality that we all associate with cornbread. This recipe uses buttermilk or yogurt to give it a delicious tart quality that melds well with the rustic corn.
One of the aspects of cornbread that I personally appreciate is that it can be enjoyed as a savory side dish or a sweet snack, with the addition of butter and honey. Pro-tip: Leftover cornbread + honey + butter + coffee the next morning = a great way to wake up. Makes 9-12 pieces.
“Fun recipe adaptations include adding chopped onions, herbs such as parsley or cilantro, and/or fresh corn kernels off of the cob in the summer time.”
1-1/2 cup yellow cornmeal (medium grind preferred)
1 cup all-purpose flour
1 teaspoon baking soda
1 teaspoon salt
2eggs
2 tablespoons brown sugar
1-1/2 cup buttermilk or plain yogurt
8 tablespoons unsalted butter, melted
Preheat oven to 400, butter an 8-inch square baking dish (or loaf, cake pan, or muffin tins).
In a medium bowl, whisk together cornmeal, flour, baking soda, and salt. In a large bowl, mix together the eggs, brown sugar, and yogurt
Add the dry ingredients to the egg mixture and stir to combine. Stir in melted butter. Pour batter into prepared baking dish
Bake on the middle rack of the oven for 20-25 minutes, or until golden-brown and cooked through.
Cool in pan for 10 minutes before cutting into squares to serve.
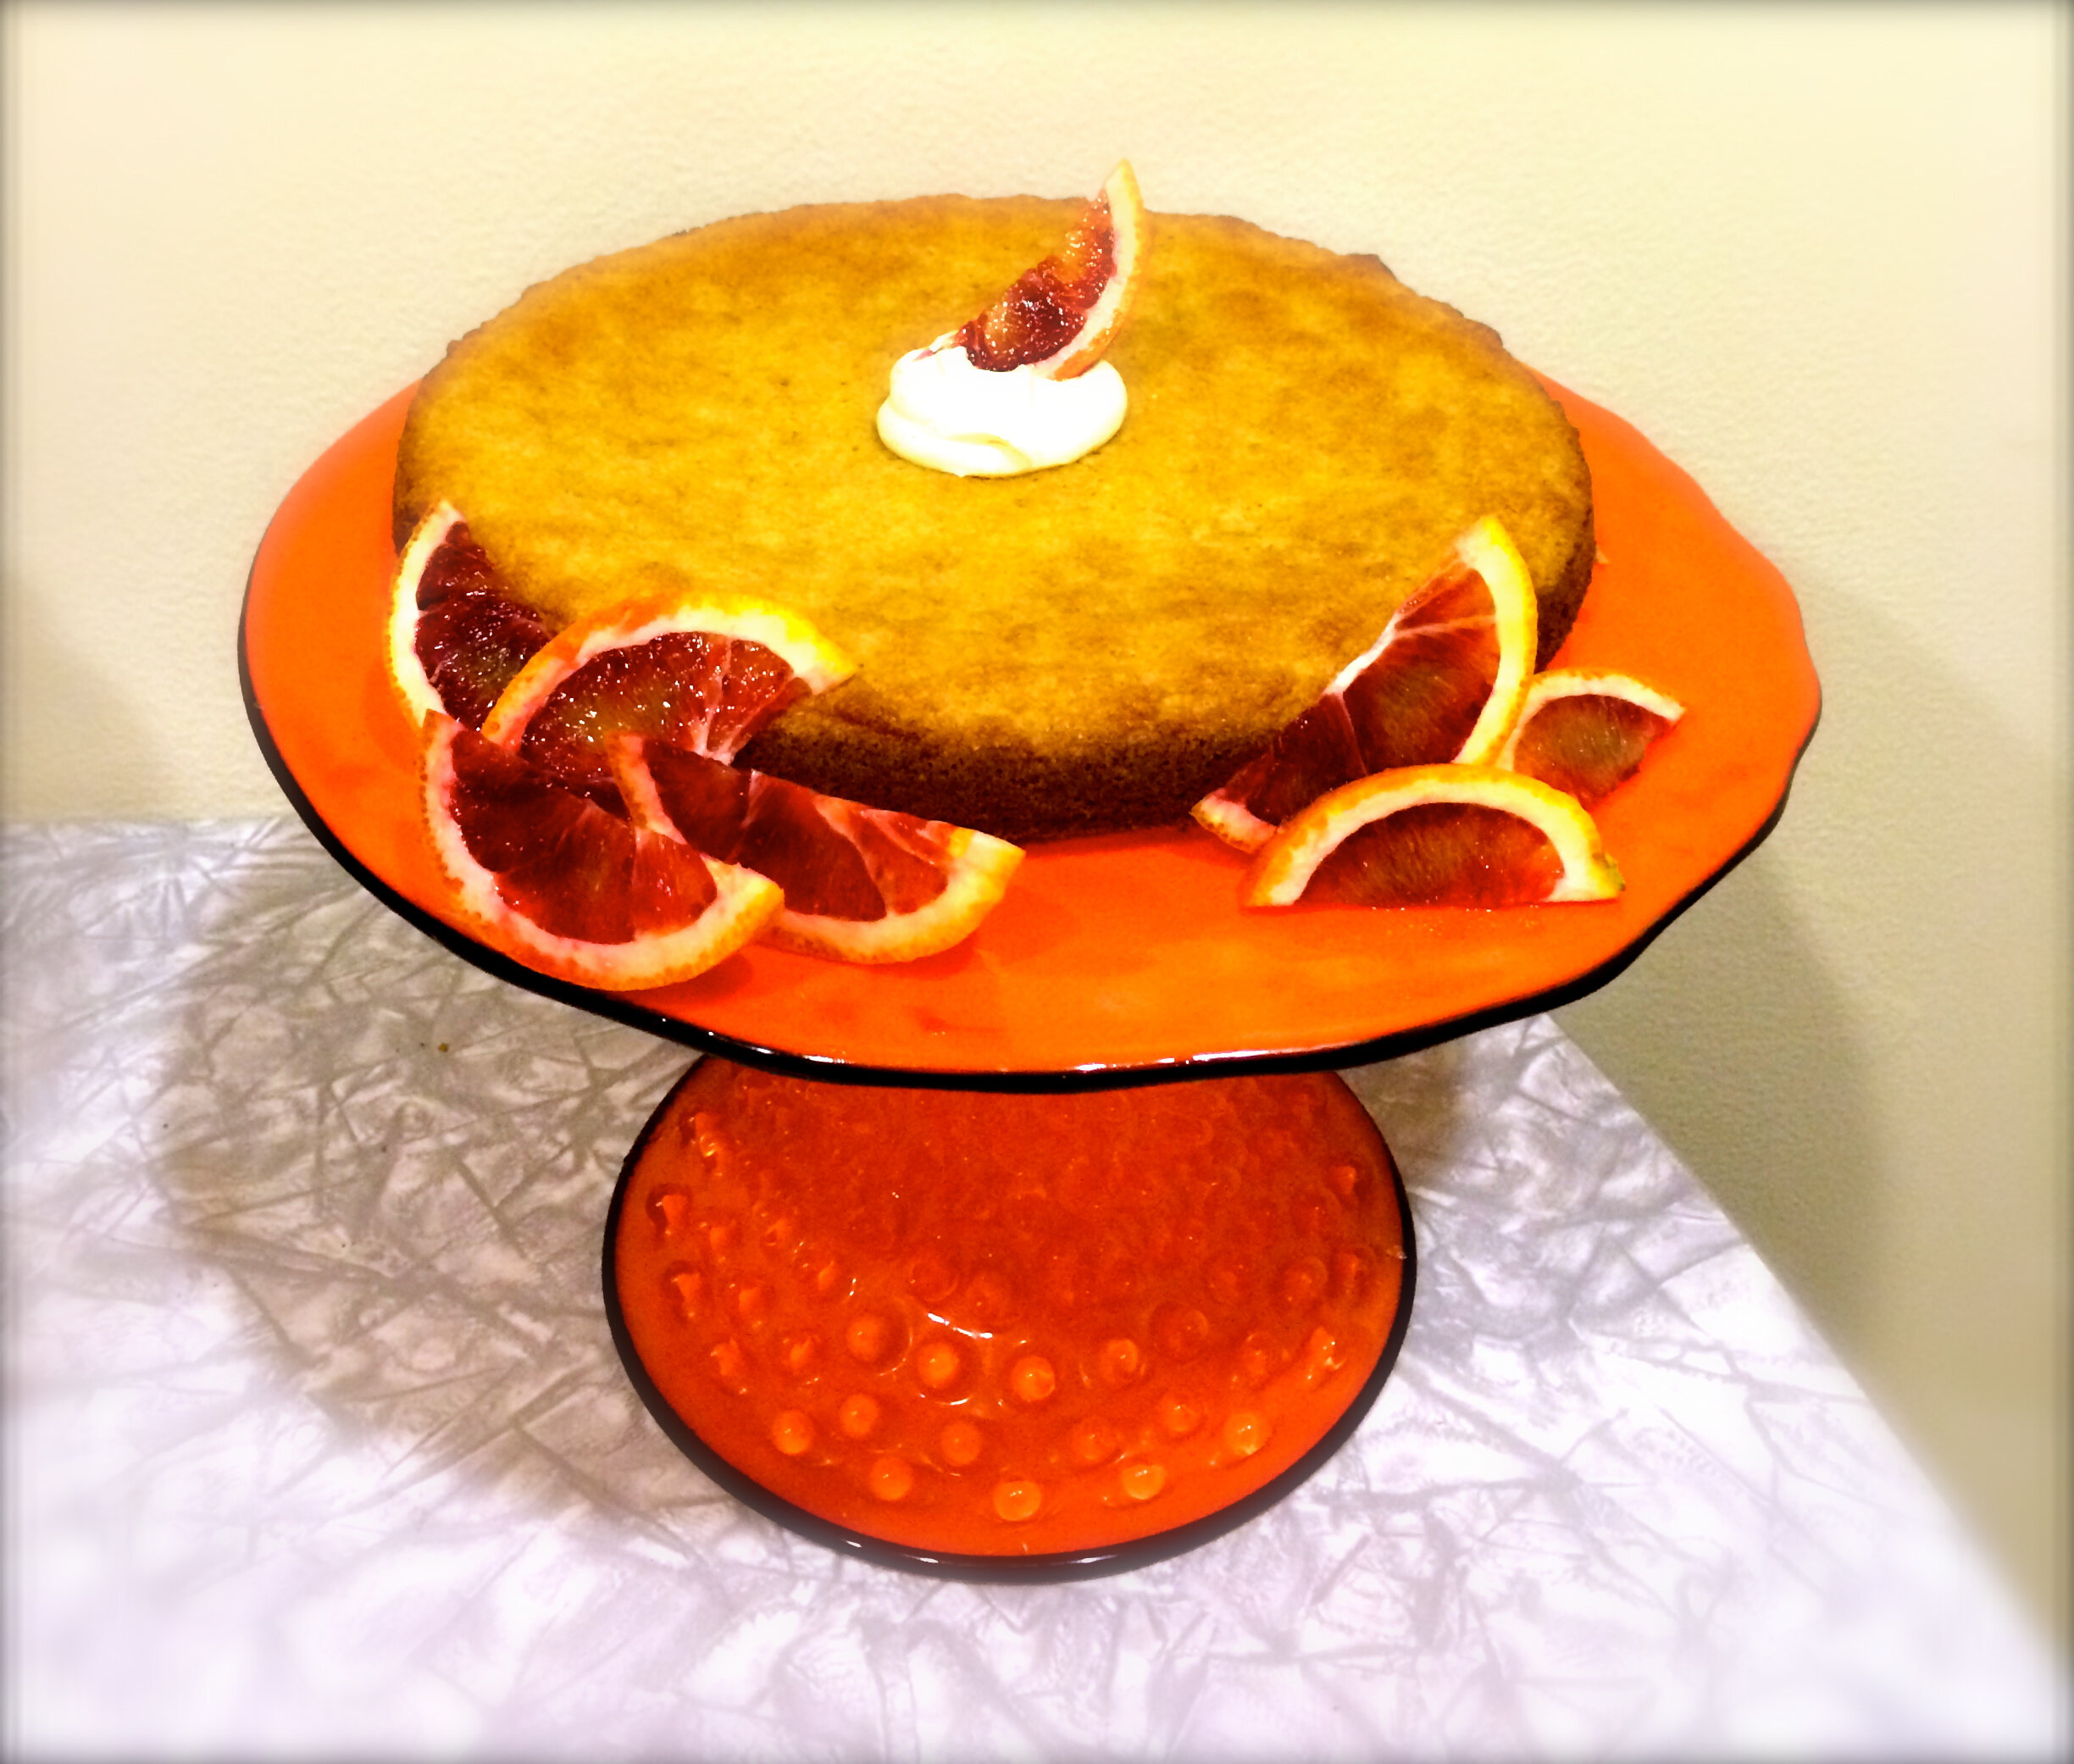
Almond Olive Oil Cake with Blood Orange

I am a sucker for olive oil in desserts. There's something about the nutty/spiciness that imparts a savory quality I think balances really well with sweet foods. Why not have your cake and eat your healthy fats too with this moist and nutty dessert? Serves 8-12.

- 1 cup almond meal or almond flour
- 1/2 cup all-purpose flour
- 1/4 teaspoon salt
- 1-1/2 teaspoons baking powder
- 2 large eggs
- 3/4 cup granulated sugar
- 1/2 cup olive oil
- 3/4 teaspoon vanilla extract
- 1/4 teaspoon almond extract
- Grated zest of 1/2 a blood orange
- 2 tablespoons blood orange juice
Preheat oven to 350 degrees F. Grease and flour a 9-inch cake pan or springform pan.
Whisk together almond meal, flour, baking powder, and salt.
In another bowl, whisk eggs with sugar. Add olive oil and continue to mix until mixture has thickened, about 1 minute. Incorporate vanilla and almond extracts, zest, and orange juice and whisk to combine.
Add dry ingredients to mixture and whisk to combine.
Pour batter into prepared pan and bake for 25-30 minutes, or until cake is cooked thoroughly and begins to pull away from the sides of the pan.
Remove cake from oven and allow to cool for about 10 minutes before removing from pan. Serve cake on its own; topped with blood orange and creme fraiche or whipped cream; or with coffee or tea.

Nine Ways to Angel Food
Investigating eggs the cake way.

I teach the food science application lecture and laboratory at UC Berkeley and one of my favorite weeks is the week where we investigate eggs using angel food cake. Not only because I absolutely love angel food and honestly, even the cakes with recipes that are intentionally messed up still taste good to me, but because I think eggs are amazing. They are amazing for their incredible nutrient density (what other food gives you so much protein, vitamins, and minerals in 75 calories?), but also because they perform such a diverse array of culinary tasks, from aroma to structure. Also, I love the fact that, once out of the shell, they are so fragile and sensitive - just a few degrees can create a completely different product. Unfortunately, not everyone shares this fascination with eggs, be it because of the way they smell or unfounded worries about saturated fat (an average of 1 egg per day is completely fine, the benefits outweigh the saturated fat content). Oh well - more for me!
Angel food cake is the perfect vehicle for evaluating the properties of egg white foams. In lab, we conduct this evaluation with nine different variations in addition to the classic “gold standard” recipe.


Variations include (beginning with arrow and moving counter clockwise). Some worked as they were supposed to and others did not. See below for descriptions of what would theoretically happen to the cake, given the variation:
Cake 1, Classic: Gold Standard
Cake 2, Beat a longer time, until Stage IV: Proteins are overcoagulated, leaving cake "brittle" and stiff.
Cake 3, Beat foam a shorter time, until Stage I: Proteins not denatured/coagulated enough, no structure, does not rise.
Cake 4, Increased manipulation/folding of batter: Collapsed air cells that were created in beating the foam. Cake is dense and flat.
Cake 5, baked at a lower temperature for a longer period of time: Does not rise as high because no initial hot air.
Cake 6, cream of tartar omitted: COT is an acid that helps stabilize the proteins and bleaches anthocyanin, a yellow pigment. Cake without COT has a poorer structure, coarser crumb, and yellower color.
Cake 7, use of hand beaters in place of electric: Totally depends on the skill of the chef! May actually lead to a better, more delicate product because hand blenders often have more blades.
Cake 8, only 1/2 the amount of sugar used: Sugar helps prevent the eggs proteins from denaturing, making it take longer to create a foam and leading to finer air cells and a stronger structure. Without sugar, structure is weak and may not be high in volume, crumb is coarser, and cake is bbviously not as sweet. The lack of sugar also leads to more developed gluten because there's no sugar to draw the water away from the gluten to develop it, which means a tougher cake with less sugar.
Cake 9, lemon juice used in place of cream of tartar: Lemony tasting and structure is weaker, less consistent.
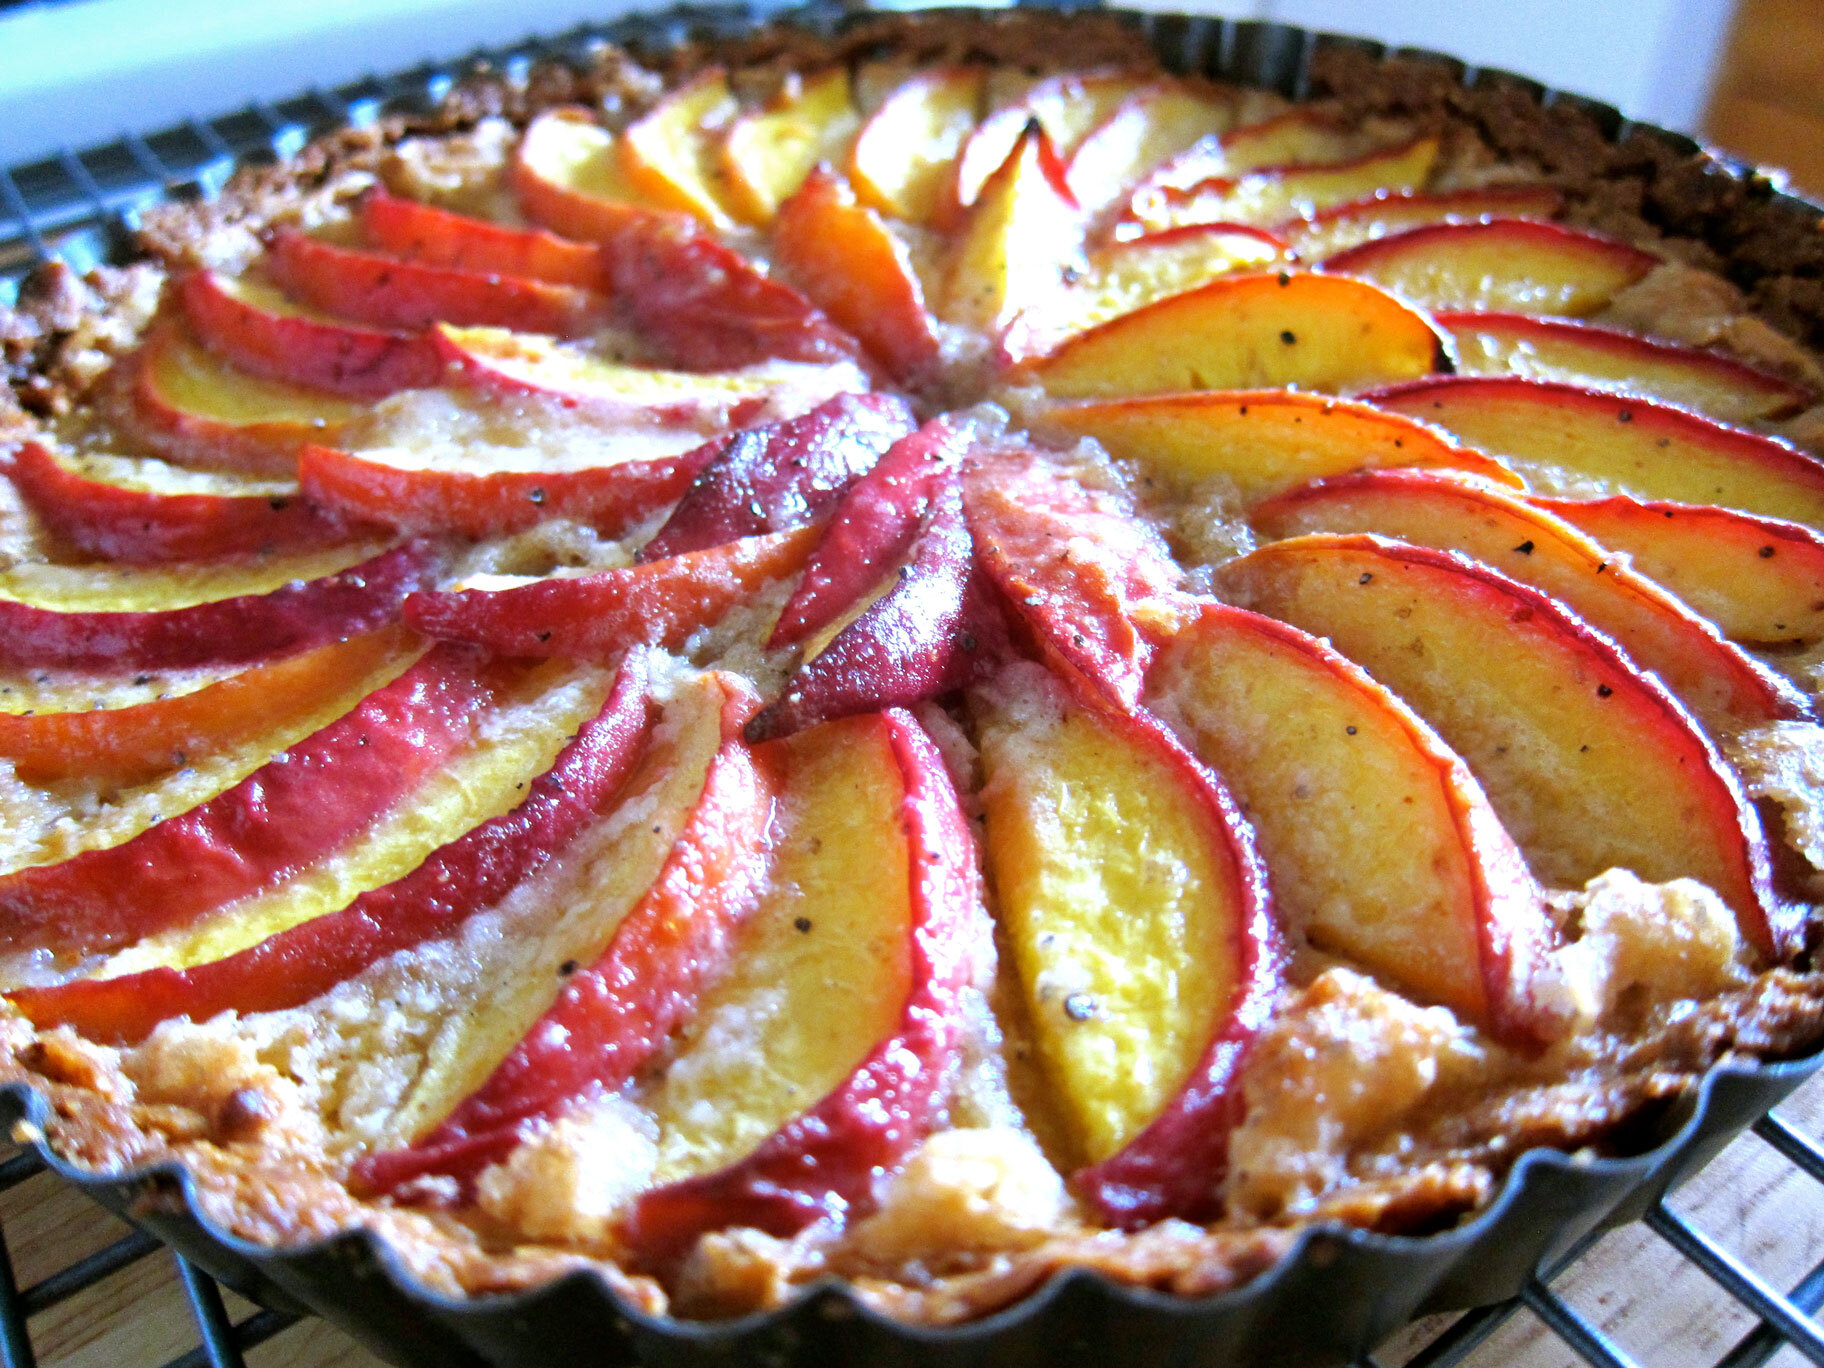
Cardamom and Brown Butter Nectarine Tart
Worth it for the smell alone.

“Caution: Production of this dessert may lead to a decrease in productivity related to ridiculously delicious kitchen smells as evidenced by inability to focus on anything else.”
I’m a sucker for cardamom, browned butter, and stone fruit, so it’s no surprise that this dessert really does it for me. Usually I make crusts with cold diced butter for better flakiness, but the melted butter in this tart crust makes for a very crunchy, more caramelized flavor and texture that’s great with the fruit filling. Using half almond meal in the crust produces great flavor and texture, but the crust falls apart a bit more easily. Amp up the cardamom amount for more intensely cardamommy flavor if you desire.
“Try making the crust with 1/2 cup almond meal and 1/2 cup plus 1 tablespoon all purpose flour for a deliciously nutty twist. ”
7 tablespoons unsalted butter, melted plus 1/4 cup (1/2 stick) unsalted butter, diced
1/3 cup plus 1/4 cup sugar
1/4 teaspoon vanilla extract
1 cup plus 3 tablespoons all purpose flour
1/8 teaspoon plus one pinch salt
1 large egg
10 cardamom pods, seeds removed and ground with mortar and pestle (green pods are the freshest and most flavorful)
3 large nectarines, sliced
Preheat oven to 375 degrees F.
Mix melted butter, 1/3 cup sugar, and vanilla. Add 1 cup plus 1 tablespoon flour and 1/8 teaspoon salt and stir until incorporated.
Transfer dough to a 9” tart pan (preferably with removable bottom). Using fingertips, press dough evenly onto sides and bottom of pan. (I use a 1/3 cup measurer to smooth the crust out)
Bake crust until golden, about 18 minutes (crust will puff slightly while baking). Transfer crust to rack and cool in pan.
Whisk together remaining 1/4 cup sugar, egg, and pinch of salt. Add 2 tablespoons flour and whisk until smooth.
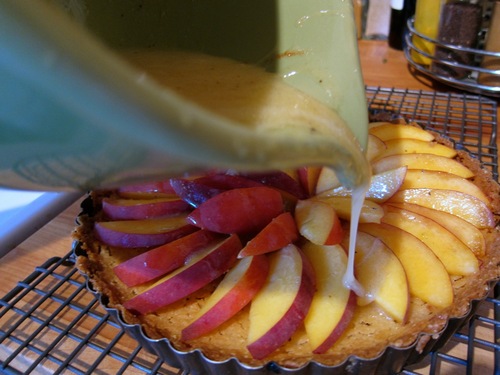
Cook remaining 1/4 cup butter and ground cardamom in heavy small saucepan over medium heat until deep nutty brown (do not burn), stirring often, about 6 minutes.
Immediately pour browned butter into glass measuring cup.
Gradually whisk browned butter into sugar-egg mixture, until well blended.
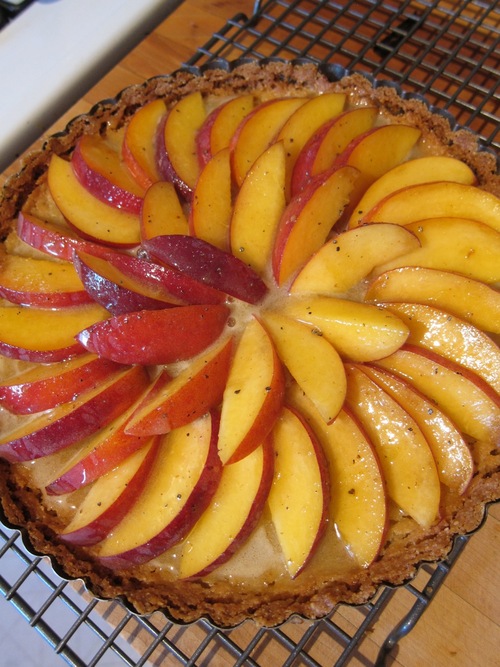
Arrange fruit in concentric circles in bottom of cooled crust. Carefully pour browned butter mixture evenly over the top and bake until filling is golden and tester inserted into center comes out clean, about 30-40 minutes.
Serve at room temperature or cold, with or without a creamy side such as ice cream, creme fraîche, or whipped cream.