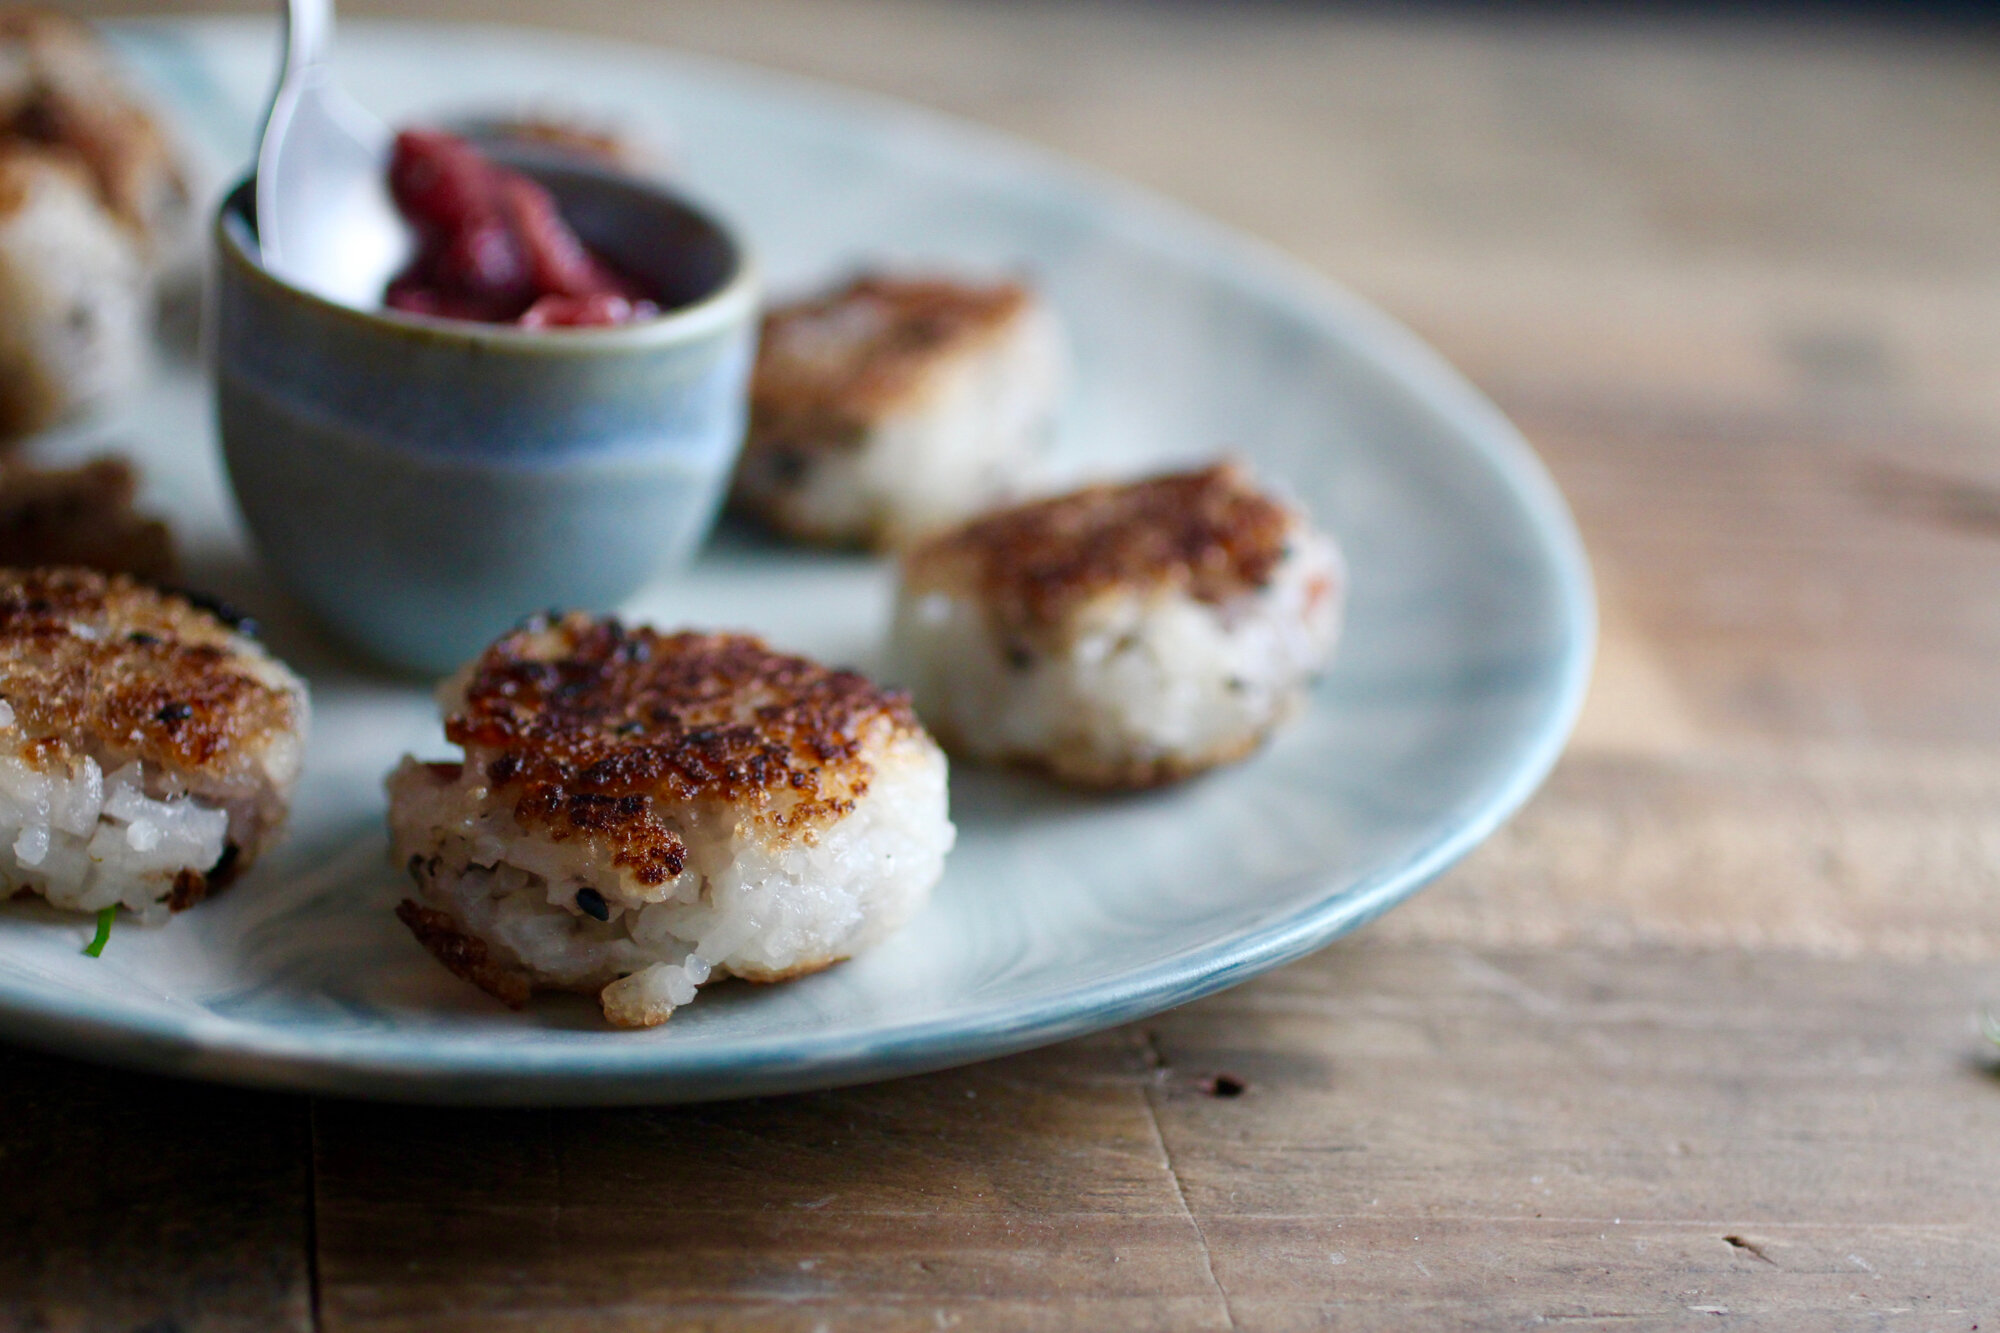
Seared onigiri (Japanese rice balls) with pickled plum

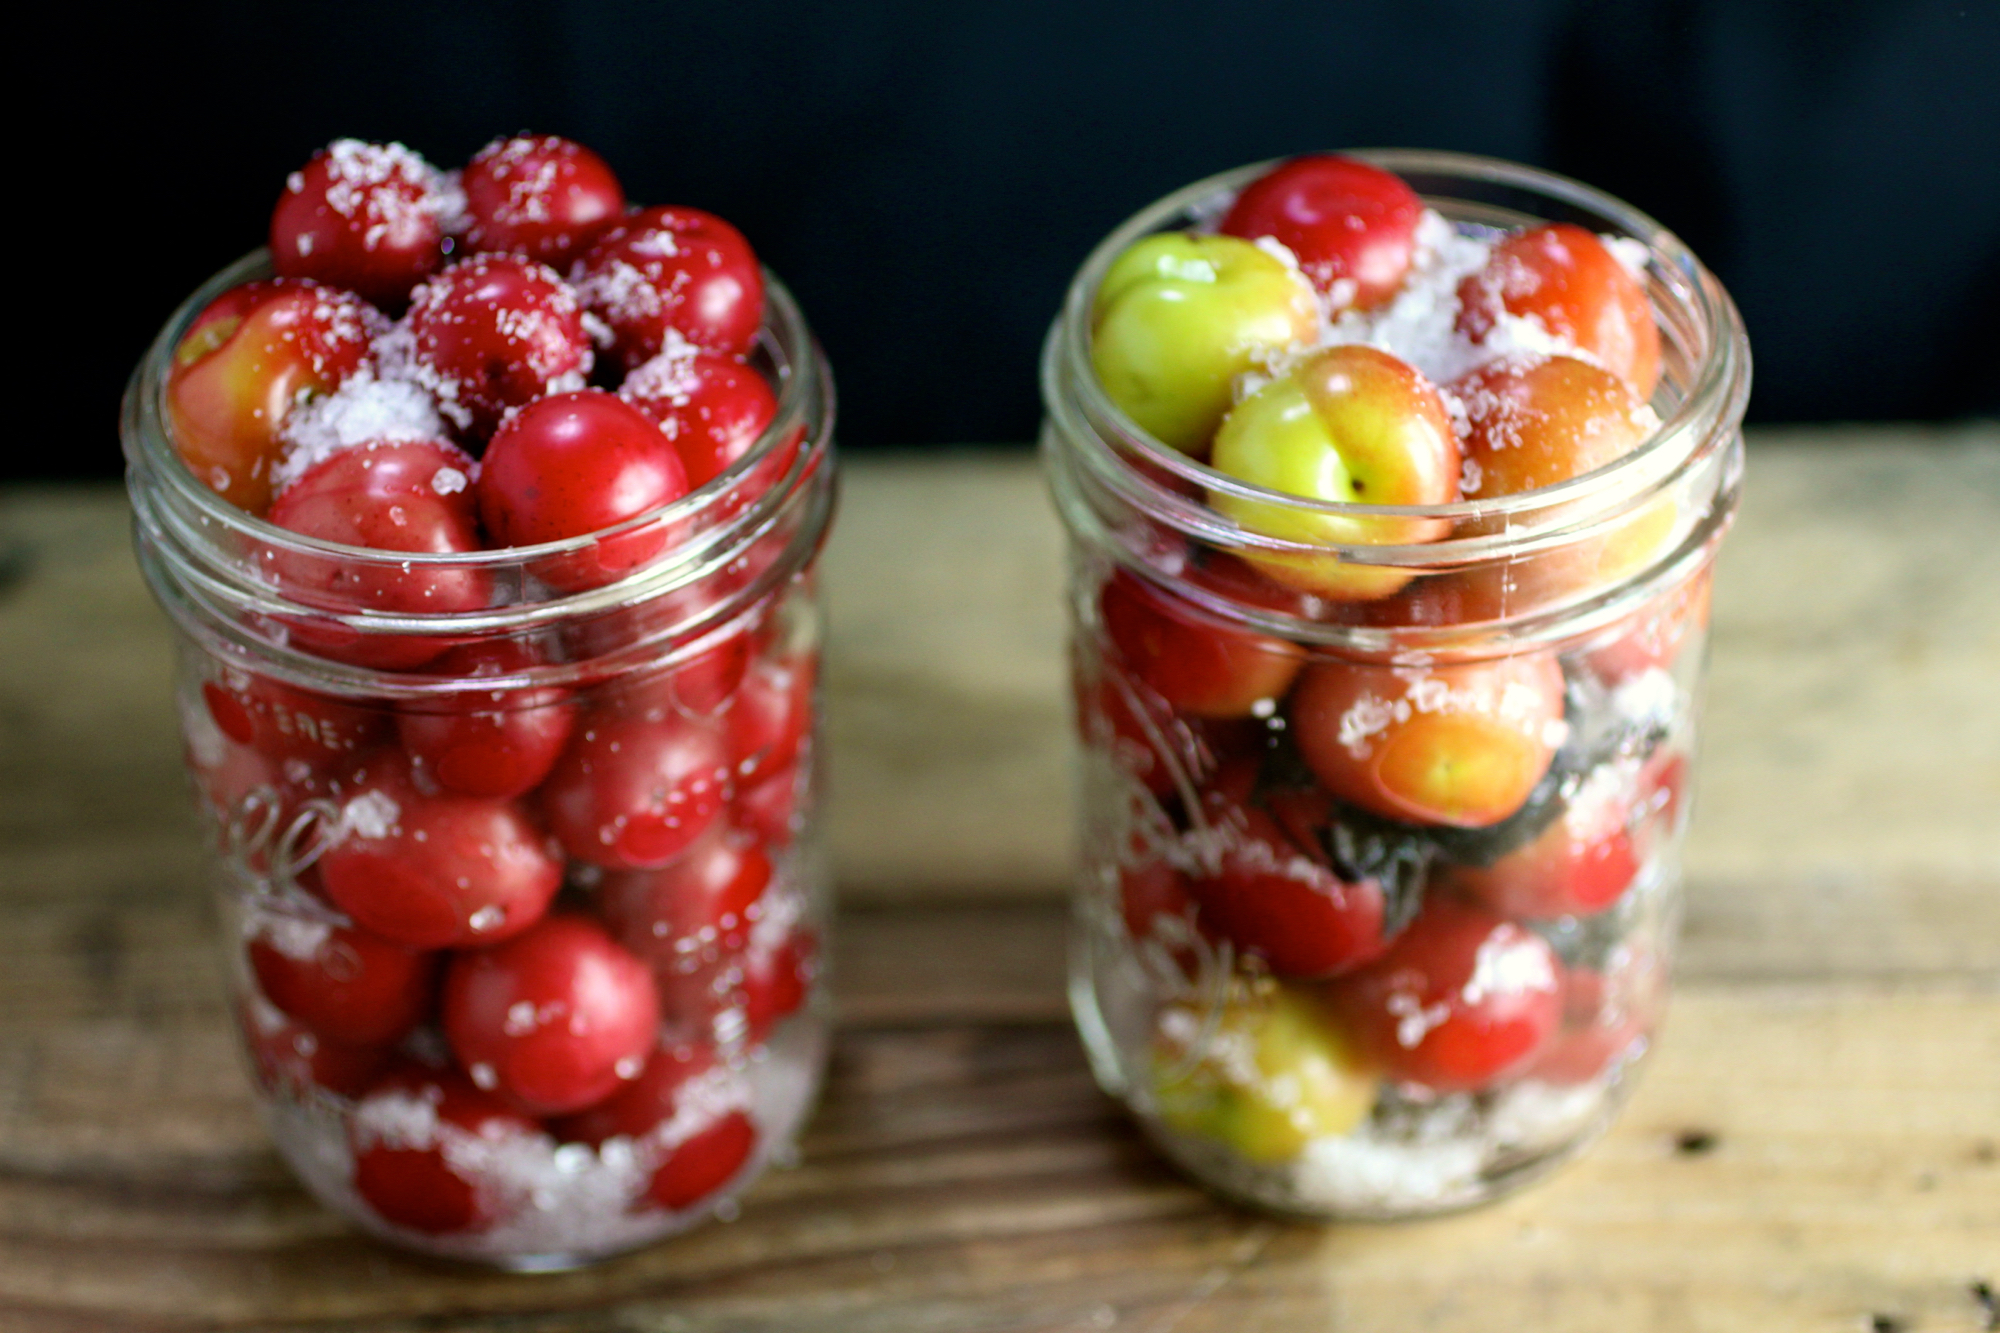
The beginnings of umeboshi made from wild California plums.
Last year I was diligent enough to get my hands on some wild plums and turn them into a California-inspired version of umeboshi, the umami-rich pickled plum condiment from Japan. You can find more about umeboshi and how I made it here, but the most important piece of information in this blog post is that as a result of my making umeboshi, I might be invited on an - I kid you not - Japanese game show. "Who Wants to Come to Japan" is a show that essentially, sends people who are interested in a particular aspect of Japanese culture and have never been to Japan and films their experience. They came across my umeboshi post and reached out to me about being a contestant. Naturally, I jumped at this opportunity. I have never been to Japan and have always wanted to go to explore Japanese foodways and the culture in general. Given it's a Japanese game show, there's definitely a high probability of ridiculousness and, although I may be the brunt of the ridicule, YOLO amiright?
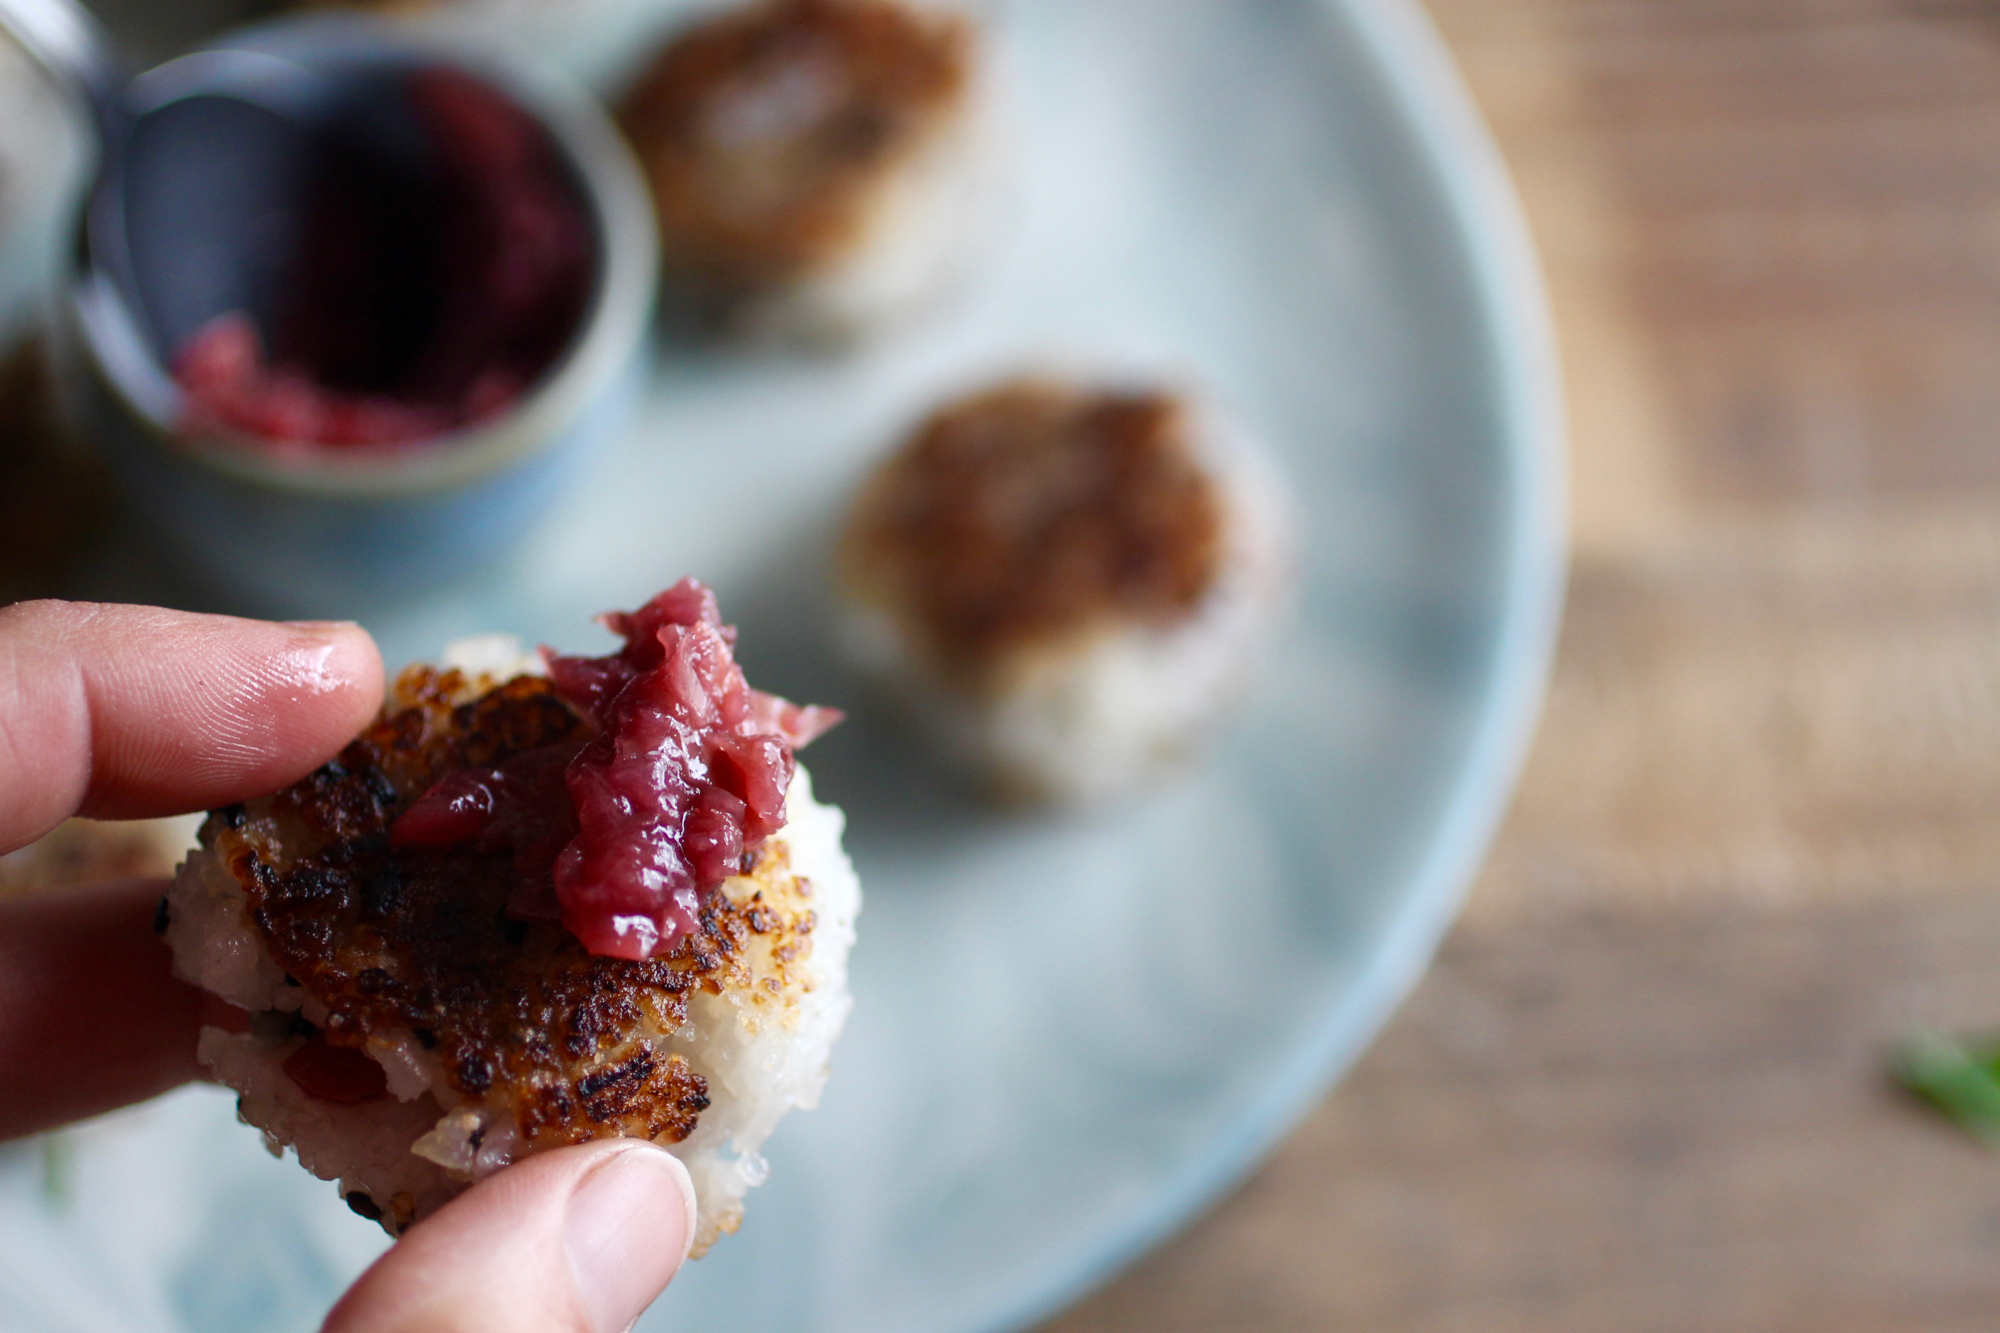
Sometimes you need a little extra umeboshi paste.
So - to honor this momentous occasion (they're visiting tomorrow!) I decided to finally get around to posting my method for umeboshi onigiri, or rice balls stuffed with umeboshi paste - a delicious way to use up leftover rice! I like to sear my onigiri (technically yaki-onigiri), kind in the same vein as aracini, if you've ever had the Italian fried rice ball appetizer, but pan-seared instead of fried.
This recipe, in combination with other umeboshi dishes including asparagus with wild onion and umami and simply a corn-butter-umeboshi sauté, are so good that I am almost out of my umeboshi supply and sadly, didn't get around to pickling any this year. I guess I'll just have to savor what I have left!
The below recipe makes about 8 small onigiri and can be expanded as needed.
2 cups cooked short-grained rice (preferably sticky rice), cooled* - great way to use up your leftovers! Especially delicious is using leftover coconut rice either from a restaurant or made at home (cook rice with half water/half coconut milk).
1-2 teaspoons sesame seeds or furikake flakes (Japanese seasoning mix)
Sea salt
4 pickled plums (umeboshi), pitted and diced or smashed into a paste
Grapeseed oil, for searing
Soy or tamari sauce, optional (above photo was plain onigiri with umeboshi paste on the side)
In medium bowl, stir sesame seeds or furikake flakes into sticky rice to combine.
Wet hands lightly with water then spread a pinch of salt across your palms. Scoop 2 tablespoons of rice mixture from bowl and gently squeeze into ball. Flatten ball then form a well in the center. Add about 1/2 teaspoon umeboshi paste to well, then fold edges of rice over paste to cover.
Gently squeeze into ball then flatten again. Continue process with more rice and umeboshi until rice is gone.
Lightly oil a cast iron pan and heat on medium-high. Once oil is hot, add onigiri and sear until lightly brown, about 1-2 minutes on each side.
Serve with optional soy or tamari sauce (though you probably won't need it!)
*If rice isn't originally sticky and/or not sticky enough, you can make it "stickier" (technically, to be sticky rice, it must be a certain variety of rice that's high in a certain time of pasty starch) by heating pre-cooked rice on medium-low with 1-2 tablespoons water for about 5 minutes or until sticky, stirring occasionally. Here's a recipe for sticky rice, but I just cook rice as I always do then make it stickier after with this method.

Fermented Beetroot-Apple Relish with Star Anise and Cloves


Salt fermentation is one of the greatest things out there. By adding salt, you keep out the bad microbes and foster an environment to the good microbes to "do their thing". Namely, to eat up the sugar and proteins and create new, delicious flavors and textures.
Additionally fermented foods, such as this relish, contain probiotics to help you digest almost anything. Fermenting foods at home can be intimidating, but once you get the hang of it, you can let the microbes do the work for you! Relish is great paired with sausage, smoked fish, potatoes, or on a cheese plate. Makes 16 ounces.
1 large red beet
1 large apple
1 whole star anise
3 whole cloves
1 teaspoon sea salt, plus more if needed
Sterilize one wide-mouthed 16-ounce mason jar by washing with soapy water, rinsing, and then submerging in boiling water for 15 minutes. Remove from water and set aside to air dry.
Peel and shred beet and apple using cheese grater and toss with star anise and cloves. Incorporate salt by sprinkling in 1/4 teaspoon at a time and stirring.
Scoop shreds into mason jar and mash with a wooden spoon to release their juices. The shreds should be entirely submerged, as the salty water from the beet and apple mixture will keep oxygen and bad bacteria out. If they are not, then create a brine by dissolving 1 teaspoon sea salt in 1 cup filtered water and pour this over the shreds until they are completely covered.
Cover with cheese cloth or clean towel and ferment at room temperature for 3-4 days or longer, depending on your desired level of sourness. The longer you let the relish ferment, the more sour it will become.
Once relish is the level of sourness that you desire, cover and refrigerate. Use within 6 weeks. Relish can also be processed in a blender or food processor if you desire a pastier texture.
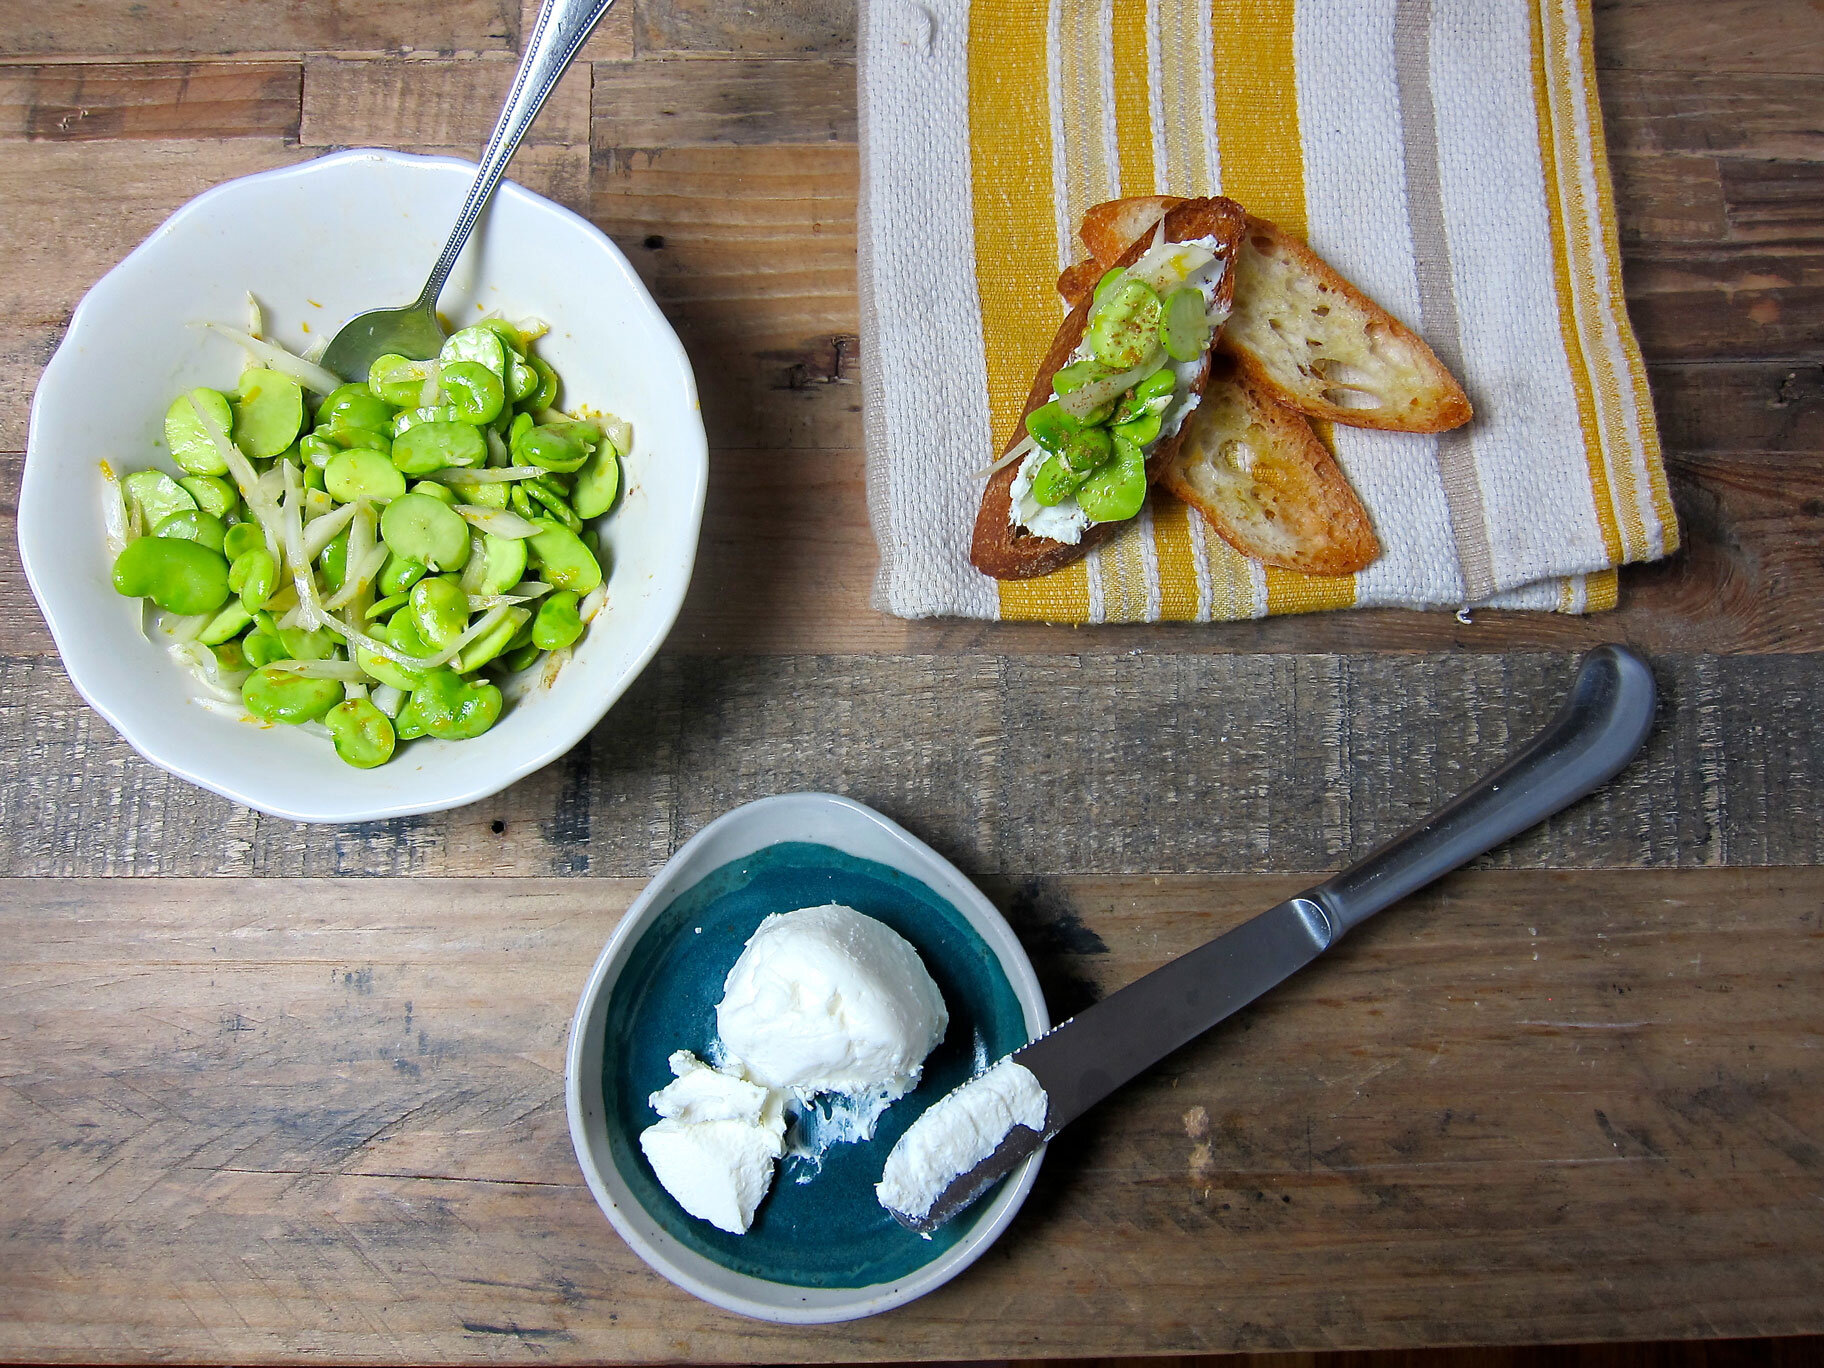
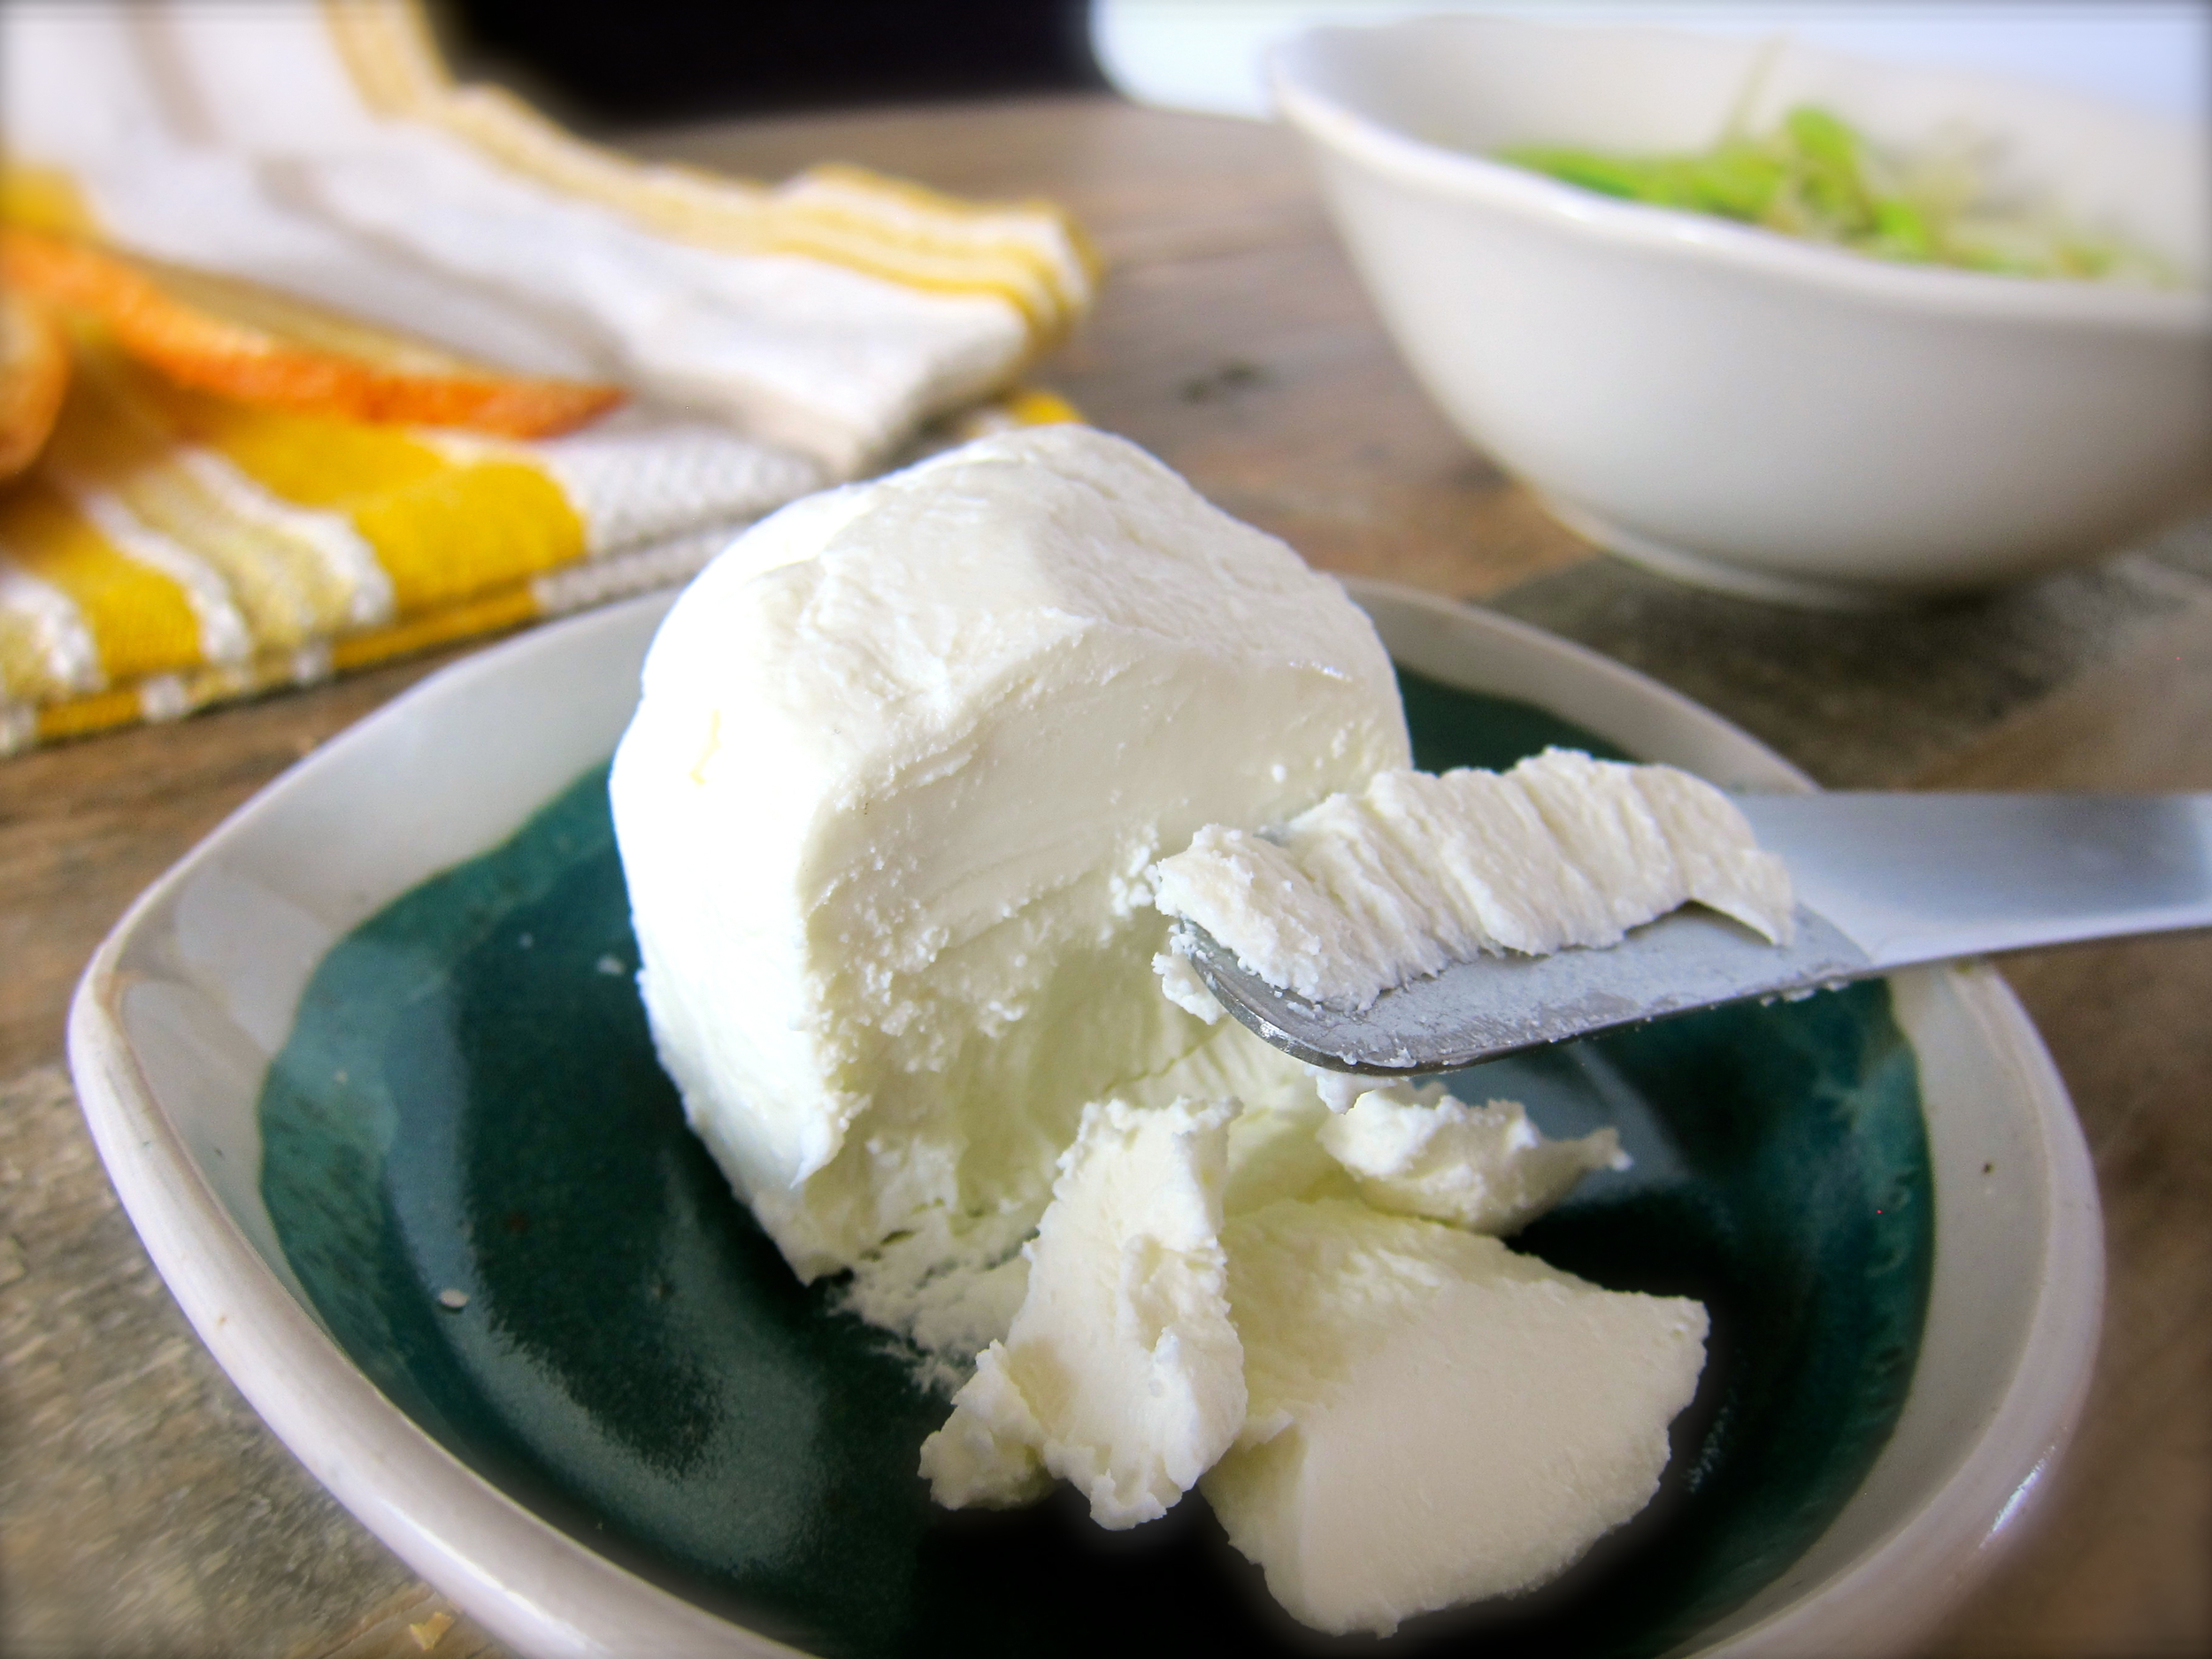
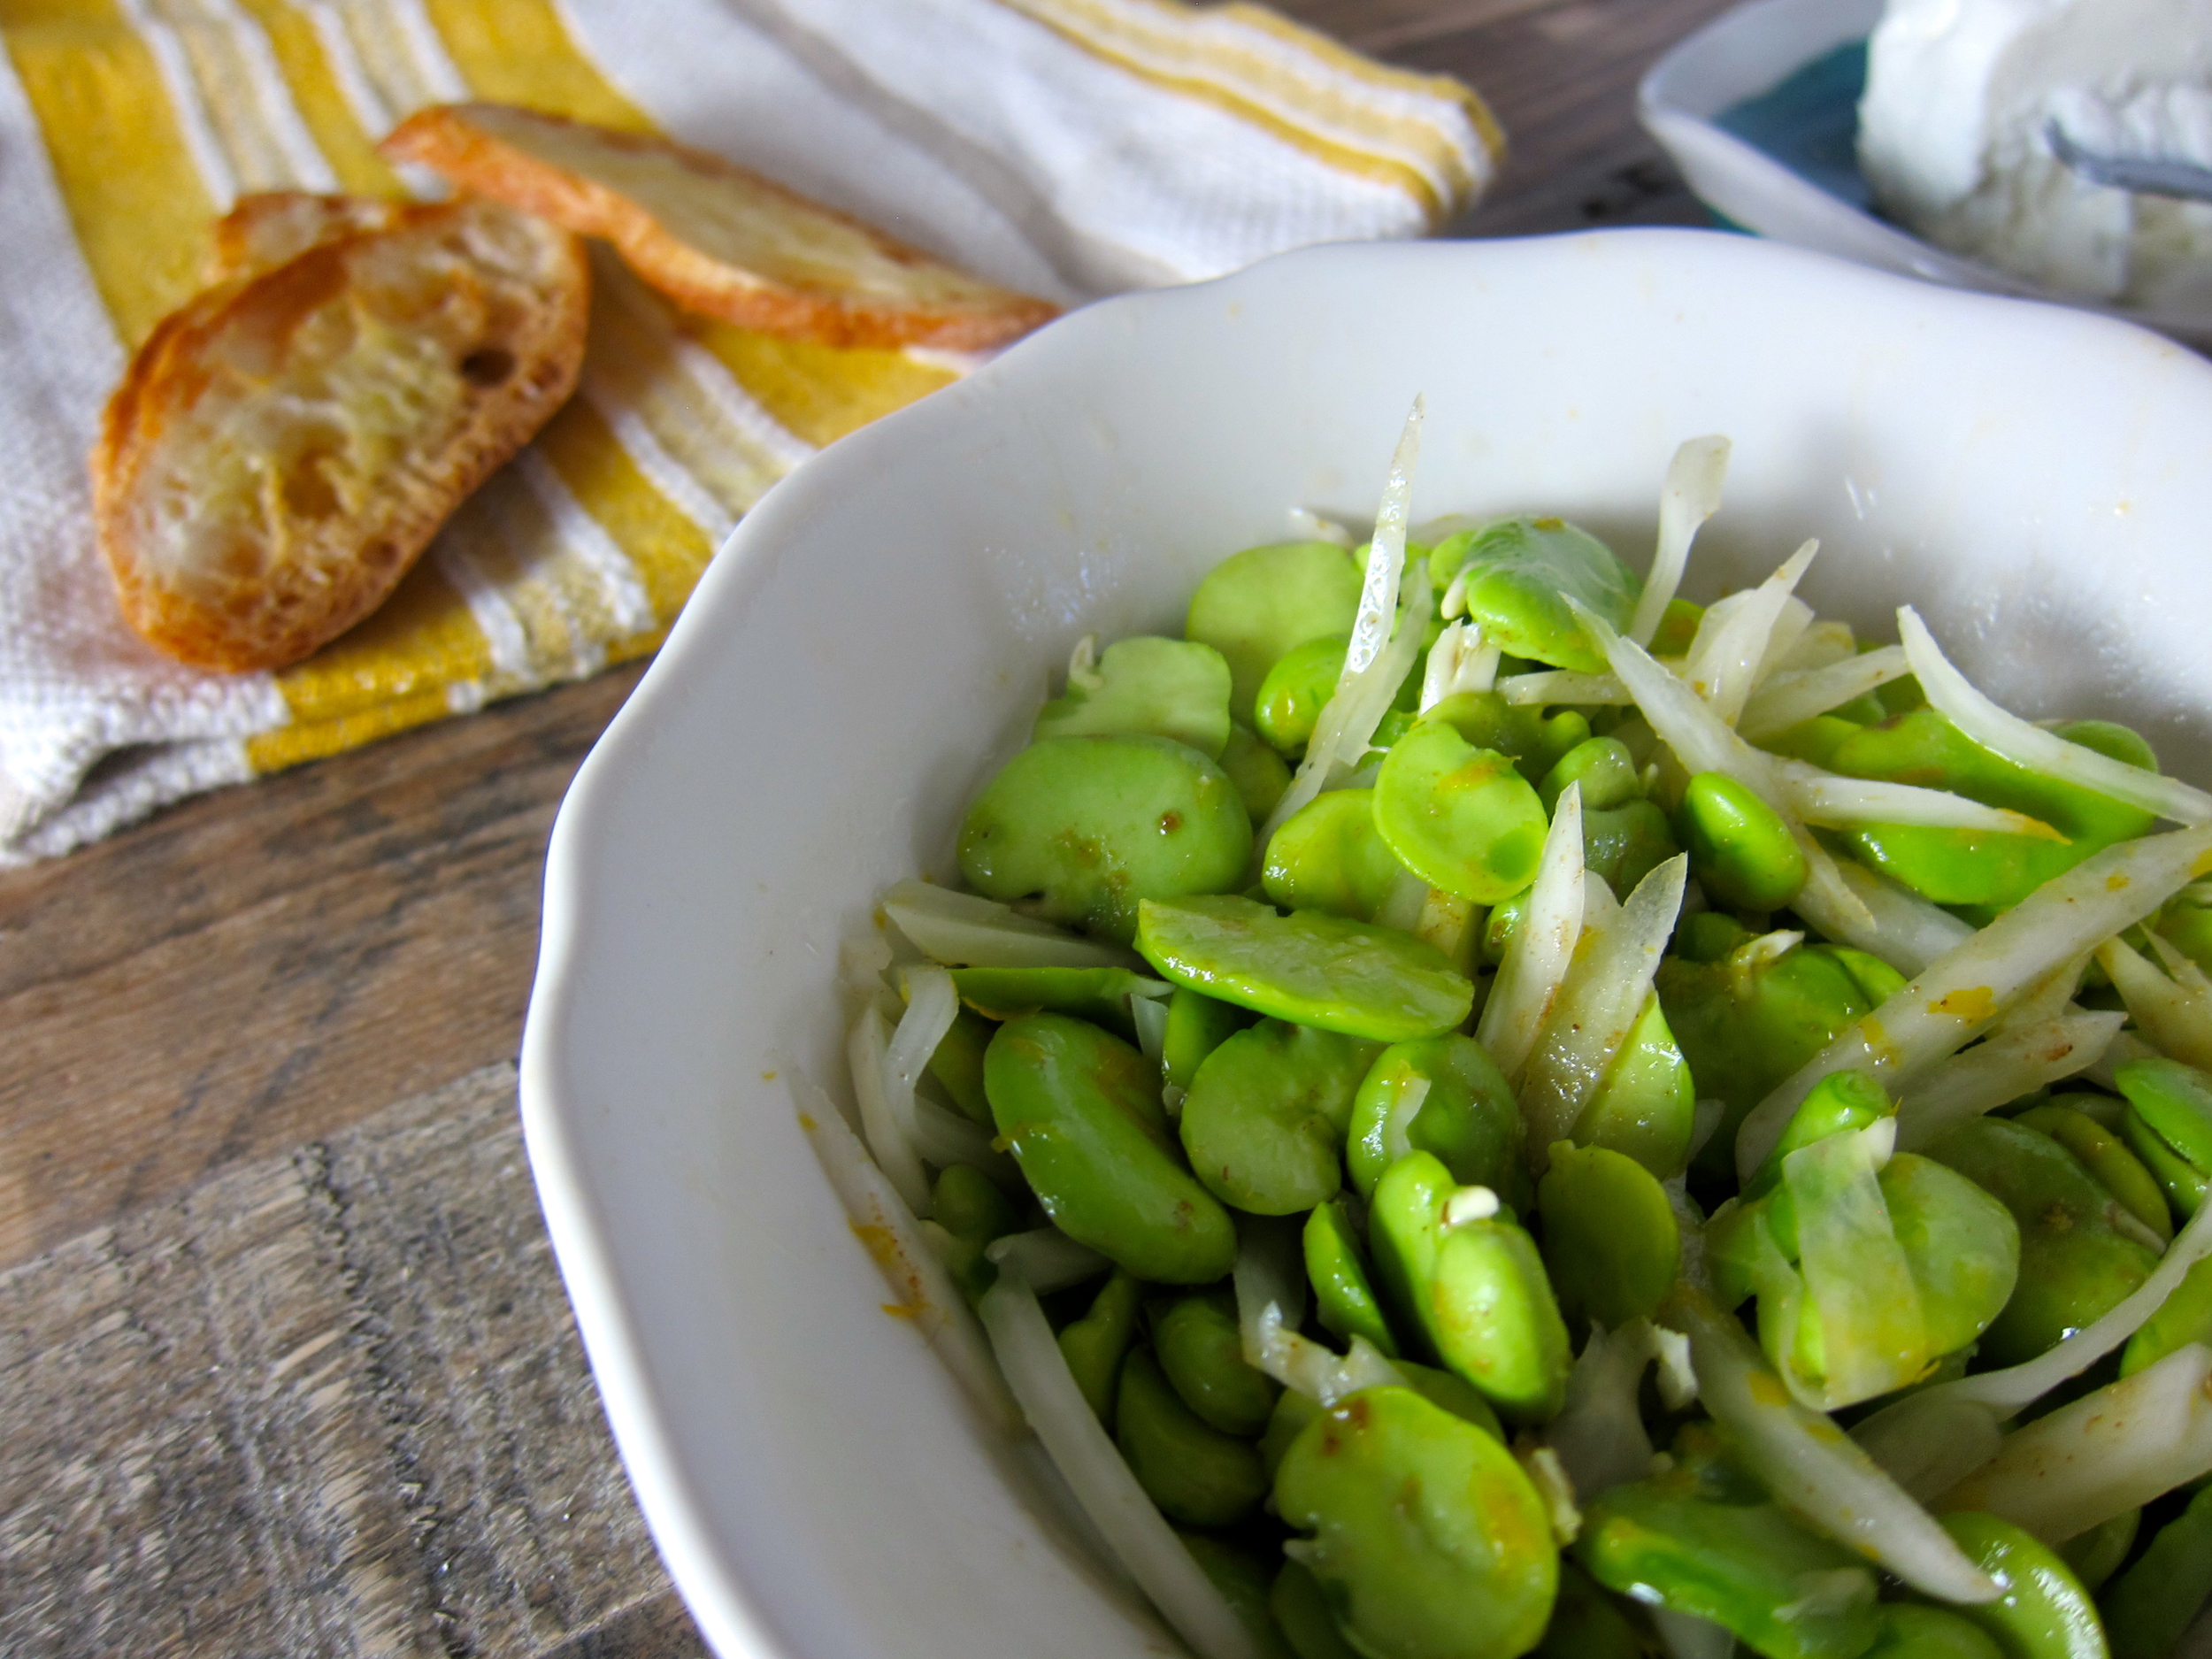
Fava bean, pickled fennel bulb, and goat cheese crostini
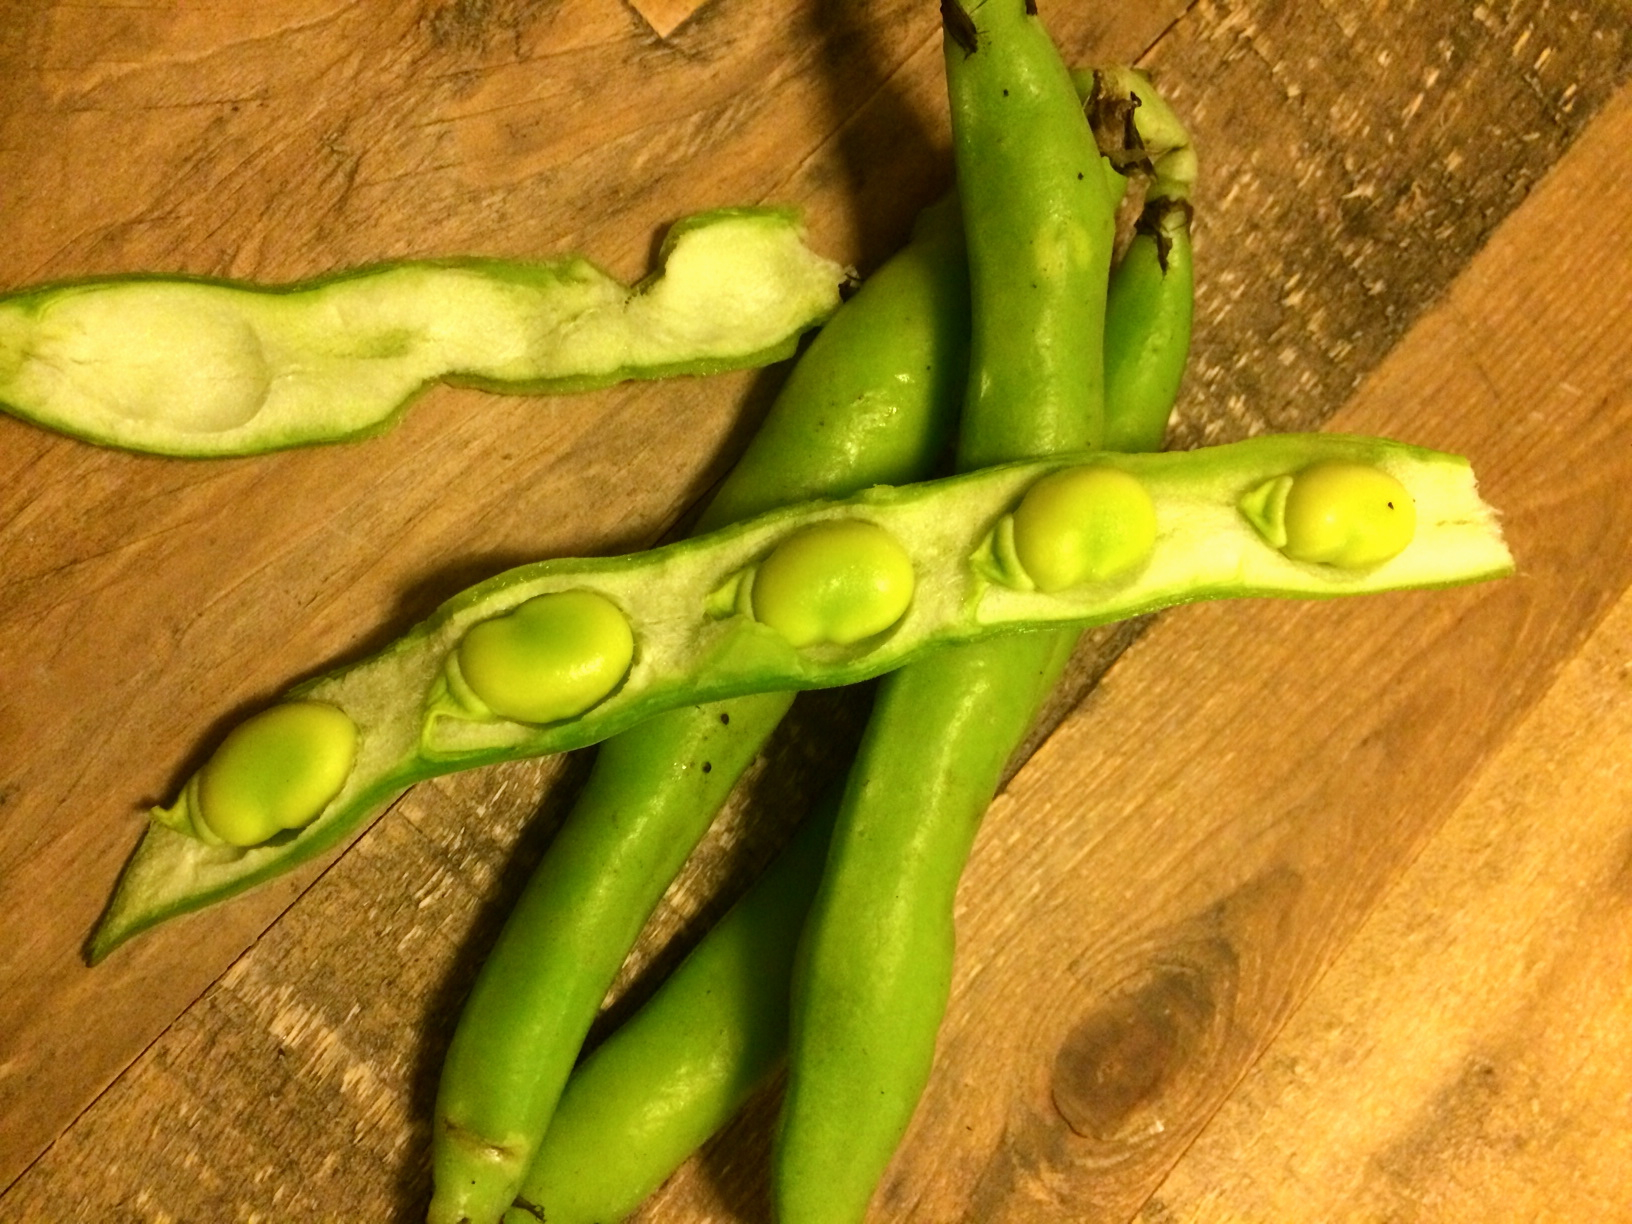
Fresh, silky representations of springtime

I am always pleasantly surprised when fava beans pop up at the farmers’ market each spring - not only because they’re even more delicious at the beginning of the season, but because it proves that California actually has seasons (go us!)
“Alternatively, you can actually skip the entire process of shelling by roasting the whole pod with some olive oil and sea salt, and eat every bit of the beans and surrounding pod. This is also quite delicious, but a different, richer flavor with less of the springtime freshness in just the beans. ”
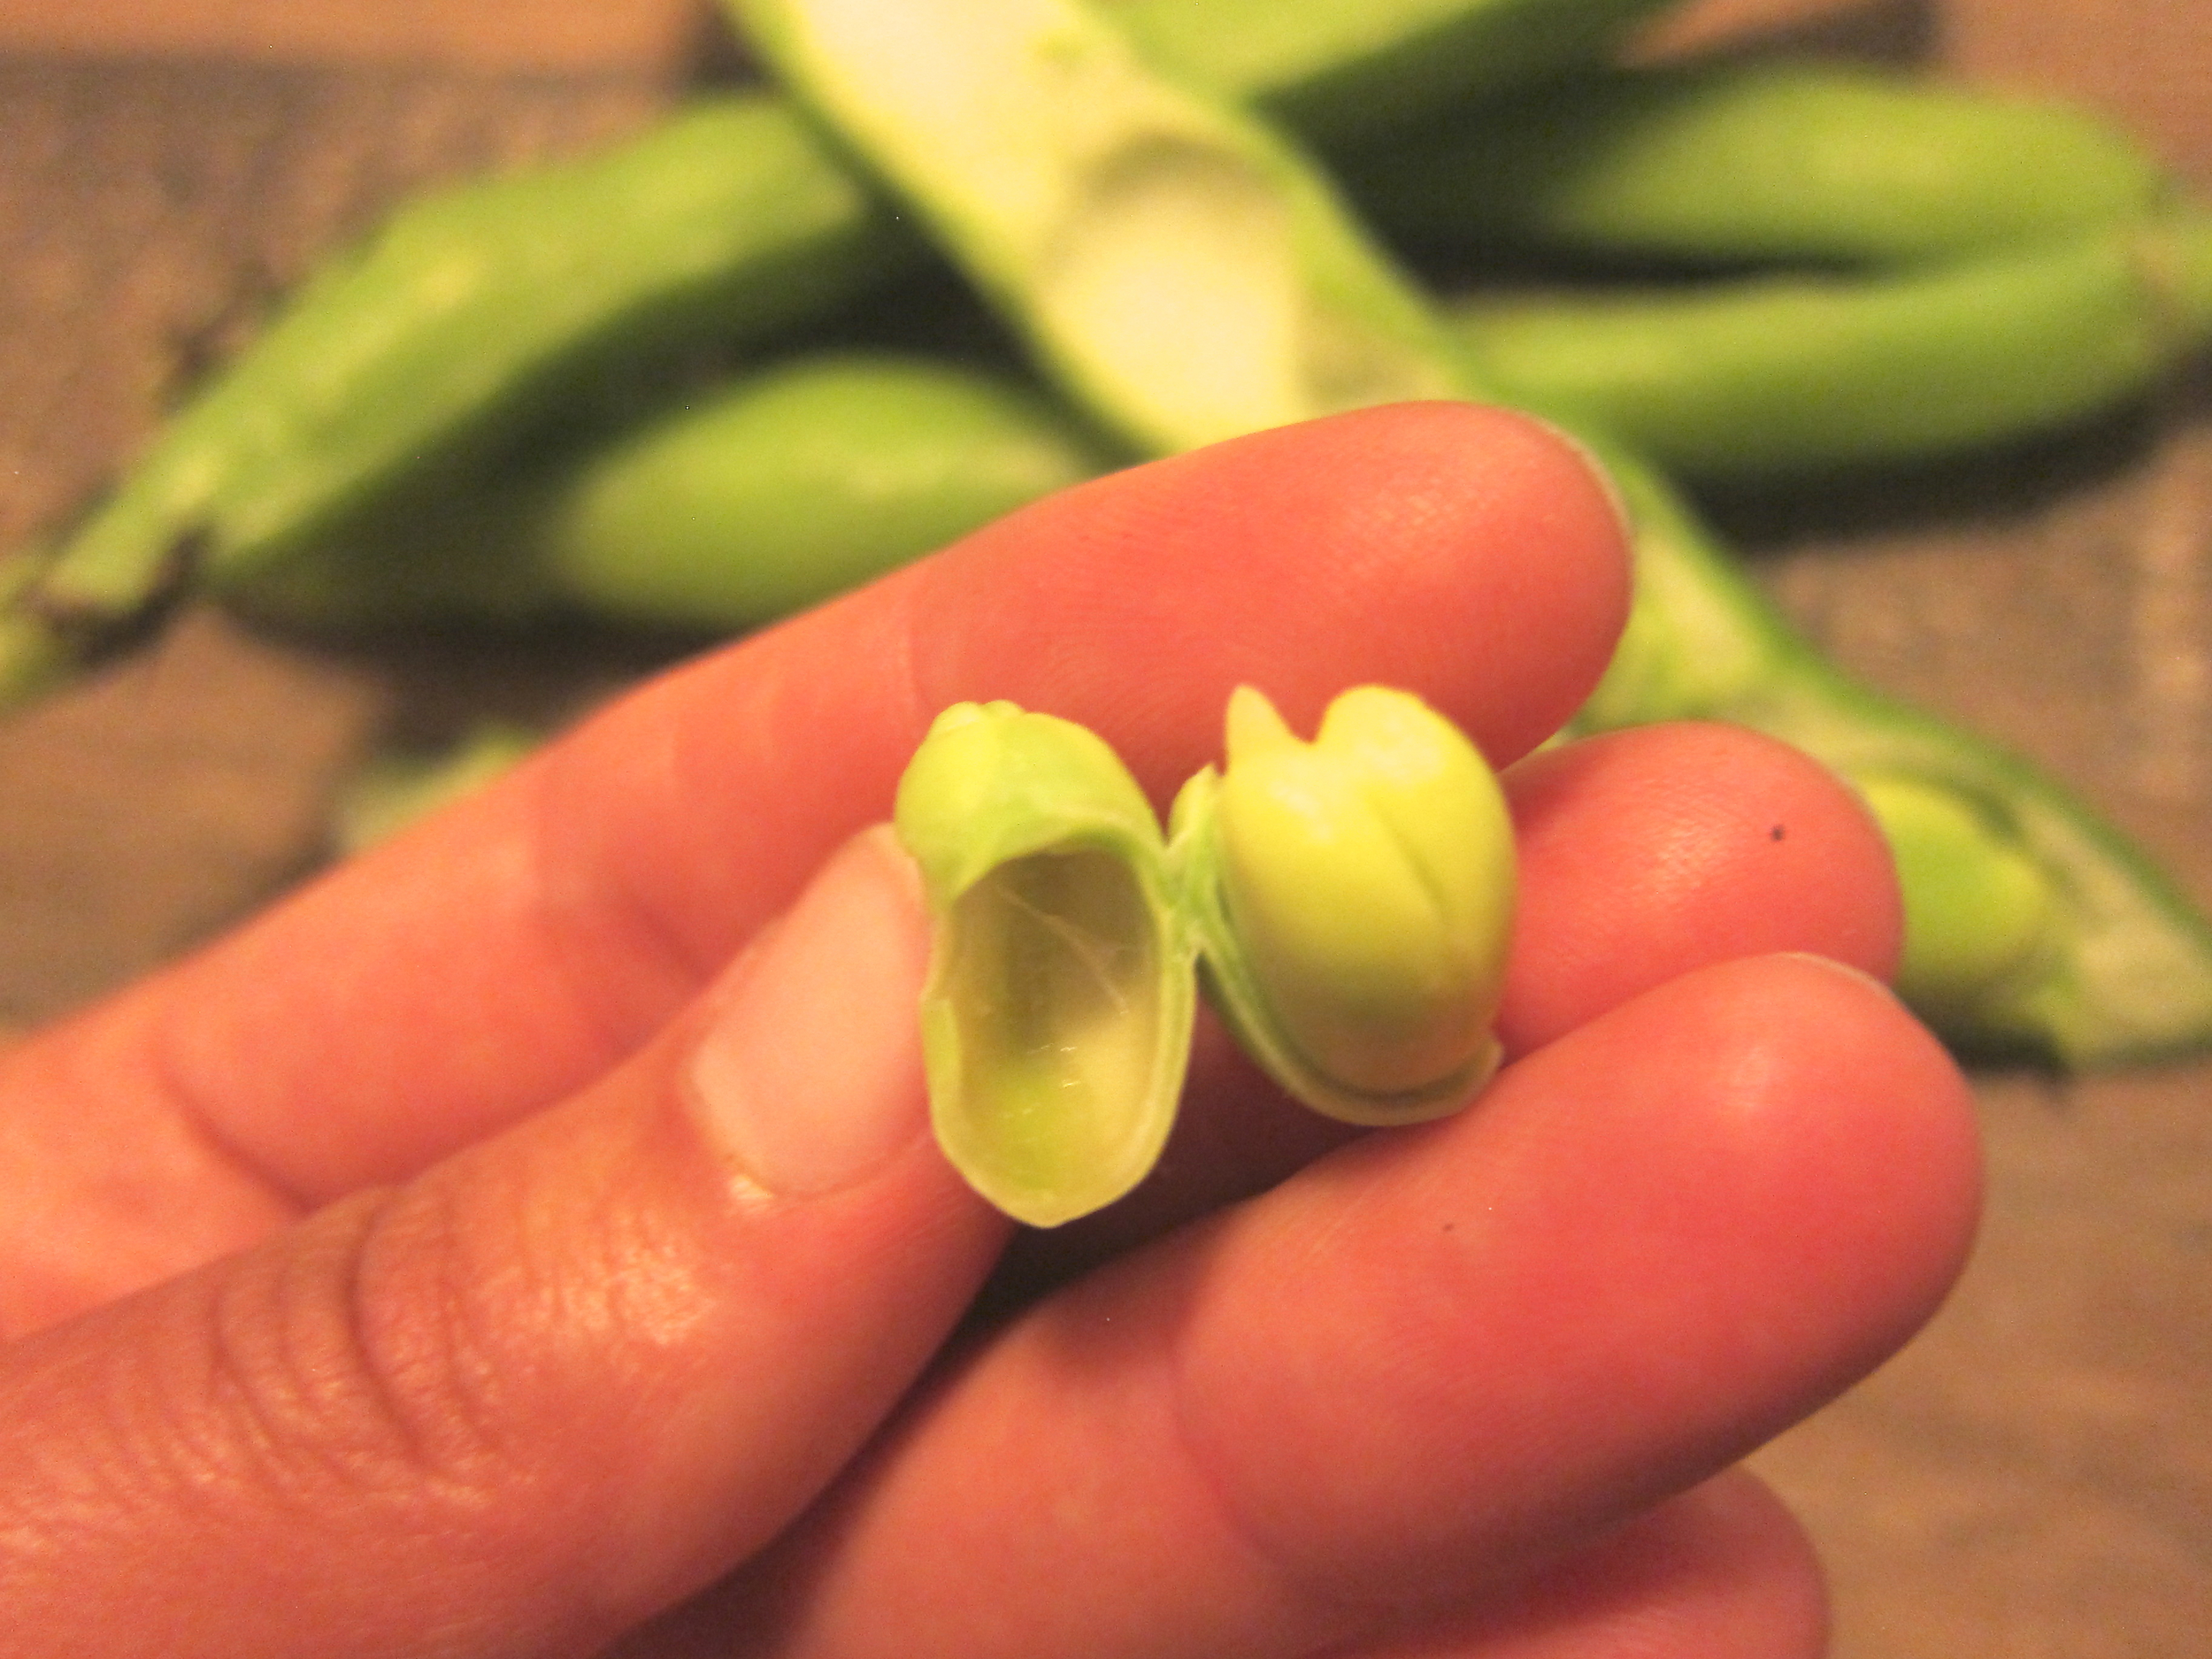
Fava beans are fresh, silky representations of springtime, but they can be a pain to process. Not only do most recipes call for removing the beans from the larger pod, but also for removing the beans from their thin surrounding shell. One of those tasks that’s fun at first, but increasingly painful as time moves on and pod after pod is processed.
“You don’t know fava - or maybe you do?”
Fortunately, the favas at the beginning of the season are so tender that you don’t have to cook the beans after removing them from the shell and they’re still oh-so-tender, which is what is called for in this recipe.
Fava beans, removed from pod and surrounding shells peeled away
Pickled* or fresh, thinly sliced fennel bulb
Lemon zest
Cumin powder
Olive oil
Toasted, thinly sliced baguette
Chèvre
Good quality sea salt
Toss 2 parts fava beans with 1 part fennel and lemon zest, and cumin to taste. Drizzle in enough olive oil to make glossy, but not too oily.
Spread chèvre on baguette slices, top with fava mixture, and sprinkle with sea salt.
* To Pickle Fennel:
Slice 1 fennel bulb into thin slivers and pack tightly into a pint jar.
Heat 1 cup white wine vinegar with 1/2 cup water, 2 tablespoons sugar, 1 teaspoon of sea salt, and herbs or spices of choosing (such as caraway and orange zest) and bring to a boil.
Allow brine to cool for 2 minutes, then pour into jar with fennel to cover completely. Cool to room temperature, seal with lid, and store in the refrigerator. Fennel can be eaten immediately and will keep well for up to 2 weeks.
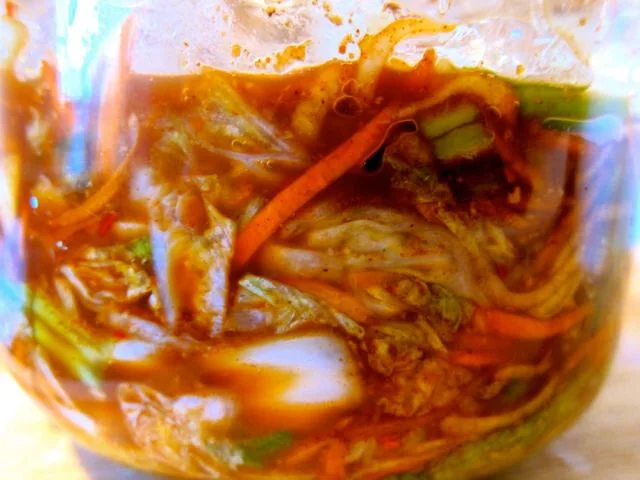
Homemade Kimchi
Kimchi state of mind.

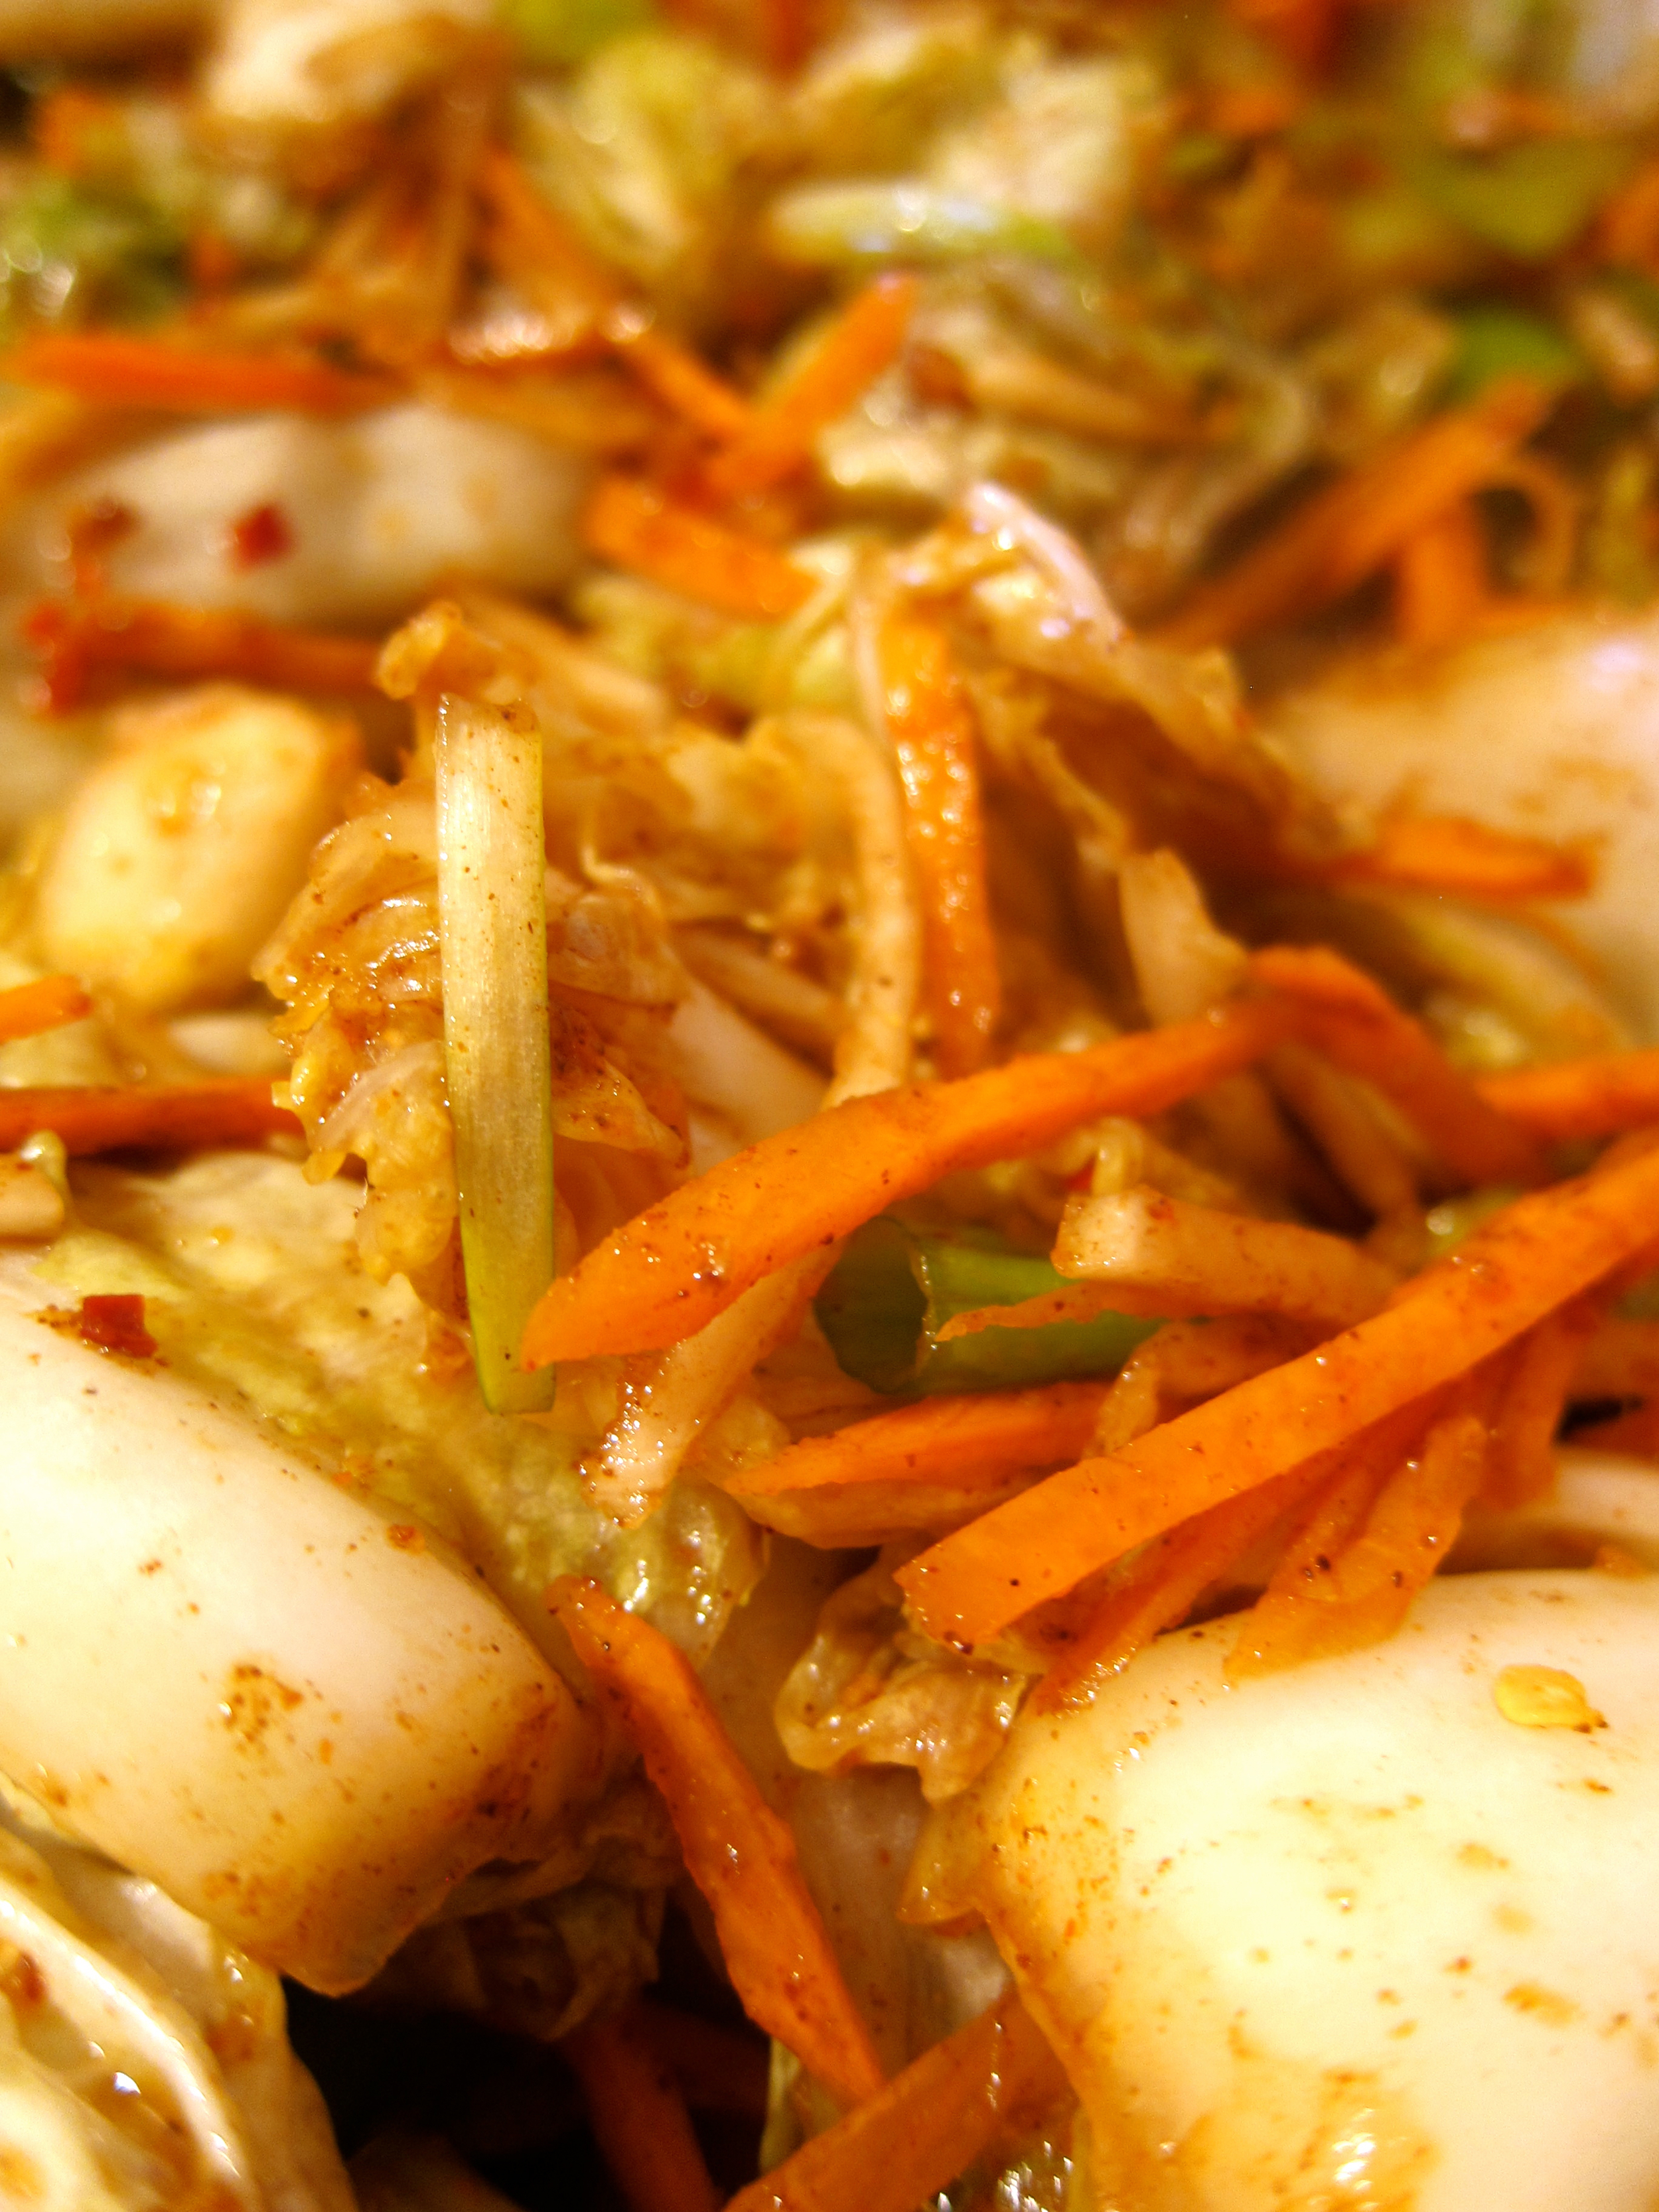
Spicy and effervescent, there are many ways to make this naughty cousin to sauerkraut. I looked at a wide variety of recipes, took bits and pieces from all of them, and then kind of abandoned ship to do my own thing. Below is my basic proportion of ingredients, but I ended up making more chili paste than was needed to coat the kimchi, which is nice because I’ll save it for something else. As long as you keep things clean, soak cabbage in salt/use salt or salty substance (like fish sauce) in paste, and don’t leave it at room temp for too long, you’ll make a safe kimchi. So taste as you go and have fun with it. I can’t wait to use mine in stir-fried rice, with greens and eggs, and to attempt a kimchi pancake!
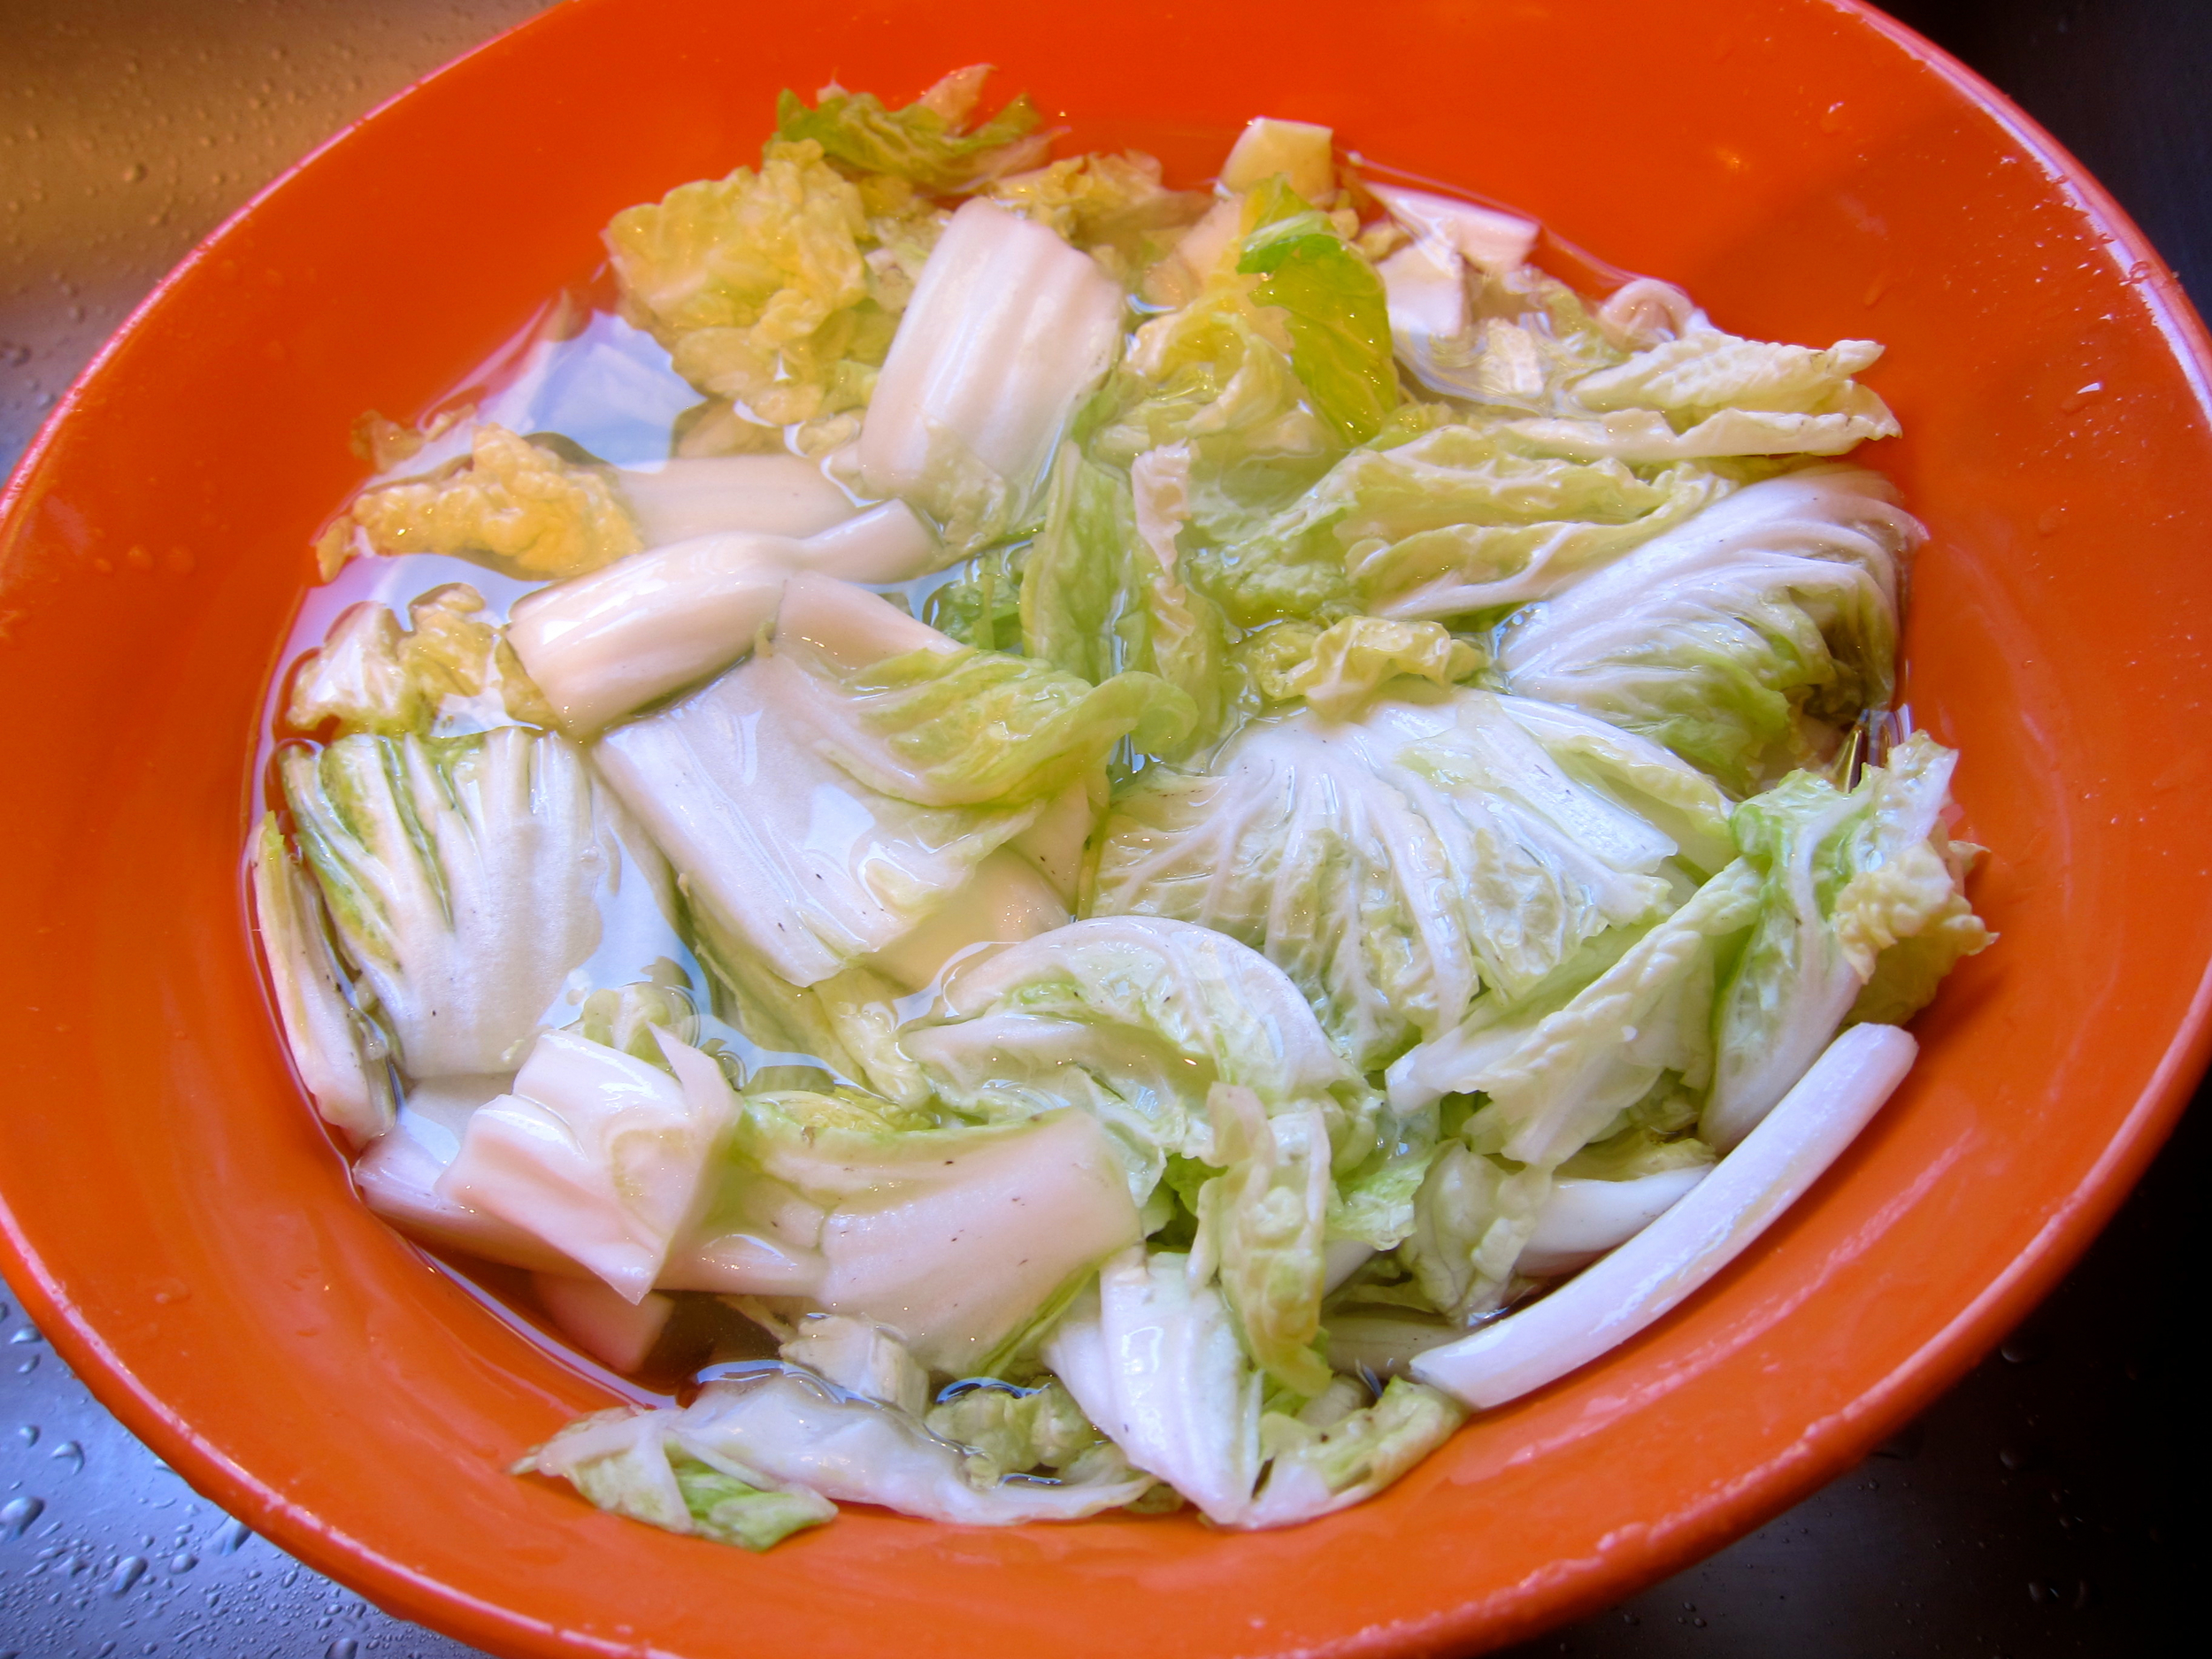
1 head of napa cabbage, chopped into 1-2” pieces (depends on how coarse you like your kimchi
2 large carrots, grated
1/2 cup grated daikon or radish
1 bunch green onion, chopped (all but very coarse dark green ends)
1/4 cup fresh chopped ginger, about 3” piece
1 small head garlic, peeled and chopped
1/4 cup + 1 tablespoon sea salt
3 tablespoons fish sauce
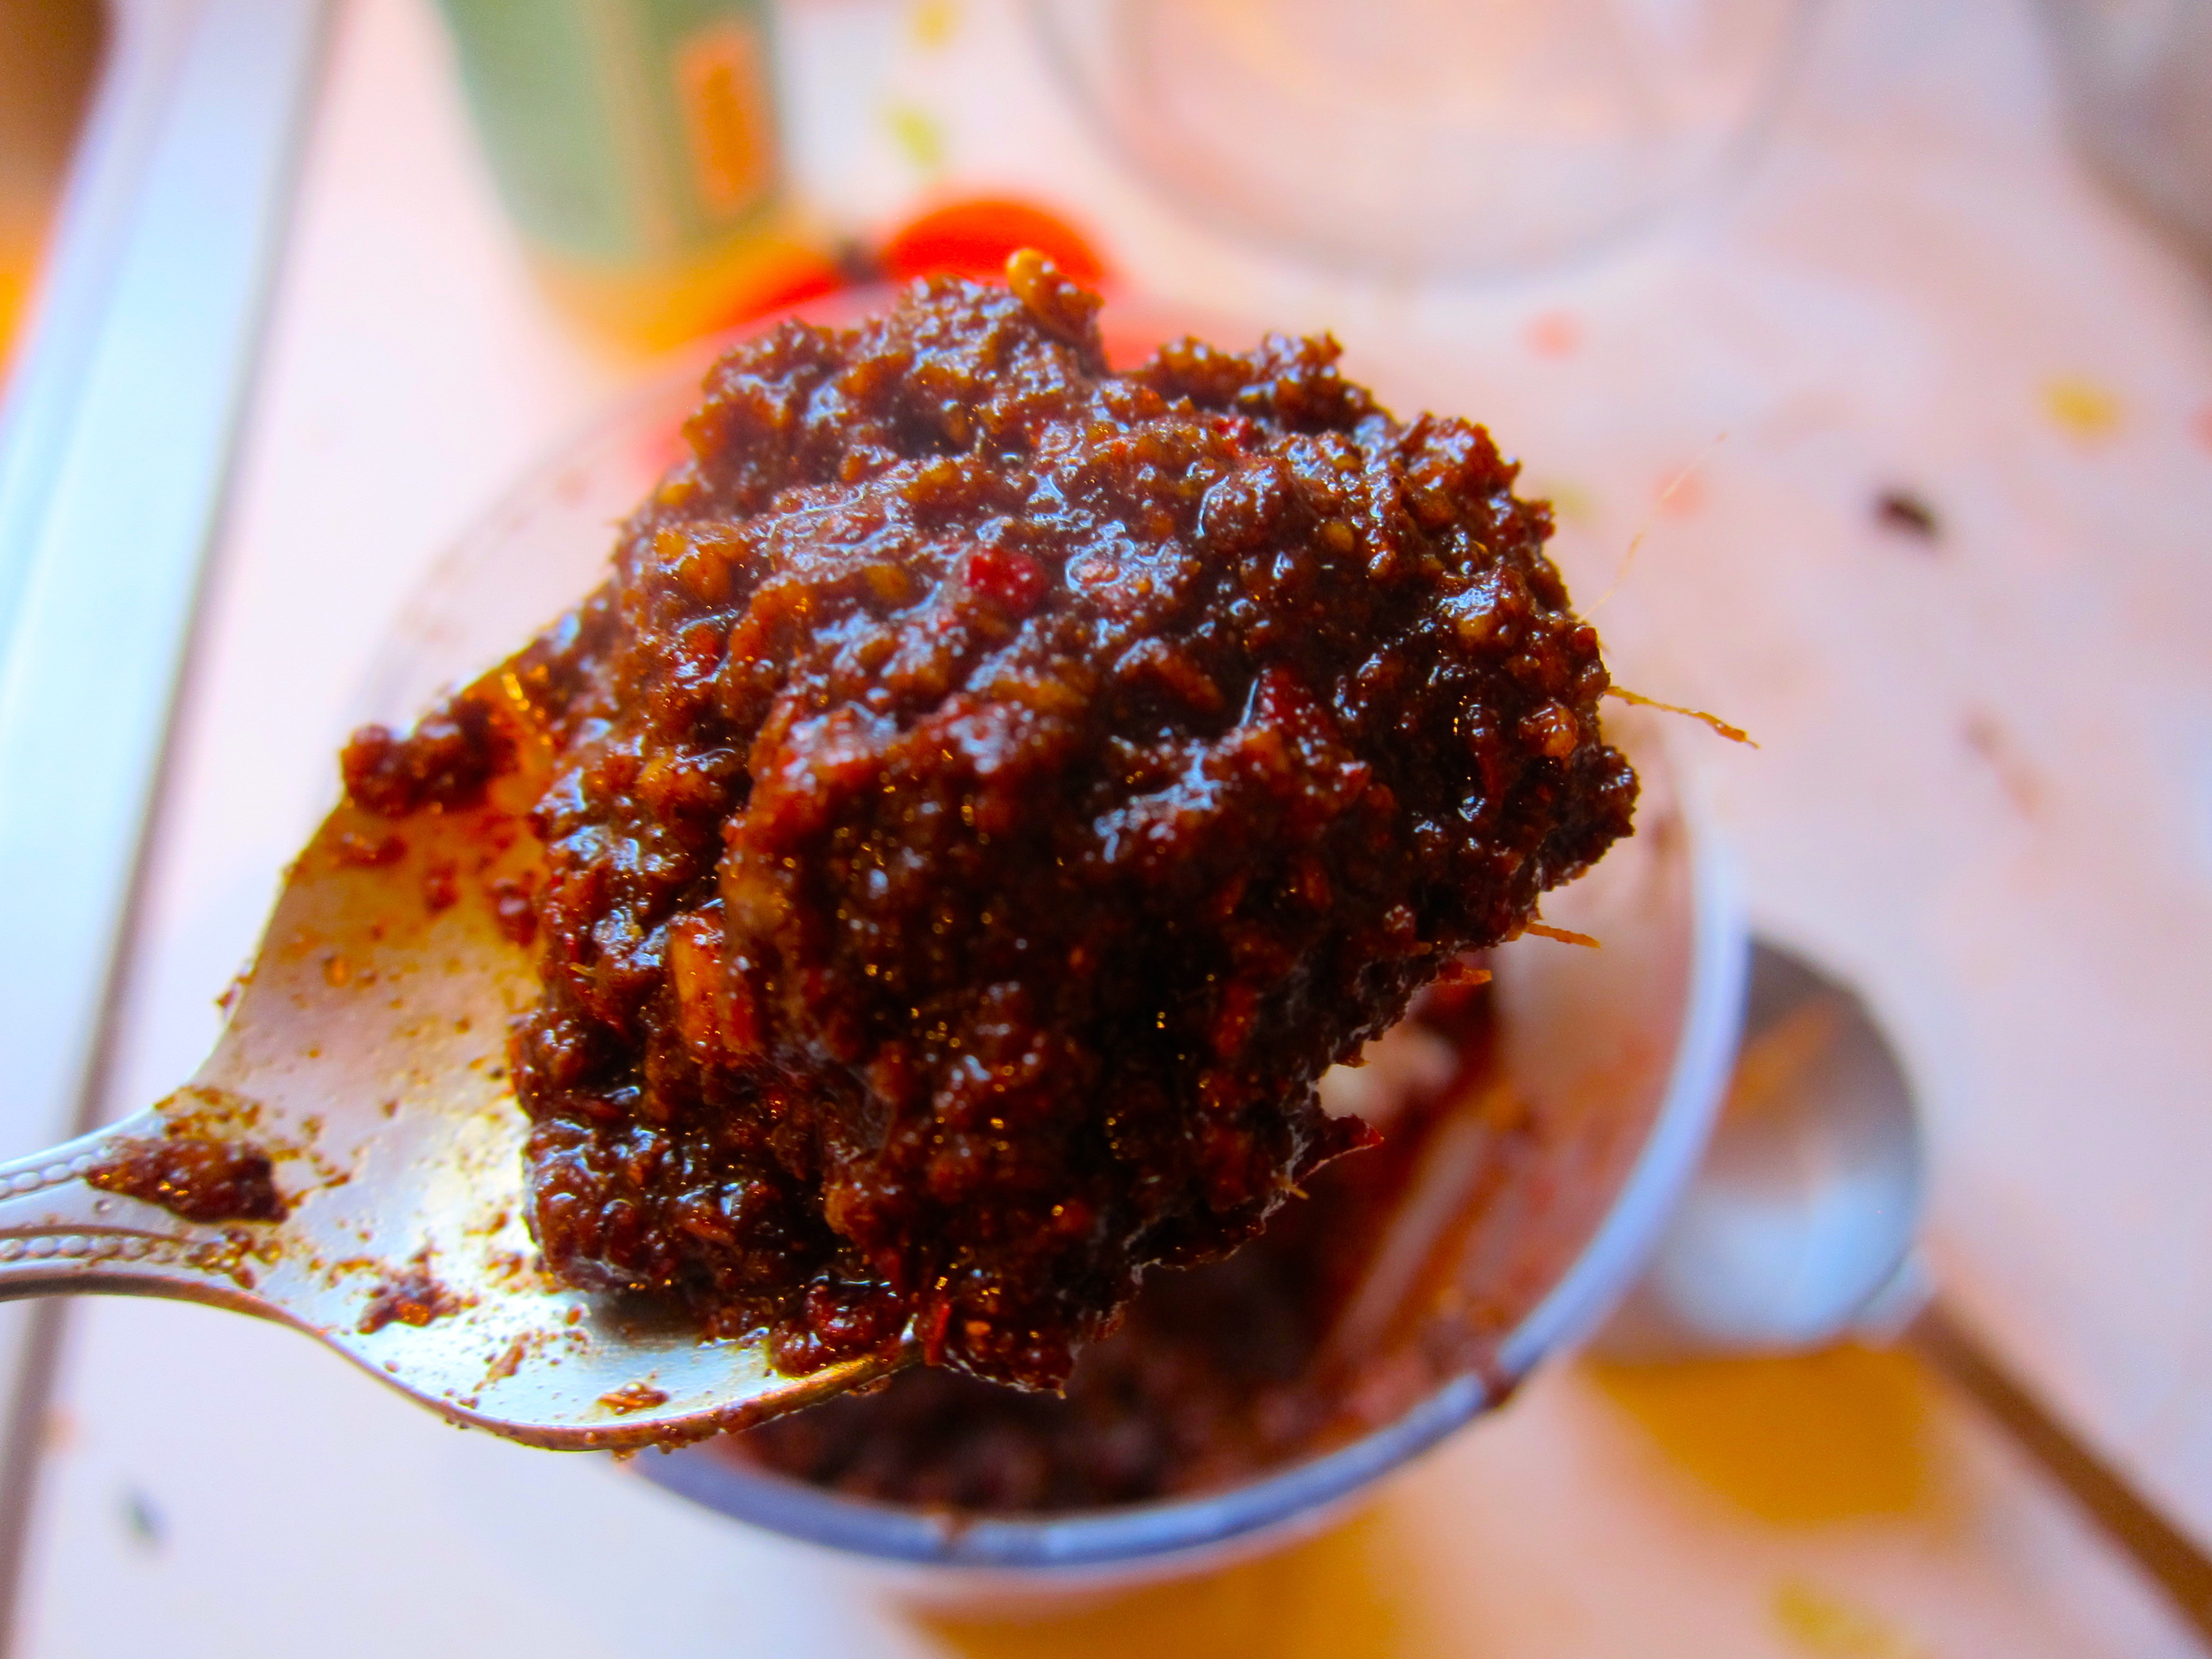
3 tablespoon chili powder (Korean preferred)
1 tablespoon cayenne
1/4 cup chopped fresh or about 7-11 small dried peppers/chilis, chopped (I had dried chinese peppers and used 9 of them)
1 tablespoons unrefined sugar
Put cabbage in large bowl and sprinkle with 1/4 cup salt. Cover with water, stir until dissolved and let sit 20 minutes. Remove and pat dry.
While cabbage is salting, blend all other ingredients but carrots, daikon, and green onion in food processor or blender until you form a paste.
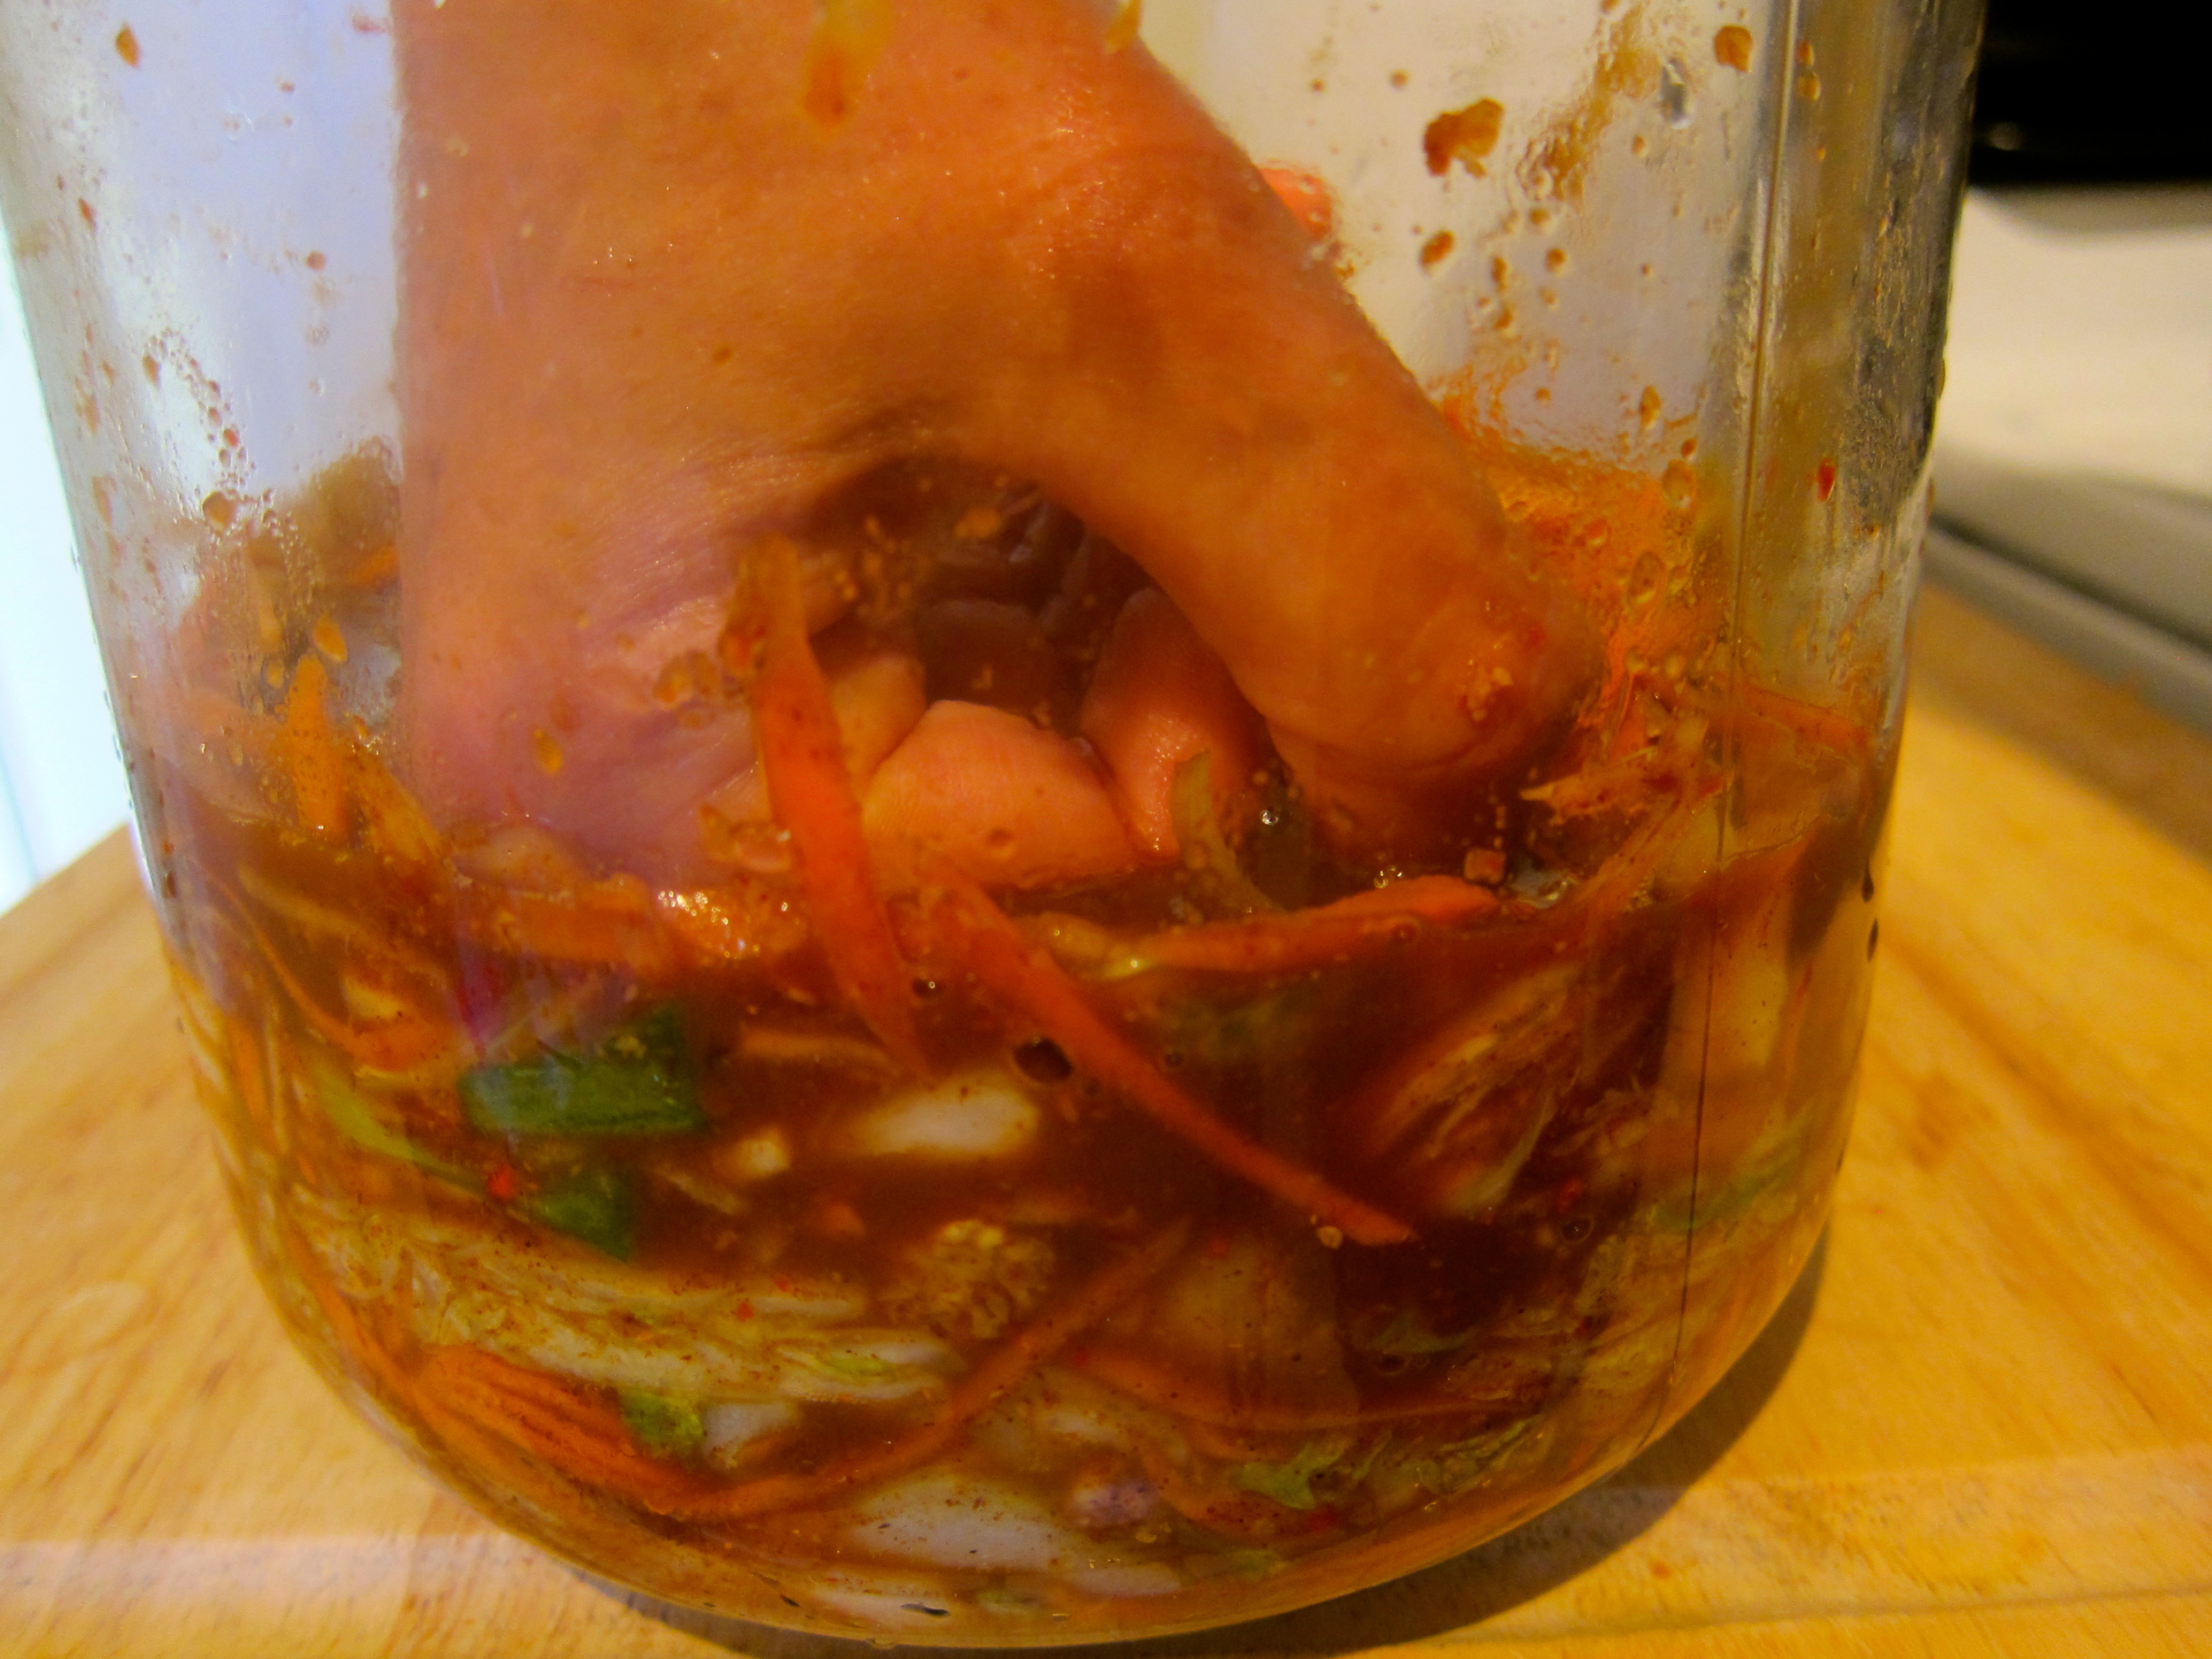
Toss cabbage with carrots, daikon, green onion, and enough paste to coat (taste until of desired heat strength, recognizing that fermentation will bring out more complex flavors).
Place into large glass or ceramic vessel. Press down with (CLEAN) hands to allow juices to escape and if water does not completely cover cabbage, then use a clean stone or plastic bag filled with water to ensure it stays until water.
Seal jar/vessel and let ferment for 2-3 days, depending on weather (hotter temps will make for faster fermentation) and desired strength.
Move to refrigerator and enjoy for up to 5 weeks.