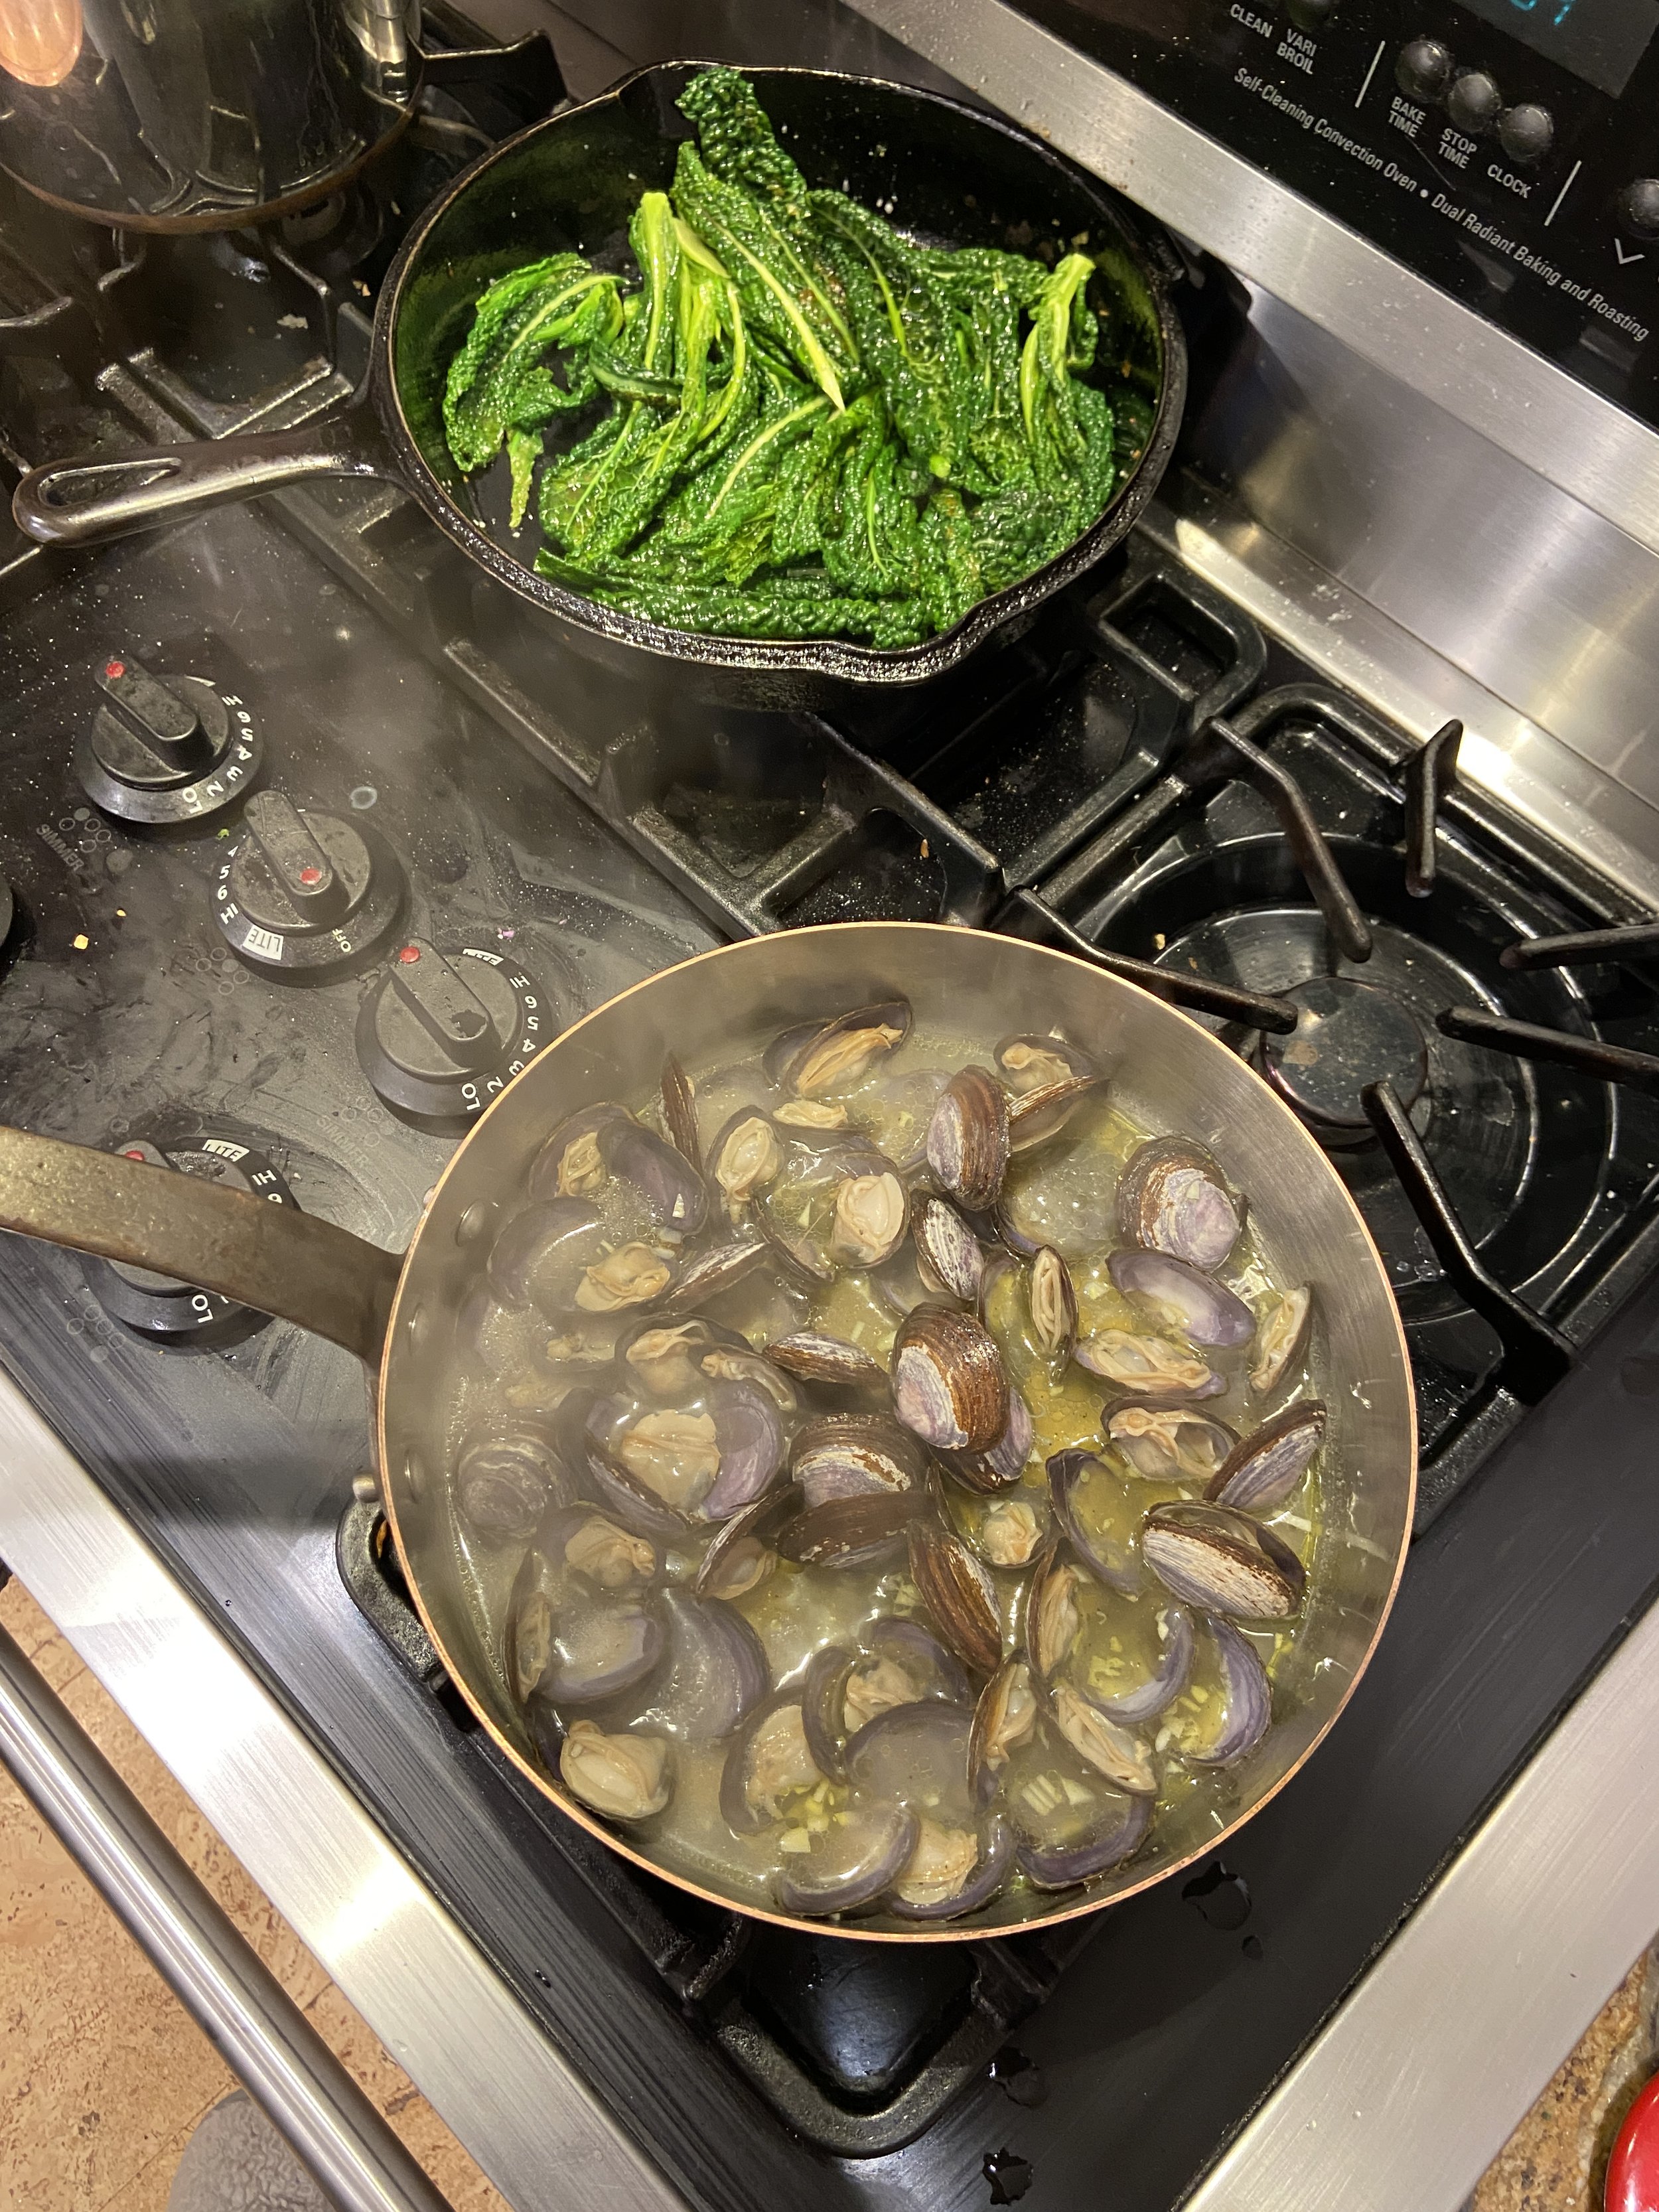
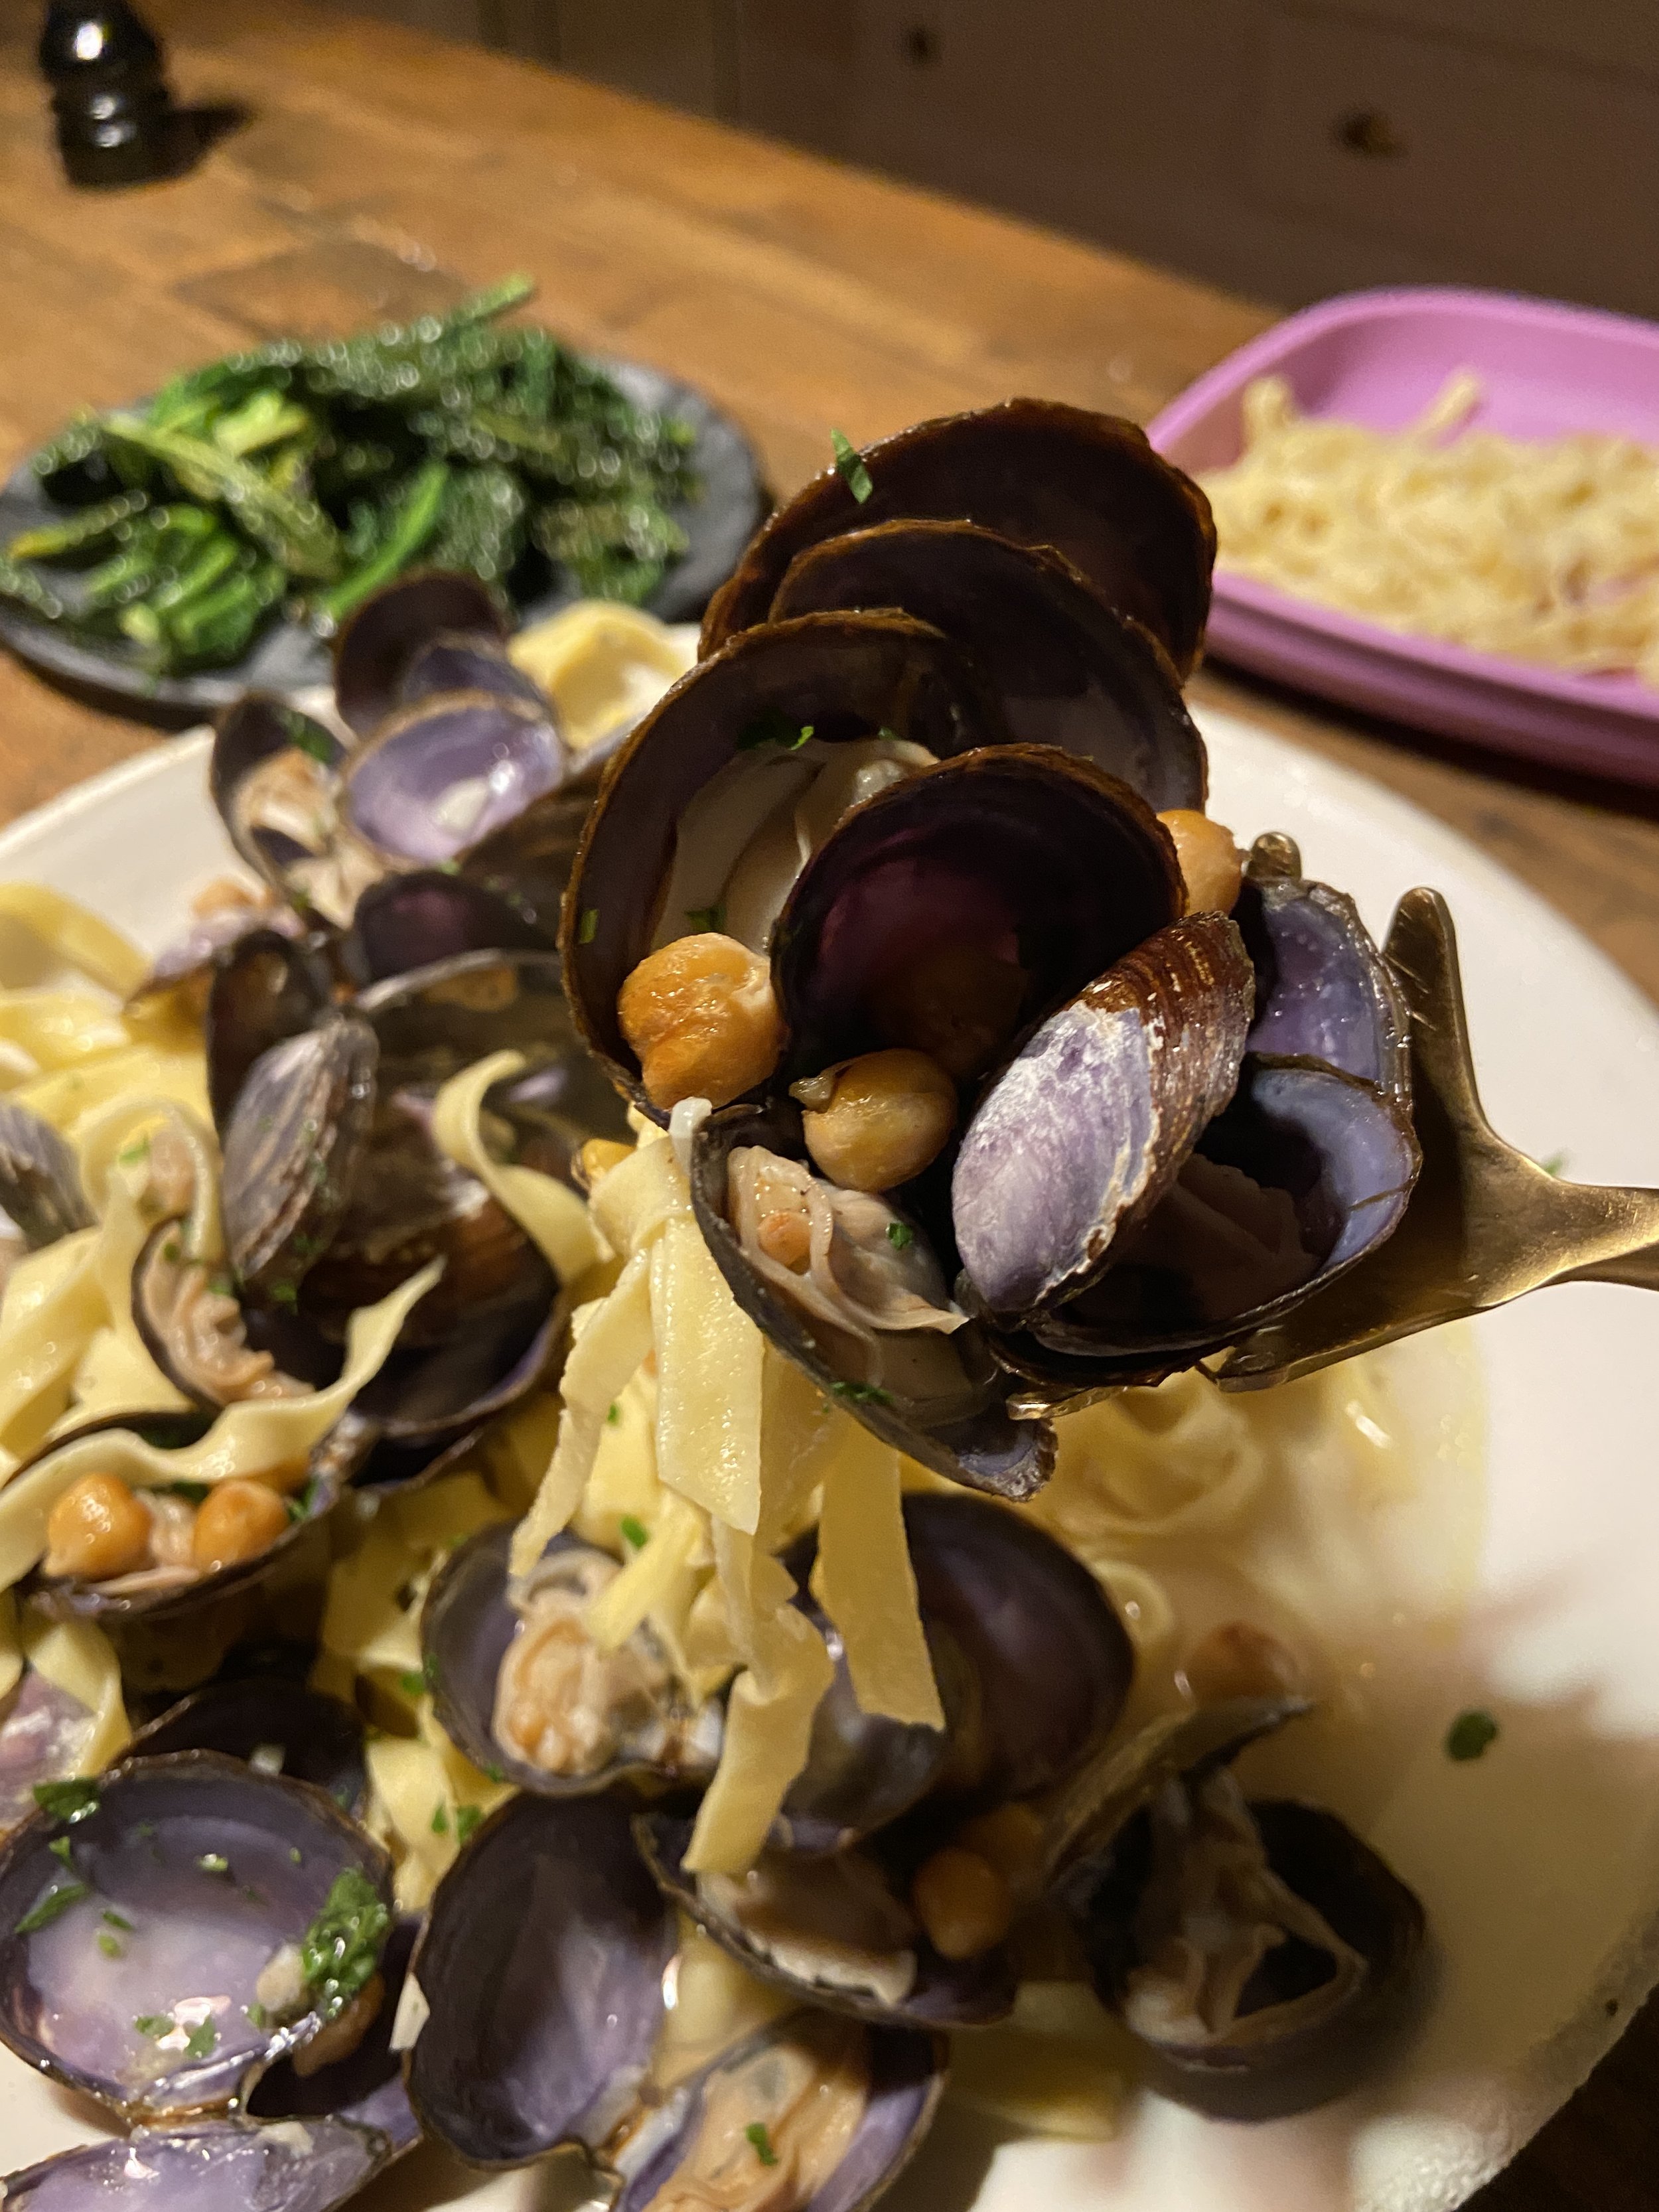
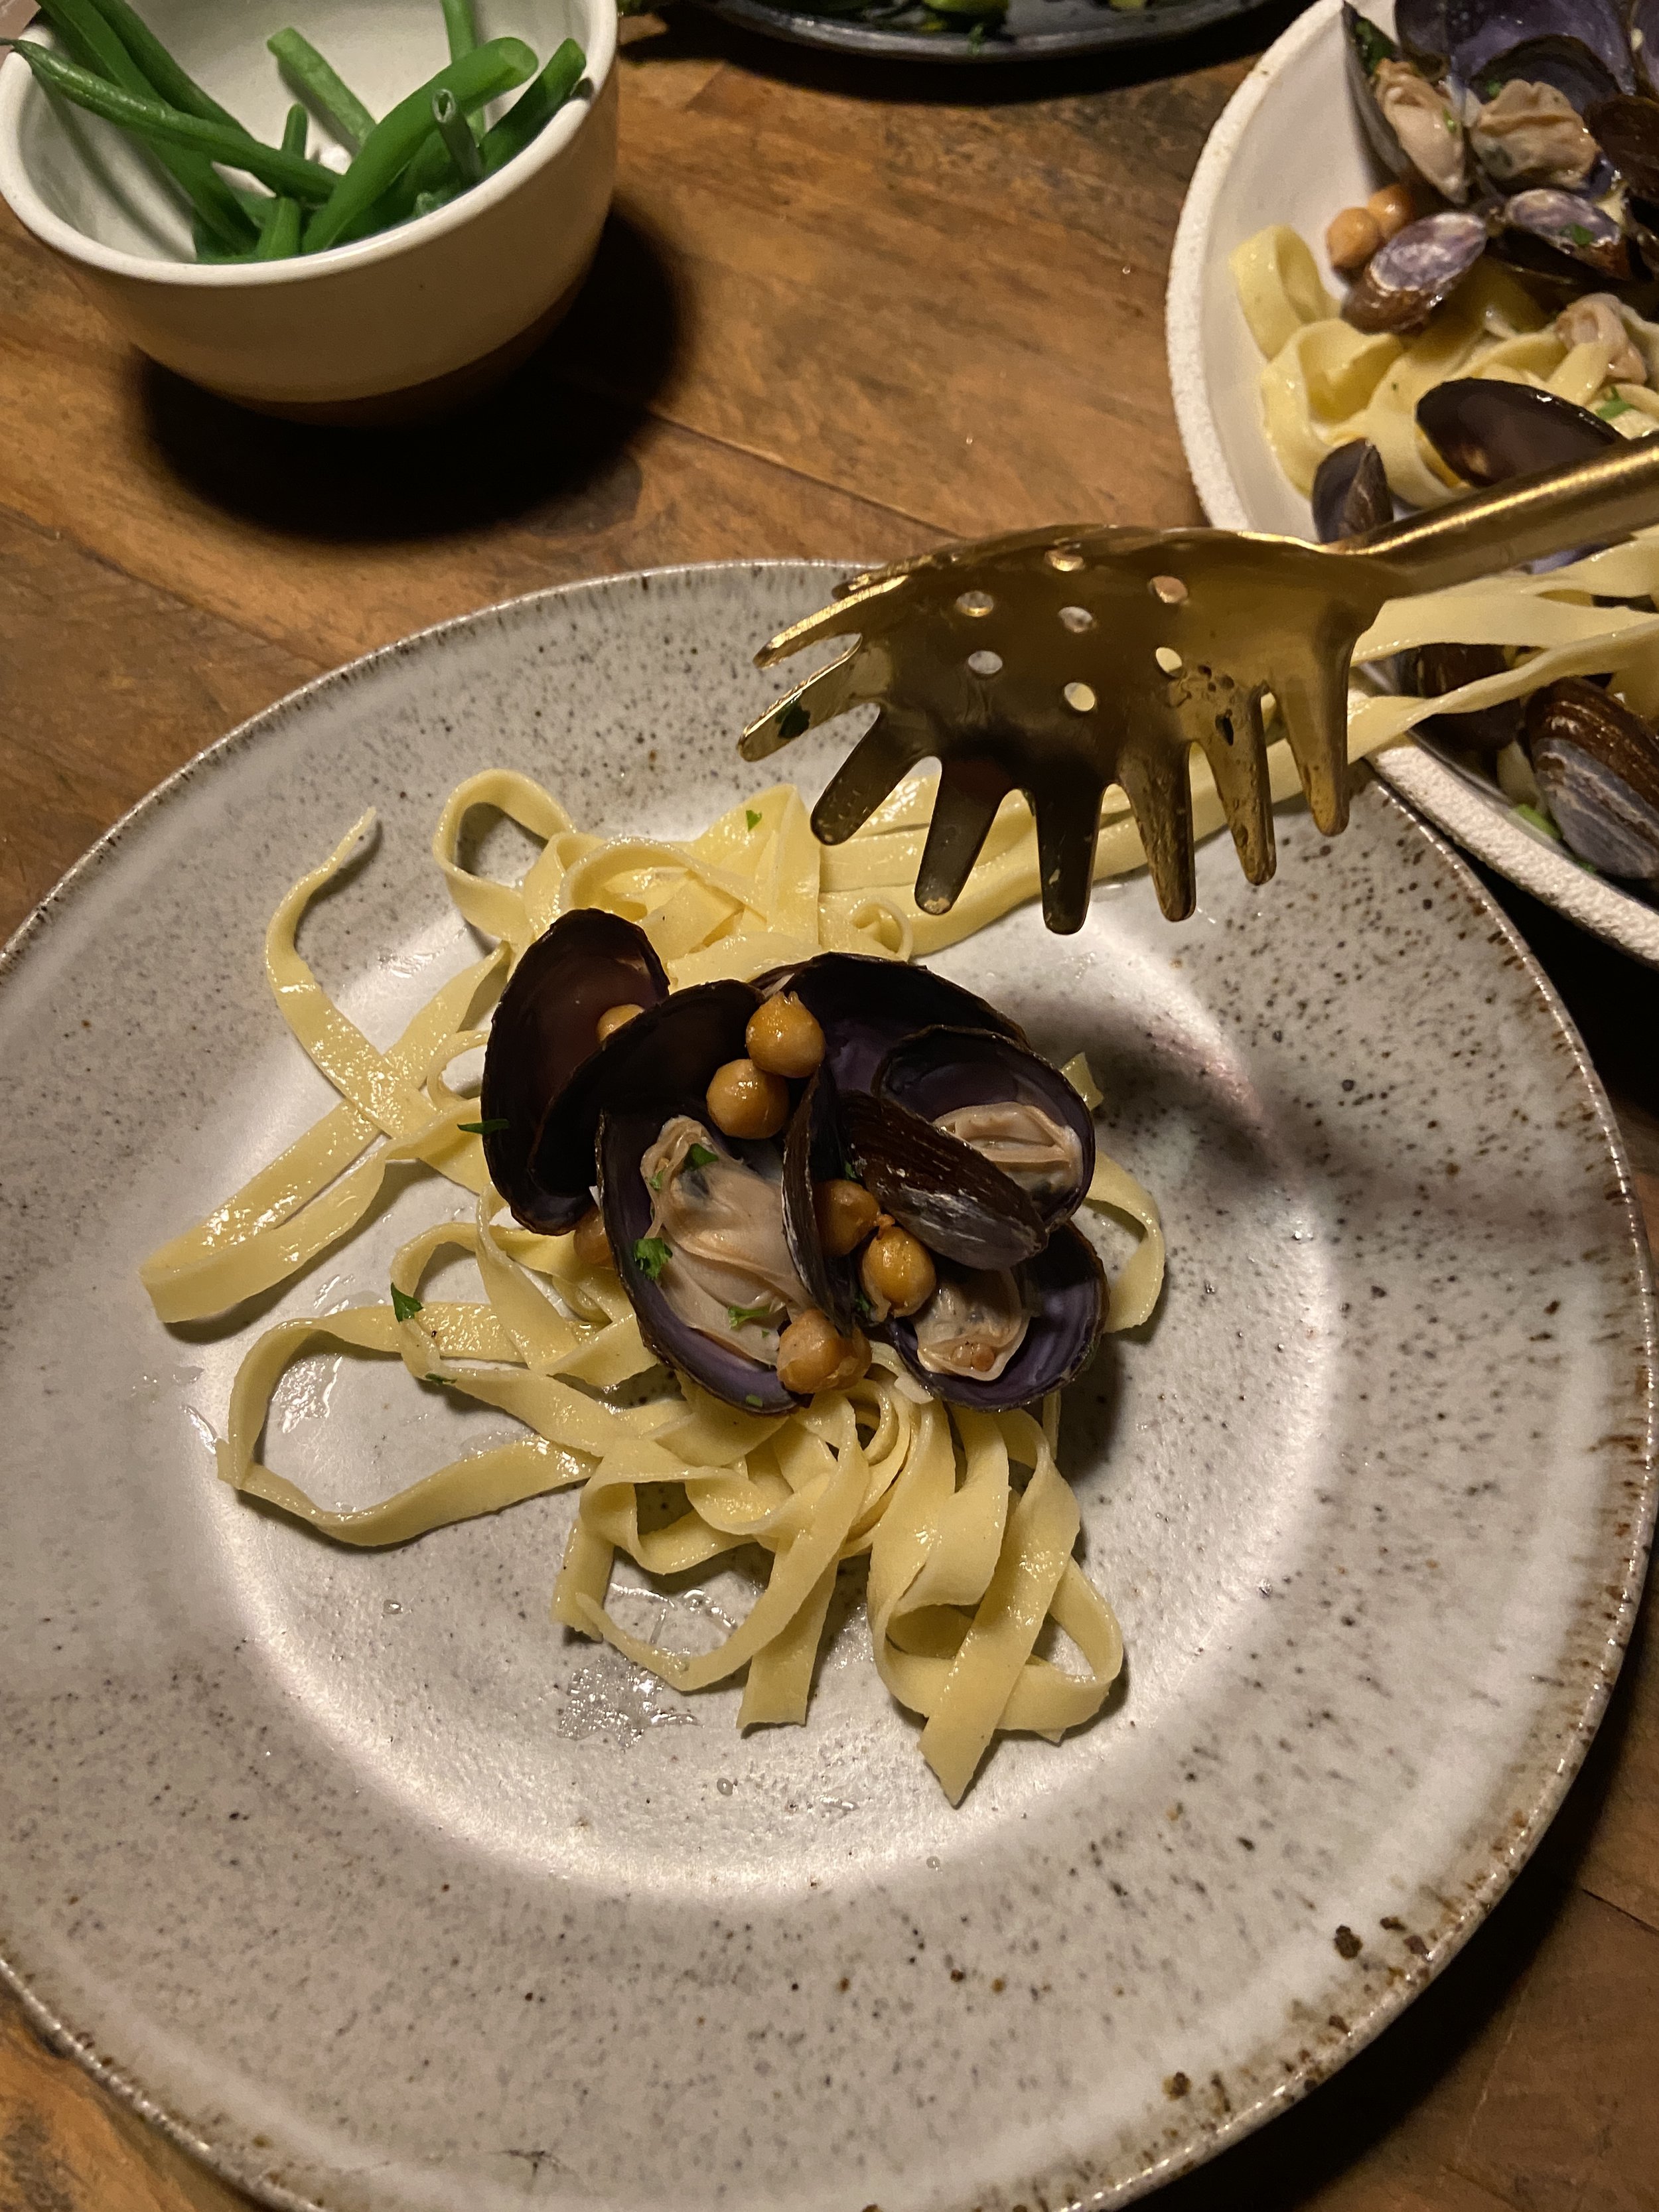
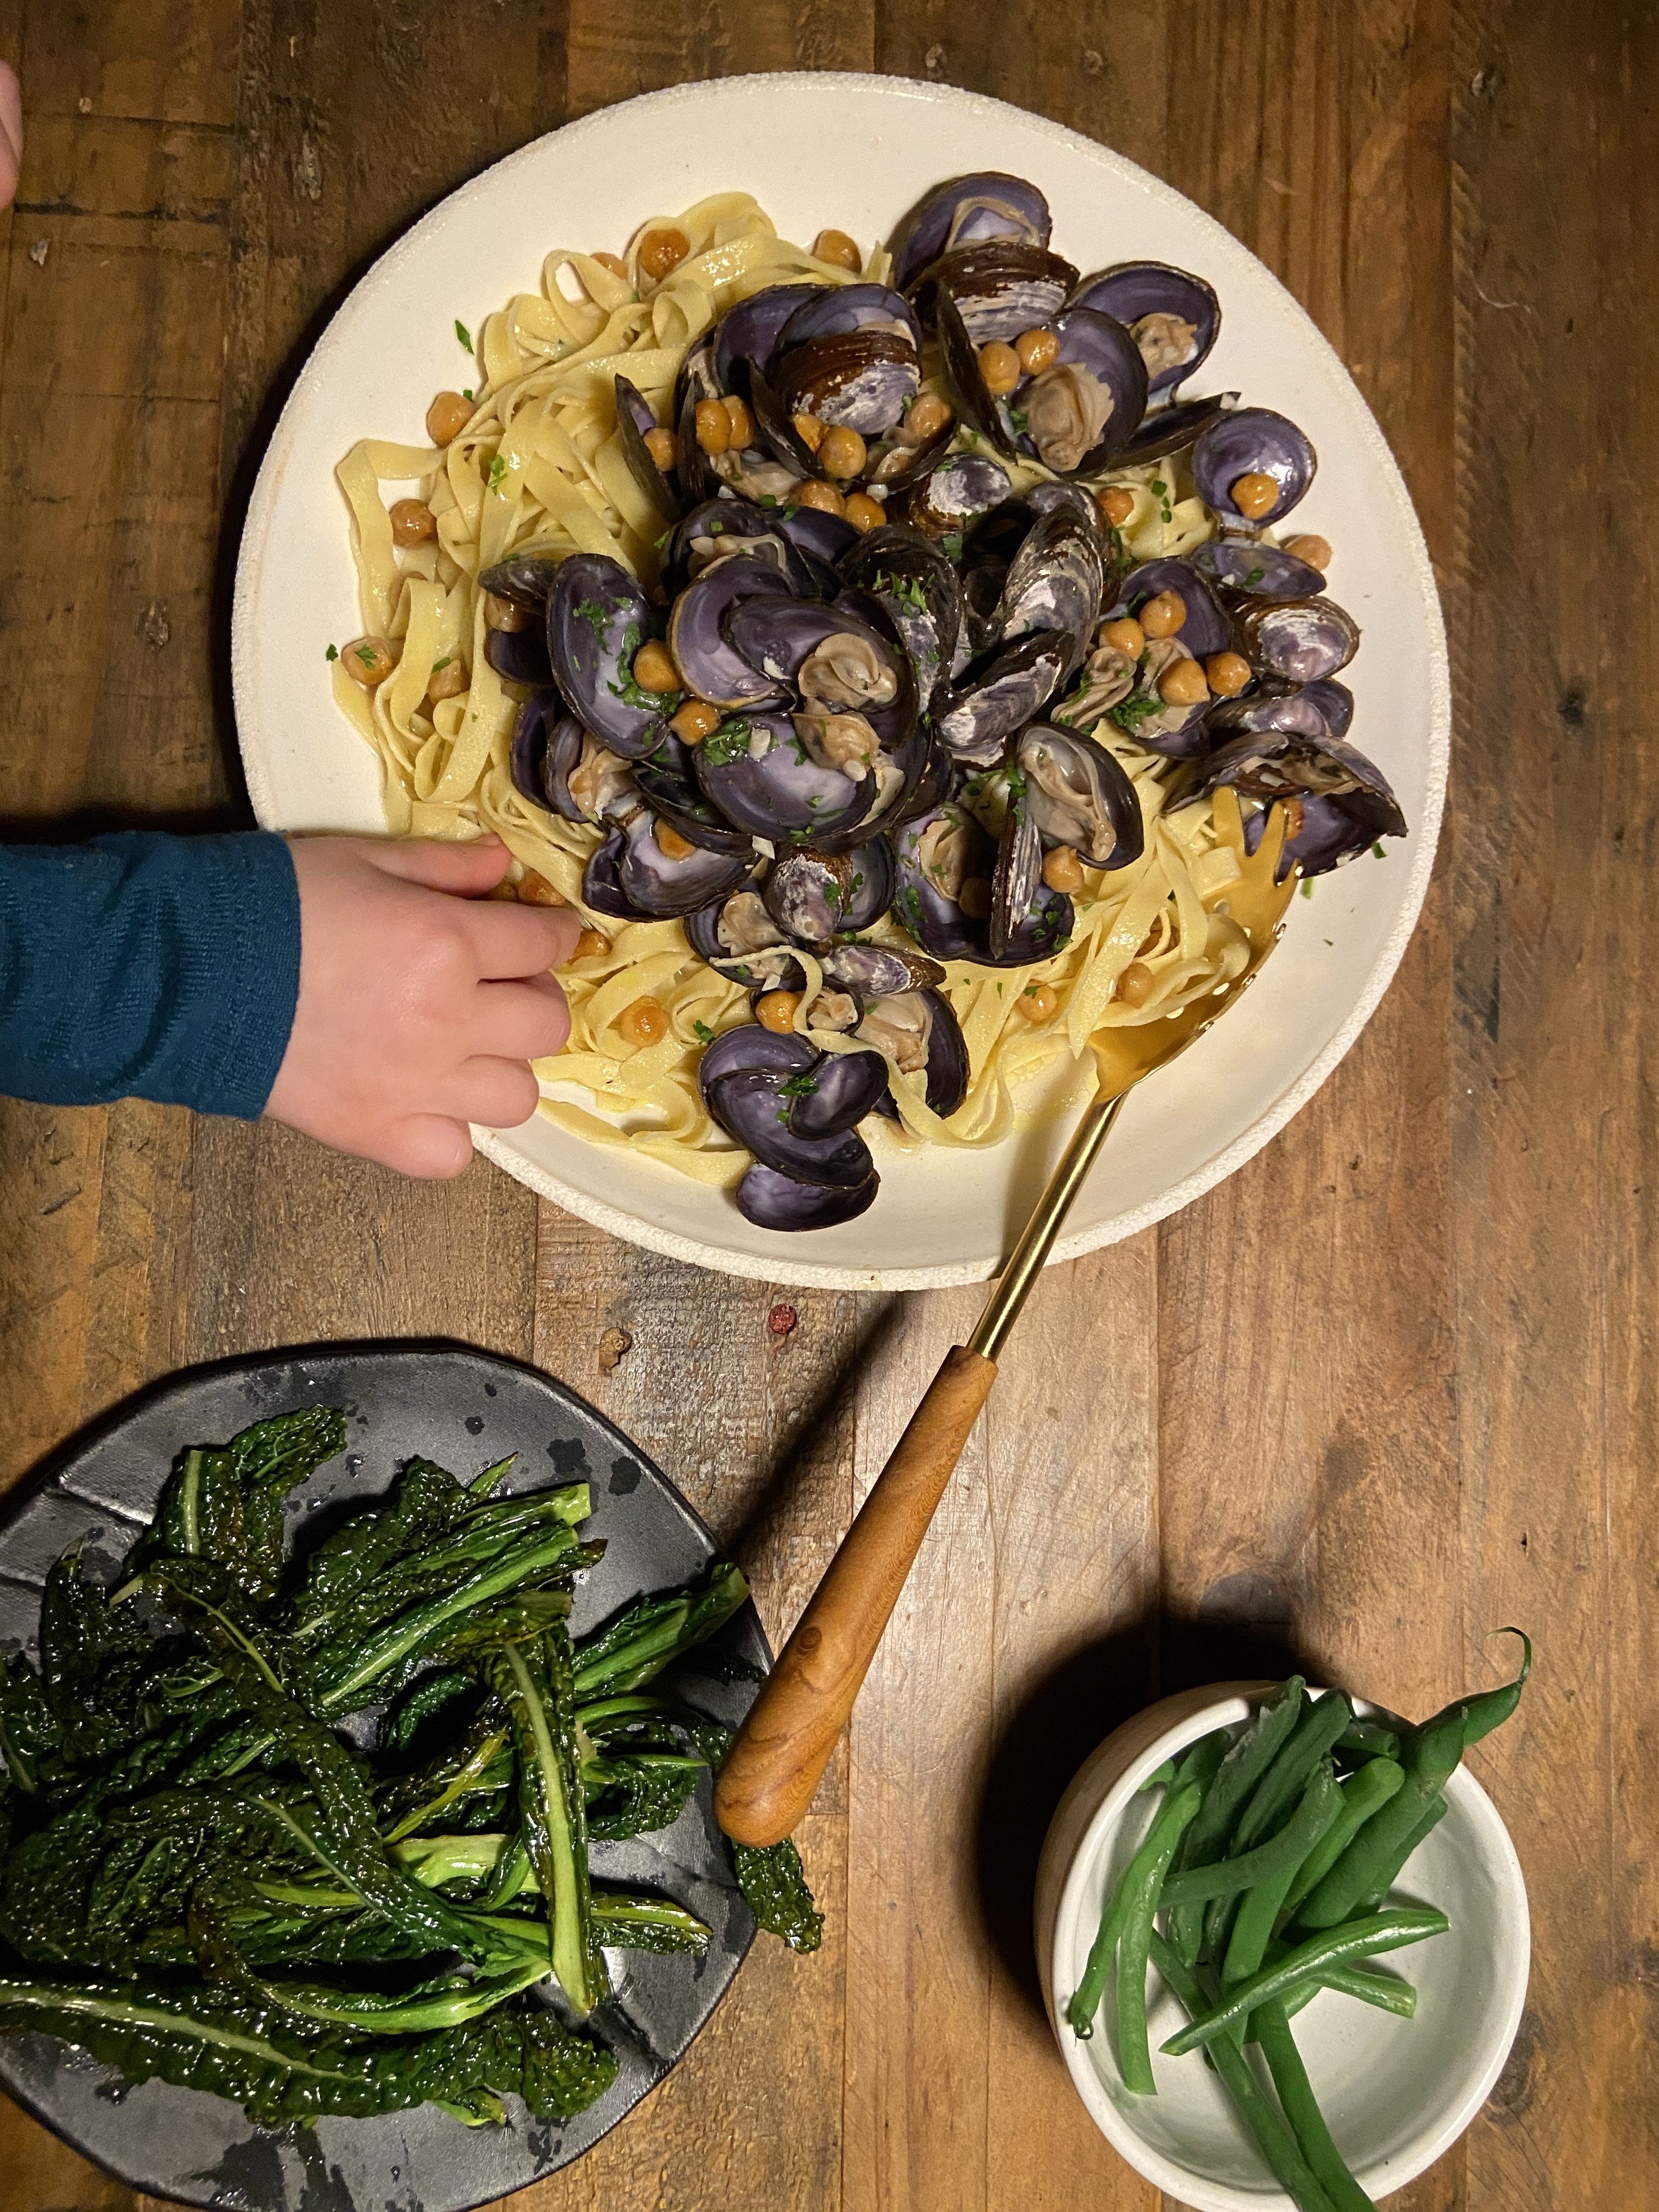
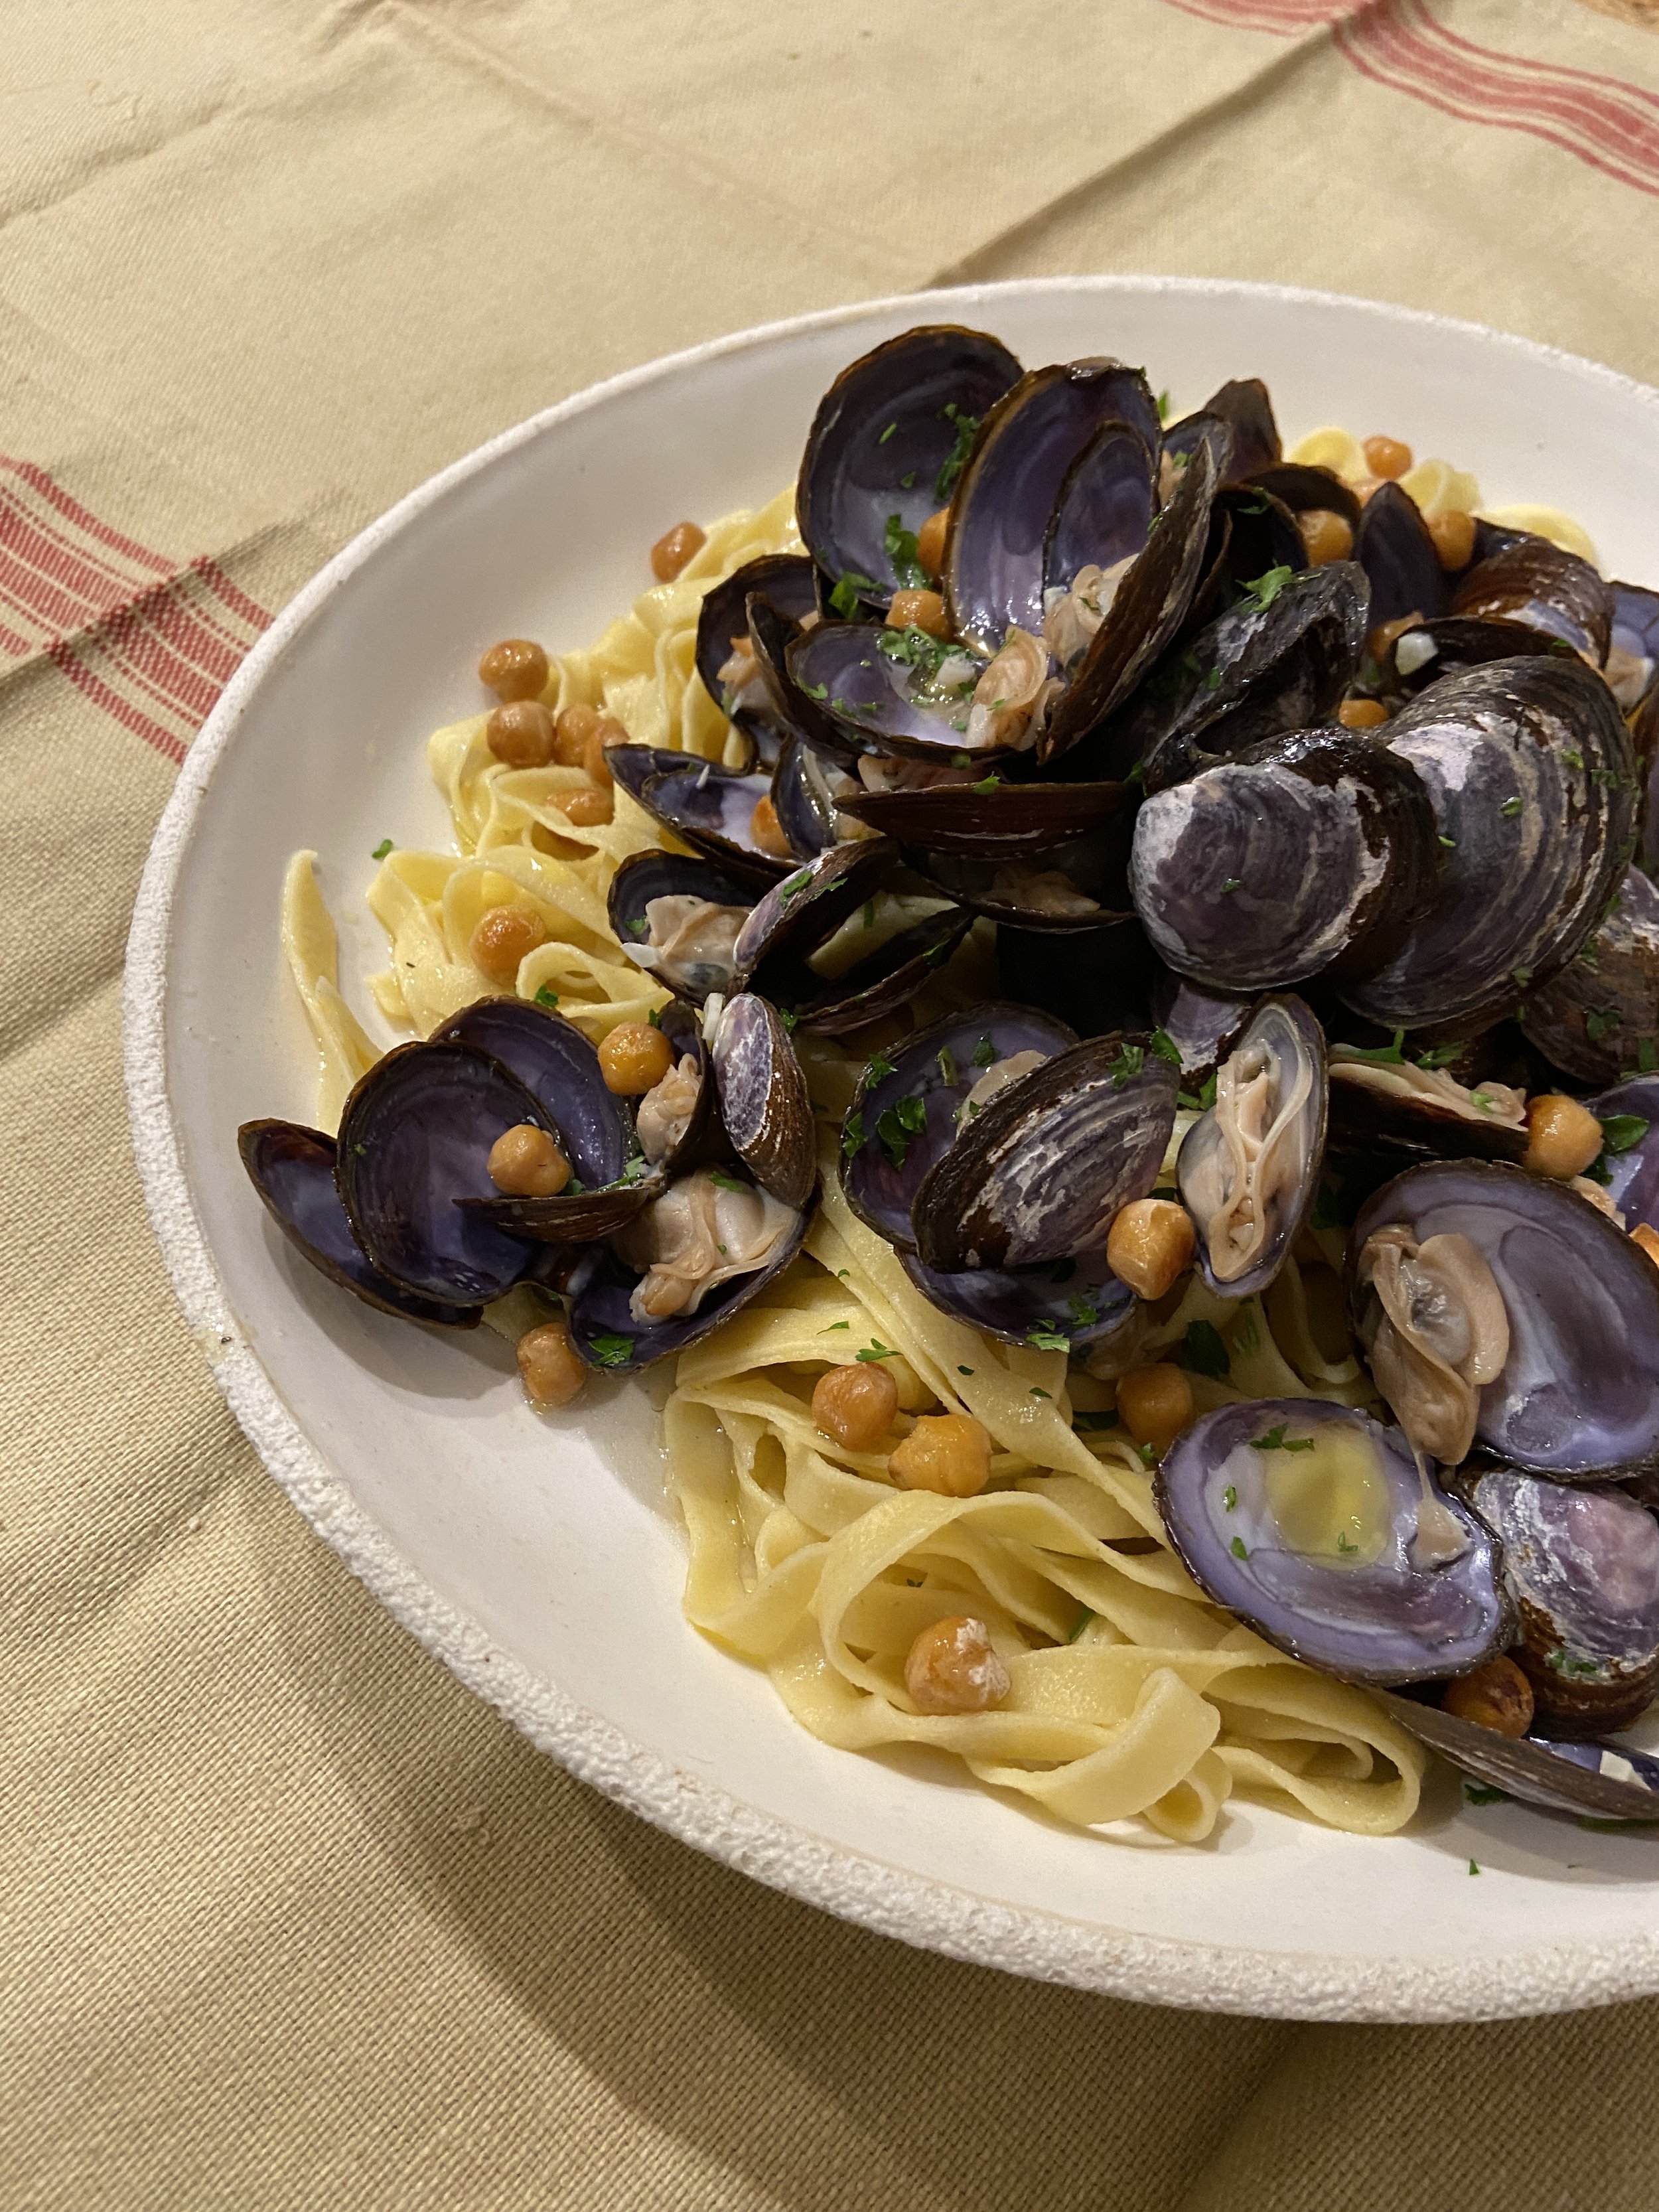
Linguini, Chickpeas, & Clams


Clams and bivalves in general can be intimidating but - spoiler alert - they’re actually very easy to cook! Don’t be scared, they won’t bite. Also, compared to other fish and especially to other animal foods, they’re a much more sustainable protein option and, bonus, they’re also a good source of omega-3s. Many are looking to so-called “blue foods” as a key way to improve global health. You can dress them up or down, but I find that simple is usually best (pairing with pasta never hurts) and they’re ready in minutes. Just make sure to buy them from a reputable source and only eat the clams that open when you cook them.
In this recipe, I added a cup of chickpeas that had been sautéed in olive oil/salt. I like adding chickpeas to give the dish more plant-forward fiber and variety, but you can stick with the classic version and leave them out.
Serves 4.
1-2lb fresh clams (we purchased ours from Flying Fish PDX - I believe they’re sustainably farmed)
1 cup cooked chickpeas (optional, see below for cooking recommendation)
1-3 tablespoons olive oil, separated
1 tablespoon butter (can do another tablespoon olive oil, but butter provides great flavor)
1-3 garlic cloves (depending on your love of garlic), chopped
1/2 cup of dry white wine
1-1.5lb fresh pasta, such as linguine (or 8-12oz dried)
Black pepper and sea salt
Fresh parsley, chopped
Freshly grated parmesan (optional)
To Prepare:

Heat a big pot of salted pasta water to a boil. Rinse clams, set aside.
If you’re adding chickpeas, now’s a good time to sauté them in ~1 tablespoon olive oil on medium-high for 5-7 minutes and sprinkle with salt. I like to use the pan that I’m going to cook the clams in then set the chickpeas to the side so I don’t dirty another pan. You can also roast them on a baking sheet - just toss with olive oil/salt and roast on 400 for 20-30 minutes.
In a large sauté pan big enough for all of your clams and some liquid, heat garlic in 1-2 tablespoons olive oil and butter (or just olive oil) on medium until softened, about 3 minutes.
Once garlic has softened, add clams, increase heat to medium-high, add wine, and toss clams until coated and sizzling.
Cook on medium-high until clams pop open. Do not eat any clams that do not open.
Once cook water is boiling, cook pasta (generally, 1 minute for fresh pasta or as directed for dry). DO NOT OVERCOOK because you’ll be adding this pasta to the hot clams before serving.
Once pasta has cooked, drain (save a few tablespoons of pasta water) and toss with olive oil in a large bowl.
Add pasta water to the clams. Serve over pasta and top with coarse ground black pepper, salt, parmesan, and parmesan (if desired).


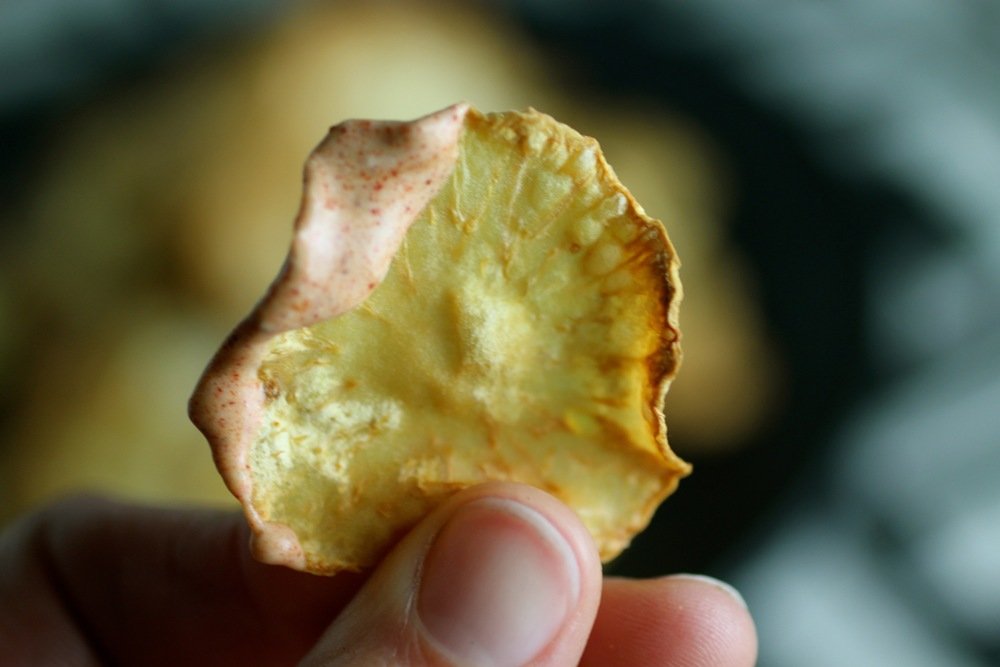
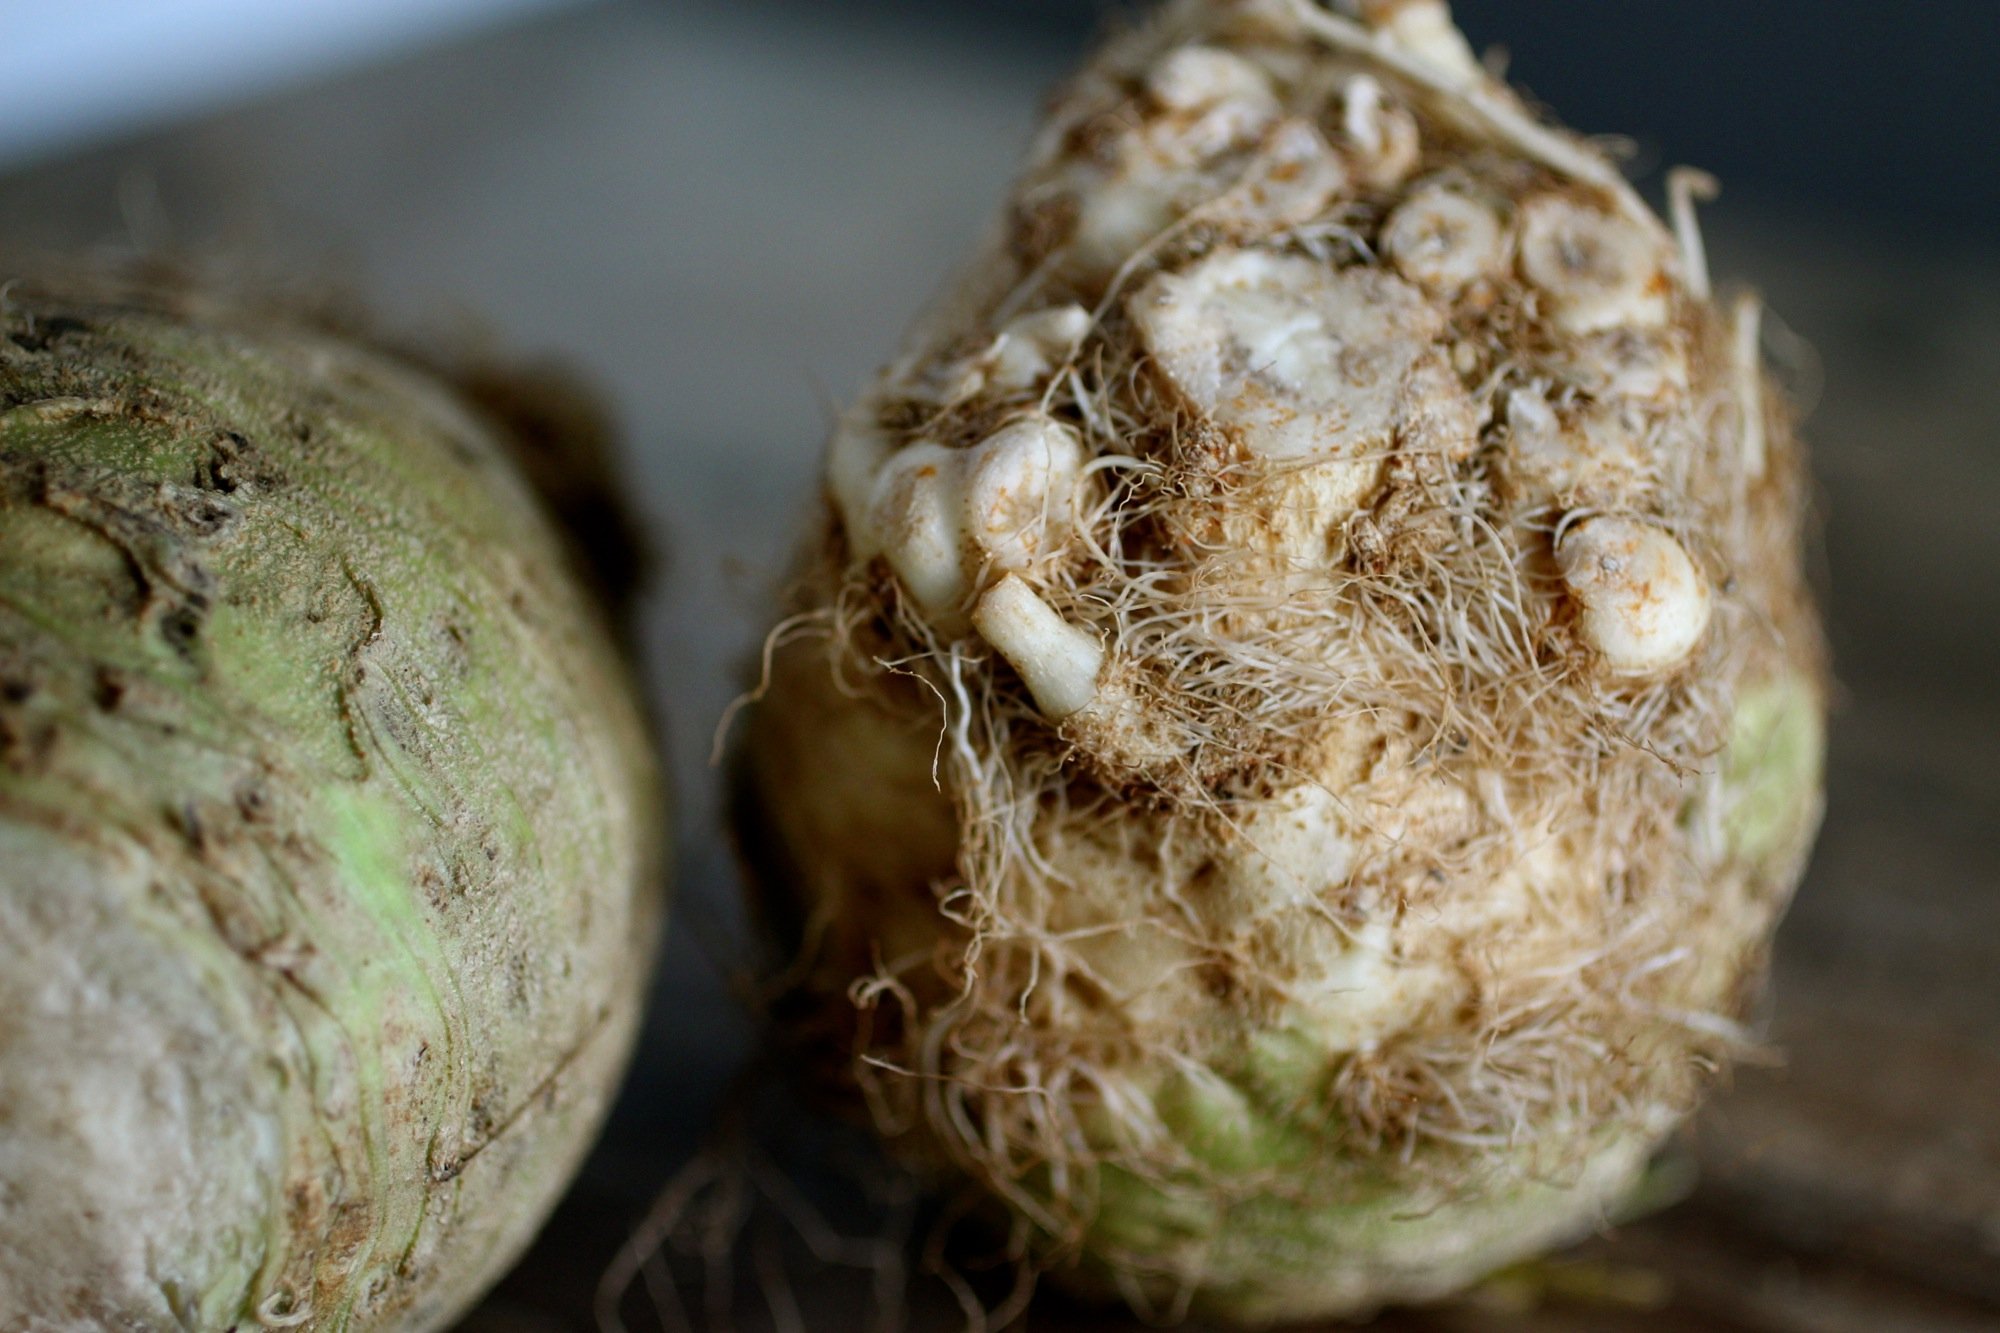
Celery Root Chips with Paprika Aioli
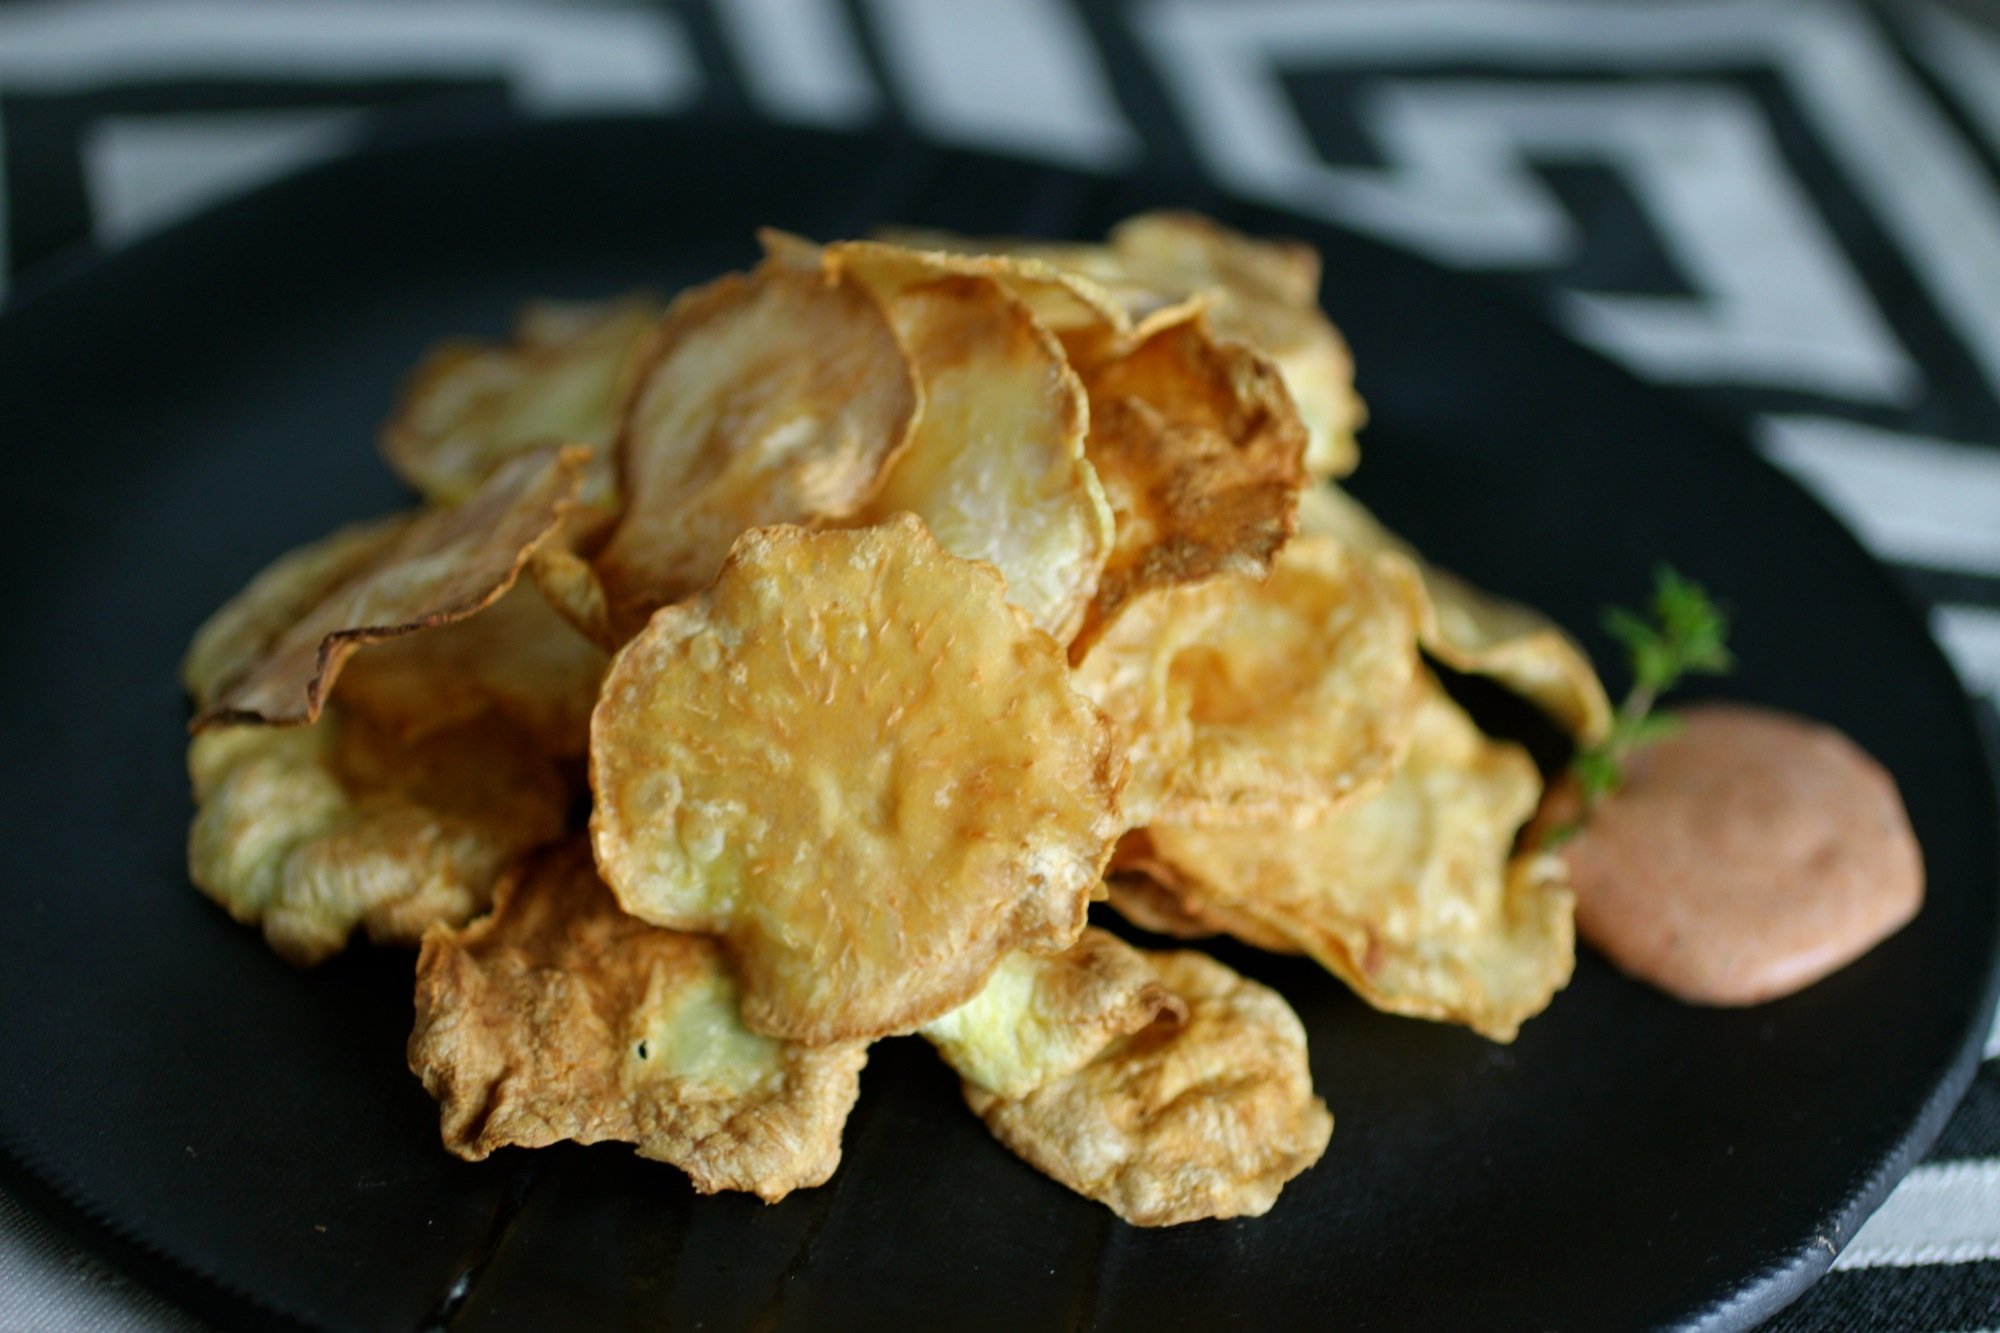
Celery root, celeriac, or whatever you want to call it, let's face it - this root is gnarly. What I love about celeriac is that even though it is gnarly and somewhat intimidating, it can be transformed into something like these chips, that are delicate, light, and elegant. Also - don't worry, it's really not that intimidating after you cut off the outside and the flavor is delightfully nutty - perfect in these chips tossed in coconut oil before baking and paired with smoked paprika aioli (or, honestly, also delicious on their own). Recipe makes enough for about 2-3 people as a snack, but you could probably eat them all on your own.
1 celery root (about 200g)
2-3 teaspoons coconut oil, melted*
About 1/8 teaspoon sea salt
Smoked paprika aioli (optional, see below)
To Prepare:
Preheat oven to 375 degrees F.
Rinse and cut off top and bottom of celery root then, using a knife, cut off remaining peel and any tougher outer layer into strips.
If needed, rinse again to remove any remaining dirt and pat dry.
Using a mandolin, slice into thin circles. The celery root may need to be cut in half first, depending on the size of the root and your mandolin.
Place chips on baking sheet and drizzle with coconut oil. Toss to coat, sprinkle with salt and spread out on baking sheet in a single layer.
Bake for 15-20 minutes or until golden brown, flipping halfway through. Chips might not be crispy while still warm, but they should become crispy as they cool.
*Olive oil can be substituted for coconut if desired. The flavor is not quite as nutty and can be more peppery, depending on olive oil.
Note: Leaving celeriac chips out for a long time, especially in a humid environment, will cause them to soak up water and lose their crispiness.
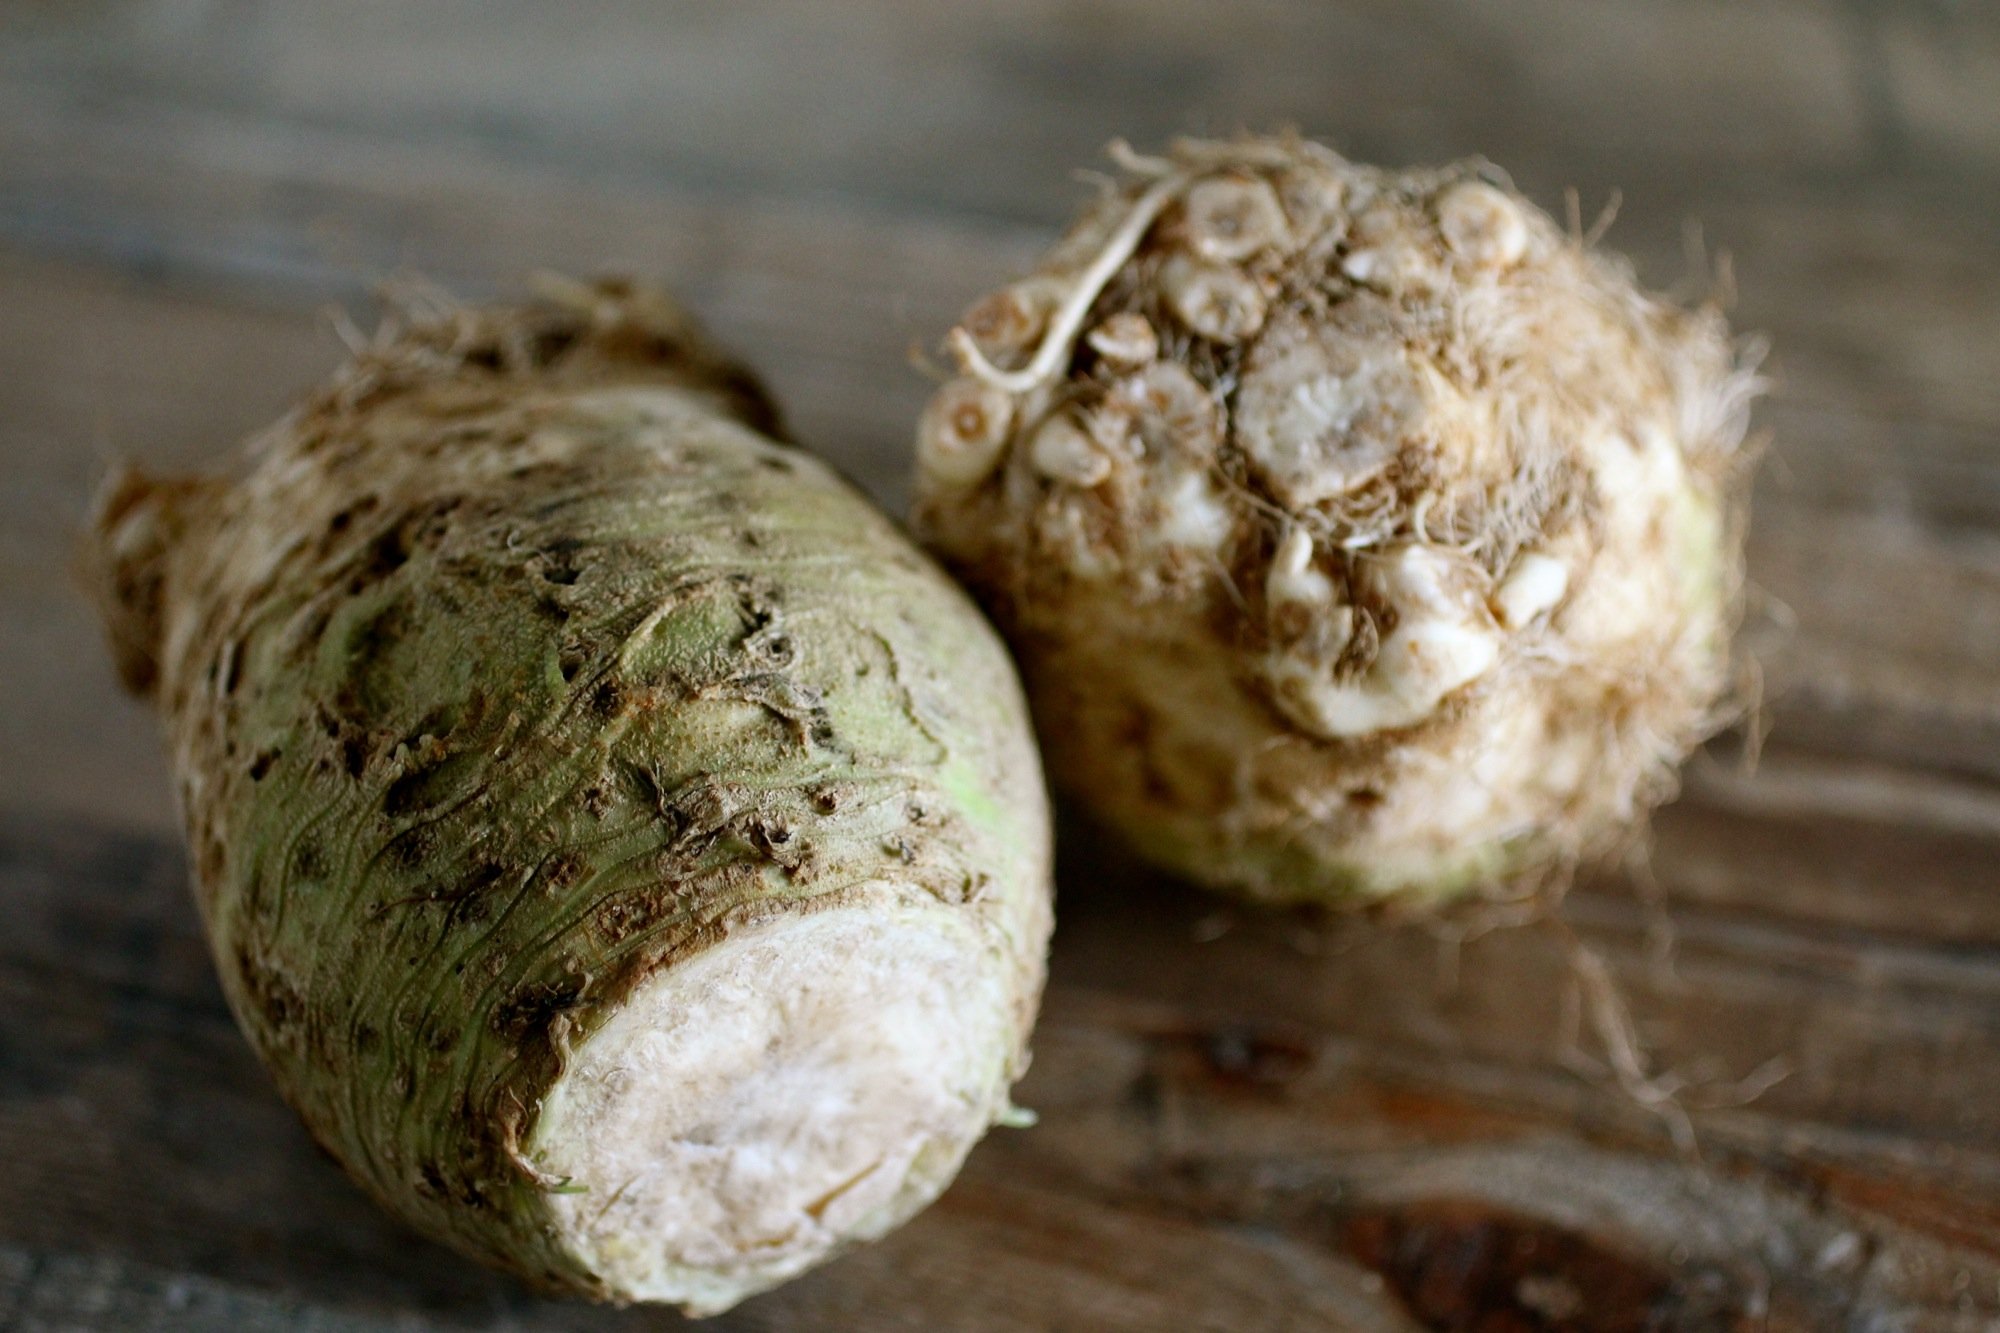
Gnarly celery root - love it!
For Smoked Paprika Aioli- This recipe will make much more than you need for these chips and goes great with raw or cooked vegetables, in salad dressings, on sandwiches, etc. When I make it, I usually split it in half and only add the smoked paprika to one half, as classic aioli is more versatile.
1 egg
1-2 medium cloves garlic, diced
1 teaspoon mustard or mustard powder
Pinch of sea salt
1 cup olive oil and either vegetable or grapeseed oil combination (adjust ratio depending on how rich olive oil-wise you’d like your aioli to taste)
2-3 teaspoons fresh lemon juice
About 1/2 teaspoon smoked paprika (to flavor one half of the aioli)
Blend egg with garlic, mustard, and salt until frothy.
While blending, slowly add in olive oil. Blend until thick and quickly mix in lemon juice. Divide aioli in half and whisk in smoked paprika to one half. Keep refrigerated until use.
CHOMP.

Savory Corn and Chard Porridge
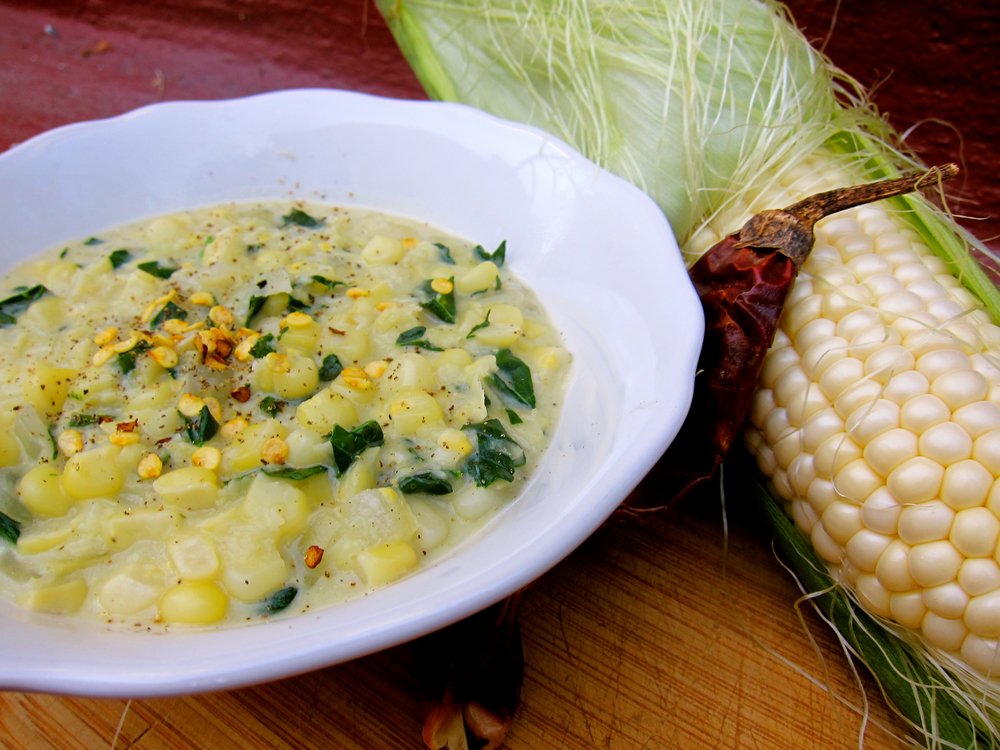
Try this flavorful dish for a unique way to sneak vegetables into your breakfast. Use mustard greens or spinach if chard is not available where you live. Serves 4.
4 large ears of corn
1 tablespoon olive oil
1 medium yellow onion, diced
1/2 cup water
1/2 cup whole or reduced fat milk
1-1/2 cups chard, chopped
1/4 teaspoon salt
1/4 teaspoon ground white pepper
1/2 teaspoon red pepper flakes
1/4 teaspoon coarse ground black pepper
To Prepare:
Using a cheese grater, coarsely grate the kernels off of 2 ears of corn into a large bowl to create a pulp. Using a knife, remove the kernels off of the other 2 ears and add to the bowl with grated corn.
In a large pot, sauté onion in oil on medium-low heat until soft, about 5 minutes.
Add the corn mixture and water to the pot and cook 5 minutes, stirring occasionally. Add milk, chard, salt, and white pepper, and cook until thickened, about 2-3 minutes.
Serve hot, topped with red pepper flakes and black pepper.

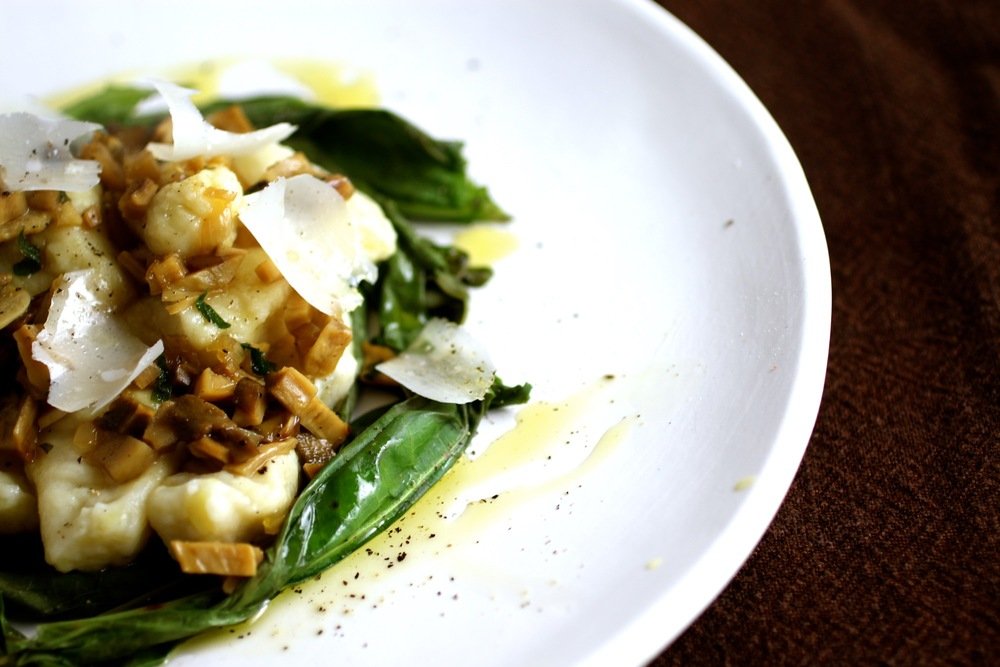
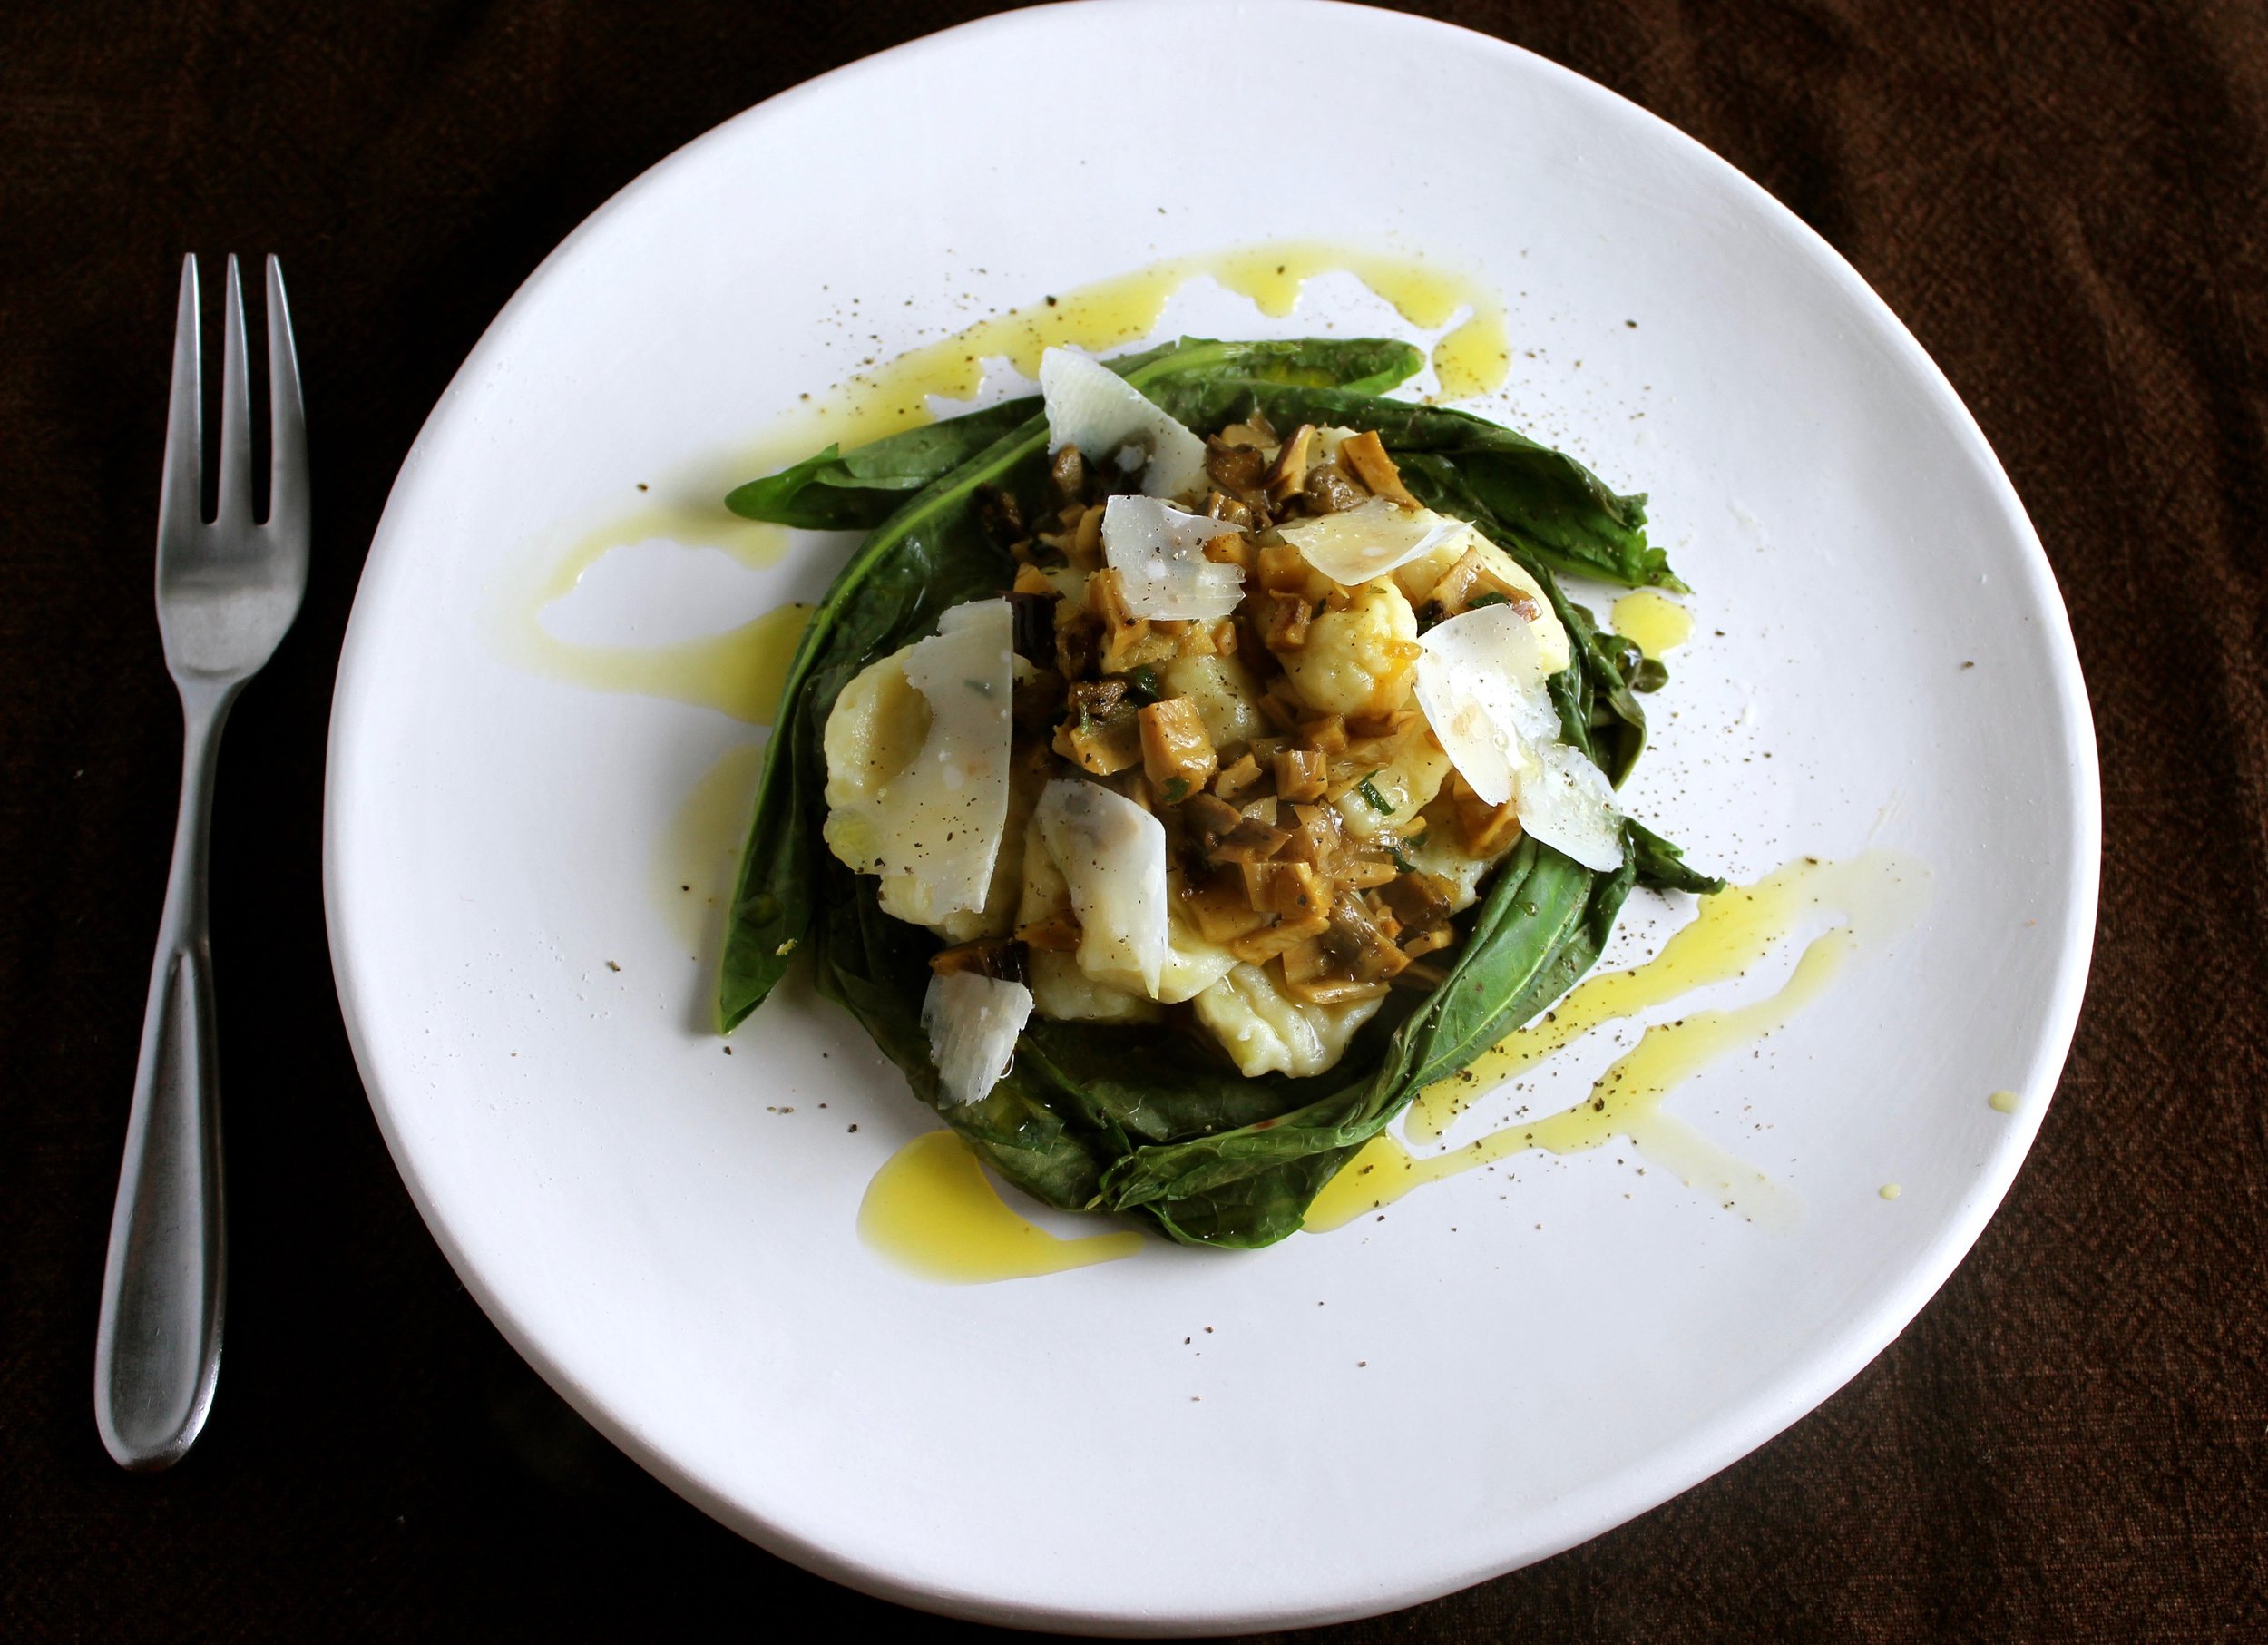
Gnocchi with porcini and Wilted wild greens
Gnocchi - the pasta of potatoes. If you see gnocchi as simply a vehicle for toppings then you haven't tried legit gnocchi. Making gnocchi from scratch may take time and attention, but the effort is worth it. The resultant soft, pillowy dumplings are stars of the show as much as any sauce. The first time I had the pleasure of tasting homemade gnocchi was in Turin, Italy when I was there for the Slow Food Terra Madre conference and I can still remember the meal - it was that good. My gnocchi may not quite achieve the same level of perfection, but I'll certainly keep trying.
I've made gnocchi several times in the past, each time with a different topping, and I really like how the richness of the mushroom sauce and the green notes of the wild greens (in this case, curly dock - more on the plant in general here) paired with the simple potato pasta in this recipe. The next time I make it however, I will blend the mushroom sauce with an immersion blender for a smoother consistency that doesn't compete with the soft gnocchi "pillows". Feel free to take just the gnocchi portion of this recipe and experiment with your own combinations, such as different mushrooms, a pesto, or a simple marinara sauce. Recipe serves 4.
Gnocchi

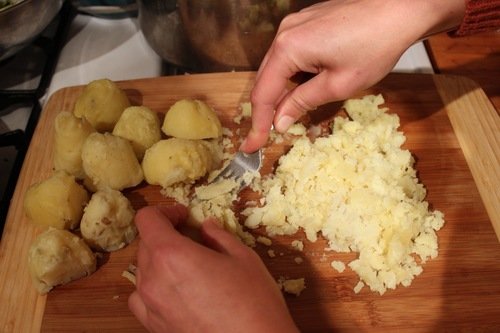
Wee little gnocchi dumplings.
2 pounds of golden potatoes
1/4 cup egg, lightly beaten
1 cup all-purpose flour
Sea salt (fine grain)
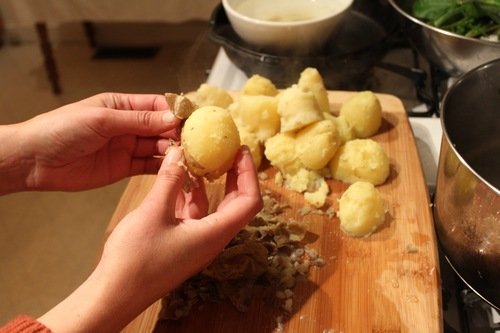
Fill a large pot with water. Salt the water, then cut potatoes in half and place them in the pot. Bring the water to a boil and cook the potatoes until tender, about 25-30 minutes.
Working one potato at a time, remove potato halves with a slotted spoon and place on a large cutting board. As soon as possible after removing from the water, peel each potato before moving onto the next (these are, obviously, hot potatoes, but you want to work as fast as possible to mash them while they're still hot). Mash potatoes using a fork to create a mound of potato "fluff" - do not over mash. Save the potato water for later.
Let the potato mash cool for about 5 minutes (you want to prevent the egg from cooking). Join the potatoes into a soft mound, drizzle with the beaten egg and sprinkle 3/4 cup of the flour across the top. Using a spatula, scrape underneath and fold to mix in egg and flour. With a very gentle touch, knead the dough. Knead in more flour if dough is too gummy/tacky. The dough should be moist but not sticky.
Lightly flour a new cutting board and separate potato dough into 8 pieces. Gently roll each 1/8th of dough into a log, roughly the thickness of your thumb. Use a knife to cut pieces every 3/4-inch. Dust with a bit more flour.
Shape gnocchi using a fork to create lines in the middle of the gnocchi, so that they kind of look like footballs. Be sure to lightly touch fork into the gnocchi so that it still stays soft and doesn't break. Set gnocchi aside, dusting with flour if needed until you are ready to boil them. Meanwhile, make the porcini sauce.


Porcini Sauce
1.5 cups low-sodium chicken broth
0.75 ounces dried porcini mushrooms, rinsed
2 tablespoons extra-virgin olive oil
1 small shallot, minced
1 clove garlic, thinly sliced
1/3 cup dry white wine
2 tablespoons minced fresh parsley
Salt and pepper
Heat broth and porcini in a small saucepan until simmering. Turn off heat, cover, and Let stand until softened, about 5 minutes. Remove mushrooms, reserve liquid, and dice porcini. Heat 1 tablespoon olive oil in a medium skillet over medium heat. Add chopped porcini, shallot, and garlic; cook until lightly browned, 2 to 4 minutes. Stir in reserved liquid, wine, and remaining tablespoon olive oil, scraping up any browned bits. Increase heat to high and bring to boil; cook to reduce, whisking occasionally, about 5 minutes. Stir in parsley and season with salt and pepper to taste. Cover to keep warm.
Cooking and Serving Gnocchi
A few handfuls of foraged dock, dandelion, or other green, thoroughly washed and trimmed
Olive oil drizzle, salt, and pepper, for garnish
Parmesan shavings, for garnish
Reheat the potato water and bring to a boil, adding more water if needed (you need enough water to cover the gnocchi). Cook the gnocchi in small batches by dropping them into the boiling water. Once gnocchi pop up to the top, remove them with slotted spoon ten seconds or so after they've surfaced. Have a large platter ready with dock or other greens that you will be serving with the gnocchi on the plate. Place the gnocchi on the platter on top of the greens - greens will wilt from the heat of the gnocchi. Continue cooking in batches until all the gnocchi are done. Top gnocchi with porcini sauce, a drizzle of olive oil, salt, black pepper, and parmesan shavings.

Autumn crunch farro salad with Asian pear, celery, and toasted hazelnuts
Autumn crunch farro salad.
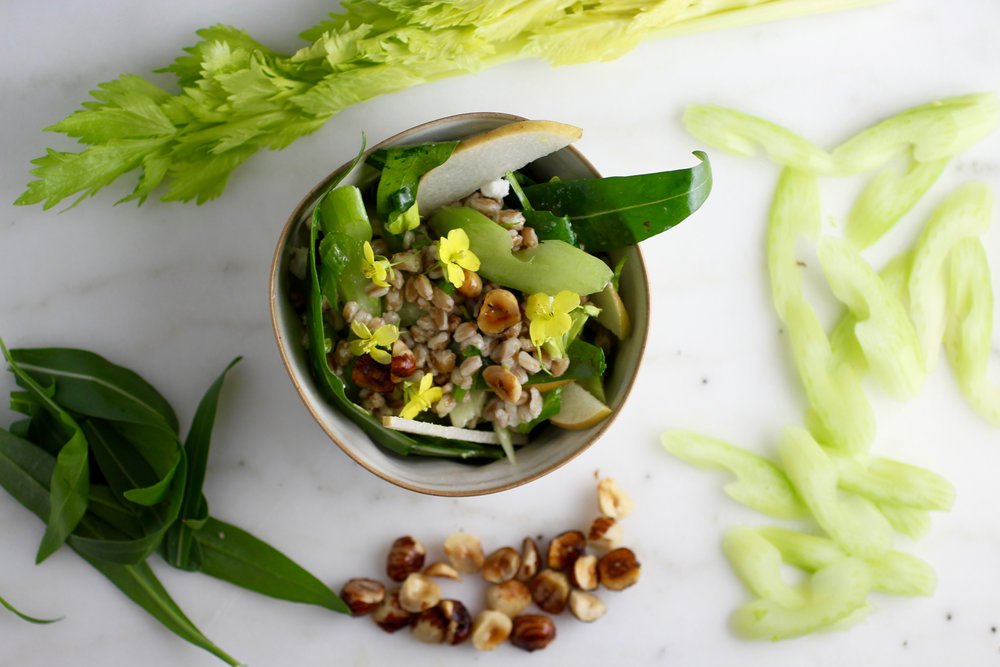
Wholesome, flavorful, crunchy.
By way of a recommendation from a food-minded friend, I was lucky enough to visit the restaurant Ned Ludd on a recent trip to Portland. Defining itself as "an American craft kitchen", Ned Ludd has all of the charm and menu items you'd expect in a Pacific Northwest restaurant with a photo of an axe in the woods on their homepage. Various pickled things, roasted brassicas, and charcuterie definitely make an appearance, as does other "good food that tells a story". Apart from delectable dishes including their delicious grilled flat bread served with olive oil (salivating just thinking about the doughy goodness), another menu item that I recall is one that we actually didn't order - a whole grain salad with a bunch of different chopped ingredients reminiscent of autumn. I specifically made a mental note to take the inspired ingredient combination of farro, arugula, asian pear, celery, toasted hazelnuts, and chevré, and try it at home. While I'm not sure if this is exactly like what they served, as again, we didn't order it, the salad was unique and delicious so I consider it an inspired-recipe win!
The fall is fading fast, but it's not too late to make use of the harvest with this salad. Also, farro is technically considered an "ancient grain" (a grain that is loosely defined as not having changed much over the last several hundred years), which is fun from a culinary sustainability standpoint and a stellar grain to have in your toolbelt. Below is an approximation (feel free to add more or less of whatever you have on hand!) and serves 4.
1 cup cooked farro*
2 large celery stalks, thinly sliced
1 asian pear, cored and thinly sliced
2 cups arugula
About 1/4 teaspoon Kosher or sea salt
Juice of 1 lemon
2 tablespoons olive oil
1-2 ounces fresh goat cheese (chevré), crumbled
1/4 cup toasted hazelnuts**
Arugula or other edible flowers for garnish (completely optional, I just happened to have arugula and flowers growing in my raised bed)
Toss farro with celery, pear, and arugula. Salt to taste.
Put lemon juice, olive oil, and a few pinches of salt in a small mason jar. Shake until combined then toss into farro mixture followed by goat cheese and hazelnuts, reserving a few to add to top.
Garnish with edible flowers (optional) and serve immediately.
*There are many ways to cook farro, but I usually just use 1 part farro to 2 parts liquid (water in this case), bring to a boil, reduce to a simmer, cover, and cook for about 30-40 minutes until farro is "al dente" (because I like it kind of firm), but soft enough to chew. In this instance, about 1/3 cup farro + 1 cup water will yield about 1 cup cooked farro. Some recipes call for cooking farro like pasta, but I feel that is an unnecessary waste of water.
**To toast hazelnuts, heat in a cast iron pan on medium-high until browned, tossing frequently, about 2 minutes and sprinkle with salt. A small amount of oil can be added to the pan and tossed with the nuts if you'd prefer a richer toasted nut.
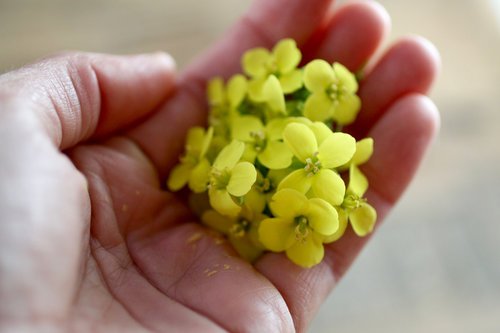
Arugula flowers for garnish that I happened to have from my raised bed arugula - not at all mandatory, but always fun to include some edible flowers!

Asparagus-Wild Onion-Umami
Asparagus-Wild Onion-Umami
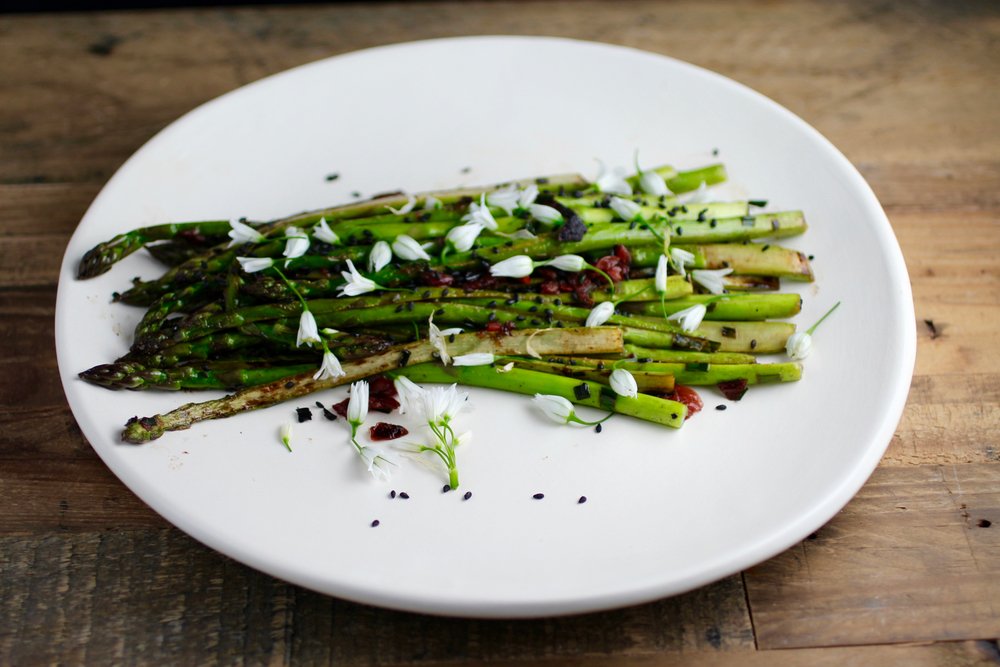
One of my favorite spoils of spring are the wild onions. In the Bay Area, the Allium triquetrum or "three-cornered leek" is the wild onion that abounds and it also happens to be as lovely in flavor as it is in appearance. This wild onion is nicknamed "three-cornered" because of the shape of its stems and has the characteristic allium smell and taste with a delicate sweet note, especially when using its small, white, star-shaped flowers.
There are many ways to enjoy these "three-cornered leeks", but pairing them with asparagus deliciously highlights the season. In California, not many foods are truly seasonal so when they are I like to indulge. Browning the asparagus and chopped onion stems in butter with umeboshi brings in umami elements then topping with the sweet wild flowers and crunchy bits of sesame really knocks it out of the park. We made umeboshi last year with local wild plums, but store bought umeboshi or even miso can be used as a substitute if you do not have access to umeboshi - either ingredient will contribute the umami flavor that you're looking for. Recipe is adaptable to the amount of asparagus you have preference for strength of flavors. The below recipe will serve 2-4 people (in our house, definitely only 2!)
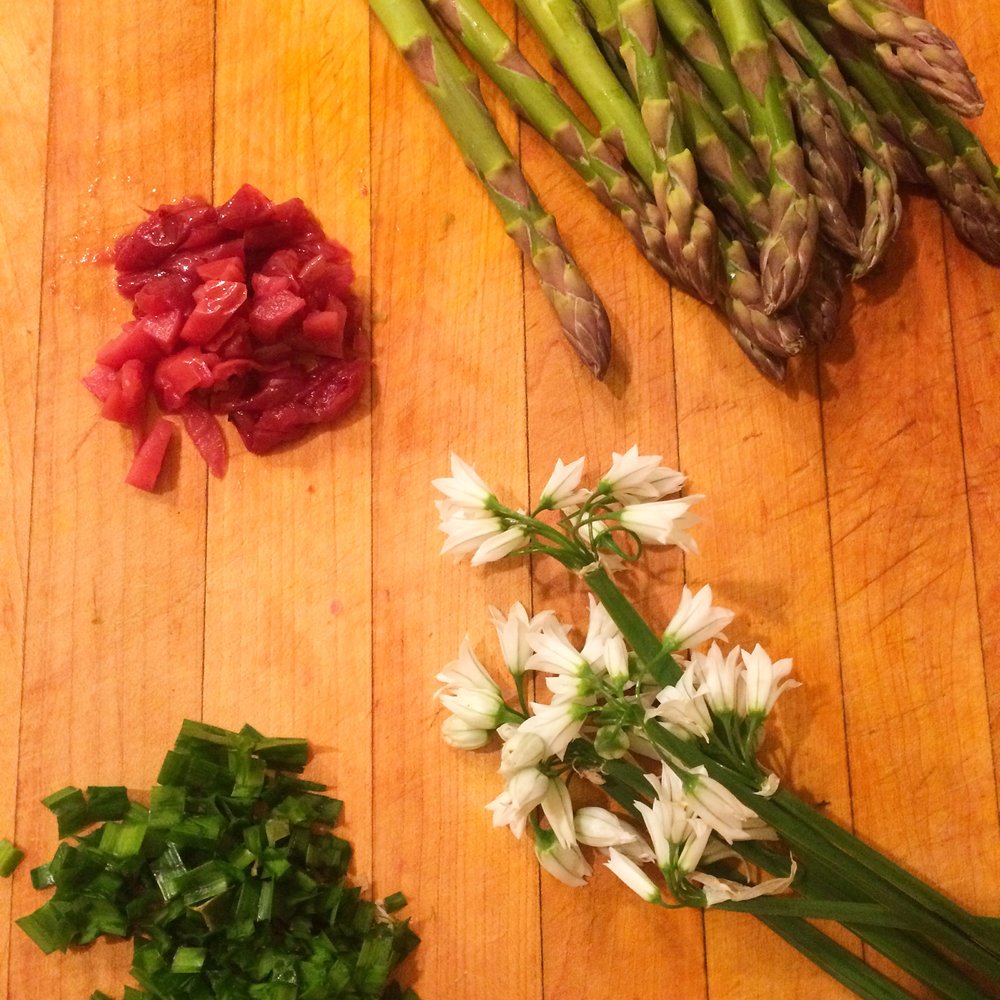
1 pound of asparagus (about 16 spears), tough fibrous stems removed
7 wild onion, aka three-cornered leek, stalks with flowers (there will be several flowers on each stalk)
1 tablespoon unsalted butter
3 umeboshi, finely chopped, or 1 tablespoon red or brown miso
1 tablespoon sesame seeds
For larger asparagus spears: Using a vegetable peeler, peel bottom of spear about 1-inch up from bottom and slice larger asparagus spears in half lengthwise. If you have thin asparagus spears, both of these steps can be skipped.
Remove wild onion flowers and dice stalks. Set aside.
In a cast iron pan, sauté butter over medium-high heat. Add asparagus, toss to coat, and cook until beginning to soften, about 1 minute. Add umeboshi (or miso in small pieces) and diced wild onion stalks, toss to coat, and cook until asparagus browns, about 3-5 minutes, tossing halfway through. Test an asparagus spear to see if it is flavored to your liking - if not, add more butter/umeboshi or miso/onion.
Remove from heat and top with sesame seeds and wild onion flowers. Serve hot.
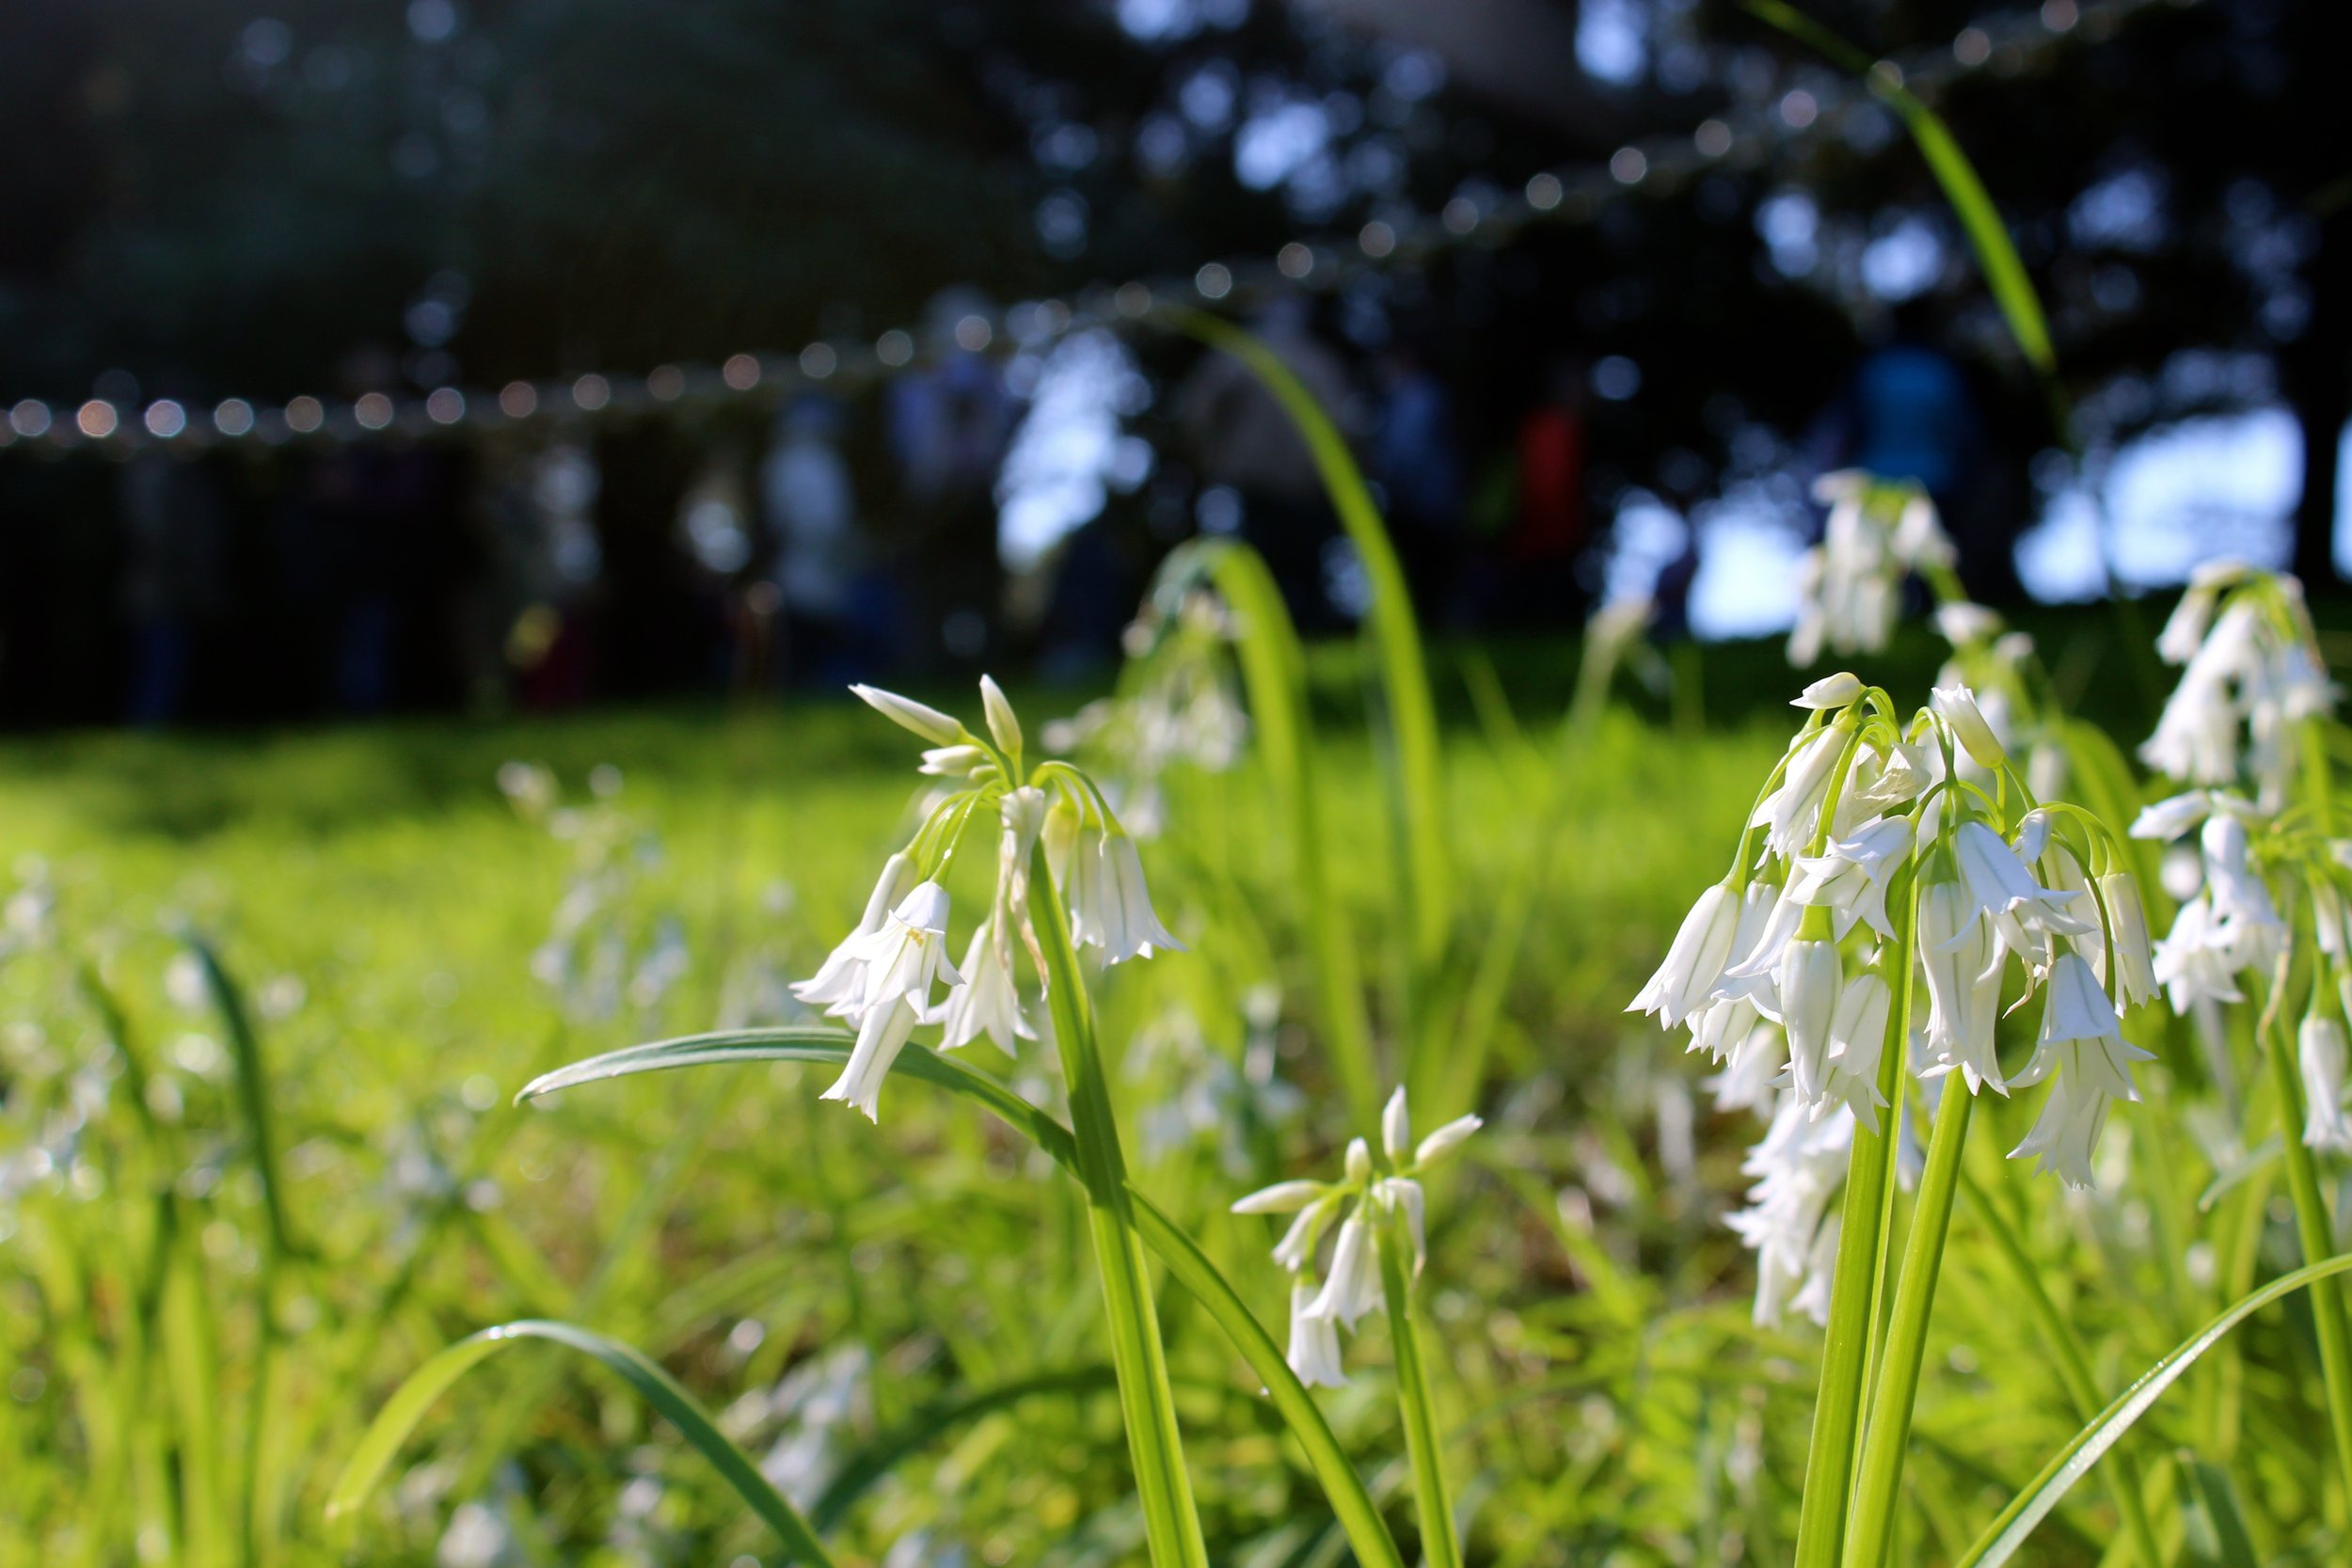
Wild onion basking in the sun.
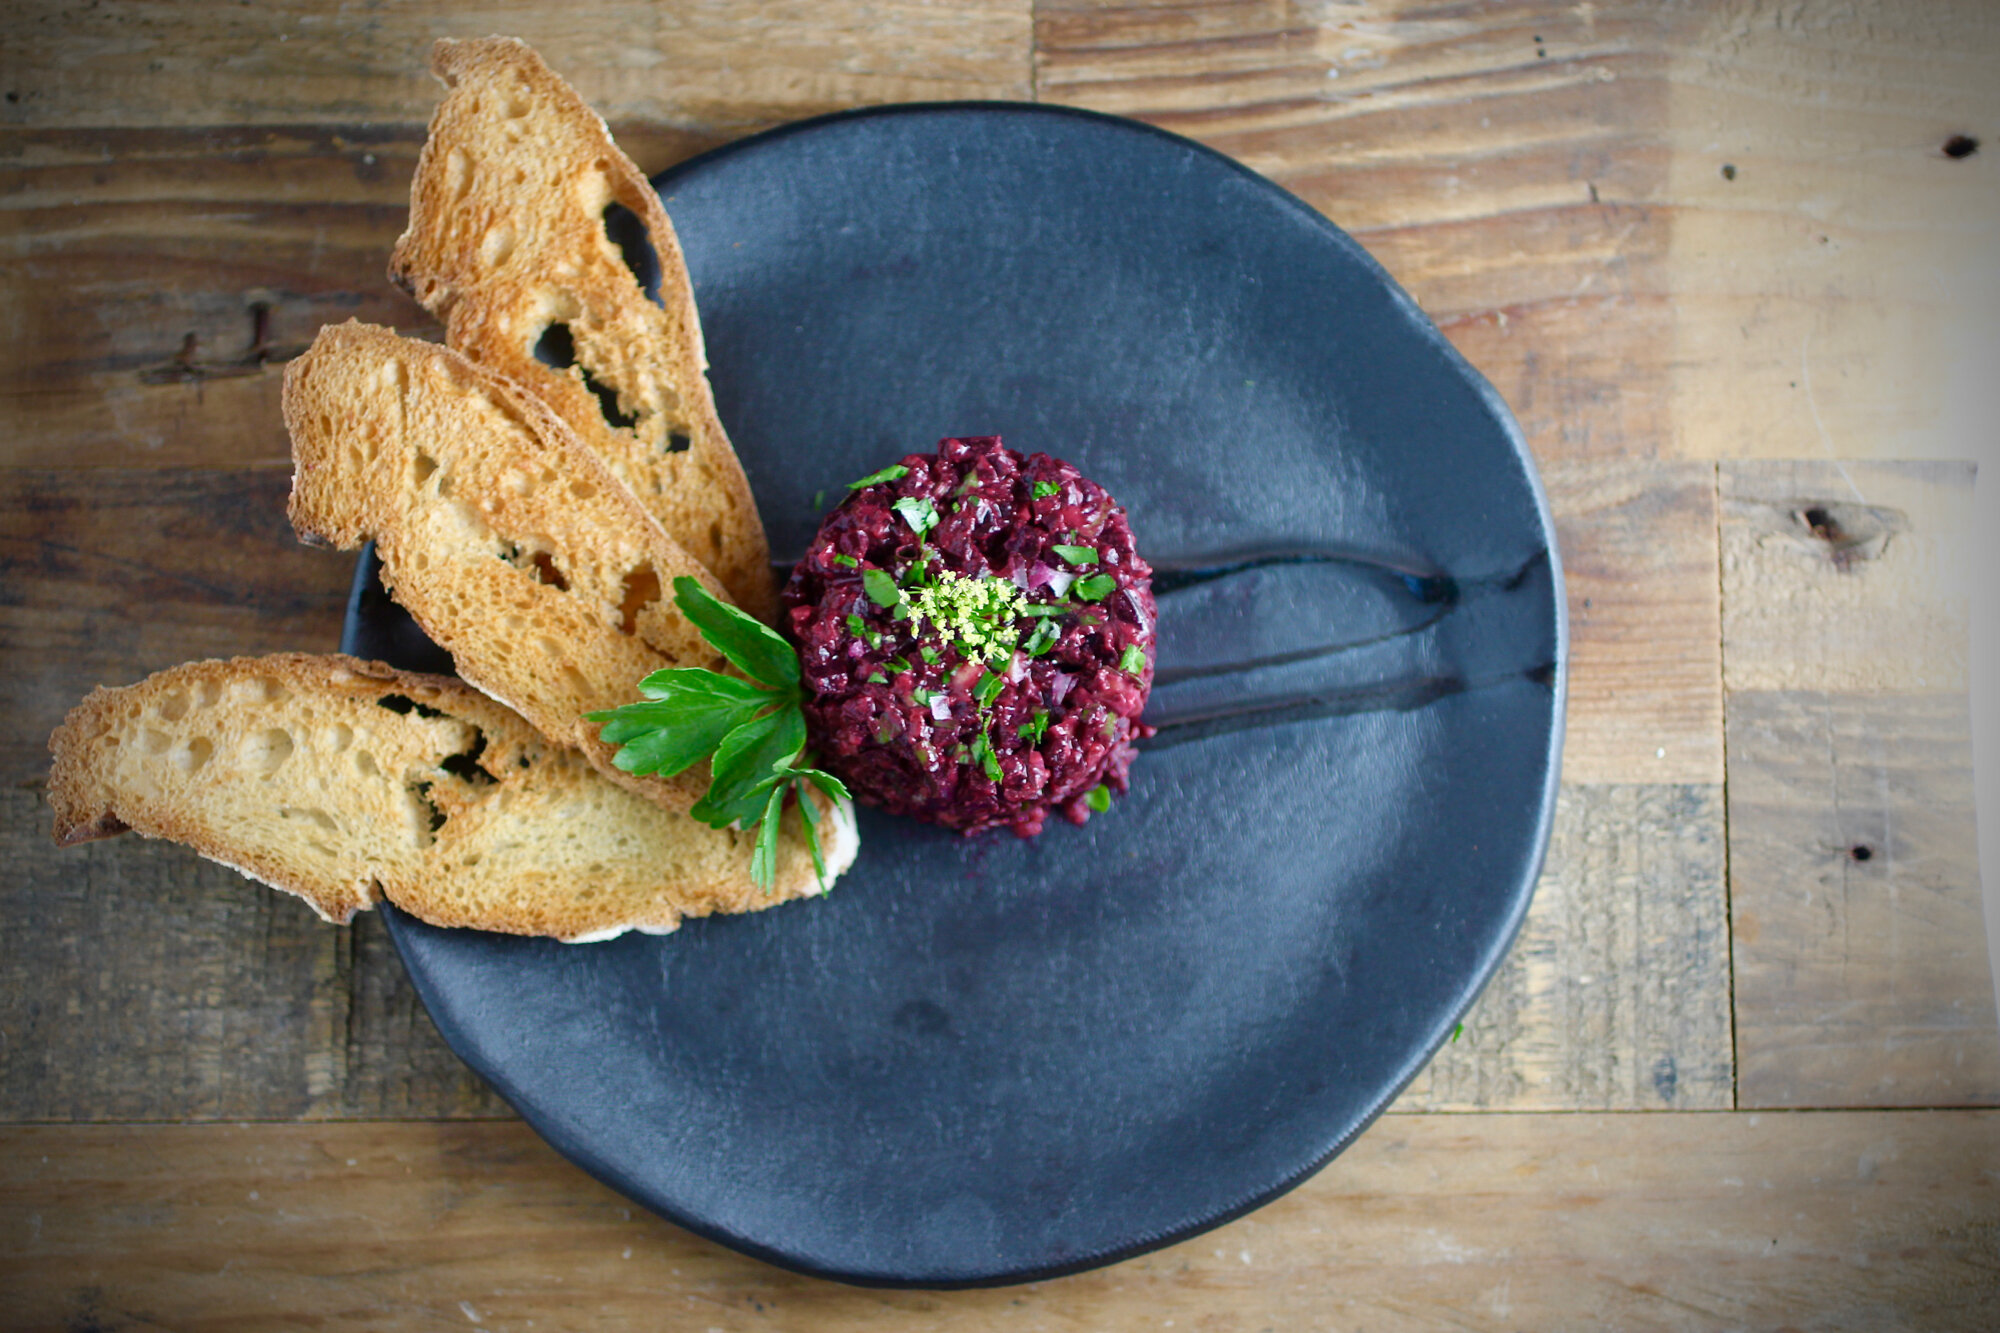
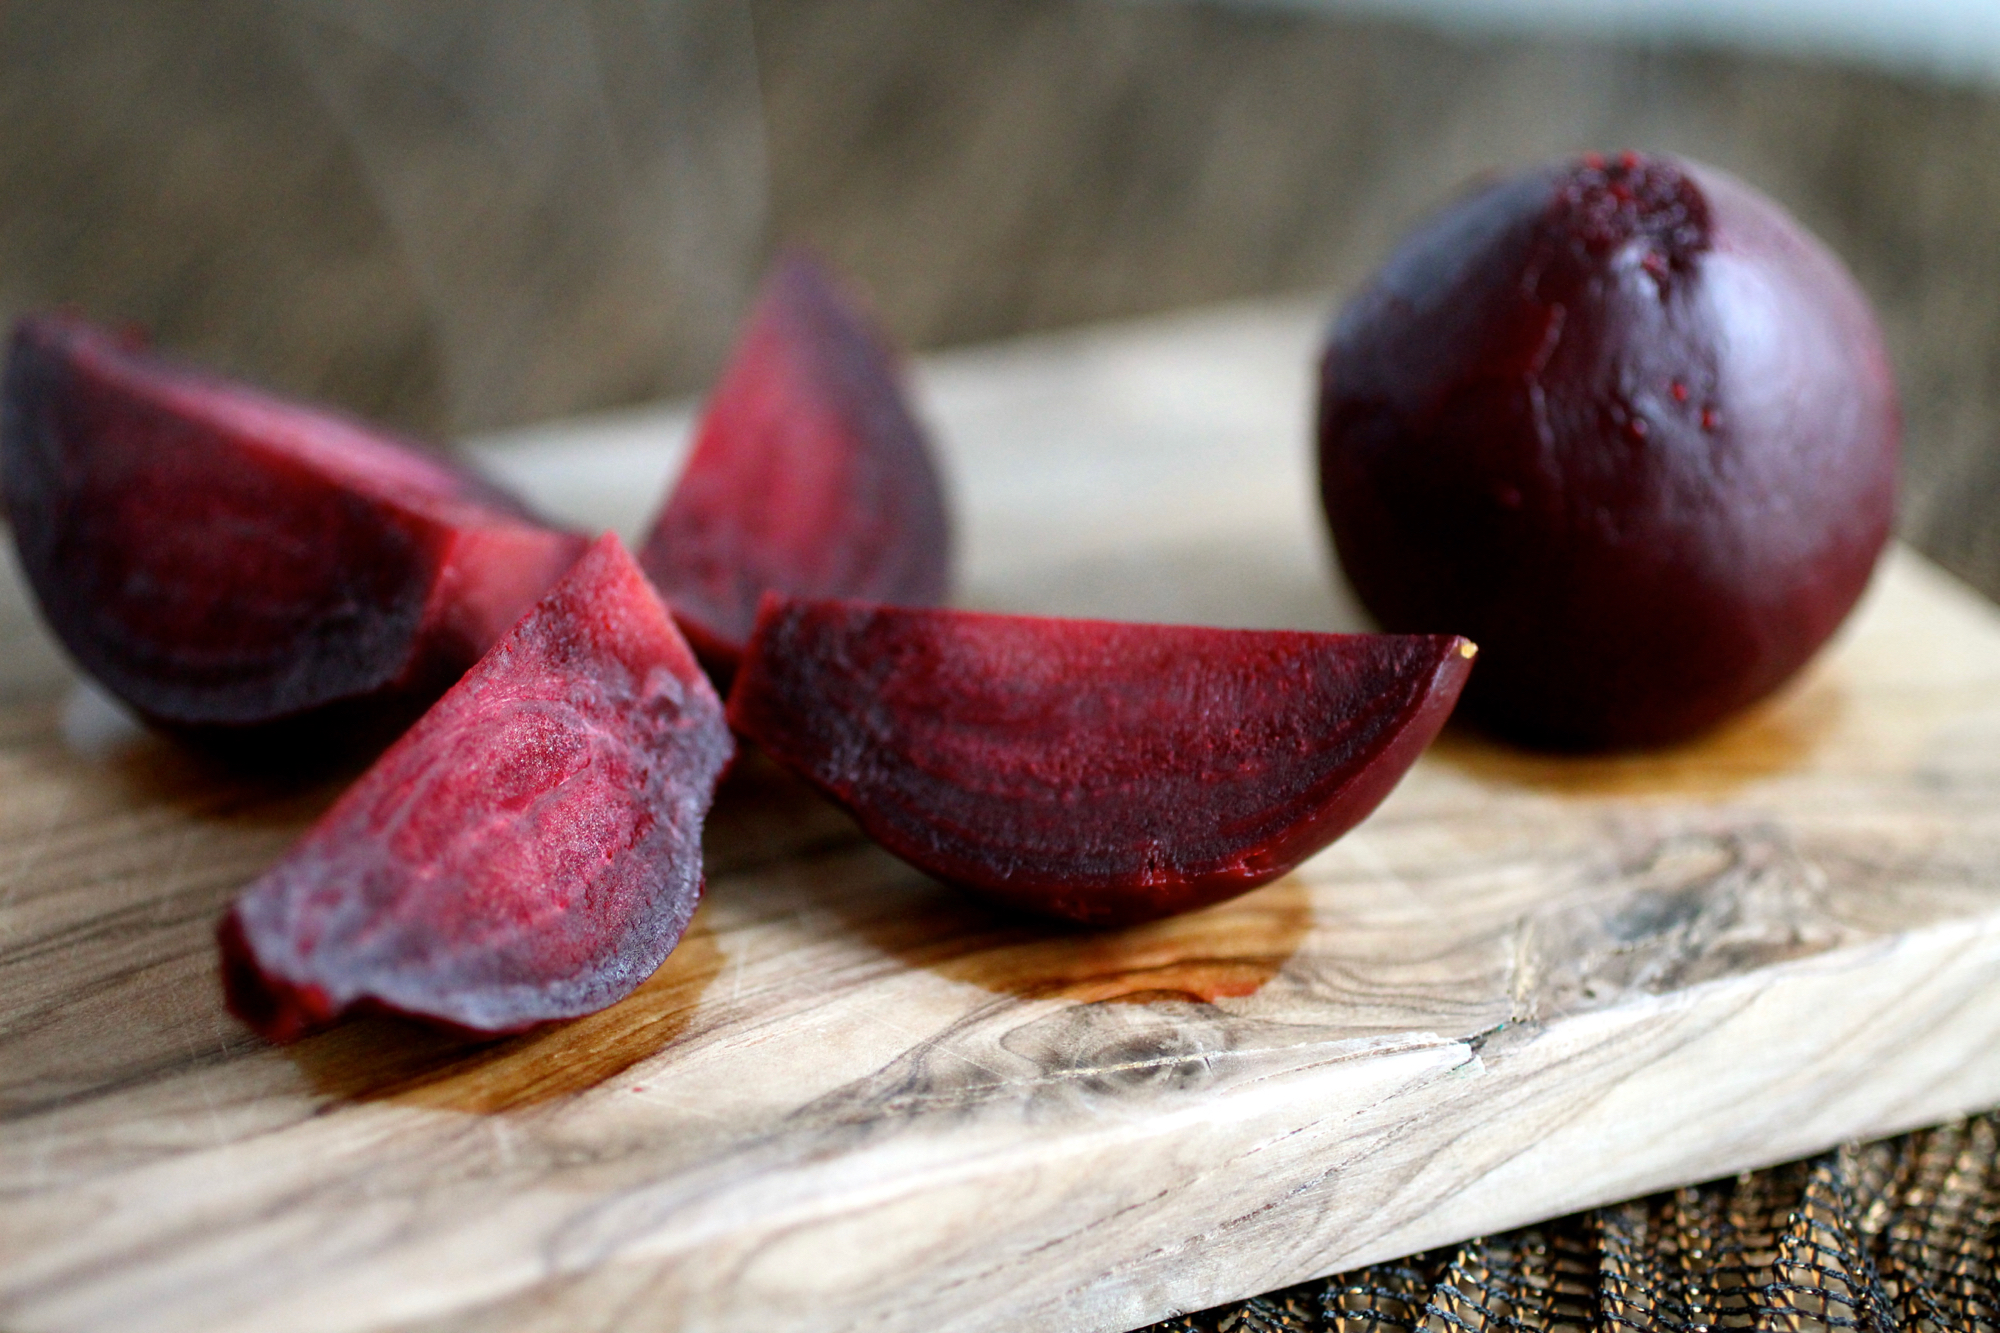
Beet tartare with shallot, capers, and dijon mustard
Plant-based spin on a classic with or without faux egg.

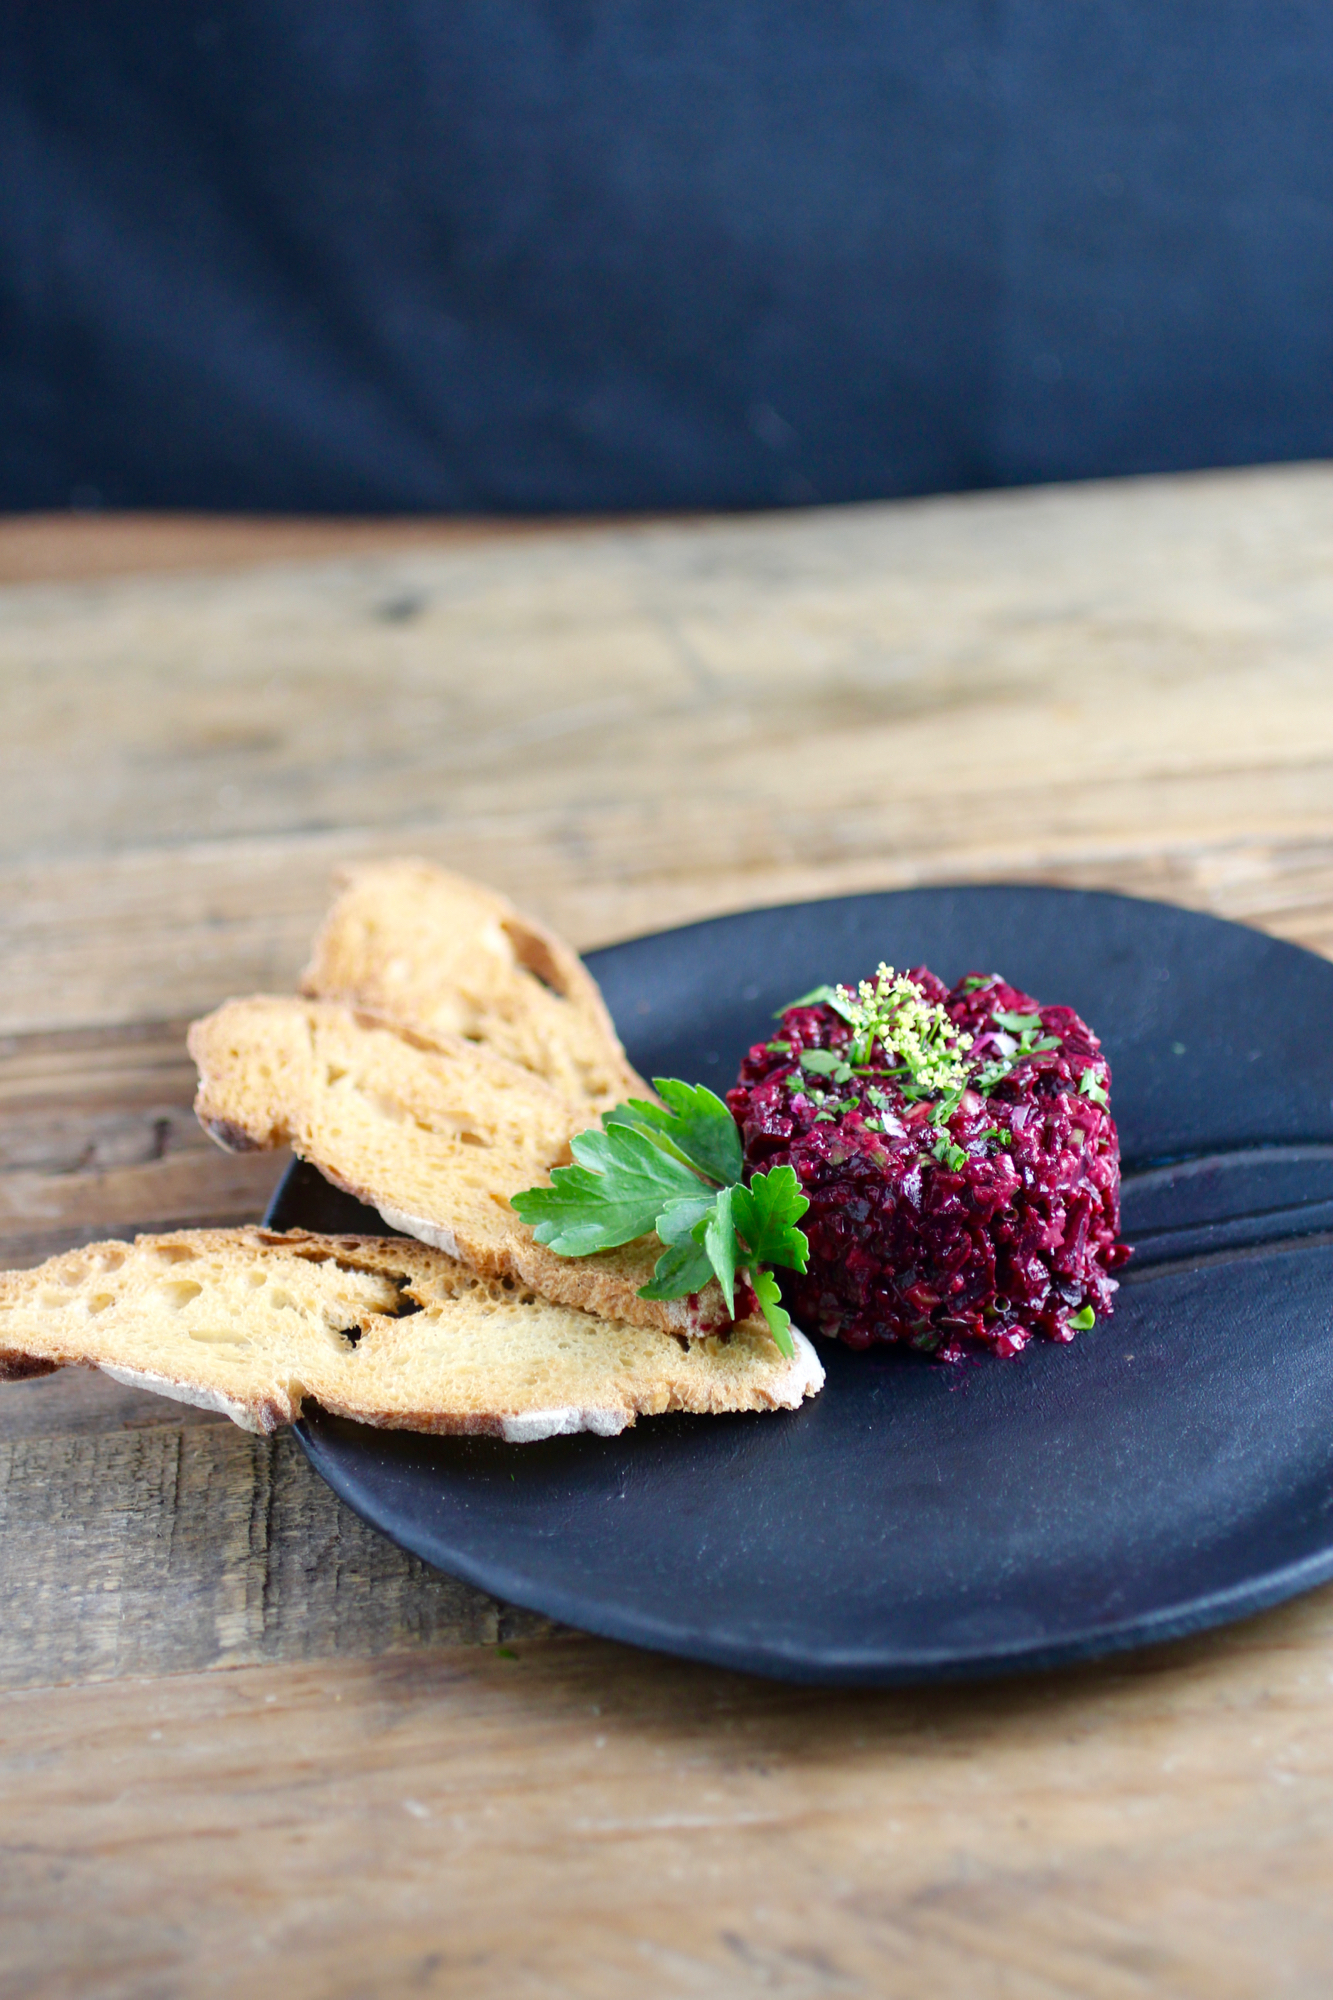
Beet tartare served with baguette crisps, but you can use any edible vehicle for the tartare of your choosing.
There's something special about classic beef tartare done right. I'm kind of a sucker for tartare when I'm at a restaurant that I know has good meat and will prepare it properly. Usually, I'm with someone else and we'll share it in addition to a few salads or other things to help balance out the meal. BUT, in the interest of plant-forward innovation, I thought I'd try to replicate tartare using beets instead of beef and making the whole dish entirely from plant-based ingredients. Crazy? Maybe.
There were some challenges with mimicking the luscious quality of the raw beef, but the combination of miso and olive oil comes pretty close and the miso has the additional bonus of providing umami flavor that you get from meat in the beef version (double score!) If you do eat meat, another great option is to make a tartare with both beef and beet (I've done a 1:1 ratio and it was very successful) to keep some of the beef flavor and texture, but still make your tartare more plant-forward. Other classic ingredients are added to this recipe such as shallots, capers, parsley, and Dijon mustard, but you can play around with these as you like!
Traditionally, beef tartare is served with a runny egg yolk on top that is mixed in to the cubed steak before eating. You could top this with a real egg yolk and it would be delicious, but I was in an experimental mood and decided to try out making a faux egg from chickpea flour, flax, miso, water, and tumeric. The flax, chickpea, and water provide texture while the miso flavor, and the turmeric color. It's pretty fun, but, you know, not a real egg yolk. In my opinion, nothing you can make in a home kitchen comes close to an egg if you want all of the egg-like properties. Using flax and other substitutions works great for many baking or binding applications, but if you're looking for a runny egg yolk there's nothing like the real thing...eggs are just magical. However, you can serve this with or without an egg/faux egg and it's still delicious. Great appetizer for your vegan friends (or self) and can easily be gluten-free if served with GF crackers, endive, or the like. Recipe below serves 6 and can be stored in the refrigerator for a few days without diminishing (too much) in quality.
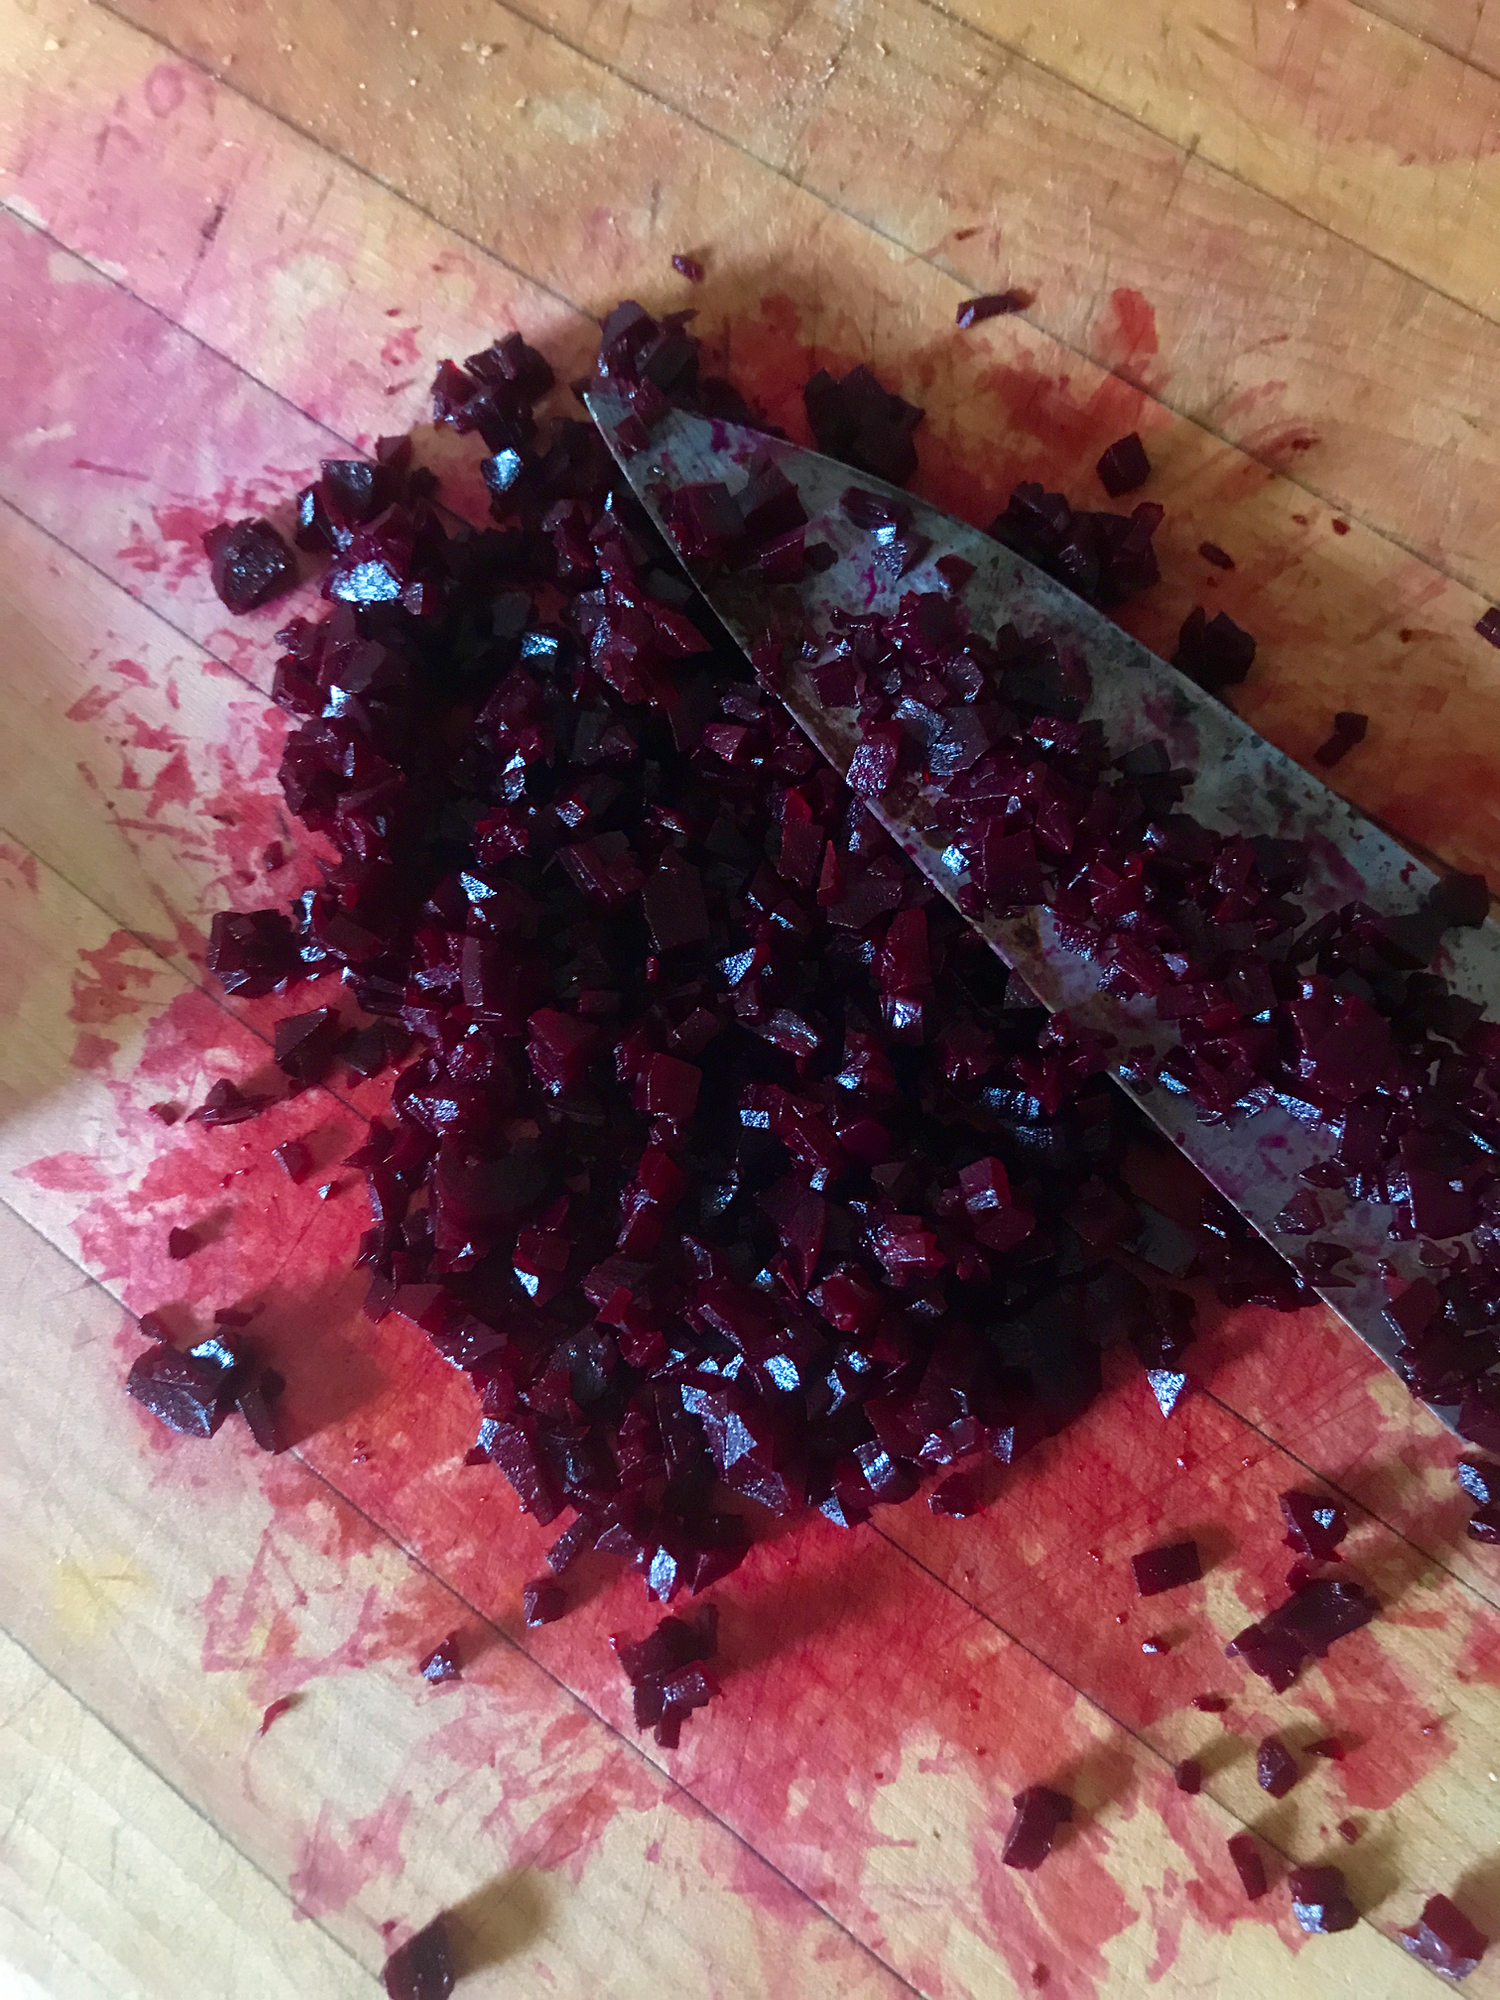
Finely mincing beets - it's not blood, it's beet juice! Be careful, it stains.
- 2 medium beets, about 6 ounces
- 2-3 teaspoons olive oil
- 2-3 teaspoons white miso
- 1 tablespoon minced capers (I used California capers)
- 2 teaspoons minced shallot
- 2 tablespoons minced parsley
- 1 tablespoon minced chives (optional)
- 2 teaspoons Dijon mustard
- Squeeze of lemon juice or dash of red wine vinegar
- Salt and cracked black pepper, to taste
- 1 egg yolk or faux egg, for serving - recipe below (optional)
- Baguette crisps (I used this recipe), crackers, cucumber, or endive, for serving
To Prepare
- Mince beet into fine cubes using knife and add to medium bowl.
- Mix in 2 teaspoons olive oil, 2 teaspoons miso, capers, shallot, 1.5 tablespoons parsley, chives (optional), mustard, and squeeze of lemon. Stir in salt/pepper to taste and more olive oil and/or miso to desired flavor and texture.
- Mound onto serving plate and top with egg yolk/faux egg yolk (optional). Sprinkle with salt and reserved parsley and serve with baguette crisps or crackers.

Beet tartare with faux egg. Not perfect, but kinda works!
Faux egg yolk - makes 1 faux egg yolk (if using for above recipe, you may want to double the below to allow for creation of a larger "yolk" if needed)
- ½ tablespoon chickpea flour
- ½ tablespoon ground flaxseed
- 1 teaspoon white miso
- 1 tablespoon water
- ¼-½ teaspoon turmeric
- To prepare: Whisk all ingredients except turmeric then whisk in turmeric to create desired color.

Spreading beet tartare on baguette crisps. The above is 1/2 of the recipe.

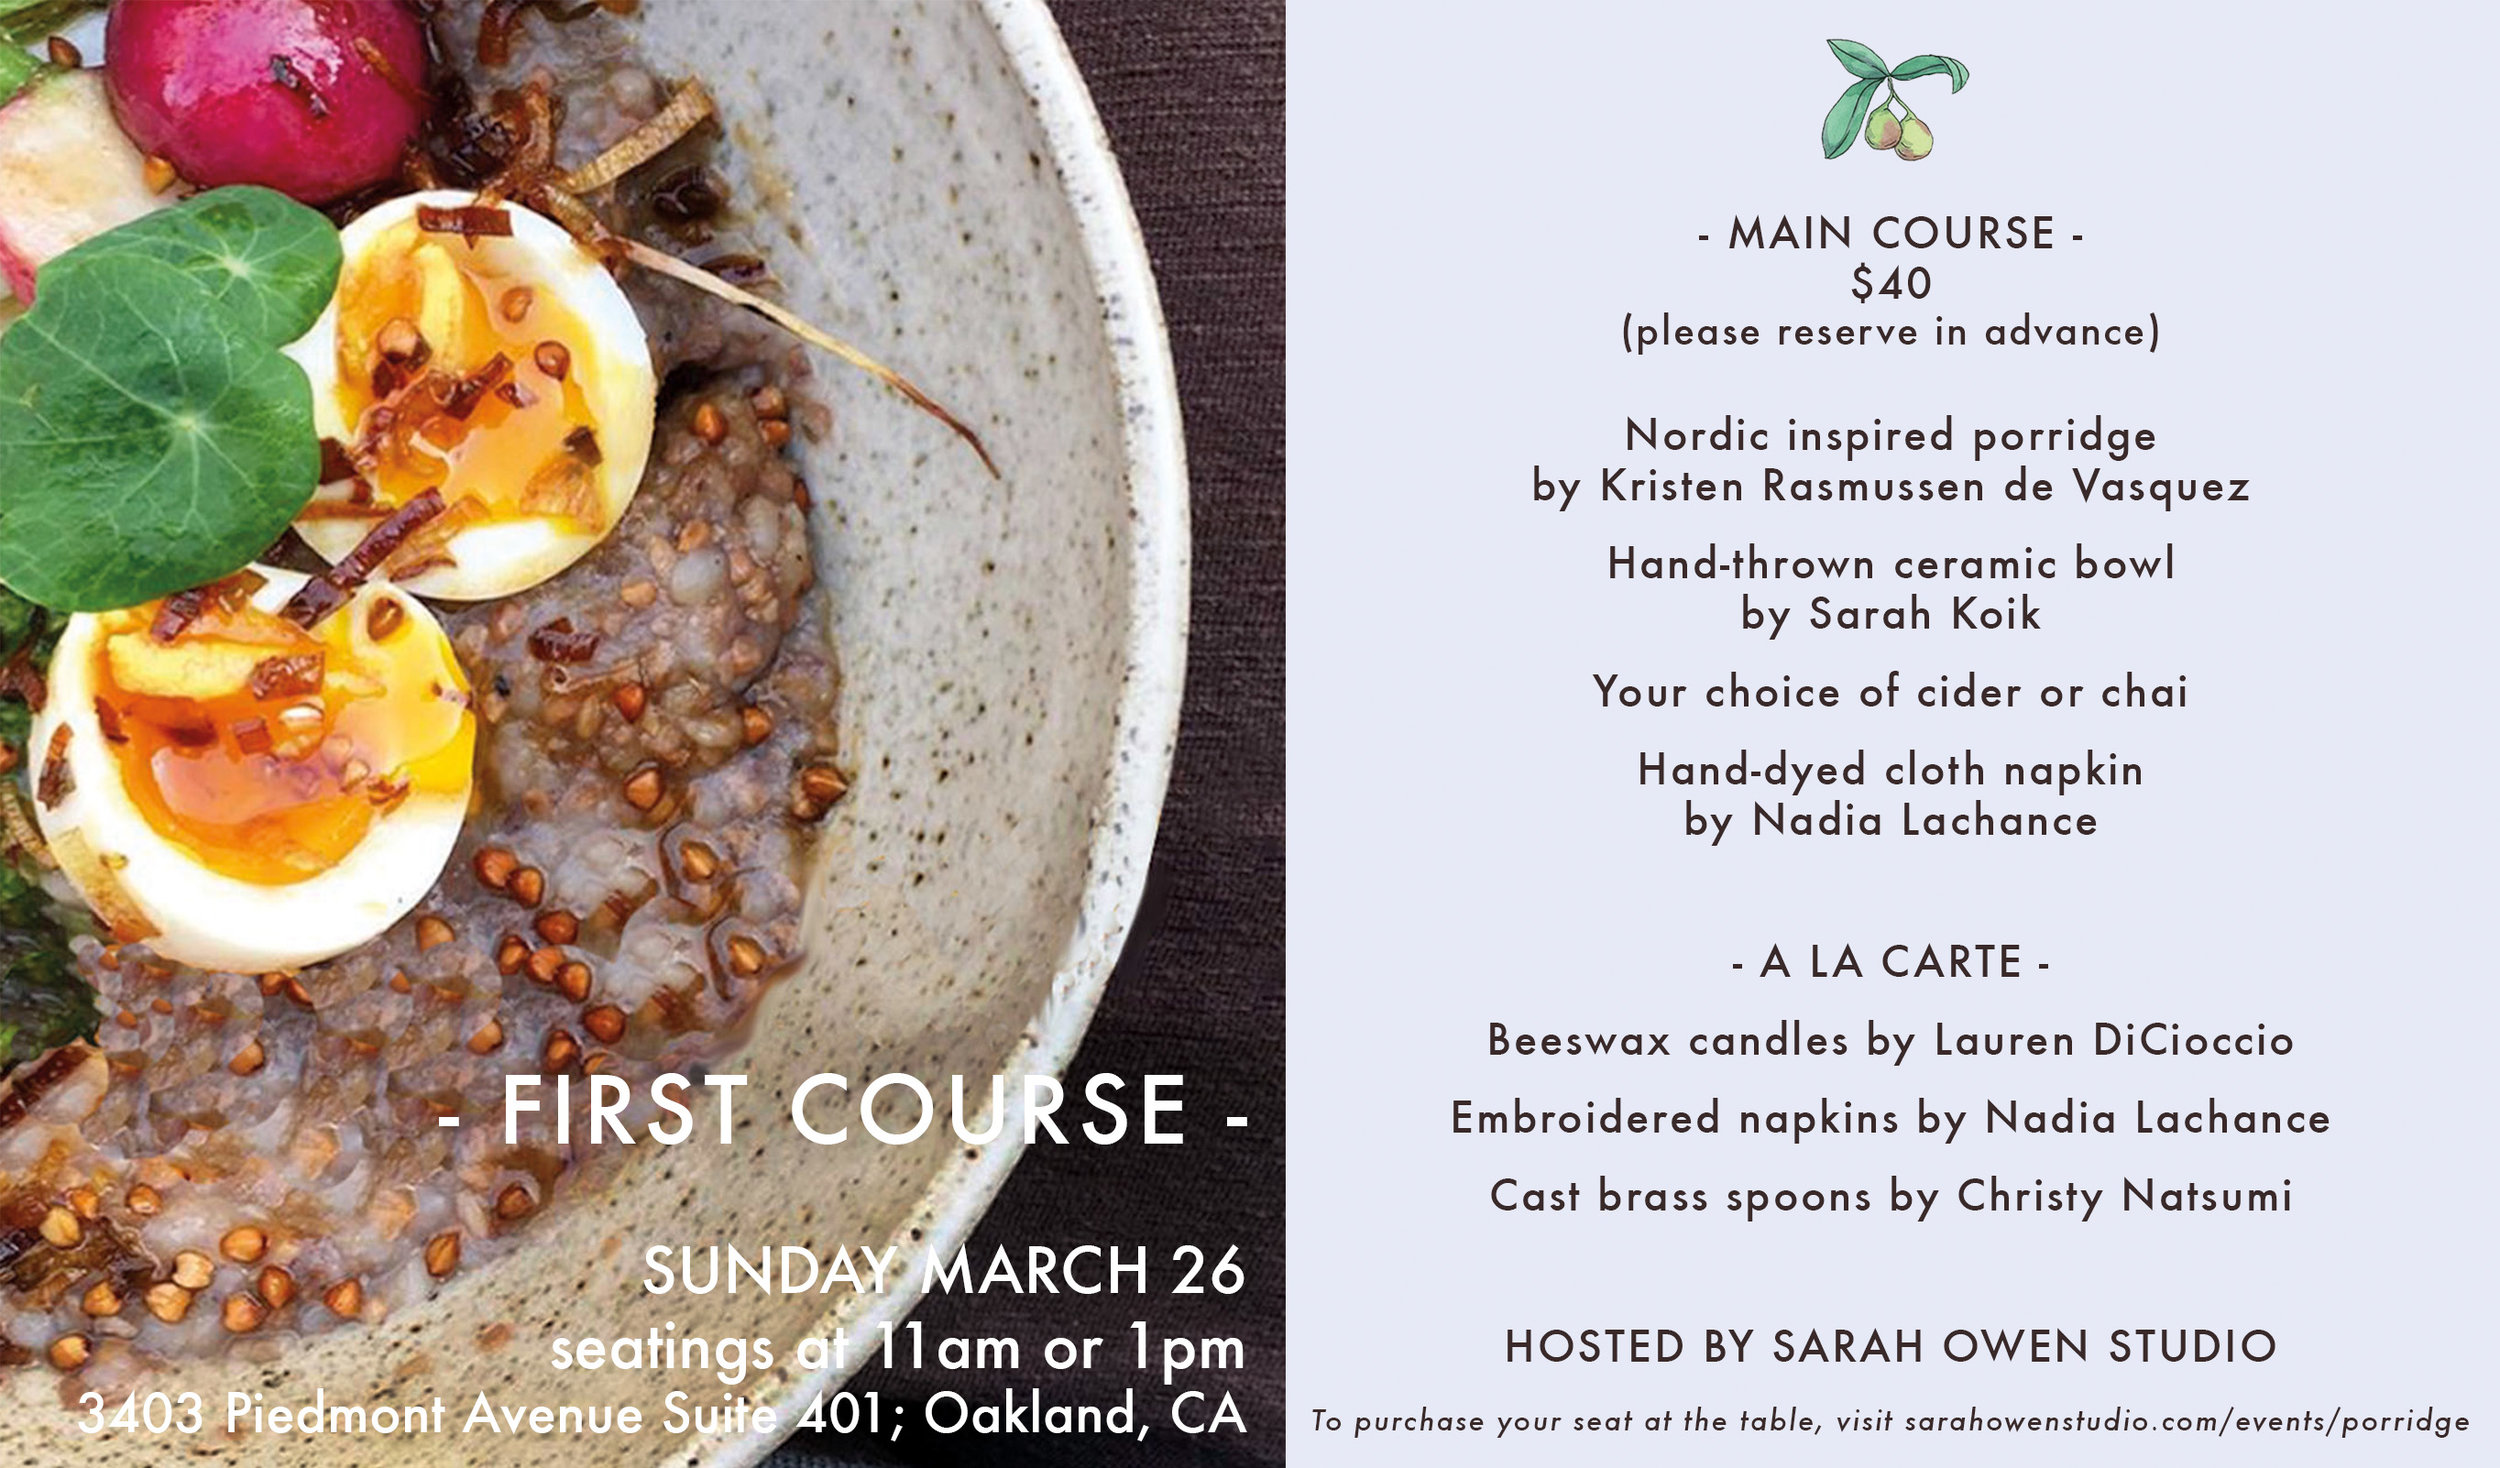
First Course
An exciting collaboration between a Nordic inspired porridge pop up and art.

If you know me, you know that I love porridge. During my time in Copenhagen, I was inspired by the restaurant Grød, where porridge was is not a pasty gruel that you eat just to be able to slog through your day (though grød does mean gruel in Danish), but rather a cozy bowl of deliciousness. With ingredients like heirloom rye, pea shoots, fermented rhubarb, toasted hazelnuts, and wild greens, I had a hunch that porridge could be a hit in many U.S. cities. Porridge is the epitome of hygge food, a danish word that means something along the lines of "beyond cozy" and is pronounced something along the lines of "hoo-gah". The concept of hygge has been popularized over the last year (it was shortlisted on the Oxford English dictionary's word of the year in 2016), but several years ago I returned with a new appreciation for hygge and all that goes with it, including porridge and, of course, candles. We may be approaching the first day of spring, but the weather is still ripe for hygge and, really, hygge (and porridge) can be embraced in any season if done right!

Gorgeous Koik Ceramics bowl that is similar to the one you'll take home at this event.
Since this danish epiphany, the porridge shop idea has been just a fun daydream until a few months ago when I finally put on a porridge pop up at Pizzaiolo restaurant in Oakland. I'm hoping to put on a few more at Pizzaiolo (so grateful to them for letting me crash their wonderful and cozy restaurant!), but meanwhile, I'm trying out a new concept. A few badass women maker friends and I are putting together First Course - a pop up featuring not only delicious porridge, but also limited edition art - including a hand-thrown bowl by my friend Sarah Koik (that you both eat out of and get to take home). This eat-your-porridge-keep-your-bowl idea has been a fantasy of mine, so I am ecstatic to see it come to fruition!
Other participating makers include beeswax candles made by amazing artist (and dear friend) Lauren DiCioccio, custom brass cast spoons by jeweler Christy Natsumi, and a set of cloth napkins/tea-towels hand embroidered by Nadia Lachance.
To reserve your spot at First Course, visit Sarah Owen Studios. Here's the porridge menu, just in case you need a bit more culinary enticement. Most produce is sourced from Top Leaf Farms, an urban farm less than 2 miles from the event, or it is foraged by yours truly, and millet was grown locally by Farmer Mai.
Millet and chicken tamari: Seared radish, crackling, and wood sorrel sauce.
Buckwheat, wild greens, and goat gouda: Soft-cooked egg, crispy shallots, and pea shoots.
Heirloom mixed-grain and rhubarb-apple crisp: Cardamom, yogurt, molasses, and bay nut.
I'll be sure to post a few recipes later on, but meanwhile get your tickets and see you there!

Beet and lemon zest hummus
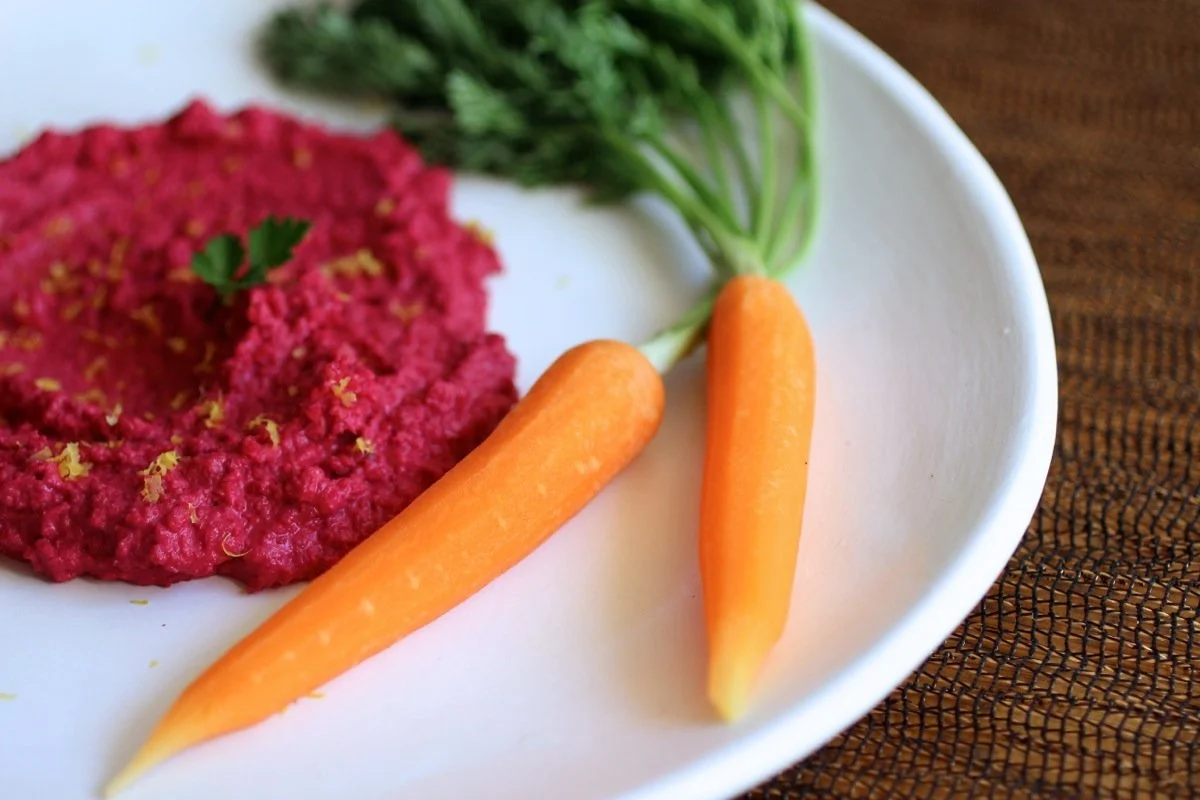
Let's face it - hummus is an easy crowd pleaser. It's vegan, gluten-free, nut-free and dip-able, so ever since it's widespread usage in the U.S. you'll be hard pressed to find a party table absent of the chickpea-tahini spread. Variations on hummus, while not as common, are similarly appreciated and, with its bright eye-catching presence, this variation brings the party (my kind of party). The flavor is similar to classic hummus, but lighter and brighter with the beet and lemon zest. A more classic Middle Eastern take on this spread, lebna bil schwendr, includes yogurt and beet instead of chickpeas and tahini. Serve with crudités, crackers, toasted pita, or as a sandwich spread. Makes 2 cups.
1 large or 2 small beets, about 4 ounces, scrubbed clean
1 cup cooked chickpeas
Zest of one lemon, about 1 tablespoon
Juice of one lemons, 2-3 tablespoons
2 tablespoons tahini
1/8 teaspoon salt
Up to 1/4 cup extra virgin olive oil
1-3 tablespoon(s) water
Fresh ground black pepper to taste (optional)
Cut tops off beets and place into a small saucepan. Cover with water, bring to a boil, and cook until tender, about 15 minutes. Slide skin off of beets while cooling under cold running water. Chop and add to food processor.
Add chickpeas, lemon zest, lemon juice, tahini, salt, and 2 tablespoons olive oil. Blend until smooth. Drizzle in more olive oil and water until desired consistency is reached. Incorporate black pepper to taste. Hummus will keep in the refrigerator for up to one week.
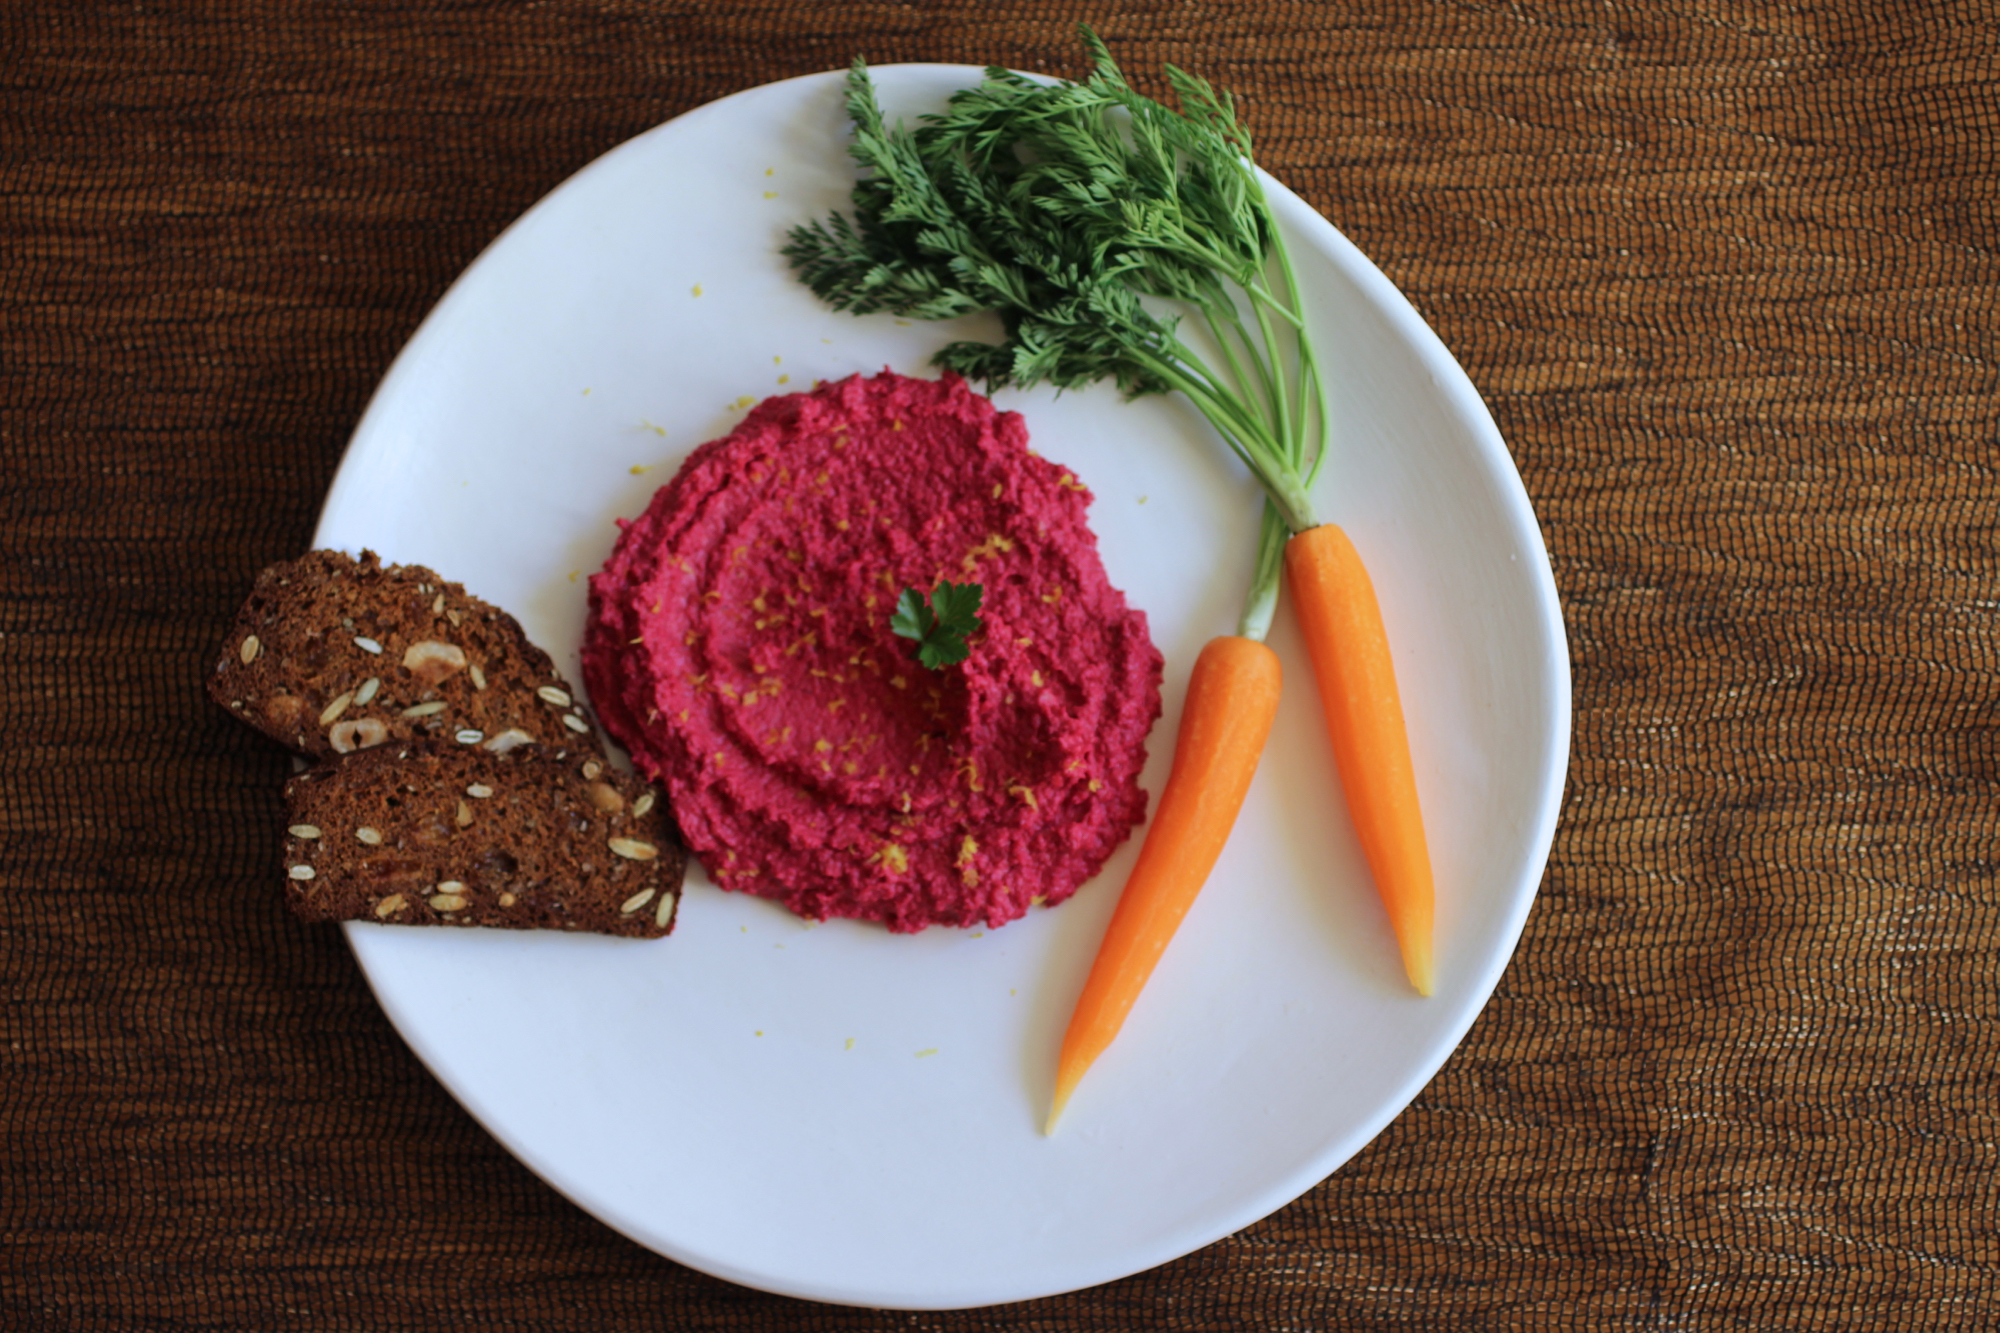
There are many ways to eat this hummus!
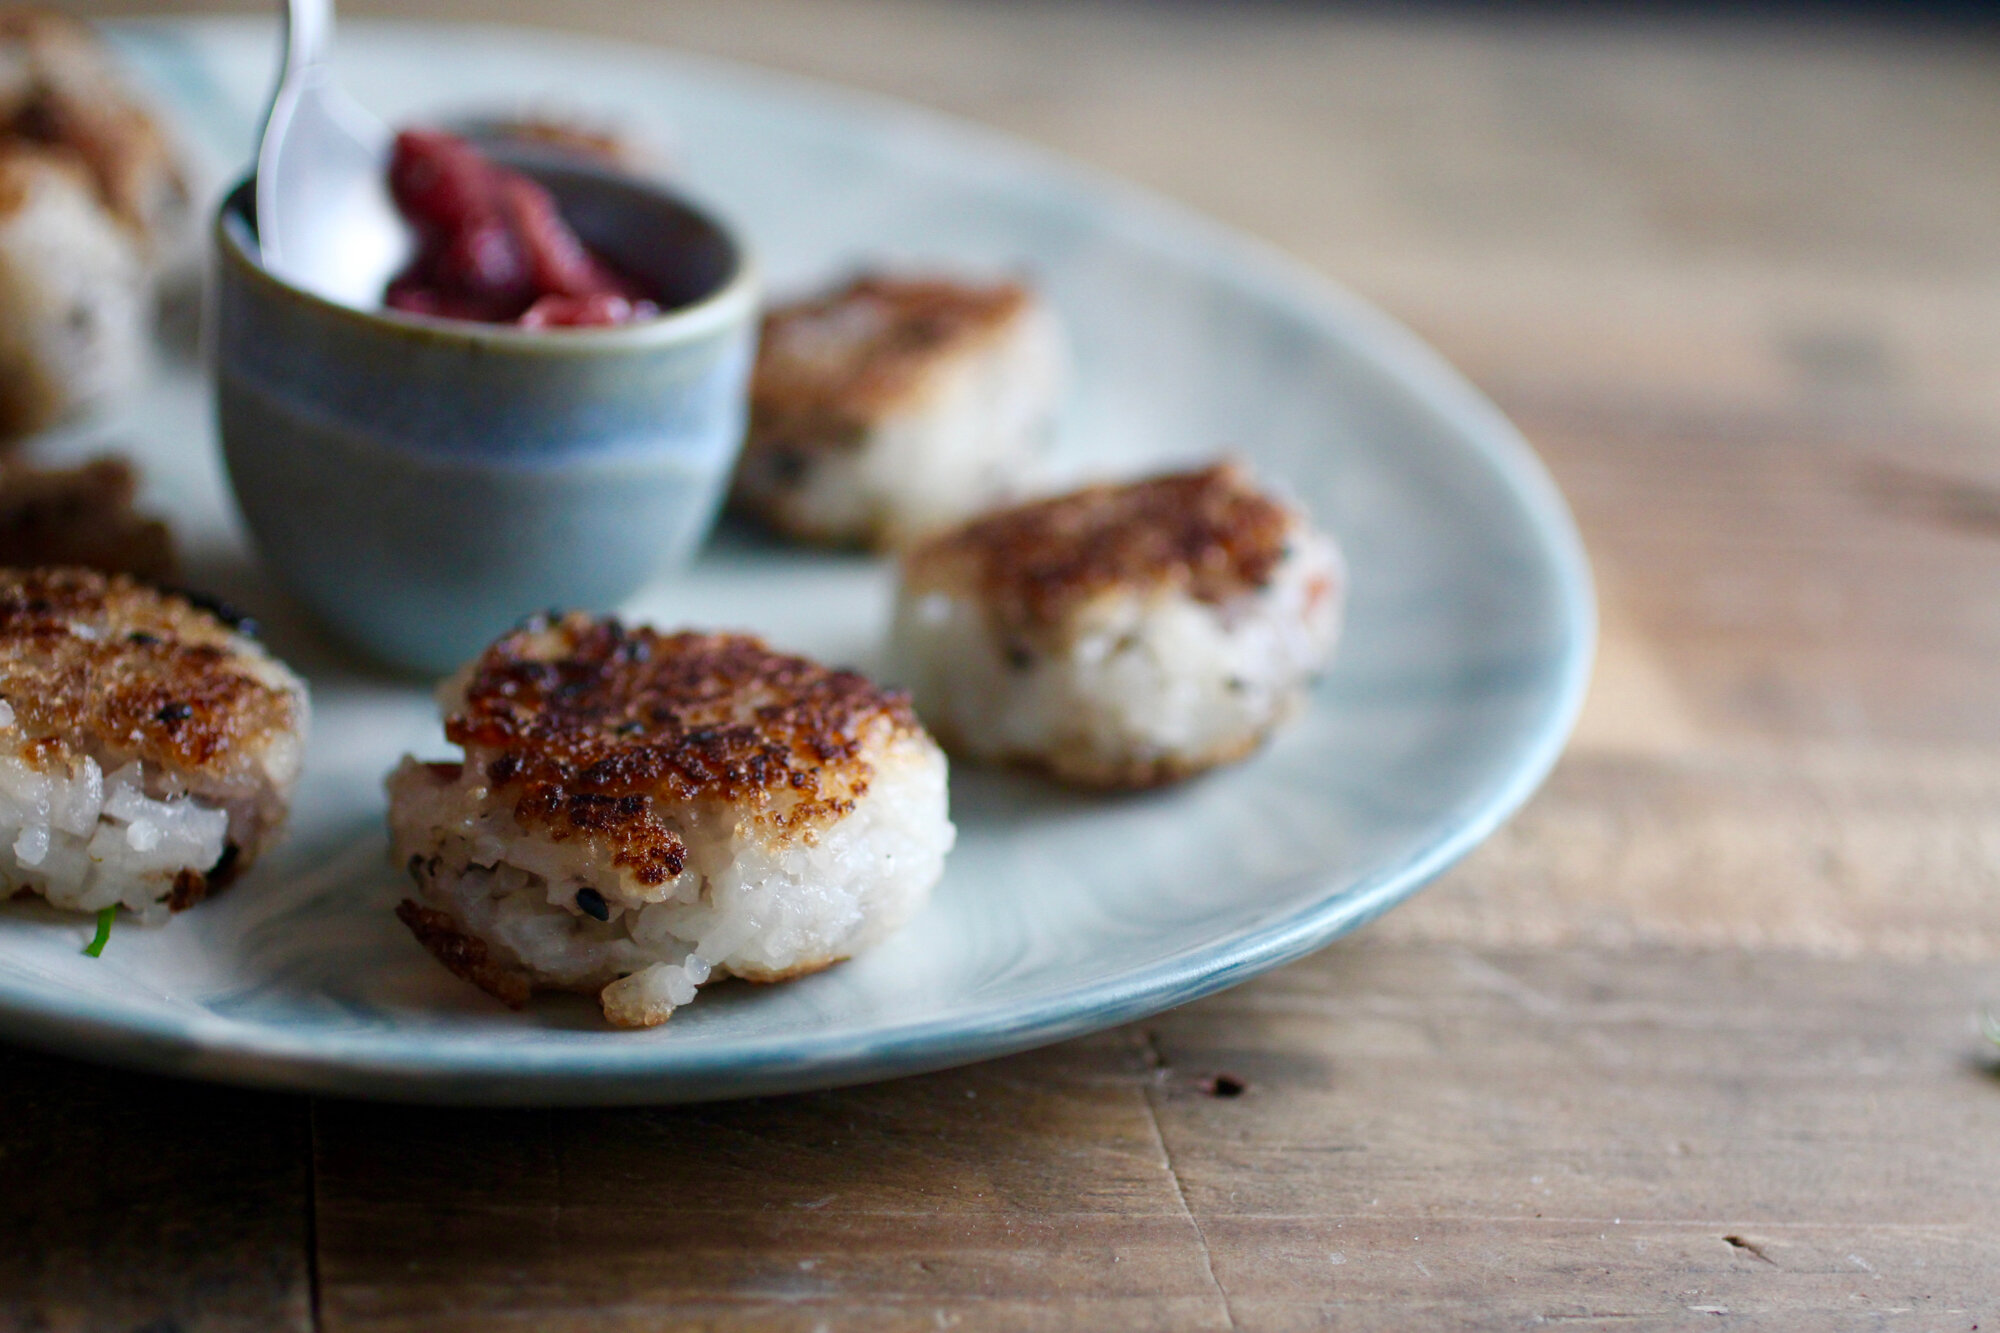
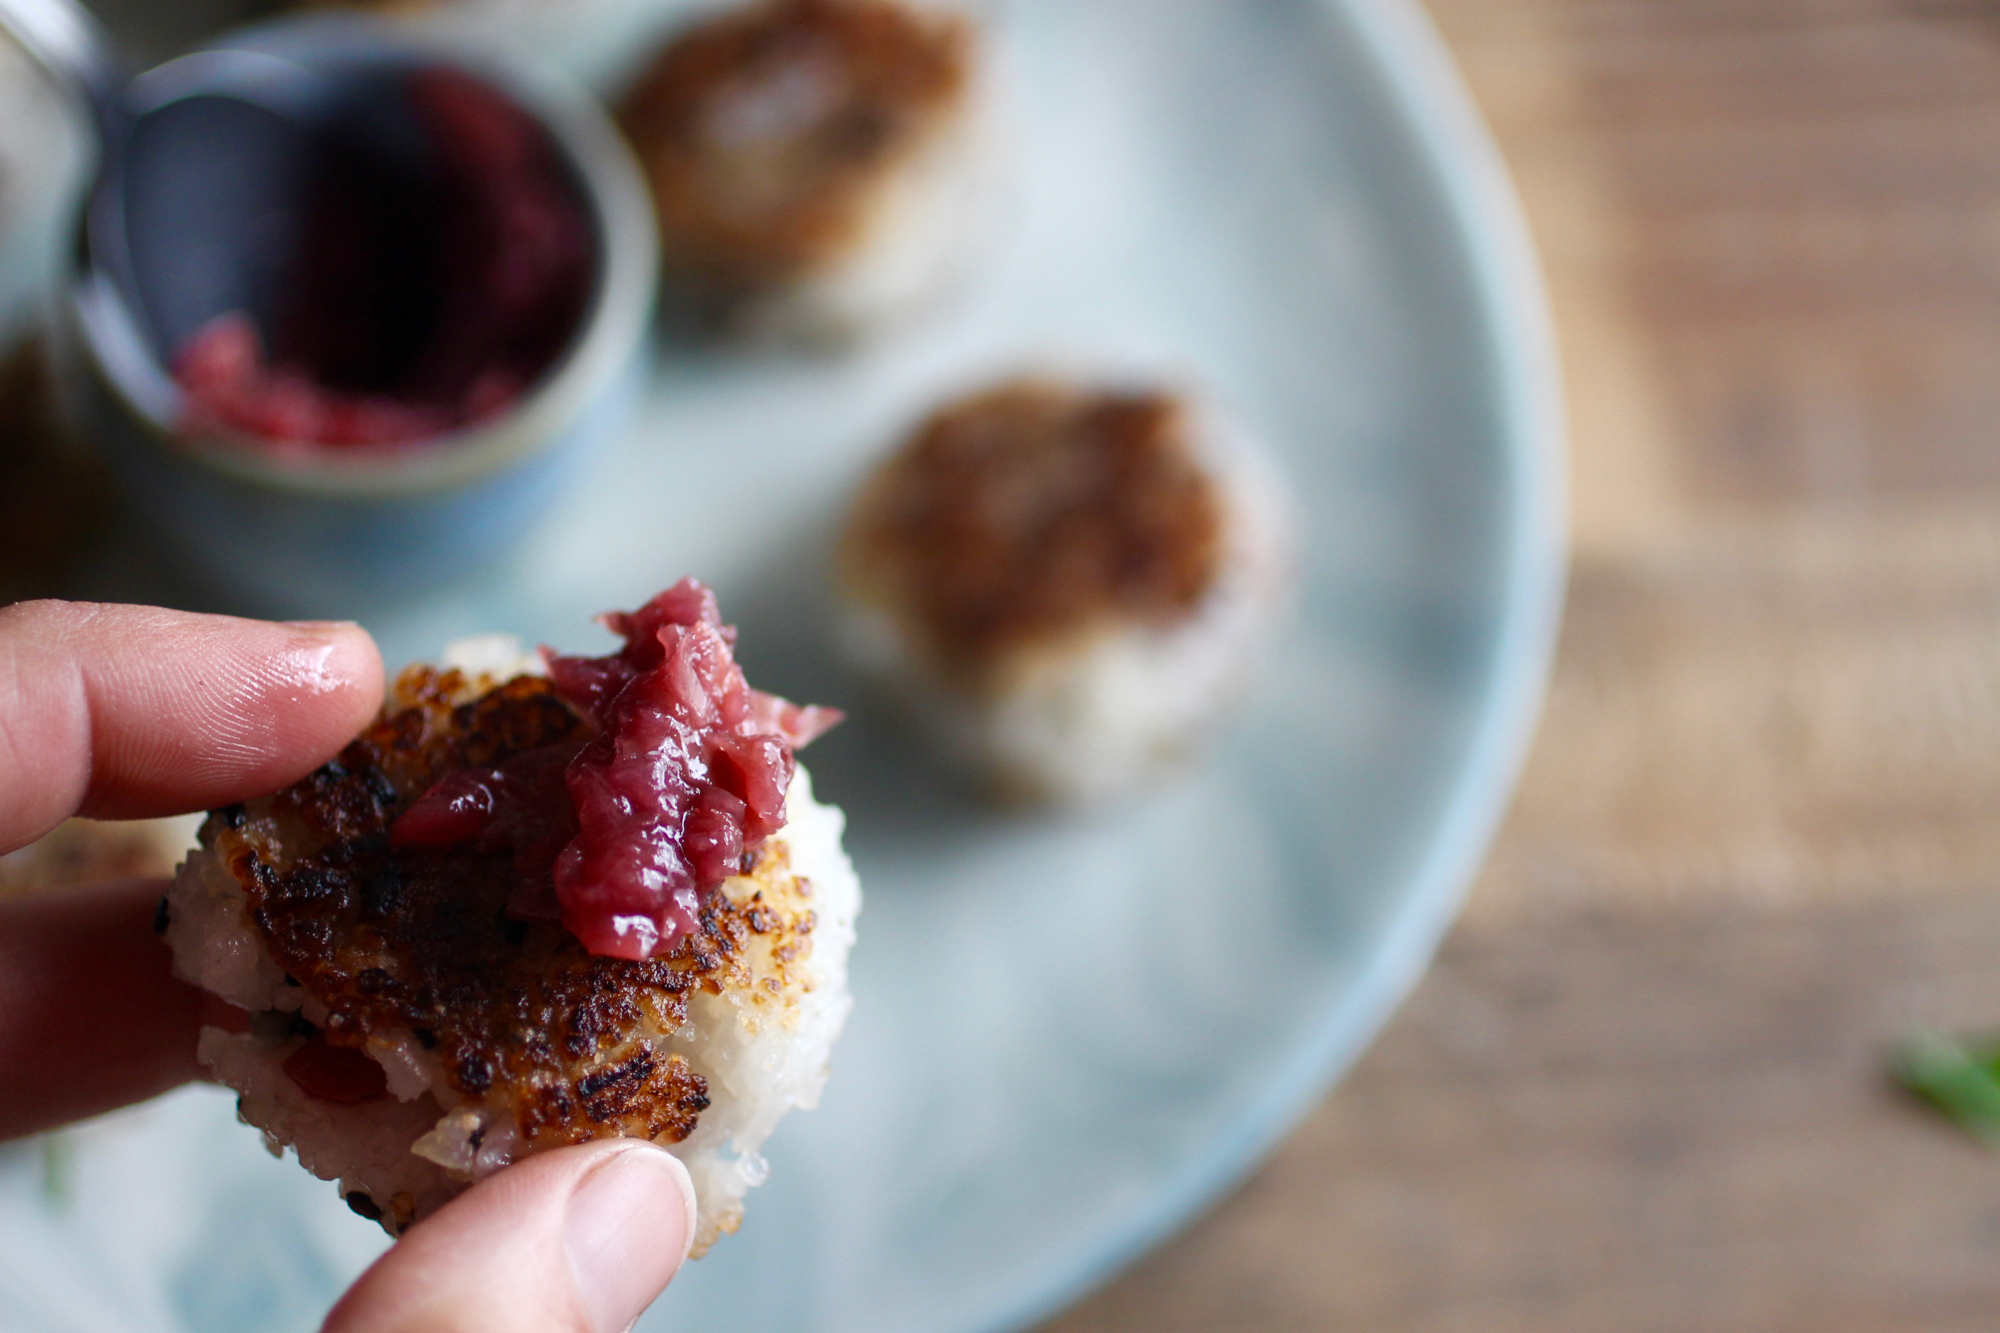
Seared onigiri (Japanese rice balls) with pickled plum

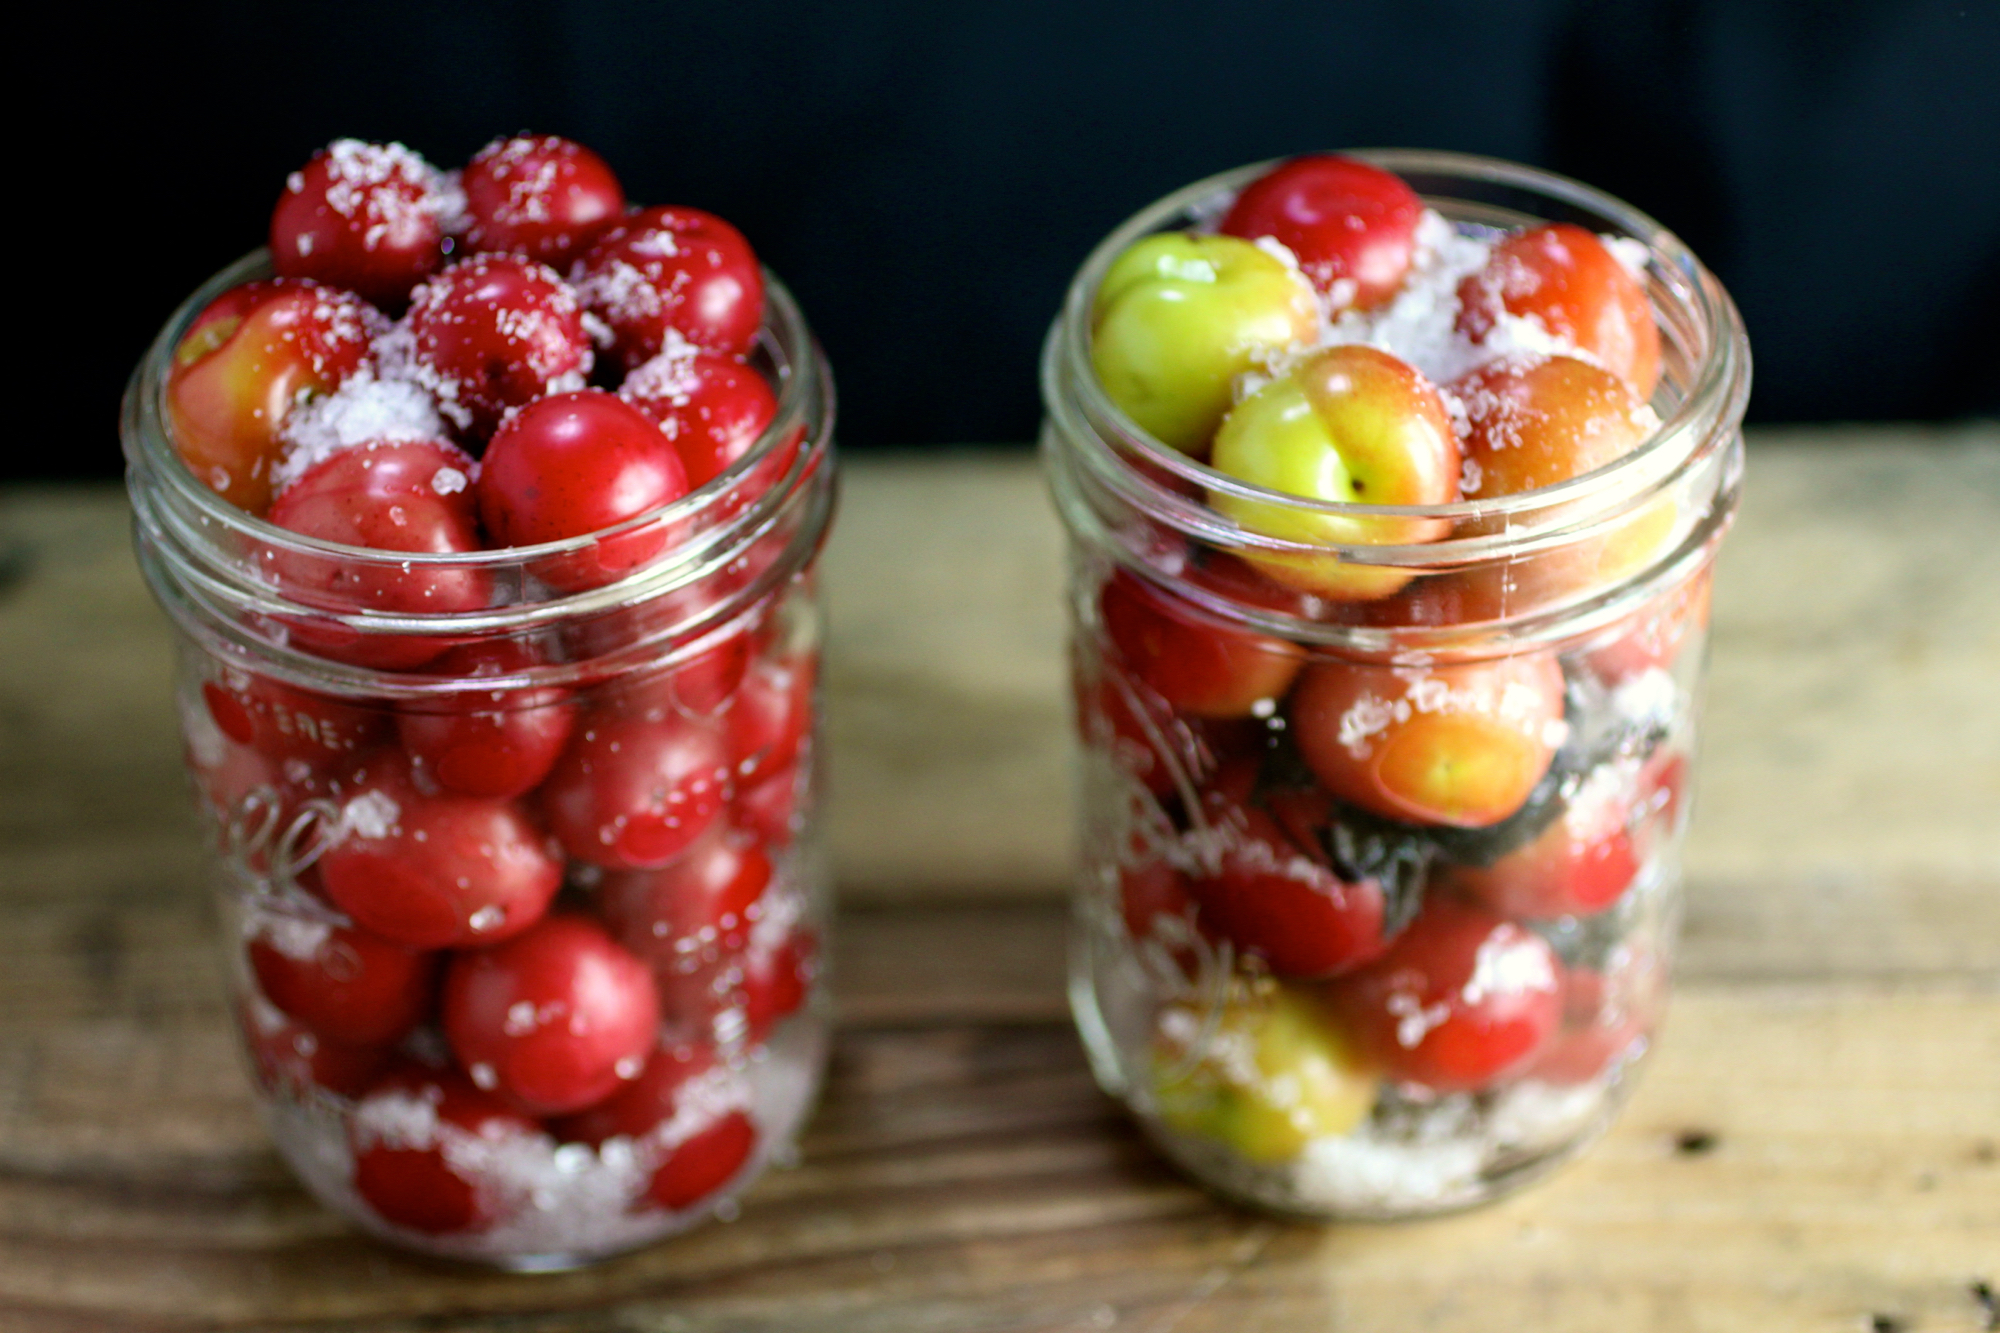
The beginnings of umeboshi made from wild California plums.
Last year I was diligent enough to get my hands on some wild plums and turn them into a California-inspired version of umeboshi, the umami-rich pickled plum condiment from Japan. You can find more about umeboshi and how I made it here, but the most important piece of information in this blog post is that as a result of my making umeboshi, I might be invited on an - I kid you not - Japanese game show. "Who Wants to Come to Japan" is a show that essentially, sends people who are interested in a particular aspect of Japanese culture and have never been to Japan and films their experience. They came across my umeboshi post and reached out to me about being a contestant. Naturally, I jumped at this opportunity. I have never been to Japan and have always wanted to go to explore Japanese foodways and the culture in general. Given it's a Japanese game show, there's definitely a high probability of ridiculousness and, although I may be the brunt of the ridicule, YOLO amiright?
Sometimes you need a little extra umeboshi paste.
So - to honor this momentous occasion (they're visiting tomorrow!) I decided to finally get around to posting my method for umeboshi onigiri, or rice balls stuffed with umeboshi paste - a delicious way to use up leftover rice! I like to sear my onigiri (technically yaki-onigiri), kind in the same vein as aracini, if you've ever had the Italian fried rice ball appetizer, but pan-seared instead of fried.
This recipe, in combination with other umeboshi dishes including asparagus with wild onion and umami and simply a corn-butter-umeboshi sauté, are so good that I am almost out of my umeboshi supply and sadly, didn't get around to pickling any this year. I guess I'll just have to savor what I have left!
The below recipe makes about 8 small onigiri and can be expanded as needed.
2 cups cooked short-grained rice (preferably sticky rice), cooled* - great way to use up your leftovers! Especially delicious is using leftover coconut rice either from a restaurant or made at home (cook rice with half water/half coconut milk).
1-2 teaspoons sesame seeds or furikake flakes (Japanese seasoning mix)
Sea salt
4 pickled plums (umeboshi), pitted and diced or smashed into a paste
Grapeseed oil, for searing
Soy or tamari sauce, optional (above photo was plain onigiri with umeboshi paste on the side)
In medium bowl, stir sesame seeds or furikake flakes into sticky rice to combine.
Wet hands lightly with water then spread a pinch of salt across your palms. Scoop 2 tablespoons of rice mixture from bowl and gently squeeze into ball. Flatten ball then form a well in the center. Add about 1/2 teaspoon umeboshi paste to well, then fold edges of rice over paste to cover.
Gently squeeze into ball then flatten again. Continue process with more rice and umeboshi until rice is gone.
Lightly oil a cast iron pan and heat on medium-high. Once oil is hot, add onigiri and sear until lightly brown, about 1-2 minutes on each side.
Serve with optional soy or tamari sauce (though you probably won't need it!)
*If rice isn't originally sticky and/or not sticky enough, you can make it "stickier" (technically, to be sticky rice, it must be a certain variety of rice that's high in a certain time of pasty starch) by heating pre-cooked rice on medium-low with 1-2 tablespoons water for about 5 minutes or until sticky, stirring occasionally. Here's a recipe for sticky rice, but I just cook rice as I always do then make it stickier after with this method.

Lebna bil Kusa (summery squash & cumin spread)
Think outside the hummus.

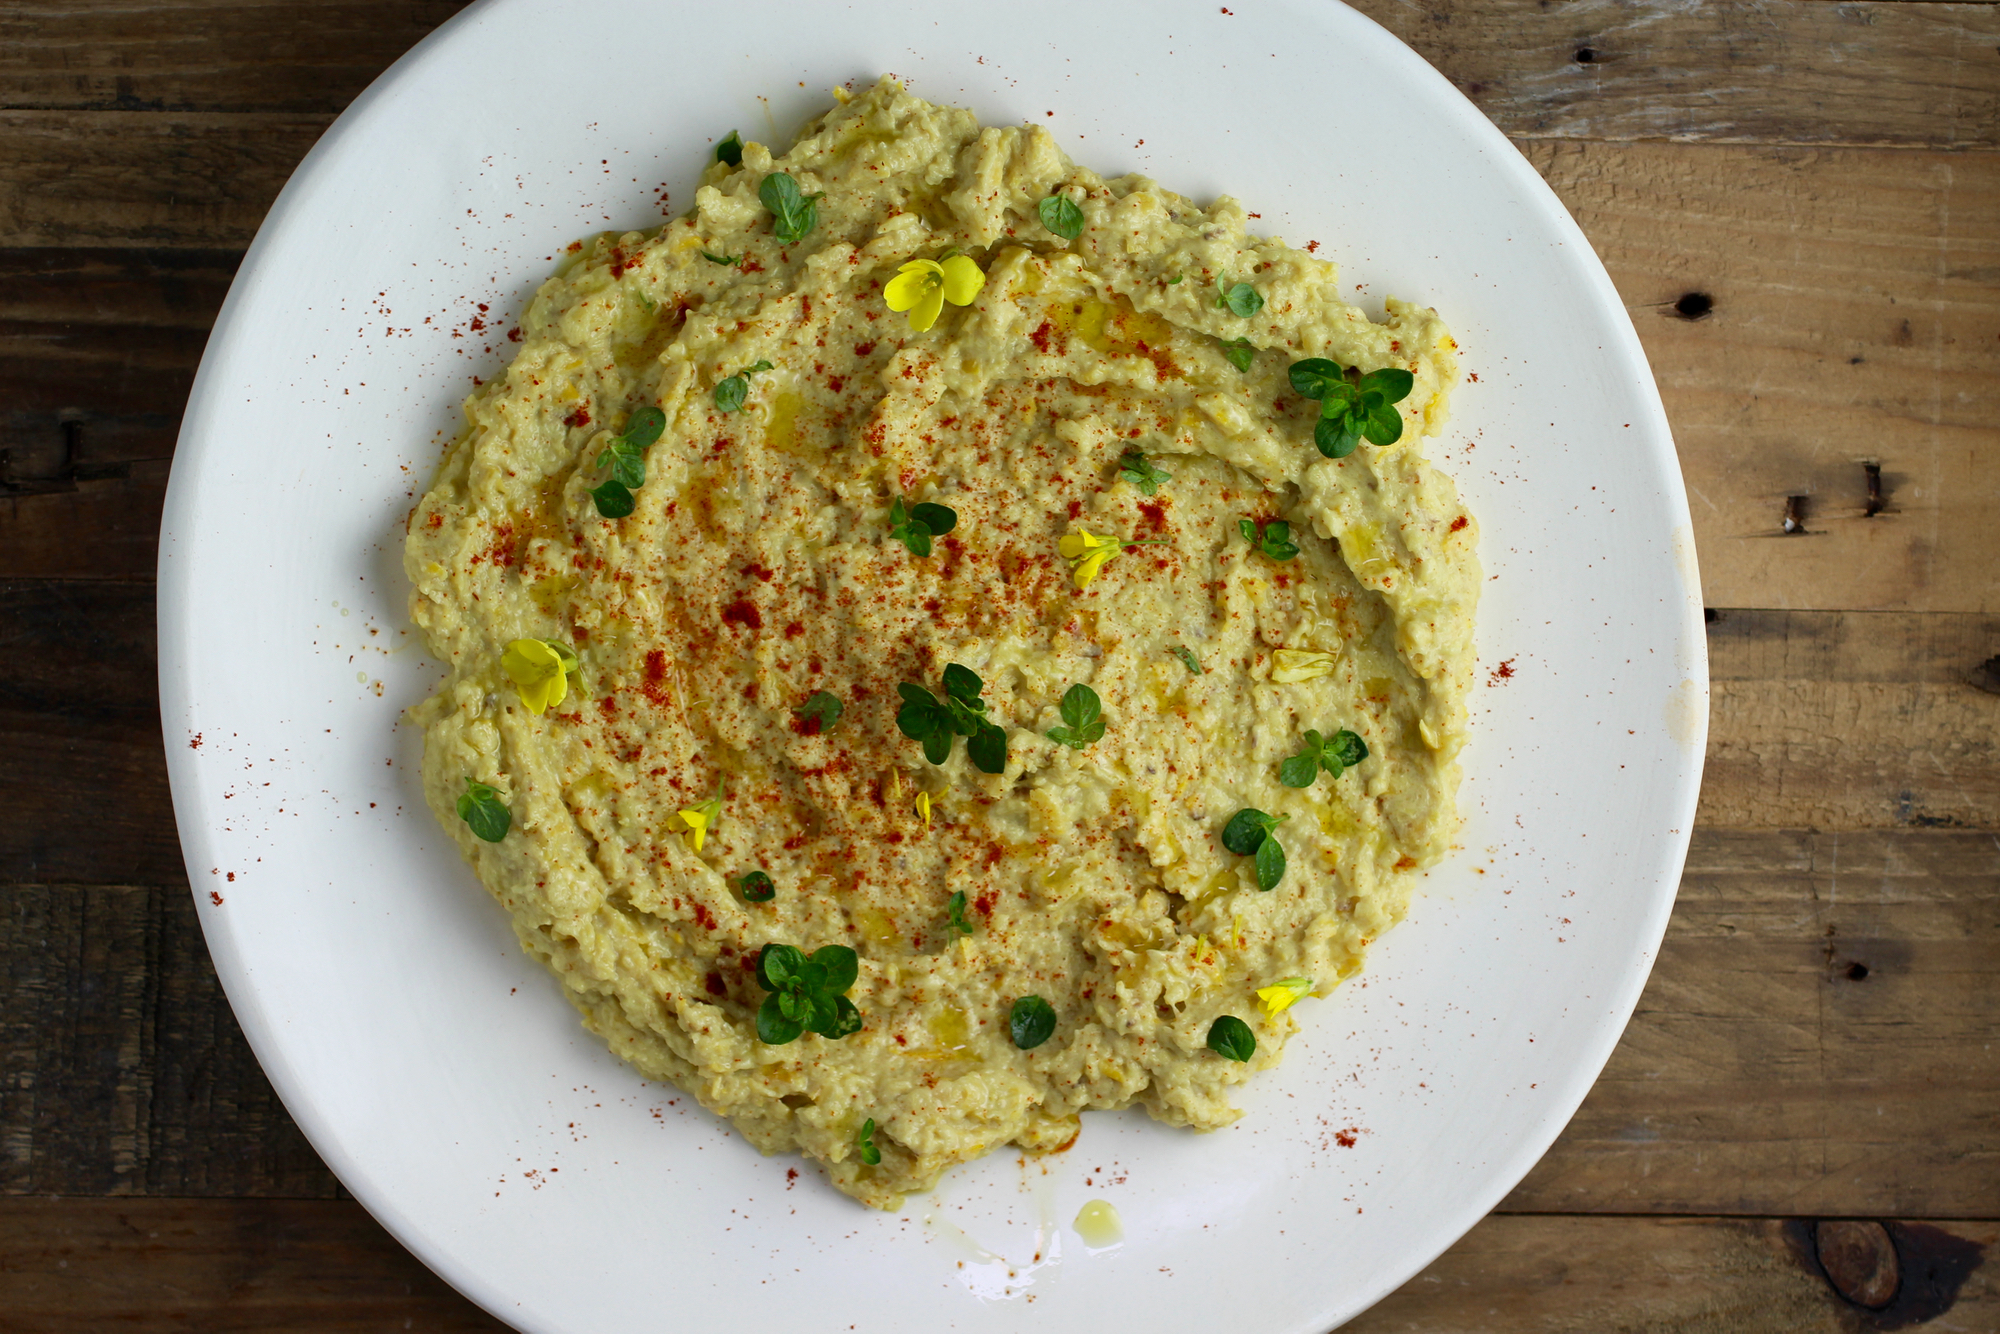
Hummus is the "king (or queen) of spreads", but lebna bil kusa makes a great princess!
I love me some hummus and it has been heartening to know that I am not alone in my enthusiasm - when you see a Super Bowl ad featuring a food, you know that it has truly been adopted by America. This love affair with hummus in the U.S. is so passionate that I even use it as a case study for examining the biocultural factors contributing to cuisine in one of the courses I teach at UC Berkeley. Hummus adheres to many current food trends - among other things, it's plant-based, Mediterranean, healthy, and snackable and, as this Wall Street Journal article discusses, demand has grown to the point that you'd be unlikely to attend any kind of potluck without finding some sort of hummus on the table. Many of the store-bought hummuses you'll find at a potluck however, are made from dried and powdered garbanzo beans, which are incredibly subpar in my opinion (though powdered hummus is great for backpacking). But, I digress - this post is supposed to be about another spread and I promise I'm getting there!
Typically, I'm a hummus purest. Give me a blend of chickpeas, tahini, olive oil, lemon, and salt and I am happy (please don't put garlic in my hummus). I worked for many years off-and-on at an "eclectic Mediterranean" restaurant in Berkeley that is now, sadly, closed. The owners are a husband and wife team, good friends of mine, and most of my Mediterranean cooking skillz I credit to the Iraqi husband. In addition to teaching me to not put garlic in hummus, he showed me that although hummus is still the king of spreads, there are some other contenders that give it a run for its money.
Lebna bill kusa (in Arabic, lebna means "yogurt" and kusa means "squash") is one of those contenders. As it's made with yellow squash, which is only available in summer months, one of the great things about LbK is that it is always a seasonal treat. As a side note, did you know that the straight yellow summer squash is also called "gold bar squash"? Pretty cool and appropriate. The yogurt in LbK nixes it from the list of dishes you can share with your vegan homies, but by upping the tahini/olive oil and adding some lemon juice you can make a vegan version that's almost - but not quite - as good. The recipe specifies a range of quantities because whenever I make it I just kind of mix and match until the consistency and flavor is to my liking. Feel free to add other herbs and spices as desired or make it as thick/thin as you like it! Zucchini would also work, but the color would not be as appealing. Makes about 2 cups.
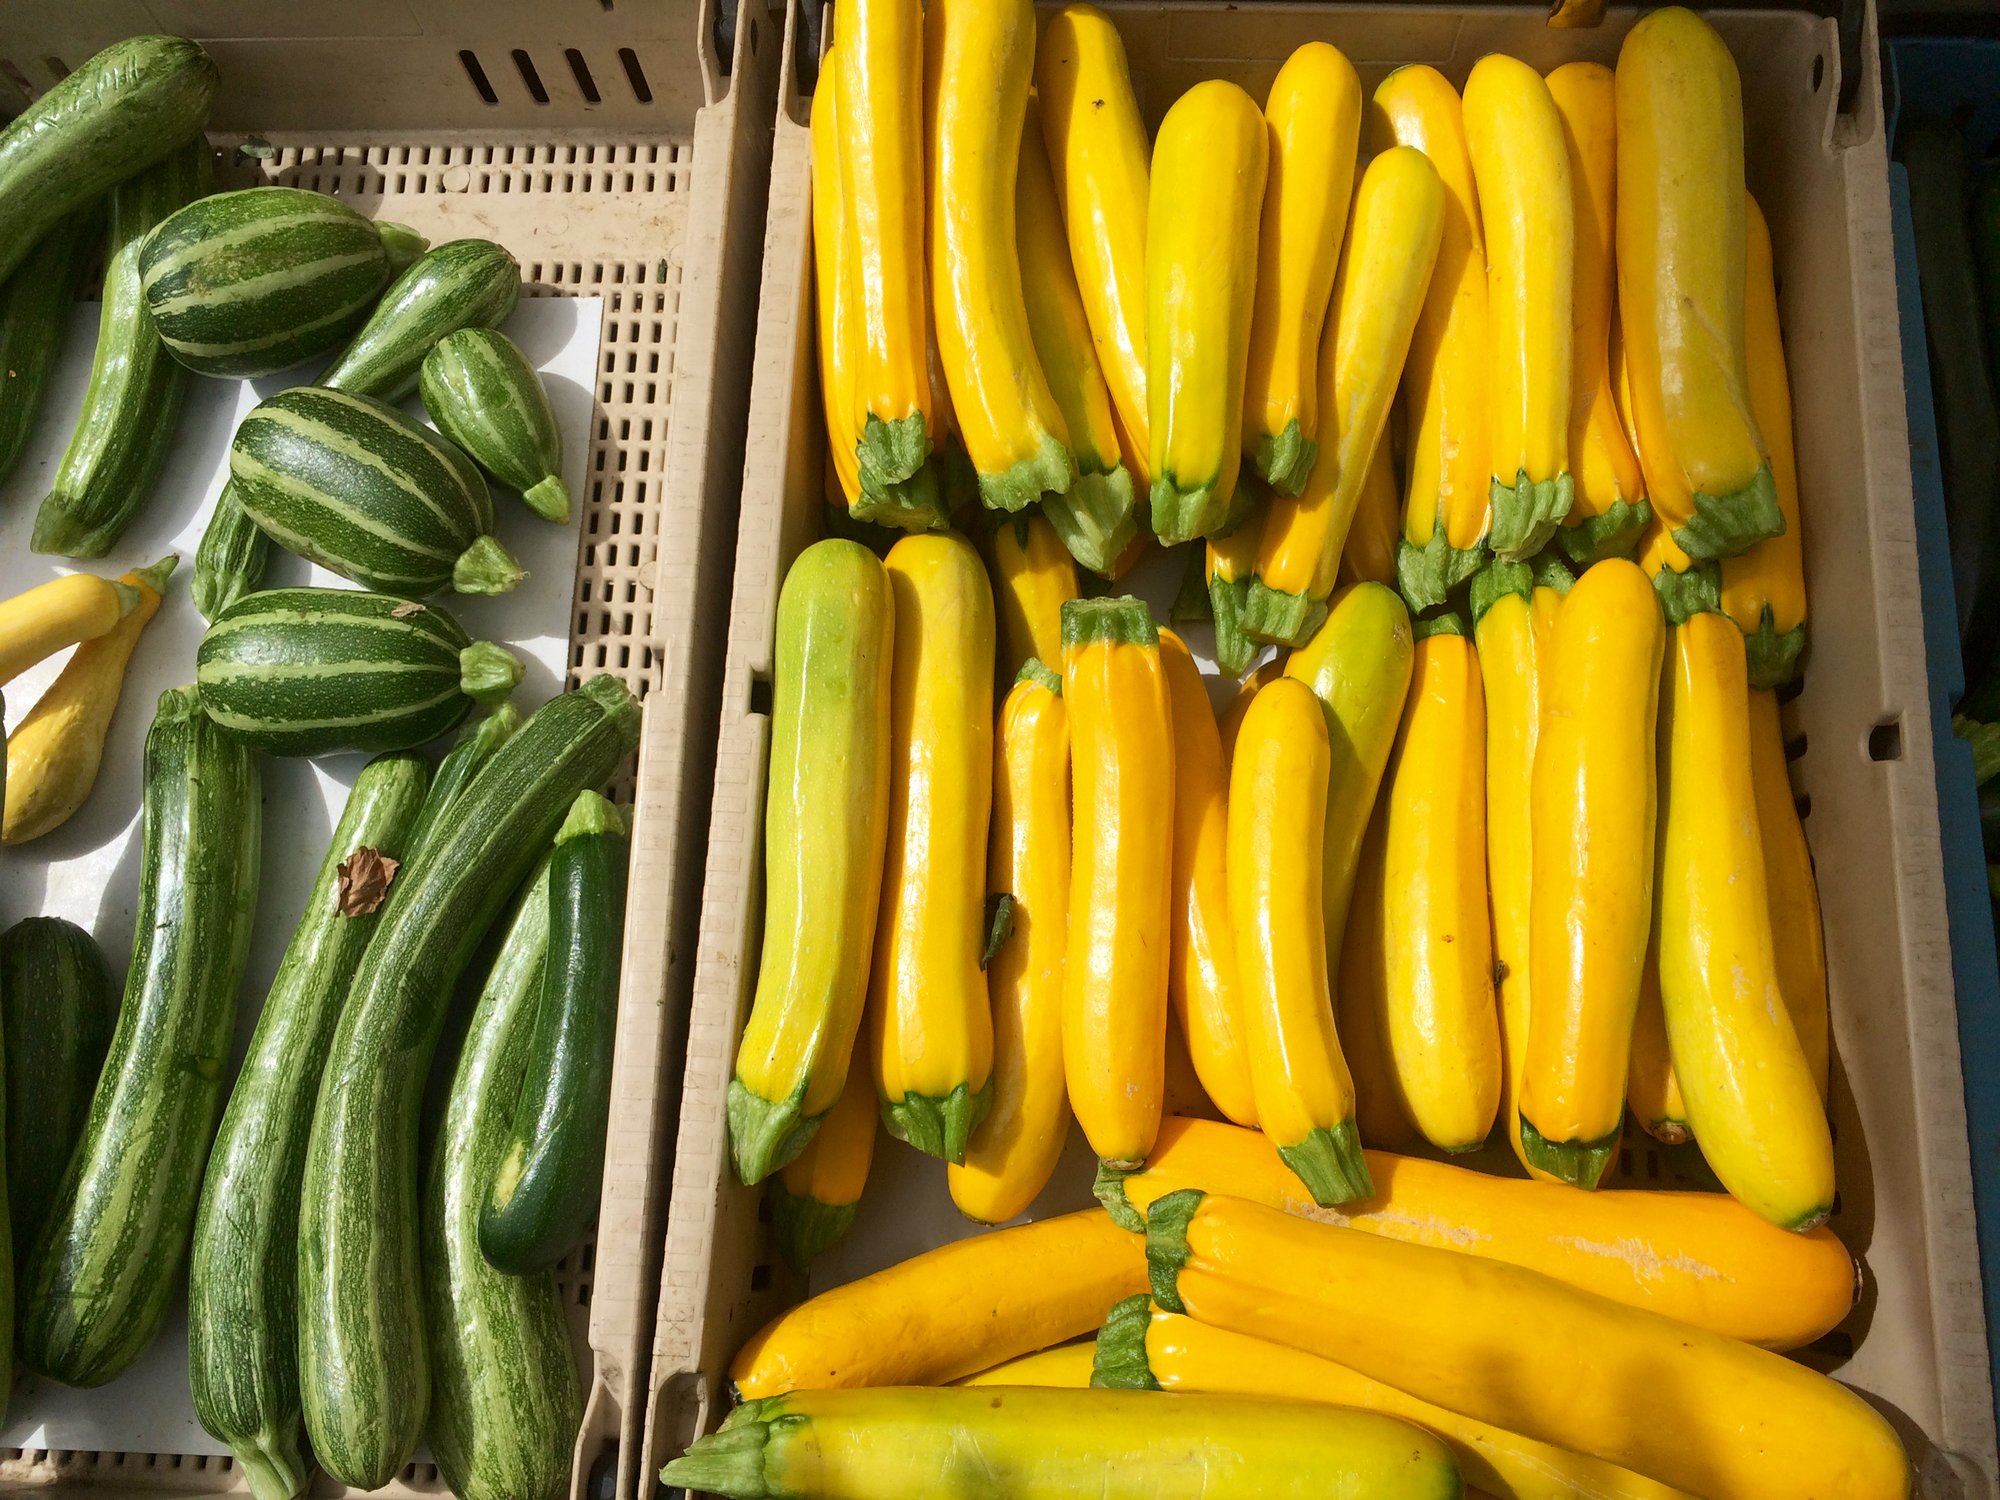
Yellow summer squash (aka "gold bar squash" shown here) gives lebna bil kusa its bright hue.
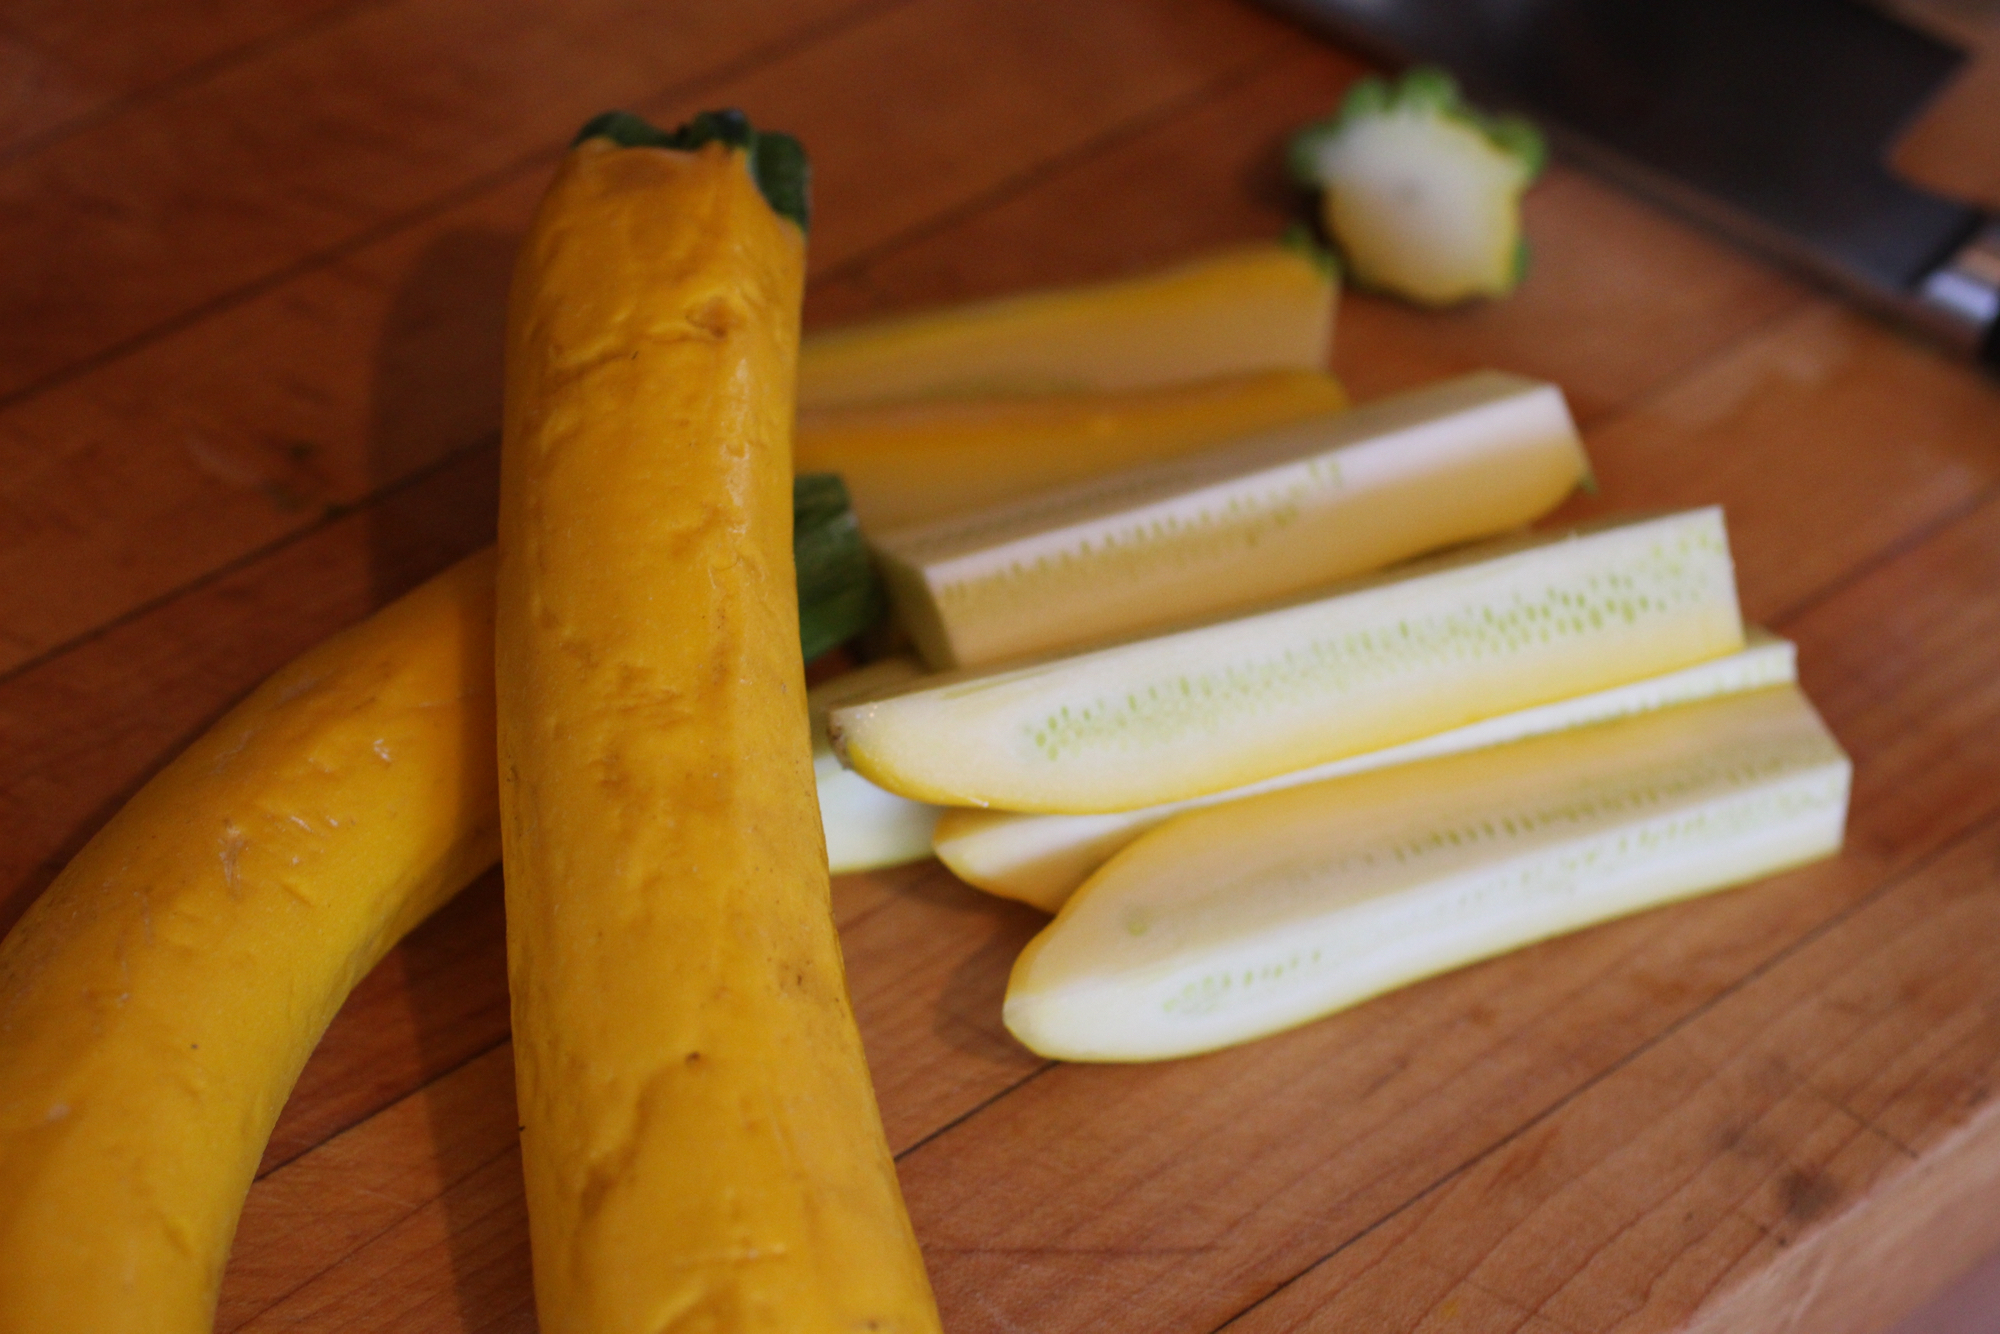
1.5 pounds summer squash (about 3 medium "gold bar" squash or 4-6 pattypan or crookneck), chopped
1-2 tablespoons olive oil, divided
1-2 tablespoons tahini
1-2 tablespoons plain yogurt
1-2 teaspoons ground cumin
Salt, to taste
Rustic bread or crackers from whole grains or crisp raw vegetables are a great way to dip up this spread.
Preheat oven to 400 degrees F.
On a baking sheet, toss diced squash with 1/2 tablespoon olive oil and spread out in a single layer. Roast for 12-15 minutes or until soft and golden brown, tossing halfway through.
Using either a food processor or potato masher (food processor if you like your spreads to be smoother, potato masher for chunkier), blend squash with 1/2 tablespoon olive oil, 1 tablespoon tahini, and 1 tablespoon yogurt. Continue adding more of these wet ingredients in small amounts in addition to cumin and salt until you have reached the desired texture and taste.
Serve immediately with crackers, bread, or raw vegetables or store in refrigerator for up to one week. Garnish with paprika, herbs, and drizzled olive oil if desired.

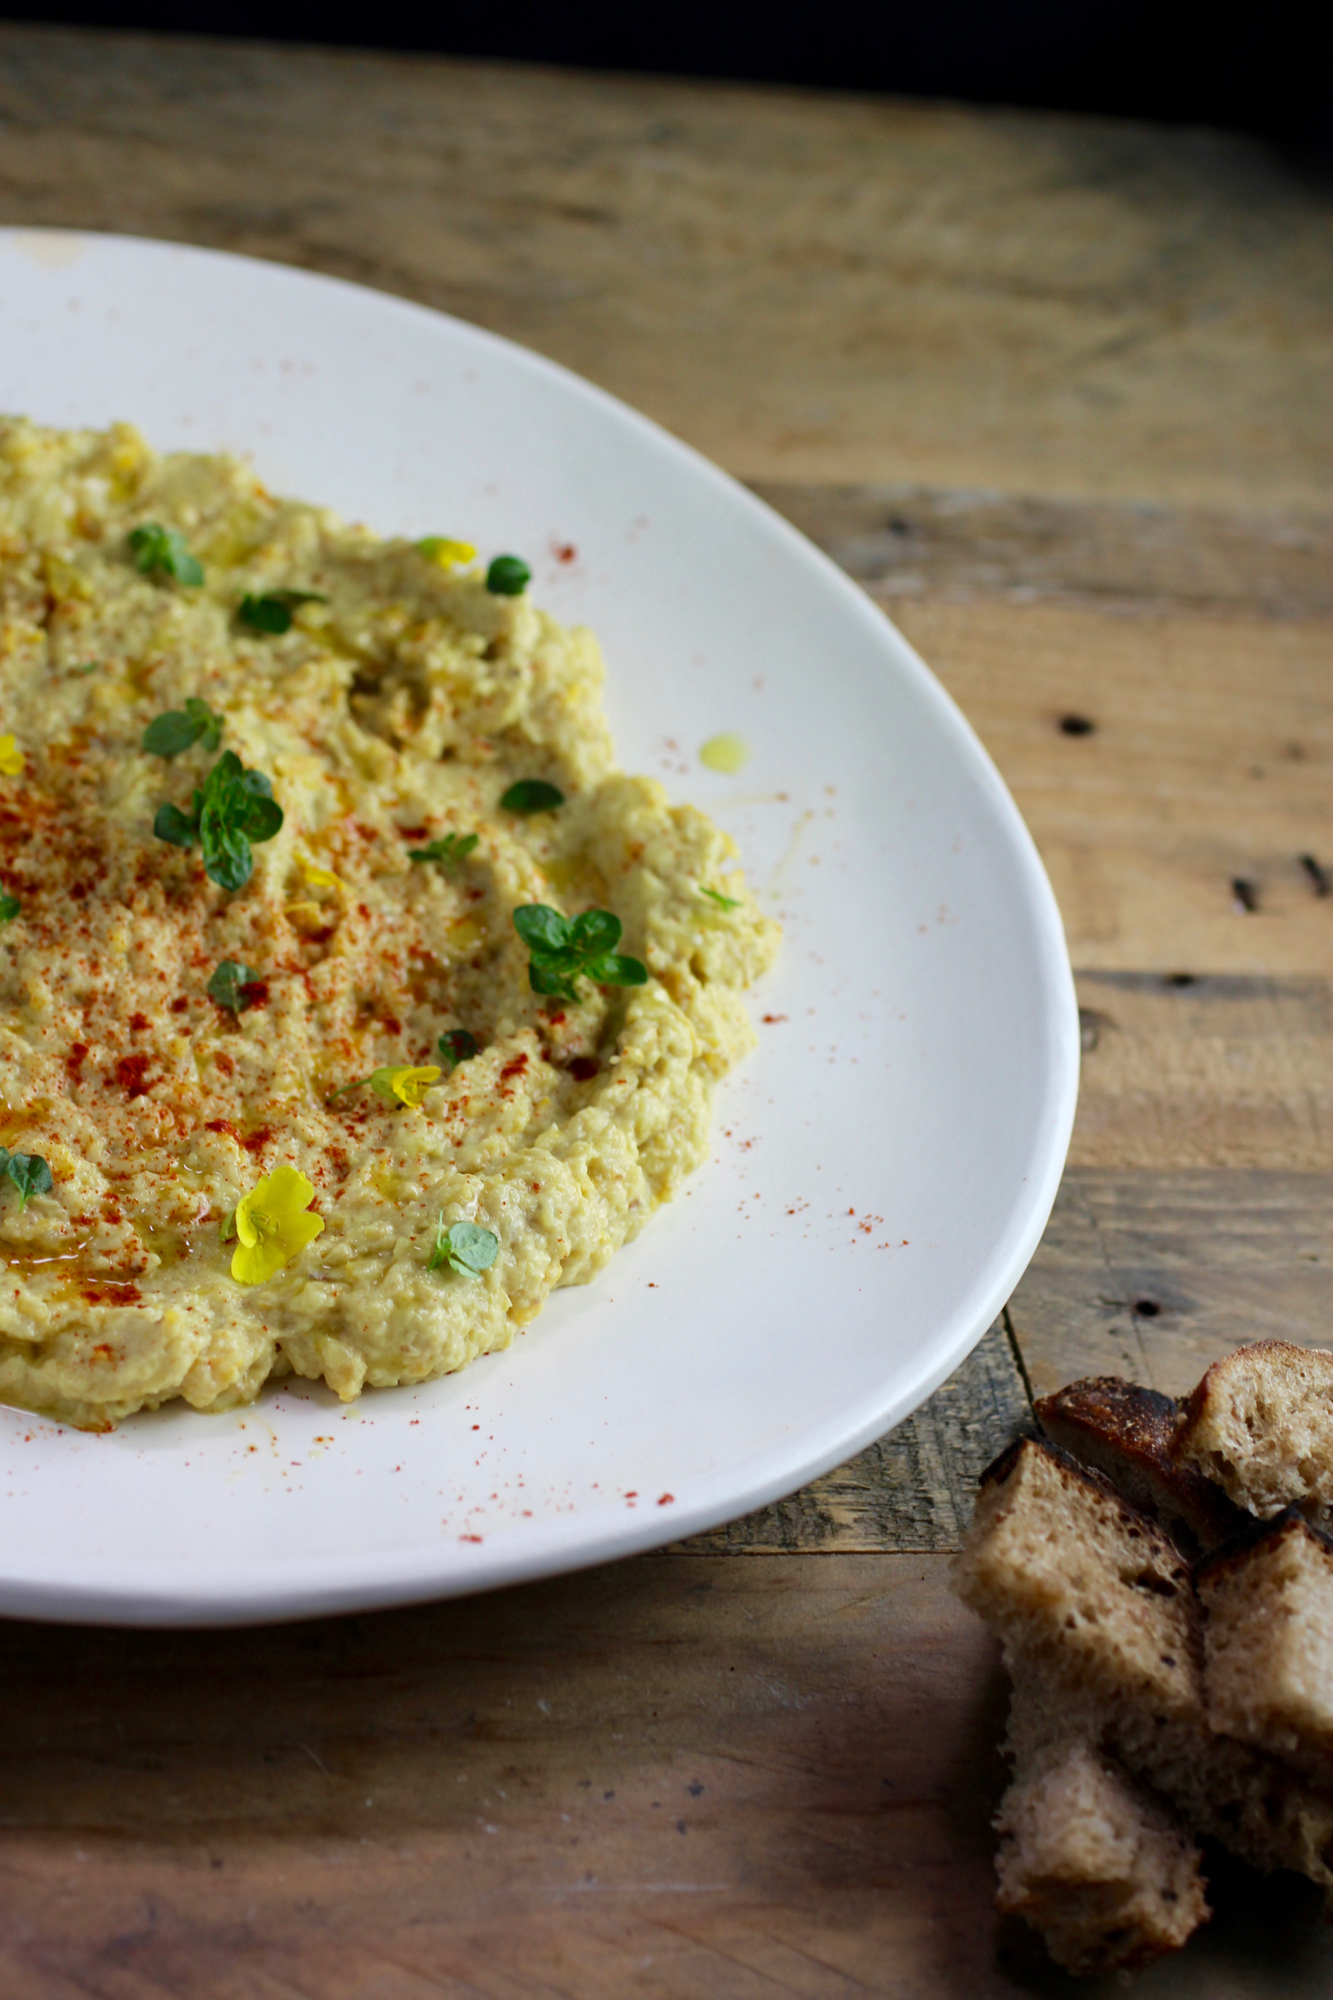
Turmeric-Spiced Cauliflower Couscous
Reinvented craveability.
I'll admit I was a skeptic when cauliflower rice came on the scene - it often feels unnecessary to mess with a good thing and I am certainly not "carbaphobic". As much as I love cauliflower (and I do love it so), even I'll admit I can overdo it with cruciferous vegetables occasionally (ever tried kohlrabi ice cream? definite skippable). I am, however, a big fan of deliciousness and vegetables and when these worlds collide my meal is complete, which is exactly what happens when cauliflower is pulverized into small bits, seasoned well, and served as a grain. In this case, I call it couscous because the flavoring is in the "couscous genre", one could easily call it rice, as it's the same process. Apart from being delicious and satisfyingly high fiber and phytonutrients, what's great about making cauliflower into a grain is that you don't even need the whole floret. If you have leftover cauliflower stems from another dish they can easily be tossed into the food processor and turned into rice!
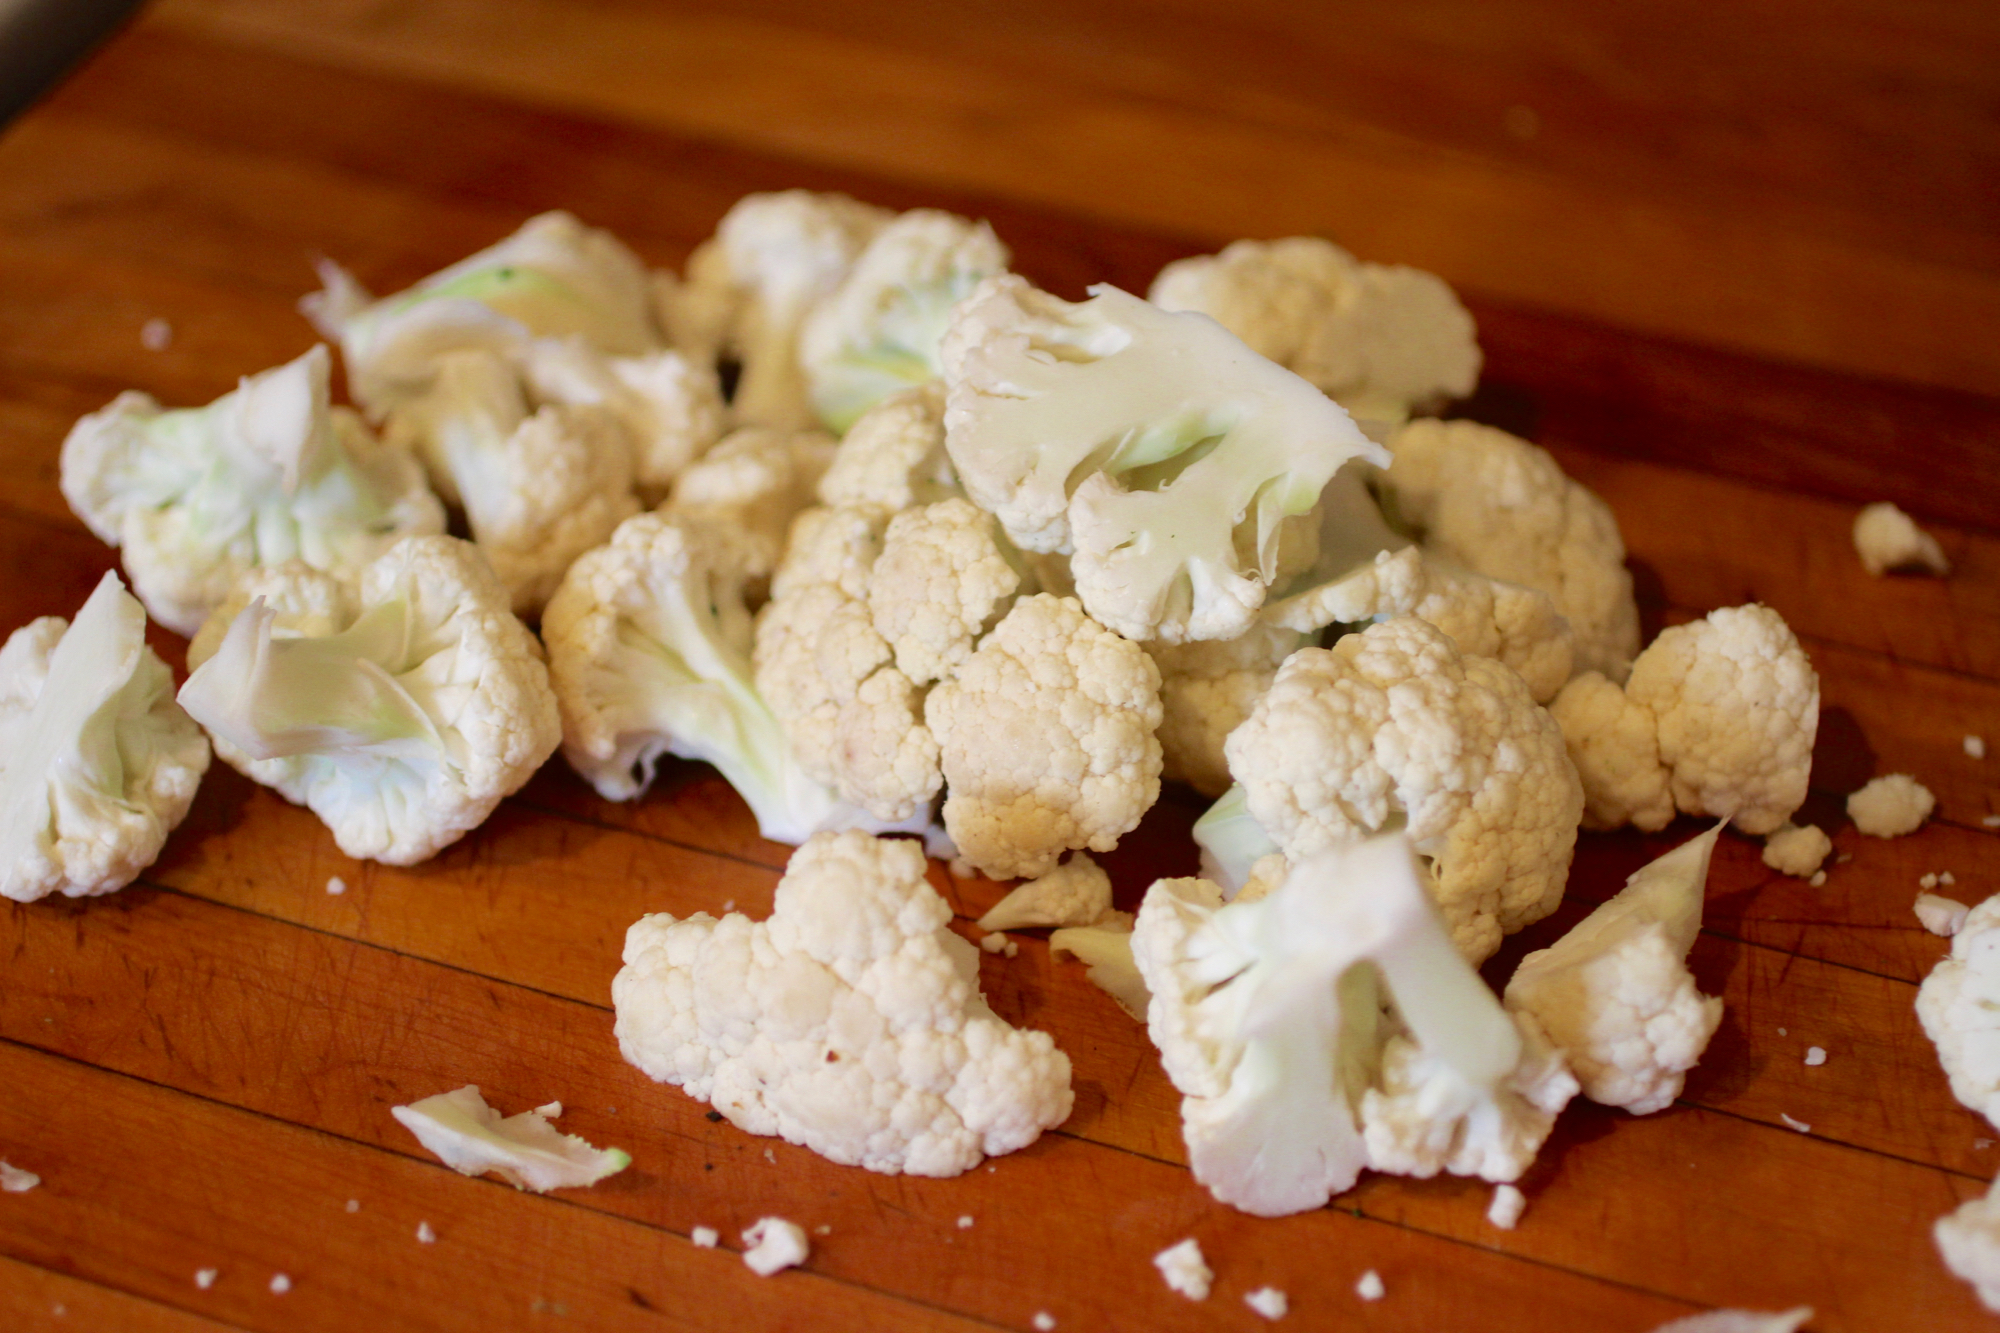
Stems and cores can be used in addition to or in place of florets.
This recipe calls for heating the cauliflower after pulsing in the food processor, but it can also be served raw for a crunchier texture and application, such as chilled cauliflower tabouli salad. Additionally, although the flavor and color of turmeric is hard to ignore, cauliflower rice or couscous is also nice simply seasoned if paired with a dish that is flavorful, such as slow cooked spicy garbanzo beans or an eggplant tagine. When it comes down to it, cauliflower rice/couscous is incredibly versatile similar to...regular rice or couscous! Serves 4.
1 large head cauliflower (about 2 pounds, stems and/or florets can be used)
1 tablespoon olive oil
2 teaspoons turmeric
1/4 teaspoon salt
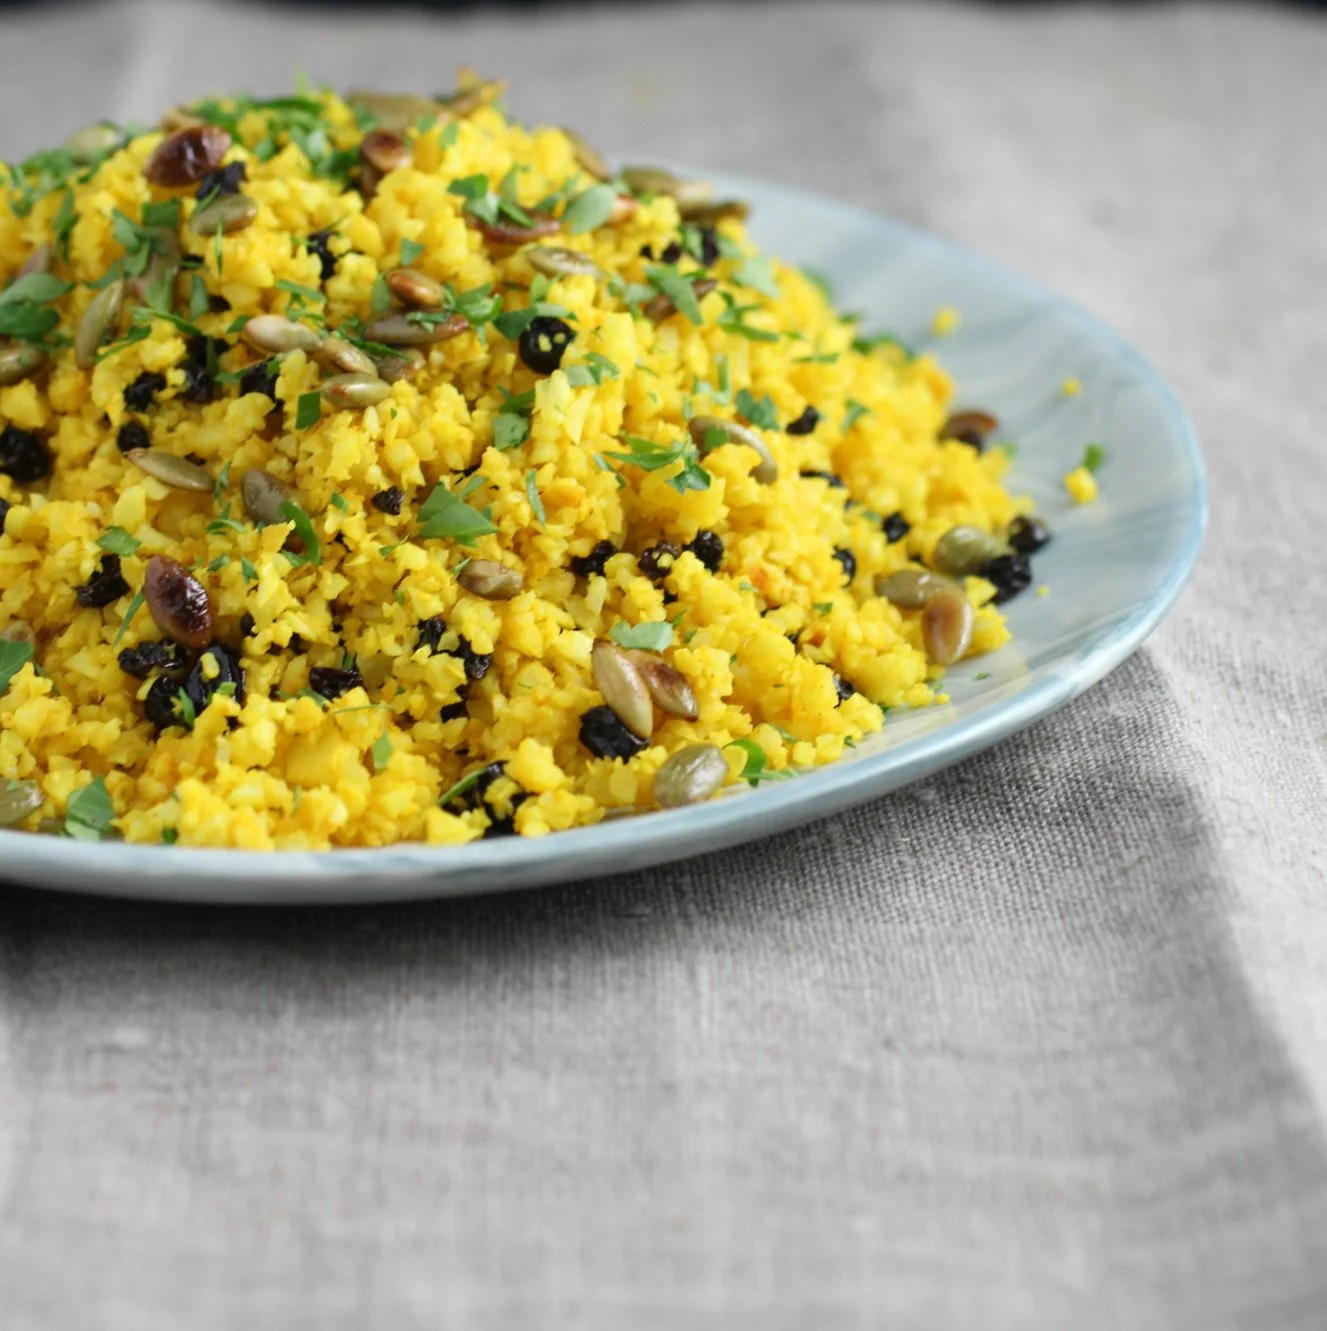
1/2 cup currants (optional)
2 tablespoons toasted pumpkin seeds
Chopped parsley, for garnish
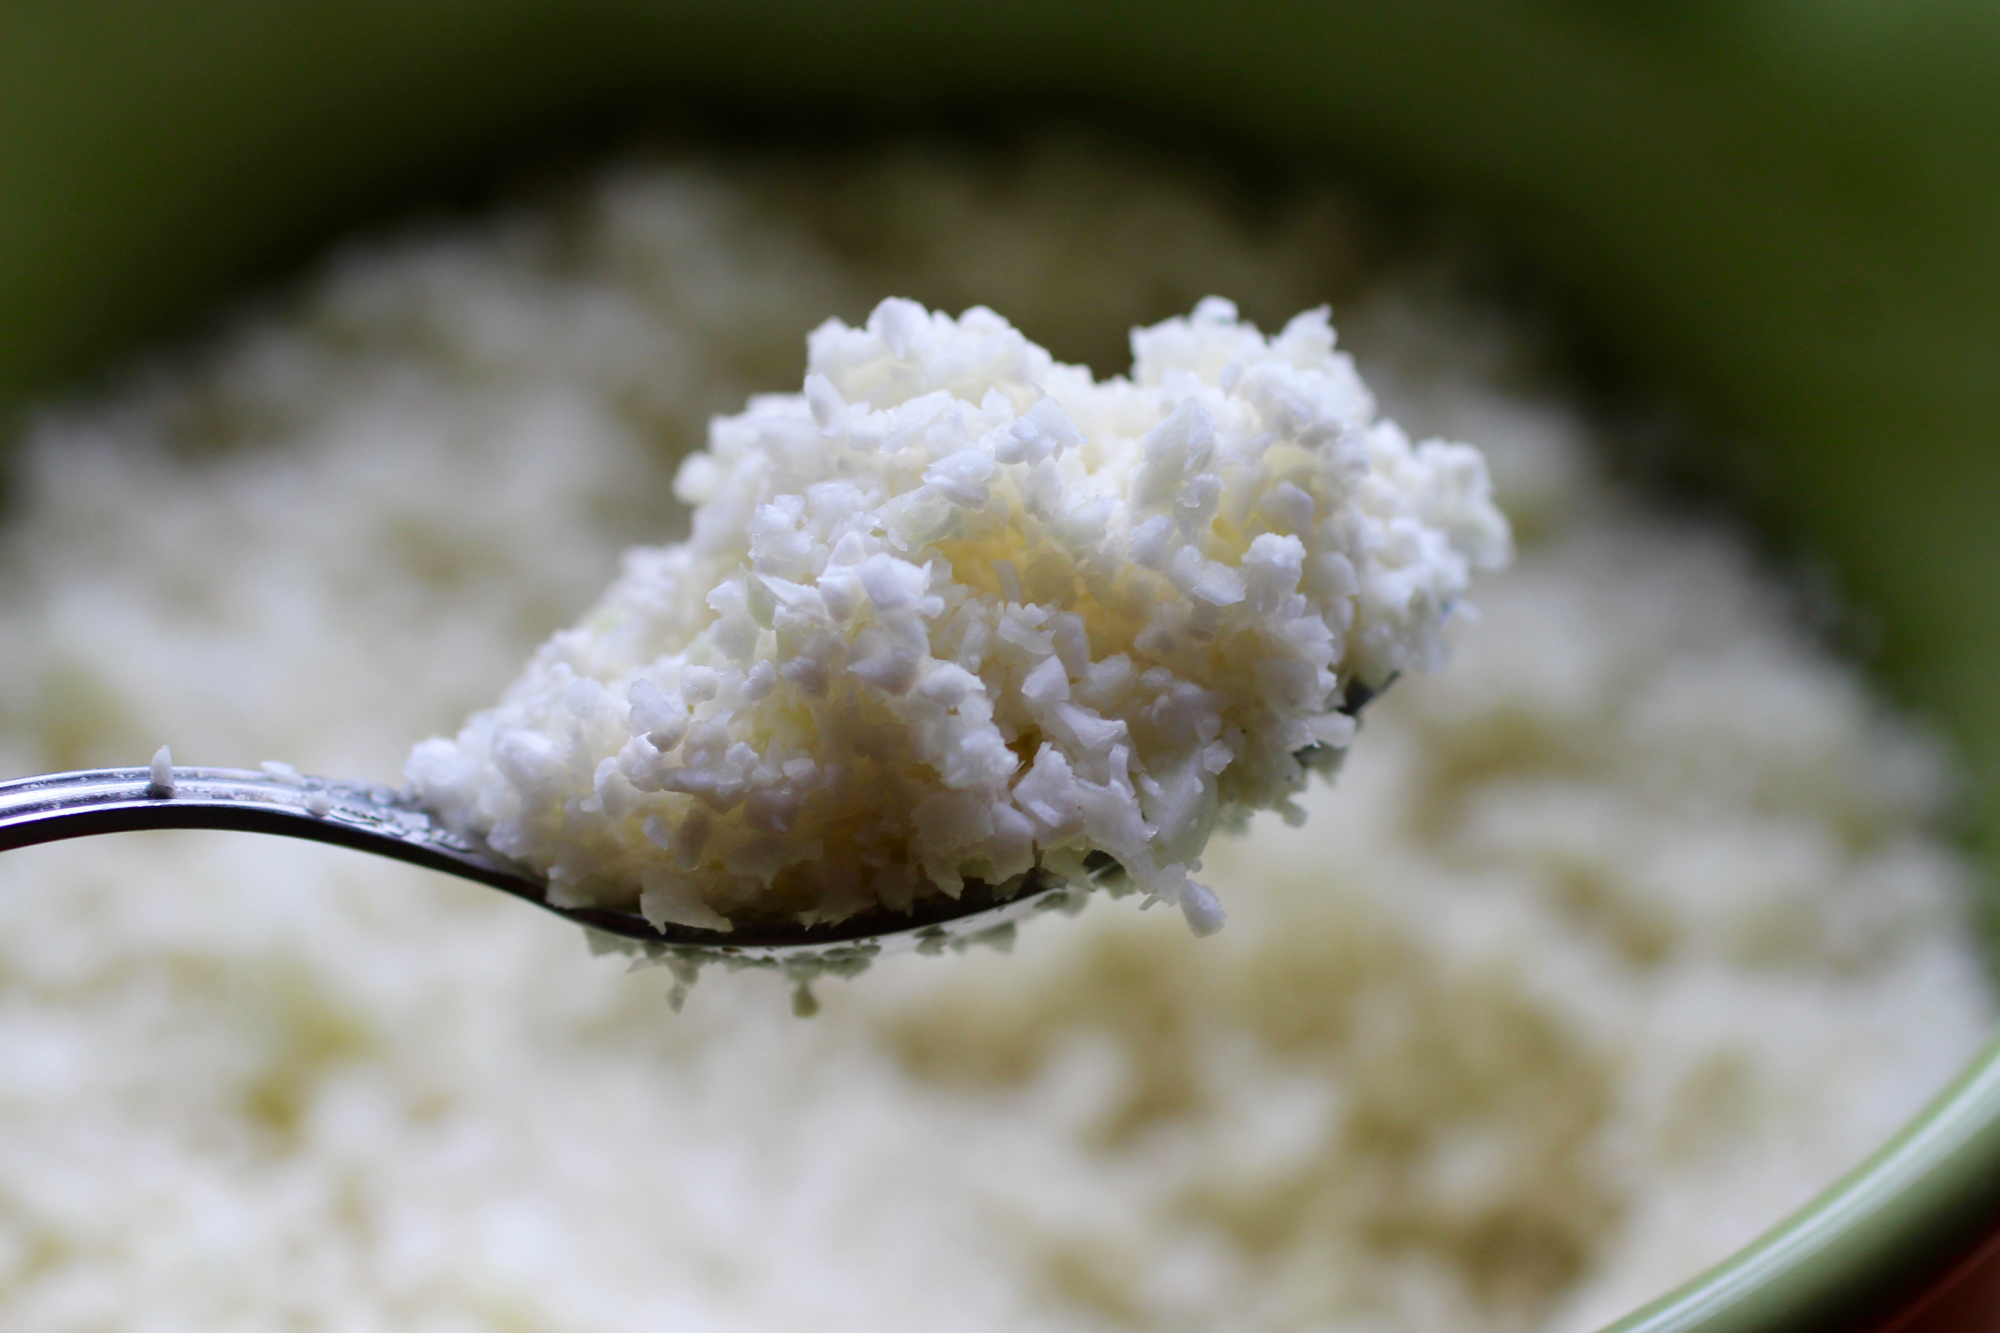
Process cauliflower until it resembles grain.
Cut and/or pull apart cauliflower into large florets and chop core/stem into smaller pieces. If you have leftover cauliflower core/stems from another application, they can be pulverized and used as well.
Using a food processor, pulse the cauliflower until broken down into couscous-sized pieces, processing in two batches if needed. As cauliflower is processed, remove any large pieces that are not broken down, set them aside, and pulse separately. If you do not have a food processor, you can grate the cauliflower into couscous-sized pieces using the large holes on a box grater.
Heat olive oil in a skillet with a lid on medium heat*. Stir in cauliflower, cover, and cook for 6-7 minutes, until desired softness is reached, stirring occasionally. Add turmeric, salt, and optional currants then stir to combine. Serve hot garnished with pumpkin seeds and chopped parsley.
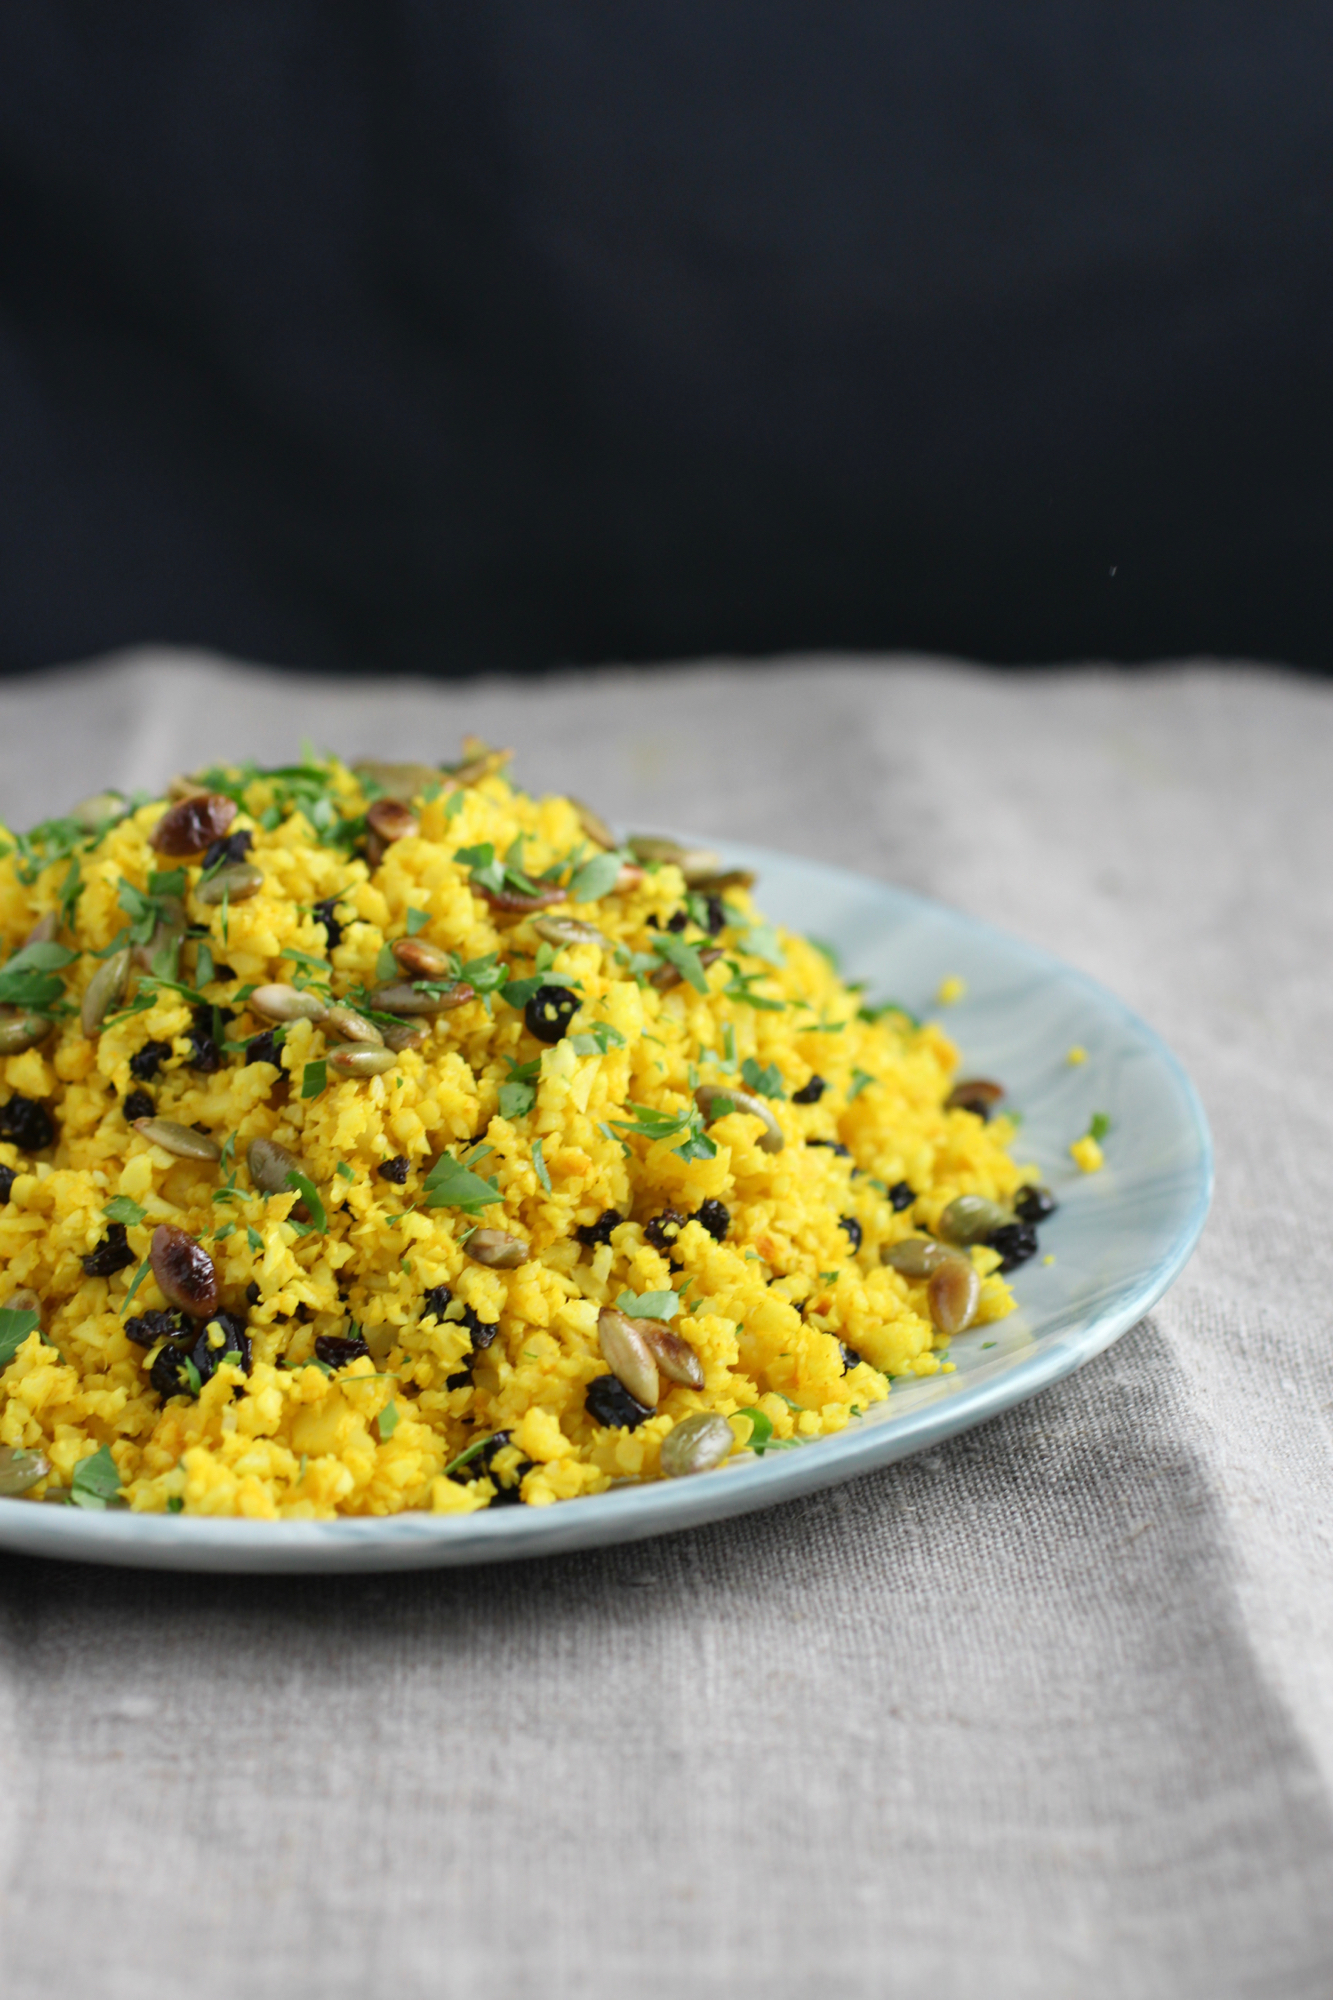
Delicious reinvented side dish or main when paired with sautéed garbanzo beans or grilled lamb.
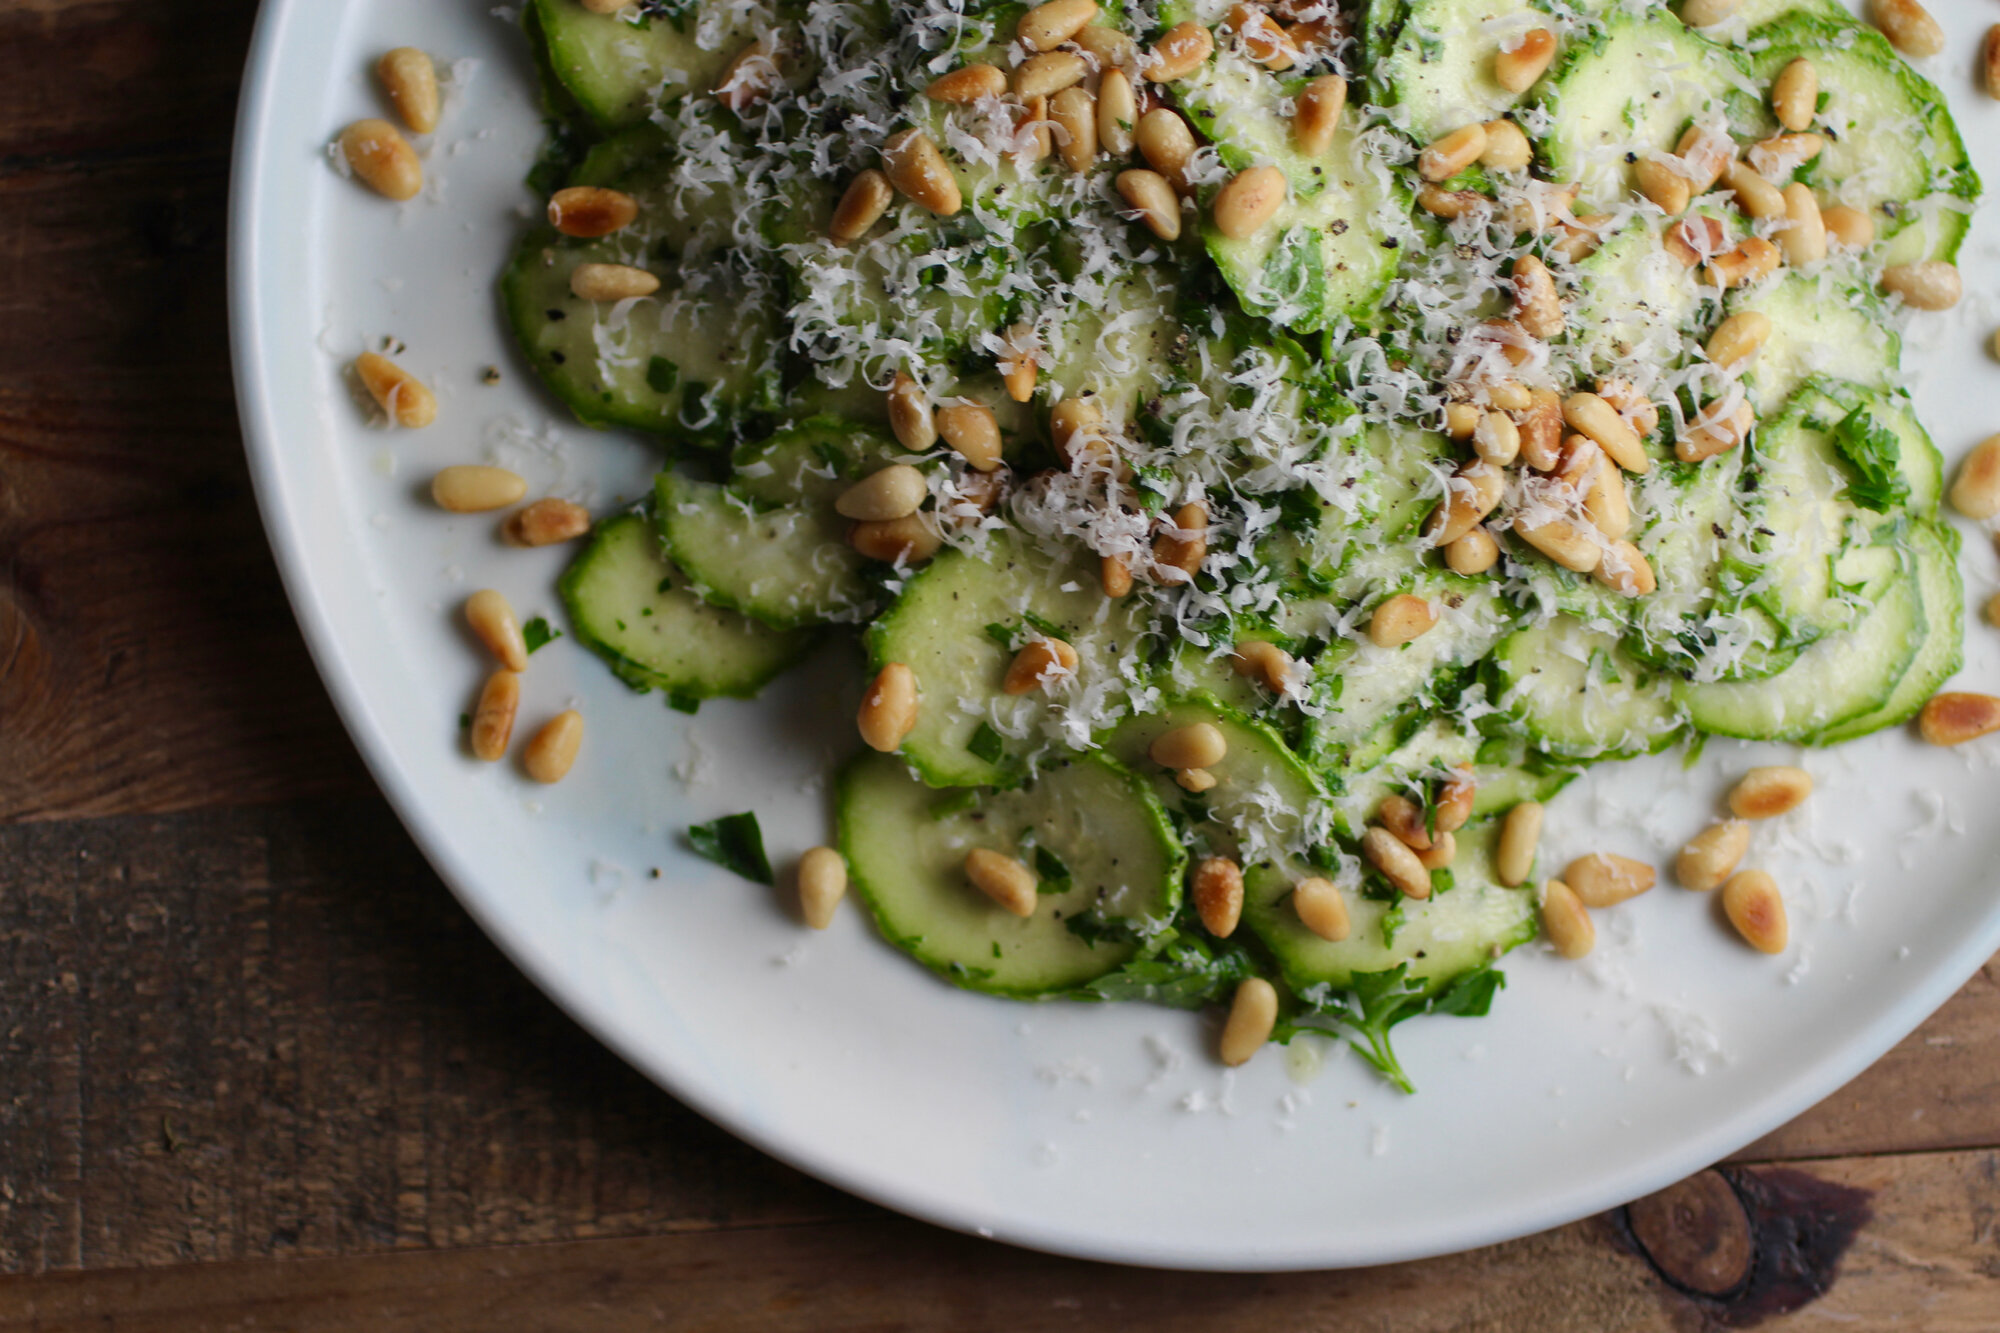
Shaved Zucchini Salad With Parmesan and Toasted Pine Nuts

I never appreciated raw zucchini until I tried this salad. It was 2008 in Italy at the Terra Madre conference where I was fortunate enough to attend as a delegate. Before that fortuitous encounter, I believe undercooked zucchini to be a missed opportunity relegated to steam tables at low-budget buffets alongside poorly done chicken parmesan. However, slicing zucchini squash into delicate slivers, tossing with a fresh lemon-olive oil dressing, and pairing with toasted pine nuts and parmesan (as is done in this salad) totally transforms the texture and flavor to be something purely delightful. The other great thing about this salad? It's incredibly quick to make, requires ingredients you are likely to already have around, and is the perfect addition to a summer dinner washed down with rose. Below recipe serves 4, but can easily be adapted to more or less people.
2 large zucchini (or summer squash)
Juice from 1/2 lemon
2 tablespoons olive oil
Salt and black pepper to taste
1 ounce pine nuts
1 ounce parmesan
2 tablespoons chopped fresh parsley
Using a mandolin, shave zucchini into thin rounds or thing long slices*.
Whisk lemon juice, olive oil, and a few pinches of salt and pepper. Toss zucchini in dressing and add more salt/pepper to taste.
Toast pine nuts in a cast iron pan on medium high for about 2 minutes, tossing frequently, until golden brown.
Top zucchini with pine nuts, grated parmesan, and parsley.
Serve at room temperature.
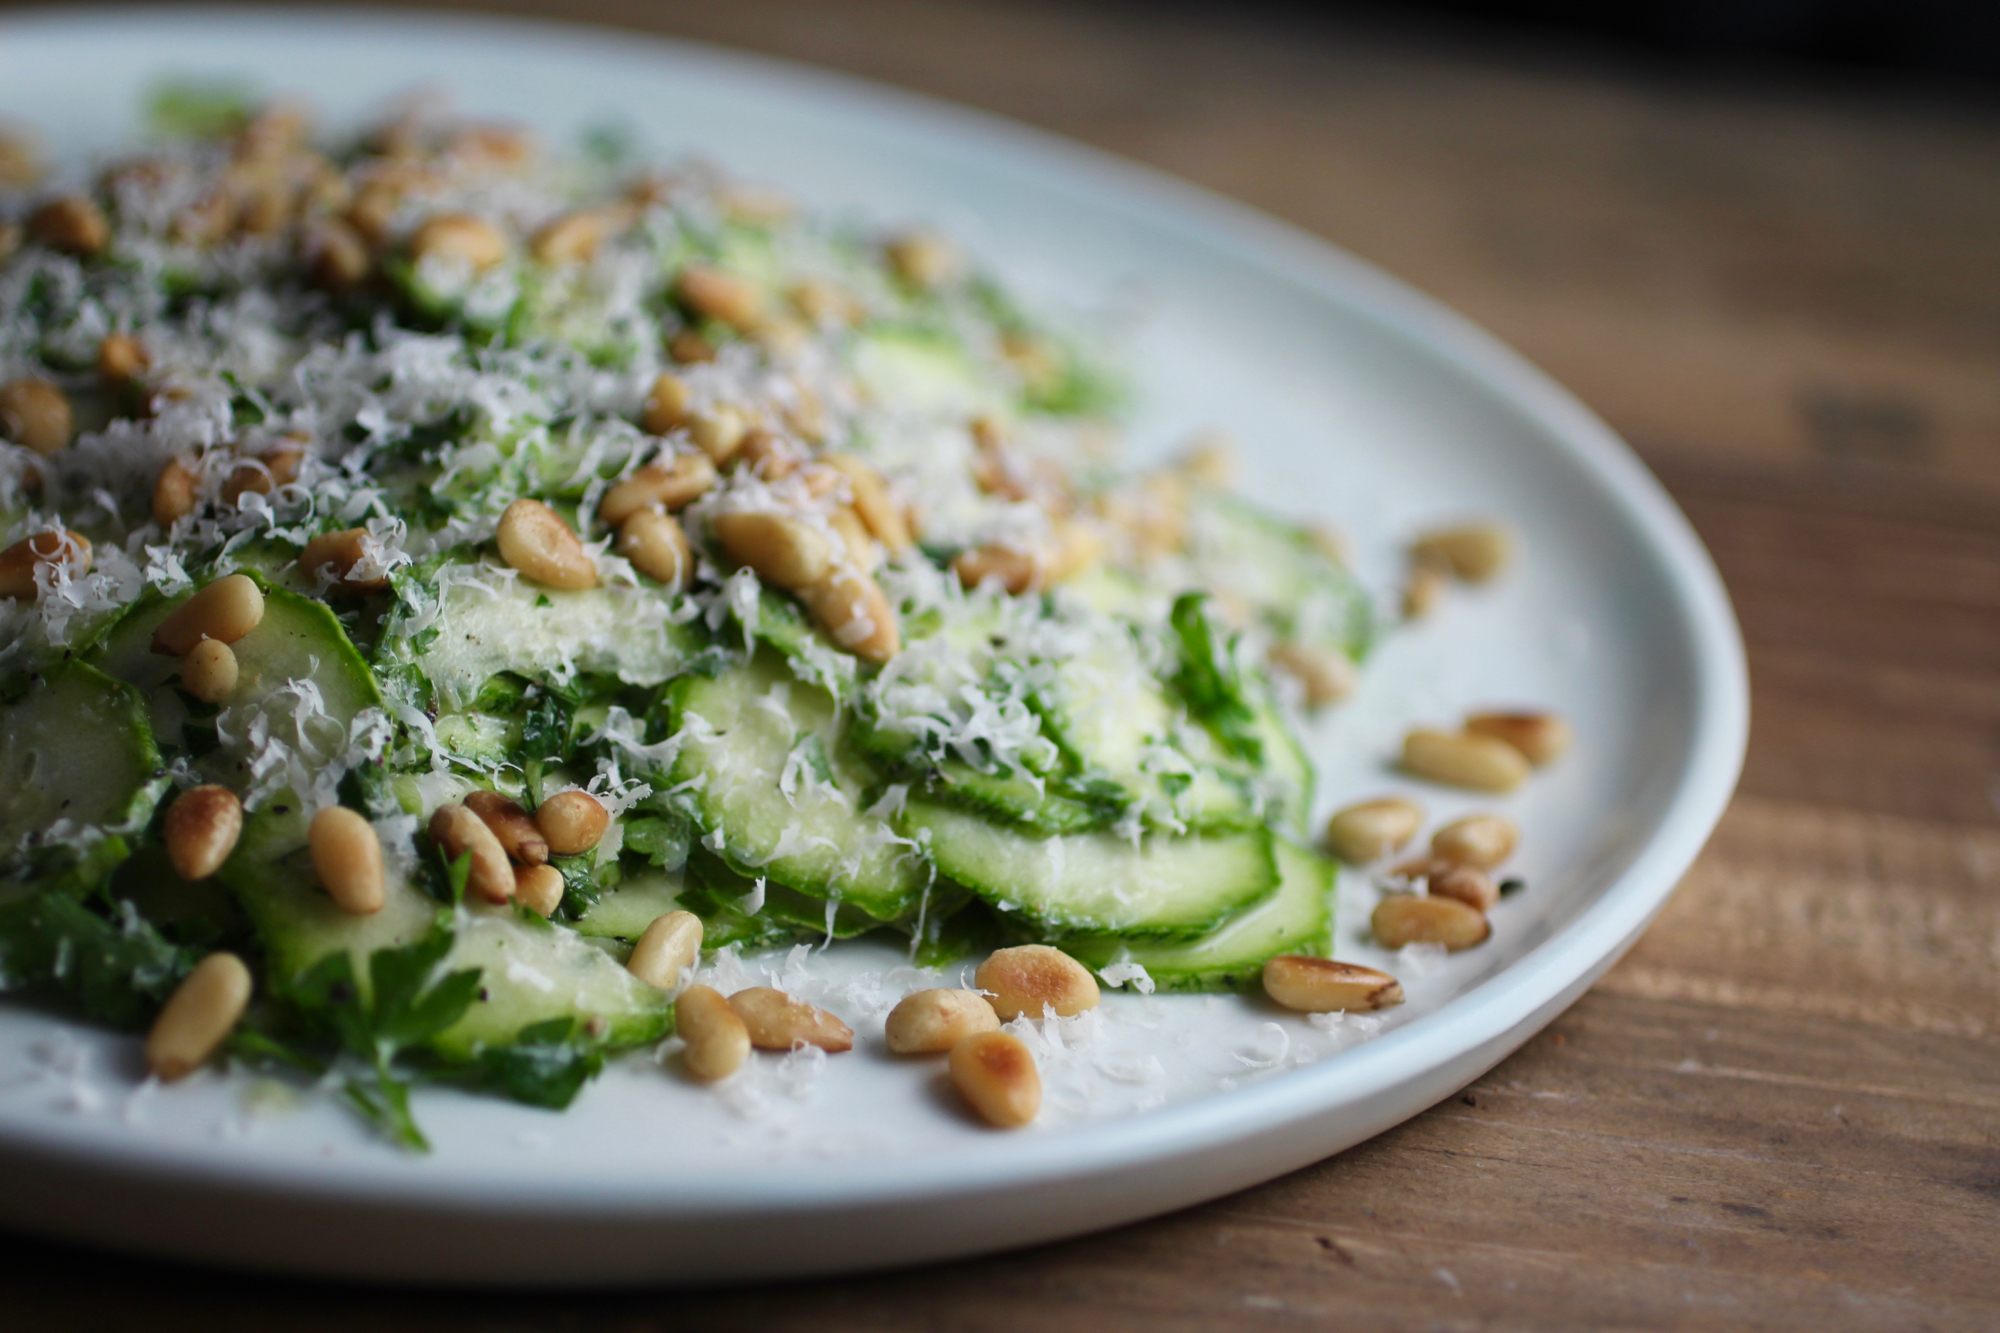
Delicate rings of raw zucchini to eat by the forkful.

Radish Greens Chimichurri
Don't toss those greens, transform them into a flavorful sauce that works with pretty much anything!

Do you have "radish greens remorse" every time you toss out delicious looking radish tops? Good news - it doesn't have to be this way! The green leafy tops of radishes and many other vegetables such as turnips, beets, and daikon are perfectly edible and delicious. You can use them as you would other green leafy vegetables, though radish greens in particular can be a little fuzzy and benefit from a bit of processing such as chopping, blending, sautéing, or the addition of an acid.
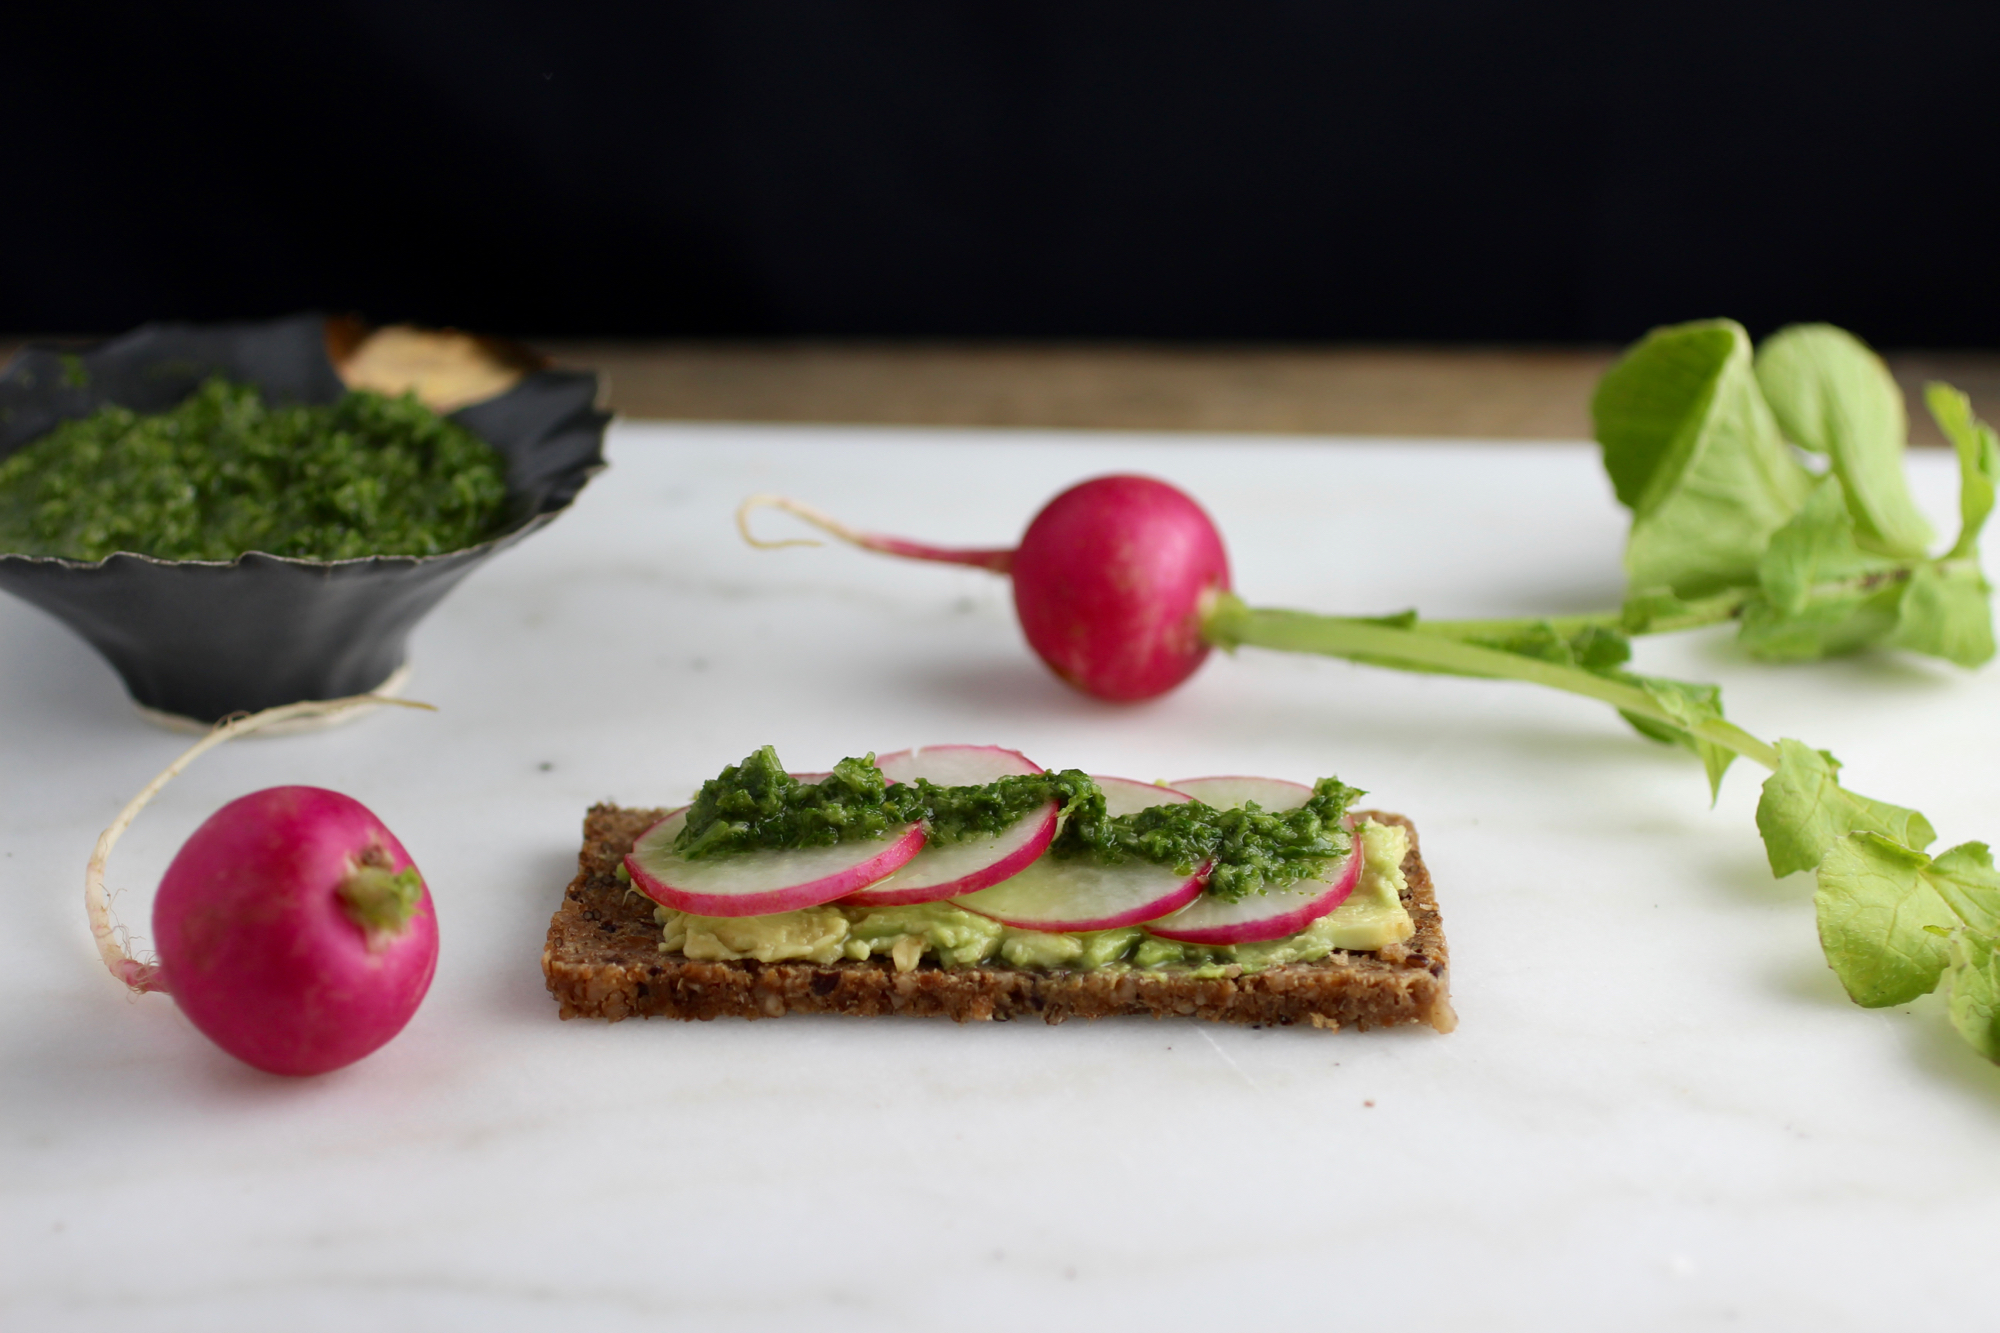
Eating "root to leaves" with sliced radish, avocado, and radish greens chimichurri rye toast.
There are a lot of different words for somewhat similar green sauces: chimichurri, salsa verde, gremolata, chermoula... and at first I deliberated over what to call this particular green sauce. I settled on "chimichurri", as it has a similar combination of vinegar, garlic, and green that you find in traditional chimichurri, just with radish tops in place of parsley and oregano. This sauce can be made with pretty much any edible green that would otherwise be discarded, even wild greens such as dandelion or plantain! It can also be adapted in numerous ways - try adding cilantro or tarragon for more bright herbaceous notes or increase the garlic if that's your jam. The sauce works great on almost anything from grilled vegetables and meat to white beans or breakfast tacos. Really, every time I make it, I end up adding it to all my meals for a few days. You can also eat "root to leaves" by topping a sliced radish and avocado rye toast with a drizzle! Recipe makes 2/3 cup.
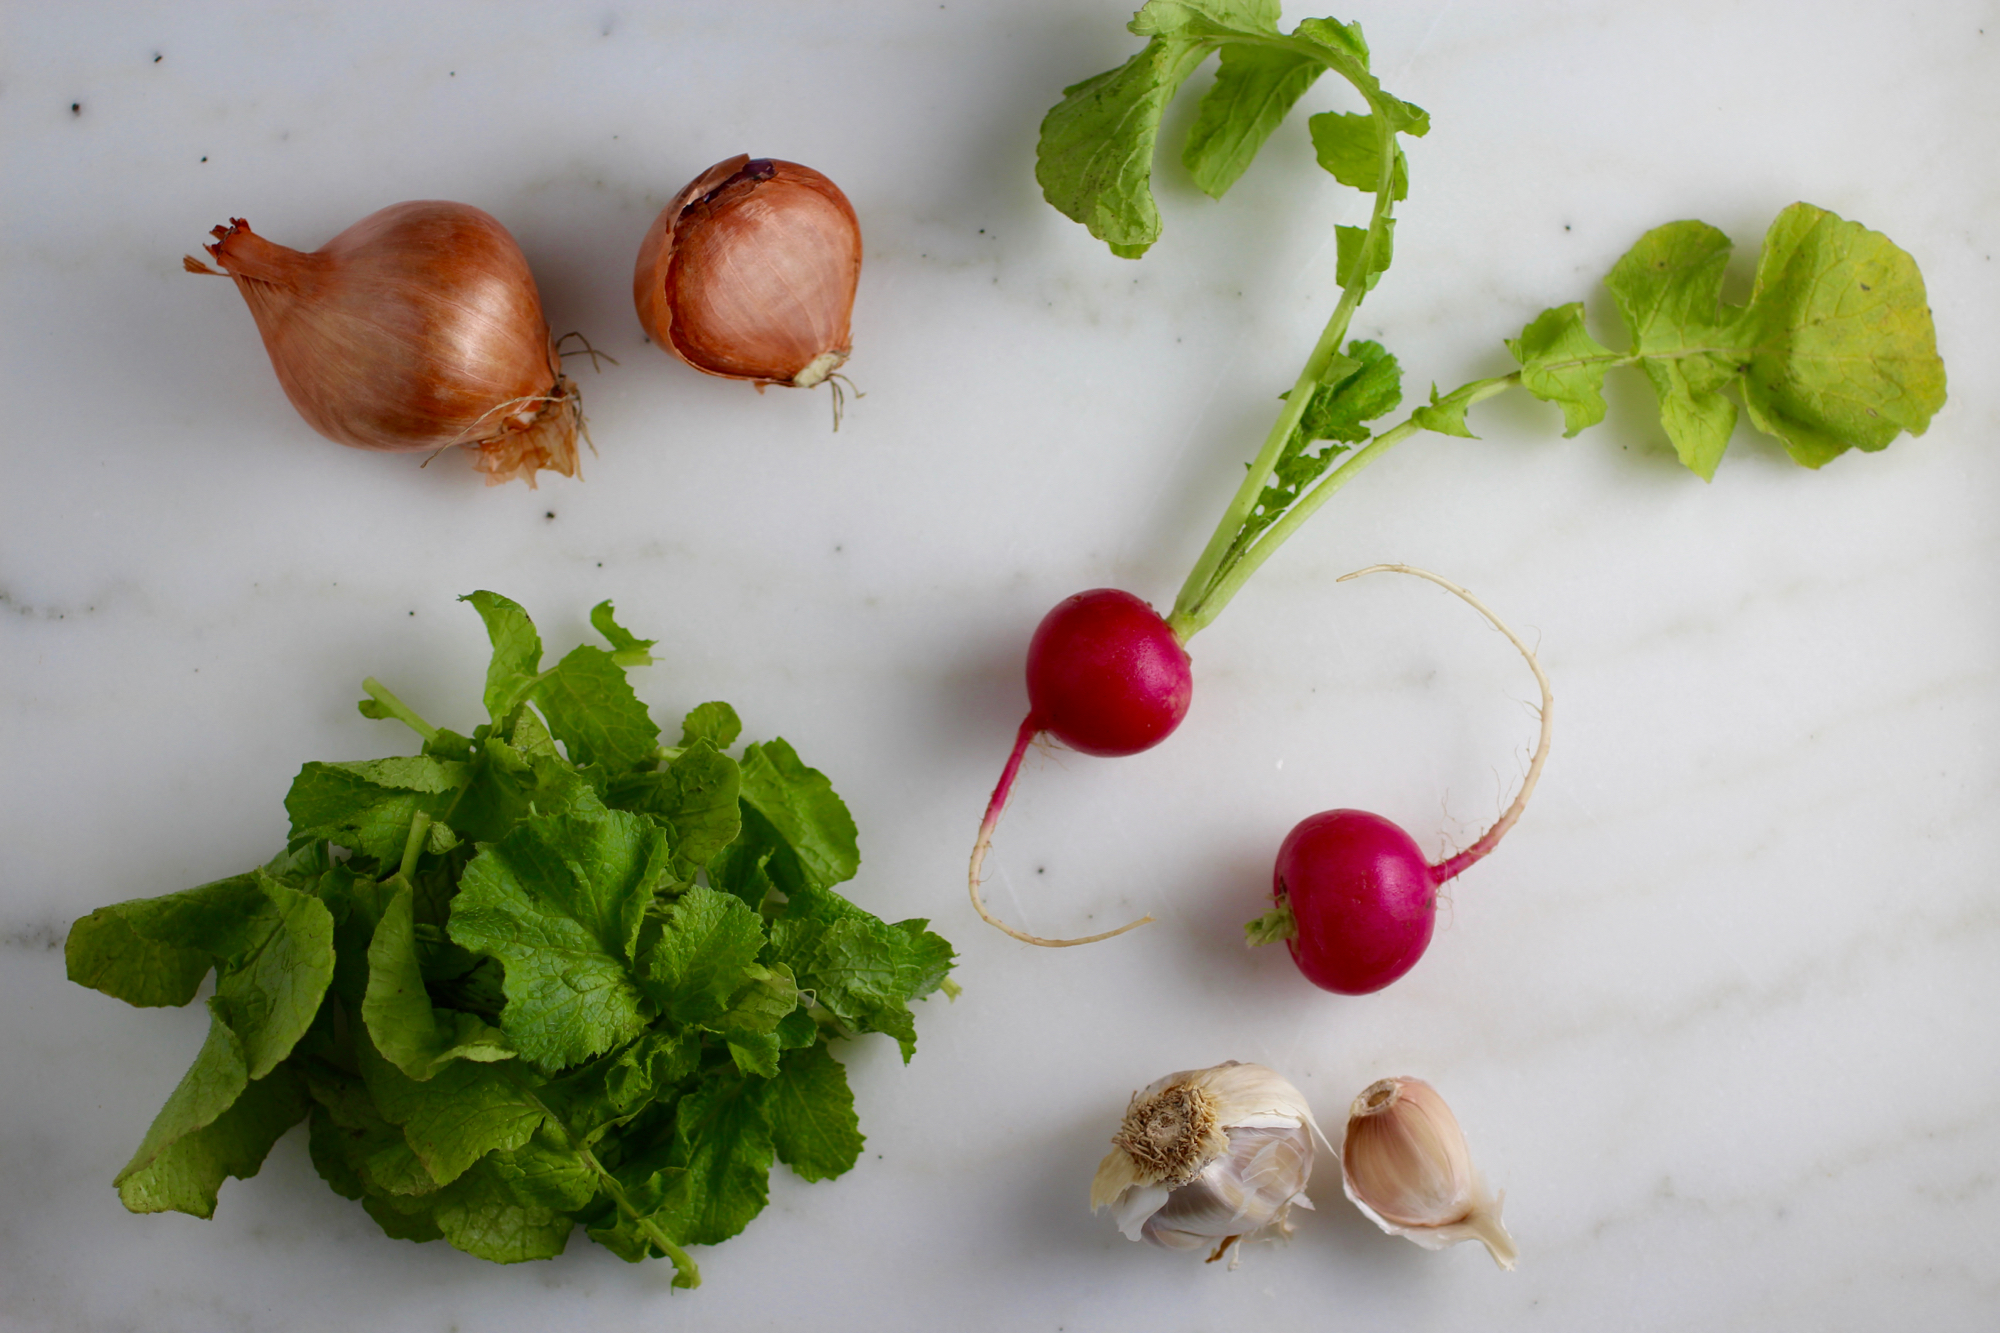
Don't toss those beautiful radish greens!
2-3 (loosely packed) cups chopped radish greens, washed
1 medium shallot bulb, chopped
1 clove garlic, chopped
3 tablespoons rice vinegar
Pinch salt
2 teaspoons olive oil
Heat about 1/2 cup water in small saucepan until simmering. Add radish greens, toss to coat, and cook until softened and dark green (about 30 seconds).
Remove greens and squeeze out excess water. Using an immersion blender or food processor, blend greens with shallots, garlic, rice vinegar, salt, and olive oil until combined, but still coarse. Drain excess liquid if needed and keep chilled up to 4 days until use.

Classic, Beety, Borscht
It's loud, it's proud, it's beetroot soup.

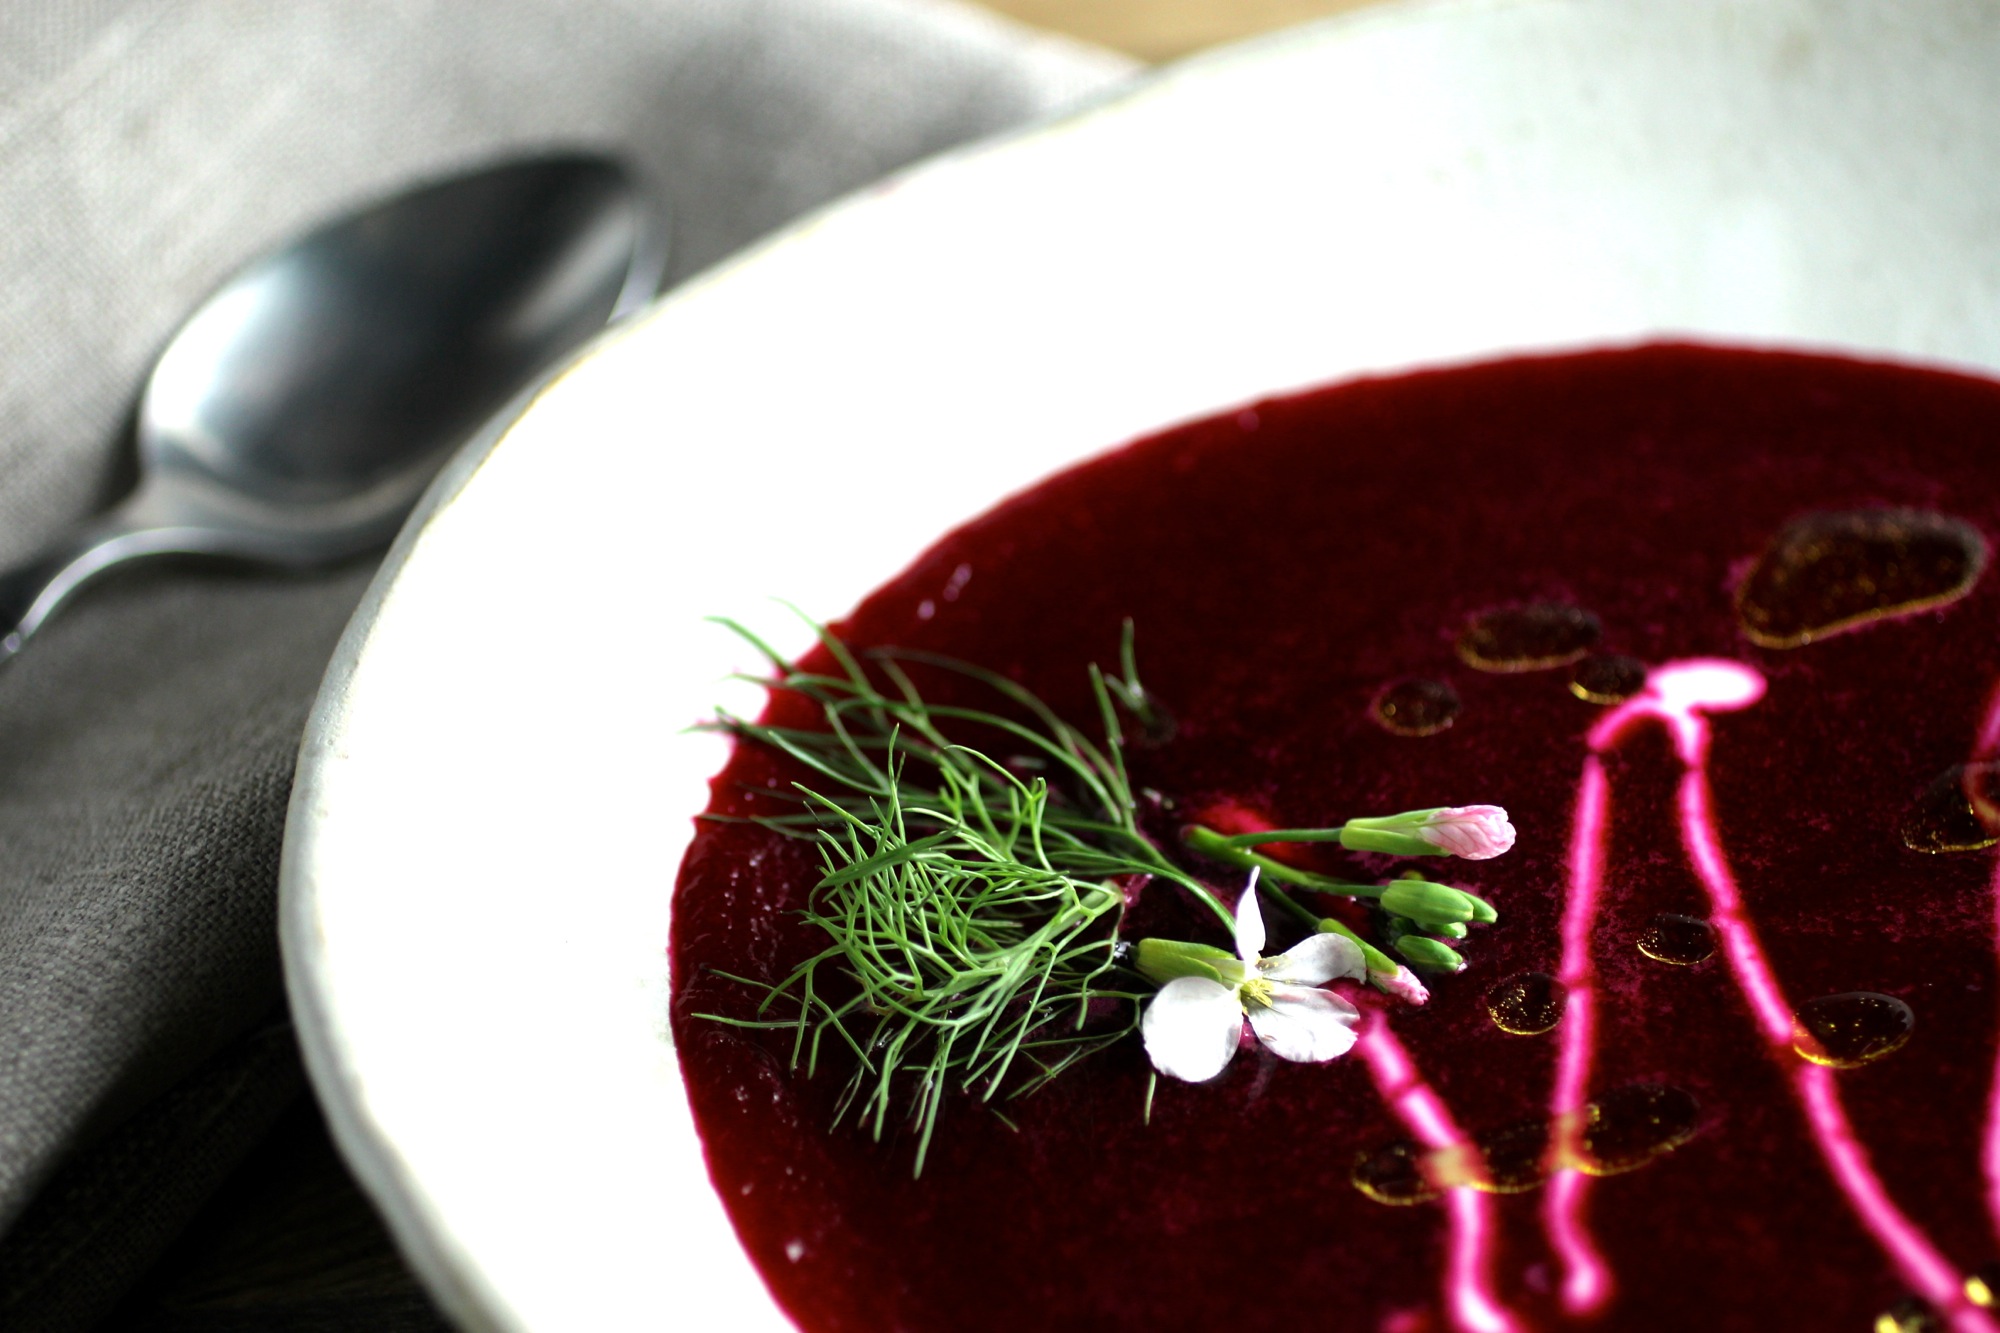
The dark red beetroot soup in this photo is complemented by radish flours, yogurt, and fennel fronds.
What better way to celebrate Earth Day than with the the beloved and ubiquitous beetroot soup of Eastern Europe? There are many ways to make borscht, from hot and hearty to cold and demure. Although hot borscht with chunks of beetroot and beef broth is comforting on a wintry day, this cold puréed version might be just what you're looking for as spring moves into summer and appetites are better pleased with brighter, lighter flavors. Serves 6-8.
“I’ve always been tempted to make borscht using golden beets, but as they tend to oxidize and turn black more easily, it always makes me nervous - if you ever do it, let me know! ”
1 pound red beets (about 3 medium), scrubbed cleaned
1 medium onion (about 1 cup), chopped
1.5-2.5 cups chicken broth (if not homemade, then low sodium)
About 1 teaspoon salt
Juice from 1/2 lemon
Freshly ground black pepper
1 cup yogurt or sour cream
Chopped dill or fennel fronds, for garnish
Radish flowers, for garnish (optional)
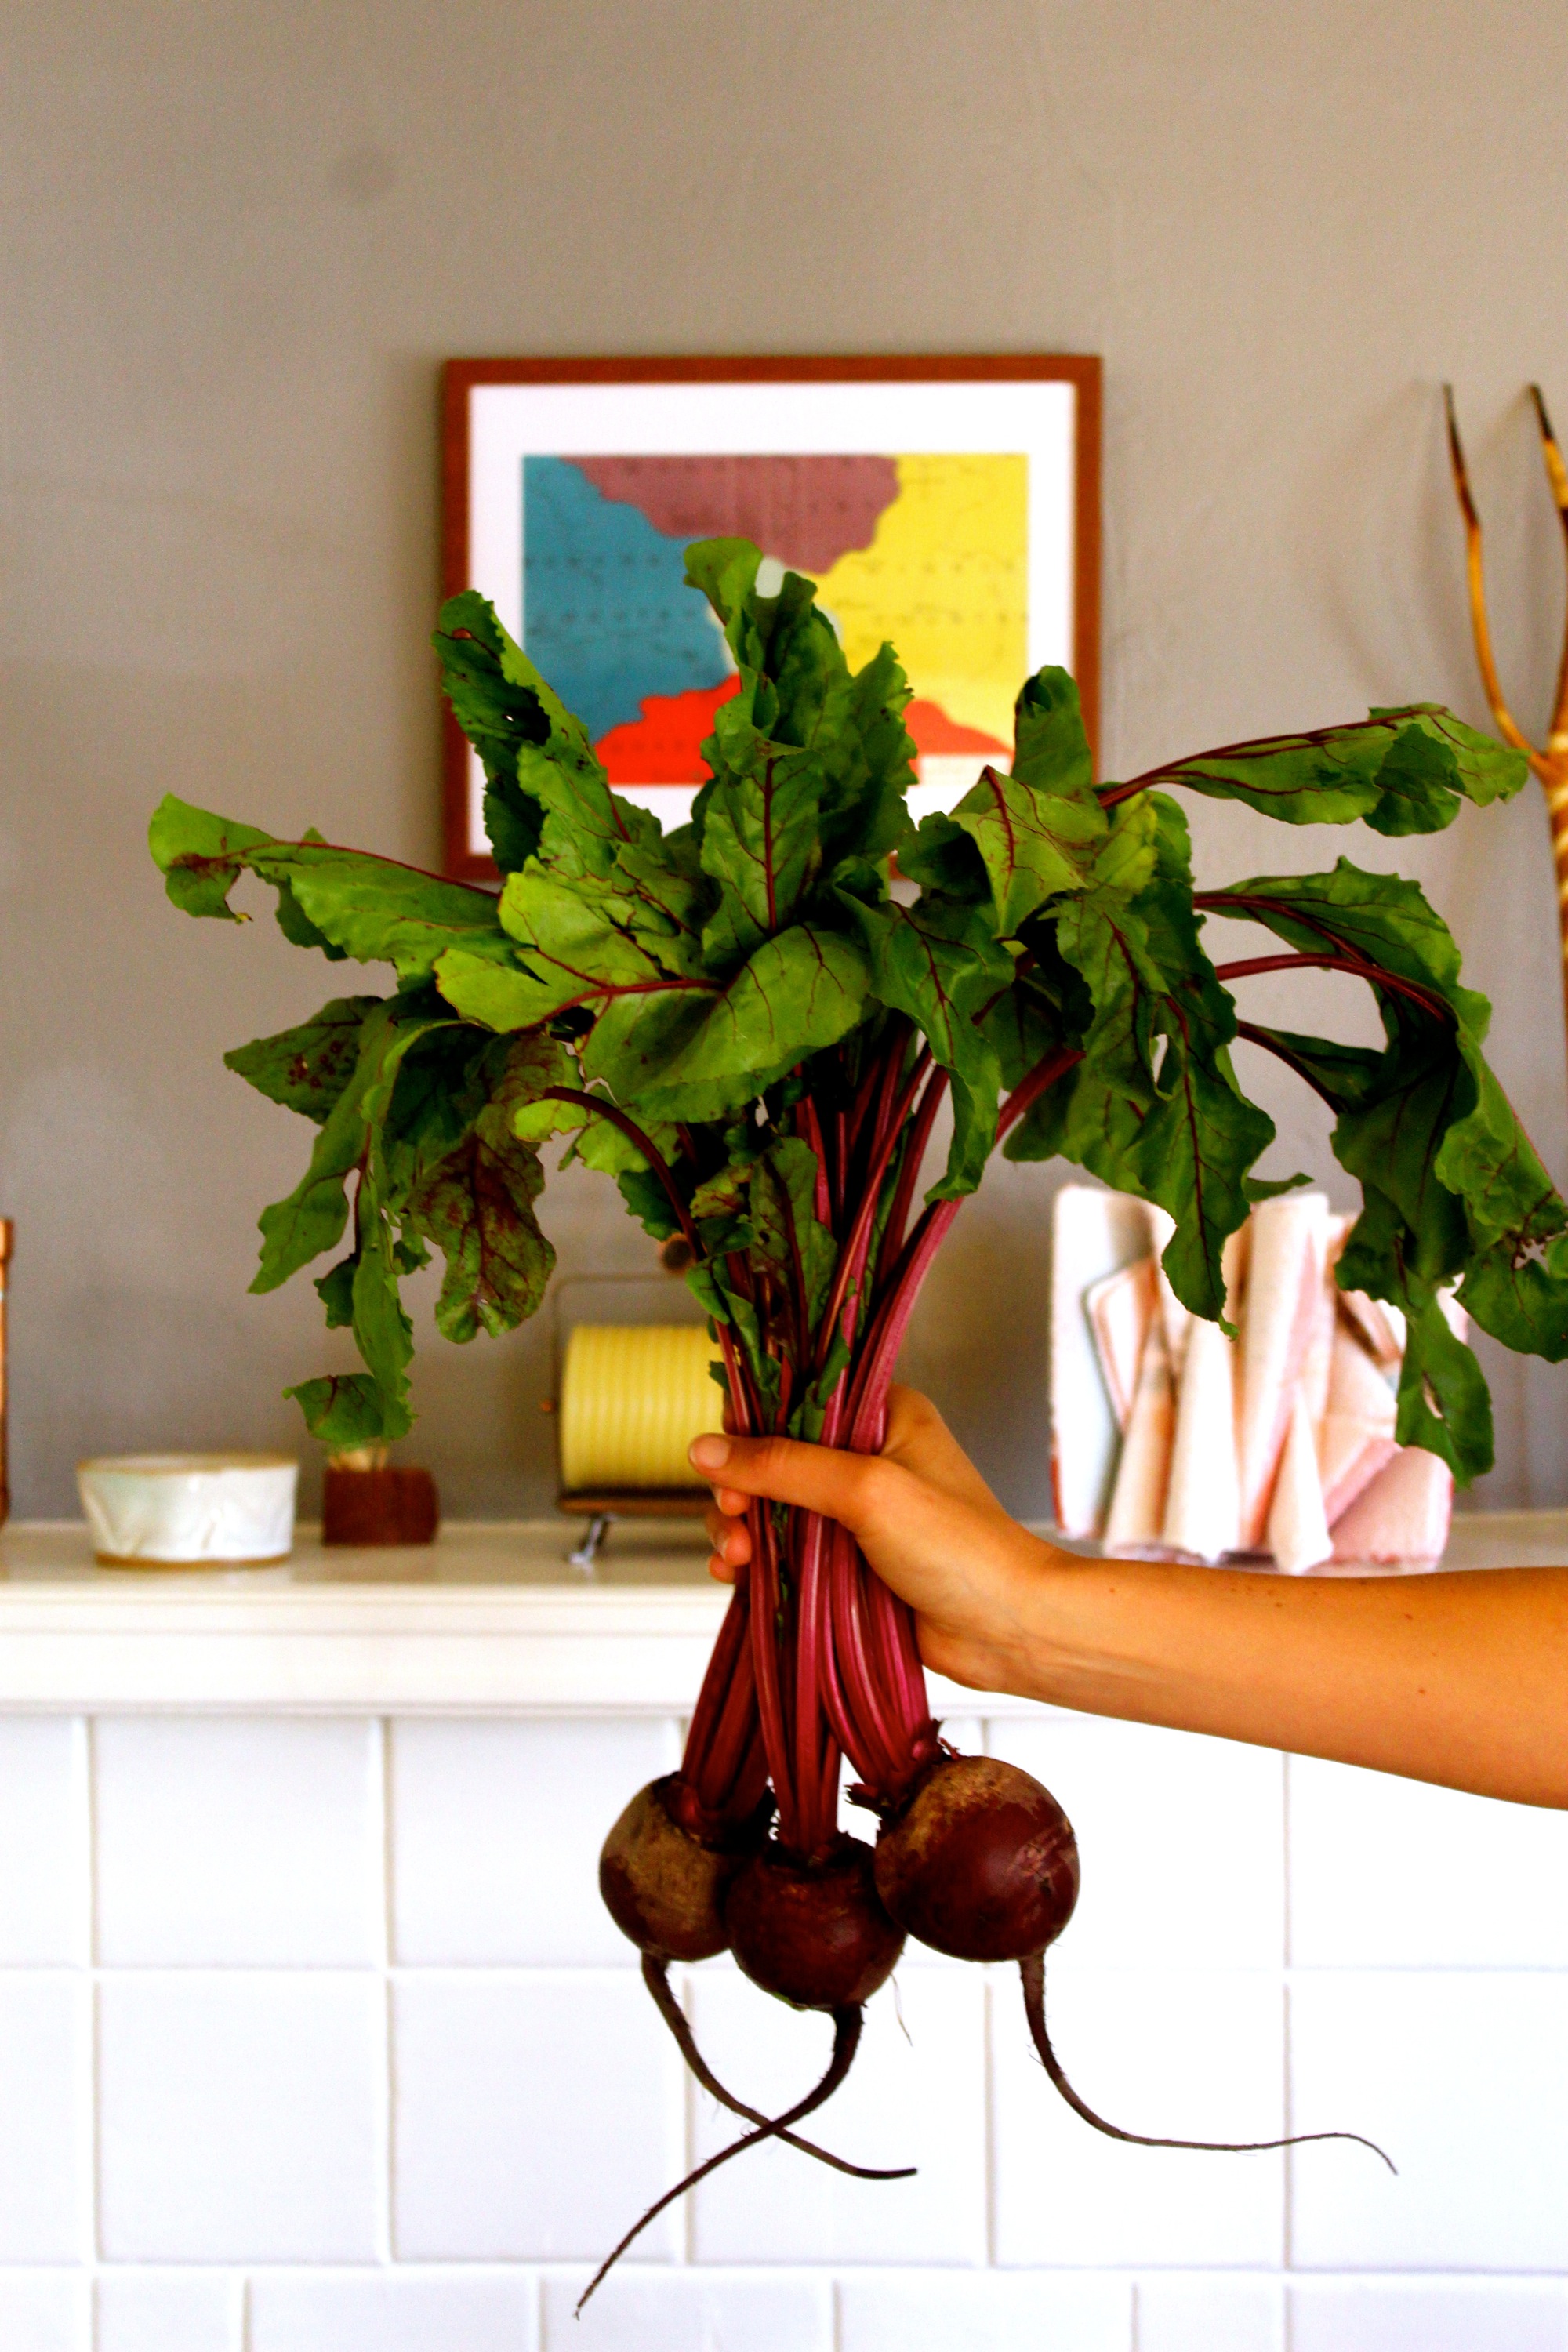
The beet moves on.
Steam beets in a medium-large pot over about 2 inches of simmering water (about 2.5 cups). Cook beets for 20 minutes, add onions to water simmering below beets, and continue cooking until beets are tender when pierced with a fork, about another 5 minutes. Turn off heat and let sit until beets are cool enough to touch.
Peel beets by sliding off skin under cold running water, dice, and add to the oniony water. Add 1.5 cups chicken broth and 1/2 teaspoon salt. Blend soup with an immersion blender until smooth, adding more broth and salt as needed. Blend in lemon juice once desired texture has been reached.
Allow soup to come to room temperature then chill for at least 2 hours or overnight. Serve with black pepper, a dollop of yogurt or sour cream, and fennel fronds.
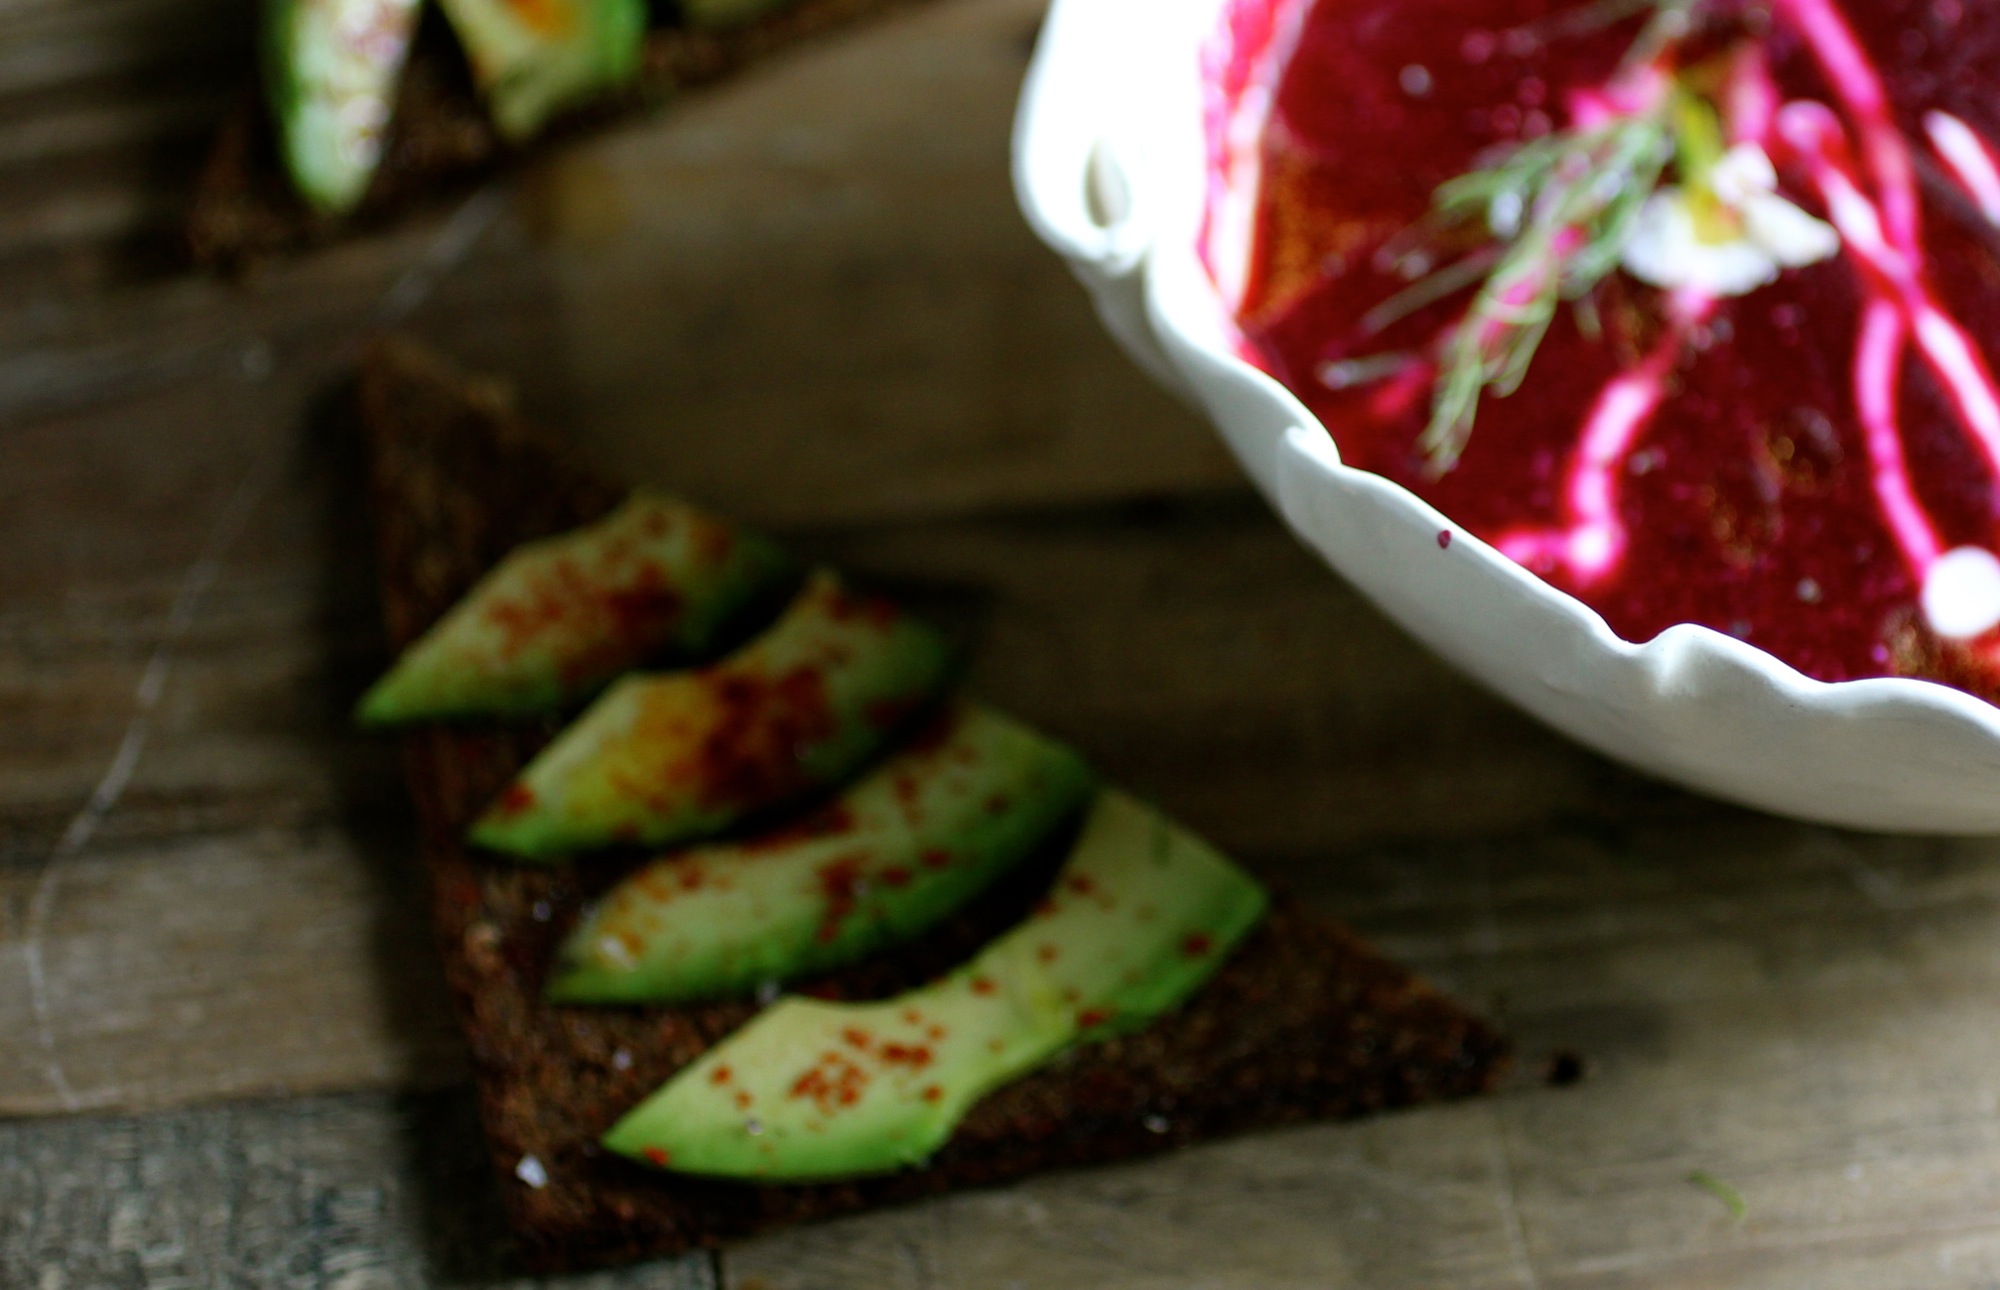
Borscht is great paired with avocado rye toast dusted with smoked paprika.

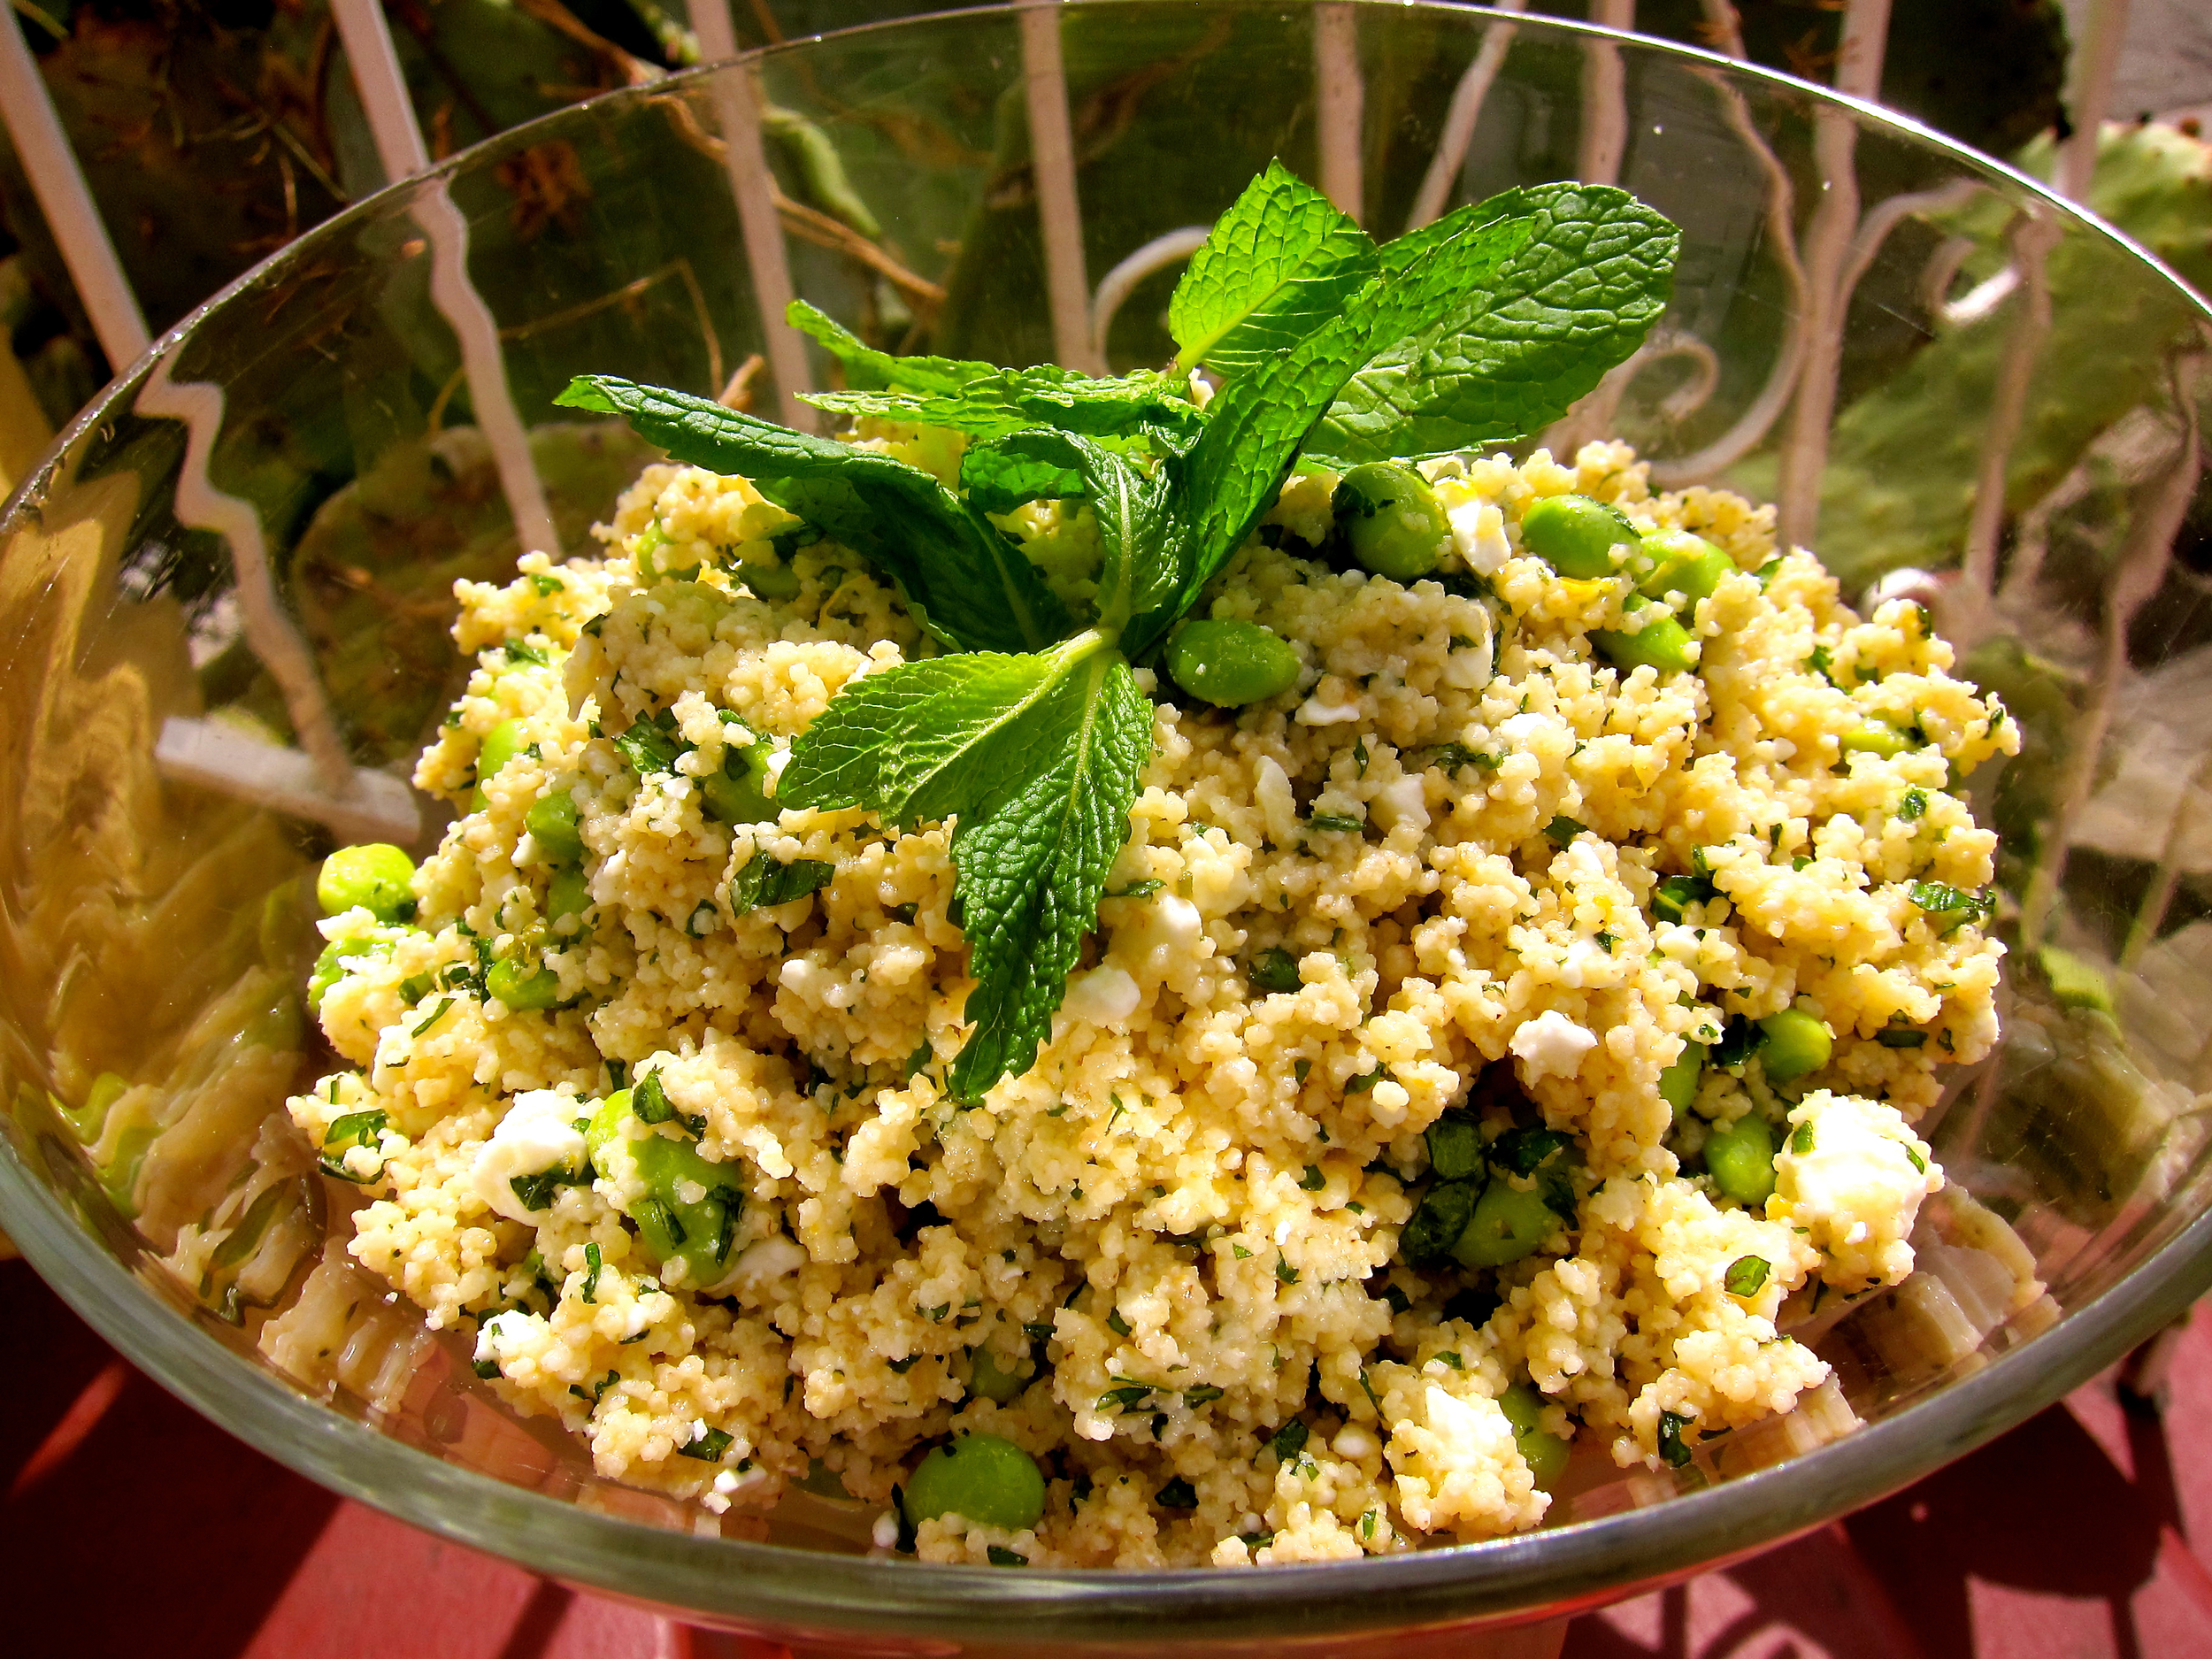
Couscous Salad with Edamame, Feta, and Mint

This bright salad will make sure you know that spring has sprung. It's very fast to prepare and ideal for picnic-type gatherings. You'll be surprised how many people ask you for the recipe!
1 cup dry whole wheat couscous
Juice of 2 medium lemons
1/4 cup olive oil
1/4 cup white wine or rice vinegar
1/2 teaspoon salt
2 tablespoons lemon zest (use lemons above)
2 cups (10 ounces) fresh or frozen shelled edamame beans
1/2 cup finely diced mint
3/4 cup crumbled feta cheese
Bring 1 cup of water to boil and then remove from heat. Stir in dry couscous and cover with a lid. Allow to sit for 7 minutes, then remove lid and fluff couscous with a fork.
Whisk together lemon juice, olive oil, vinegar, and salt. Remember to zest lemon first for the next step.
Once couscous has cooled to room temperature, toss in zest, edamame, mint, feta, and dressing.
Serve cold or at room temperature.

Spring Frittata with Asparagus, Leeks, and Chèvre
Spring sprung into a cast iron pan.

Celebrate spring by including asparagus and the bright flavors of goat cheese and tarragon in this elegant and satisfying meal. Frittata is a very easy way to whip up a stylish breakfast that’s also very durable and adaptable to a variety of dietary needs (well, apart from vegan that is, as eggs are necessary). This will solve your weekend brunch needs - don't worry, next weekend is just around the corner! Serves 6.
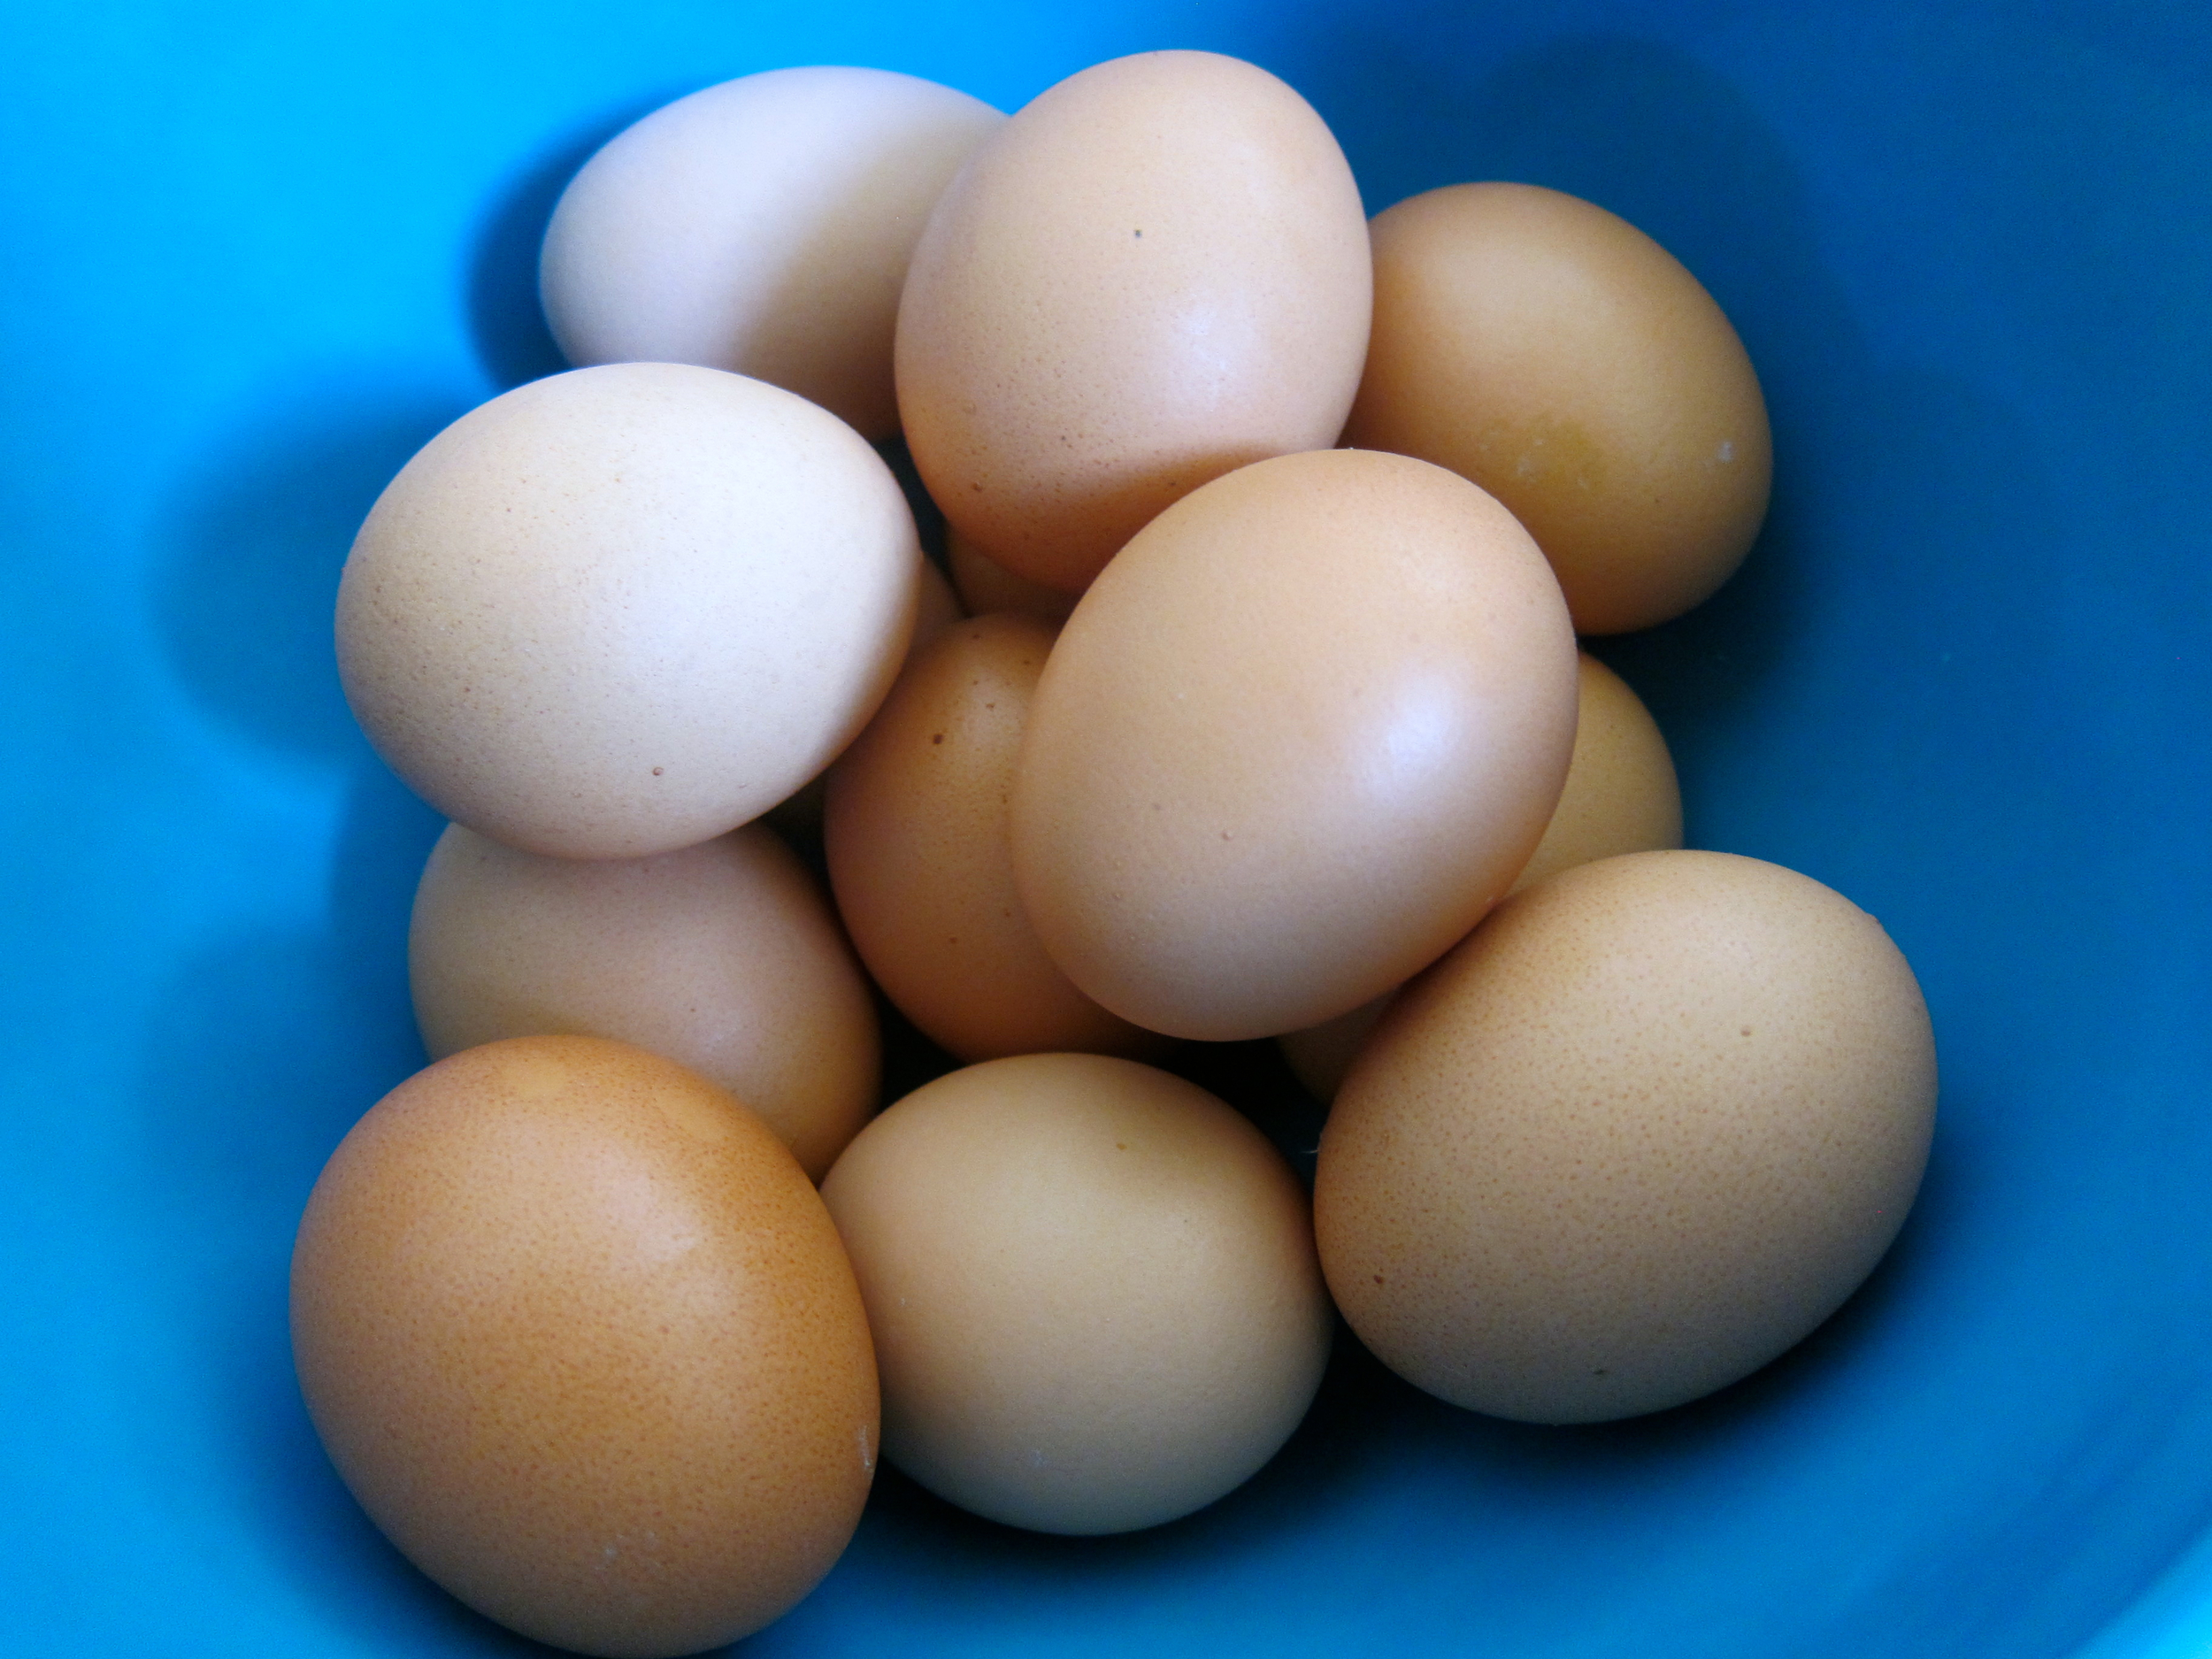
10 eggs
2 tablespoons fresh thyme leaves
1/2 teaspoon salt
1/4 teaspoon coarse ground black pepper
1 tablespoon unsalted butter
2 tablespoons olive oil
1 medium leek, trimmed and thinly sliced (use whites and greens)
16 asparagus spears, ends trimmed and chopped into 1.5-inch pieces
4-6 ounces chèvre (fresh goat cheese), crumbled
Preheat the broiler to high. Whisk eggs with thyme, salt, and pepper. Set aside.
Heat butter and oil in a large oven-proof pan over medium-high heat. Add leeks and cook, stirring occasionally, until softened, about 3 minutes. Mix in asparagus and continue to cook another 2-3 minutes until asparagus is slightly softened but still bright green.
Pour egg mixture over asparagus, stir once just to ensure even distribution of ingredients, and cook about 2 minutes, until almost set. Sprinkle with crumbled chèvre and broil frittata in the pan until golden brown, about 3-5 minutes (check and rotate if one side is cooking faster). Remove from oven and serve from pan or slide frittata onto a plate.
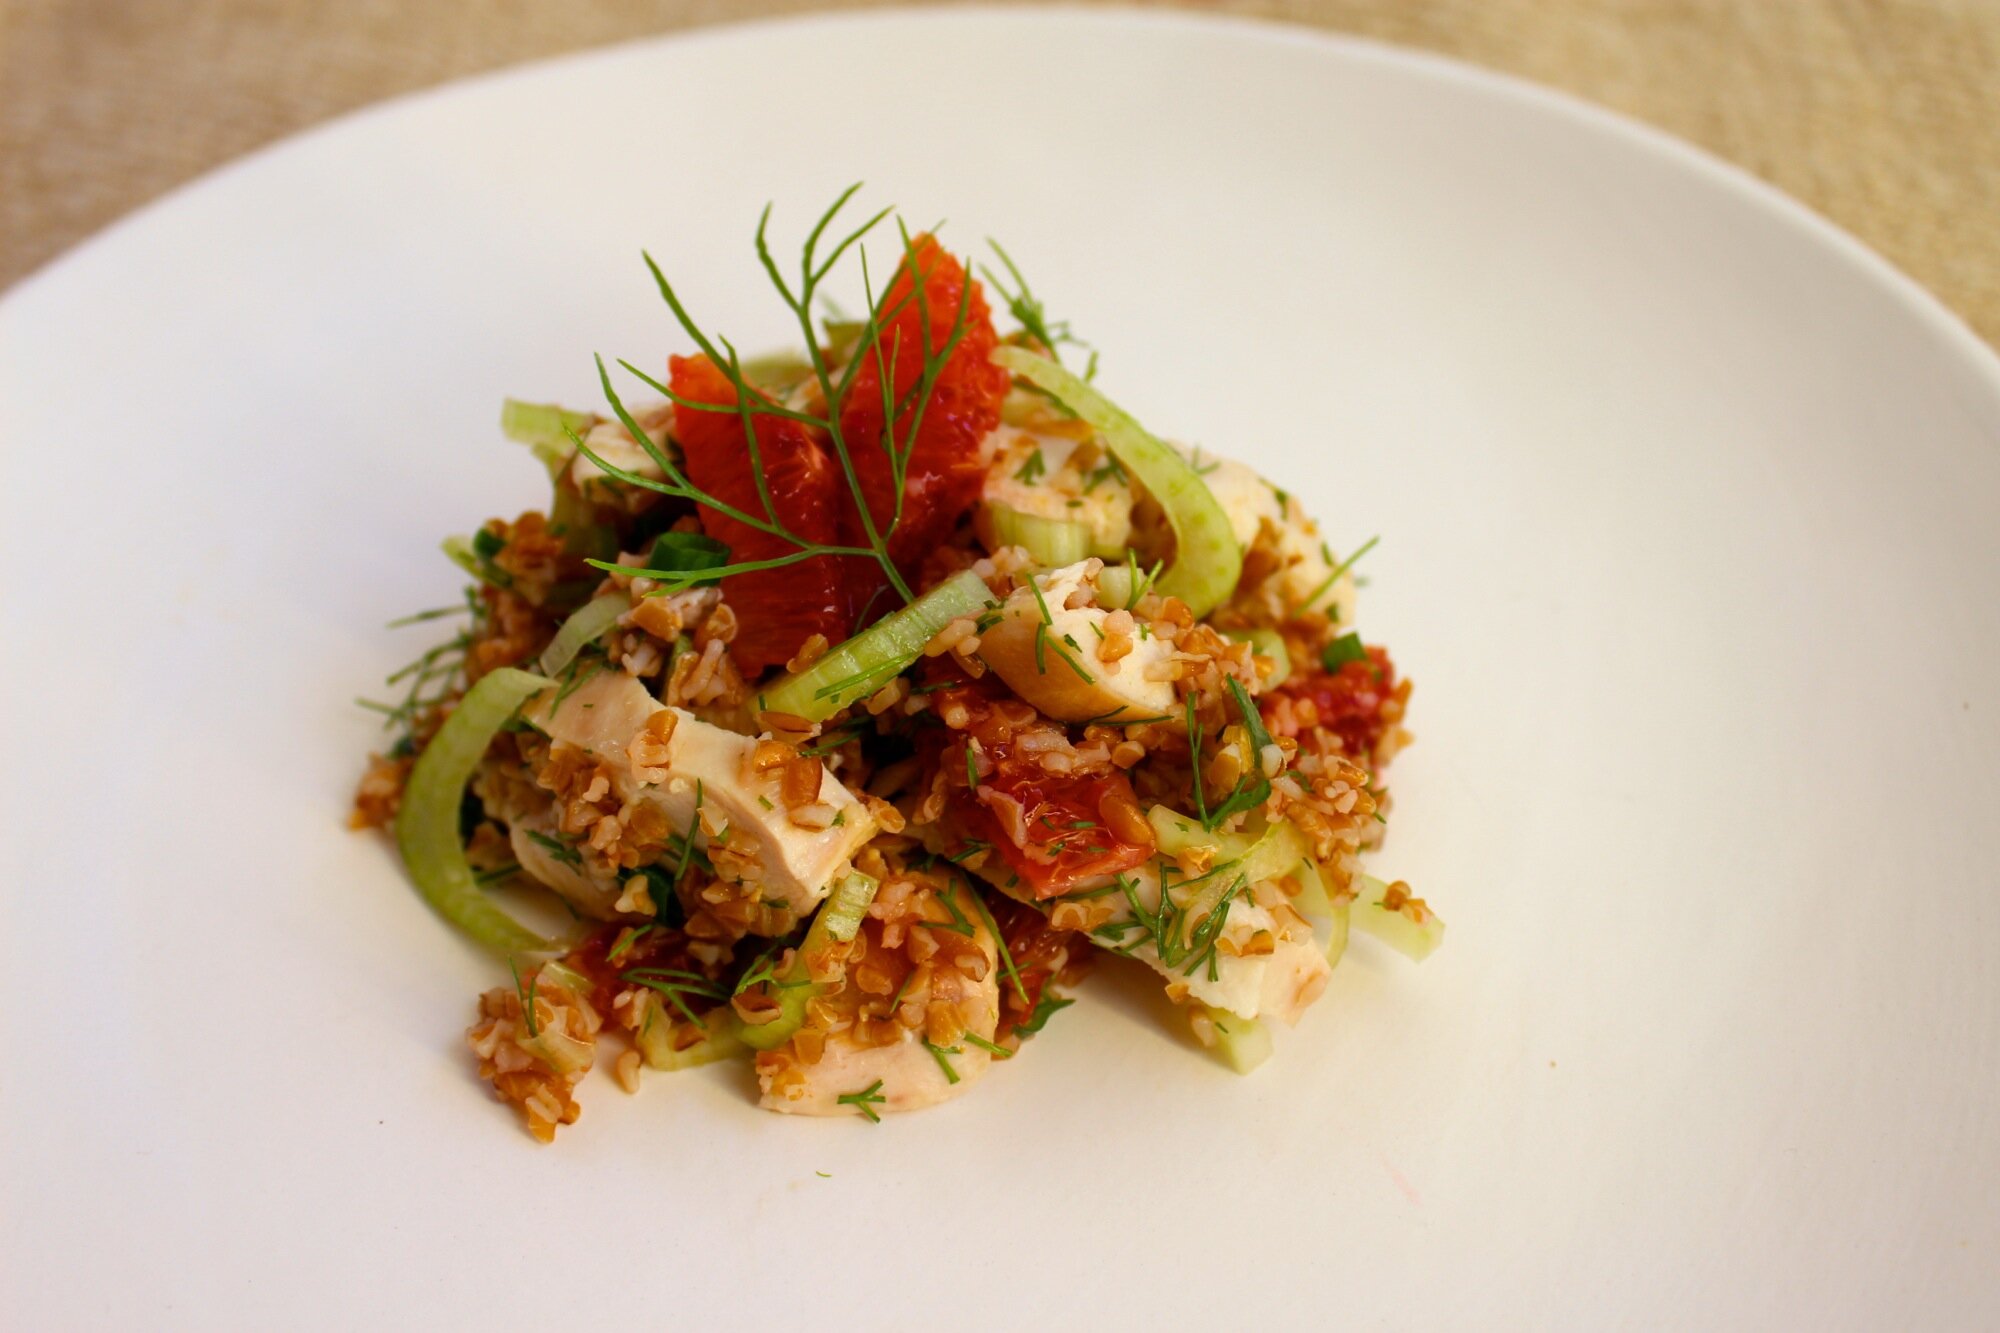
fennel, bulgur, & chicken salad with blood orange
A bright future for leftovers.

One of the most satisfying things to do in the kitchen is to reinvent leftovers and salads are a great way to do this as they allow for the addition of all kinds of bits and pieces. This recipe calls for chicken breast and provides cooking instructions, but there's no reason you couldn't chop up some leftover roast chicken, now is there? Along the same vein - no grapefruit? No problem - try oranges or even apples! Out of bulgur, but have some quinoa? Sounds great! Really - the possibilities are endless, but I really do enjoy this combination of the sweetly herbal, crunchy fennel and the juicy, rich blood orange paired with chicken and bulgur. Fantastic for lunches or picnics. Serves 4 as a main.
1 cup dry bulgur
Two 6-ounce boneless chicken breasts (preferably skinless)
2 tablespoons grapeseed oil, divided
1/8 teaspoon sea salt, divided
3 medium blood oranges
Juice from 1 lemon
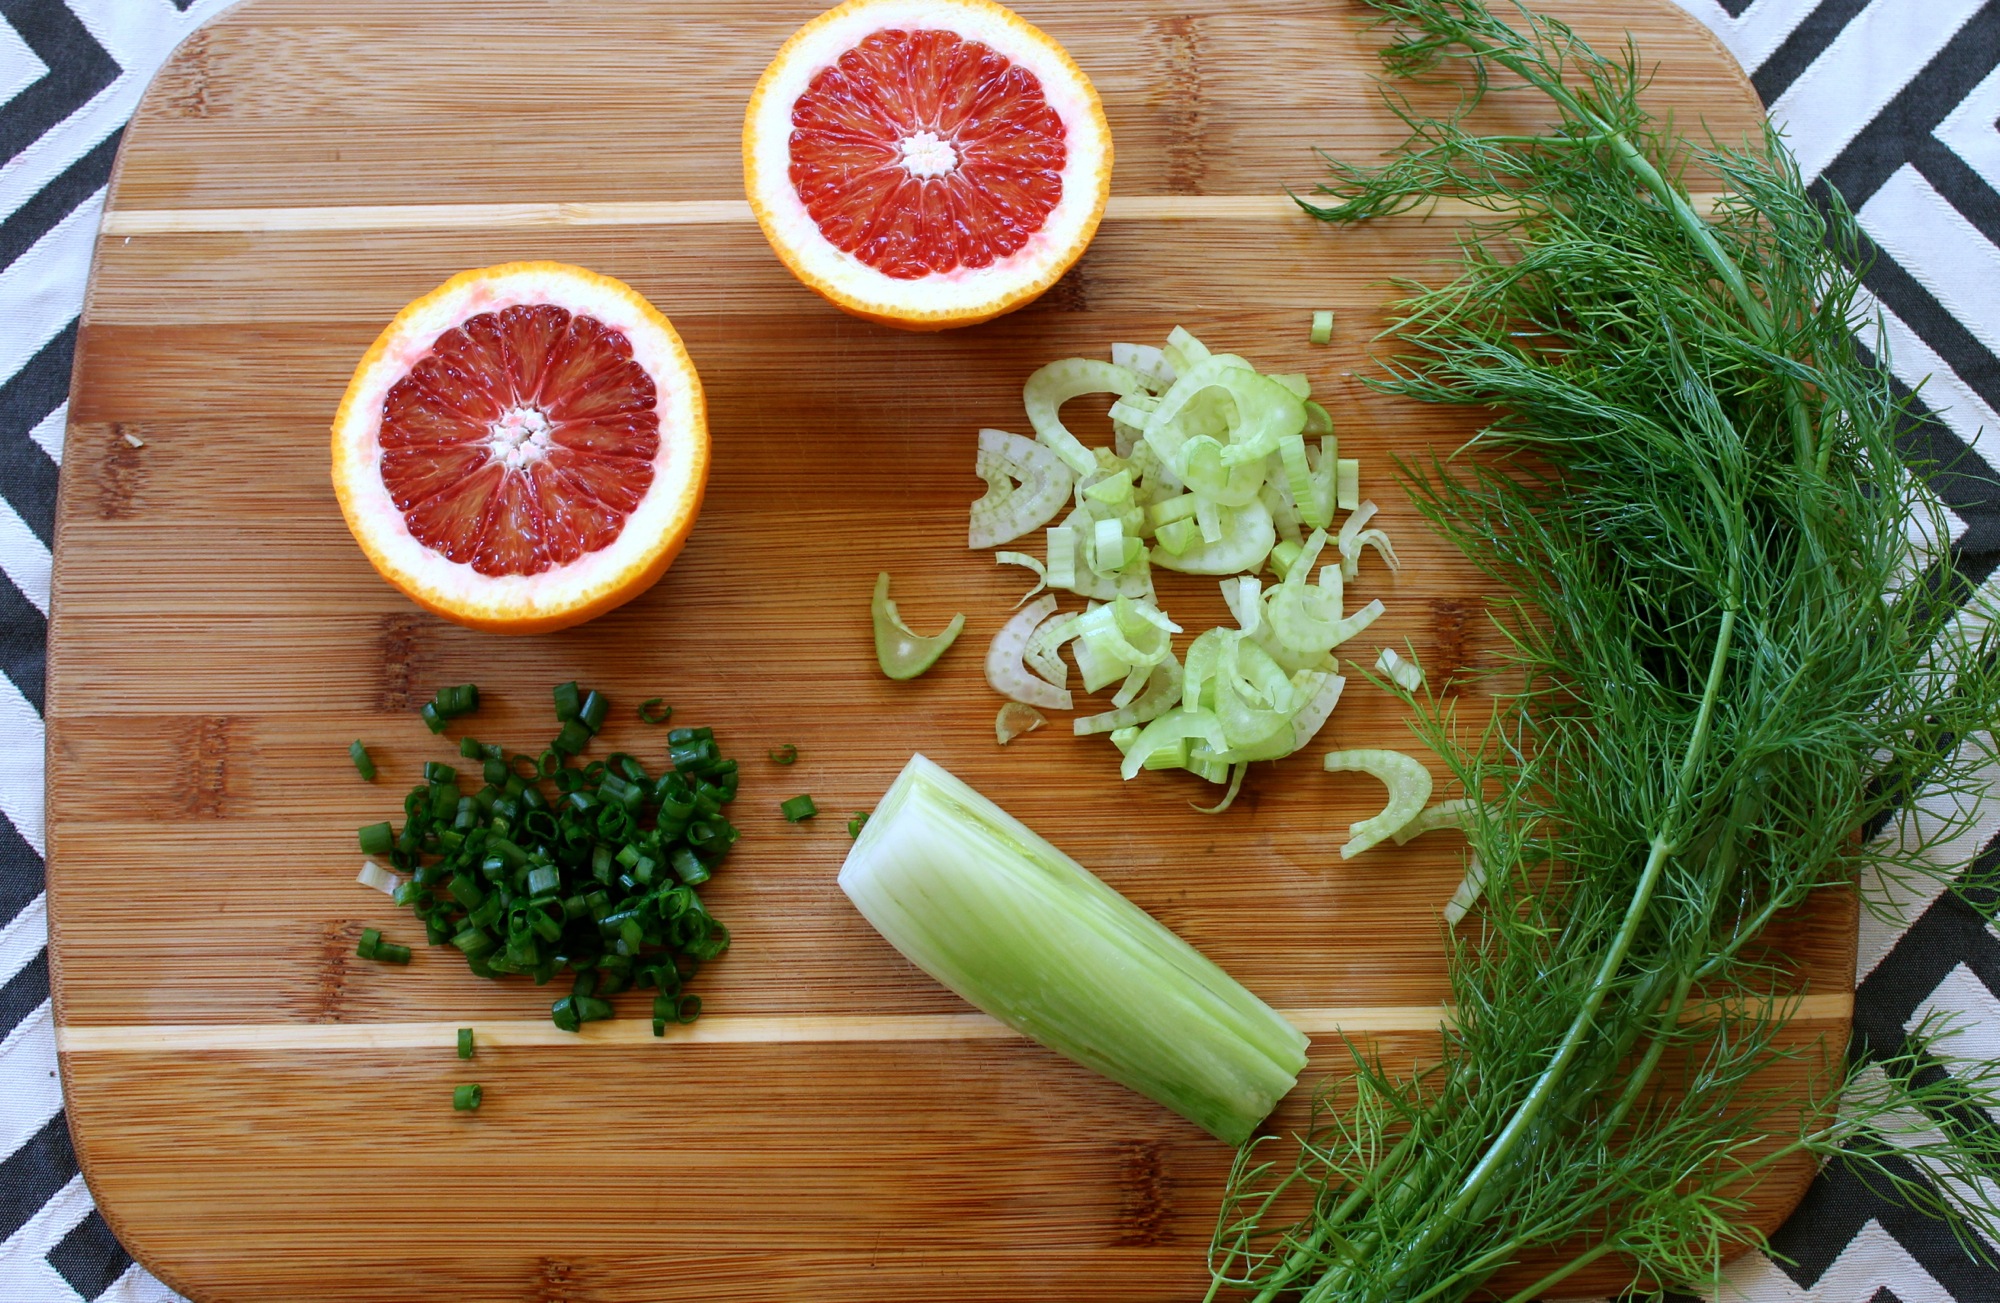
1 large fennel bulb, with fronds (try wild fennel stalks and fronds!)
1/4 cup diced fresh green onion
Salad greens (optional)
Preheat the oven to 500 degrees F.
In a saucepan, combine bulgur with 1 cup water and bring to a boil. Cover, reduce heat, and simmer for 10-12 minutes, or until tender. Set aside to cool.
Meanwhile, coat the chicken breasts with 1/2 tablespoon of grapeseed oil and sprinkle with about half of the salt. Lay the chicken on a baking sheet and bake on the top oven rack for 15 minutes or until cooked through - flip the chicken halfway through cooking time. Allow to cool and then slice into 1/4-inch thick strips.
Cut oranges in half. Squeeze the juice from one of the halves into a small bowl or jar. Add the remaining grapeseed oil, salt, tablespoon of olive oil, and lemon juice to the blood orange juice. Whisk or cover jar and shake until thoroughly combined.
With a knife, remove the peel and outside pith of the remaining 5 orange halves. Slice into wedges. It's helpful to know how to segment citrus like a boss.
Remove the fronds from the fennel bulb and thinly slice the bulb. Chop several of the fronds, enough to fill 1/2 cup.
Toss bulgur with dressing, chicken, orange wedges, fennel bulb, fennel fronds, and green onion. Serve at room temperature or cold atop salad greens (if desired).

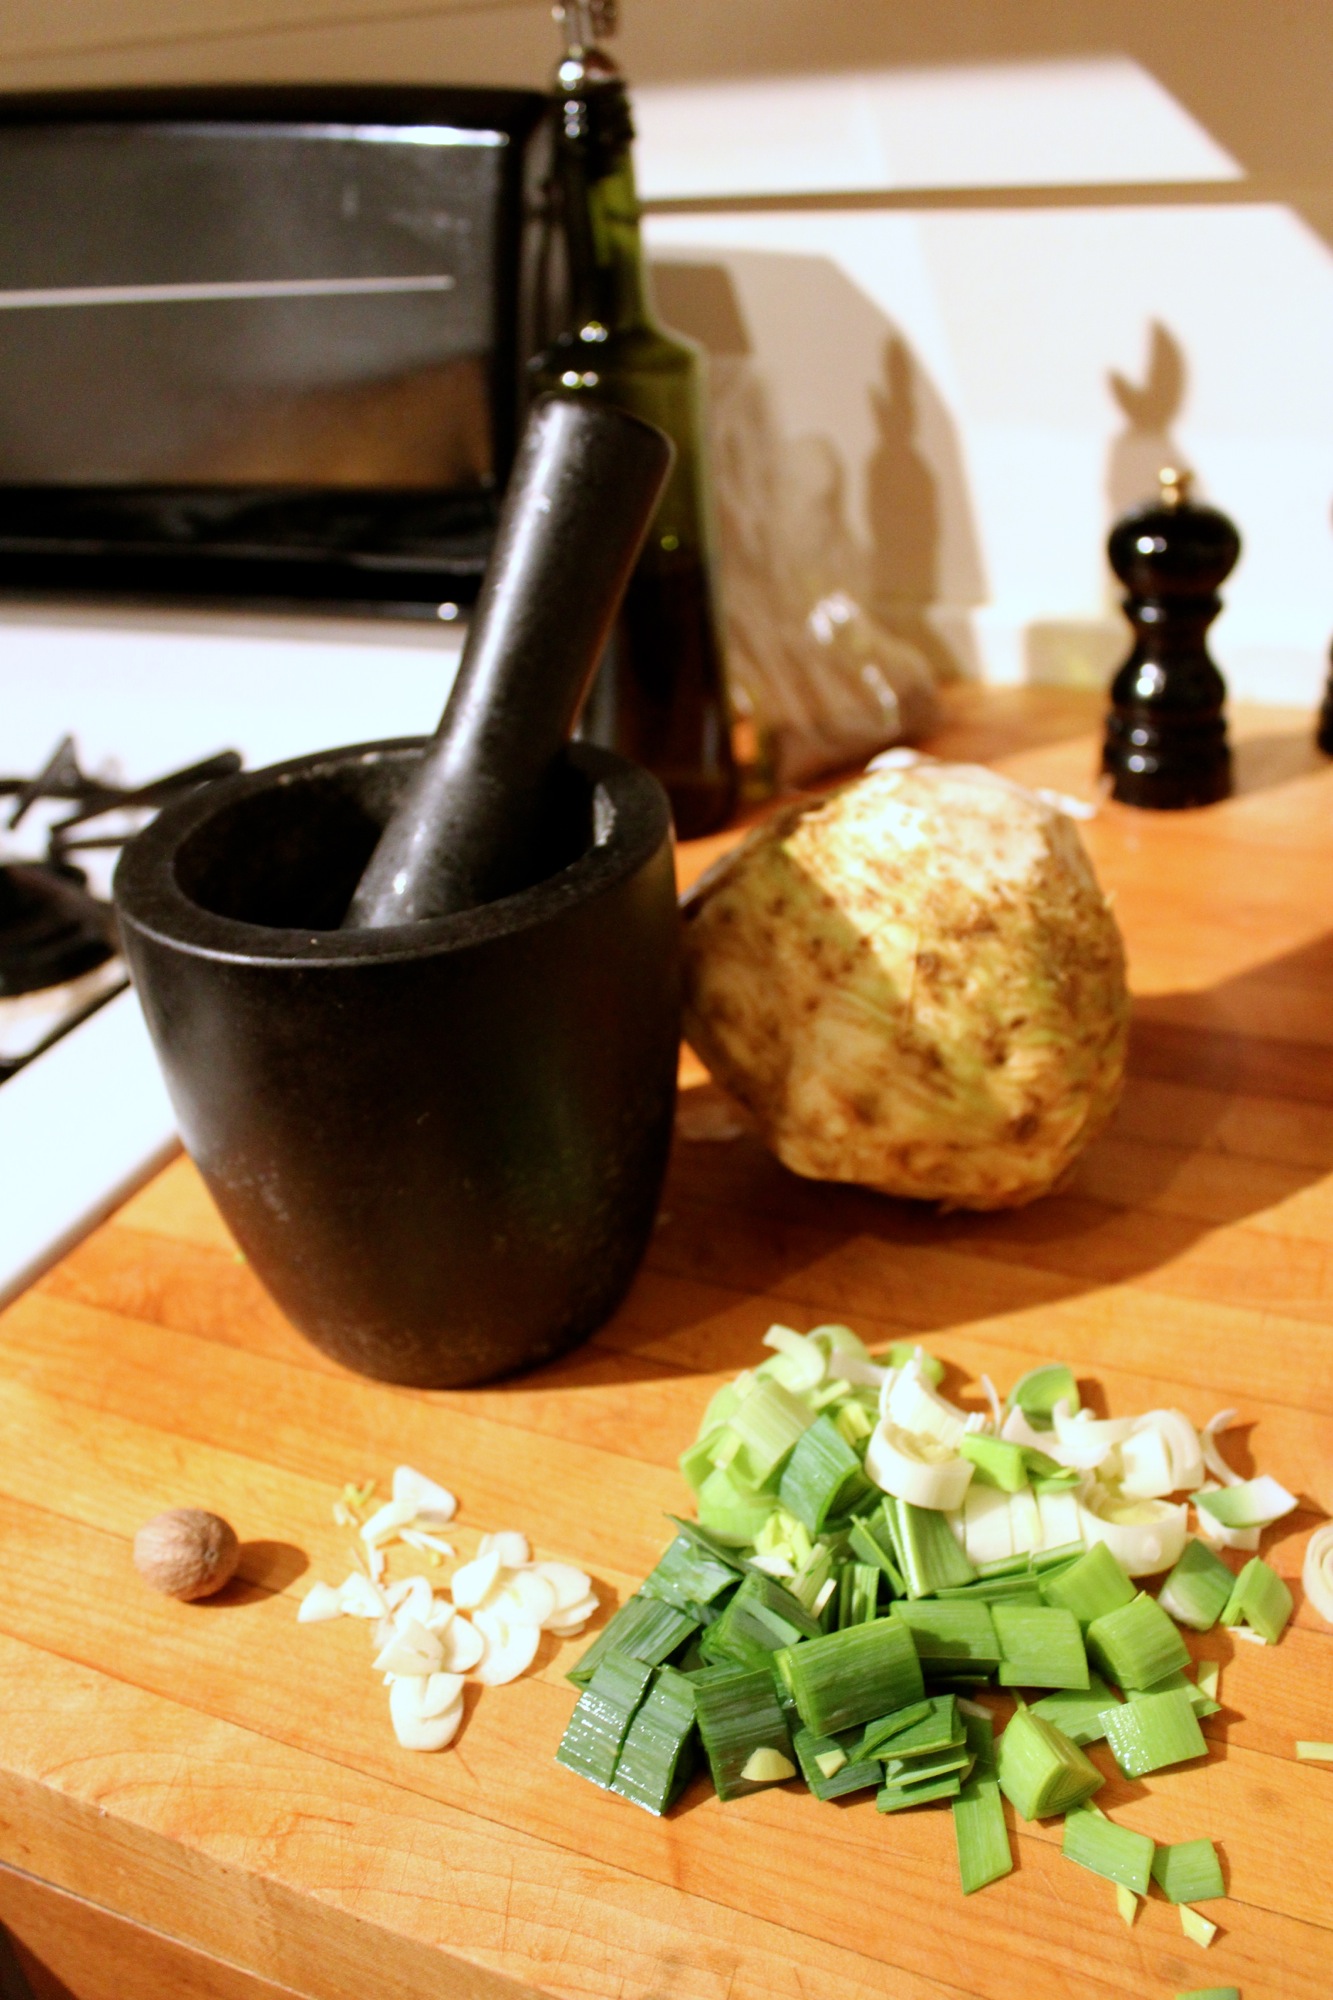
Celeriac Soup with Truffle Oil and Chives
Get gnarly.

As was demonstrated with celeriac chips, celery root can produce foods you would not expect from it's rugged exterior. Instead of a delicately crispy chip, this time celeriac is transformed into a silky, rich, and elegant soup. There are a lot of directions you can take a blended root vegetable soup, such as the addition of bacon or blending with apples, but I think this combination of nutmeg, chive, and truffle oil is ethereal and satisfying. Serves 4.
1 tablespoon butter (can substitute olive oil if a vegan soup is desired)
1 tablespoon olive oil
1 large leek, trimmed of rugged dark green leaves and thinly sliced
1/4 teaspon sea salt, plus more to season as needed
1-2 garlic cloves, peeled and thinly sliced
One large celery root (about 1.5-pounds), peeled and chopped into cubes
2 cups chicken stock (can substitute water or vegetable stock if a vegan soup is desired)
2-3 cups water
1.5 teaspoons freshly-ground white pepper
Fresh nutmeg, to grind over top
Truffle oil, to drizzle
About 2 tablespoons diced fresh chives (a little less than most bunches)
In a large pot, melt butter with olive oil on medium low heat.
Add the leeks and garlic and cook for about five minutes, stirring frequently. Add the salt and continue to cook until the leeks and garlic are soft and translucent, about another 5 minutes. If the pot begins to brown too much on the bottom as they cook, add more butter or olive oil.
Add the celery root, stock, and 2 cups water. Bring to a boil, then reduce to a strong simmer. Cook, with the lid to the pot ajar on top, until the celery root pieces are soft and easily pierced with a paring knife, about 30-45 minutes.
Add white pepper then purée using an immersion blender, or let the soup cool to room temperature and purée in a food processor until smooth. Taste season with additional salt and pepper if desired. If the soup is too thick, it can be thinned with remaining part of cup of water to desired consistency.
Serve with a drizzle of truffle oil, a few gratings of nutmeg, and a scatter of chives.
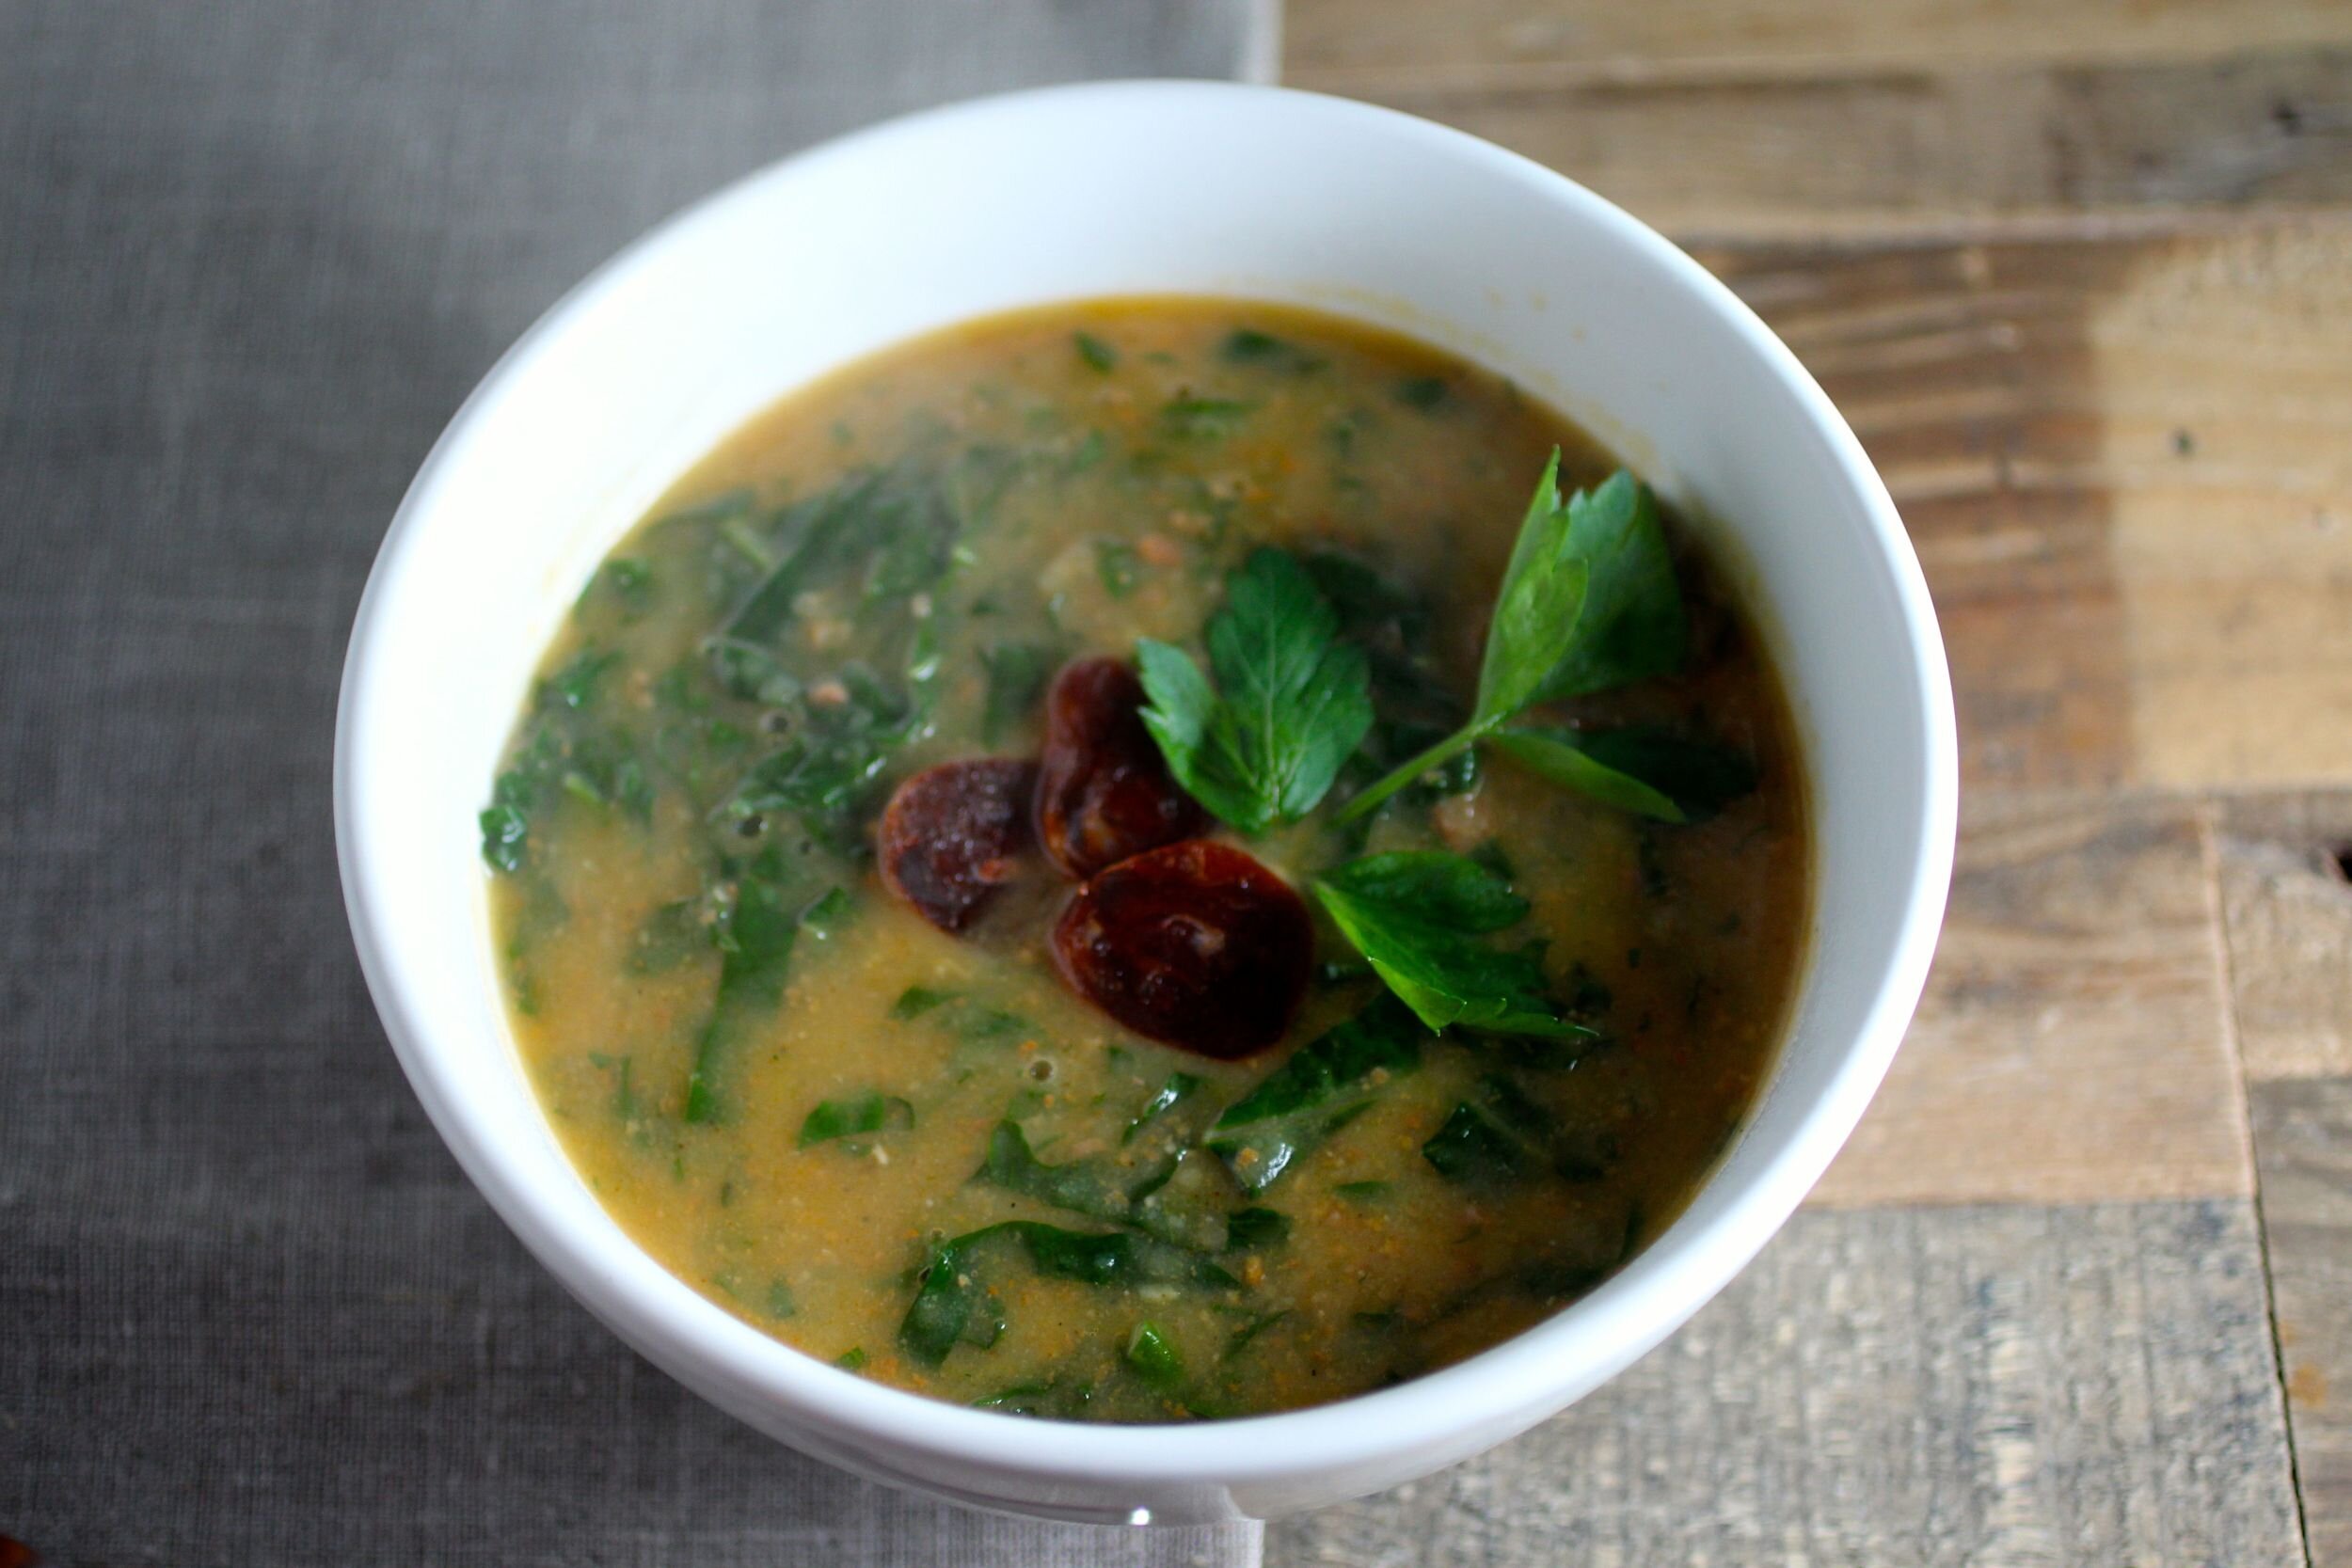
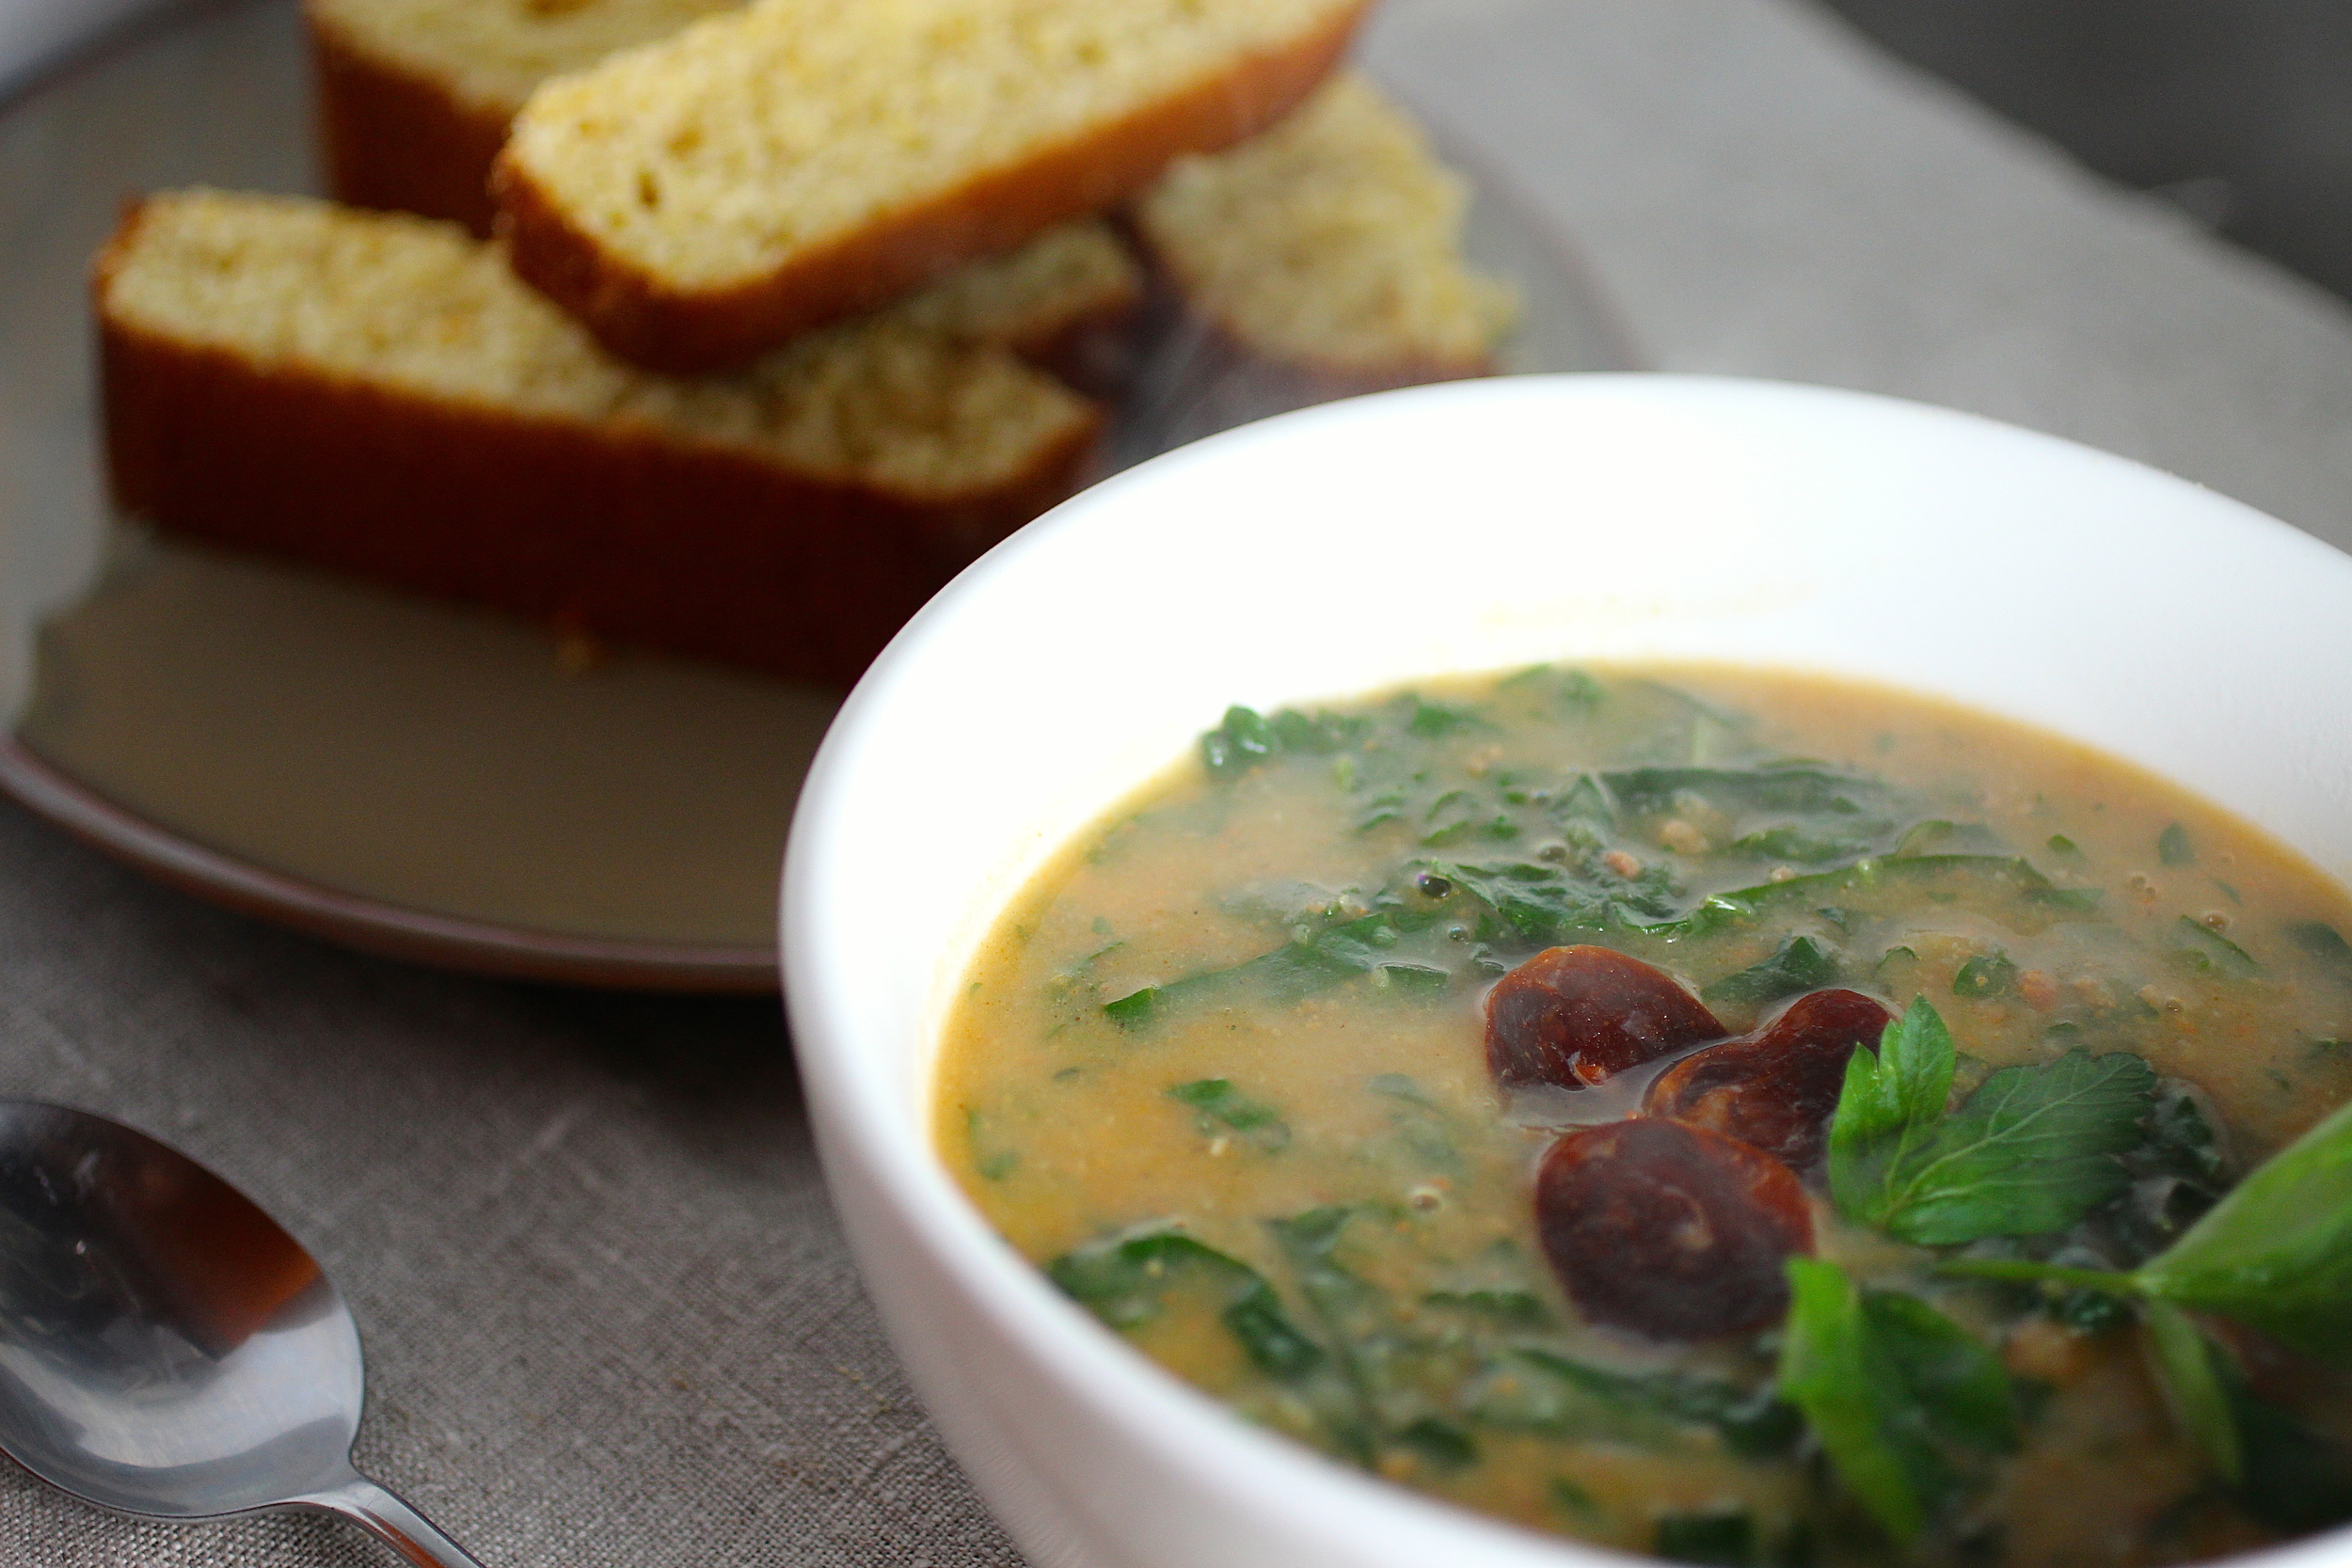
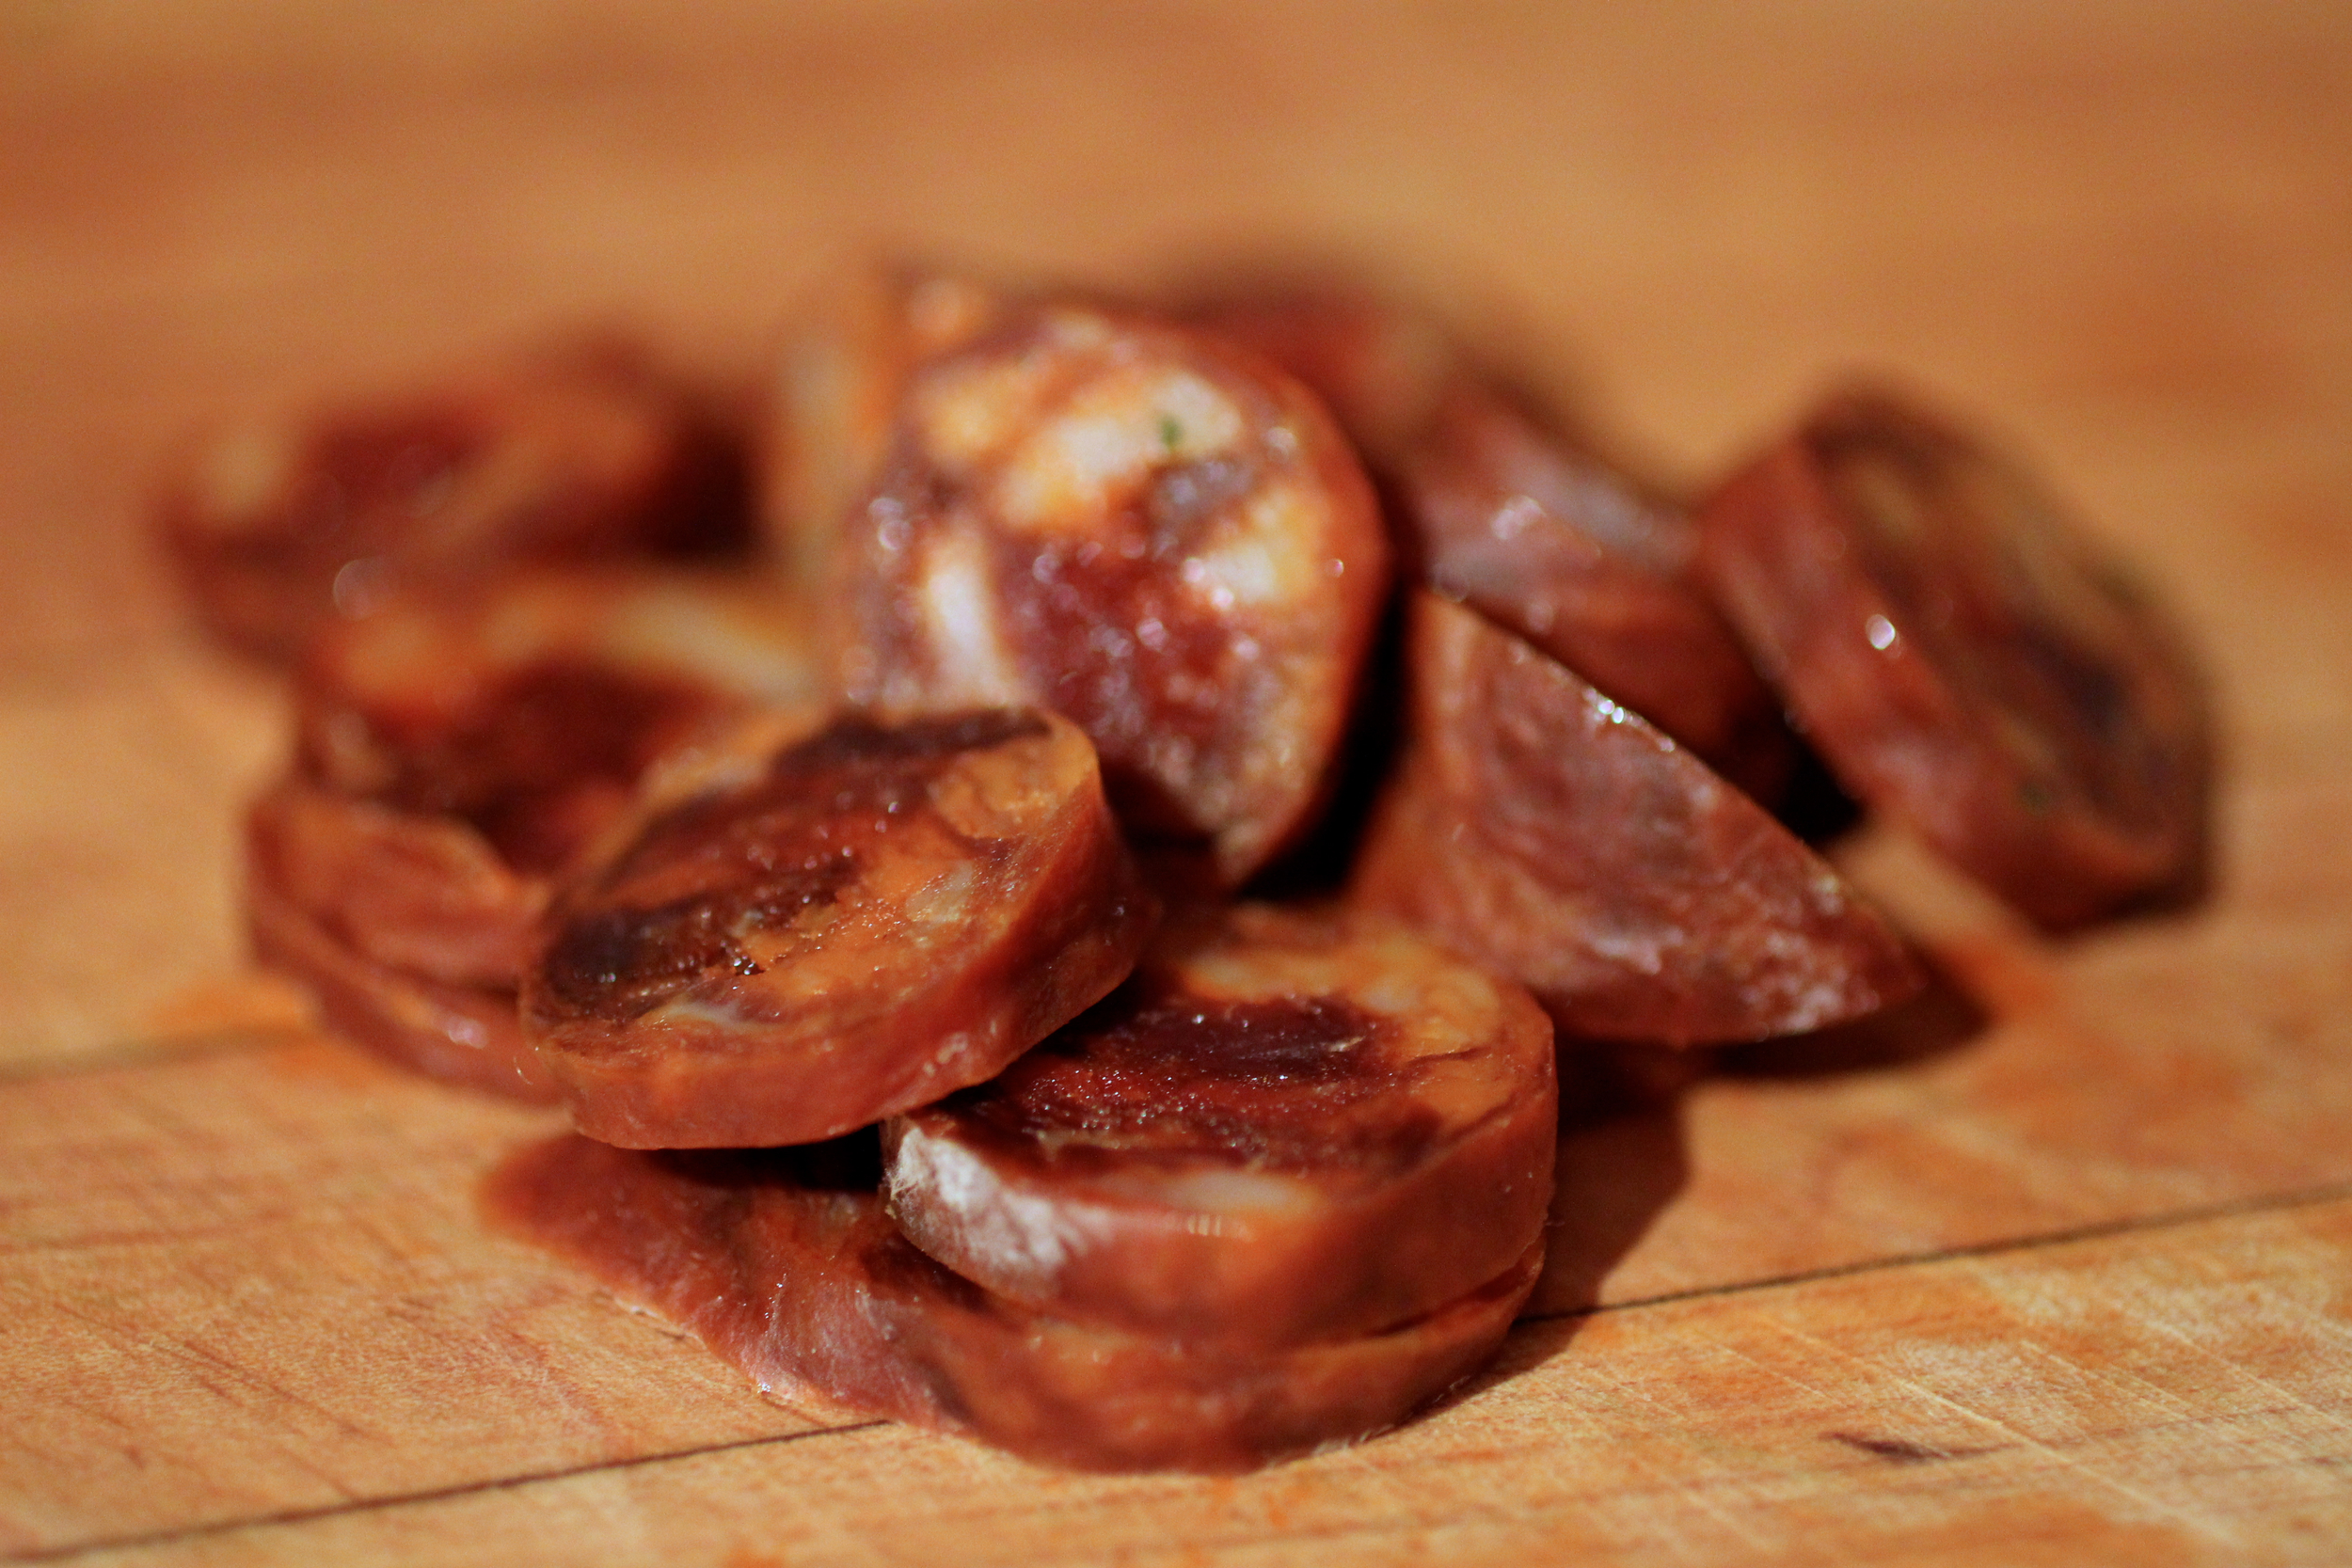
Caldo Verde Verde
An even greener spin on an already green soup.

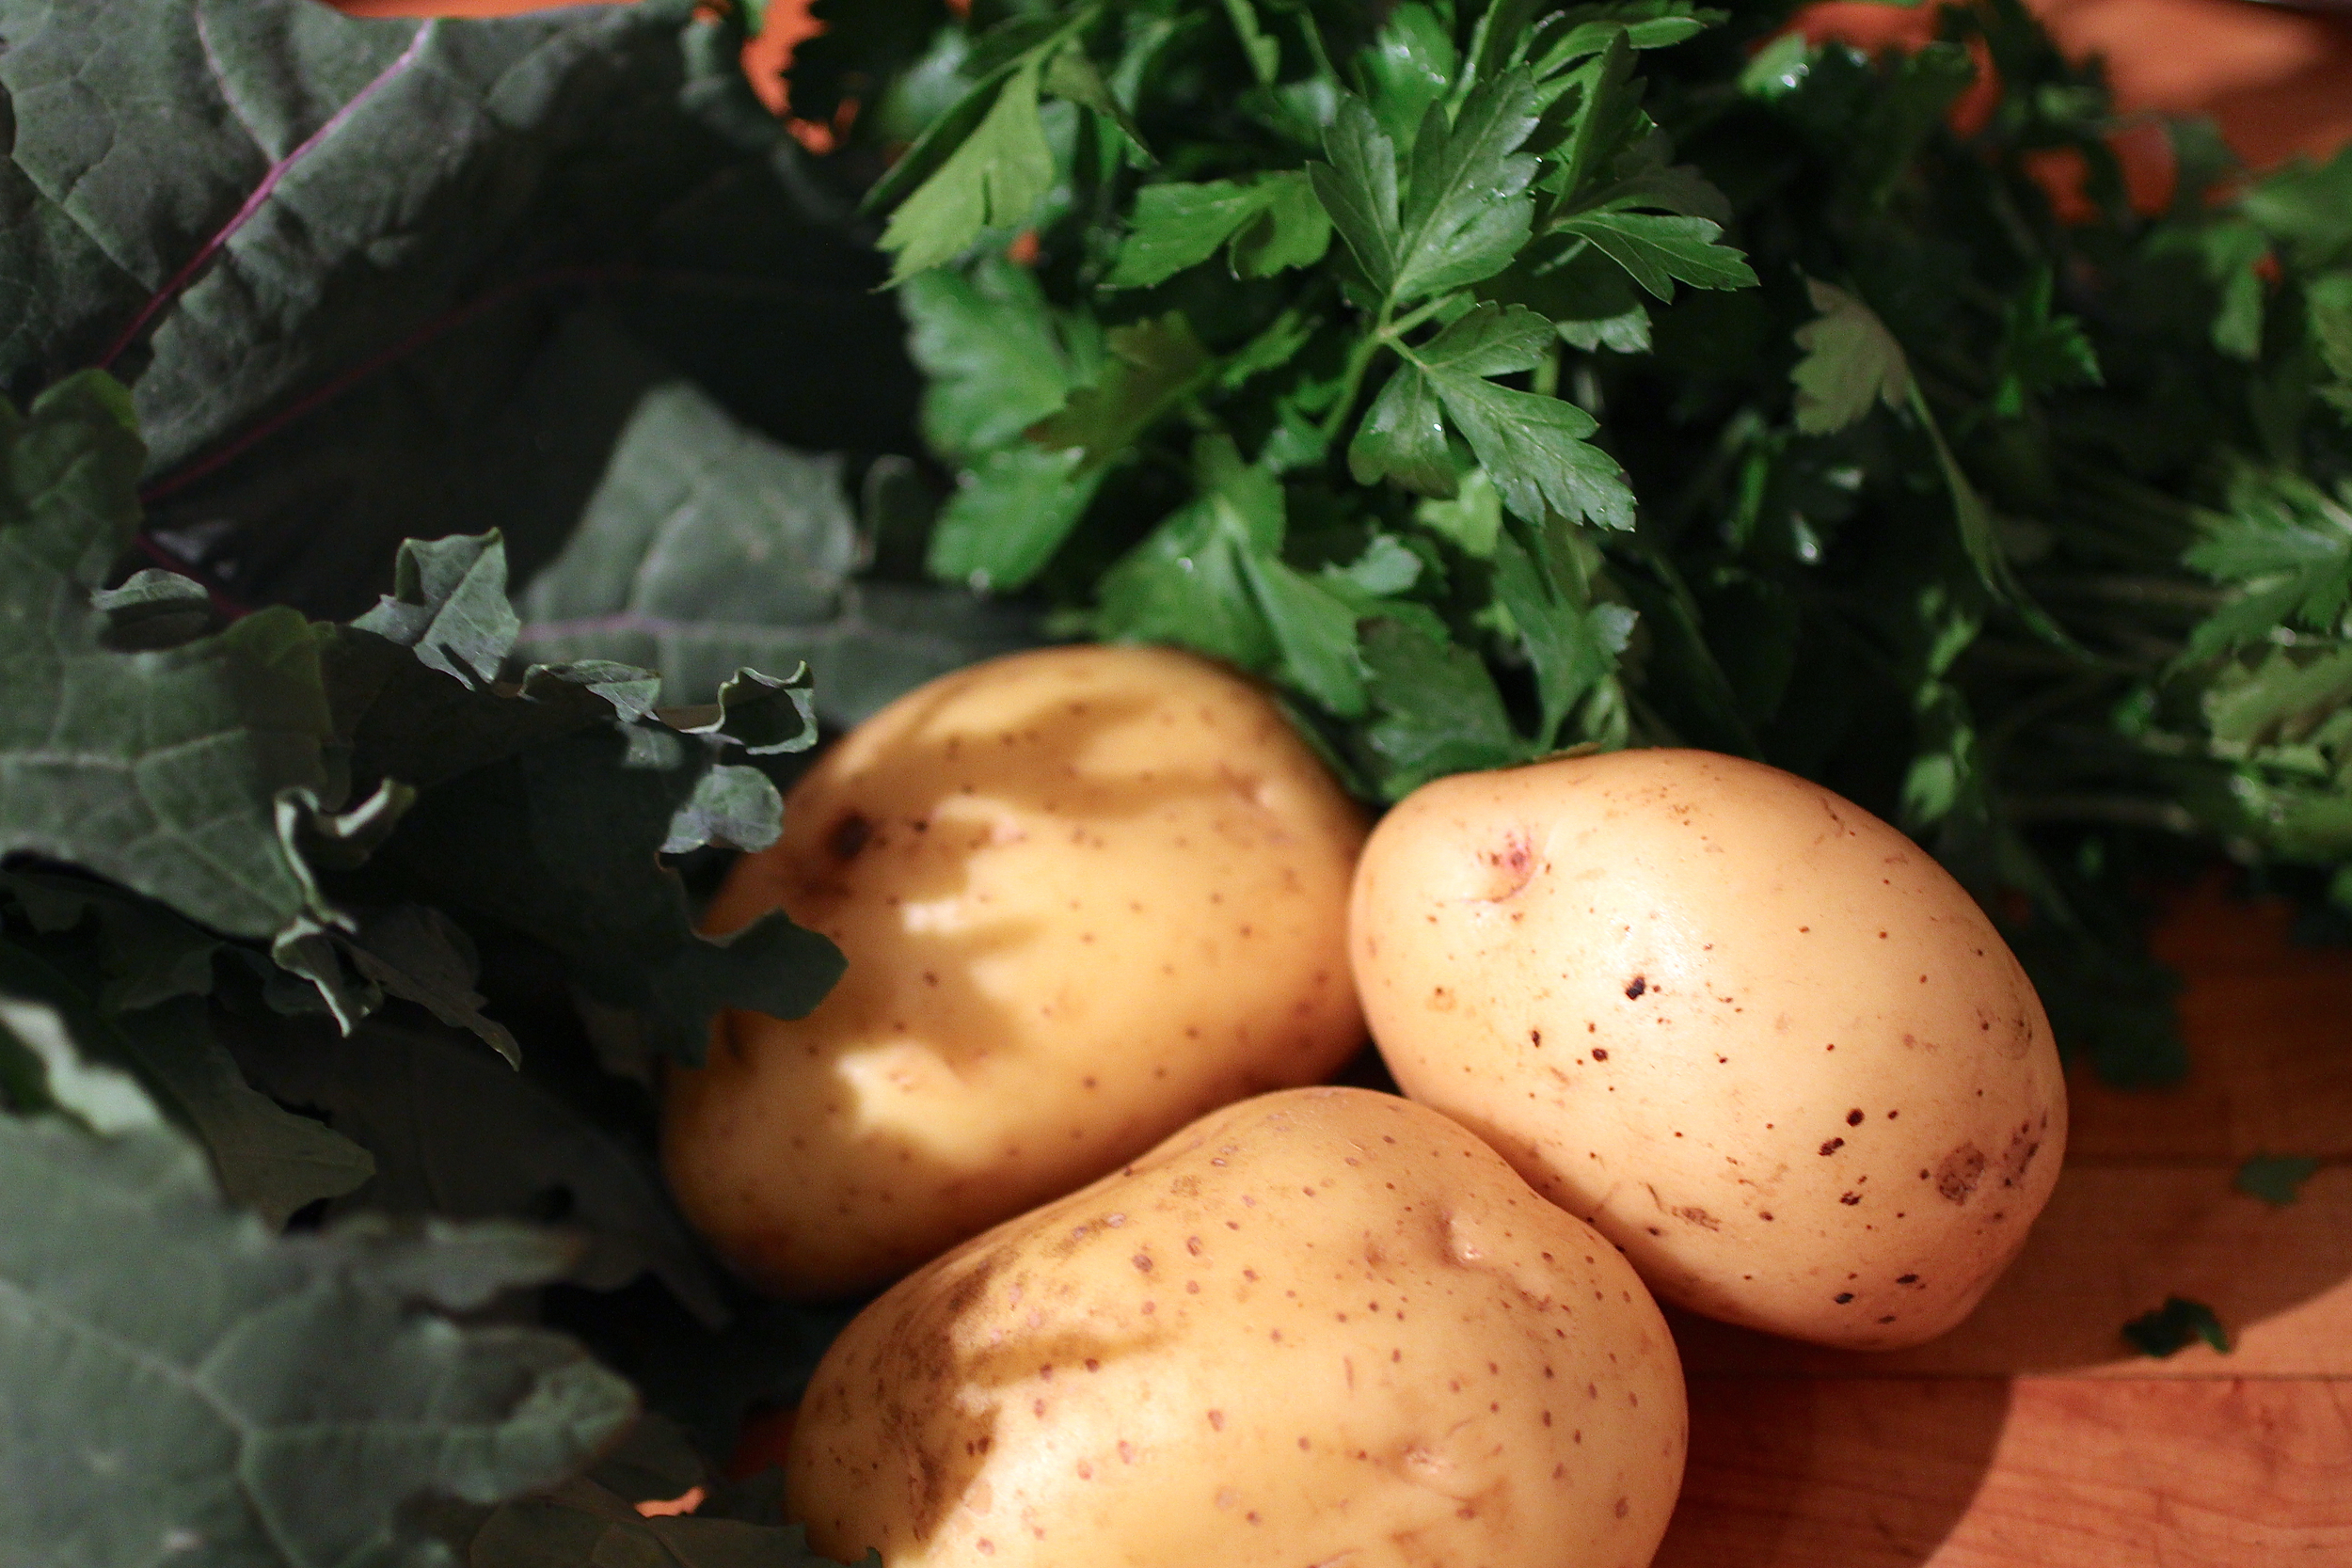
Caldo verde is a traditional Portuguese soup made from potato, chorizo, garlic, and a bunch of leafy greens, such as kale or chard (there’s no reason why you couldn’t use all or partial amount wild greens here either). In this spin, I include even more greens to the recipe by way of parsley and cilantro to give it just a bit more brightness, complexity, and of course, to make it even greener. March is a great time to get into green!
A few friends and I have been doing what we call "#craftsoup" nights where the host prepares soup and everyone crafts as they eat. The purpose of soup is a meal that's easy for the host and easy to eat while you're crafting. I'm always on the lookout for soups to prepare for these nights that are simple, quick, crowd-pleasing, and a complete meal in themselves (one of the rules of #craftsoup night is the host doesn't make anything beyond soup, though I break that rule often). This meal definitely checks all of these boxes and any soup that includes a pound of green leafy vegetables while tasting rich and satisfying has my vote! Serves 4 as a main course, 6-8 as a side.
“The soup can be “veganized” by using sautéed mushrooms instead of the chorizo and replacing butter with olive oil. ”
1 tablespoon extra-virgin olive oil, plus more for drizzling
1 tablespoon unsalted butter
3 garlic cloves, diced
1 large yellow onion, chopped
4-5 ounces chorizo (I like to use Palacios brand purchased at Berkeley Bowl), sliced 1/4 inch thick
2 cups water
2 cups chicken stock
3-4 Yukon Gold potatoes (about 1.25 pounds total) chopped
2 teaspoons white pepper (preferably freshly ground)
Salt to taste
1 pound Red Russian kale (about 1 large bunch), stems discarded and leaves finely sliced - no reason why you couldn’t use wild greens such as dandelion or dock here.
1/2 cup combination of fresh parsley and cilantro, diced (cilantro can be replaced by parsley for the cilantro-haters out there)
Heat the tablespoon of olive oil and butter in a large pot on medium low. Add the garlic, onion and half of the chorizo and cook, stirring occasionally, until the onion softens, about 6 minutes.
Add the water, broth, and potatoes and bring to a boil. Simmer until the potatoes are tender, about 15 minutes.
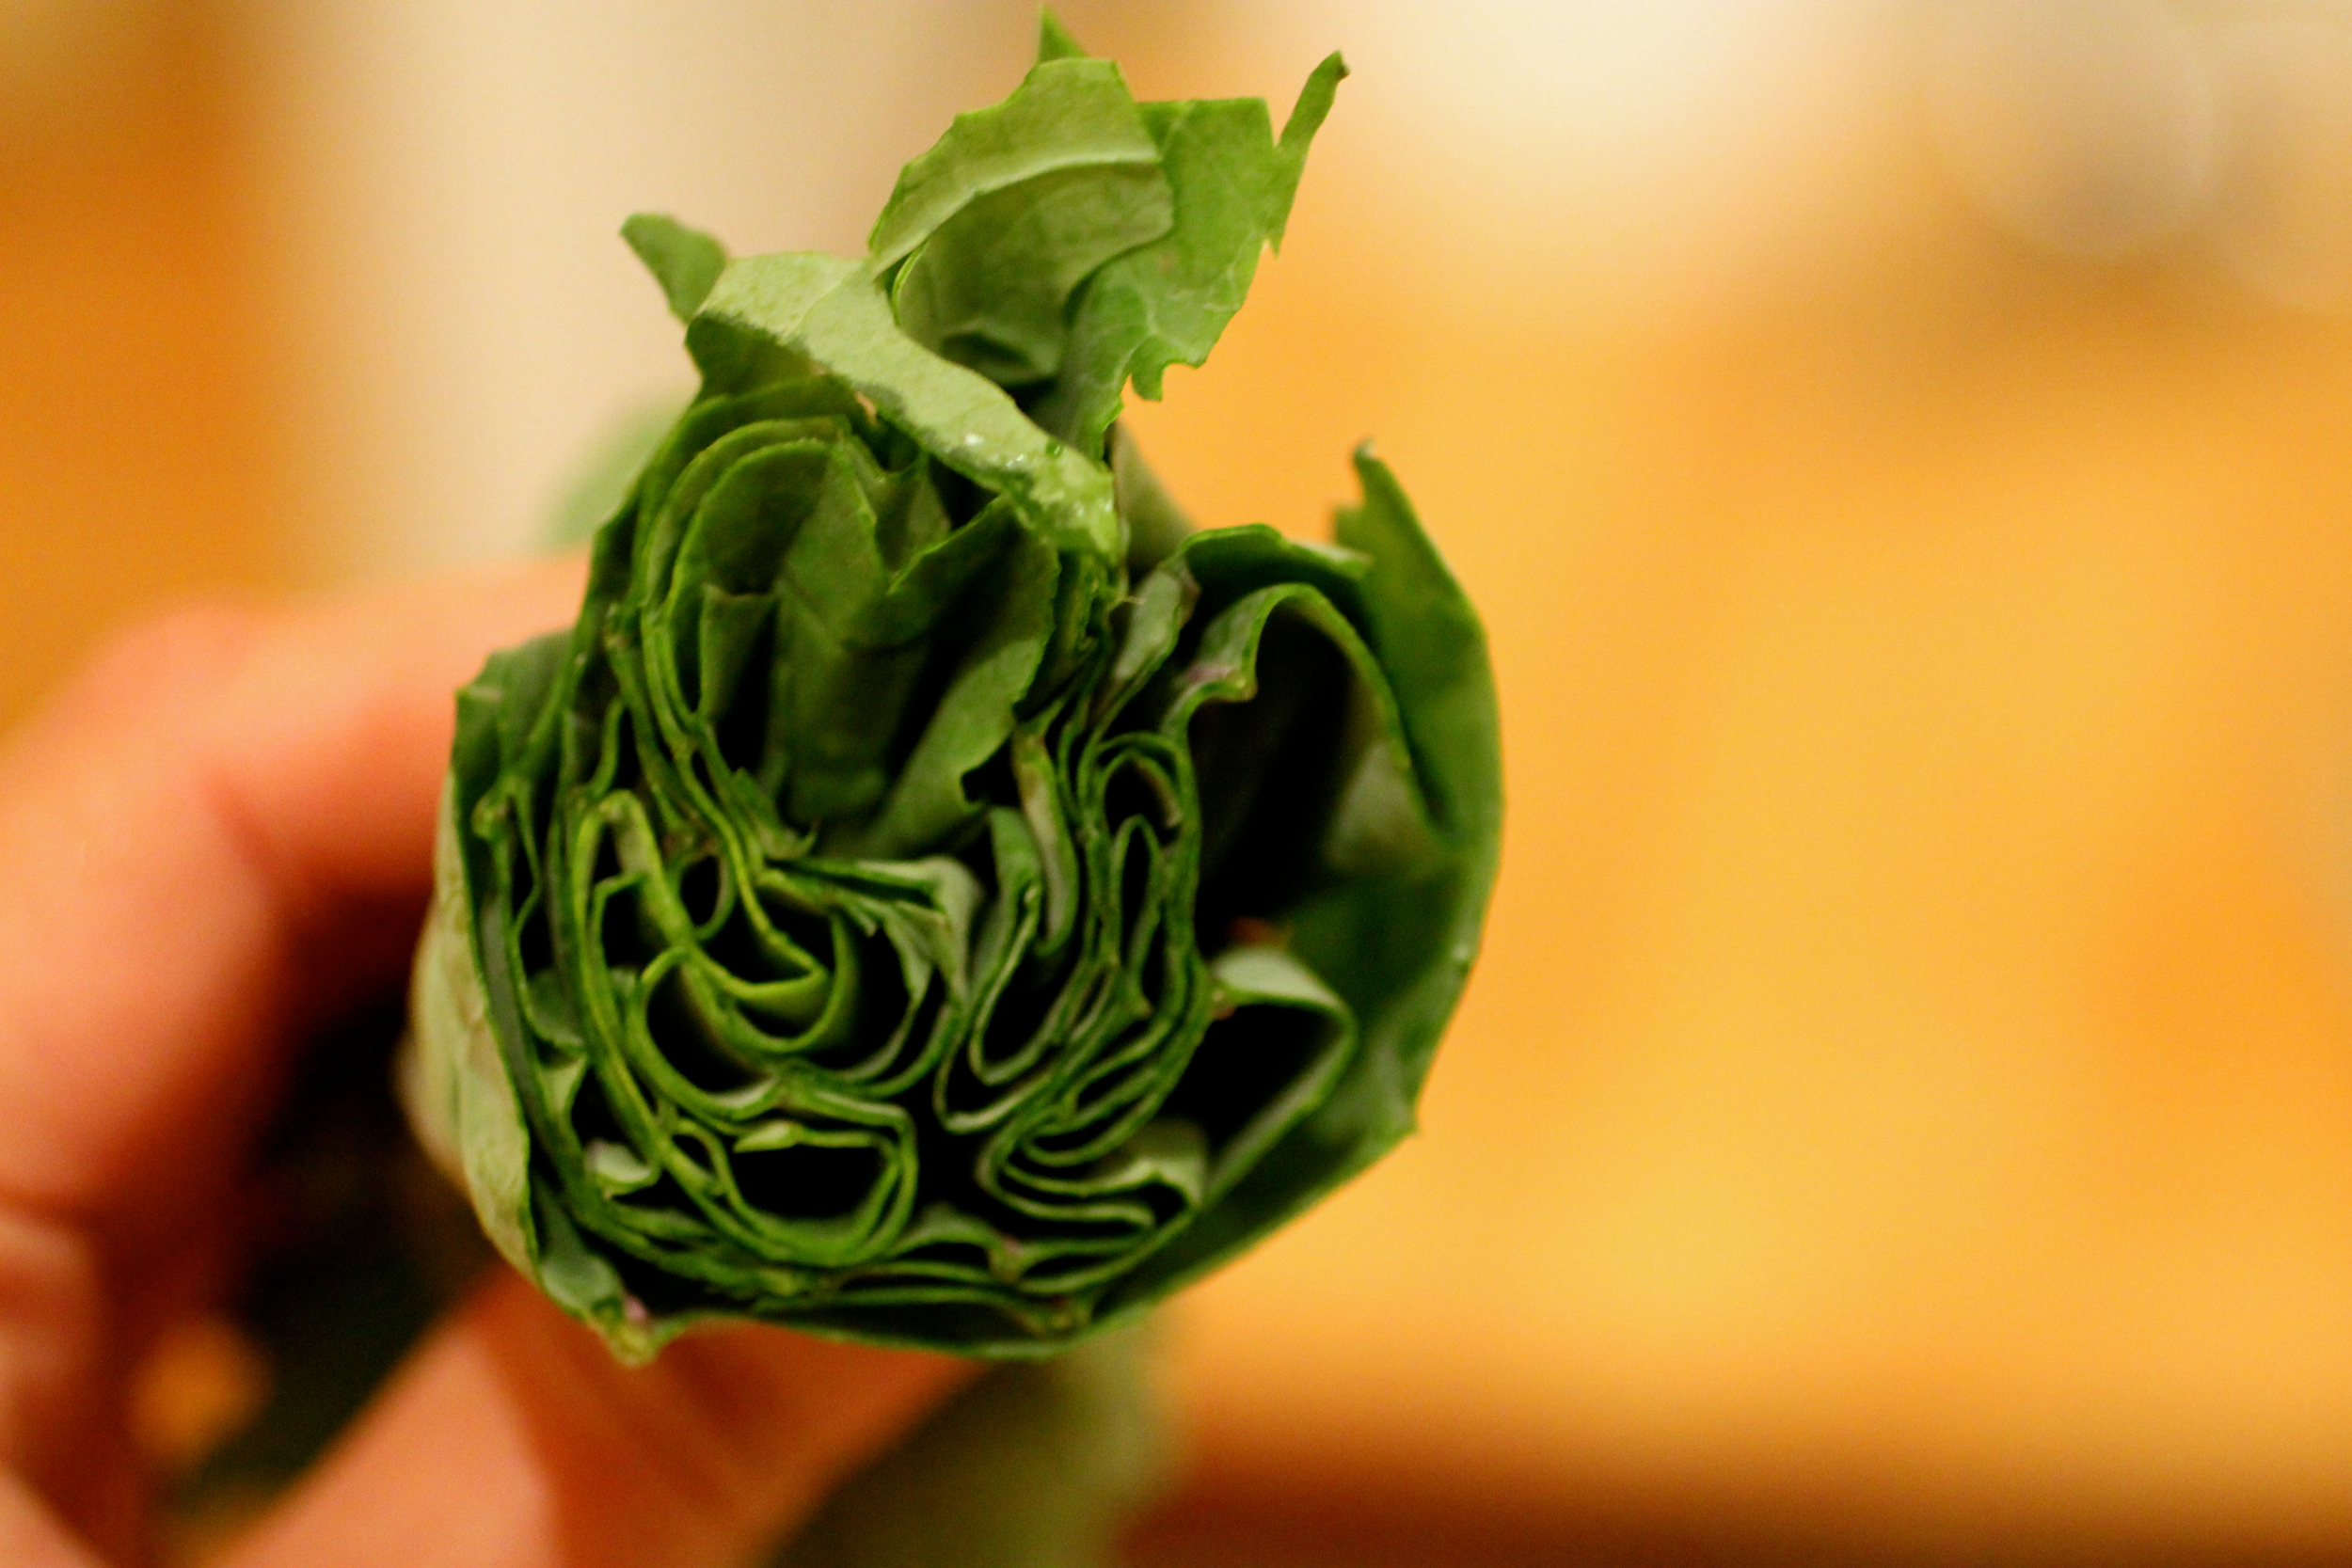
A great trick for chopping the greens into thin strips is to layer the leaves, roll up, and chop multiple leaves at the same time.
Using an immersion blender, purée the soup and add white pepper and salt to taste. Bring the soup to a boil. Add the kale and remaining chorizo (reserving a few pieces of chorizo for garnish) and simmer until the kale is wilted, about 3 minutes. Just before serving, stir in herbs, drizzle with olive oil and garnish with chorizo and herb sprig.
Serve with: Buttermilk cornbread