

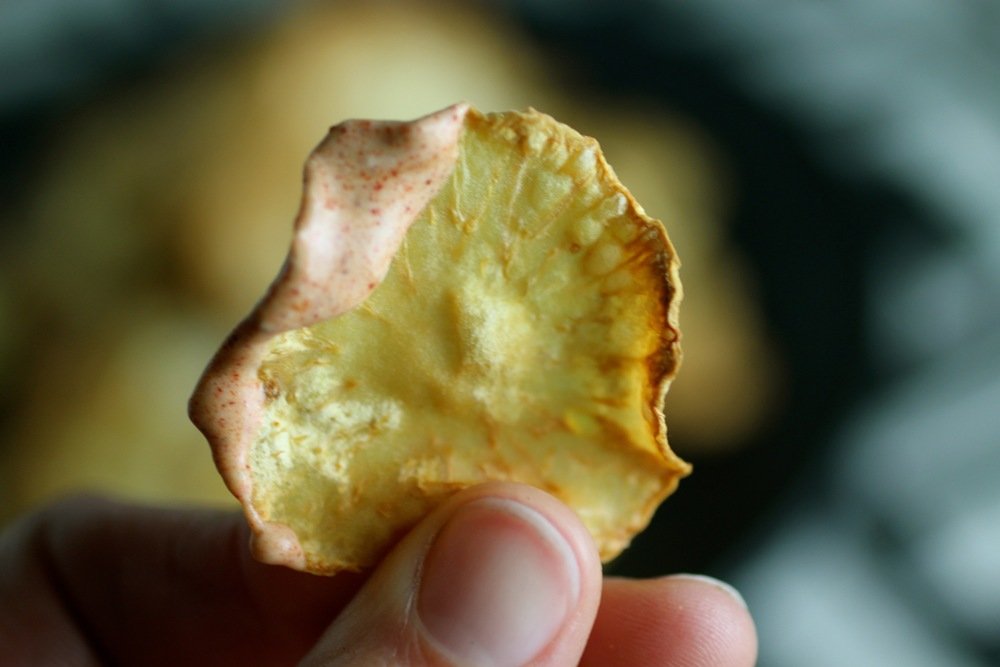
Celery Root Chips with Paprika Aioli
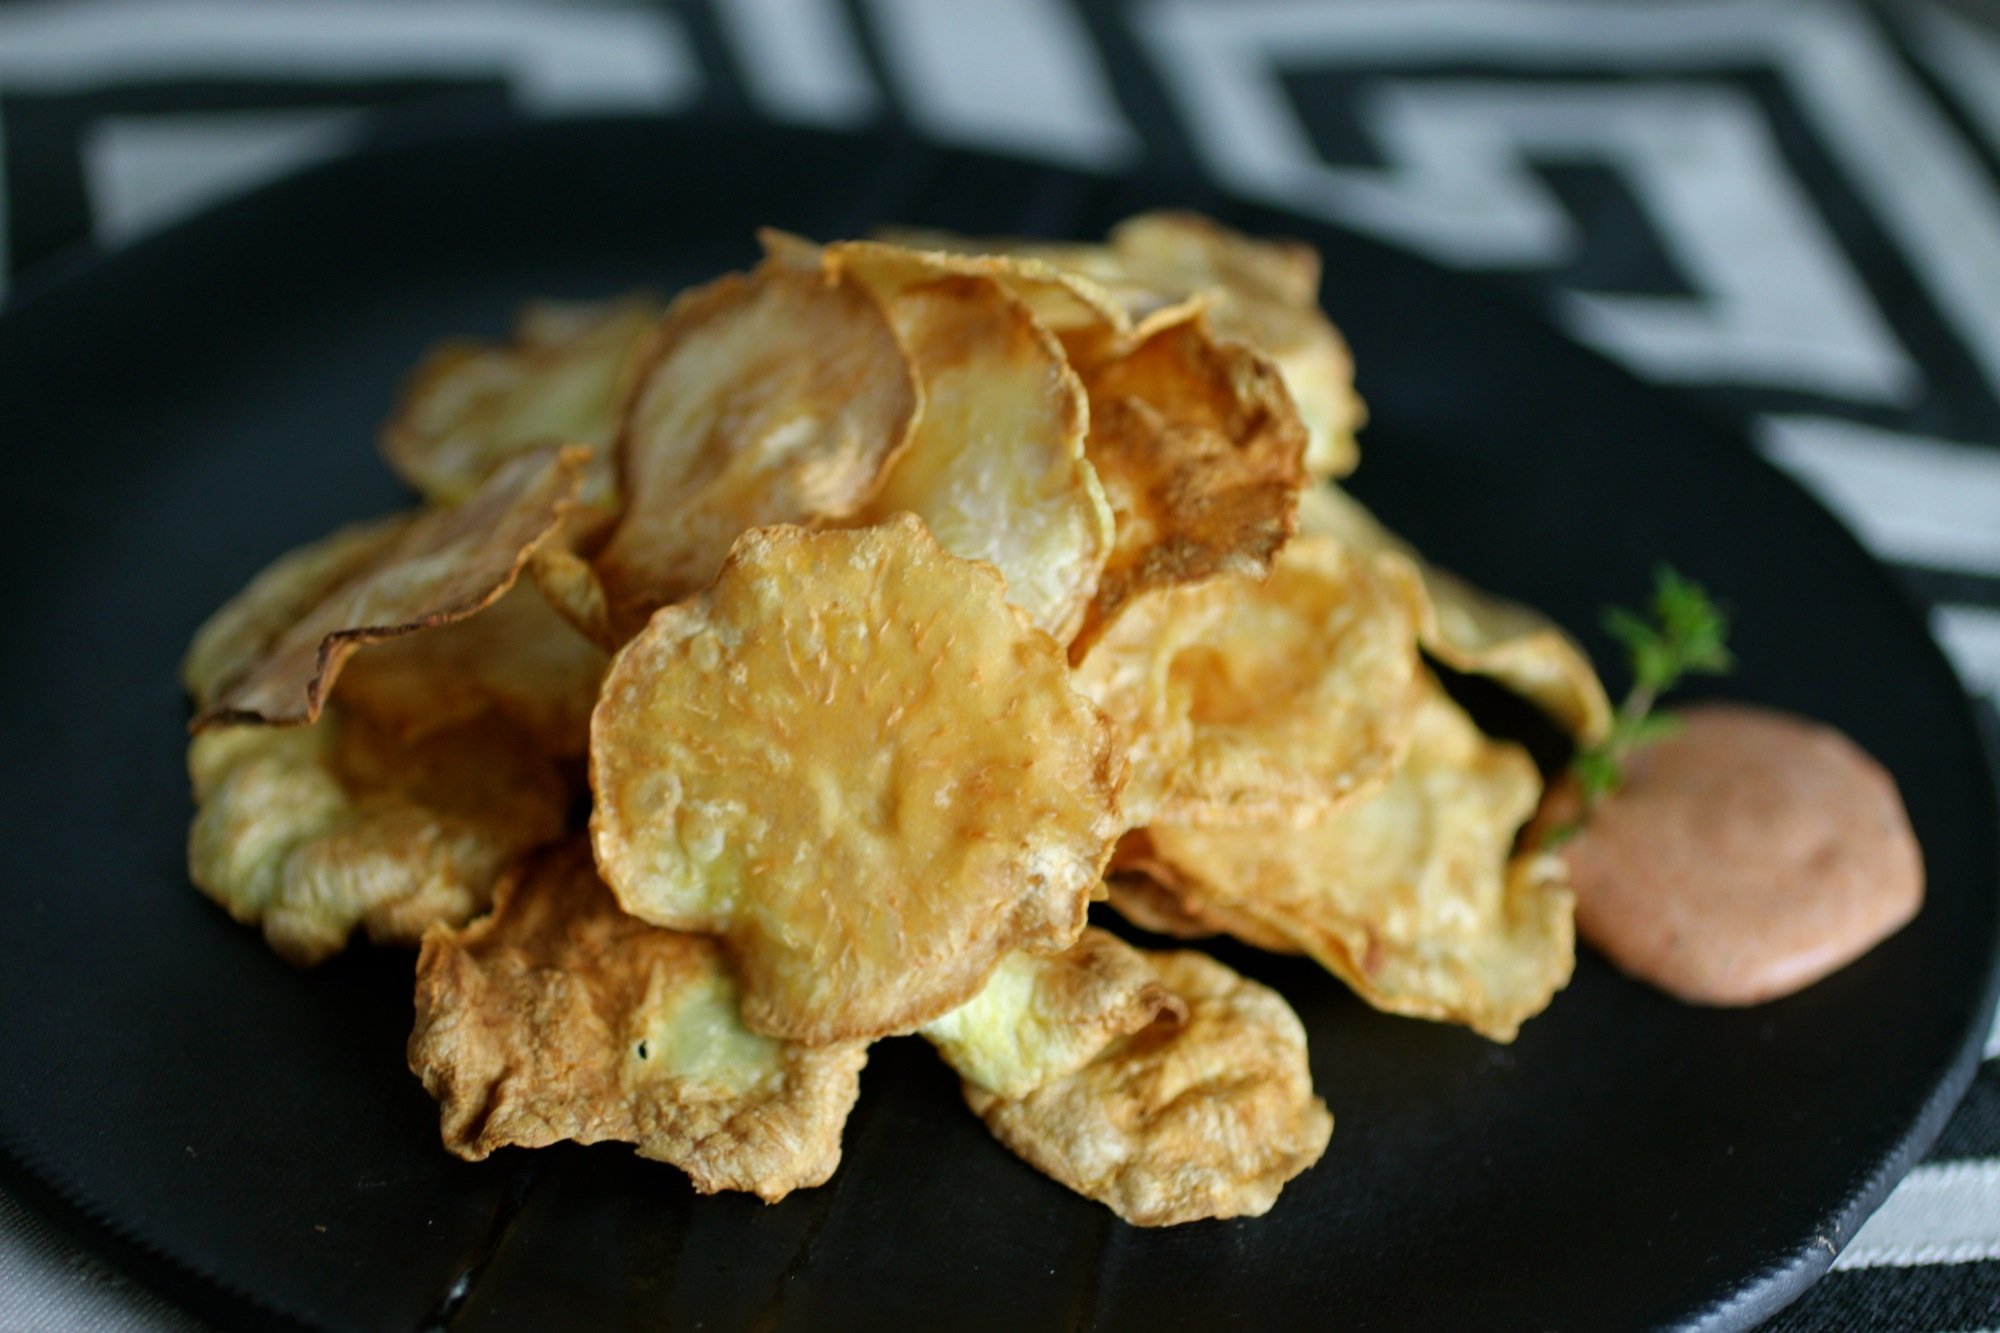
Celery root, celeriac, or whatever you want to call it, let's face it - this root is gnarly. What I love about celeriac is that even though it is gnarly and somewhat intimidating, it can be transformed into something like these chips, that are delicate, light, and elegant. Also - don't worry, it's really not that intimidating after you cut off the outside and the flavor is delightfully nutty - perfect in these chips tossed in coconut oil before baking and paired with smoked paprika aioli (or, honestly, also delicious on their own). Recipe makes enough for about 2-3 people as a snack, but you could probably eat them all on your own.
1 celery root (about 200g)
2-3 teaspoons coconut oil, melted*
About 1/8 teaspoon sea salt
Smoked paprika aioli (optional, see below)
To Prepare:
Preheat oven to 375 degrees F.
Rinse and cut off top and bottom of celery root then, using a knife, cut off remaining peel and any tougher outer layer into strips.
If needed, rinse again to remove any remaining dirt and pat dry.
Using a mandolin, slice into thin circles. The celery root may need to be cut in half first, depending on the size of the root and your mandolin.
Place chips on baking sheet and drizzle with coconut oil. Toss to coat, sprinkle with salt and spread out on baking sheet in a single layer.
Bake for 15-20 minutes or until golden brown, flipping halfway through. Chips might not be crispy while still warm, but they should become crispy as they cool.
*Olive oil can be substituted for coconut if desired. The flavor is not quite as nutty and can be more peppery, depending on olive oil.
Note: Leaving celeriac chips out for a long time, especially in a humid environment, will cause them to soak up water and lose their crispiness.
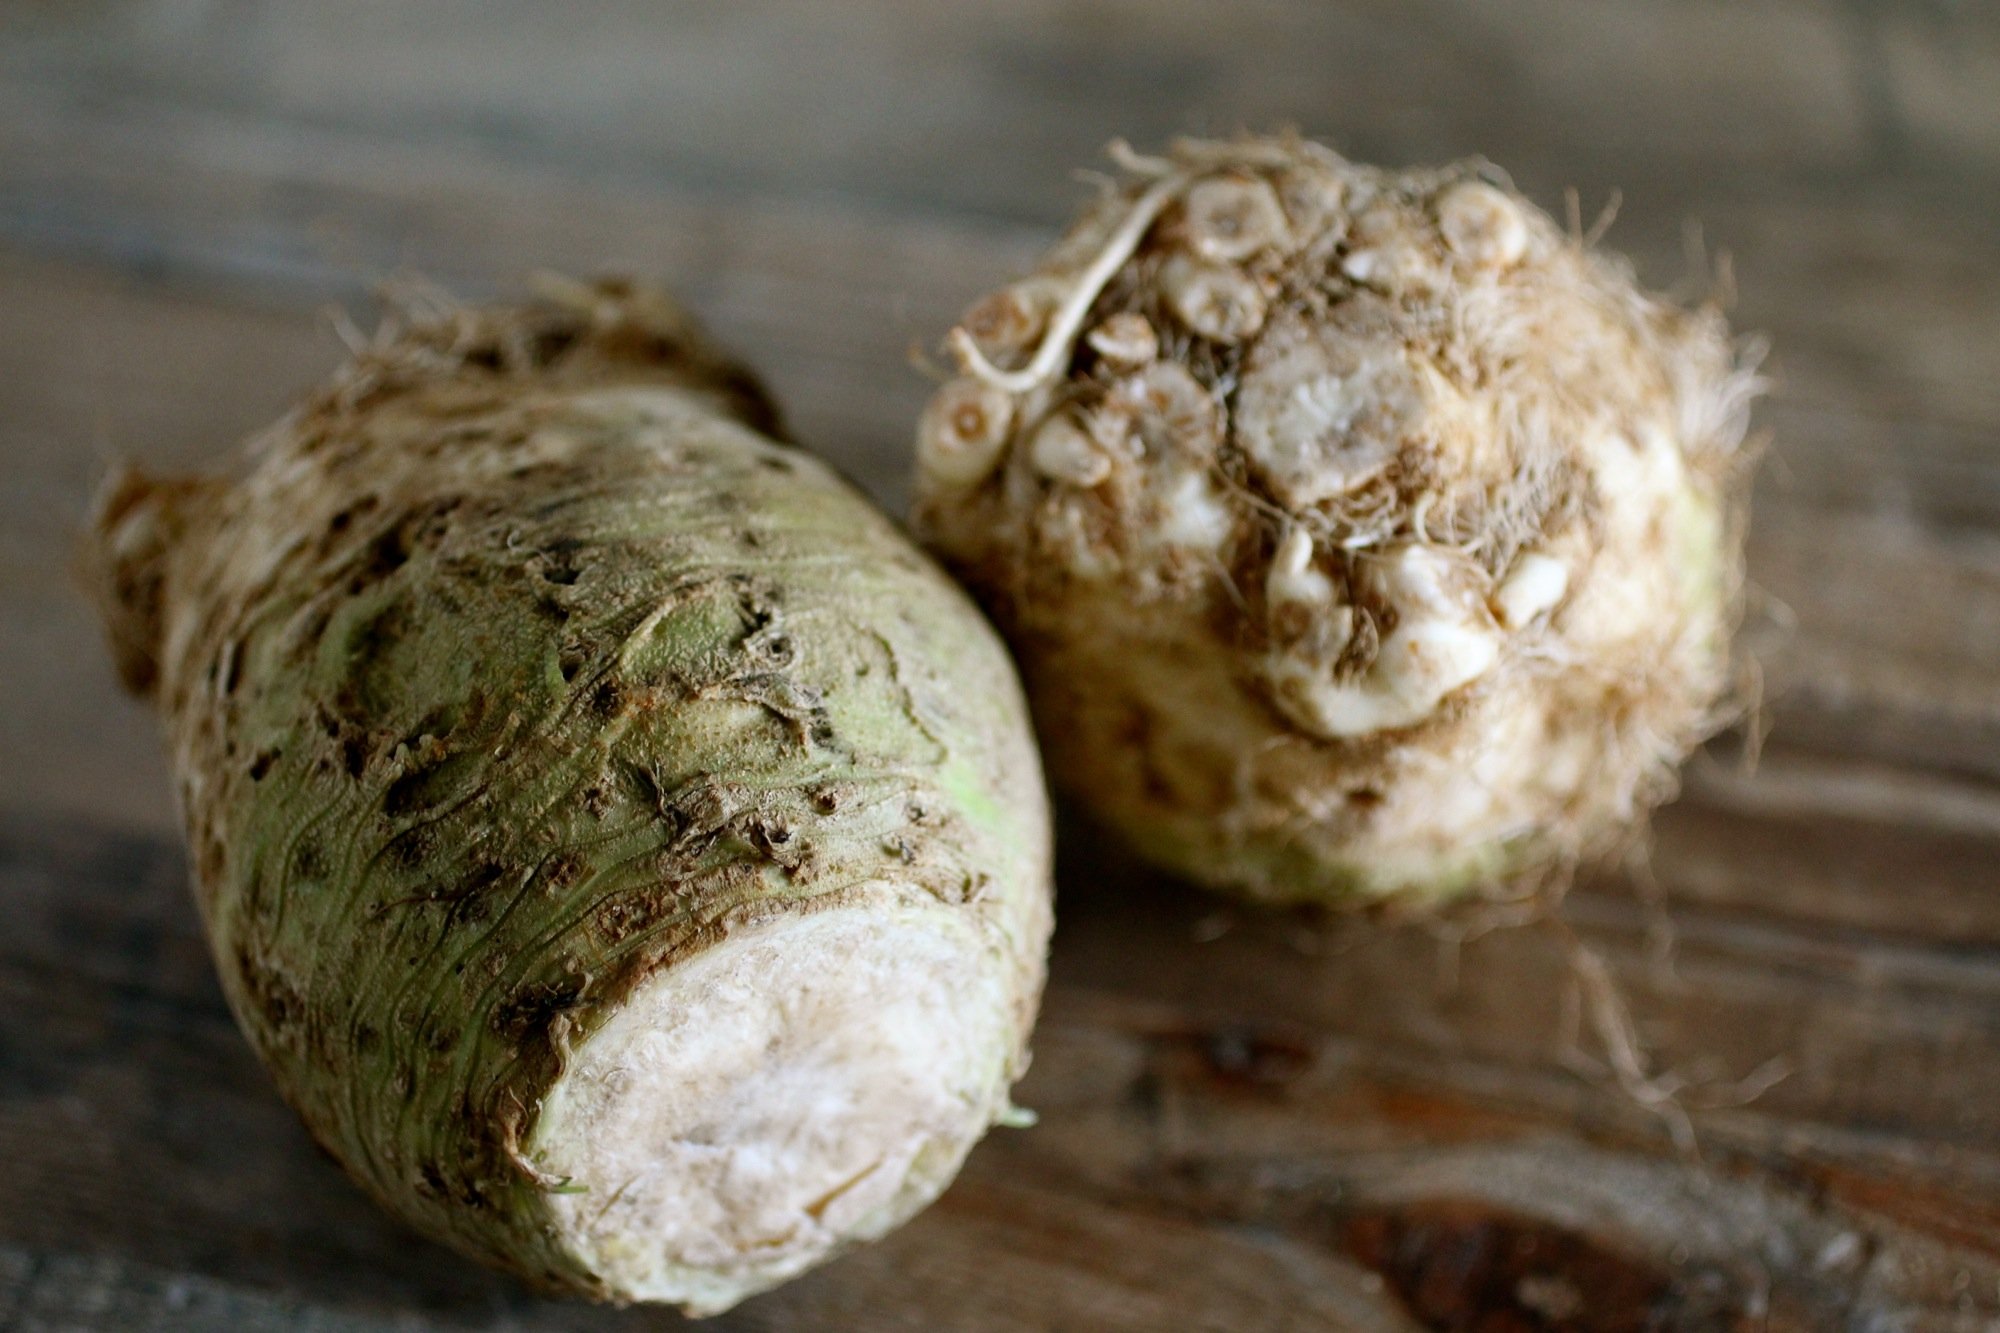
Gnarly celery root - love it!
For Smoked Paprika Aioli- This recipe will make much more than you need for these chips and goes great with raw or cooked vegetables, in salad dressings, on sandwiches, etc. When I make it, I usually split it in half and only add the smoked paprika to one half, as classic aioli is more versatile.
1 egg
1-2 medium cloves garlic, diced
1 teaspoon mustard or mustard powder
Pinch of sea salt
1 cup olive oil and either vegetable or grapeseed oil combination (adjust ratio depending on how rich olive oil-wise you’d like your aioli to taste)
2-3 teaspoons fresh lemon juice
About 1/2 teaspoon smoked paprika (to flavor one half of the aioli)
Blend egg with garlic, mustard, and salt until frothy.
While blending, slowly add in olive oil. Blend until thick and quickly mix in lemon juice. Divide aioli in half and whisk in smoked paprika to one half. Keep refrigerated until use.
CHOMP.

Plantago, Butter, & Thyme Morsels
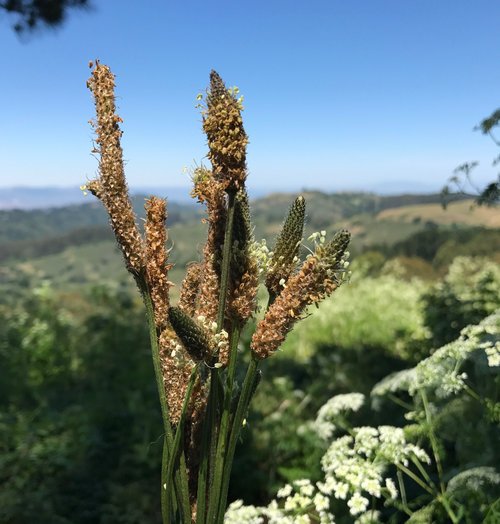
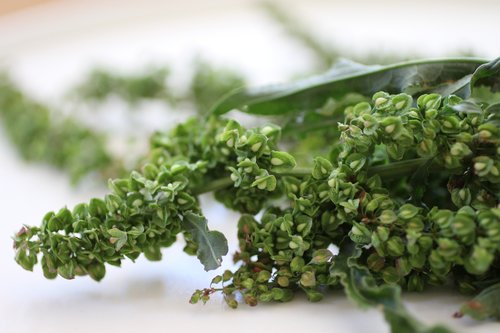
Plantago seedpods are as great for eating as they are for flinging!
Plantain (Plantago major and Plantago lanceolata) is easy to recognize and grows everywhere. You probably have some growing within a block of where you are RIGHT. NOW. Plantago major is the plantain with the wider, oval-shaped leaves and Plantago lanceolata is the plantain with the thinner leaves (lance-shaped, as the name indicates). I will save explanation of of the plantain in general and using the leaves for another post (in short: the leaves can be eaten as you would other greens, ideally cooked, as they are quite fibrous) and focus this post on the late-spring/summer/early fall delicacy - plantain seed pods.
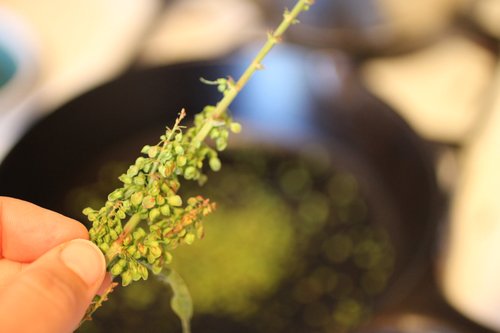
When I was young we used to catapult the brown seedpods by wrapping the stem around the pod and flinging it. This is an enjoyable activity to this day, BUT maybe instead of flinging the pods at your sister (ahem - you know who you are!), fling them into a pan with some butter and thyme to prepare this simple, delicious recipe. Alternatively, just cut or pull off the pod stems away from the plant.

Entire Plantago lanceolata, complete with leaves, seedpods and roots.
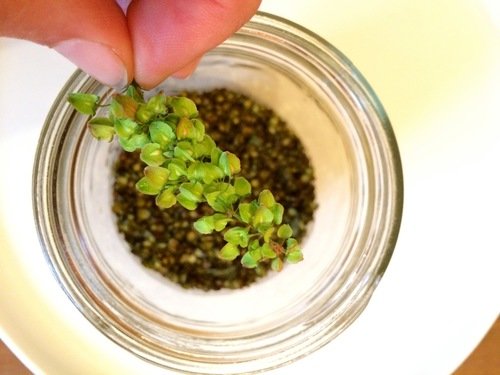
When I first heard that these seedpods tasted like morel mushrooms I didn't think it was possible, but I was wrong - it is. I promise - give it a try and you will see. The other great thing about these pods is that they are packed with psyllium, a form of fiber that is often added to foods to increase dietary fiber content, as well as calcium. Yes, that's right - grow everywhere, taste like morel mushrooms AND high in nutrients. The pods can also be broken up into smaller seeds and toasted in a pan with herbs and spices to sprinkle on top of salads/popcorn/etc. or eat as a snack. This method of preparing plantago seeds is very simple, so there is no excuse not to try!
To Prepare:
Heat butter and/or olive oil (enough to coat bottom of pan) in a cast-iron pan on medium-high.
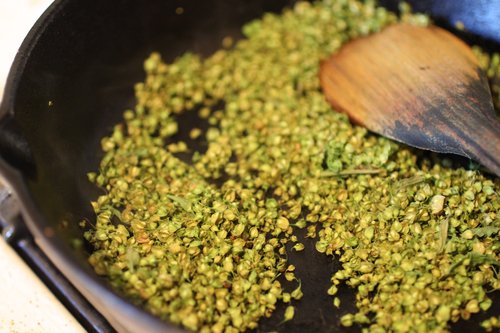
Add seedpods (with or without stems, I like to include the stems to use for serving) and heat for 2 minutes, tossing to coat in butter/oil. Add thyme and a sprinkle of salt and continue cooking another 1-2 minutes, stirring occasionally until pods are toasted and seeds just begin to fall off. If seedpods look to dry, add more butter or oil and toss to coat.
Serve immediately. If stems are still attached, they can be used as a serving stick (eat just the pod off of the stem - the stem is very tough).

Sautéing seedpods in cast-iron. At this point, they have soaked up all of the butter/oil and if I need to cook them longer I would have to add more.

Rumex Crisps: Dock Seed Crackers
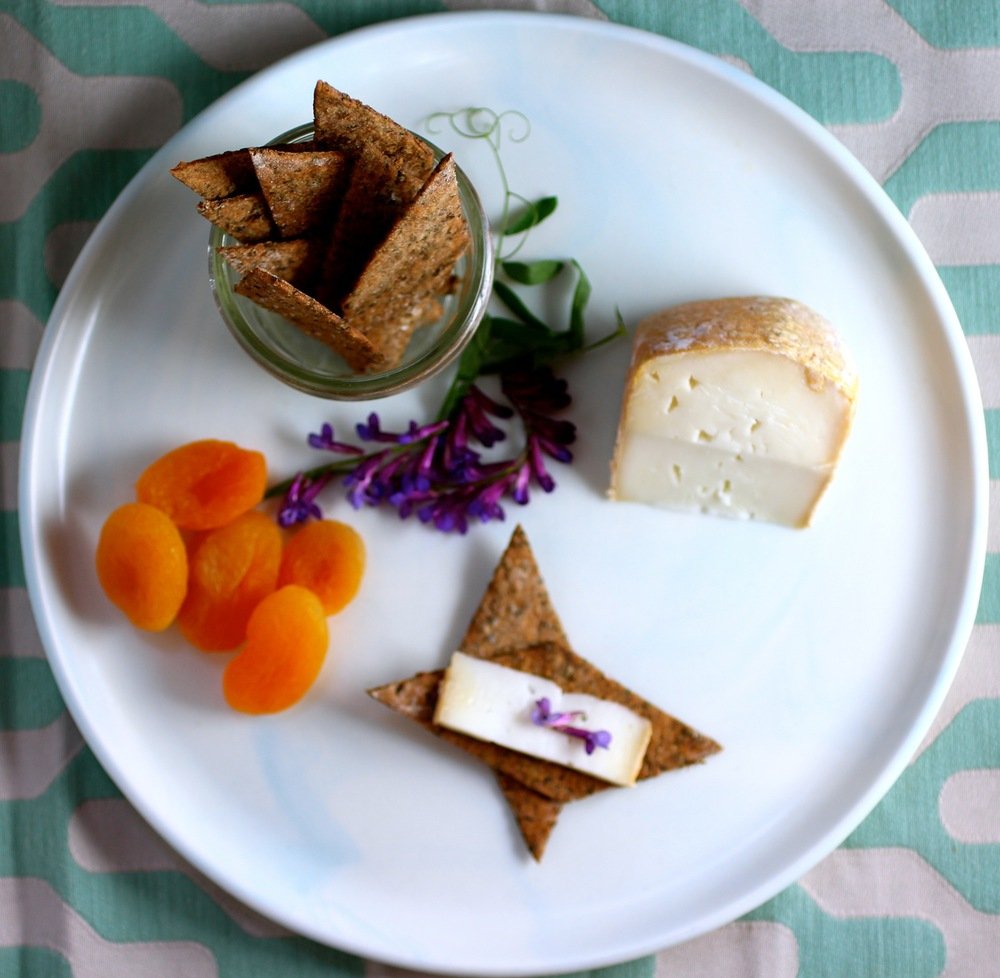
The latin name for curly dock, a wild plant with edible leaves and seeds, is Rumex crispus (see previous post for foraging/harvesting info). Thus, when I decided to use the toasted seeds in a cracker, the name was obvious. Let's be honest - I made these crackers specifically because I came up with the name Rumex crisps. I'm a sucker for wordplay. On the plus side, the seeds paired beautifully with the rye flour for a delicious, crispy, nutty-tart cracker that is great alongside rich creamy cheeses and sweet dried apricots (or other fruit). The below recipe makes about 36 2-inch crackers, depending on how thinly you roll out the dough.

Toasted vs. raw dock seeds.
1/2 cup toasted dock seeds
3/4 - 1 cup rye flour
1/4 teaspoon sea salt, plus more for sprinkling
1 tablespoon grapeseed oil, plus more for brushing
1/2 tablespoon honey
1/3 cup water
Preheat oven to 300 degrees F.
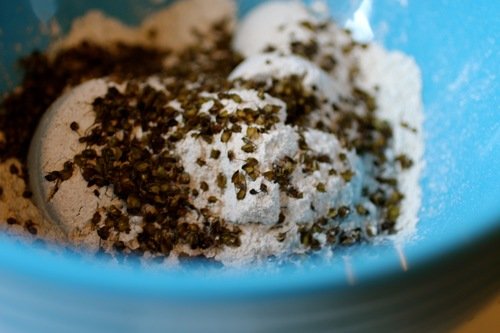
In a large bowl, blend together dock seeds, 3/4 cup rye flour, and salt. Stir in grapeseed oil, honey, and water until incorporated. Add more rye flour as needed so dough is no longer sticky, but still moist.
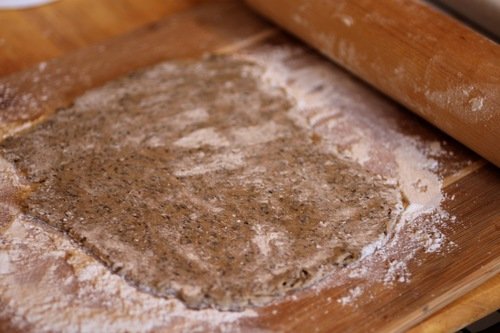
Divide dough in half and roll out thinly on a floured surface (not paper-thin, but "cracker-thin"). Don't stress too much about the thickness - if the crackers are thicker, they'll just take a bit longer to cook.
Cut crackers into any shape that you like, such as squares, diamonds, or strips, and place them on a baking sheet. Crackers can be close together, as they hold their shape as they cook. Gather dough scraps, re-roll, and cut as needed. Repeat with remaining dough half.
Brush crackers lightly with grapeseed oil (or rub with fingers), sprinkle with a little more salt, and bake for 15 - 20 minutes. Remove from oven and cool on rack. Store in an airtight container and enjoy for up to 2 weeks. If you live in a humid environment, crackers can be re-toasted in the oven.
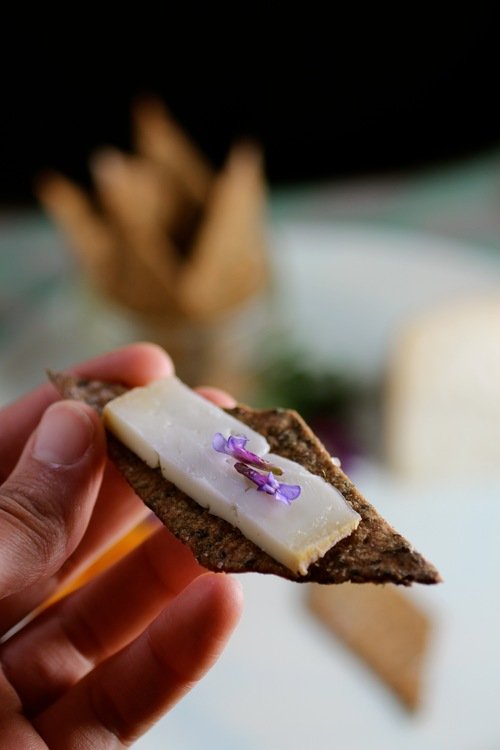
A diamond-shaped Rumex crisp with a creamy sheepsmilk cheese and vetch tip flower.

Toasted Dock Seeds
Raw dock seeds are beautiful, but (in my opinion) not as tasty.
Dock, or Rumex spp. (general and foraging info here), has tart edible leaves that are available in the spring, but the real treat to me are the seeds of the dock, which you can find in the later spring through summer on the West Coast (and most of the world). The seeds can be eaten raw, but are better toasted and, being a member of the buckwheat family, can be used like you would buckwheat (which is a seed itself, not a grain). Try mixing the seeds into a granola or dough for crackers, sprinkling them over poached fish, or grinding them into a flour and using it for baking.
To remove the seeds from the plant, first wash and shake out the dock to dry it then simply run your fingers down the length of the stalk, pulling off seeds as you go. You might want to do this outside, as dock seeds have a tendency to "jump".
Toast the seeds in a cast iron pan on medium high, stirring frequently to cook the seeds evenly. In my experience, 1 cup of seeds in a medium cast iron pan will take about 10 minutes, but this will changed depending on how many seeds you're toasting at once and size of pan (less seeds = more exposure to heat).

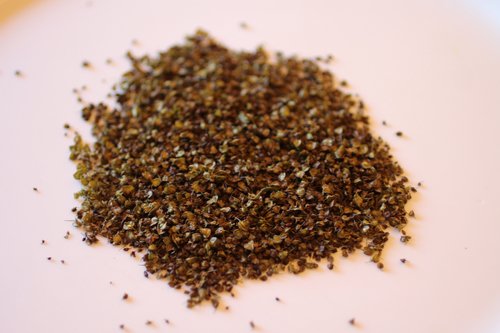
Dock seeds, toasty brown.

Cornmeal-battered nopales with smoked paprika

I had a very, very productive nopal cactus in front of my house in Oakland. So productive, in fact, that harvesting and processing its fruit felt like a part time job in the summer/fall. Nopal is the common name for members of a group (the Opuntia genus) within the cactus family, with the plural being nopales. Usually however, I see nopales referring to the cactus pads specifically, with prickly being the fruit. If you see a big cactus with large flat "paddle" leaves with thorns and bright red fruit, it's an Opuntia cactus and is edible. Some are better tasting than others and there are also better times to harvest the cactus pads. See my past post on harvesting nopal cactus pads for more details. The best piece of advice is to be careful because the thorns on the fruit have a tendency to jump onto you!
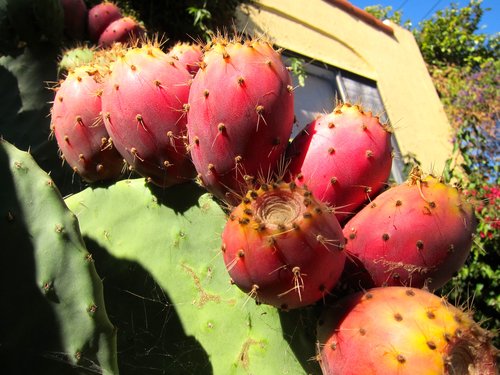
Oh how I loved my very productive Opuntia cactus.
This recipe is really just guidance, as the specific quantities aren't incredibly important. If serving as an appetizer or in tacos, which are probably the best uses, make about 1 medium cactus pad per person.
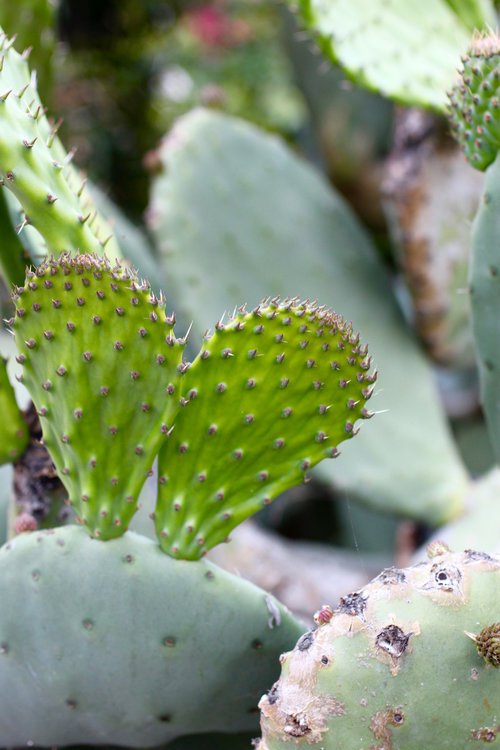
Nopales (cactus pads) that are at optimal tenderness - just remember to remove the spines!
What I like about it is the dry heat method of pan-frying helps to limit the viscous quality that can happen with nopales (similar to okra). And, of course, cornmeal crunch is always appreciated. Feel free to play around with the cornmeal to flour ratio, herbs and spices, and dipping sauces. I have also thought about cutting the nopales into strips before battering and frying, which might help further reduce the viscous qualities and make for easier serving. Enjoy!
Young/tender nopales pads
1 part medium-grind cornmeal (about 1/2 cup for 4 medium cactus pads)
2 parts all-purpose flour (about 1 cup for 4 medium cactus pads)
Smoked paprika or chili powder (about 1 teaspoon for 4 medium cactus pads)
White or black pepper (about 1/4 teaspoon for 4 medium cactus pads)
Salt (about 1 /4 teaspoon for 4 medium cactus pads)
Eggs, beaten (1-2 eggs for 4 medium cactus pads)
Oil for frying (about 1/3 cup for 4 medium cactus pads)
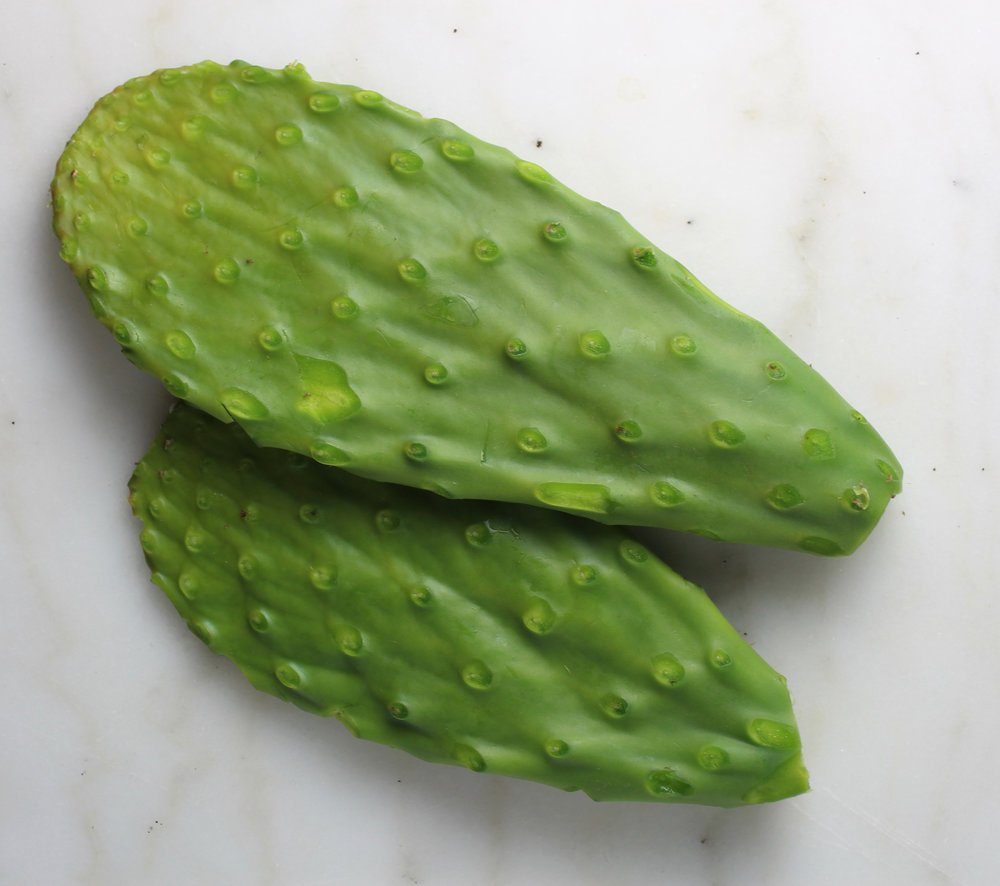
Cactus pad with spines removed.
To prepare

Coating with all-purpose flour before the egg and cornmeal batter.
Remove thorns from cactus pads (see this post for information on removing spines). Set up a plate with paper towels to lay the nopales after you fry them.
Mix cornmeal, 1/2 cup flour, spices, and salt on a plate. Set other 1/2 cup all-purpose flour on a different plate.
Toss each cactus pad in pure flour mixture to lightly coat then dip in beaten egg and shake off excess. Dredge each egg-covered pad in the cornmeal mixture so that it covers all sides and set aside.
Add oil to frying pan - oil should be about 1/4-inch high - and heat on high.
When oil is hot, cook nopales about 2 minutes per side, or until browned, and set on paper towel. You may cook these in batches if needed, adding more oil as necessary.
Serve hot with a squeeze of lemon and a dipping sauce such as aioli, romesco, or an herb blend (optional). Cactus can be cut into strips prior to serving.
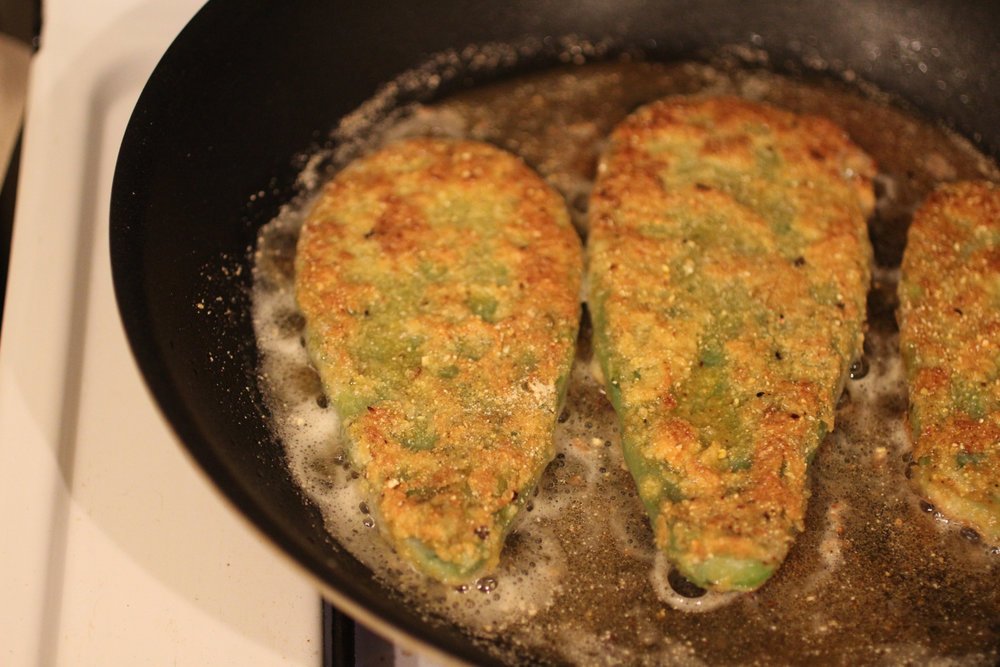
Frying to a golden-brown.

Radish Greens Chimichurri
Don't toss those greens, transform them into a flavorful sauce that works with pretty much anything!

Do you have "radish greens remorse" every time you toss out delicious looking radish tops? Good news - it doesn't have to be this way! The green leafy tops of radishes and many other vegetables such as turnips, beets, and daikon are perfectly edible and delicious. You can use them as you would other green leafy vegetables, though radish greens in particular can be a little fuzzy and benefit from a bit of processing such as chopping, blending, sautéing, or the addition of an acid.
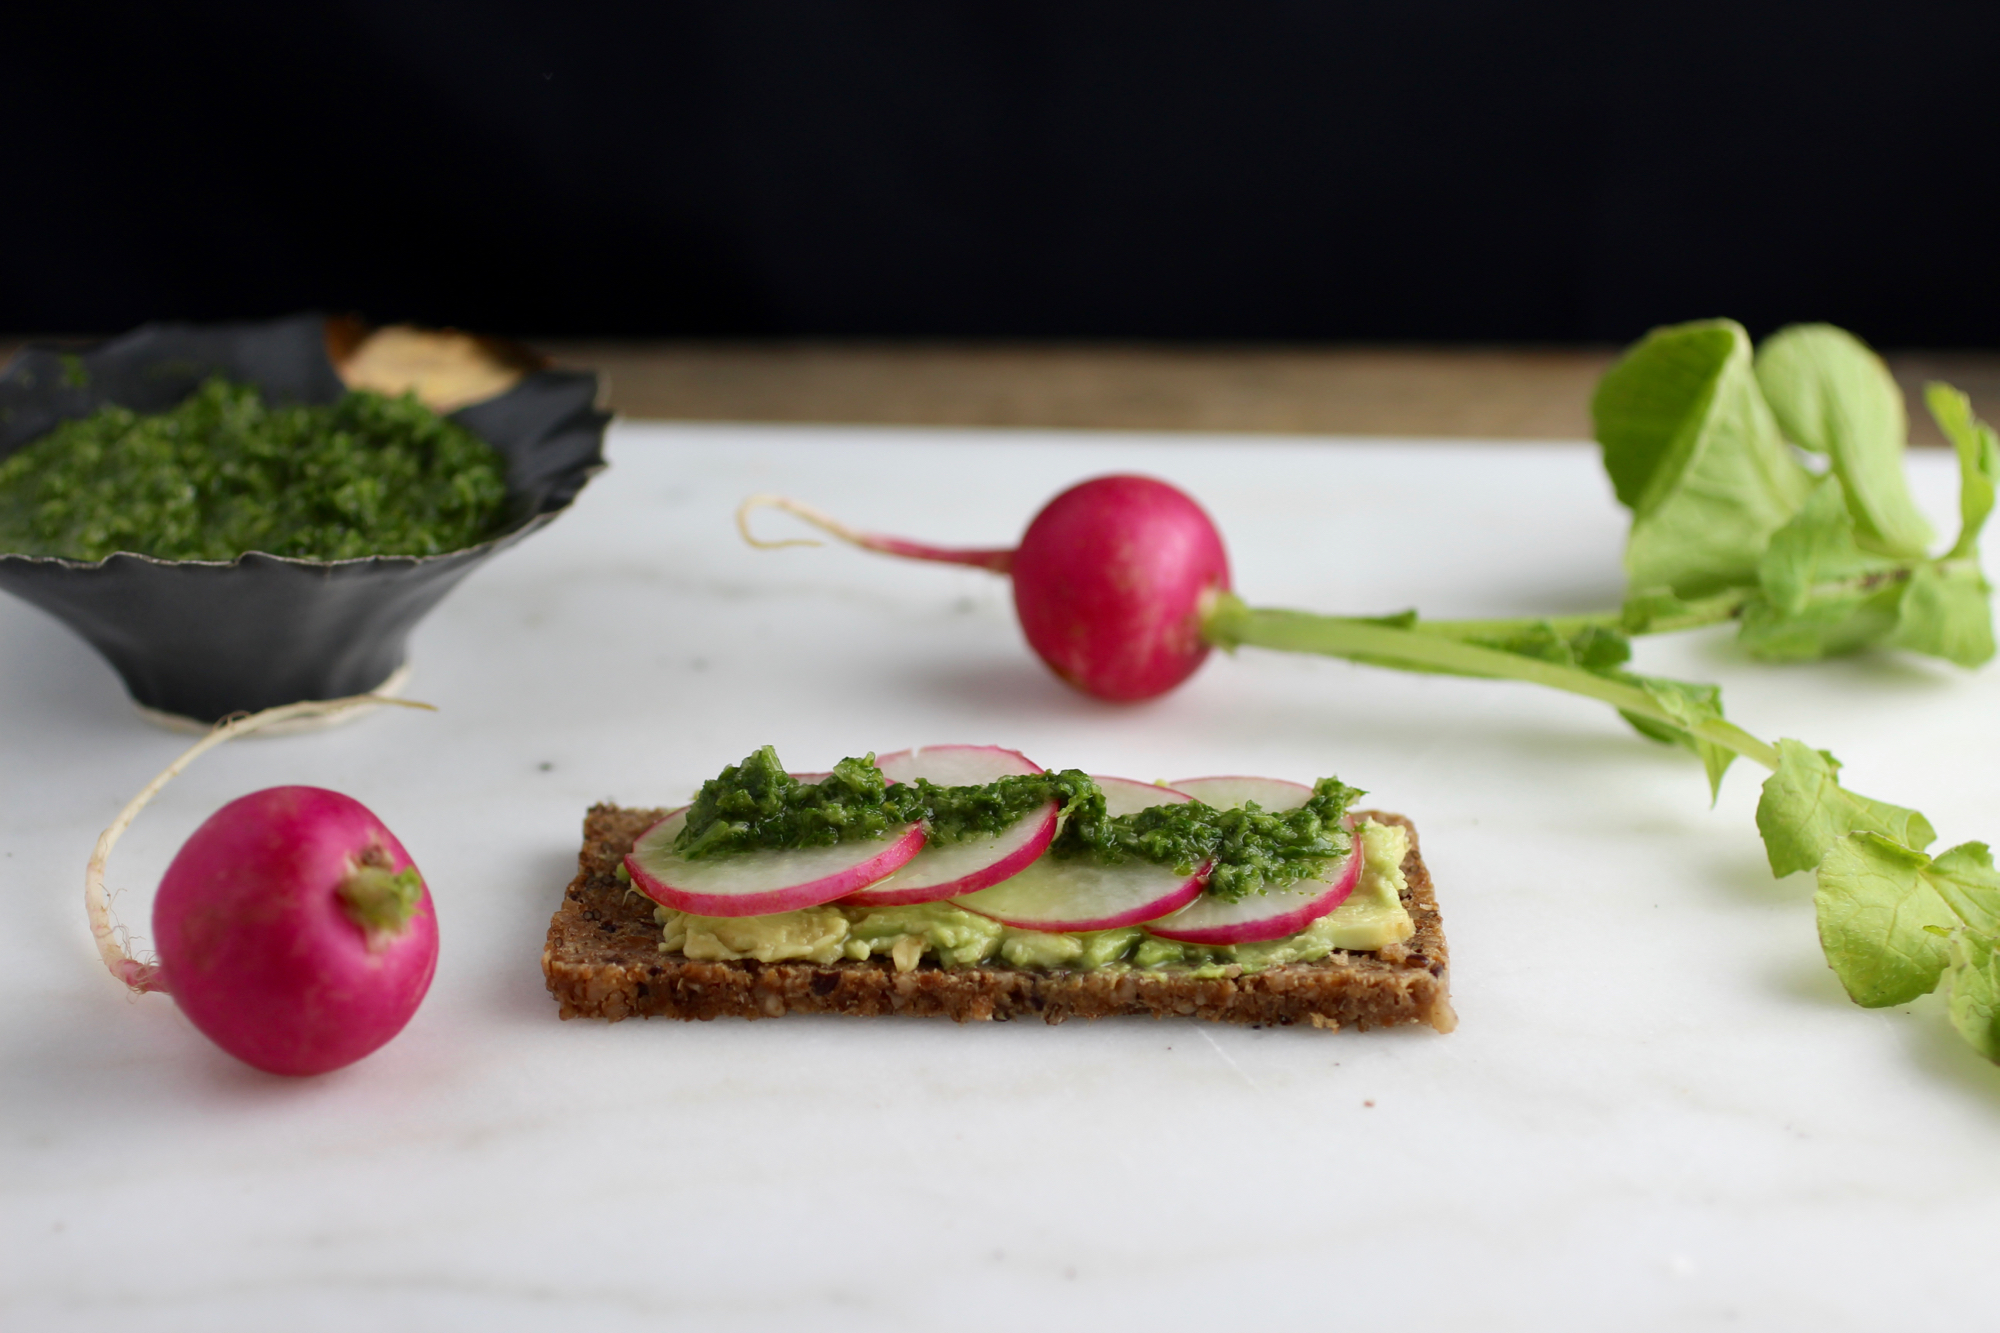
Eating "root to leaves" with sliced radish, avocado, and radish greens chimichurri rye toast.
There are a lot of different words for somewhat similar green sauces: chimichurri, salsa verde, gremolata, chermoula... and at first I deliberated over what to call this particular green sauce. I settled on "chimichurri", as it has a similar combination of vinegar, garlic, and green that you find in traditional chimichurri, just with radish tops in place of parsley and oregano. This sauce can be made with pretty much any edible green that would otherwise be discarded, even wild greens such as dandelion or plantain! It can also be adapted in numerous ways - try adding cilantro or tarragon for more bright herbaceous notes or increase the garlic if that's your jam. The sauce works great on almost anything from grilled vegetables and meat to white beans or breakfast tacos. Really, every time I make it, I end up adding it to all my meals for a few days. You can also eat "root to leaves" by topping a sliced radish and avocado rye toast with a drizzle! Recipe makes 2/3 cup.
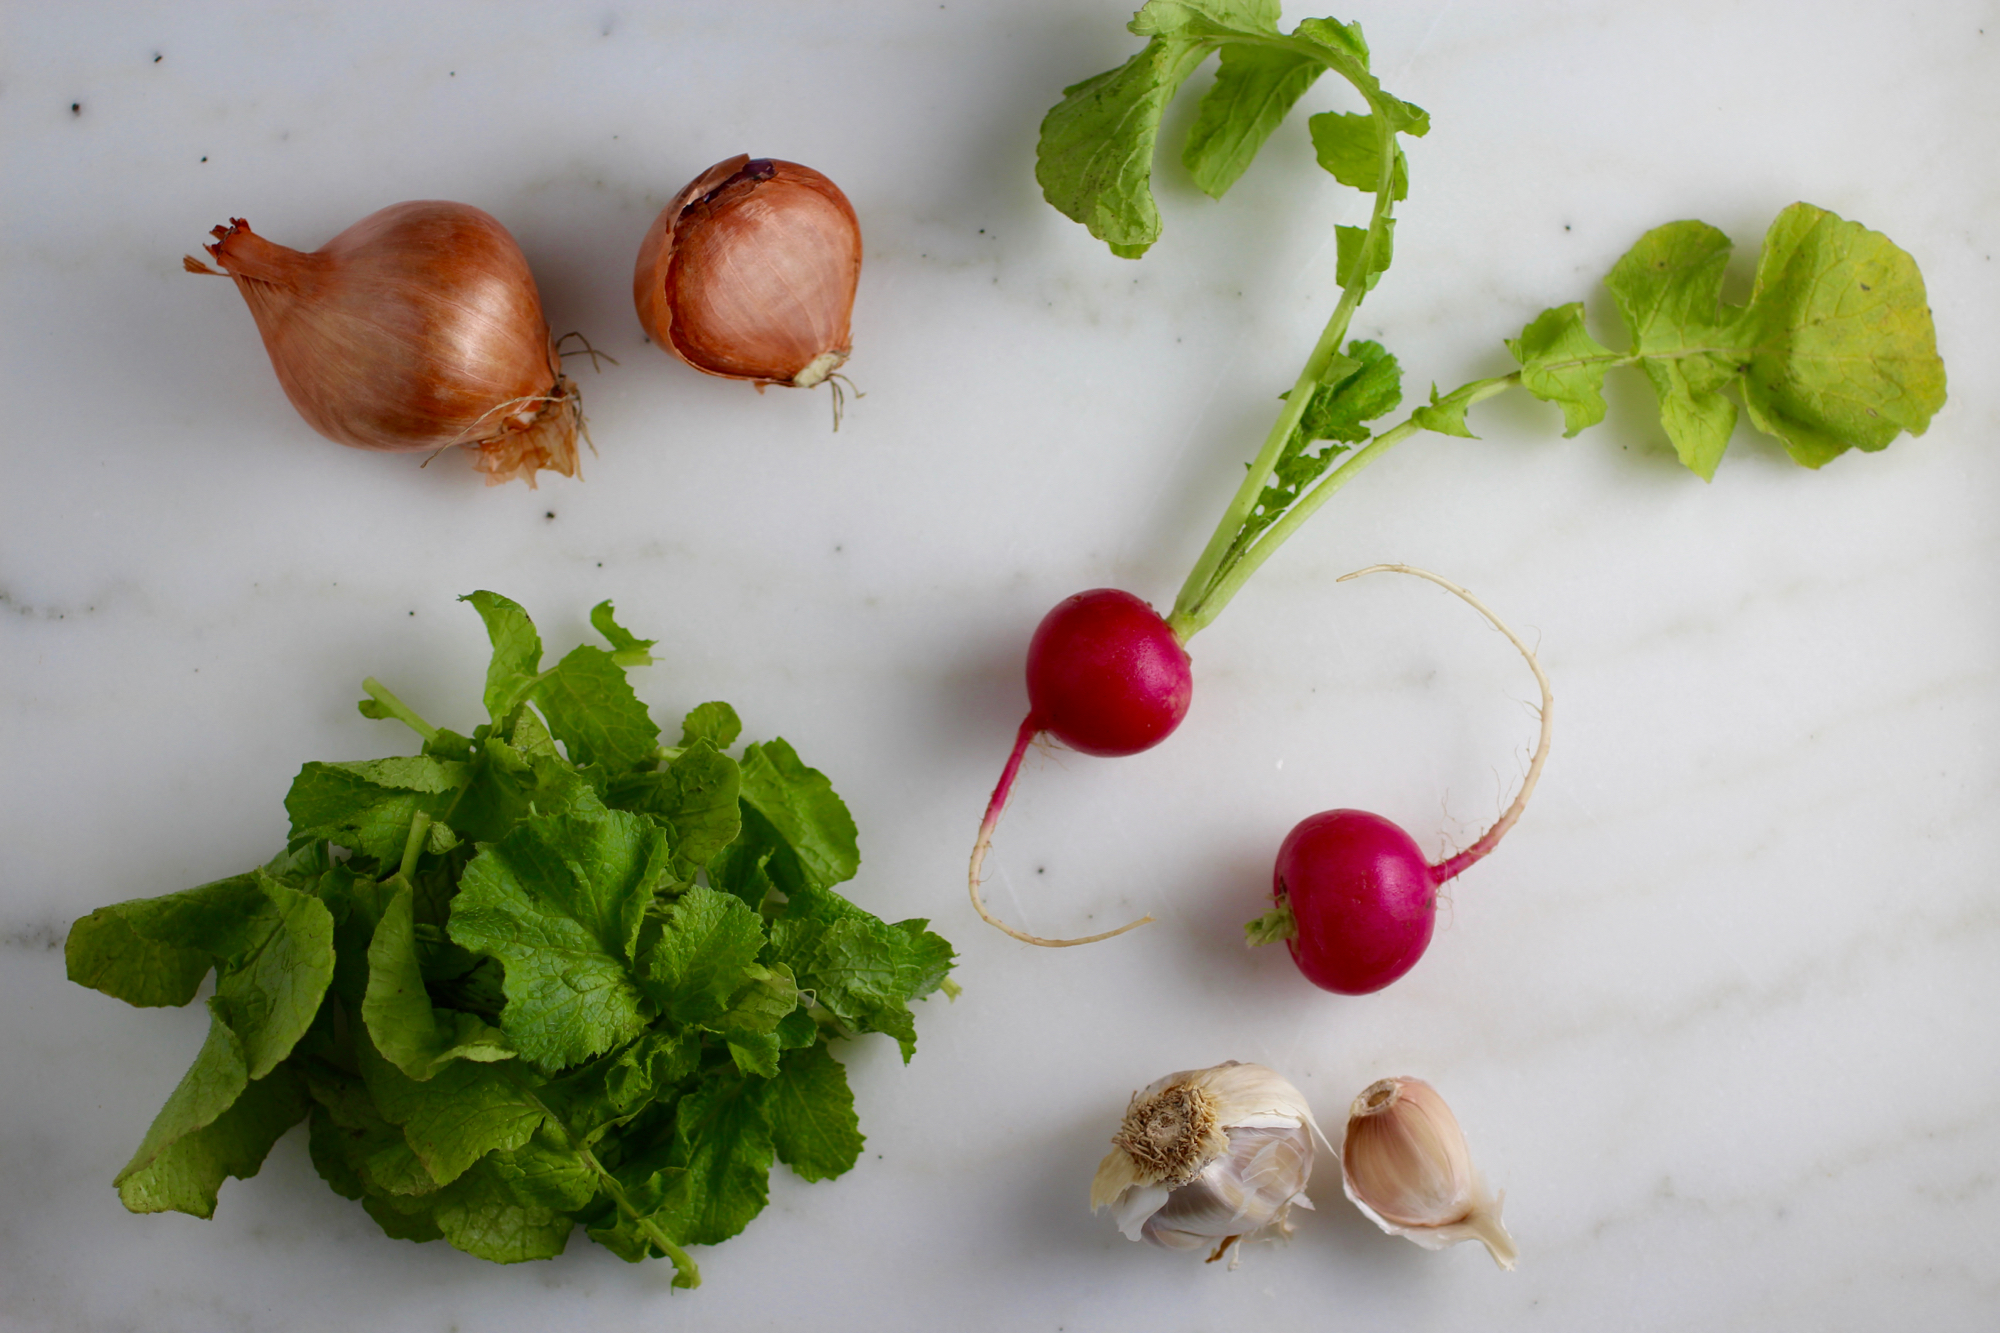
Don't toss those beautiful radish greens!
2-3 (loosely packed) cups chopped radish greens, washed
1 medium shallot bulb, chopped
1 clove garlic, chopped
3 tablespoons rice vinegar
Pinch salt
2 teaspoons olive oil
Heat about 1/2 cup water in small saucepan until simmering. Add radish greens, toss to coat, and cook until softened and dark green (about 30 seconds).
Remove greens and squeeze out excess water. Using an immersion blender or food processor, blend greens with shallots, garlic, rice vinegar, salt, and olive oil until combined, but still coarse. Drain excess liquid if needed and keep chilled up to 4 days until use.

The Makings of a Good Picnic
Complexity is not necessary.

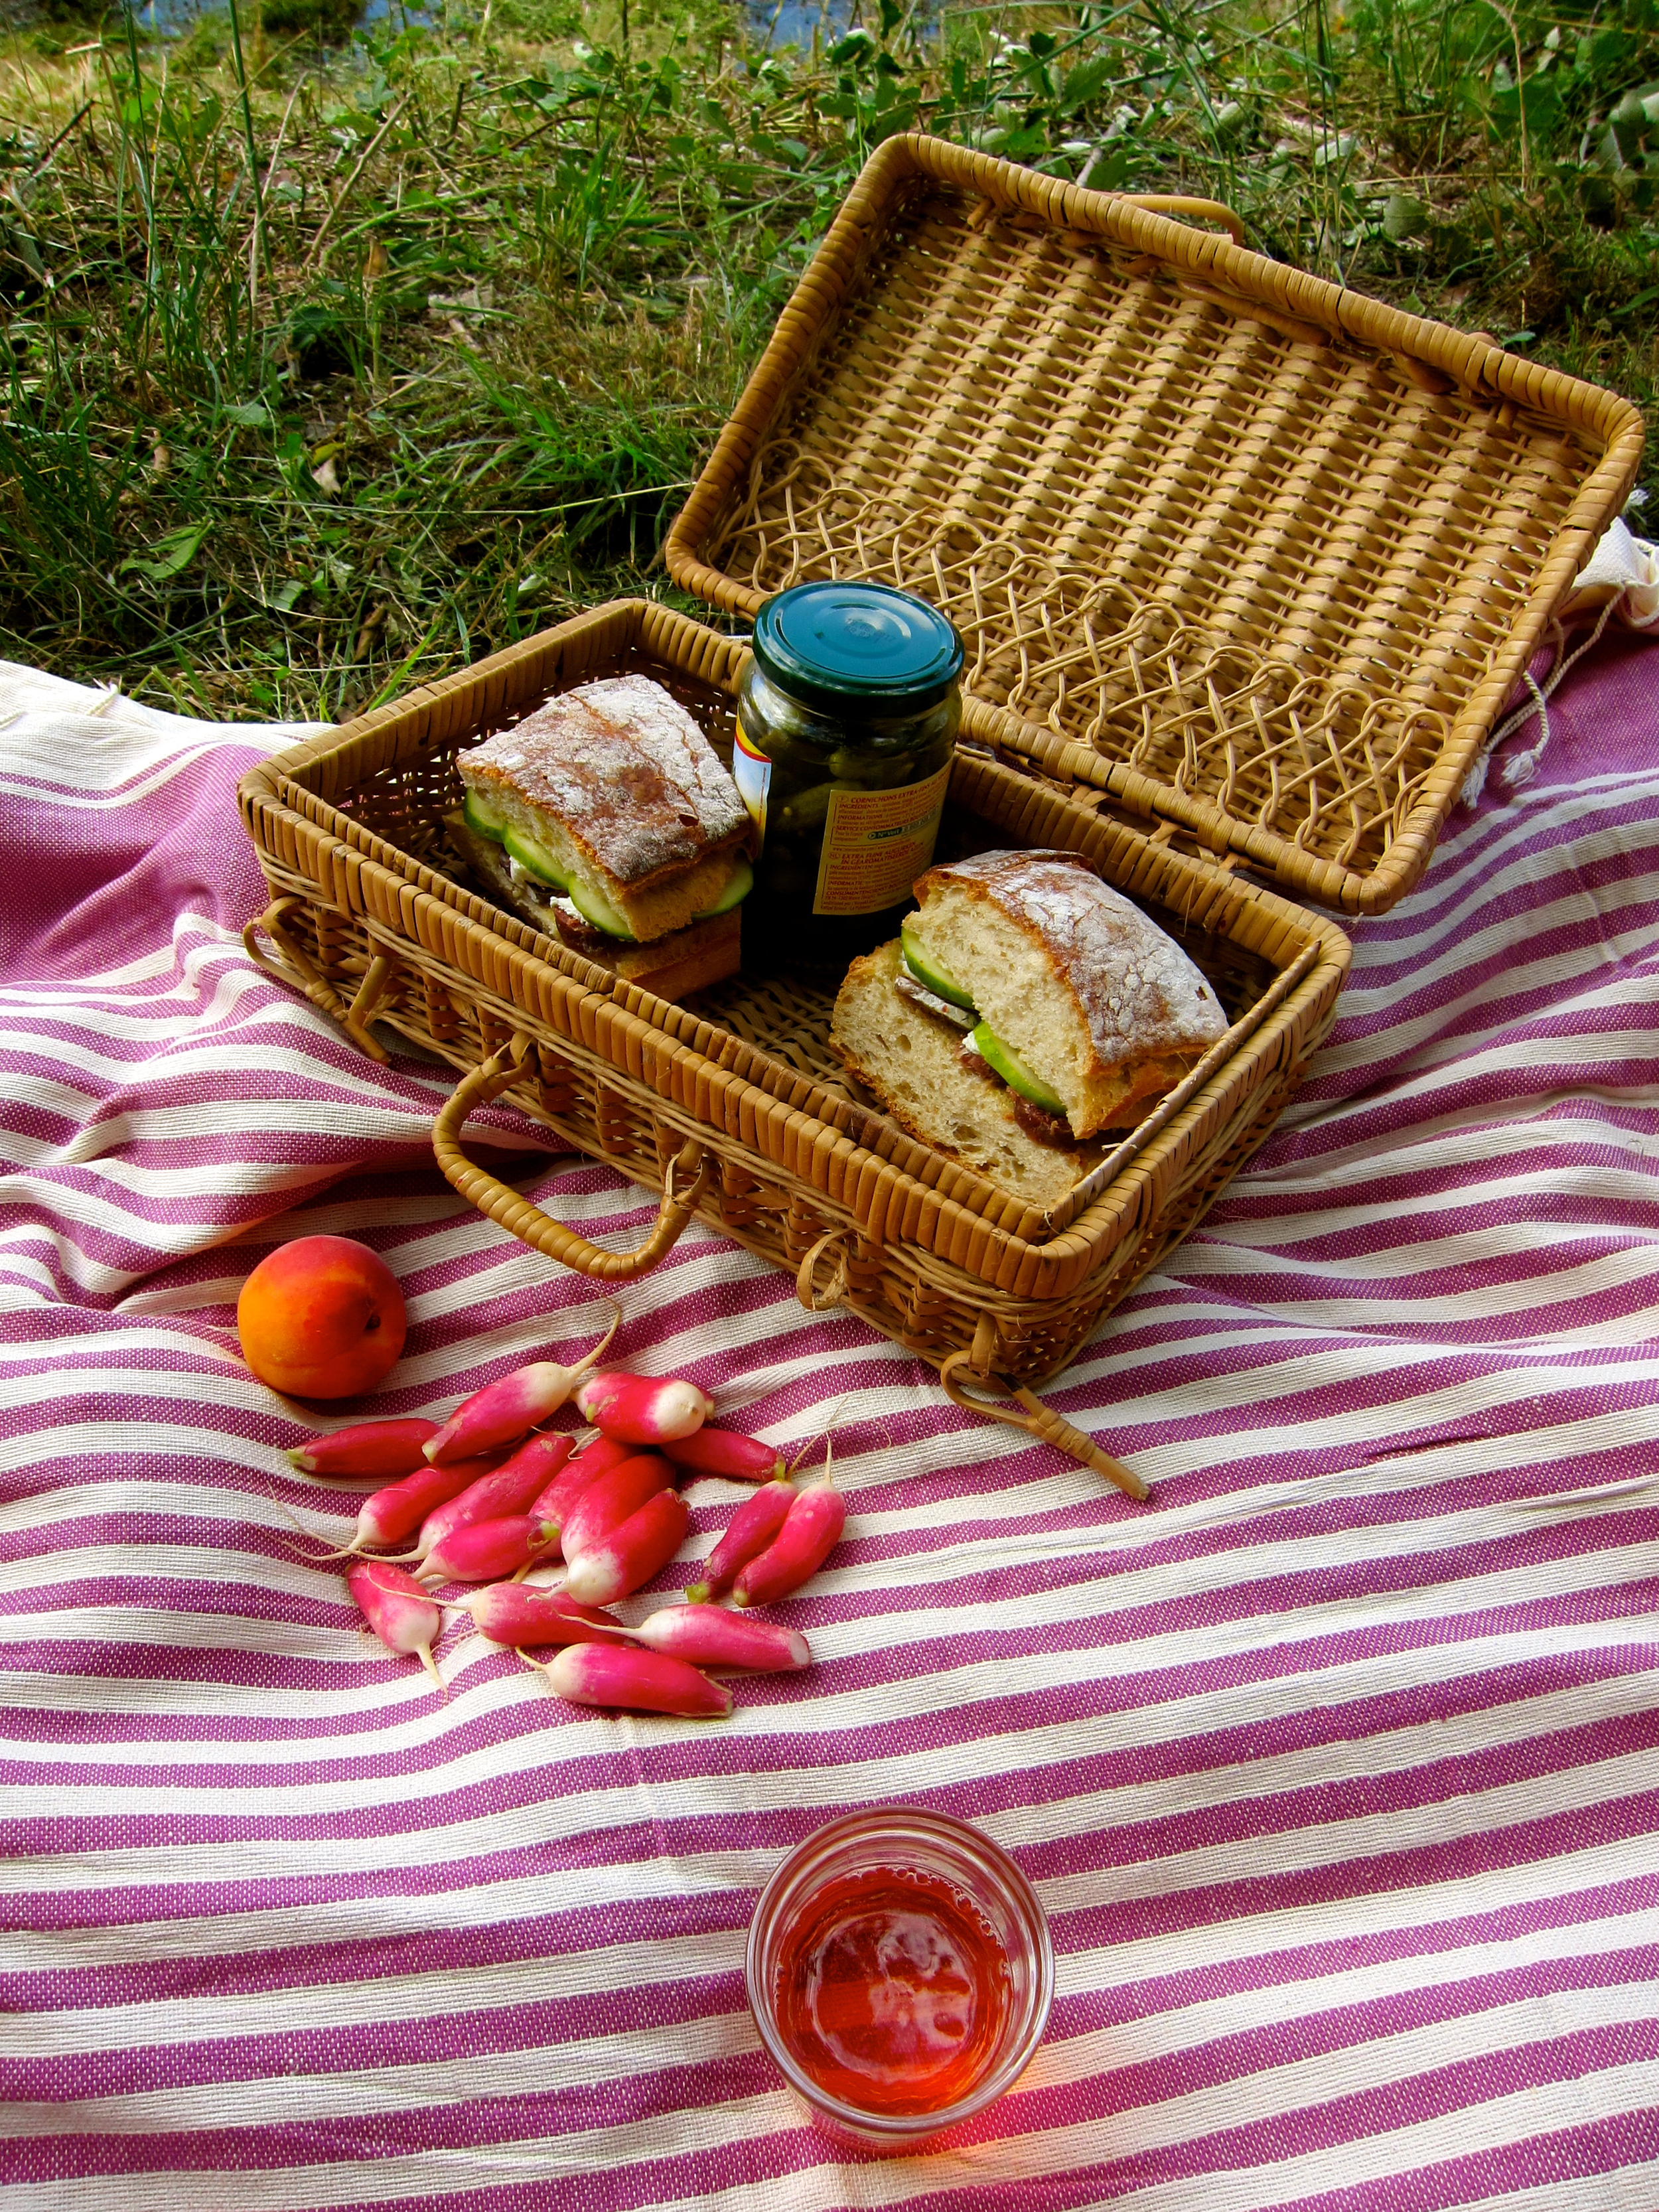
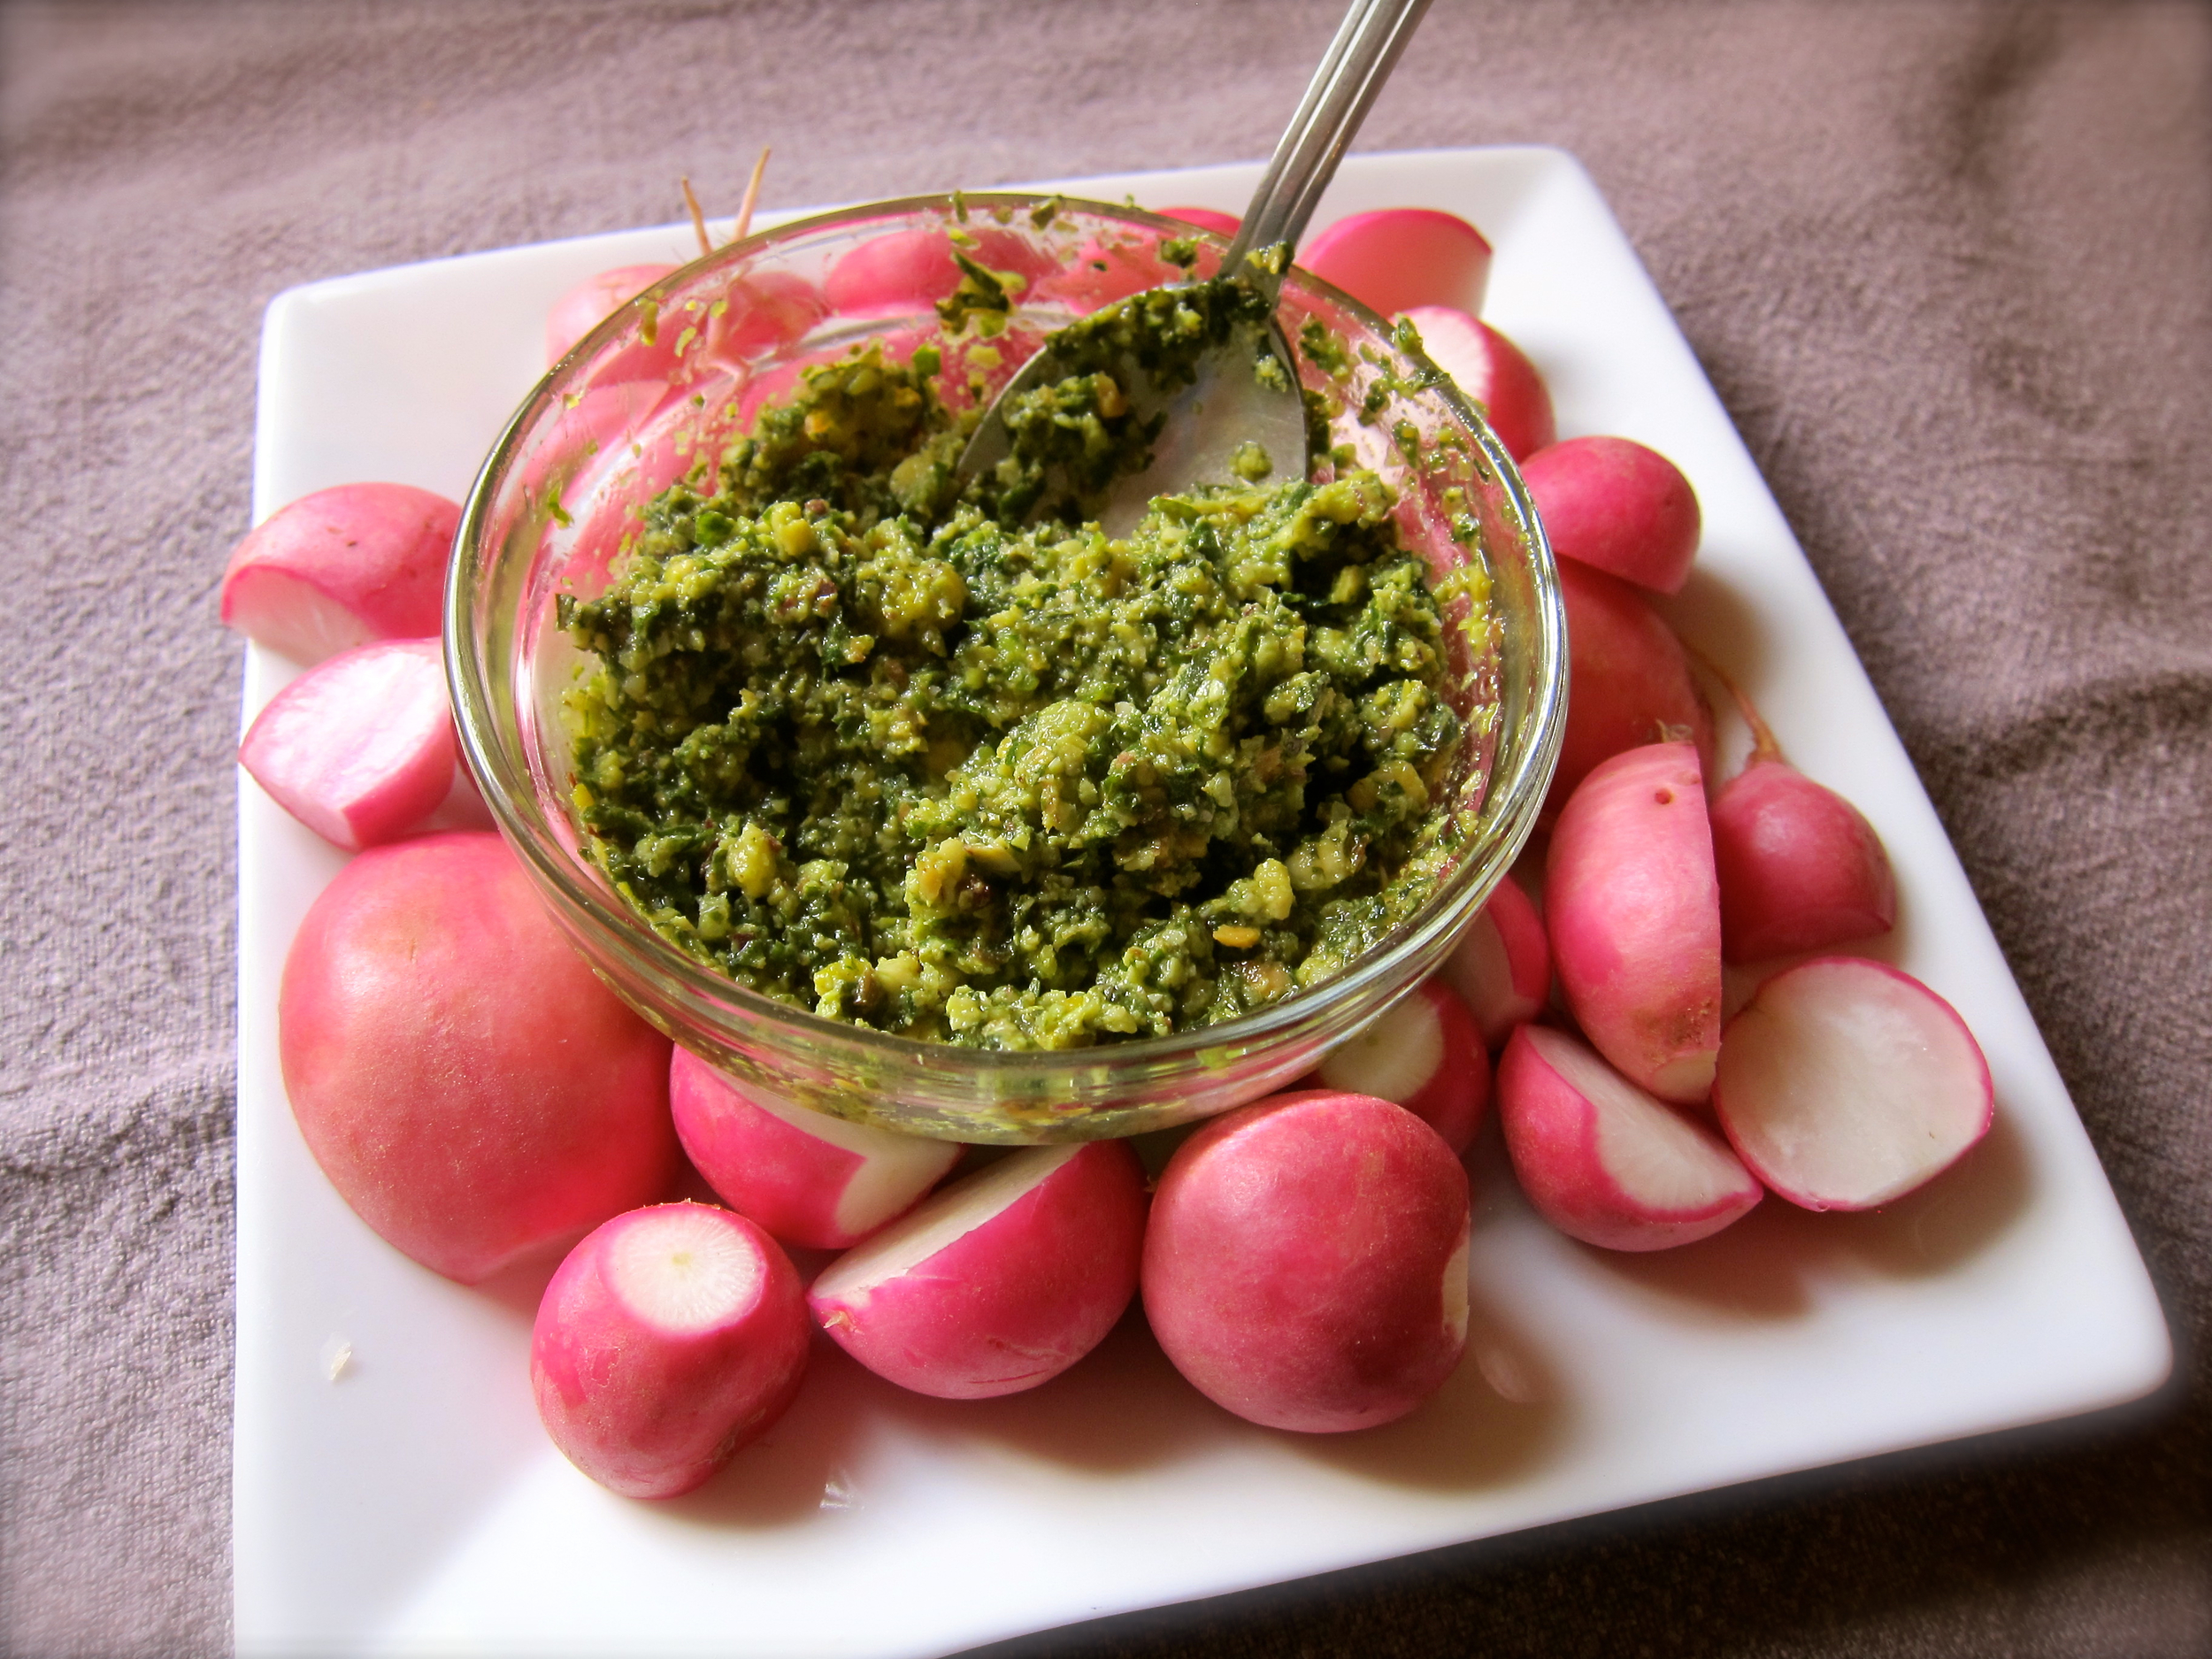
A picnic can take on many forms. It doesn’t require anything complex to make a good picnic, but it does necessitate good food. Here are some of my picnic favorites along with a recipe for pistachio pesto - this is something you can make a batch of, take some for a picnic, and freeze the rest for later. It’s a very refreshing and light pesto recipe (if that’s possible), as there’s no cheese or garlic and is great with radishes as pictured, spread on a sandwich or crostini with goat cheese, topping grilled chicken, tossed into pasta or chopped tomato and fresh corn kernels…there are many possibilities to explore (as always when it comes to food).
Some necessities of a good picnic options (feel free to mix-n-match, throw together into a sandwich, etc.):

Baguette
Cheese(s)
Dried sausage, prosciutto, or smoked salmon
Pickles
Crudité: Radishes, cucumber, carrot, etc.
Dip for crudité such as pistachio pesto or hummus
Deconstructed caprese salad (bring tomato, mozzarella, olive oil/vinegar, basil and put together when you arrive)
Fresh fruit
Potato salad
Curried chicken salad (the curry-ing is not necessary, but it’s my favorite way to have it)
Rose wine, white wine, or beer
Cutting board
Knife
Mason jars for wine
A few napkins or paper towels
Forks if needed
Picnic blanket
A pleasant environment (doesn’t have to be perfect, just pleasant)
Pistachio Pesto (unintentionally vegan)
1 cup raw pistachios, chopped
1 bunch basil, chopped (I’ve also made it with sage and it turned out well)
1/3 cup olive oil
Juice from 1/2 lemon
1 teaspoon salt
To Prepare:
In a food processor, blend the pistachio with basil until coarsely ground. Add olive oil until a paste is formed, then blend in lemon juice and salt. Water, olive oil, or lemon juice (depending on which direction you want to take the flavor) may be added until your desired texture is reached.