

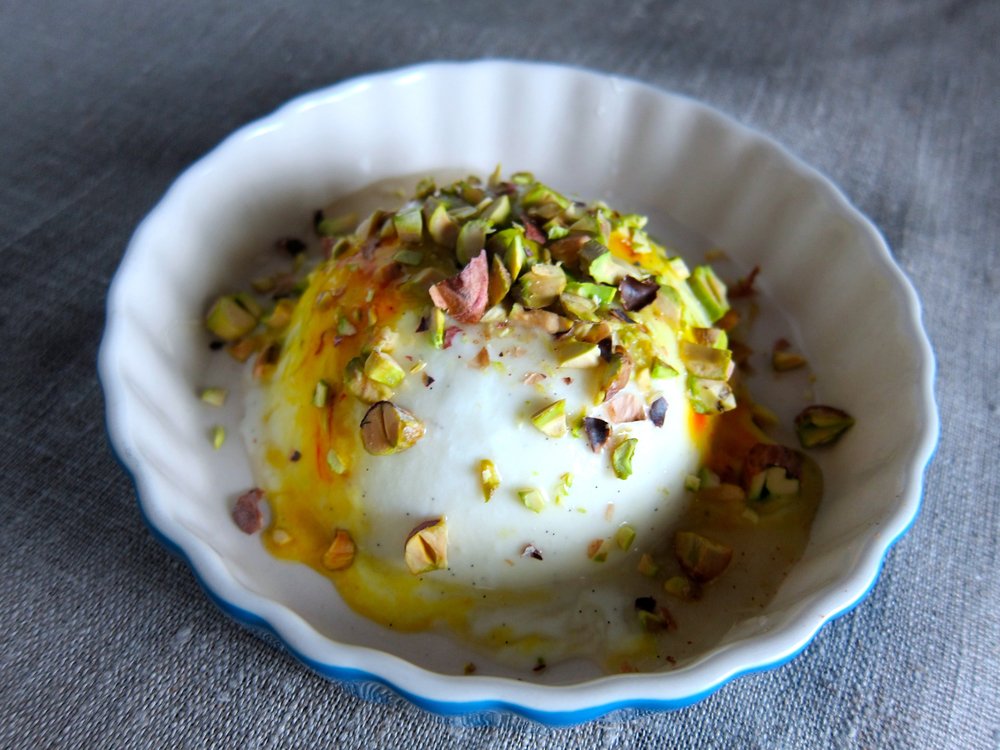
Yogurt Panna Cotta with Saffron & Pistachio
For those of you who have not made panna cotta, you might be intimidated by the idea. I was. After all, the results are impressive and seemingly skill-requiring - Italian grandmother slaving away all day skill-requiring. On top of that, panna cotta uses gelatin, something that isn't found in most present-day pantries and comes animal by-product. Yes, traditional panna cotta is not vegetarian.
What if I were to tell you that panna cotta is incredibly easy to make and not only that, it's also very forgiving? By forgiving, I mean that you can adjust the milk to cream ratio, incorporate yogurt or buttermilk, or even play around with dairy-free milks or vegan gelatin and still create a luscious and beautifully wobbly gel. The other great thing about panna cotta is that it's the perfect canvas for a variety of flavor combinations from saffron pistachio to berry compote and nutmeg to dusted dark chocolate or bay nuts.
There's nothing wrong with serving panna cotta in its container with a spoon, but it doesn't require much more work to remove the gel from it's container and put it on a plate and doing this elevates the dessert to very classy level. Recipe below is adapted from a Smitten Kitchen recipe and makes 4 individual servings.
Grapeseed oil, to crease ramekins or other containers used to hold panna cotta
A few saffron threads per panna cotta
1-1/2 teaspoons (or 4 grams) unflavored gelatin
1 cup plain whole-milk yogurt
1/2 cup heavy cream
1/2 cup whole milk
1/4 cup granulated sugar
2 teaspoons lemon juice
1/2 vanilla bean
1/4 cup toasted pistachios, chopped
Honey, to drizzle
Lightly grease containers for panna cotta with grapeseed oil and add a few saffron threads to each container. Ramekins or small cups or bowls work well. Taller/more narrow containers such as jars also work, but make it harder to remove the panna cotta once it has cooled.
Place 2 tablespoons of water in a small bowl. Stir in gelatin and allow to soften, about 10-15 minutes.
In a large bowl, whisk together yogurt with 1/4 cup cream and 1/4 cup milk. Add remaining cream and milk to a saucepan, stir in granulated sugar, and bring to a simmer. Stir in gelatin mixture to dissolve, remove from heat, then whisk into dairy mixture. Scrape the inside of the vanilla bean into mixture along with lemon juice and whisk. Pour into cups, stir once with a fork or chopstick to mix around saffron, and chill in the refrigerator for at least 2 hours. This can be done the night before.
To unmold the cups, fill a saucepan with about 3/4-inch of water and bring to a simmer. Turn off heat and a dip panna cotta cup into the water for 5 seconds, then invert it onto a flat plate. Repeat with remaining cups.
Right before serving, drizzle with honey and top with 1 tablespoon of chopped toasted pistachio. See below for inspiration for other panna cotta variations.

Panna cotta variation with blueberry compote and thyme.

Panna cotta variation with dusted foraged bay nuts and olive oil.

Strawberry Mascarpone Tart with Lavender

Strangely, I have made this tart (or variations on this tart) several times and have never recorded the recipe - it is just that easy and forgiving! In the interest of posterity and the sharing of deliciousness, I decided to finally post the recipe to the blog.
As mentioned, this recipe is very forgiving so variations are accepted and encouraged, though the combo of cornmeal-strawberry-mascarpone-lavender should not be treated lightly. The cornmeal crust is a variation on a classic pâte sucrée that I use for almost every tart shell. I have also subbed the cornmeal for buckwheat, which is just as delightful, but a little darker/nuttier. Other variations include brown sugar in place of white, addition of different herbs and spices such as rosemary, cinnamon, or saffron, different fruit, etc. Again however, you might want to just stick to this very delicious combination! Makes one tart, about 6-8 servings.

Mascarpone tart awaiting strawberry slices.
7 tablespoons cold unsalted butter, plus more for greasing the tart pan, diced
1/2 cup plus 2 tablespoons all-purpose flour
1/2 cup cornmeal (medium-grind)
1/2 teaspoon plus one pinch salt (medium-grind), divided
2/3 cup granulated sugar, divided
2-3 tablespoons plain yogurt, cold milk, or cold water (I prefer yogurt for its tangy quality)
8 ounces mascarpone
1 large egg
1/2 vanilla bean pod scrapings
1/2 teaspoon vanilla extract
1 pint strawberries
1/4 cup lavender flowers (other edible flowers can be used, but lavender is very easy to find as it often grows wildly or is feral on roadsides)
Honey, for drizzling
To Prepare
Lightly grease the bottom and sides of an 8-inch or 9-inch tart pan. Set aside.Mix flour, cornmeal, 1/2 teaspoon salt, and 1/3 cup sugar and cut in butter. Using pastry blender, fork, or hands mix butter into flour mixture until the dough resembles small peas. Add yogurt, milk, or water and blend until dough sticks together when pressed, but is still crumbly.
Press dough into and up sides of pan, chill in refrigerator for 30 minutes. Preheat oven to 350 degrees F and bake for 15 minutes, until golden-brown. Remove from oven and allow to cool.
While tart shell is cooling, remove the tops from the strawberries and thinly slice. set aside.
Whisk mascarpone with remaining 1/3 cup sugar, egg, vanilla bean pod scrapings, vanilla extract, and pinch salt until combined. Once tart shell is completely cool, spread mascarpone evenly over shell and bake for 30-35 minutes, or until set. Tart will turn golden and may have some areas of browning and start to rise some - don't worry, that's what is supposed to happen!
Remove from oven and cool for 20-30 minutes. Top mascarpone with strawberries in overlapping concentric circles, starting with the largest strawberry slices around the outer edge and working your way in until the entire tart is covered with strawberries.
Top with lavender flowers and drizzle with honey. Serve at room temperature or cold.
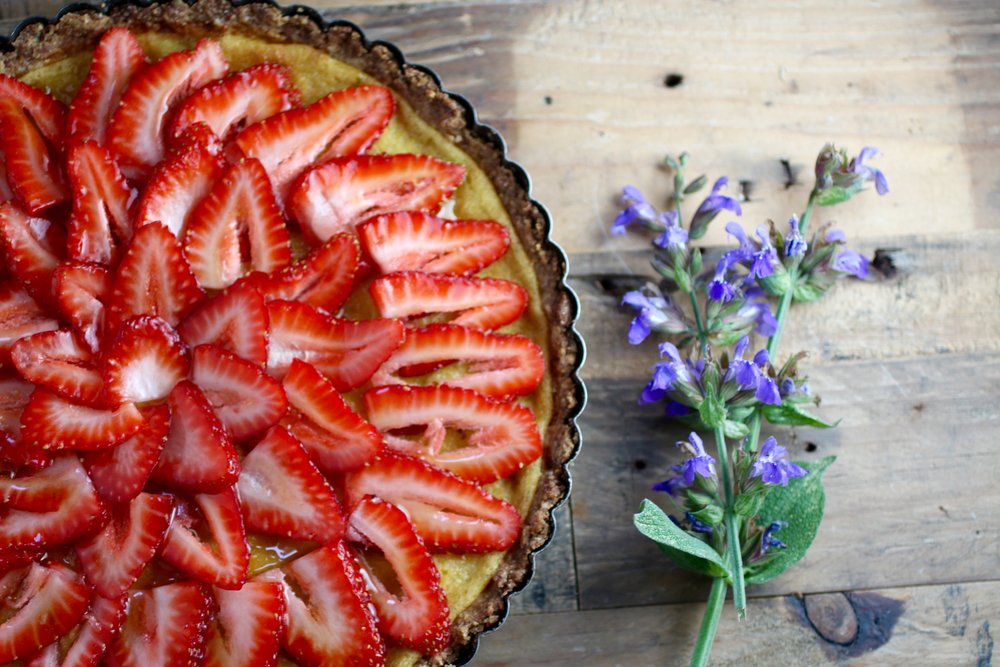
Strawberries laid out in concentric circles - now just awaiting the lavender and honey!

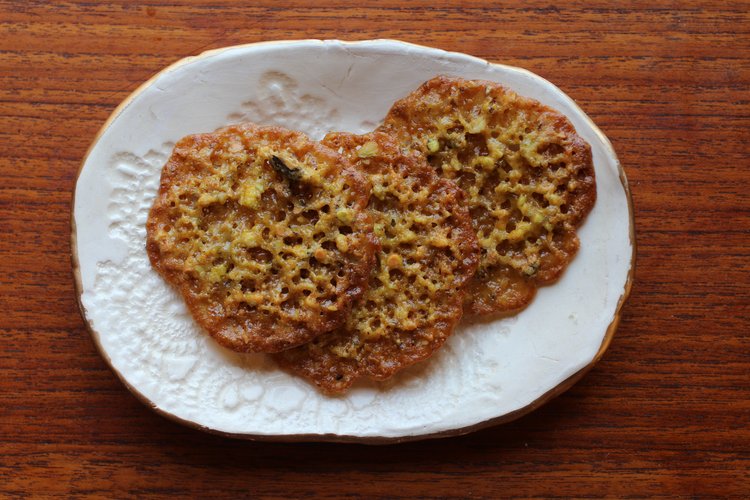
Saffron Pistachio Laceys

Brittle and delicate with amazing crunch and flavor.
More toffee than cookie, I grew up with lacey cookies purchased from the local grocery store. Although not invented by the Humboldt County company that made them in my hometown, they definitely cornered the market and brought "Laceys" (now a registered trademark) to the forefront of local graduation parties, holiday gatherings, gift baskets, and this girl's heart.
The classic registered trademark Laceys cookie is composed of melted chocolate sandwiched between two toffee cookies, which is delightful and worth making, whereas this version is uniquely different and much lighter, with pistachio, saffron, and and absence of chocolate (trust me) for a truly crisp taste and more unique Middle Eastern/Indian flavor. Lacey cookies have barely any flour, but a relatively larger amount (compared to typical cookie recipes) of sugar that, when heated, caramelizes and, in combination with the butter and nuts, create more of a brittle nutty candy than cookie.
I'm a sucker for caramelly, nutty, crunchy, slightly salty, exotic-spicey desserts and this version of a lacey cookie (or Laceys®) takes the cake - er - cookie! This version has a great brightness from the orange zest (just in time for the approaching citrus season!) and is light enough to warrant pairing with vanilla ice cream or frozen yogurt, no complaints! Or perhaps making an ice cream sandwich that crackles to the bite and turns into a saffron-pistachio toffee ice cream in the mouth? Just a thought. Additional bonus is that they're so thin, one batch makes quite a lot and they keep well in the freezer - just remove, thaw for 5 minutes until you can slice them and cook them up as directed. Recipe is adapted from one found here and makes about 48 cookies, depending on how thick you slice them.
2 1/2 tablespoons unsalted butter, melted
1/8 teaspoon finely chopped saffron threads
3/4 cup unsalted shelled pistachios (about 3 ounces)
1/2 cup granulated sugar
1/4 teaspoon almond extract
1/4 cup all-purpose flour
2 teaspoons grated orange zest
2 tablespoons orange juice
In a small bowl, add saffron to melted butter and let sit for five minutes.
In a food processor, pulse pistachios and sugar until nuts are very finely chopped. If you do not have a food processor, you can simply chop them with a knife until fine, but it will take some time.
In a medium bowl, stir together saffron butter, pistachio-sugar mixture, almond extract, flour, orange zest, and orange juice.
Cover bowl and chill in refrigerator for 15 minutes (dough will be too sticky to handle otherwise).
Remove from refrigerator and roll into two logs about 1/2-inch in diameter. Wrap in plastic wrap or parchment paper and freeze at least one hour.
Preheat oven to 325 F.
Using a sharp knife, slice each log into about 1/4-inch thick slices. Place sliced dough discs two inches apart from each other on parchment-paper or Silpat-lined cookie sheets.
Bake 10 minutes or until golden.
Cool on cookie sheets (the cookies will break if you remove them while warm).
Store layered between parchment in an airtight container at room temperature for up to a week. If you leave them out to open air for more than a few hours, they will absorb any moisture from the air and potentially become soggy.
Try using for toffee ice cream sandos!
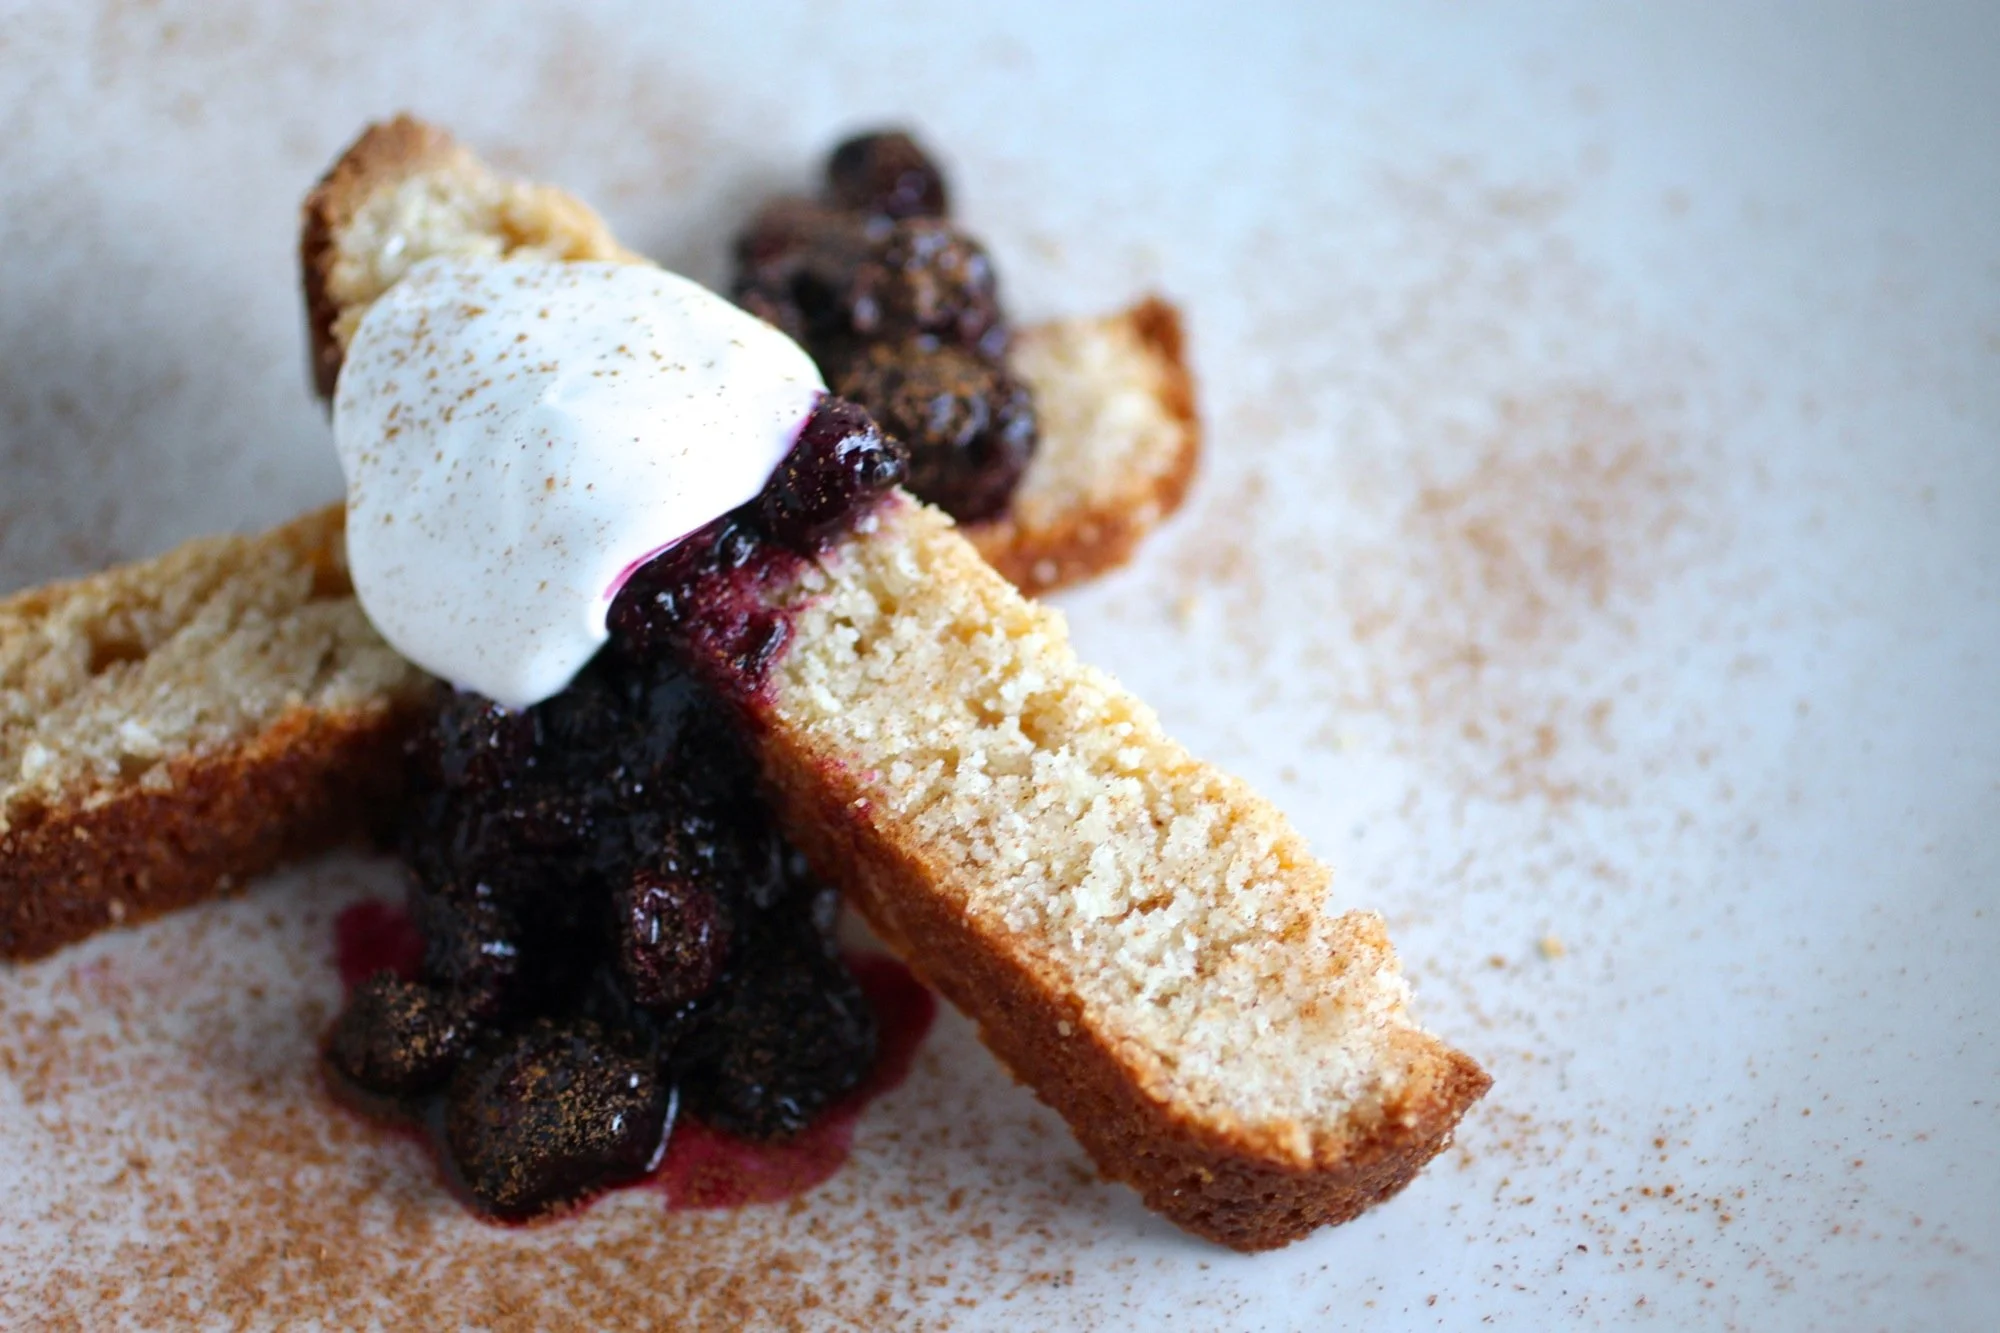
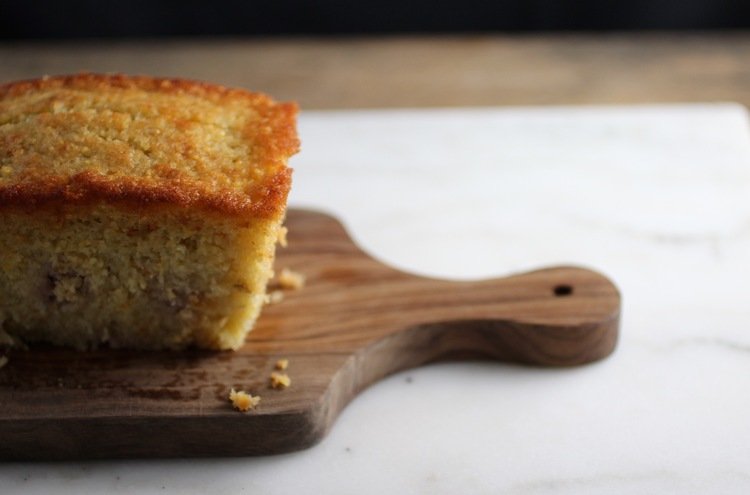
Danish Almond Sweet Bread

While at my parents' house over the holidays, some friends were visiting one morning and I had to scramble to bake something using ingredients from the pantry, which was pretty bare (note: by no fault of my parents, it had just been many days of feasting). Santa brought my sister a small Danish recipes cookbook where I found a recipe for "Danish Almond Bread". I didn't actually like the look of the recipe in the cookbook, but it inspired me to adjust another recipe I had to ultimately create what I was looking for - something very nutty and chewy, but sweet and satisfying. My parents didn't have almond meal on hand, so I put my niece to work picking out almonds from a mix of nuts that I then blended and, surprisingly, it worked just fine. I have since made the recipe two times and each time it has been quickly devoured.
The batter itself is more like cookie dough than bread or cake batter and is lovely sliced thin and topped with crème fraîche and berry or citrus compote and a dusting of cinnamon. I could also see it pairing well with a variety of other ingredients - sautèed stone fruit and herbs, chestnut purée and honey, fresh cherries and fennel seed... Makes one loaf that serves 8-12.
2/3 cup butter, room temperature
1 cup sugar
2 eggs
1 cup almond meal
1/2 teaspoon almond extract
1/2 teaspoon ground cinnamon
1 cup all-purpose flour
1 teaspoon baking powder
1/2 teaspoon salt
Preheat the oven to 350 degree F and grease a loaf pan.
In a large bowl, beat the butter and sugar until soft and fluffy using a pastry blender or electric beater. Gradually beat in the eggs, one at a time, until incorporated. Add the almond meal, almond extract, and cinnamon and mix thoroughly. Blend in the flour and baking powder and salt.
Spread the batter into the loaf pan (it will be thick) and bake for 50 to 60 minutes or until a toothpick inserted in the center comes out clean and top is golden brown.

Prickly pear salty caramels
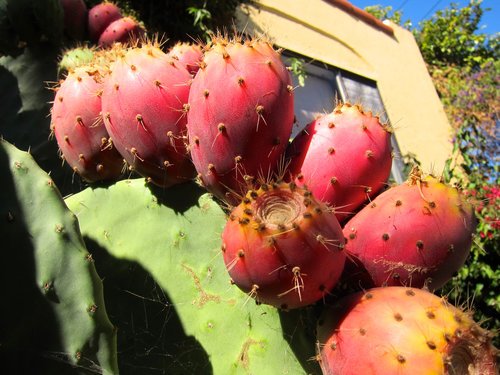
Prickly pear margaritas, prickly pear sorbet, prickly pear cheesecake, prickly pear fermented beverage, prickly pear marinade - you name it, I've tried it with prickly pear. This is primarily because at my house in Oakland has a giant prickly pear cactus (Opuntia) that is very, VERY productive. Like, part-time job in the late summer/fall productive. At first, I was so pumped that I wasn't very generous with the fruit, but now, when I hear someone comment on the prickly pear cactus (which happens quite often) I run out and give them a bag of frozen fruit. You can read more about my harvesting methods here. Since there's so much fruit, I now pretty much stick to the second process listed, which is a loss of the pulp, but dramatically less work.
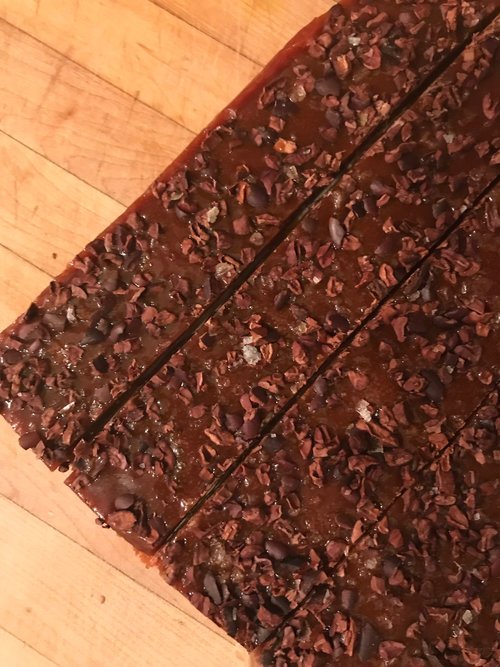
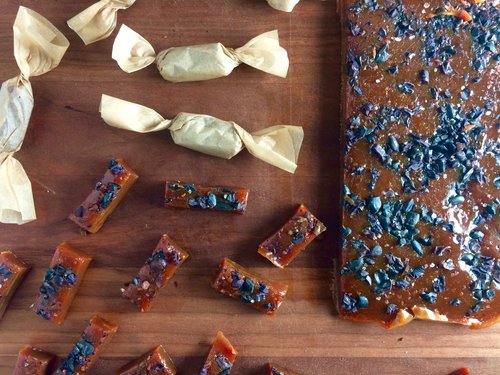
Cutting caramels into squares.
A few years ago, in an effort to get rid of as much juice as possible, I was trying to think of recipes where reducing the juice was required. I remembered making apple cider caramels at some point, so I decided to give that a try using this Smitten Kitchen recipe for apple cider caramels, but substituting out cider for prickly pear juice. There are also a few other changes, like adding cacao nibs to the top and omitting cinnamon (wouldn't be bad, but just already a lot going on). The caramels were above and beyond my expectations - a deep, rich sweetness balanced by the salt and toasty cacao nibs. Really so, so good and now my favorite prickly pear concoction. Additionally, they can be wrapped and keep well, so a great unique holiday gift item! Recipe makes about 50 caramels, depending how large they are cut.
4 cups (945 ml) prickly pear juice
8 tablespoons (115 grams or 1 stick) unsalted butter, cut into chunks
1 cup (200 grams) granulated sugar
1/2 cup (110 grams) packed light brown sugar
1/3 cup (80 ml) heavy cream
Up to 1/4 cup cacao nibs
Up to 2 teaspoons flaky sea salt, such as Maldon, or less of a finer salt
Neutral oil for the knife, if needed
Boil the prickly pear juice in a 3- to- 4- quart saucepan over high heat until it is reduced to a dark, thick syrup, about 1/2-3/4 cup in volume. This takes about 40-60 minutes on my stove. Stir occasionally.
Meanwhile, get your other ingredients in order, because you won’t have time to spare once the candy is cooking. Line the bottom and sides of an 8- inch square metal baking pan with 2 long sheets of crisscrossed parchment. Set it aside. Put salt and cacao nibs in a small dish.
Once you are finished reducing the juice, remove it from the heat and stir in the butter, sugars, and heavy cream. Return the pot to medium- high heat with a candy thermometer attached to the side, and let it boil until the thermometer reads 252 degrees, only about 5 minutes. Keep a close eye on it. Stir occasionally. (Don’t have a candy or deep- fry thermometer? Have a bowl of very cold water ready, and cook the caramel until a tiny spoonful dropped into the water becomes firm, chewy, and able to be plied into a ball.)
Immediately remove caramel from heat and give the caramel several stirs to distribute it evenly. Pour caramel into the prepared pan then sprinkle with cacao and salt. Let it sit until cool and firm—about 2 hours, though it goes faster in the fridge. Once caramel is firm, use your parchment paper sling to transfer the block to a cutting board. Use a well- oiled knife, oiling it after each cut (I have never had to do this...), to cut the caramel into 1-by-1-inch squares or 0.5-by-2-inch. Wrap each one in a larger piece of parchment or wax paper, twisting the sides to close. Caramels will be somewhat on the soft side and will keep for 2 weeks at room temperature, 1 month in the refrigerator.
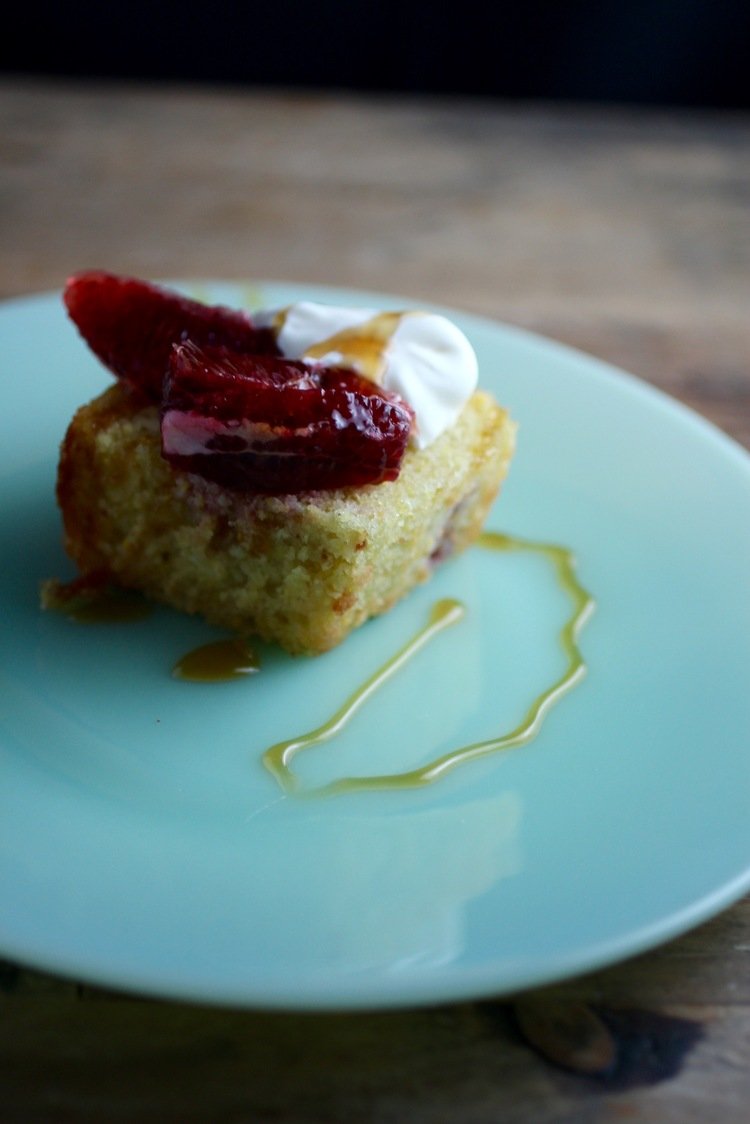
Olive oil cornmeal cake with blood orange and honey

A bit more olive oil can also be drizzled over the top - definitely won't hurt!
We recently returned from our honeymoon in Peru, where we picked up some palta (avocado) honey at the peak of summer to the other side of the equator where it is currently a different kind of seasonal peak - the height of the winter doldrums. Fortunately, grey winter days are not without their culinary delights, one of them being amazing citrus. Given our recent honey purchase, the cold weather begging me to "get my baking on", and beautiful blood oranges that fold so lovely into an olive oil cake, this combination was calling my name. The palta honey has very unique dark, earthy quality to it, but any honey that you enjoy will do for drizzling.
The recipe is adapted from a Smitten Kitchen recipe in a few ways including to incorporate cornmeal and deconstruct the compote - blood orange slices are so gorgeous it's a shame to chop them up for this application and we wanted the honey to shine on it's own. Makes one 9x5-inch loaf pan or four, 5x2.5-inch loaf pans. I happen to have four of these small loaf pans and am always looking for excuses to use them because they are pretty darn cute and more surface area = more crispy bits = delicious.

Butter for greasing pan
5 blood oranges
1 cup (200 grams or 7 ounces) sugar
About 1/2 cup (118 ml) plain yogurt
3 large eggs
2/3 cup (156 ml) extra virgin olive oil
1 cup plus 2 tablespoons all-purpose flour
6 tablespoons cup medium grind cornmeal
1-1/2 teaspoons (8 grams) baking powder
1/4 teaspoon baking soda
1/2 teaspoon salt
Honey, for drizzling
Crème fraîche for serving (optional, but perfect - just do it)
Preheat oven to 350 degrees. Butter a 9x5-inch loaf pan or four 5x2.5-inch loaf pans. Grate zest from 2 oranges and place in a bowl with sugar. Using your fingers, rub ingredients together until orange zest is evenly distributed in sugar.
Supreme an orange - aka "segment citrus like a boss" (I created that instructional post and just found out through this recipe that this technique is called "supreming"!). Break up segments with your fingers into about 1/4-inch sized chunks.
Halve 2 oranges and squeeze juice into a measuring cup; you’ll will have about 1/4 cup. Add buttermilk or yogurt to juice until you have 2/3 cup liquid altogether. Pour mixture into bowl with sugar and whisk well. Whisk in eggs and olive oil.
In another bowl, whisk together flour, cornmeal, baking powder, baking soda and salt. Gently stir dry ingredients into wet ones. Fold in pieces of orange segments. Pour batter into prepared pan.
Bake cake for 50 to 55 minutes (9x5-inch loaf pan) or 25-30 minutes (5x2.5-inch loaf pans), or until it is golden and a knife inserted into center comes out clean. Cool in loaf pan(s). While cake is cooling, supreme 2 more oranges and keep refrigerated until served.
Slice cake and serve with crème fraîche, blood orange slices, and a drizzle of honey. You can also drizzle some more olive oil over the top if you're feeling wild. Keeps for 3-4 days.

Buckwheat Hazelnut Shortbread

Shortbread is called short bread because it is very high in fat, which gets in the way of gluten development, thus "shortening" the gluten strands. Gluten is a very strong and stretchy protein, so when a lot of fat gets in the way of its development, the tenderness and melt-in-your mouth effects increase. Food scientists wanted to capitalize on this so they created a fat product that shortens really well, in addition to being cheaper than butter and more solid and shelf-stable than vegetable oils. They call it shortening (naturally). However, in light of the fact that the trans fat in shortening is incredibly bad for your healthy and that butter tastes way better and is more sustainable, we will be using butter in our shortbread.
This twist on shortbread incorporates buckwheat flour and hazelnuts, producing a rustic, dark, and nutty cookie that is always a crowd-pleaser. Dough can be made in advance and frozen for later use. Makes 6 dozen cookies (recipe can be halved). “If you prefer a crispier crunch and more classic hazelnut shortbread, just replace the buckwheat flour with all-purpose flour, as buckwheat flour does absorb some moisture. ”
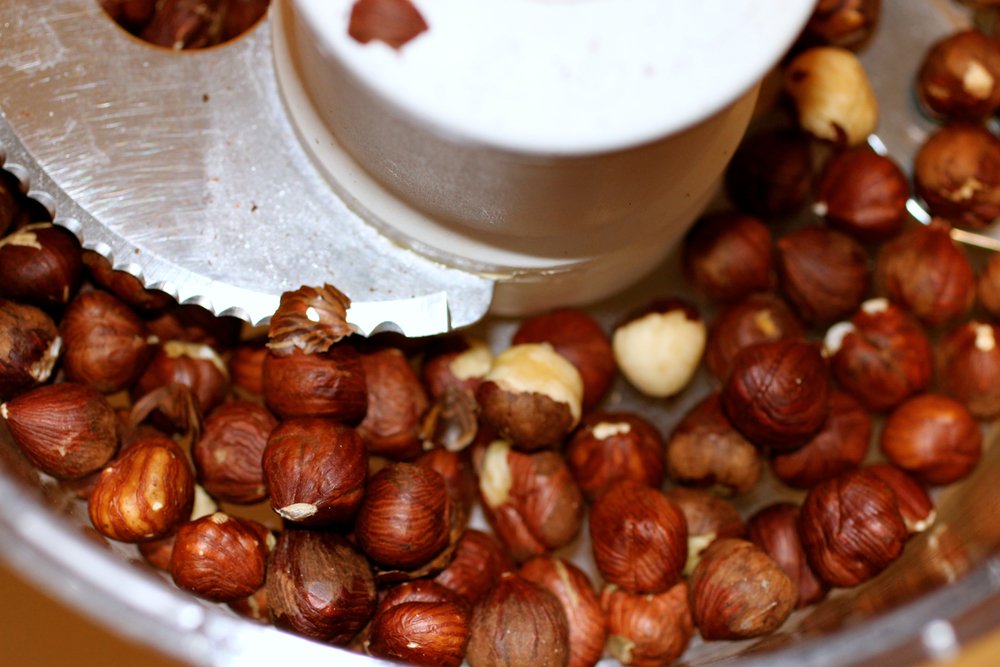
Blending hazelnuts in food processor.
1 cup hazelnuts (preferably raw, but I have done it with toasted - the shortbread is just…toastier!)
1-1/2 cup all-purpose flour
1/2 cup buckwheat flour
1 teaspoon baking powder
1 teaspoon sea salt
2/3 cup granulated sugar
16 tablespoons (2 sticks) unsalted butter, room temperature, diced
1 teaspoon vanilla
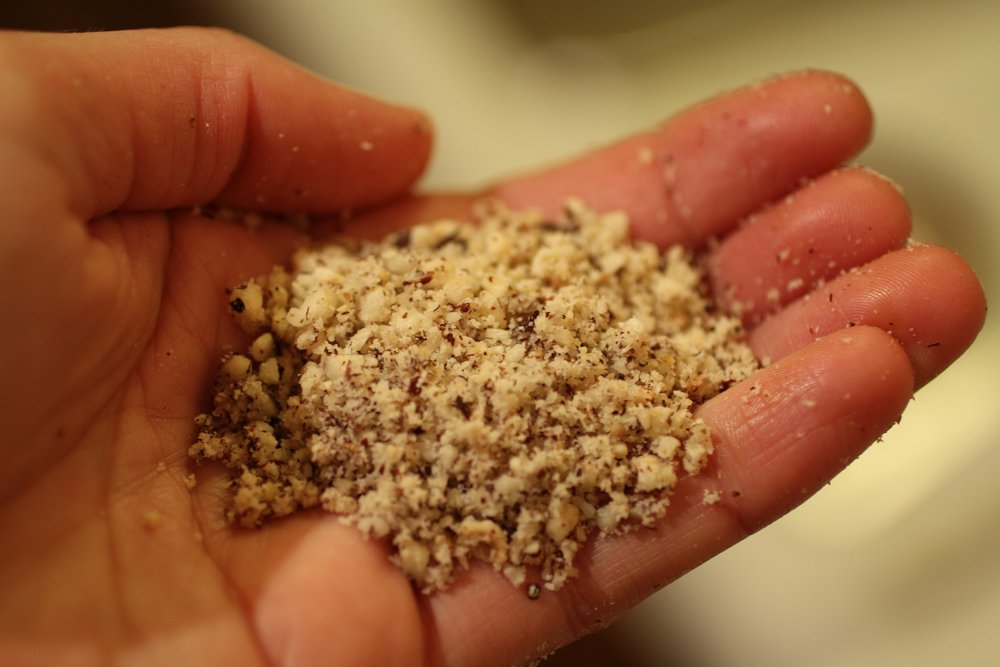
Hazelnuts post grinding.
Preheat oven to 350 degrees F.
Blend hazelnuts in food processor or with immersion blender until mostly fine, but with some medium-sizes coarse granules remaining, about 1 minute. Set aside.
Whisk all-purpose flour, buckwheat flour, baking powder, and salt in a medium bowl.
In large bowl, cut sugar into butter with fork, pastry blender, or hand blender until fluffy. Add vanilla and hazelnuts, mix to combine. Add flour mixture and blend until just incorporated.
Roll a ball, flatten, cover with plastic, and refrigerate 20 minutes. Remove from refrigerator and roll out onto lightly floured surface about 1/4” thick. Cut into rectangles about 1” x 2” and bake for 11-13 minutes until lightly toasted.

